Creating Levels, Grids, Layout and model elements for a residential unit using REVIT
Ans.1. What is BIM? Summarize the features of BIM and benefits of using BIM over 2D CAD tools.
Aim :- What is BIM? Summarize the features of BIM and benefits of using BIM over 2D CAD tools.
Introduction :- What is BIM? Summarize the features of BIM and benefits of using BIM over 2D CAD tools.
Procedure :-
BIM : Building Information Modelling (BIM) is an intelligent 3D model -based process that gives the Architecture, Engineering and construction (AEC) professionals the insight and tools to move efficiently plan, design, construct and manage buildings and infrastructure. It is a process supported by various tools, technologies, and contracts involving the generation and management of digital representations of physical and functional characteristics of places. Building information model are computer files which can be extracted, exchange or networked to support decision- making regarding building assests. This software is used by individual, businesses and government agencies who plan, decisgn , construct, operate, maintain buildings and diverse structure such as Plumbing, water, electricity, gas, communication, utlities, road, railways, bridges, ports and tunnels etc.
Features of BIM
- Improve visulaisation
- Improved productivity due to easy retrive information
- Increase coordination of construction documents
- Embedding and linking of Vital information
- Increase in speed of delivery
- Reduces cost
- It contain most of data needed for building performance analysis
Benefits of BIM
- Improves onsite collabration and communication
- Model based cost estimate
- Visualise project in preconstruction
- Better coordination and clash detection
- Reduce cost
- Improve scheduling and sequencing
- Increase productivity
- Better safety at construction site
- Execution overall better builds
- Streamline facility management
Ans.2. Understand the concept of Categories, Families, Elements, Instances in Revit. Go to Insert Tab, choose a category. Pick a family and element. Understand the instances and insert it to Revit model
Aim :- Understand the concept of Categories, Families, Elements, Instances in Revit. Go to Insert Tab, choose a category. Pick a family and element. Understand the instances and insert it to Revit model
Introduction :- Understand the concept of Categories, Families, Elements, Instances in Revit. Go to Insert Tab, choose a category. Pick a family and element. Understand the instances and insert it to Revit model
TOOLS USED
- Insert toolbar
- Select category
- File name
- Load family
- Open
Procedure :-
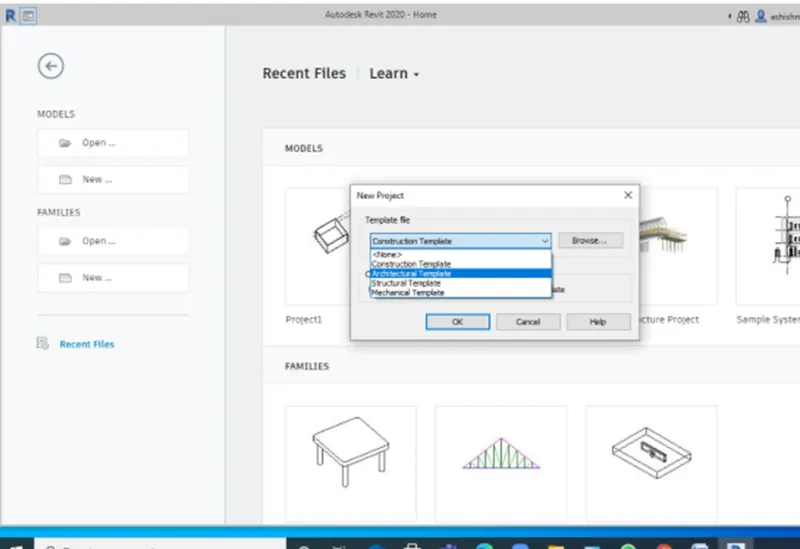
- Select architectural template on opening new project
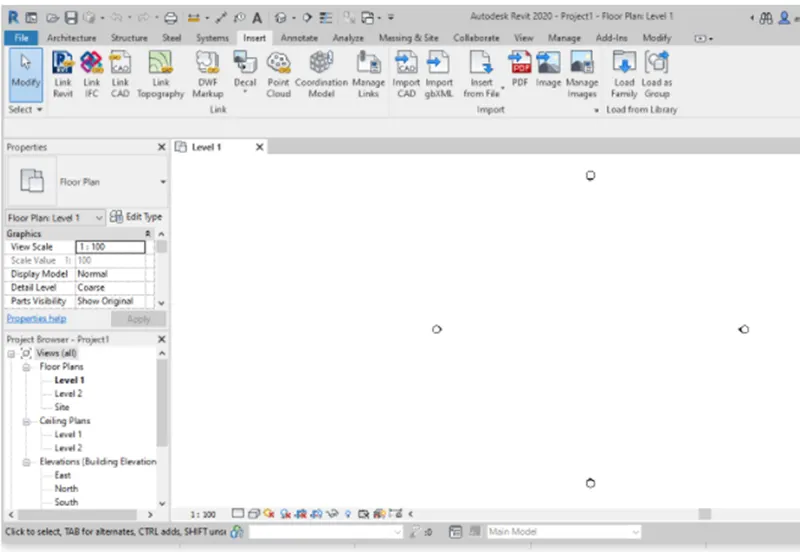
- Open inserrt toolbar
- There you will find load family option
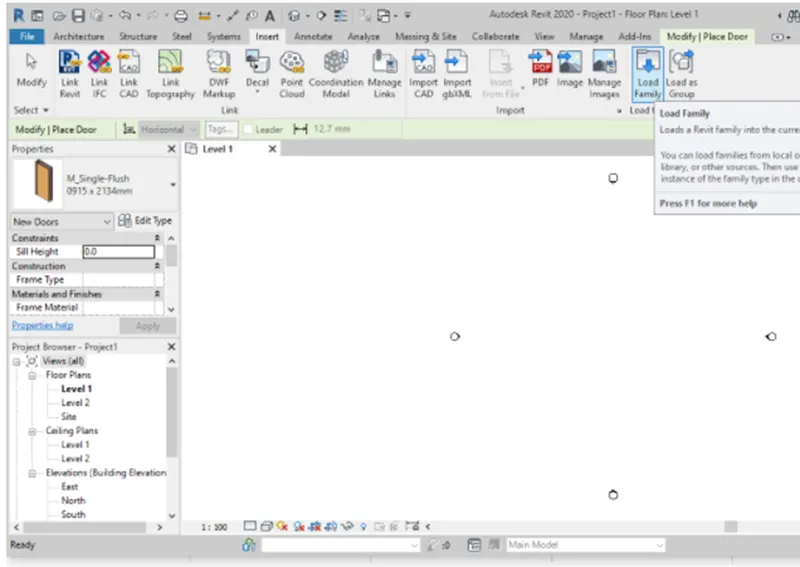
- After clicking on open family load will appear
- Go to window in architectural menu and selct object
- Drag and click on where you want to insert the door/window opening
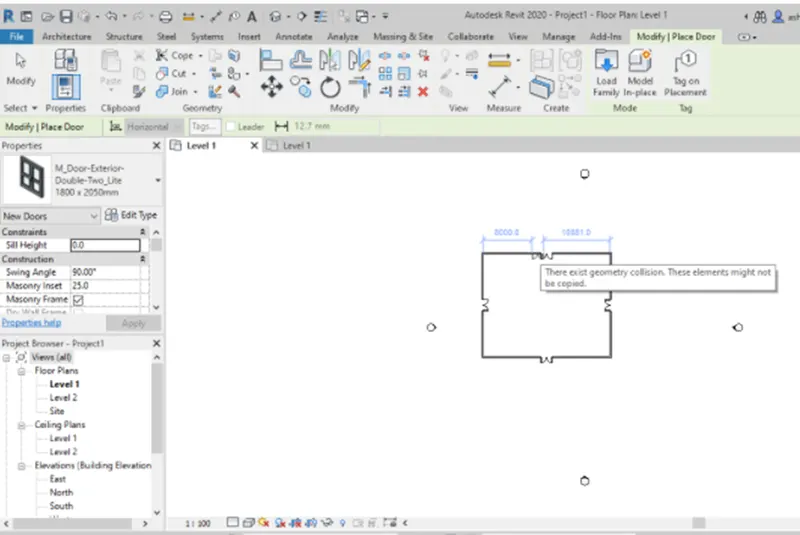
Result :-
Thus, families are loaded sussessfully
Ans.3. Setting up a Project – Open a project file with architectural template. Save the file with appropriate name. Set up the project units to Imperial / Metric based on your convenience of modelling. Complete the project information under Manage tab. Set up the maximum backups for project file to 3
Aim :- Setting up a Project – Open a project file with architectural template. Save the file with appropriate name. Set up the project units to Imperial / Metric based on your convenience of modelling. Complete the project information under Manage tab. Set up the maximum backups for project file to 3
Introduction :- Setting up a Project – Open a project file with architectural template. Save the file with appropriate name. Set up the project units to Imperial / Metric based on your convenience of modelling. Complete the project information under Manage tab. Set up the maximum backups for project file to 3
TOOLS USED
- Manage toolbar
- Project information
- Architectural templates
- Open
- Save
Procedure :-
- Open new project with Architectural templates
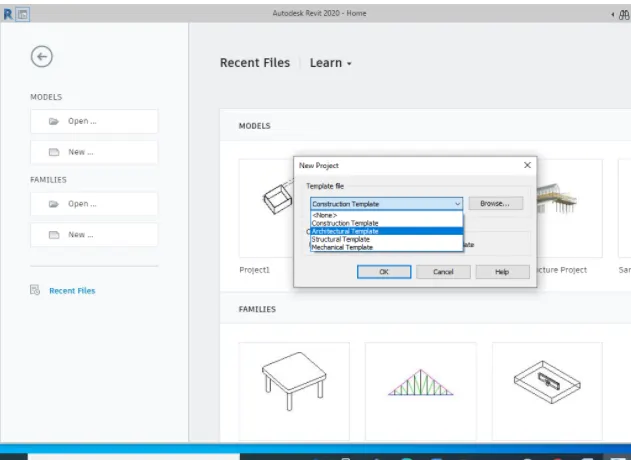
- Then the project is open and then click on manage tab
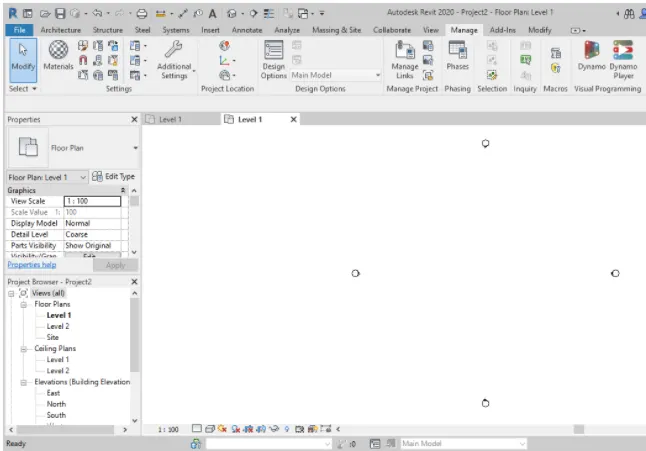
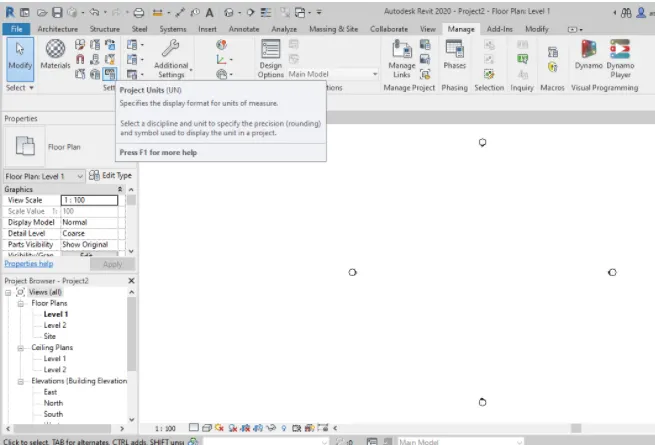
- Click on project units, to change as per the requirement
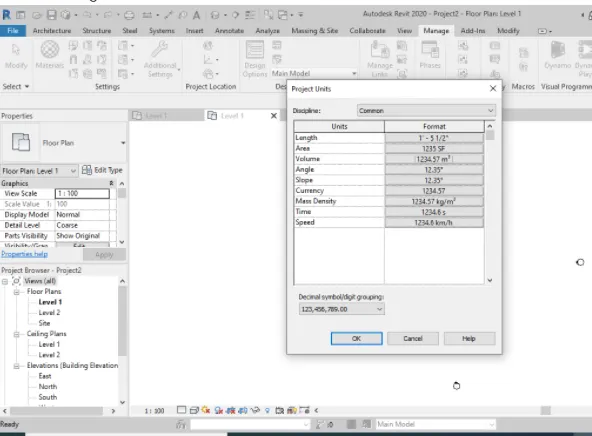
- After changing on units, click OK
- Click on project information icon
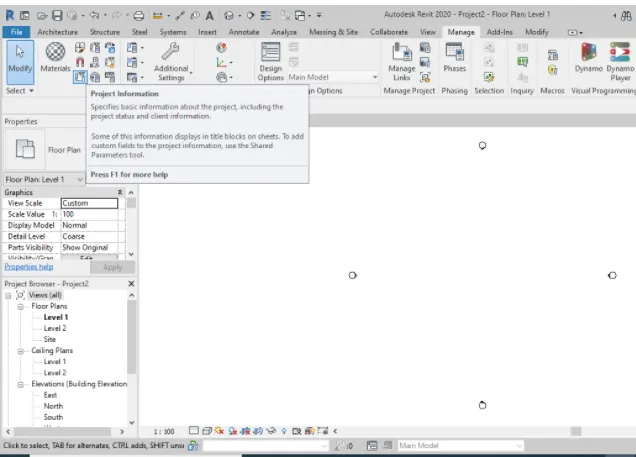
- Fill all the require details and press OK
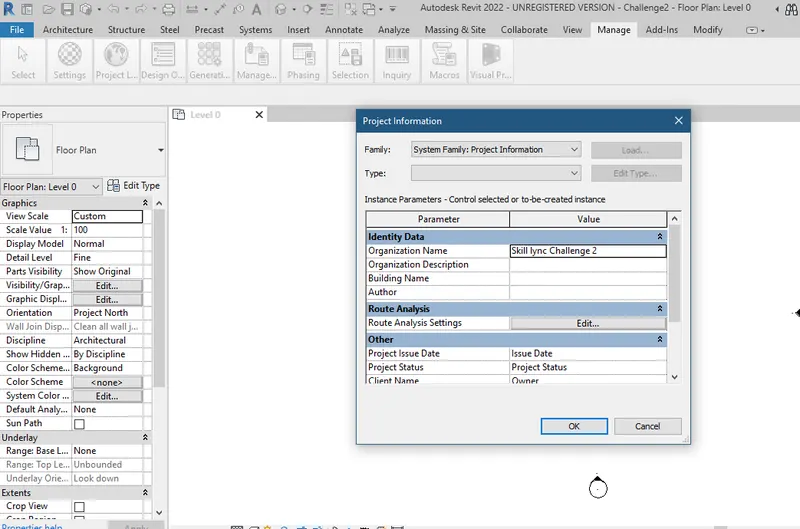
- Now, click on save, save the file AND NAME THE FILE
- click on option button where we can backup option. Set maximum backup of Project to 3
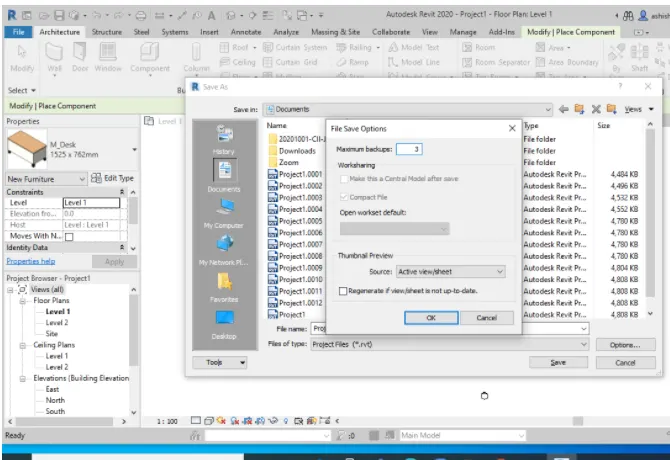
Result :-
Thus, required changes are made on REVIT model
Ans.4.
Understand the concept of Levels and Grids. Follow the naming and conventions. Create the following Levels: ( Convert to metric equivalents if metric is your units)
Ground Floor @ 0’
First Floor @ 10’
Second Floor @ 20’
Roof @ 30’
Grids Transverse Grids A, B,C,D, E @ 10’ spacing
Longitudinal Grids from 1 to 10 @ 20’ spacing
Aim :- Understand the concept of Levels and Grids. Follow the naming and conventions. Create the following Levels: ( Convert to metric equivalents if metric is your units)
Ground Floor @ 0’
First Floor @ 10’
Second Floor @ 20’
Roof @ 30’
Grids Transverse Grids A, B,C,D, E @ 10’ spacing
Longitudinal Grids from 1 to 10 @ 20’ spacing
Introduction :- Understand the concept of Levels and Grids. Follow the naming and conventions. Create the following Levels: ( Convert to metric equivalents if metric is your units)
Ground Floor @ 0’
First Floor @ 10’
Second Floor @ 20’
Roof @ 30’
Grids Transverse Grids A, B,C,D, E @ 10’ spacing
Longitudinal Grids from 1 to 10 @ 20’ spacing
TOOLS USED
- Levels
- Grid
Procedure :-
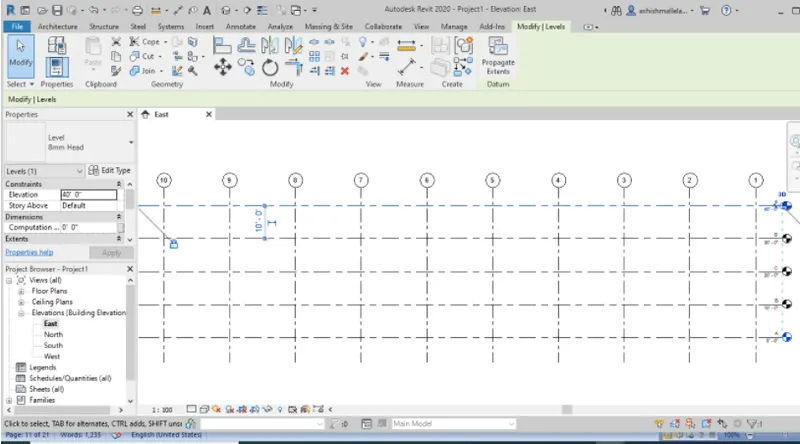
- Open new project with Architectural templates
- Draw rectangle wall
- Select view option and select section and draw section
- Select section then go to architectural and select levels
- Selct levels and give apprpropriate name and distance
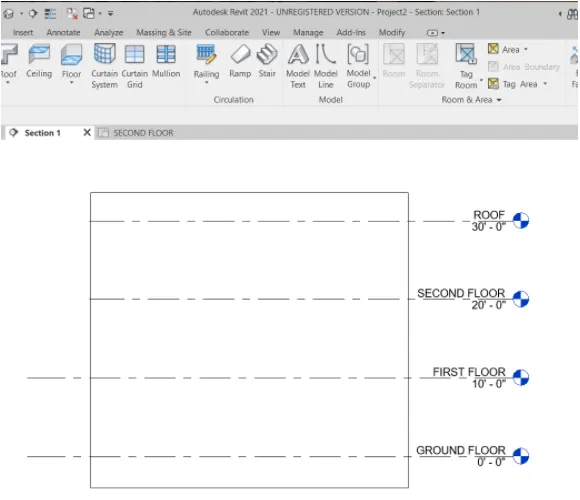
- Go to architectural option and select grids and draw grids
- Specify distance and name
- Thus grids are made
Result :-
Thus, required grids are made on REVIT model
Ans.5.
3D modelling of residential unit – From looking at your house / or a place you aspire. Create a conceptual layout of the residential unit. You can measure using a tape or
you can access your residential plan to create a similar layout.
Aim :- 3D modelling of residential unit – From looking at your house / or a place you aspire. Create a conceptual layout of the residential unit. You can measure using a tape or
you can access your residential plan to create a similar layout.
Introduction :- 3D modelling of residential unit – From looking at your house / or a place you aspire. Create a conceptual layout of the residential unit. You can measure using a tape or
you can access your residential plan to create a similar layout.
TOOLS USED
- Walls
Procedure :-
- Open REVIT
- Open new project with Architectural templates and imperial system
- Draw rectangle wall
Result :-
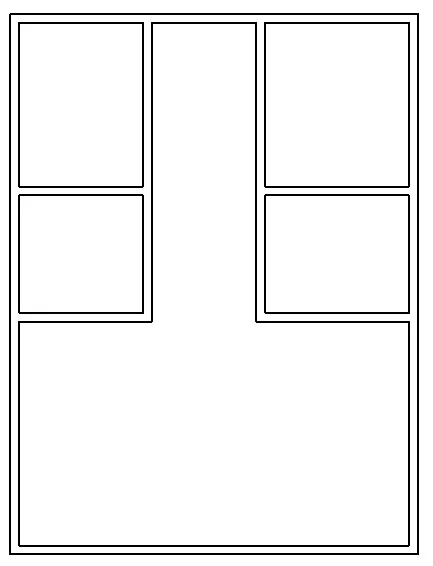
Ans.6.
In the layout created draft the level of details you are planning to include – Dimensions of room, components you plan to add in the residential unit.
Aim :- In the layout created draft the level of details you are planning to include – Dimensions of room, components you plan to add in the residential unit.
Introduction :- In the layout created draft the level of details you are planning to include – Dimensions of room, components you plan to add in the residential unit.
TOOLS USED
- Walls
- Dimensions
- Rooms
- Tag rooms
Procedure :-
- Open REVIT
- Open file where layout are made
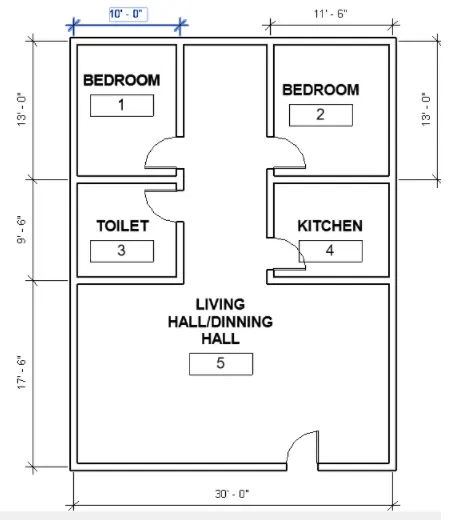
- Select doors in ribbion command
- Place doors
- Select dimension and give dimensions
- Select room command and place room at every room
- Select tag room and tagging
Result :-
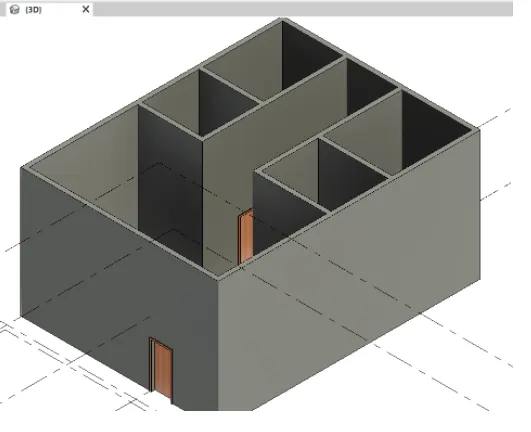
Model is sussesfully drawn in 2D and 3D in REVIT
Ans.7.
Identify the residential model elements such as Door, Windows, Tables, Chair, Couch, Bed, Lamps from the library and insert them to the model . Save the project for use
for Assignment 3
Aim :- Identify the residential model elements such as Door, Windows, Tables, Chair, Couch, Bed, Lamps from the library and insert them to the model . Save the project for use
for Assignment 3
Introduction :- Identify the residential model elements such as Door, Windows, Tables, Chair, Couch, Bed, Lamps from the library and insert them to the model . Save the project for use
for Assignment 3
TOOLS USED
- Insert
- Load families
- Doors
- Window
- Camera
Procedure :-
- Open REVIT
- Open new project with Architectural templates and imperial system
- Draw rectangle wall
- Place doors
- Place windows
- select insert option and and select load option
- Select furniture beds and chair etc
Result :-
Unable to load the families as anavaailable with my version