Creating Levels, Grids, Layout and model elements for a residential unit using REVIT
1) What is BIM? Summarize the features of BIM and benefits of using BIM over 2D CAD tools.
Building Information Modeling (BIM) is the holistic process of creating and managing information of build asset. Based on an intelligent model and enabled by a cloud platform, BIM integrates structured, multi-disciplinary data to produce a digital representation of an asset across its lifecycle, from planning and design to construction and operations.
Features:
- Since BIM isa physical adn functional representation of characterisics of building process, it provides every minute details of the project.
- Every stakeholder akes their discipline-specific input to make it a comprehensive shared information resurce about the structure.
- One can easil access the right information at the right time that provides a reliable basis for decision making during a structure's entire life cycle.
- It not only represents 3D geometric view of structure but also provide more comprehensive overview of entire building process.
- It covers every component of this process from geometrical aspect of the design to spatial relationships, from light anaysis to provision of various services from the topographical information to quantitites or properties of building and so on.
- BIM design tools allows us to obtain various views from a building model and produce high quality, accurate drawings. These views are based on a single definition of each object and thus giving a more realisitic and accurate idea of final struvcture.
Benefits over 2D CAD tool:
- 3D BIM provides many advantages over 2D CAD due to vast capabilities of paramatric modelling.
- All the components modeled in 3D BIM software can contain a real world information about that component.
- For instance, if we were to place a wall within a BIM model, the wall would automatically include information about it, with less or no input from the user. Hence, once 3D model is complete, the informations can be eaily and quickly translated into schedules, drawings and much more.
____________________________________________________________________________________________________________________
2. Understand the concept of Categories, Families, Elements, Instances in Revit. Go to Insert Tab, choose a category. Pick a family and element. Understand the instances and insert it to Revit model
Categories:
- Classification of families like doors, walls, furniture and lighting fixtures.
- Families are grouped and sorted by category in the content libraries and in the Project Browser.
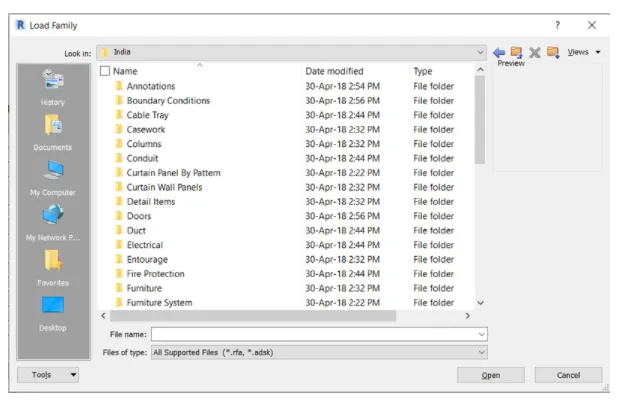
Families:
- A family is a group of elements with a common set of properties called the parameters and realted geofraphical representations.
- Different elements belonging to different values for some or all their parameters, but the set of parameters is the same.
- All elements you use in Revit is a family.
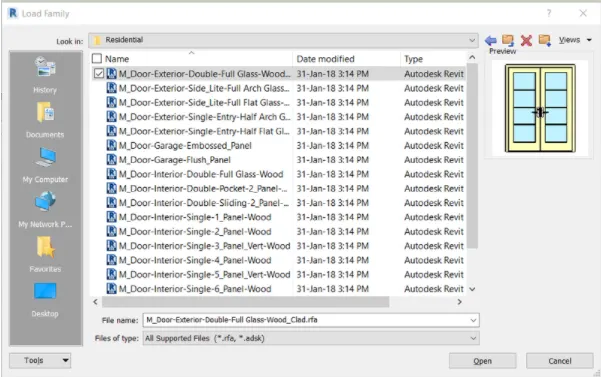
Elemets:
- Elements are the building blocks of a 3D model.
- They represent the real world commponents that a designer adds to the model.
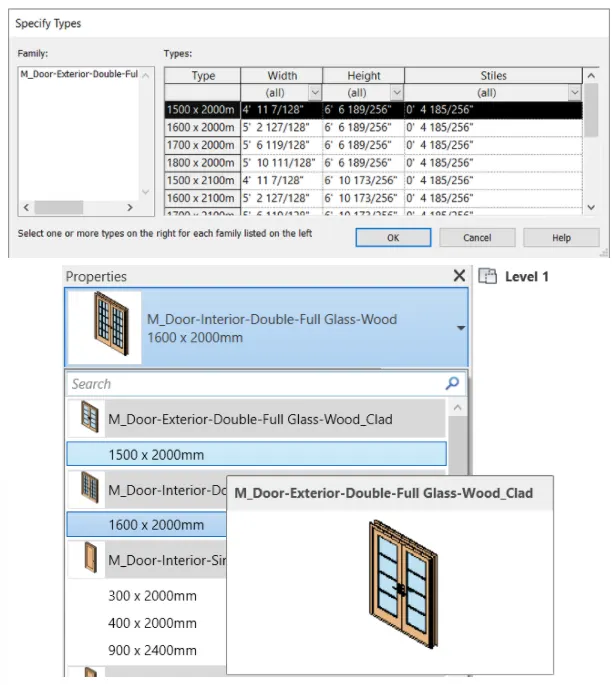
Instances:
- Instances are the individual graphical/geometric elements placed in a Revit model.
- As a subset of Revit elements, instances inherit a series f parameters from their Category and Type and might have intance parametes as well that only belongs to that single instance.
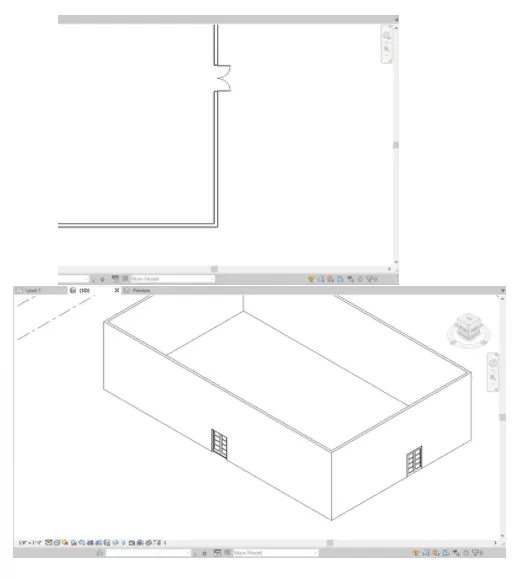
____________________________________________________________________________________________________________________
3.Setting up a Project – Open a project file with architectural template. Save the file with appropriate name. Set up the project units to Imperial / Metric based on your convenience of modelling. Complete the project information under Manage tab. Set up the maximum backups for project file to 3.
Step 1:
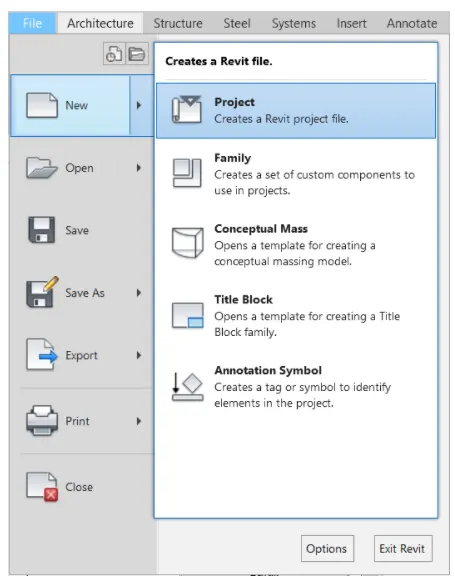
Select the file tool bar, then the new tab appears and select the new option and then select the project.
Step 2:
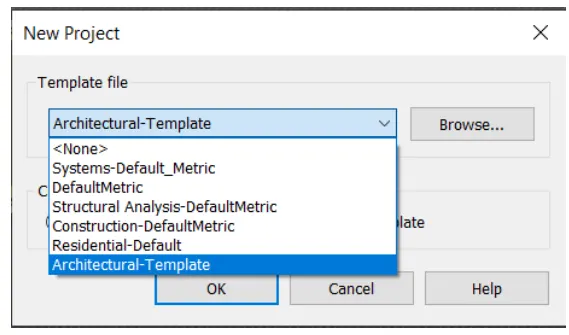
Select the architechtural template in the new project, then click ok
Step 3:
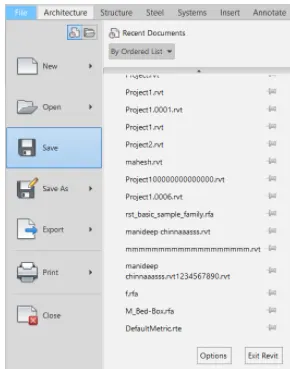
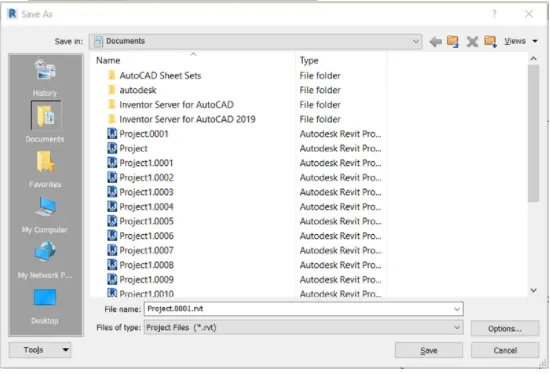
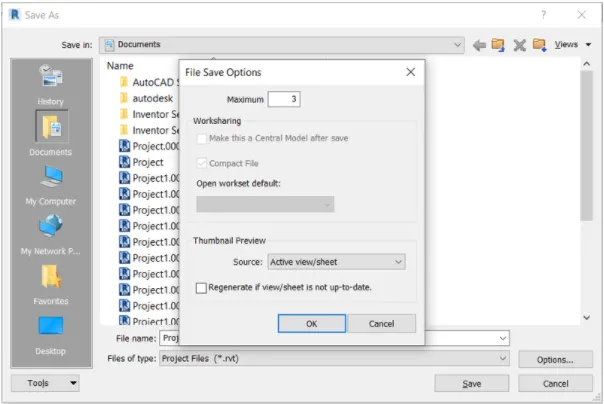
Open the file toolbar and click on save. Enter the name and before saving the name of the project, click on the options at right corner of the save as tab.
Next we need to put the maximum backups for the project file to 3.
Step 4:
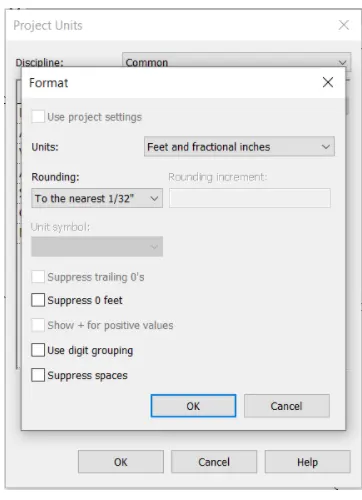
Select the project units in the manage toolbar
Put the units to feet and fractional inches as shown
Step 5:
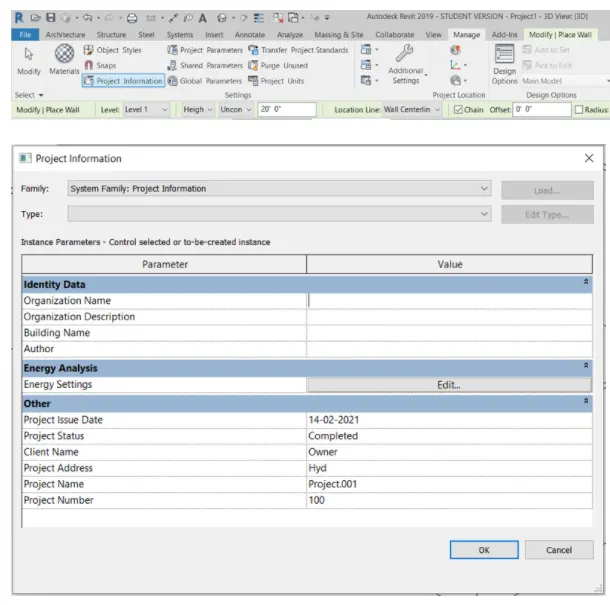
Open the manage toolbar and then select the project information
After selecting the project informationm the new tab will be visible then enter the project details in the project information tab.
____________________________________________________________________________________________________________________
4.
Aim:
To create the grids and levels using the given details.
Proceudre:
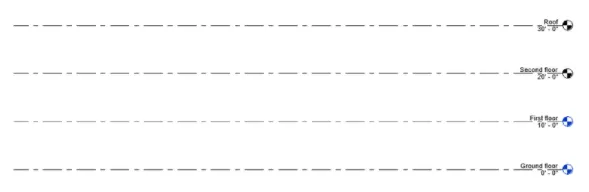
- For creating the levels, first we select the levels in the projectbrowser.
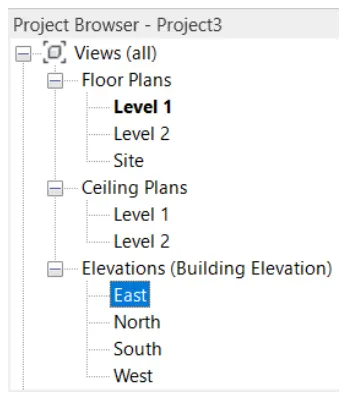
- Levels will be displayed as shown below
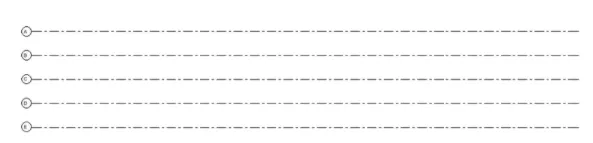
- Draw the grid lines horizontally indicating the grids with A, B, C, D and E.
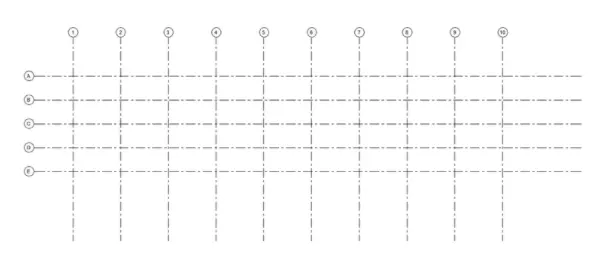
- Draw the vertical grid lines on the horizontal grids, including the grids with numbers from 1 to 10.
____________________________________________________________________________________________________________________
5.
Aim:
To create a conceptual layout of the residential unit in revit.
Procedure:
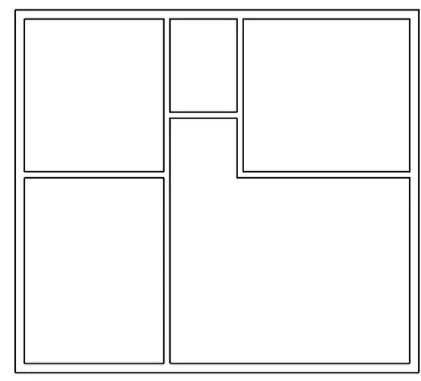
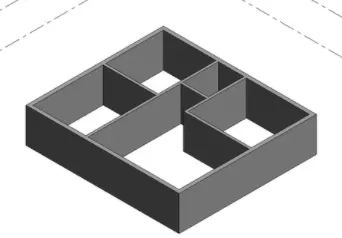
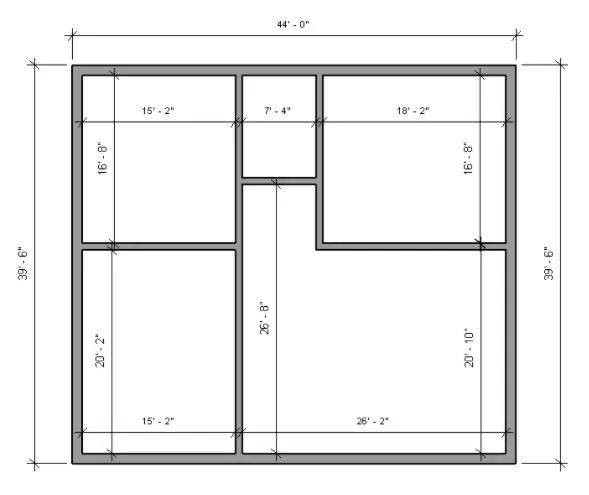
- Draw a residential layout with standard dimensions as shown.
- Change the visibility to shaded.
- Add the dimesions to the layout plan.
- Change the layout to 3D view.
Result:
____________________________________________________________________________________________________________________
6.
Aim:
To draft the level of the details which includes dimension of the room.
Procedure:
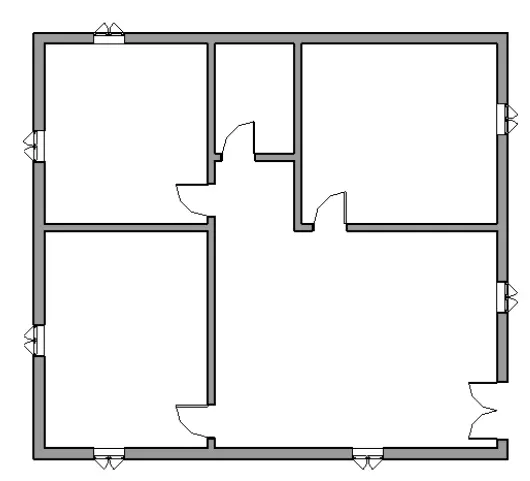
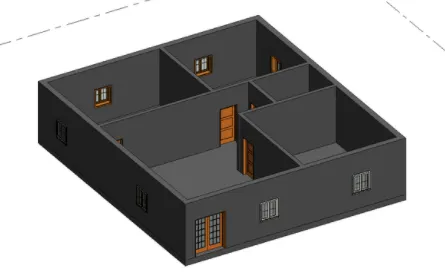
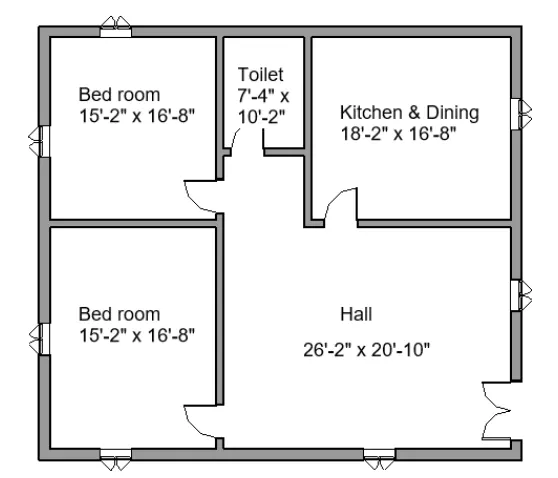
- From the previous drawn residential plan, annotate the rooms as shown
- Add the doors and windows wherever requires, from the door and window option in the architecture toolbar.
- Using text tool, name the rooms and its dimensions.
- Provide a floor using the floor option.
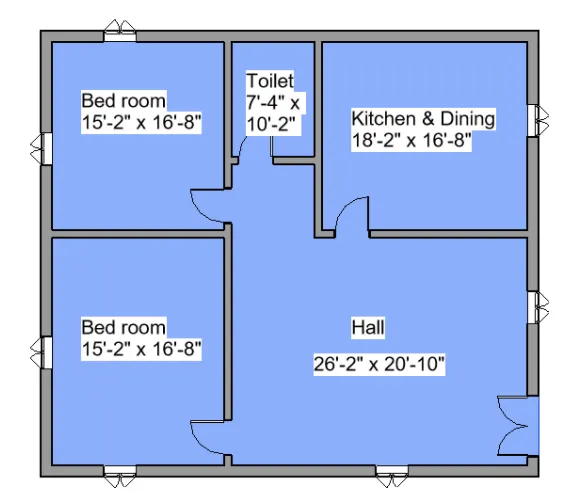
Result:
____________________________________________________________________________________________________________________
6.
Aim:
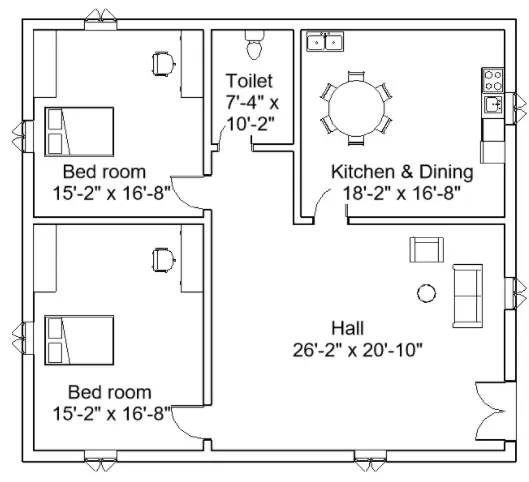
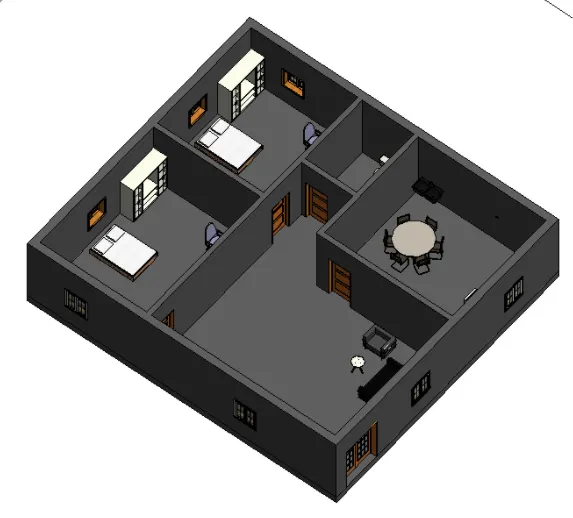
To insert the residential model elements such as door, window, tables chair, bed, lamps, etc from the library to the model.
Procedure:
- Open the previous revit model we used for question 5.
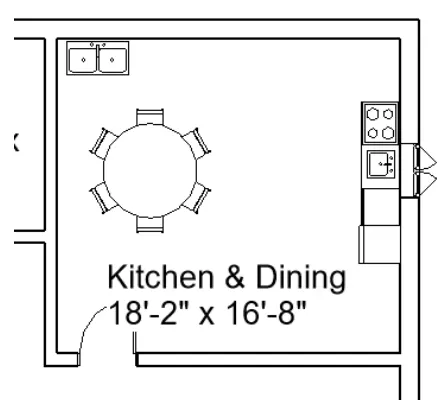
- Insert the dining table, kitchen stove and washing sink for kitcehn and dining.
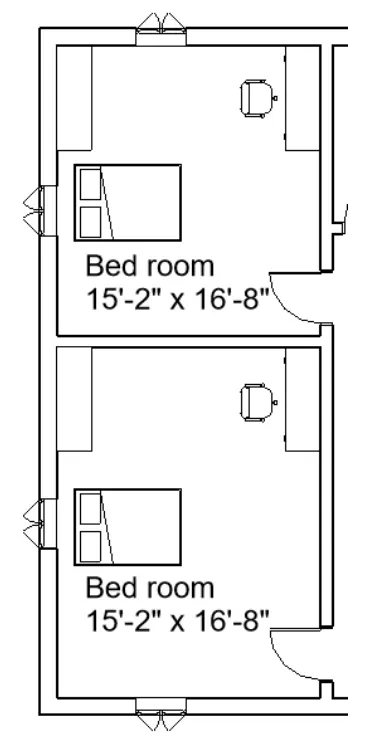
- Add beds, chairs and tables form the library for bedroom.
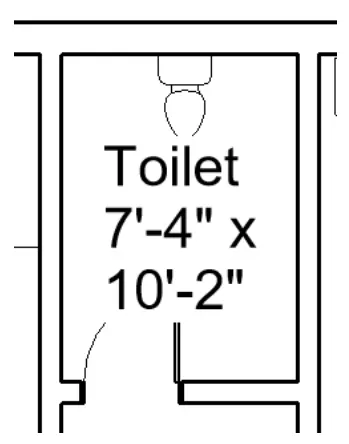
- Insert urinals for toilet.
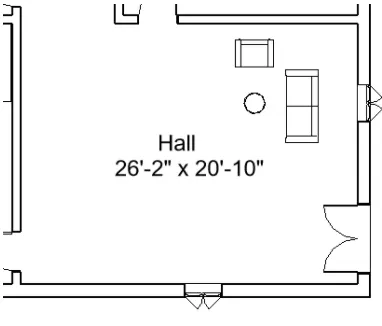
- Insert furniture things for the hall.
Result:
________________________________________________________________________________________________________________________________________________________________________________________________________________