Creating Kitchen layout, Hatching of Architectural elements and sectional view of an Industrial Building in AutoCad
1.
AIM:
Create the kitchen layouts and include the pattern for the hatches as indicated. Additionally, use blocks as necessary. In the plan, include the relevant proportions. Using AutoCAD, provide the dimensions of doors, appliances, and other items according to standards.
The purpose of this challenge is to learn various hatch patterns and how to scale them for various appearances.
The aim of this particular challenge is to select the architectural drawing of a kitchen and demonstrate the various hatch patterns on it.
INTRODUCTION:
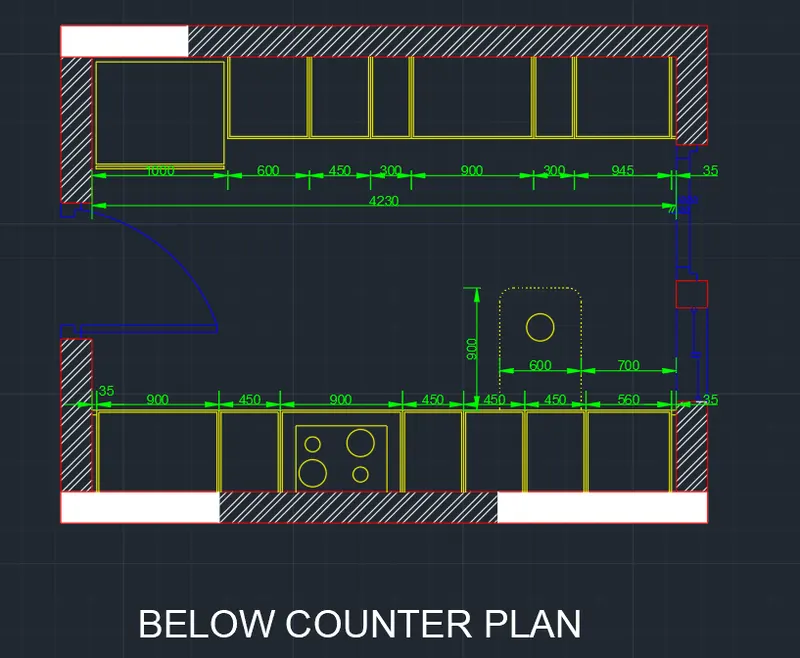
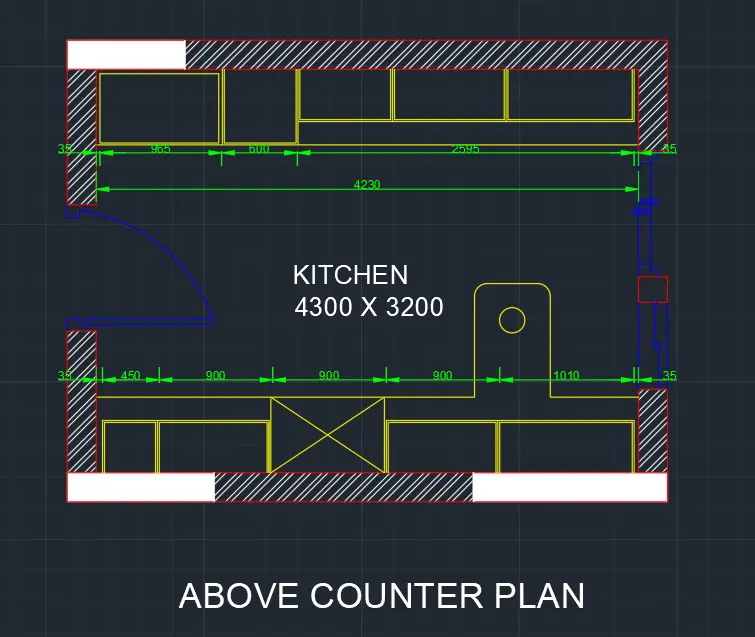
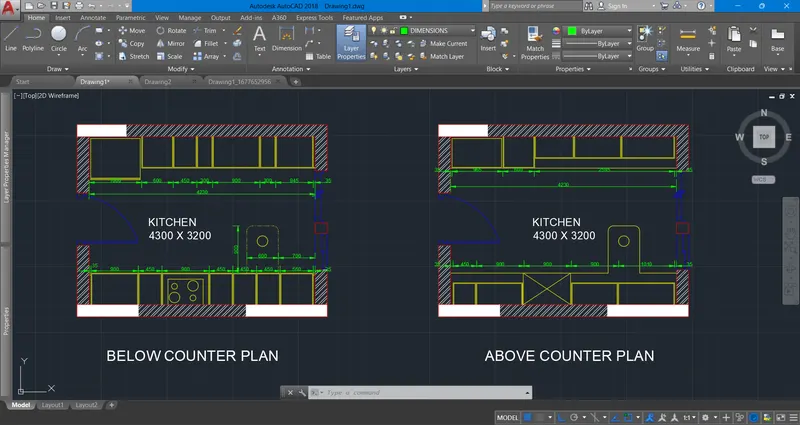
The hatch pattern indicates if the figure is an elevation or a section. The sectional plan of the kitchen above and below the counter is shown in the drawing below.
PROCEDURE:
Step1: Below the Counter Plan:
- First take Line command and specify a point and then draw the line horizontally of length 4300mm.
- Draw another line from the previous line of length 3200mm.
- Taking previous line as reference draw another line of length 4300mm horizontally backwards at the top.
- Join the first line and the last line which we have drawn previously.
- Now offset the four sides with the offset 20mm outside.
- Next, we have to offset the line inside with the length 600mm including the fridge.
- Afterwards we draw the fridge separately with other dimensions in the kitchen layout.
- Leave the space left and right corners with
- Next put the dimensions for every part in the drawing.
- Next draw a counter or slab with length of 600mm and width 900mm.
- Draw the hub in the middle at the bottom of the kitchen.
- Now create the windows using the line command and trim the remaining parts or lines.
- Put the elements in the respective layers.
Step2: Above the Counter Plan:
- Firstly, we have to draw the line horizontally with length 4300mm
- Next draw another line from the previous line with the length of 3200 vertically upwards.
- Next again draw another line from the previous line with the length of 4300 horizontally backwards.
- Next, we have to join the first and last line which we have drawn previously.
- Next offset the four sides with the distance of 20mm outside.
- Next, we have to offset the lines inside with the offset command with the length 350 mm and again we do the offset of 600 mm on the same side.
- Now leave the space for both side corners with the length 35 mm.
- Do the offset in inside walls with the distance 10 mm for all sides of all parts
- Next, we have to use the different hatch styles to hatch the walls in the kitchen layout
- Now we have to draw the doors using the line command, circle command, and trim command
- Next, we have to draw the windows using line command
- Trim the extra lines
- Now we have to use a single text command and indicated the parts where ever required with single text command
- Next draw a counter or slab with length of 600 mm and width 900 mm
- Draw the hub in the middle at the bottom of the kitchen
- Now create the windows using the line command and trim the remaining parts or lines
- Put the elements in the respective layers.
RESULT:
2.
AIM:
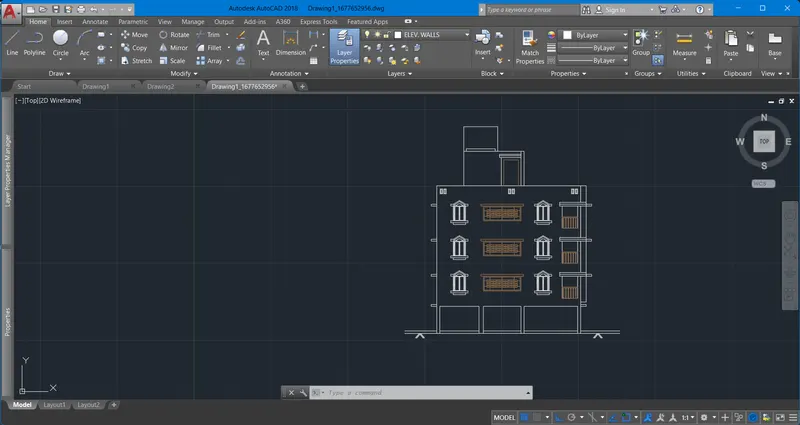
Create the elevation of the plan created in the Challenge 7 and apply proper hatch in the walls, doors, windows, and other architectural elements. Refer to the dimensions in Plans and sections in Challenge 7.
INTRODUCTION:
A sketch that depicts the front or side of something is called a "elevation". In contrast, a floor plan depicts a place from above, as if you were gazing down on it from the ceiling. As a result, you can only see an object's tops and not its sides, back, or front. You have the opportunity to view things from all angles while you are elevated.
You cannot view the specifics of your new cabinetry, such as the size of each drawer or the placement of each cabinet, without elevation drawings. Simply said, a floor plan cannot convey all of this information effectively.
PROCEDURE:
- From the plan and elevation of the drawing from challenge 7, this elevation can be easily drawn.
- Xline Project all the lines from the plan including windows, balcony and sunshade.
- Using Offset Command and trim commands, the needed lines are drawn or removed to/from the drawing.
- Create a Balcony with veranda grill as given.
- Create a window with line command, offset commands.
- Copy and paste them in the desired locations.
- Create different layers and allocate them in their respective layers.
RESULT:
3.
AIM:
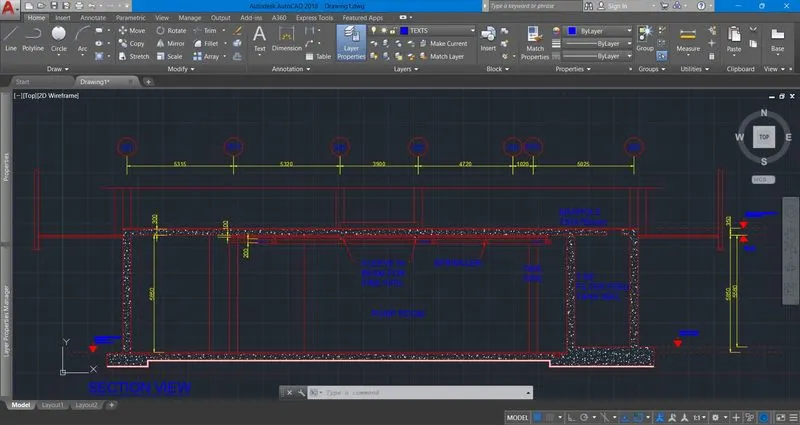
Create the section view of an industrial building as shown in Figure. Provide appropriate hatches and dimensions wherever required. Also, provide annotations to the drawing.
INTRODUCTION:
Section drawings are a specific type of drawing architects use to illustrate a building or portion of a building. A section is drawn from a vertical plane slicing through a building. This is as if you cut through a space vertically and stood directly in front looking straight at it. Sections are a common design drawing and technical architectural or engineering convention for graphic representation of architecture.
PROCEDURE:
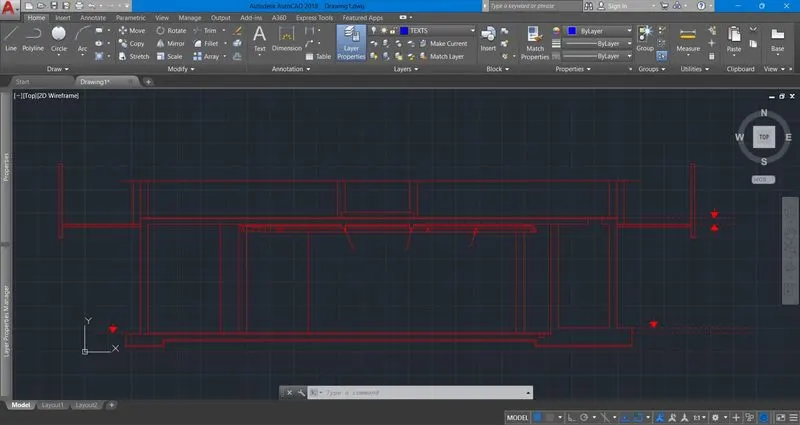
- First draw the X Line at any point on the screen
- Next offset the line to the top to a distance of 5850 mm and we have to do offset of last offset line to the distance of 300 mm to the top
- Next, we have to draw the vertical X Line on any point on the horizontal line
- Use the offset command to draw the needed section
- Next, we have to trim the outer edges using the trim command Next offset the bottom edges of the top floor to a distance of 30 mm
- Now offset the last line with a distance of 100 mm to the bottom
- Next, we draw the sprinkler pipe along with the duct pipe
- Duct pipe thickness is 300 mm and thickness of sprinkler pipe is 100 mm
- Next, we draw the manhole cover with the thickness of 750 mm at the right top edge of the filter feed walls
- Now draw the thickness of pump room slab with the different layers using the line command
- Using the hatch command, hatch the wall and floor slabs.
- Using the layer option, specify the objects to their respective layers.
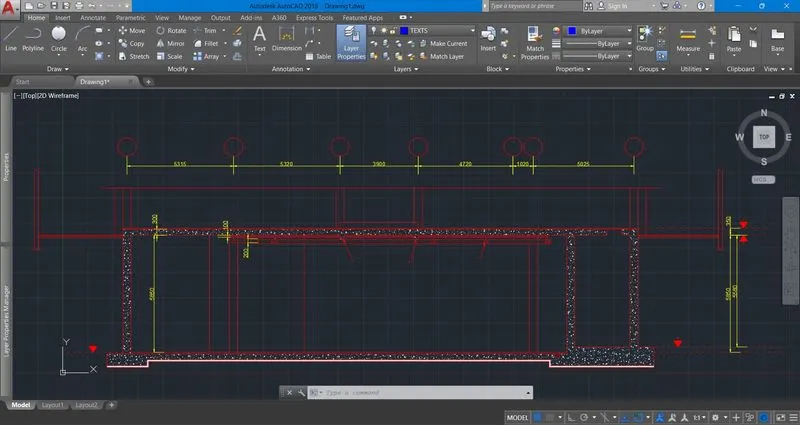
- Using text command and dimension command, enter the texts and the dimensions.
RESULT: