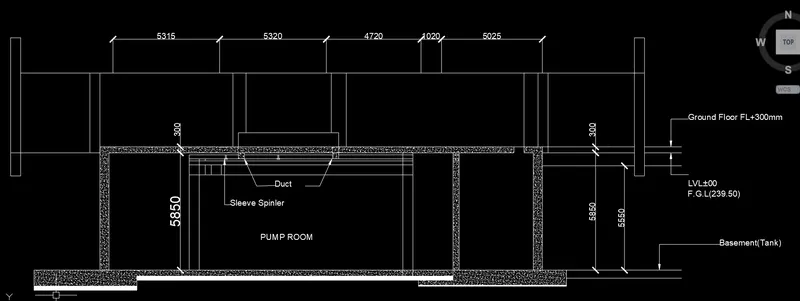
Creating Kitchen layout, Hatching of Architectural elements and sectional view of an Industrial Building in AutoCad
1/07/21
Answer
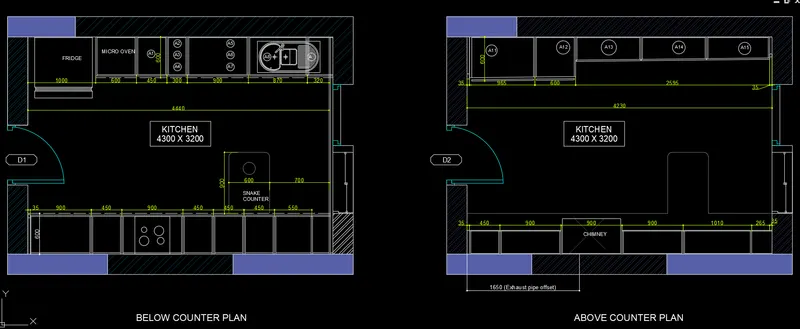
1. Create the Kitchen Layout.
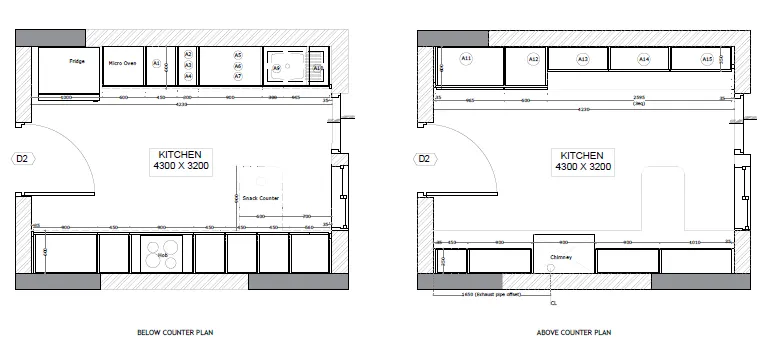
Aim
To draw Create the layouts of the Kitchen and provide hatches pattern using AutoCAD.
Procedure
STEP-1 opening to the AutoCAD software and entering the workspace.
STEP-2 Setting limits >specify lower-left corner:0,0
STEP-3 specify upper-left corner:100,100
STEP-4 Set>units>Demical>intersectional scale>mm
STEP-5 Limmax>100,100
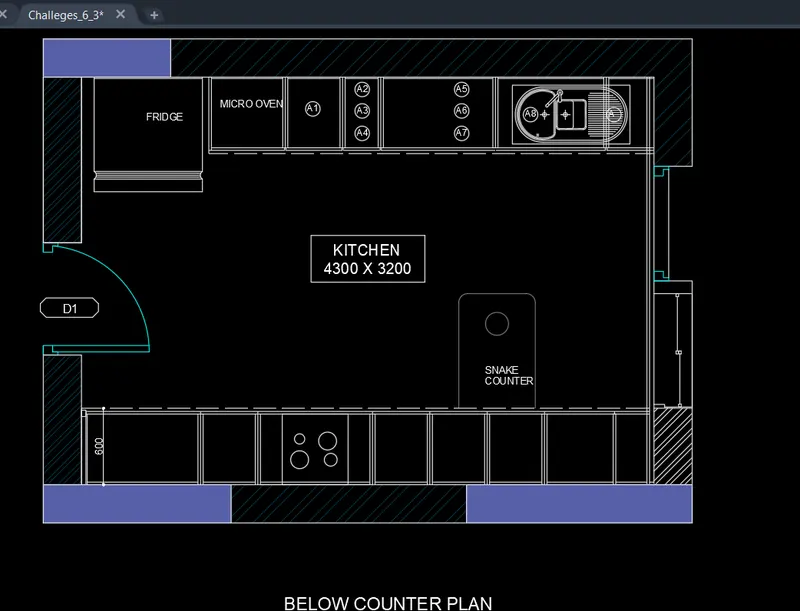
Below counter plan
STEP-6 offset command> to make the boundary on four sides
STEP-7 trim command> help to trim the all unwanted line in the area
STEP-8 Offset command>100,600,450,300,900,300,945,35
STEP-9 all these measurements are to divide the parts
STEP-10 total area of 4230 is the right side section
STEP-11 total area of 4230 is the left side section also
STEP-12 but the difference in the segments
STEP-13 offset command> 35,900,450,900,450,450,450,560,35
STEP-14 trim command> to remove the all unwanted line in the boundarys
STEP-15 door, window, french door are provided in the side
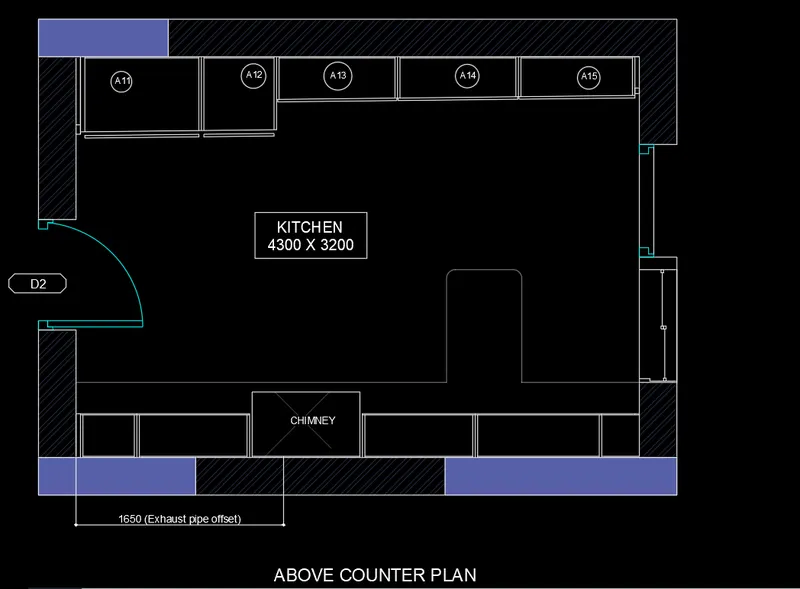
Above counter paln
STEP-16 same as the below, first we fixed the boundary 4230 of the vertical axis.
STEP-17 offset command> of 350 to all compartments.
STEP-18 all required things are allocated in the area.
STEP-19 door and widow to locate in the right place.
STEP-20 chimney is provided in the process and above that 1650 of exhaust pipes offset is required
dimension
STEP-21 mtext command> used in the dimension areas.
STEP-22 DLI command> to put the dimension
STEP-23 Hatch command>pick the footing to hatch
STEP-24close the entire object
STEP-25and save the file for feature use.
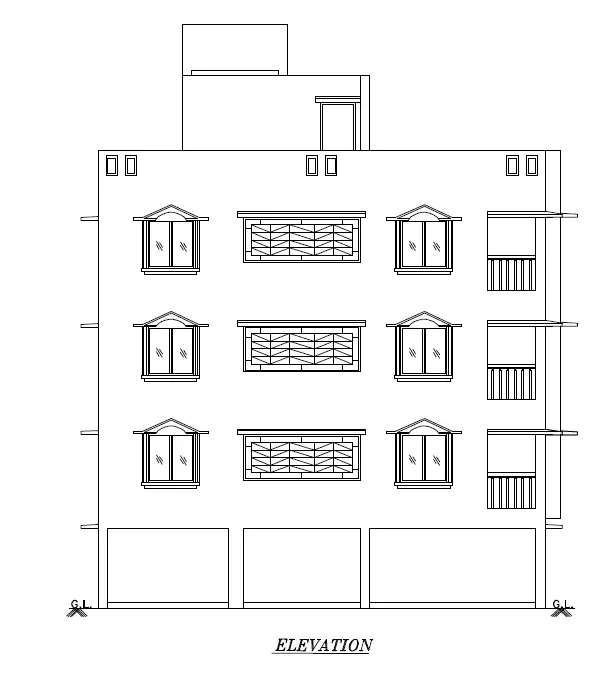
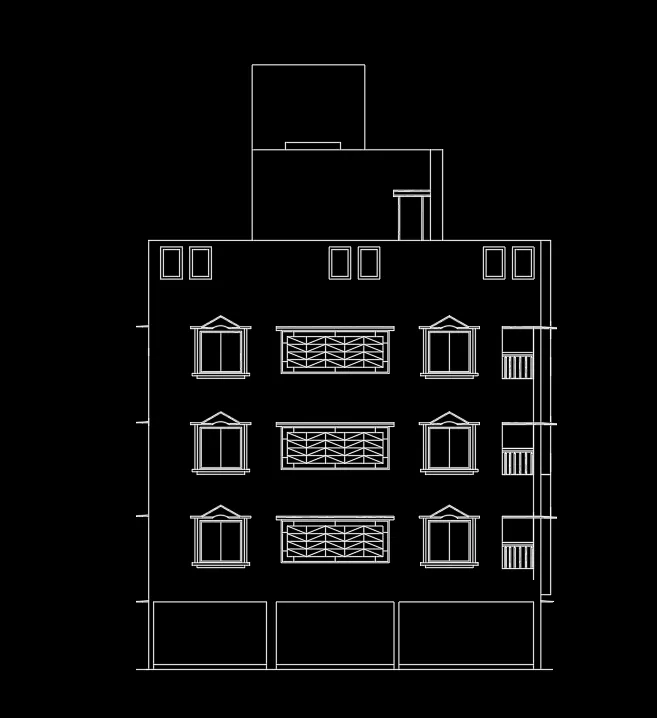
2. Create the elevation of the plan
Aim
To draw Create the elevation of the plan using AutoCAD.
Procedure
STEP-1 opening to the AutoCAD software and entering the workspace.
STEP-2 Setting limits >specify lower-left corner:0,0
STEP-3 specify upper-left corner:100,100
STEP-4 Set>units>Demical>intersectional scale>mm
STEP-5 Limmax>100,100
STEP-6 the same FFL we getting into the height of the 150
STEP-7 we are having the 2450,2850,2850,2850,1000 of the top of the building
STEP-8 we need to showcase the balcony on the side of every floor of the building
STEP-9 same as we consider the inner wall 125 and the outer wall of the 250 to be considered
STEP-10 the window is placed in the exact location of the building
STEP-11 sunshade of every floor to be considered.
STEP-12we having the parapet wall of the 125
STEP-13we are having the over headed tank at the top of the building
STEP-14 offset command> help as to crop the area into the different level of construction.
STEP-15 trim command> help to find the trim the unwanted line and actions.
STEP-16 toolpallet command> help as to provide the trees, cars, etc.
STEP-17 rectangular command> help to create the playground area.
STEP-18 hatch command> helps to provide the hatches design in the following functions.
STEP-19 Block command> help to create a total object in one block for the feature use
STEP-20 close the entire object
STEP-21 and save the file for feature use.
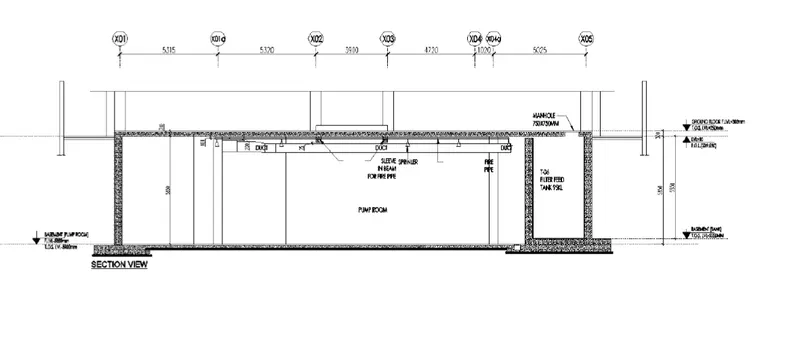
3.Create the section view of an industrial building
Aim
To draw Create the section view of an industrial building using AutoCAD.
Procedure
STEP-1 opening to the AutoCAD software and entering the workspace.
STEP-2 Setting limits >specify lower-left corner:0,0
STEP-3 specify upper-left corner:100,100
STEP-4 Set>units>Demical>intersectional scale>mm
STEP-5 Limmax>100,100
STEP-6 we are planning to create an industrial building.
STEP-7 we having the sectional part and the ground level as pump room
STEP-8 the whole dimension of the pumproom is Y-Axis 300,5850
STEP-9 the X-Axis 5315,5320,3900,4720,1020,5025 is the horizontal form
STEP-10 we want to make the manhole, filter feed tank 95kl, fire pipe, duct, sleeve sprinkler
STEP-11 offset command> helps to crop the area into the different levels of construction.
STEP-12 trim command> help to find the trim the unwanted line and actions.
STEP-13 toolpallet command> help as to provide the trees, cars, etc.
STEP-14 rectangular command> help to create the playground area.
STEP-15 hatch command> helps to provide the hatches design in the following functions.
STEP-16 Block command> help to create a total object in one block for the feature use
STEP-17 close the entire object
STEP-18 and save the file for feature use.