Creating Conceptual mass in REVIT and Creation of Sinusoidal curve and a Parametric stadium using Dynamo
AIM:
To create the concept of designing conceptual mass and sinusoidal surface and the parametric stadium is created using the revit and dynamo.
1,
Open a architectual template in revit > now select the dynamo > a new window from dynamo appears.
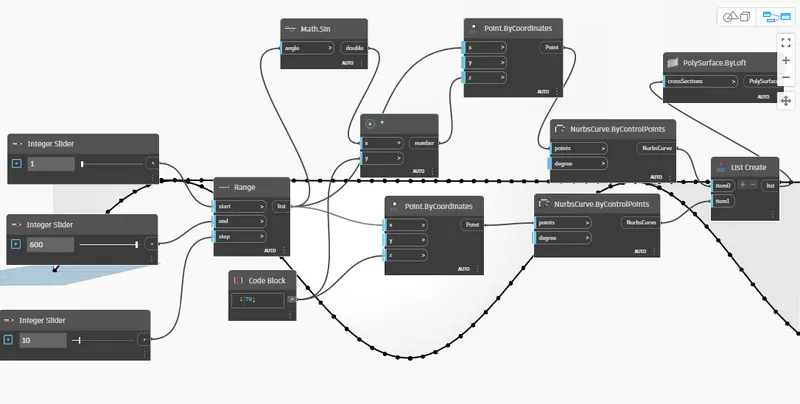
to create the sinusoidal points and create the surface on the curve we need to add in some codes,
we are using the following codal inputs for this question,
- integer slider
- range
- point by coordinate
- code block
- math sin
- product
- nurbs curve by control point
- list
- poly surfac by loft
step 1,
create the integer slider block, copy and paste it twice. So we have 3 integer slider. We can also use a code block for this purpose.
the 1st slider is starting point fo the curve,
2nd is the end point of the curve, 3rd is the distance of the interval between the start and end point of the curve.
We enter the value as 10, 600, 10
10 is the starting point
600 as the end point
the other 10 is the distance of interval between the start and end point, so the 600 is divided 60 equal points with the interval of 10.
step 2,
create range block and connect the start, end and steop to the appropriate block.
step 3,
create the set of the points by coordinates. connect the range to the points by coordinate block. one link on x on one points the other link on other block of coordinates.
this creates the a set of lines on the x direction.
Step 4,
Since the once element has to be a sinusoidal curve, we create the math.sin block and connet a link from the range block to the math.sin block and the x on the any one of the x point from the points by coordinate.
create a produce block and connect a lin from the math.sin to the product block x.
step 5,
we create an another code block or integer slider to assign the angle of the curve. We assume the number as 70. connect the link from the code block to the z of of the points by coordinate which the block has been select to the sinusoidal curve. Connect the other link from the code block to the y point of the math.sin.
The angle of the curve has been set, and the points for the curve has been created.
step 6,
once the points are created the line on the points has to be created, for doing that we need to create a set of nurbcurve by control panel block, connect the link from the point by coordinate to the point on the nurbcurve by panel.Now the line on the points are created.
step 7,
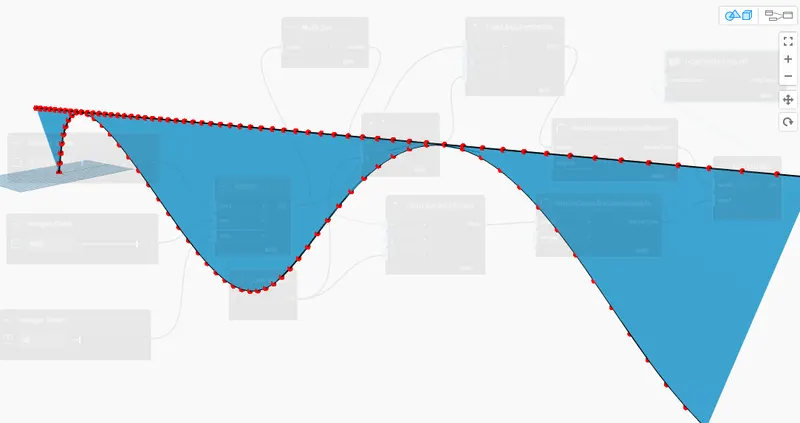
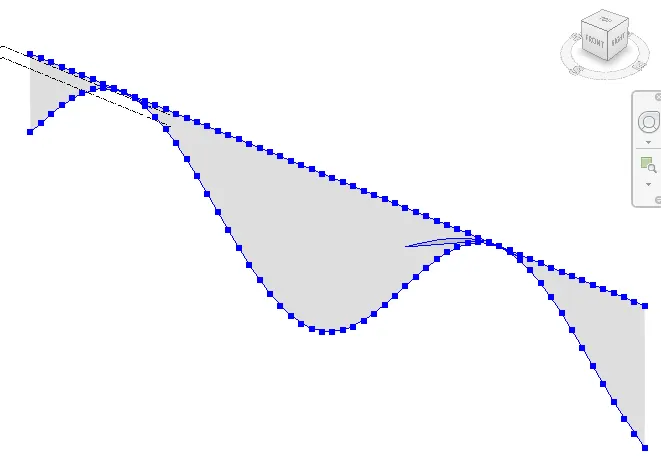
now creating the surface we need to create the list block and the surface by the loft, connect the links from the 2 nurbcurve block to the list block and connect the link from the list block poly surface by loft block . the surface on the two line is created.
2,open the architectural template in the revit > open dynamo from the manage option >
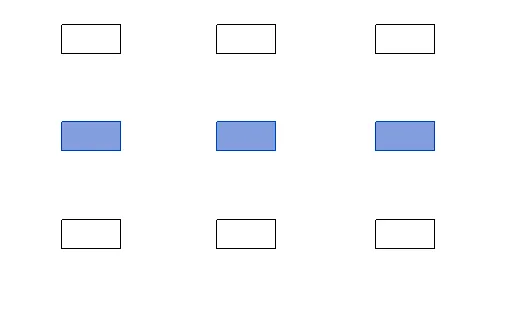
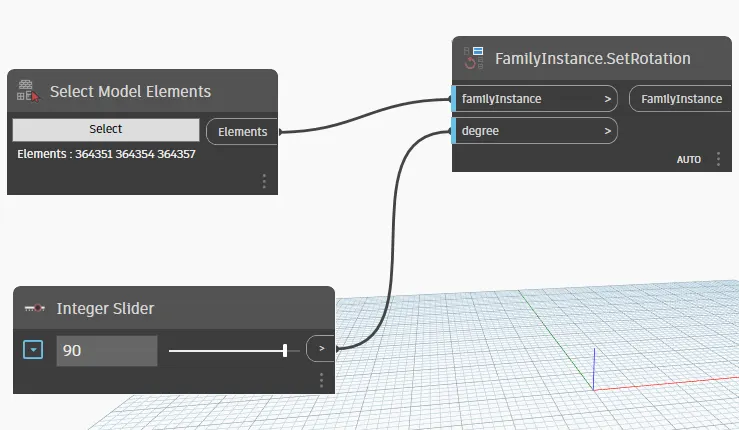
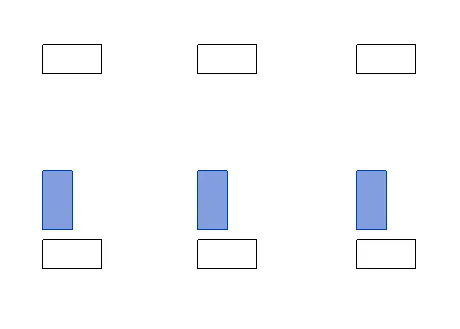
3,open the architectural template in revit > place any component > create the array of the element > open the dynamo > to rotate the array > select model element block (to select the element from the revit) > family instance.setrotation block (to assign the selected element) > open the integer slider to assign the angle of rotation.
click the select option on the select model block and select the element that to be rotatd from the revit.
now enter the angle of rotation in the integer slider block, link the integer slider block to the degree in rotation block and the select model element to the family option on the rotation block.
4,
Open the revit software > open any template > click on the file option > select new option > choose the conceptual mass option > select the metric mass > click open.
The conceptual mass template will be opened to the screen.
By default level 1 will be there, create an another level above level 1 as level 2.
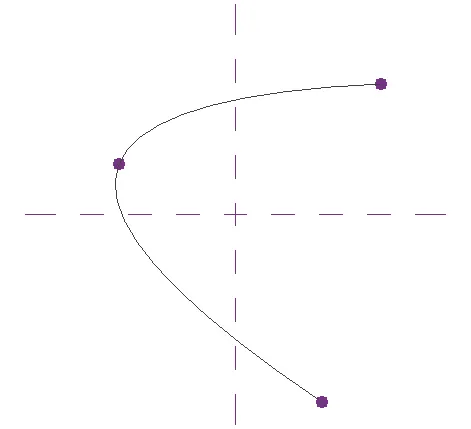
Set the view to the floor plan level> select the spline with the points option from the create tab > draw a curved line on the sheet.
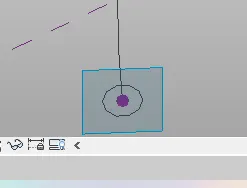
Set the work plane on the points in the curve and draw a any looped shape, we assumed a circle in here.
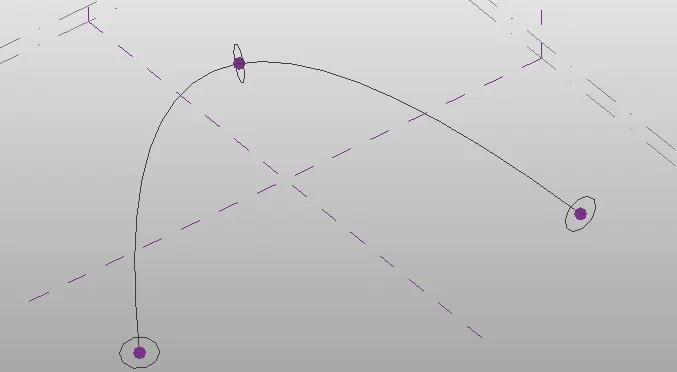
Select the curved line and circle select the solid form from the create form option.
A solid form of the curve with the circle shape will be created.
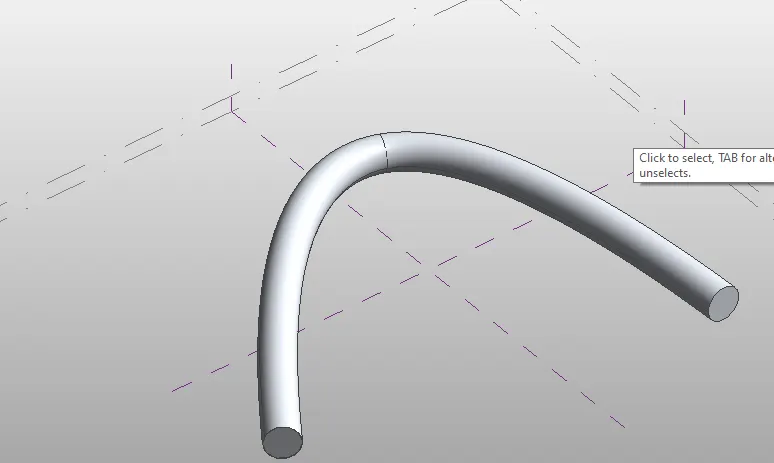
Now select the form and click on the divide surface option from the toolbar.
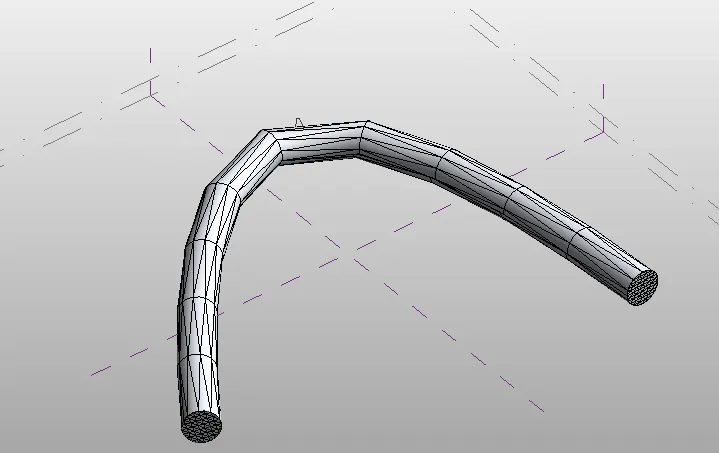
The surface will be divided into possible maximum numbers.
now select the divided surface and and select the shape as desired and select apply.
5,
Open the architectural template on revit, open the dynamo from the manage option.
To create
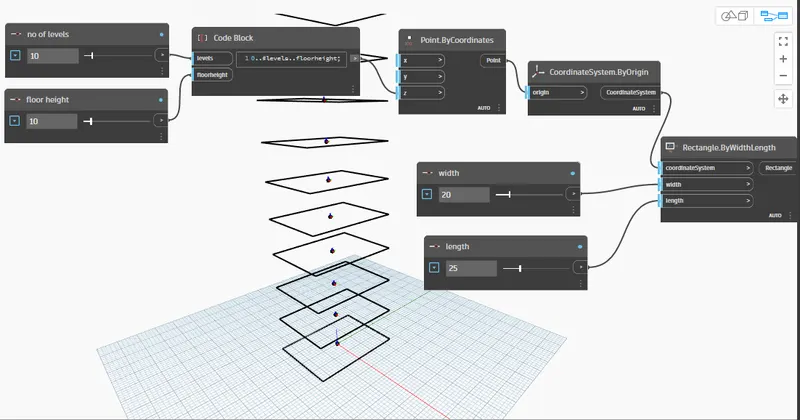
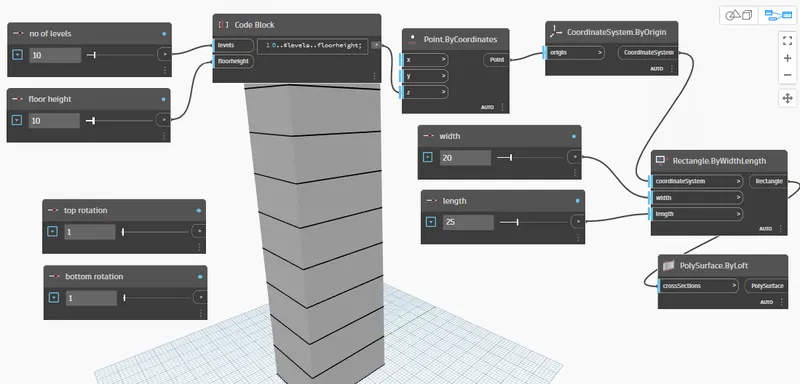
Open a set of integer slider and name them as no.of.levels. and level height > create a code block and enter the name of the links from the previous integer > to create the rectangle as the floor plan. create an another set of integer slider and name them as length and width > create a rectangle by width length.
Create an othe rset of integer slider to apply the codes for bottom and top rotation,
Create the points by coordinates block to place the points on the z axis, create the coordinate system with origin to create the poits from the origin poit to the top level on the z axis.
Now link the no of level and the level height to one code block, link the code block to coordinate point block.
Link the point by coordinate block to coordinate system by origin block.
The points will be created on the z axis as per the levels and the height of the levels are assigned.
To create rectangle on the assigned points, create the rectangle by width length block, link the length width to the lenth and width option on the block.
To create the rectangle on the all points on the z axis, link the coordinate system by origin to the coordinate on the rectangle block.
To create the surface on the rectangle, create the polysurface by loft.
Link the rectangle block to the polysurface block, now the surface for all the triangles will be created.
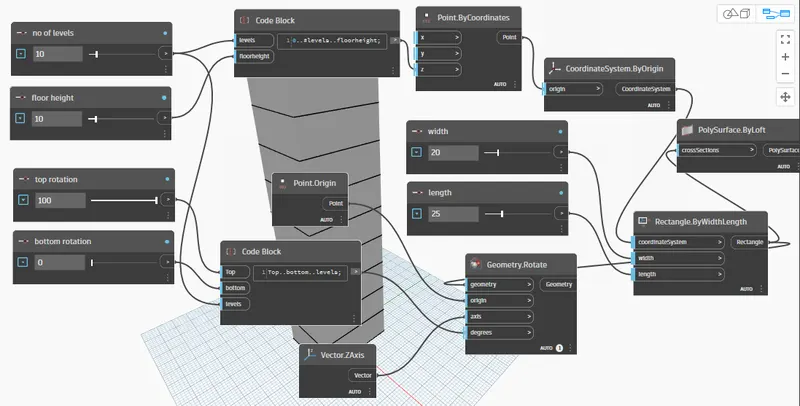
To rotate the surface create the 2 Integer slider and rename them as top rotation and bottom rotation.
create a another code block and add the code top, bottom and level.
link the top rotation to thetop code from the code block, link the bottom rotation to the bottom in the code block and link the no of level code to the level code from the code block.
Now link the geometry from the rectangle block, to the polysurface.
the surface is twisted to the angle tha is provided.
Result and Report:
The concept of designing conceptual mass and sinusoidal surface and the parametric stadium is created using the revit and dynamo.