Creating Conceptual mass in REVIT and Creation of Sinusoidal curve and a Parametric stadium using Dynamo
1) Using Dynamo create a set of sinusoidal points and create a curve and create a surface out of the curve.
Aim : To create a set of sinusoidal points, a curve and surface out of the curve using dynamo
Procedure:
1. Open Architectural template in Revit, go to manage tab
2. Choose the dynamo and open new file
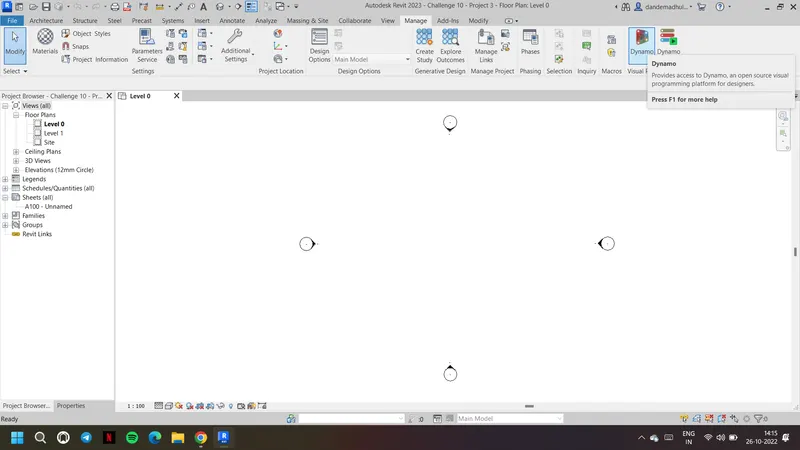
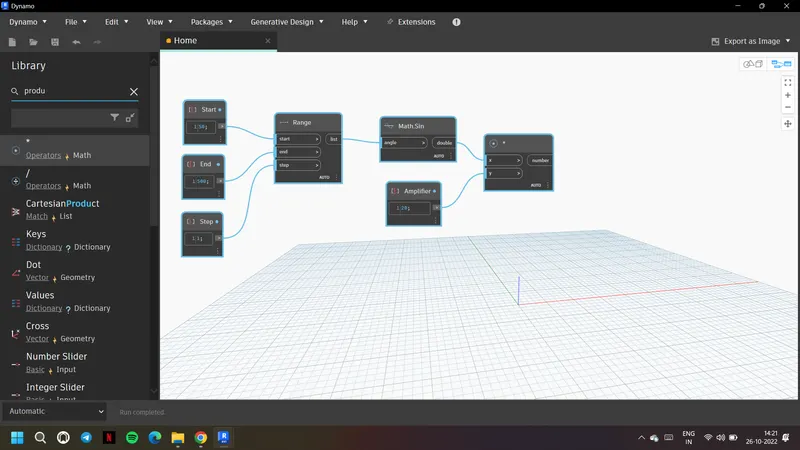
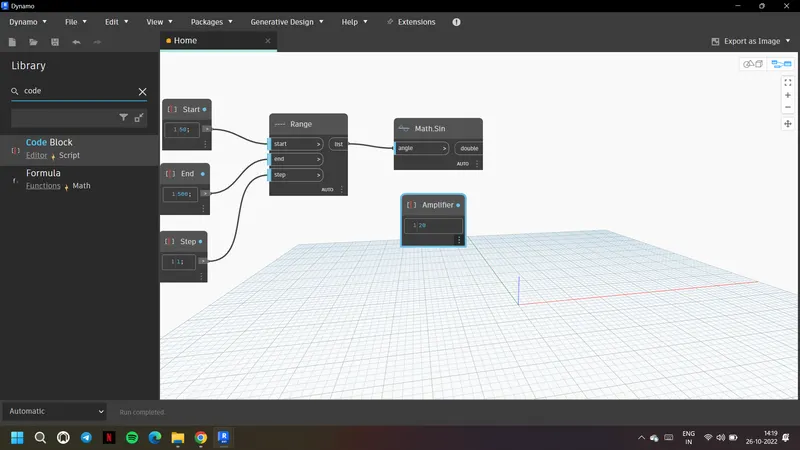
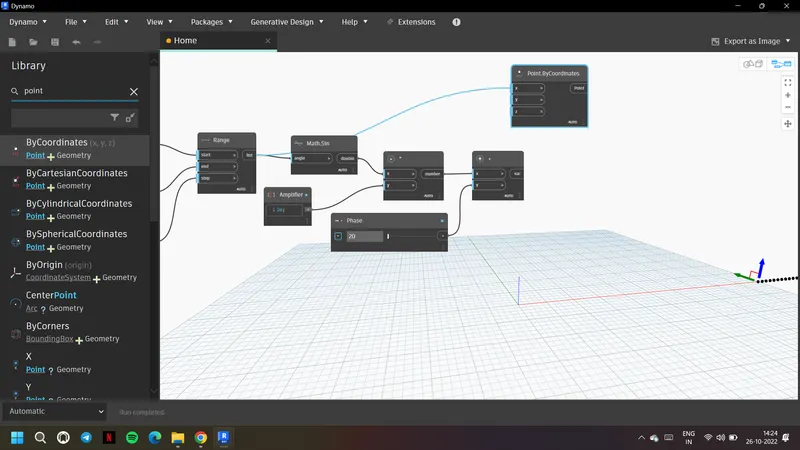
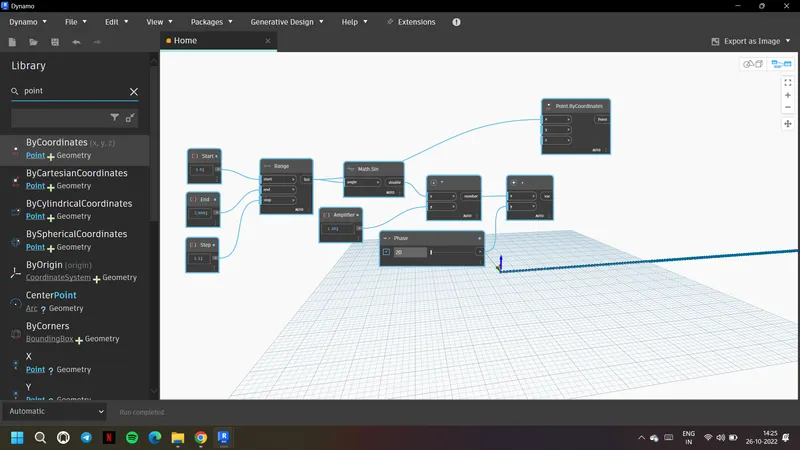
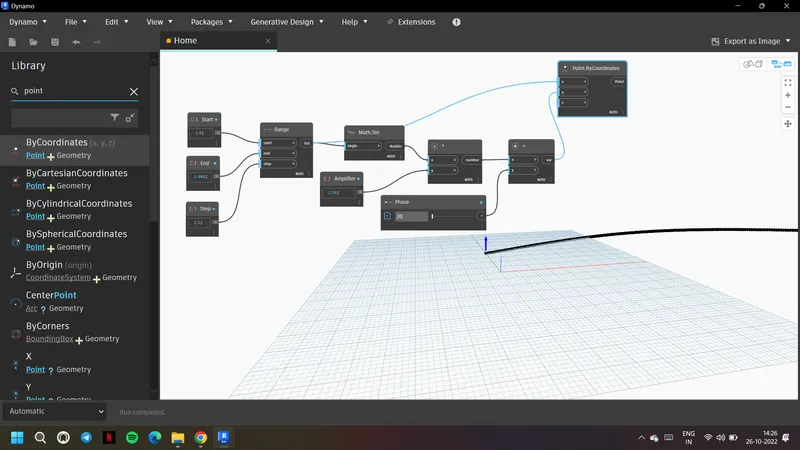
3. Then first to define start, end and step value. Create code blocks
4. Edit the names and values as shown as desired
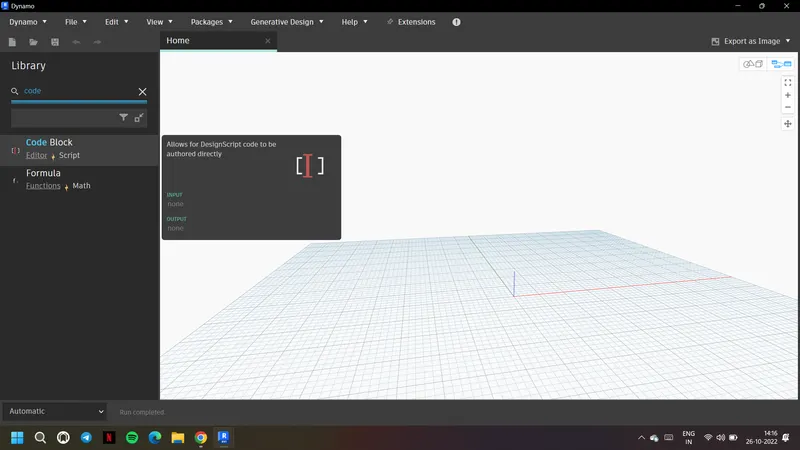
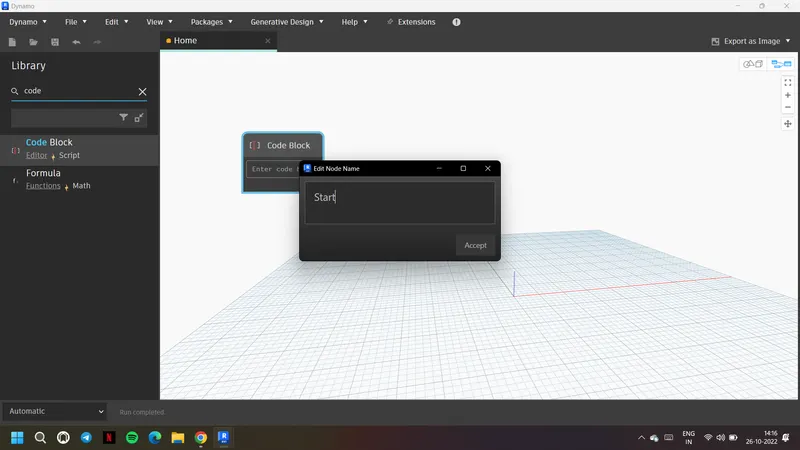
5. Then give range and give inputs
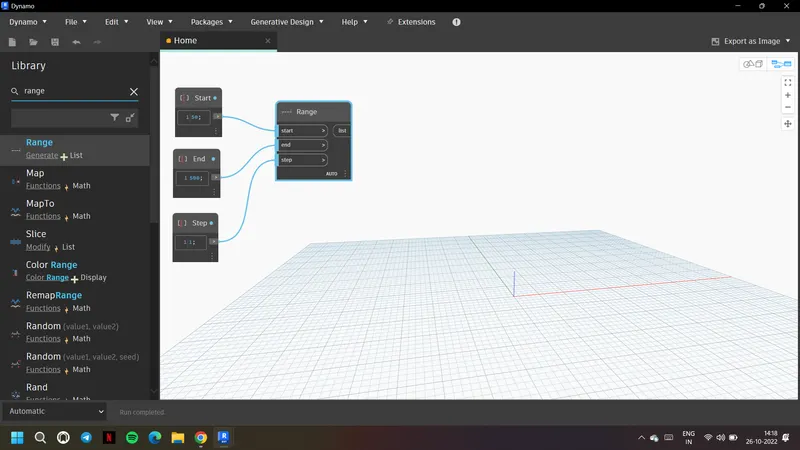
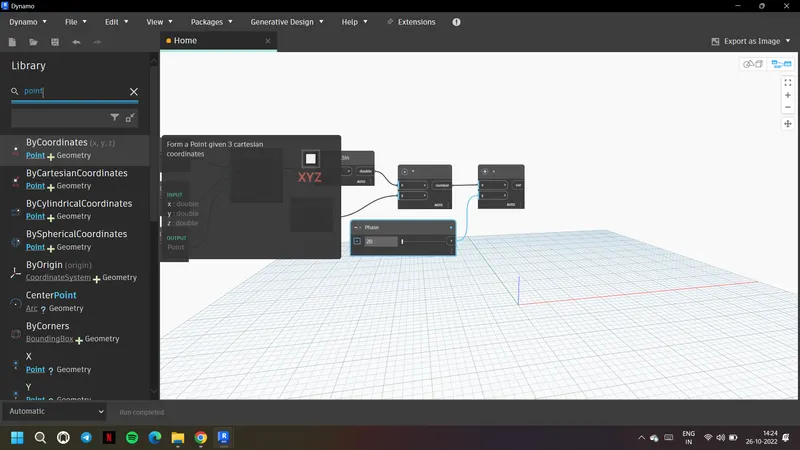
6. Use pointsbycoordinate and range list as input
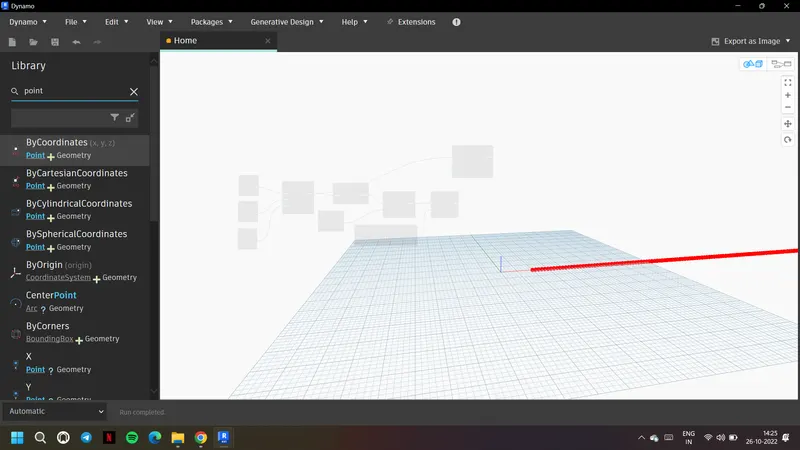
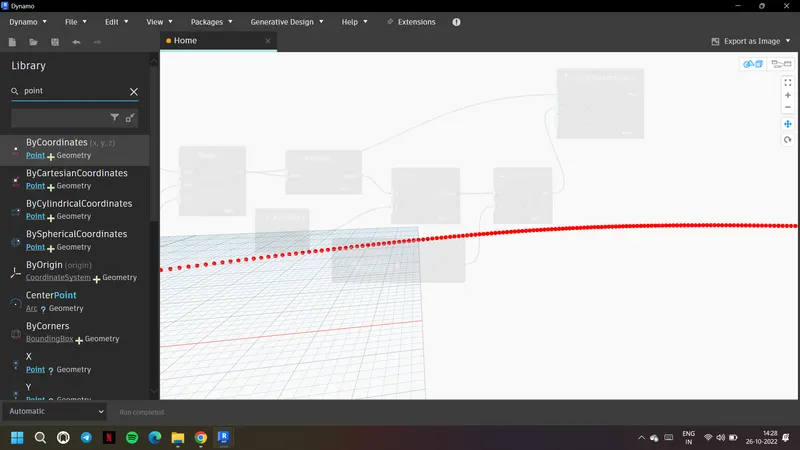
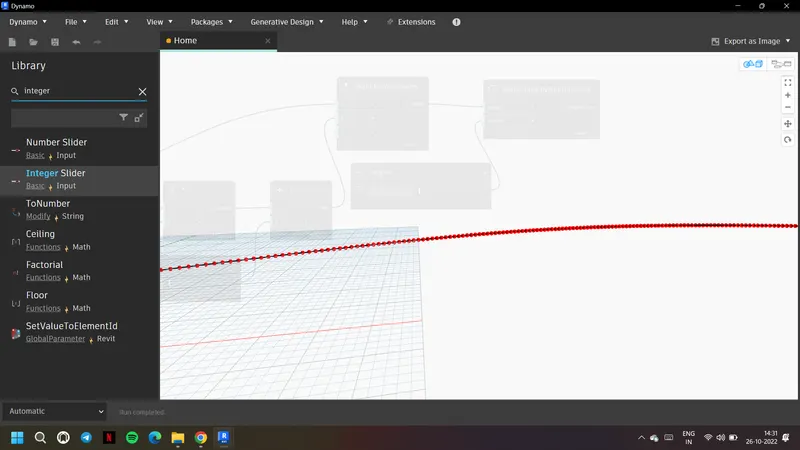
7. We will get a set of points according to the given range with given step
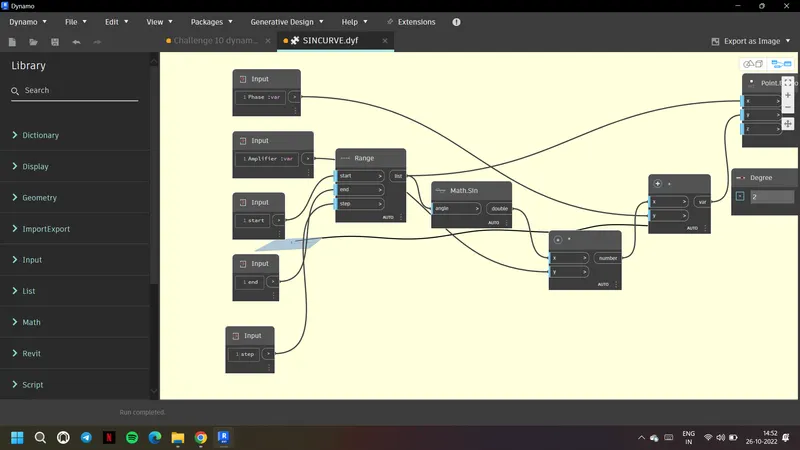
8. Create math.sin and give range list as input to it
9. Create anotehr code block and name as amplifier and give value
10. Using product give math,sin and amplifier as inputs
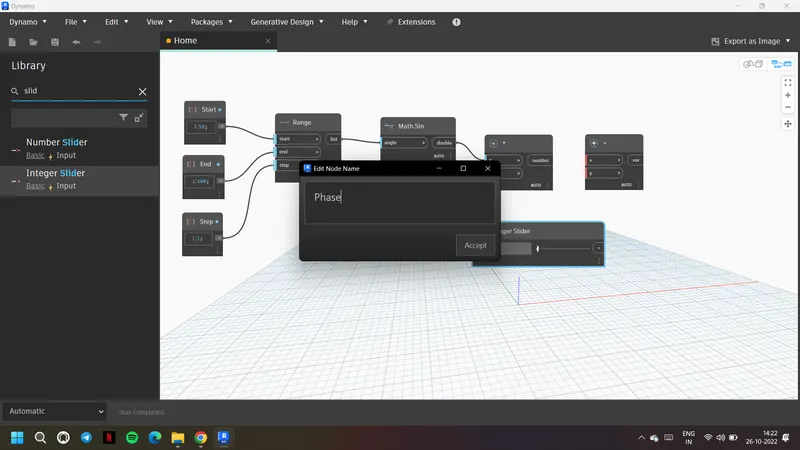
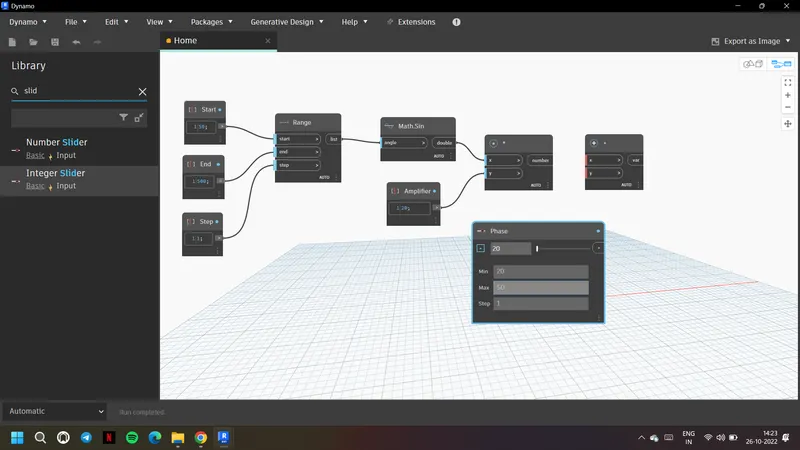
11. Now using integer slider create phase and give minimum and maximum values
12. Use add and give product and phase as inputs. This is the sinusoidal curve equation
13. Give this add as input to pointbycooordinate y then the sinusoidal ports are formed
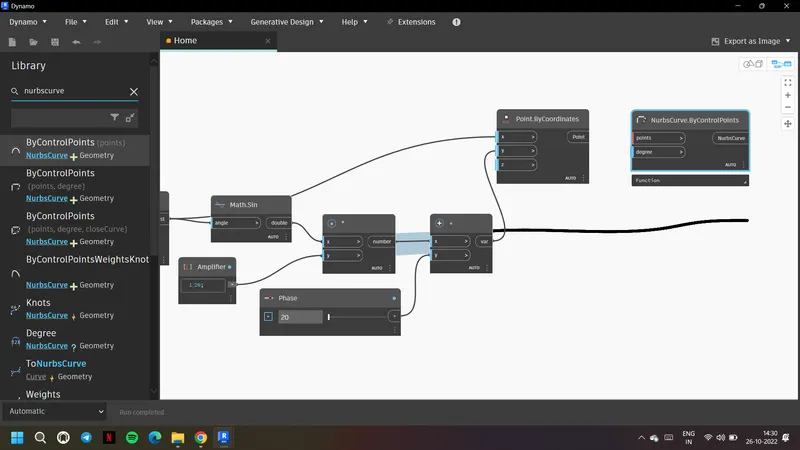
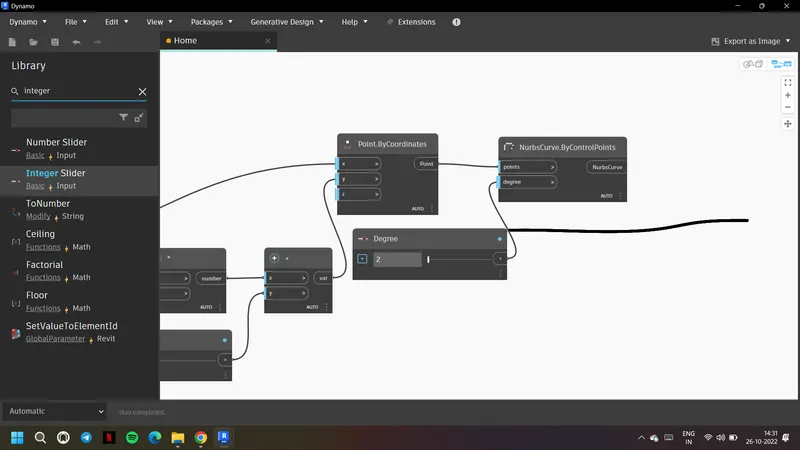
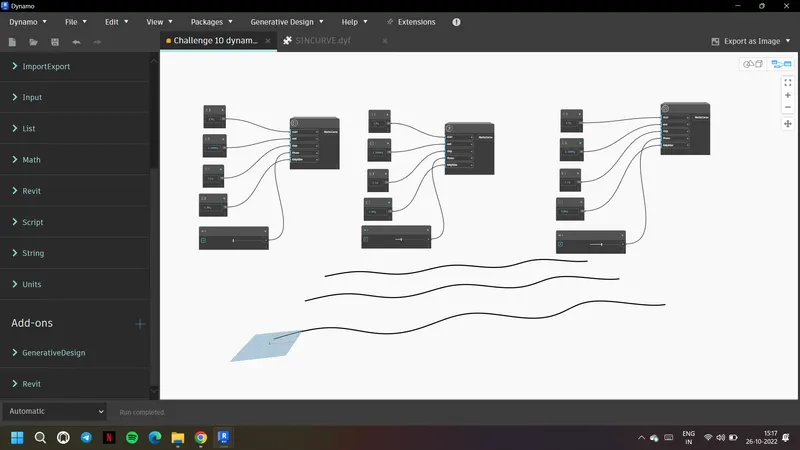
14. Now to form the curve go to nurbscurve by control points
15. Create integer slider name it as degree adn give a small range as 2 to 5
16. Give degree and pointsbycoordinates as inputs to curve
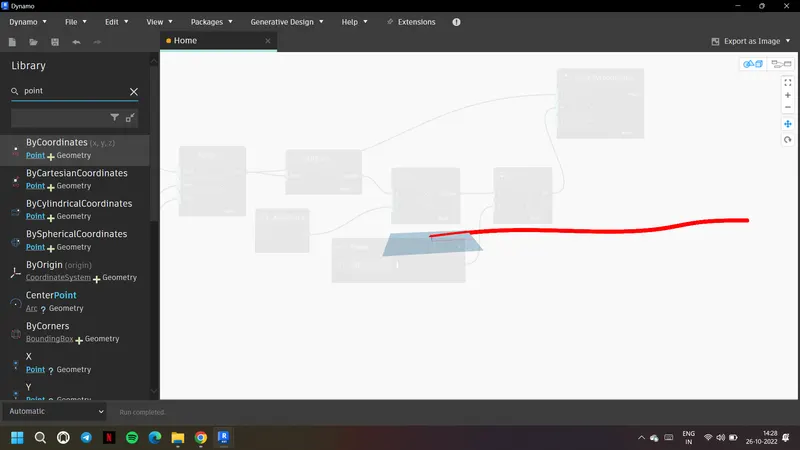
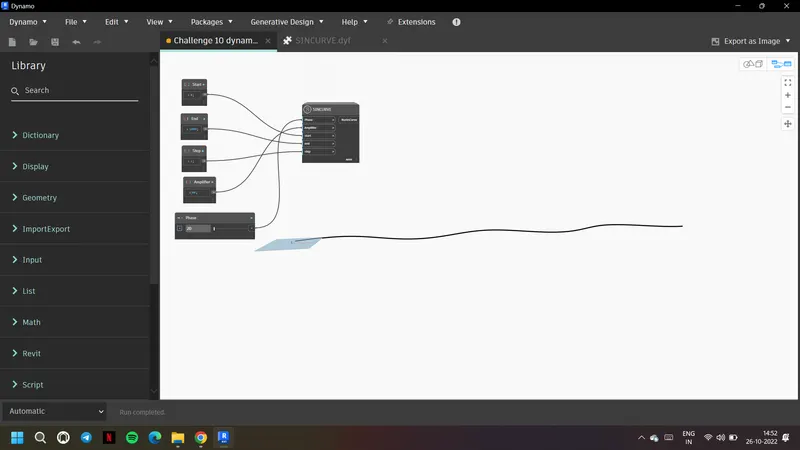
17. Then the sinusoidal curve is formed along the sinusoidal points as shown
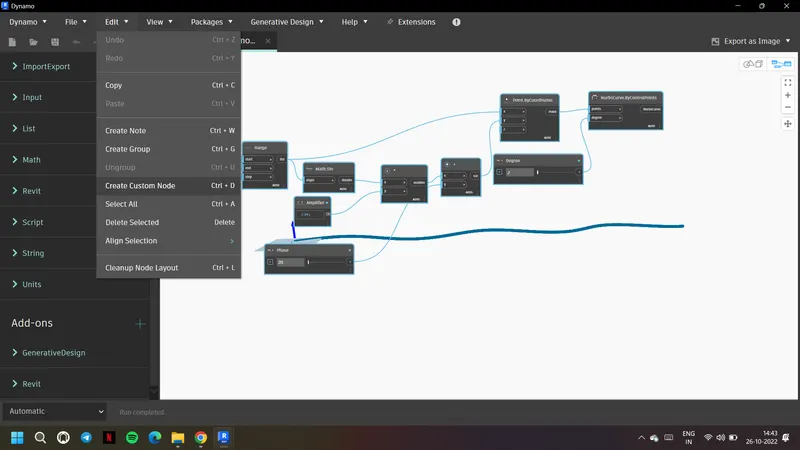
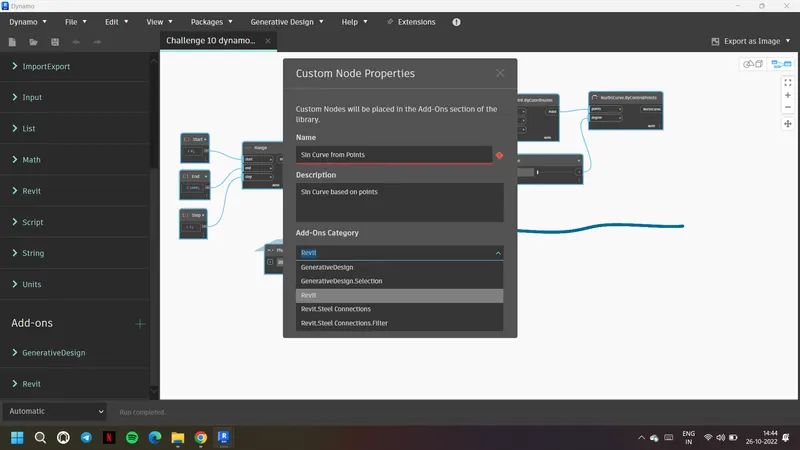
18. Now save this dynamo file and select particular nodes as shown
19. Go to edit and choose create custom node. Give proper name, description and save it
20. The custom node gets replaced with all the selected nodes.
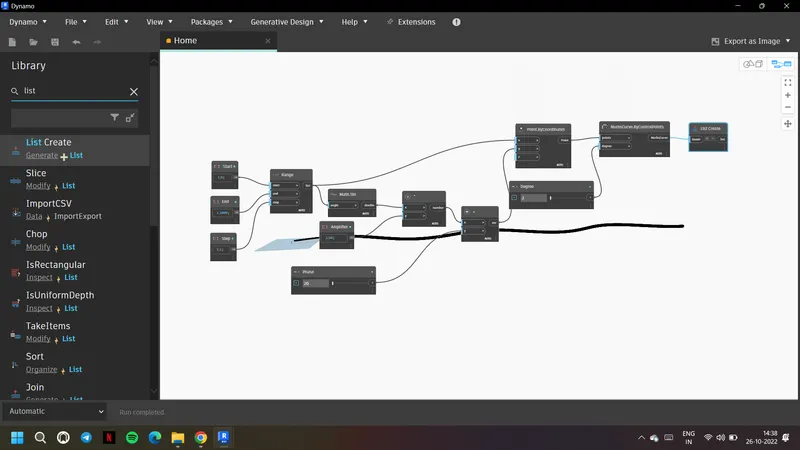
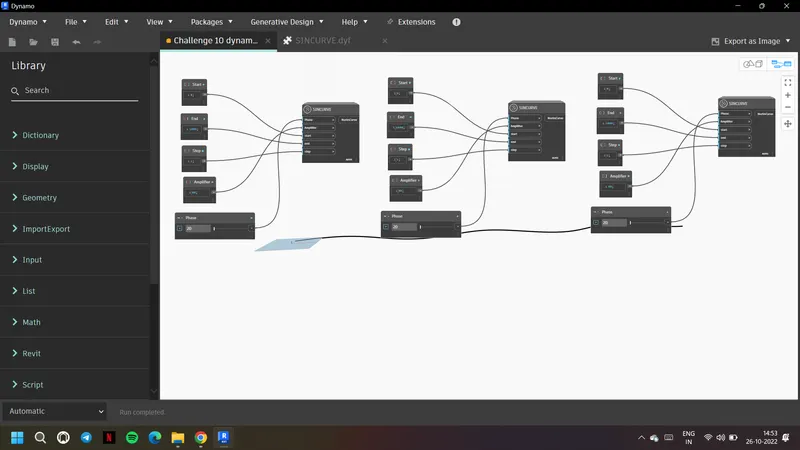
21. Now copy the nodes and paste as shown
22. Change the phase of the curve to get multiple curves
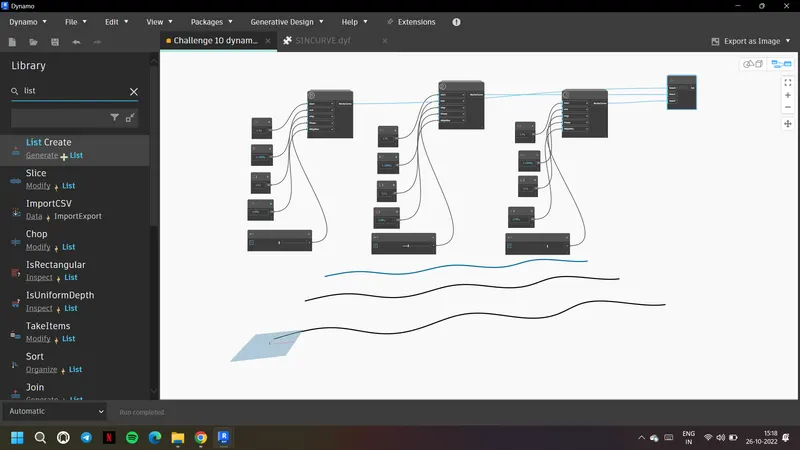
23. Now go to list and create list. Give the three curves as input
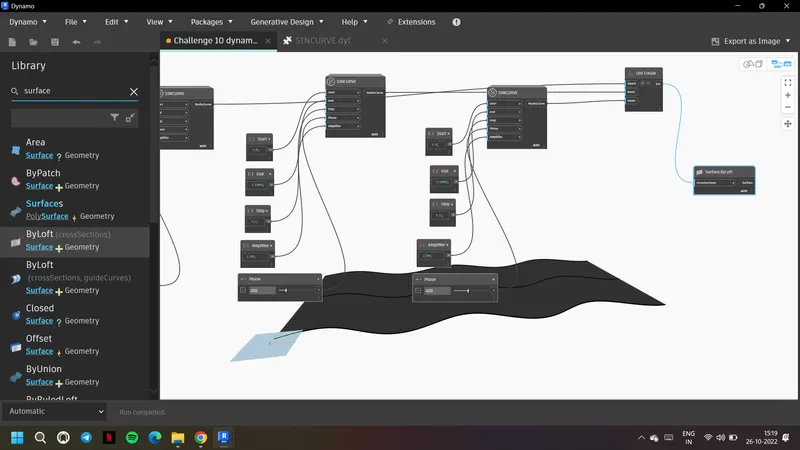
24. Choose surfacebyloft and give the list as crosssection input
25. Surface is formed out of the formed sinusoidal curves
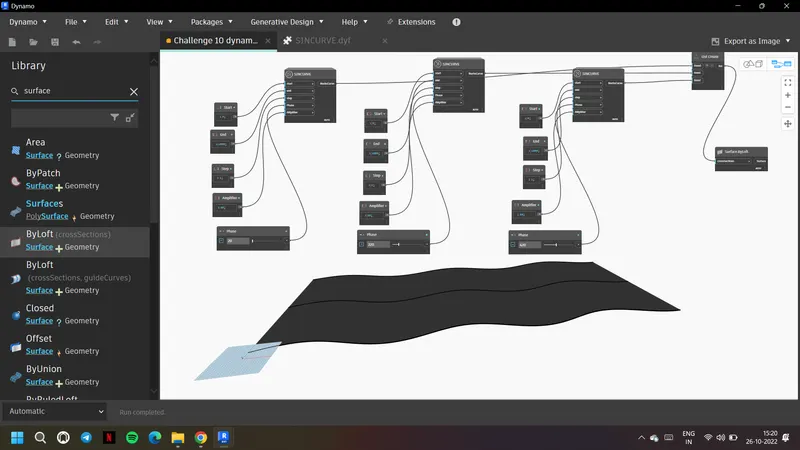
Result: A set of sinusoidal points, a curve and a surface out of the curve is created using the Dynamo
2) Create a conceptual layout of floor plan in dynamo . Using the tools available in dynamo link the lines to appropriate model elements in Revit by choosing the wall types and wall parameters. Make use of the sliders to slide through the height of the wall and length of the wall.
Aim : To create a layout of floor plan in Dynamo and to link the lines to appropriate model elements in Revit by choosing the wall types and wall parameters
Procedure:
1. Open Architectural template in Revit, go to manage tab
2. Choose the dynamo and open new file
3. Create two number slides and four point bycoordinates as shown
4. Give the number as inputs to the points and create four lines by start point and end point
5. Give these points in such a way to form the four lines as a closed polygon
6. Now to create wall by curve and height. Choose list
7. Assign all the lines to list and give list as input to curve
8. Create level and walltype and assign them respectively
9. For height of the wall create a slider and give it as input
10. Walls are formed as desired and can change the wall height, type accordingly through dynamo
11. Choose floor by outline, type and level
12. Give list and level as inputs of outline and level. For floor level create floor level.
13. Floor is formed as desired. Can change the floor type as desired through dyanamo
14. Open the revit 3d view to view created walls and floor
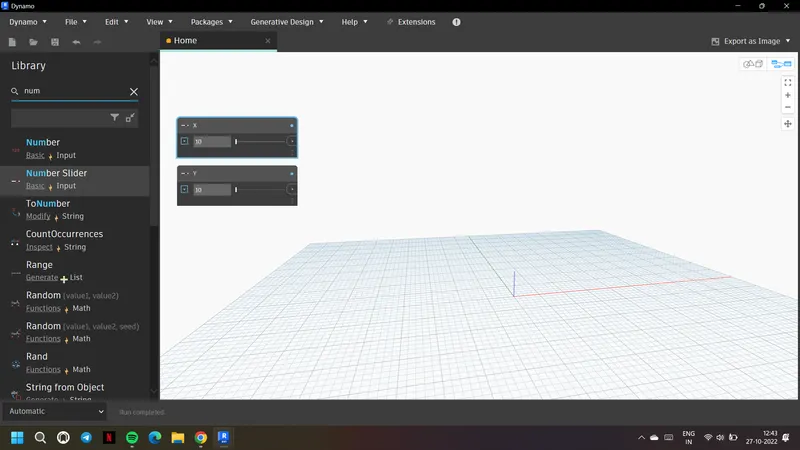
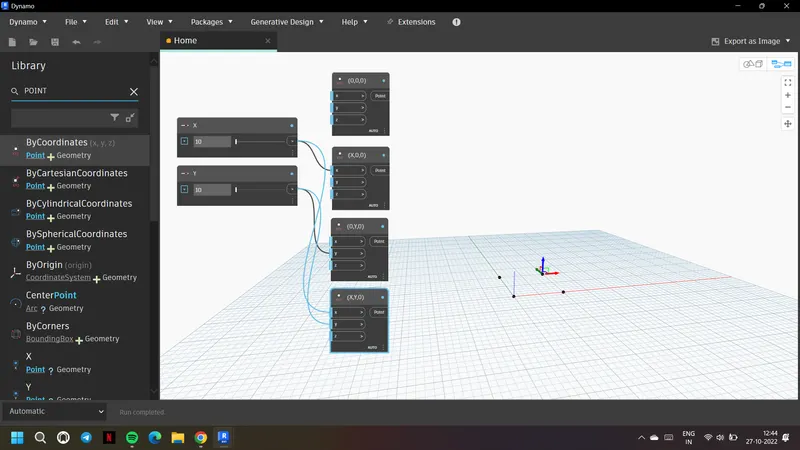
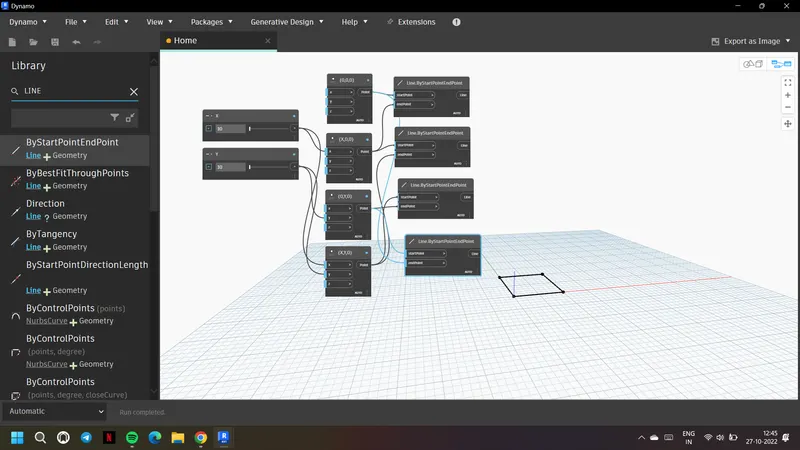
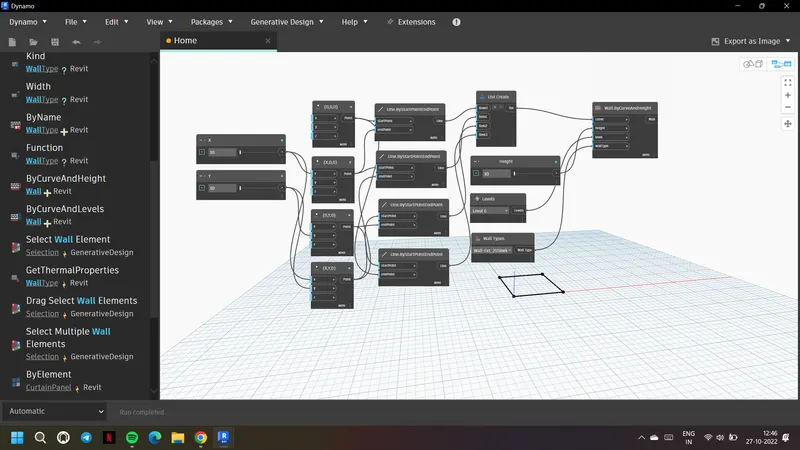
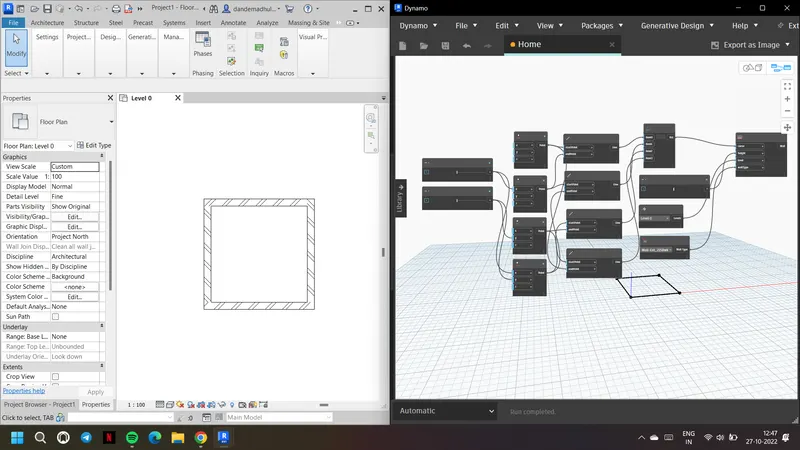
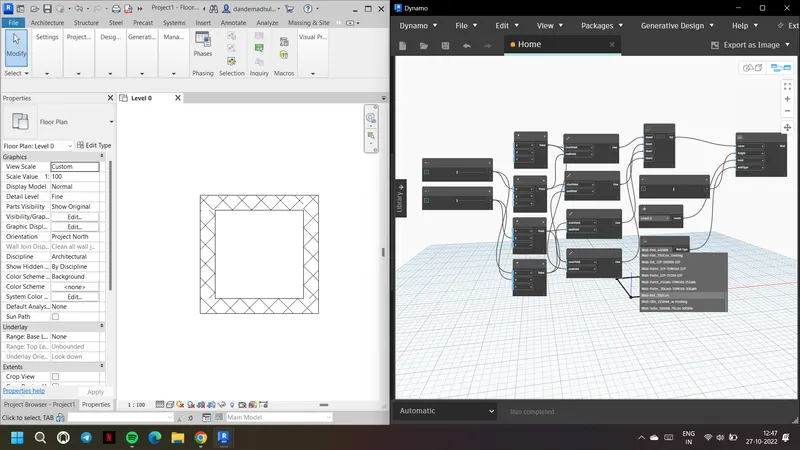
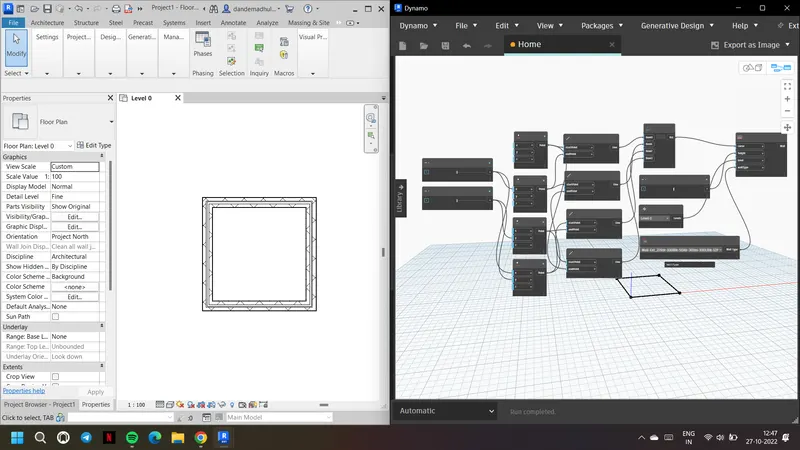
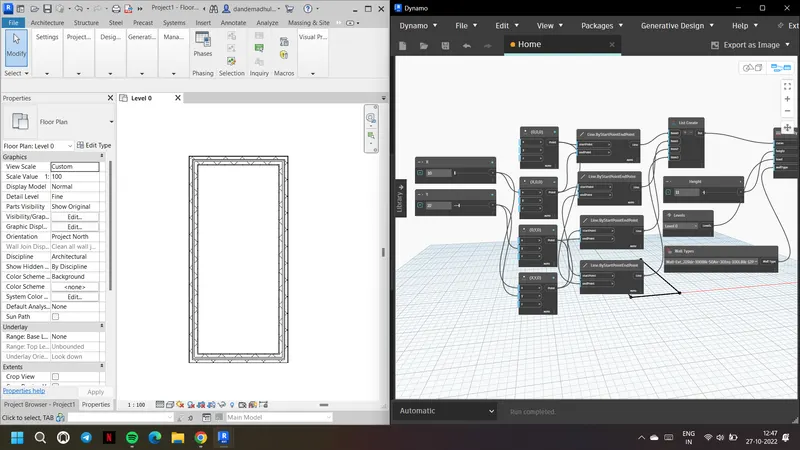
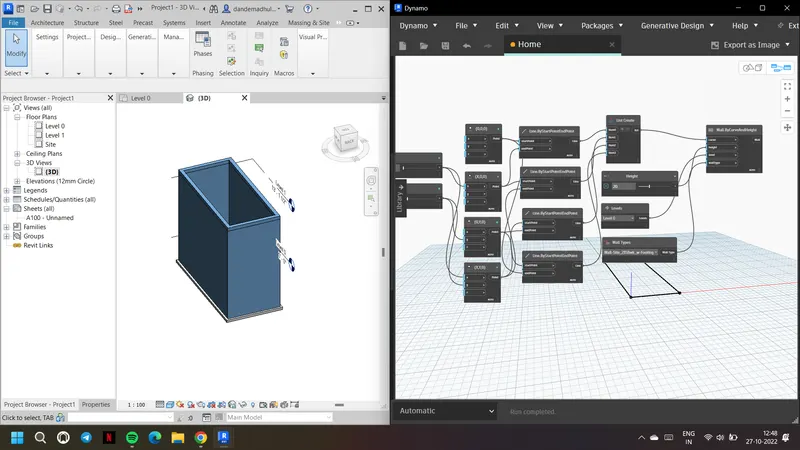
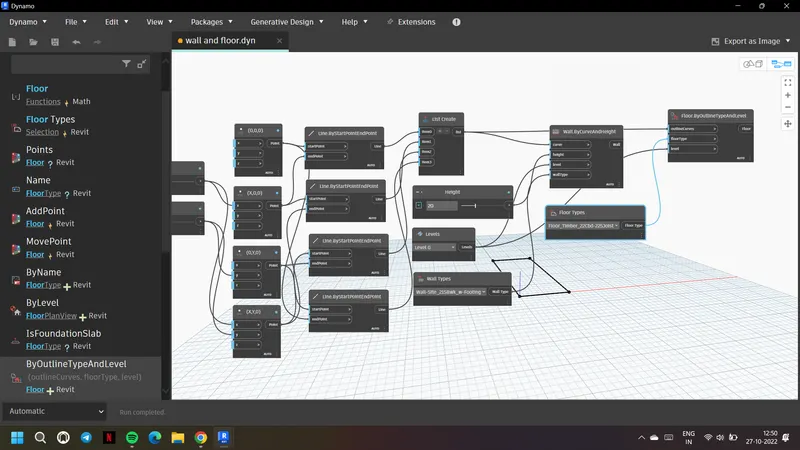
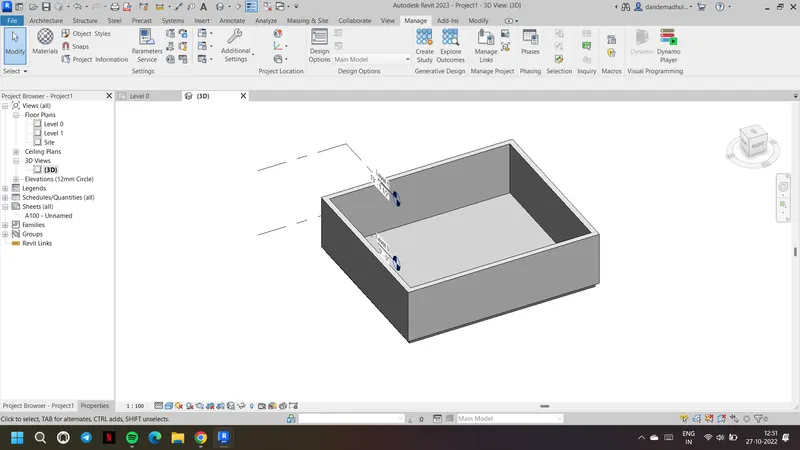
Result: A layout of floor plan is created in Dynamo and linked the lines to appropriate model elements in Revit by choosing the wall types and wall parameters
3) Create an array of model elements in Revit. Use dynamo to vary the properties of model elements by using the slider or code block
Aim: To create model elements in Revit and to use dynamo to vary the properties of model elements by using the slider or code block
Procedure:
1. opent the architectural template in Revit
2. Create four columns as shown in the model
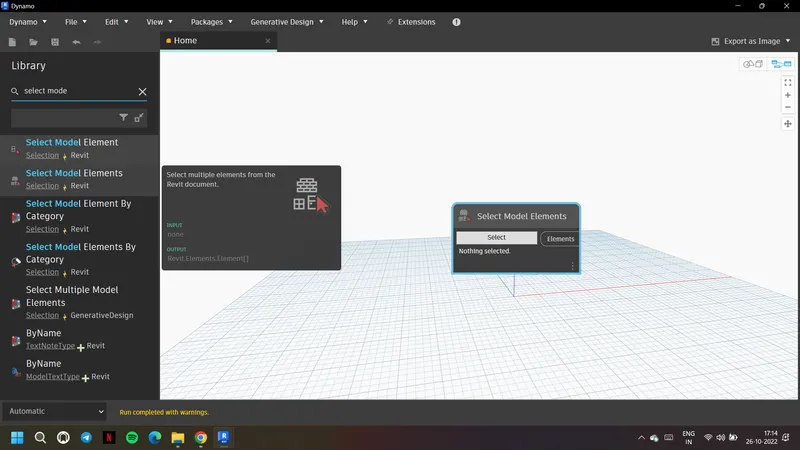
3. Go to dynamo choose select model elements
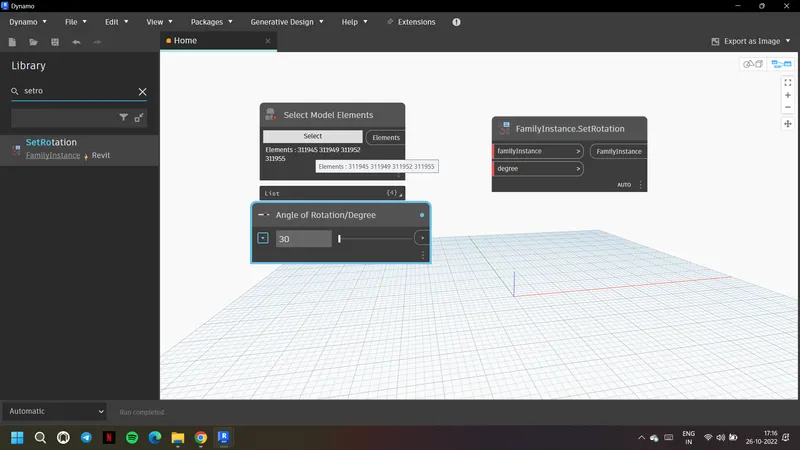
4. Choose select option and come to revit and select the created columns
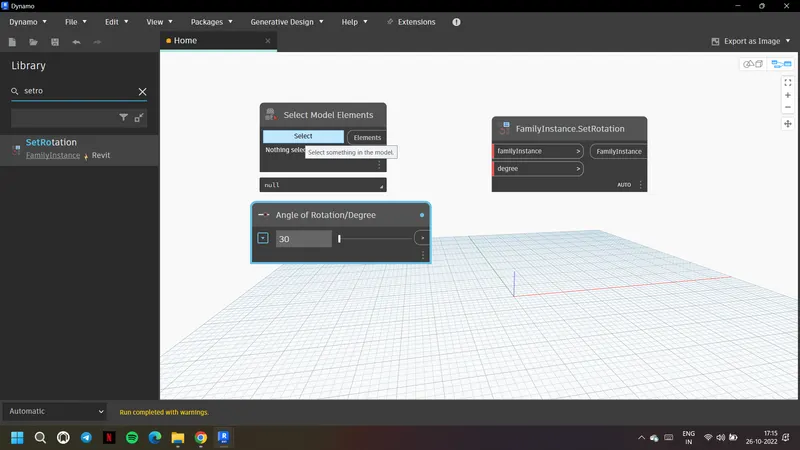
5. Now in dynamo create number slider for angle of rotation
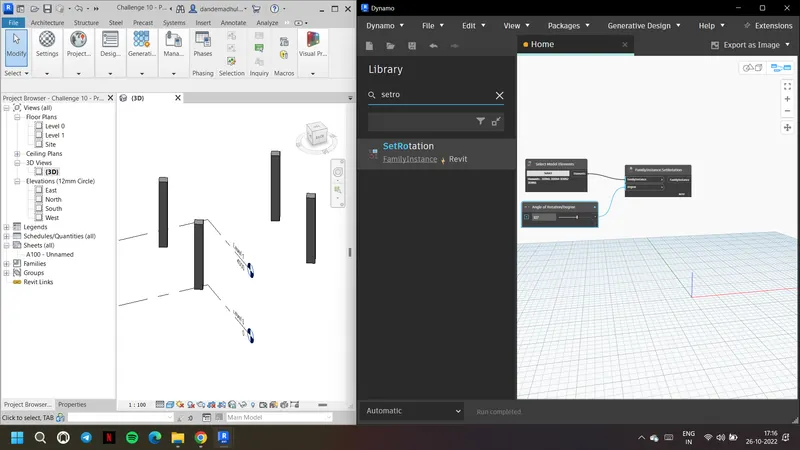
6. create setrotation and give select model elements and angle as inputs
7. With change of angle in dynamo the columns in revit gets changed as shown
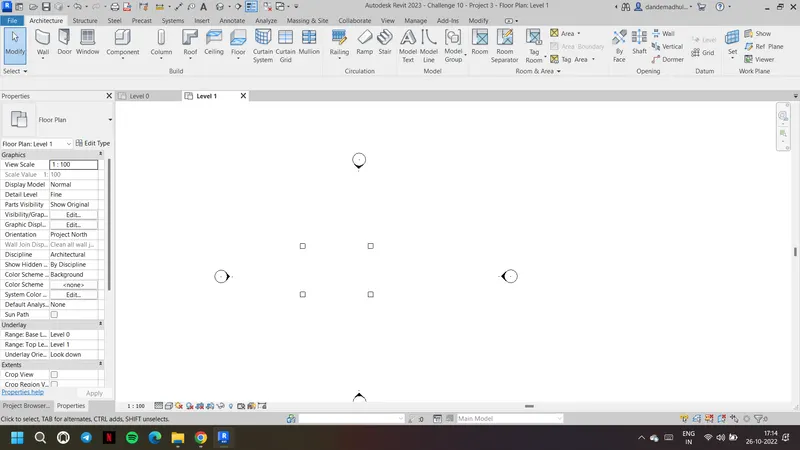
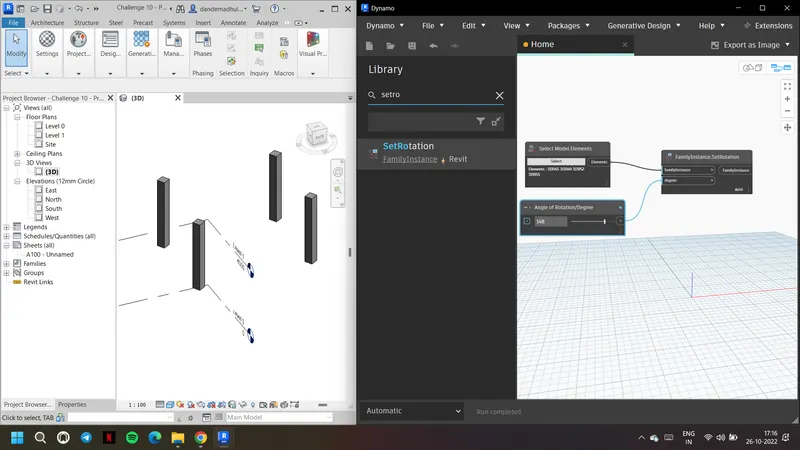
Result: An array of model elements are created in Revit and dynamo is used to vary the properties of model elements by using the slider or code block
4) Create a conceptual mass in Revit and develop a parametric column by dividing the surfaces and apply the concepts similar to used in parametric walkway modelling. Use triangular bent or square shaped panels to add finish to the parametric column
Aim: To use conceptual mass in Revit to develop a parametric column. To use triangular bent or square shaped panels to add finish to the parametric column
Procedure:
1. Open the revit file and conceptual mass
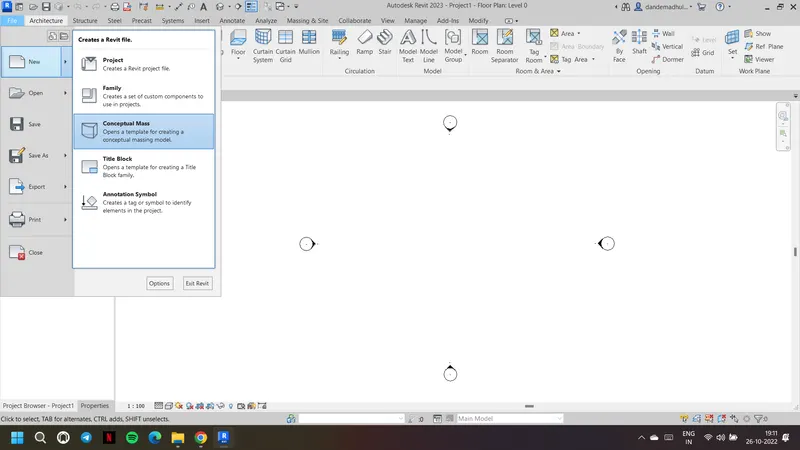
2. Choose metric mass from it and open it as shown
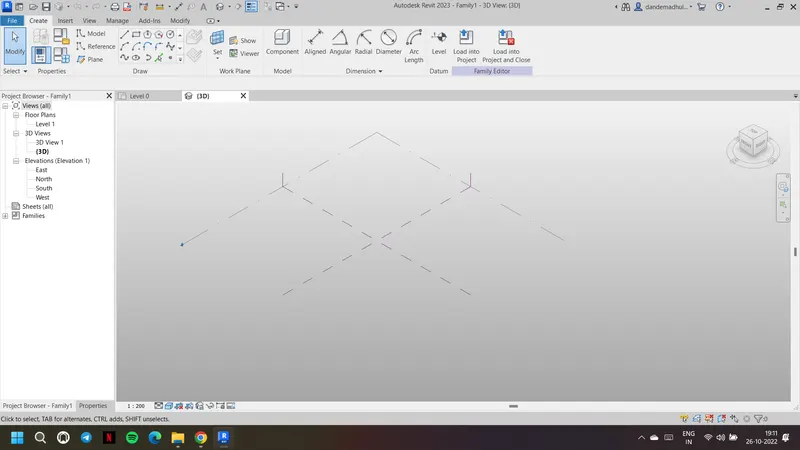
3. Create a level at 30' height and draw a line of 30'
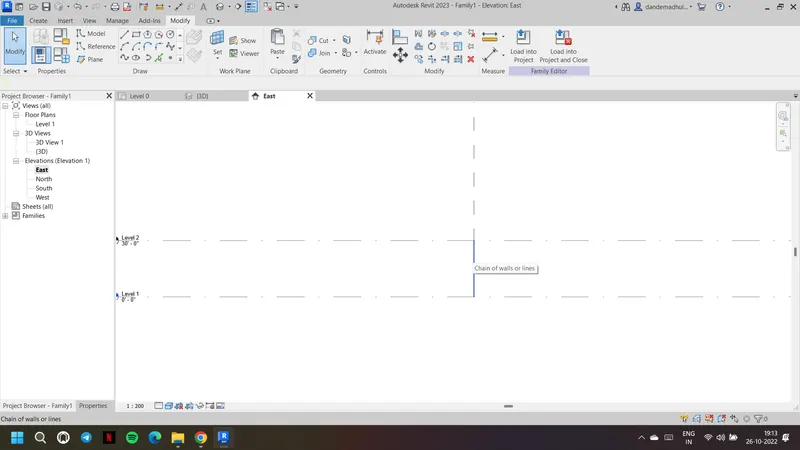
4. Choose the reference point and set the plane and choose show
5. On that plane draw polygon as shown as desired with 4 or 5 or 6 sides
6. For each reference point draw the polygon
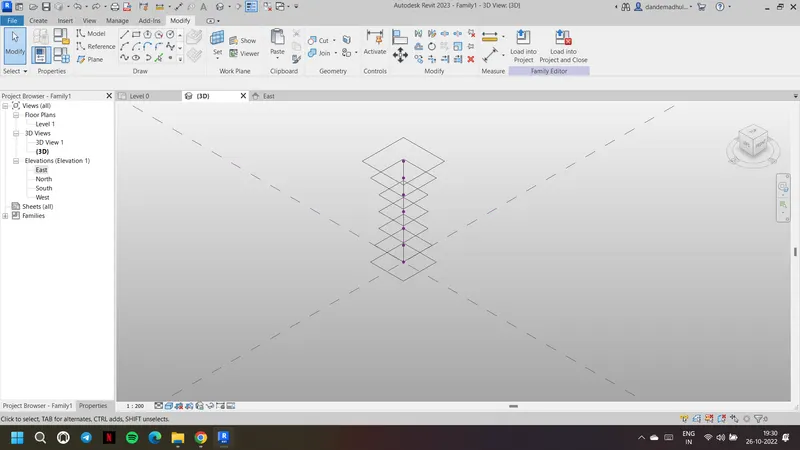
7. Select all the elements and click on create form
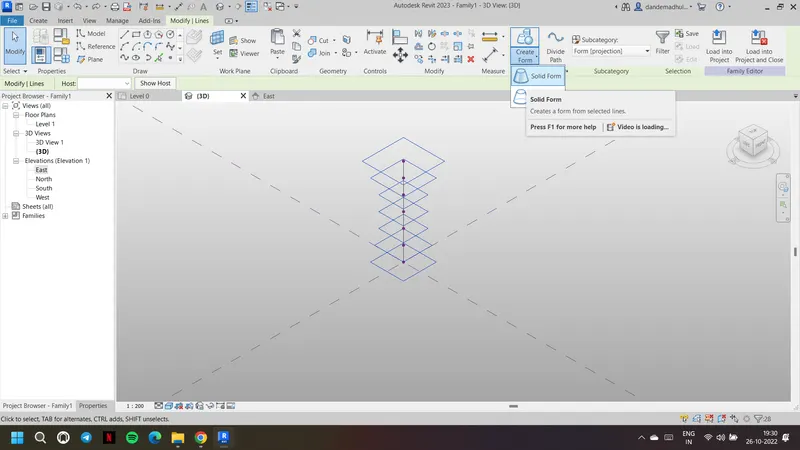
8. The parametric column is formed in Revit. Now select it and filter and select the form
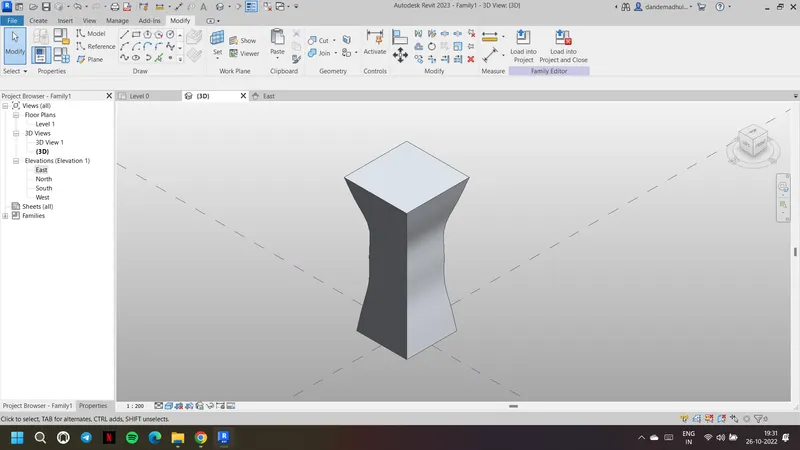
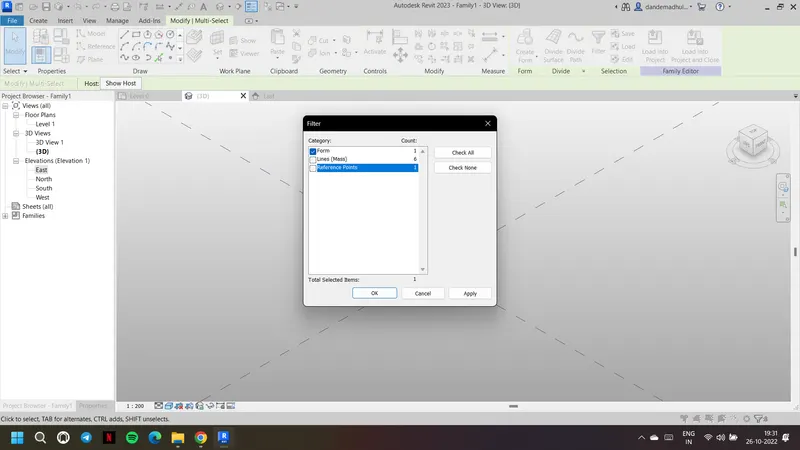
9. Choose divide surface option and choose triangular bent panel as shown
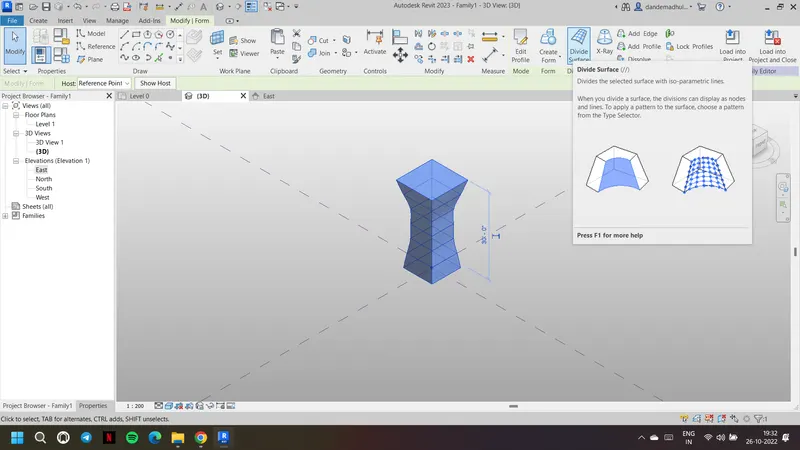
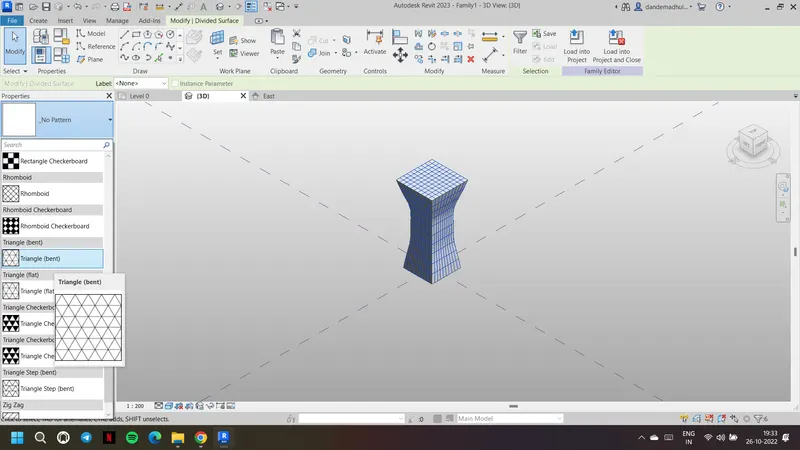
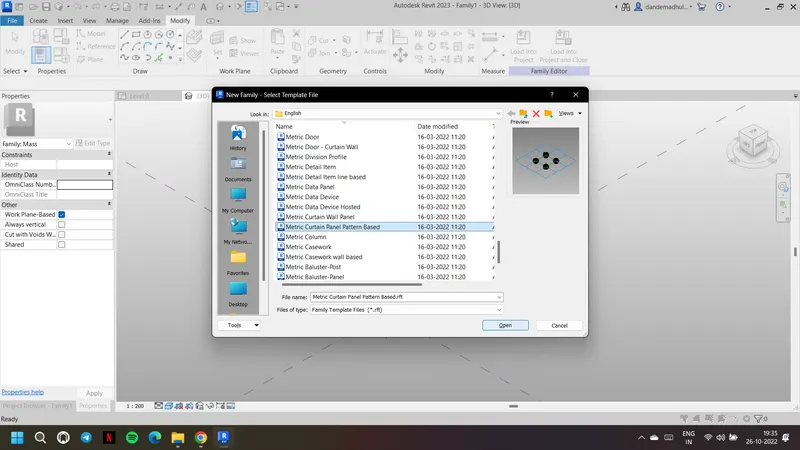
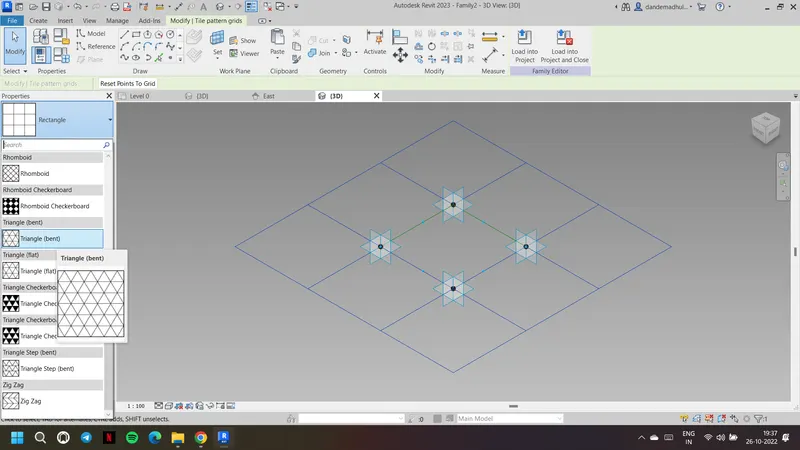
10. Open the family and choose curtain panel pattern based
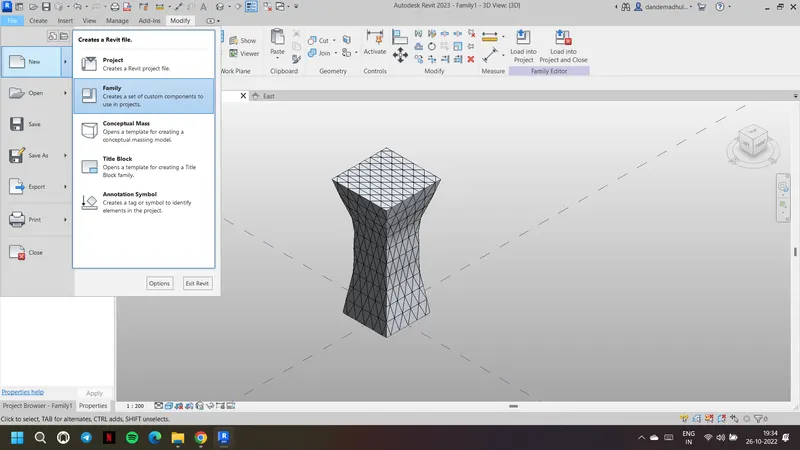
11. Choose the triangular bent pattern and set a reference point
12. At reference point draw a rectangle and select them and create form
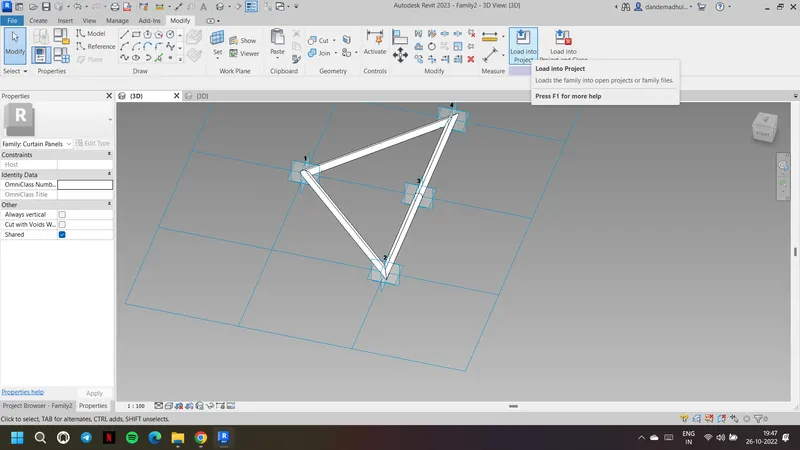
13. Load this family into the project and apply it to the parametric column
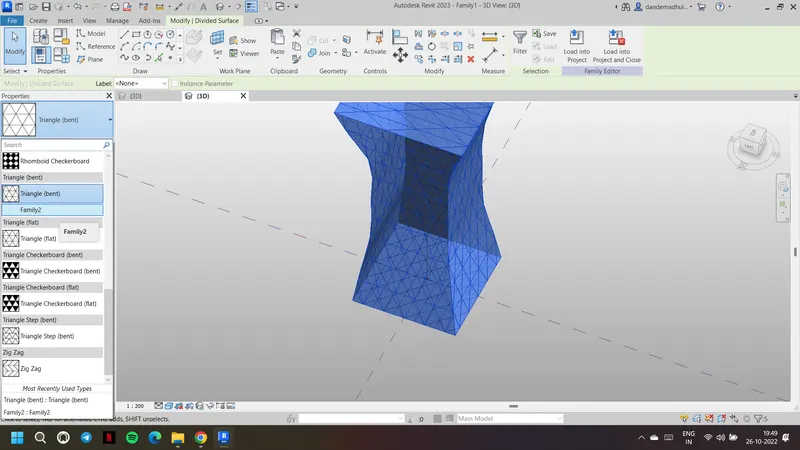
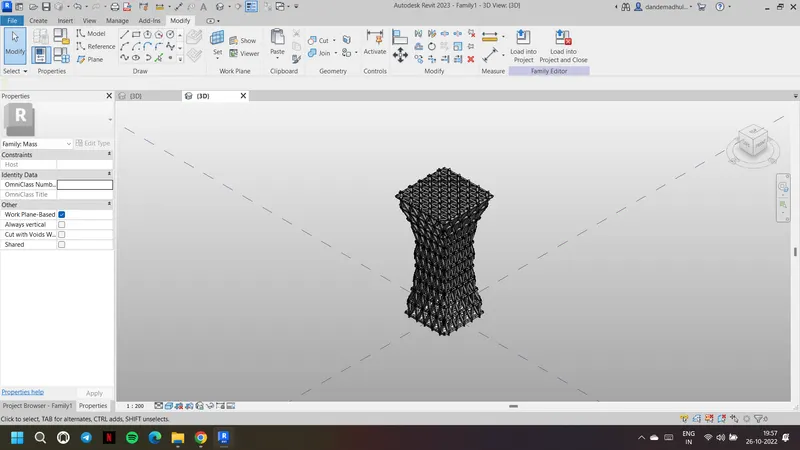
Result: Conceptual mass in Revit is used and developed a parametric column. Also added triangular bent or square shaped panels to the parametric column
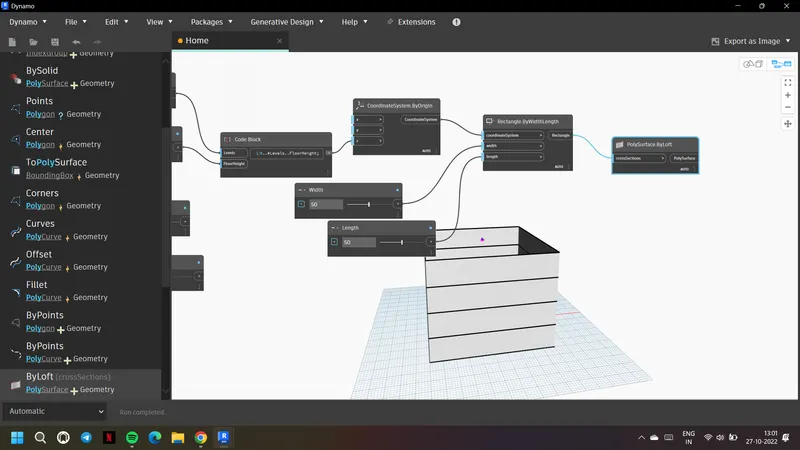
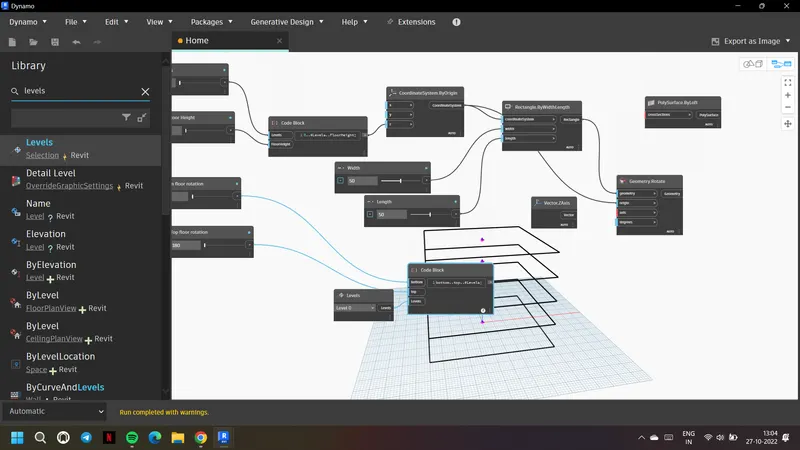
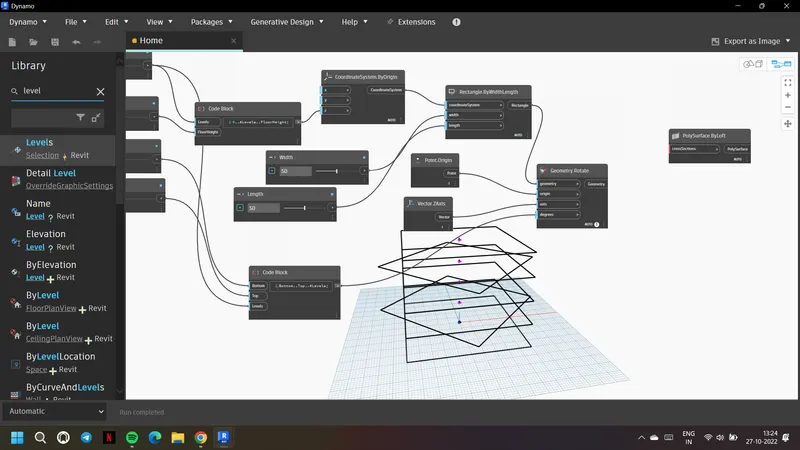
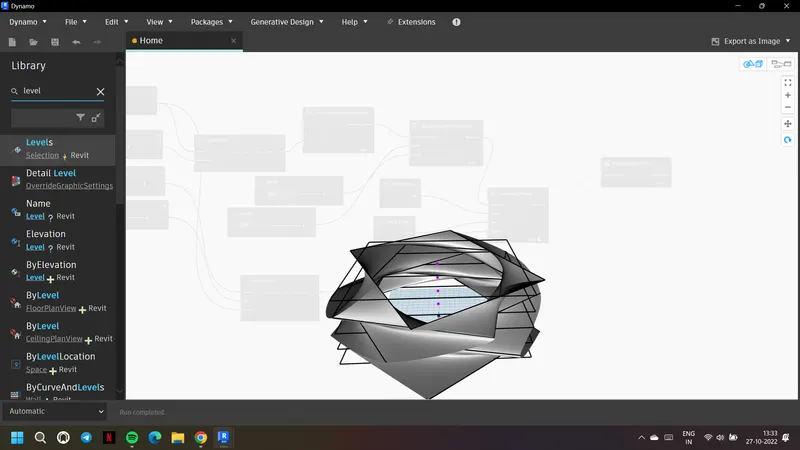
5) Use Dynamo to work on developing a Parametric Stadium. List your parameters and use the visual programming approach to complete the modelling, You can use the concepts discussed in parametric high rise tower in class for reference.
Aim:To develop a parametric stadium using Dynamo.
Procedure:
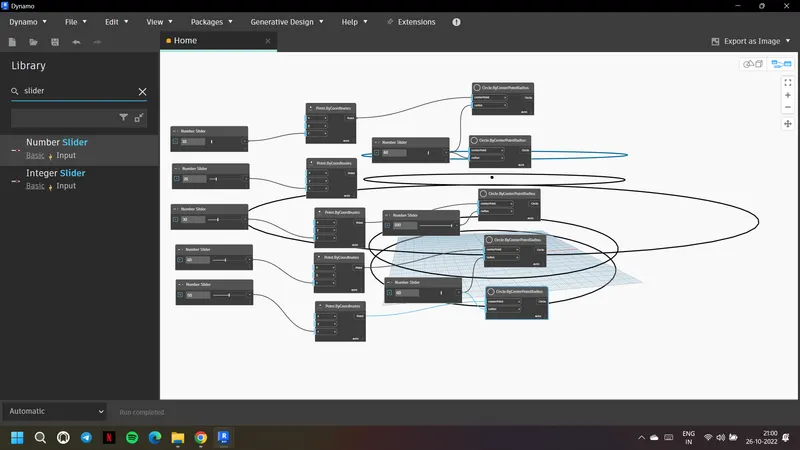
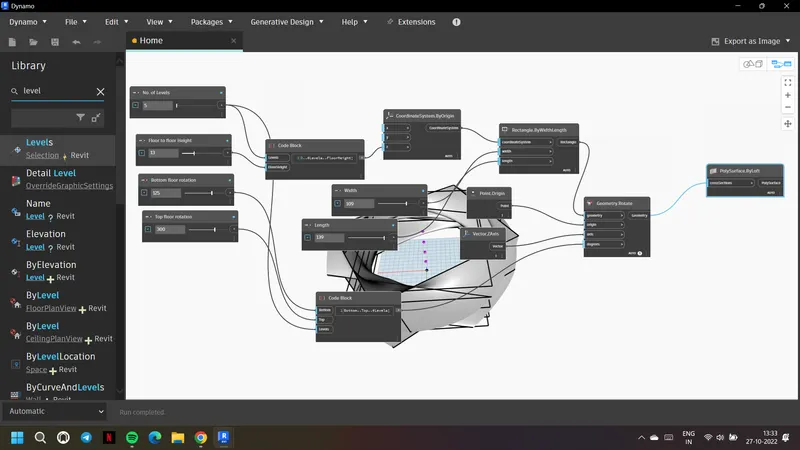
1. open the dynamo and choose number sliders as shown
2. Choose point by coordinates and assign these number sliders to z to form the levels
3. Now by using circle by point radius join the points
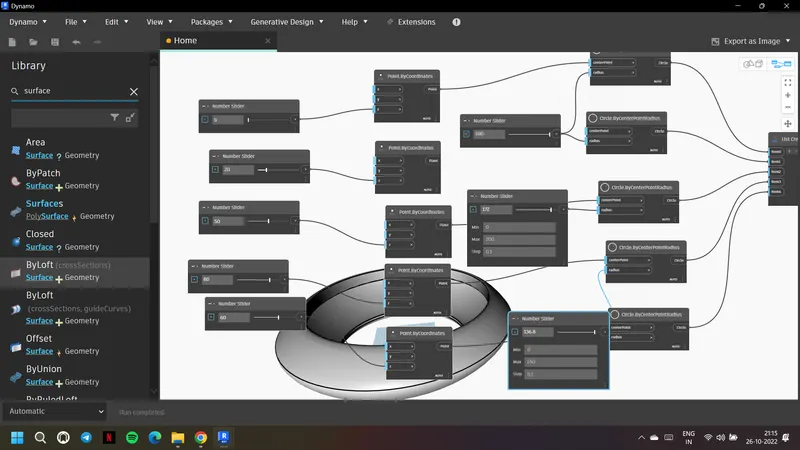
4. For radius input the number slider, to form the stadium as desired give radius as shown
5. Top and bottom level same radius and middle level a separate radius
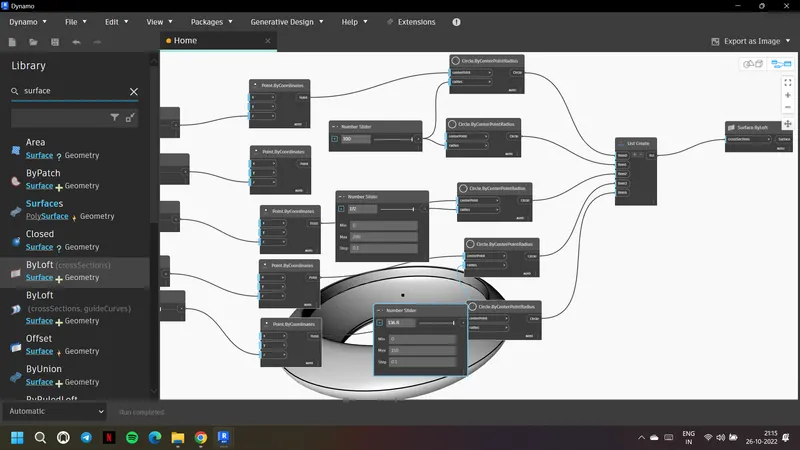
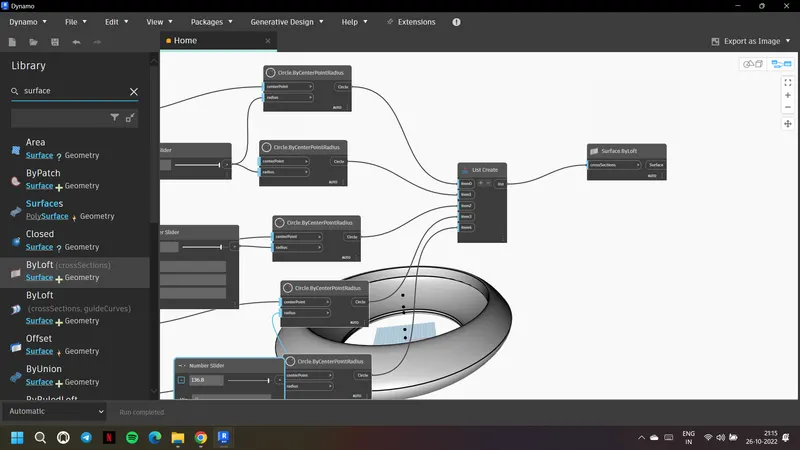
6. Choose list and input these circles
7. Use surface by loft to create the surface
8. Desired stadium is formed. Adjust the radius accoridngly as per the requirement.
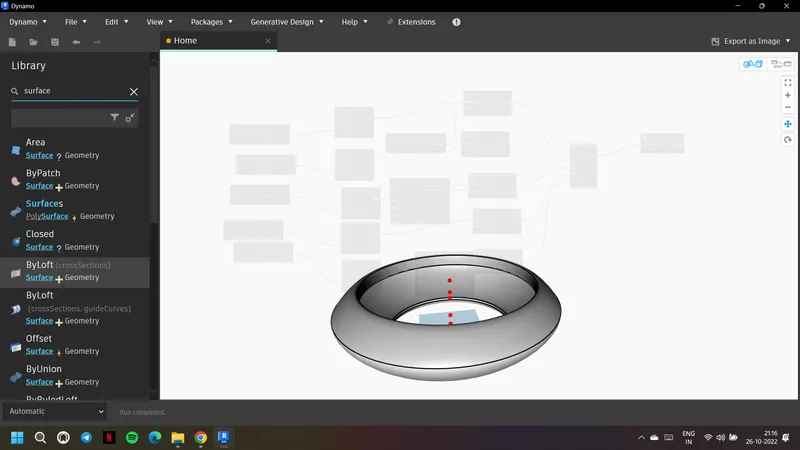
9. The other stadium is also drawn by including the top and bottom rotation
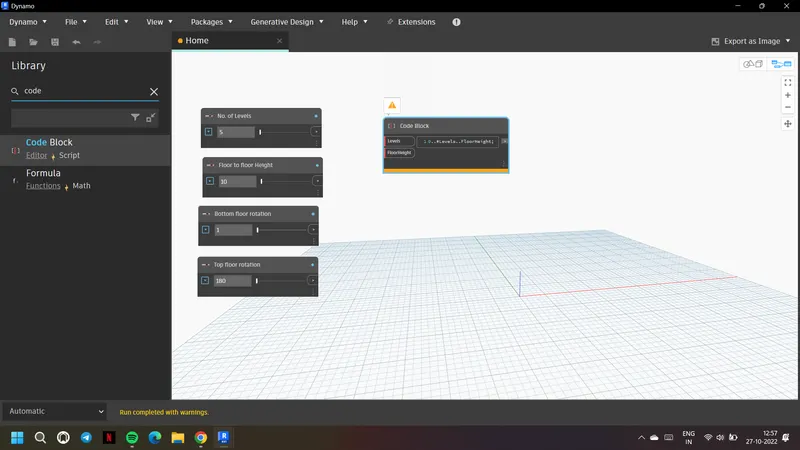
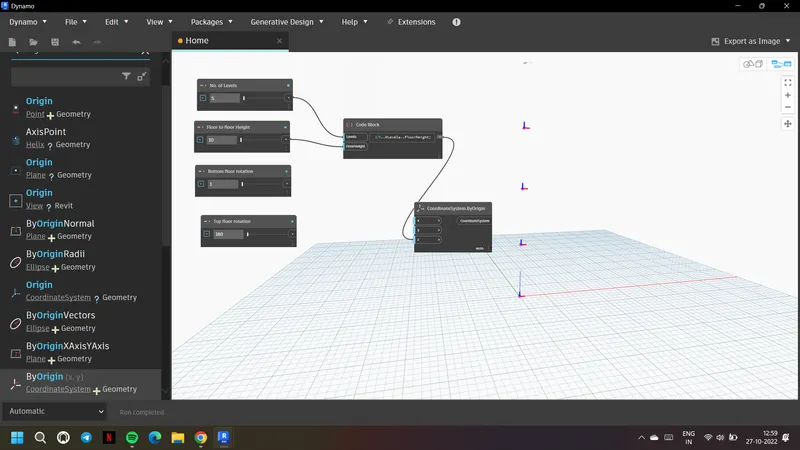
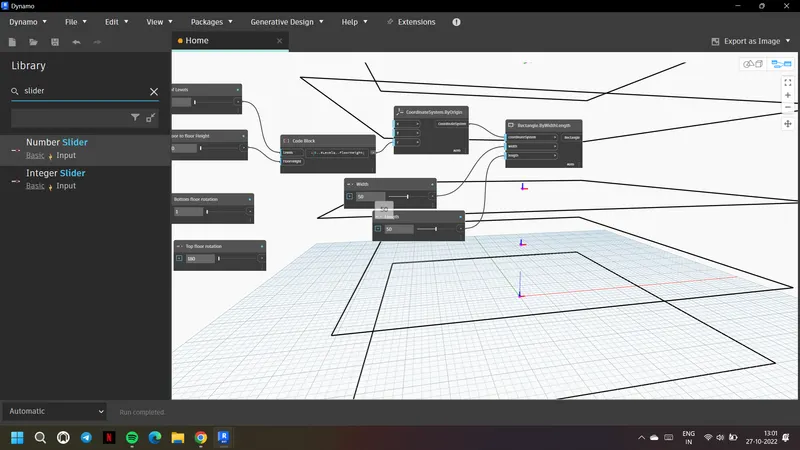
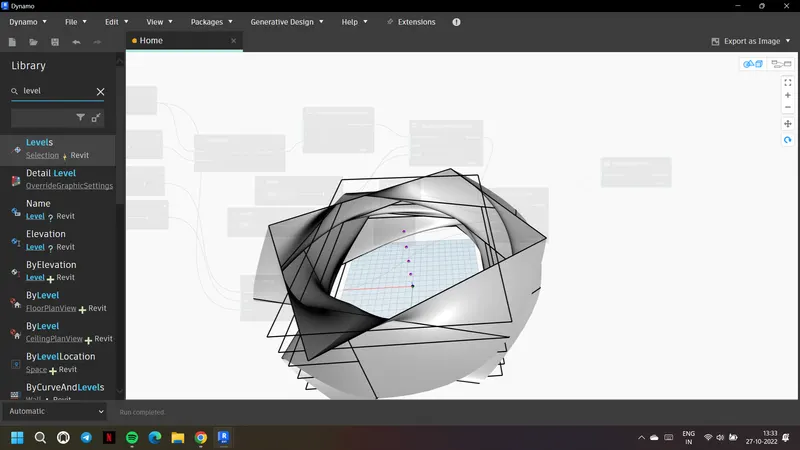
Result: Parametric stadium is developed using Dynamo