Creating Conceptual mass in REVIT and Creation of Sinusoidal curve and a Parametric stadium using Dynamo
1AIM
To create a set of sinusoidal points and create a curve and create a surface out of the curve using dynamo.
INTRODUCTION
- Autodesk Dynamo is a programming environment that requires no programming experience .
- Dynamo enables designers to create visual logic so they can explore a wide range of parametric conceptual designs using logic, simple data and analysis without the need to create a physical phototype. Dynamo also automates repetitive design tasks so designers can use their productive time more wisely.
- There are two versions of Dynamo
- Dynamo Studio
- Dynamo Revit
MAIN BENIFITS
- Generation of sophisicated designs using simple data , logic and analysis
- Rapid testing and iteration of designs
- Solutions to complex geometric problems
- Automation of repetitive tasks
- Realistic risk studies
- Communication with Revit, Robot , Rhinocerous, Navisworks,Excel,Google Sheets, SAP2000
PROCEDURE
STEP1
- Open revit software
- Select new architectural template
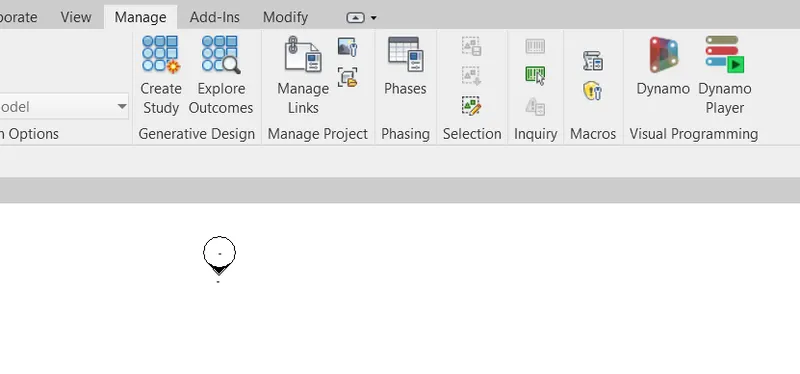
- Go to the manage tab click on the dynamo
- Dynamo window will open
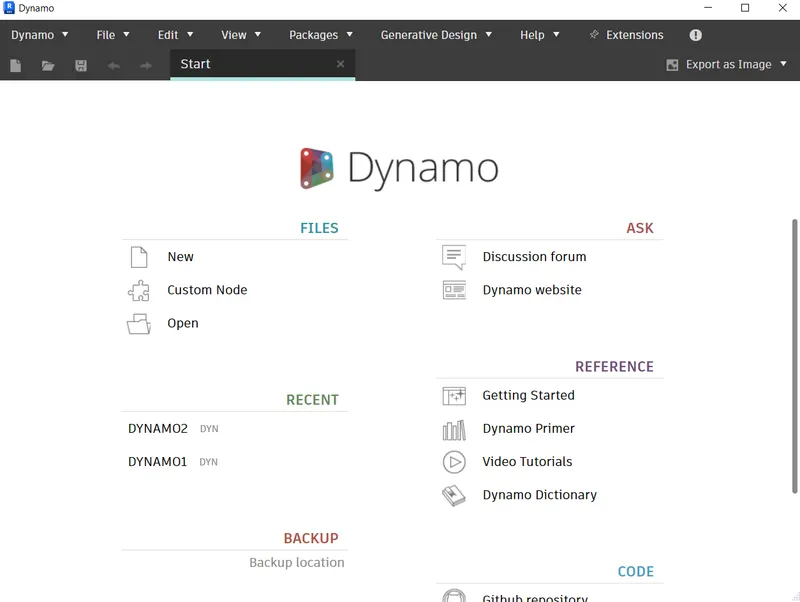
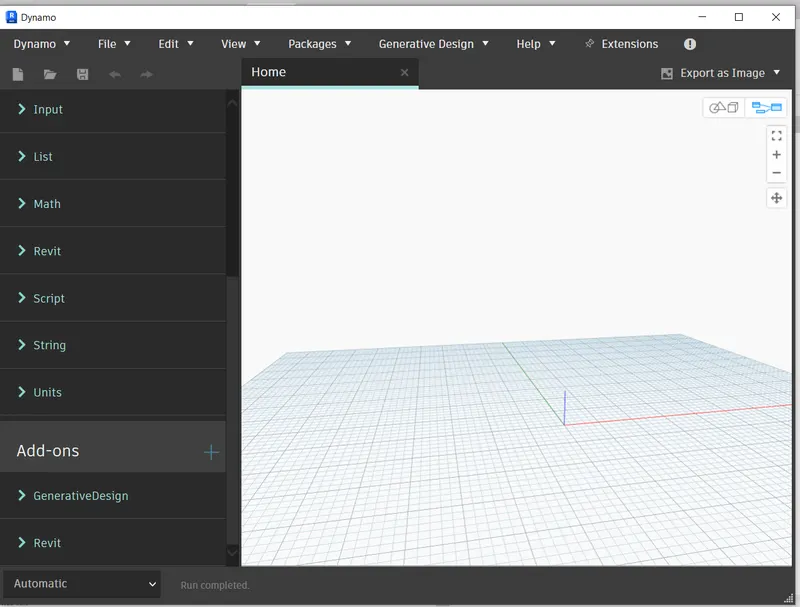
- Click new on dynamo window
STEP2
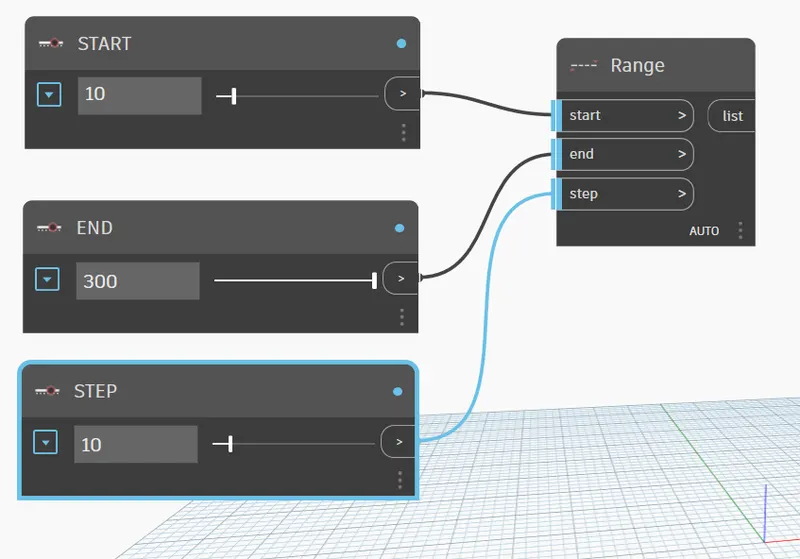
- First we need to select the integer slider we need 3 integer slider
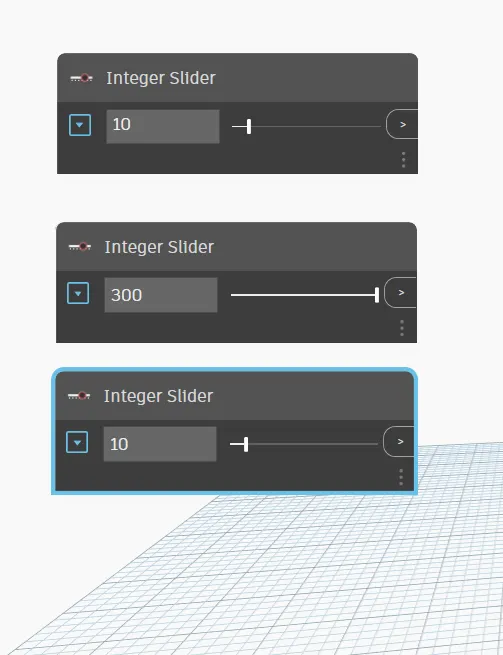
- Rename it as START,END AND STEP
- insert range and connect the integer slider to range
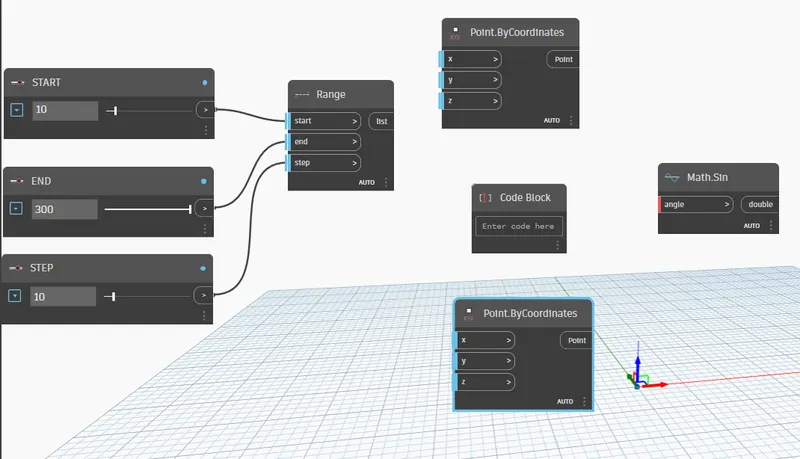
- Then insert two points by coordinate , code block and math.sin
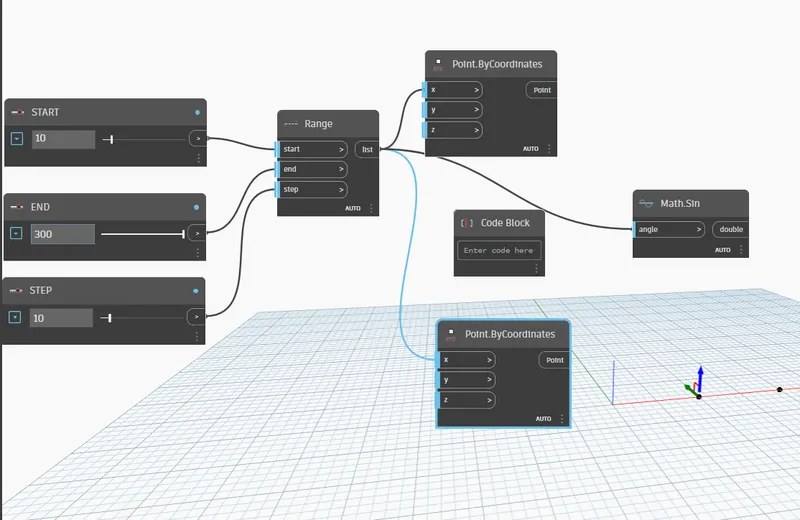
- From range connect to the x of two point by coordinate and math.sin
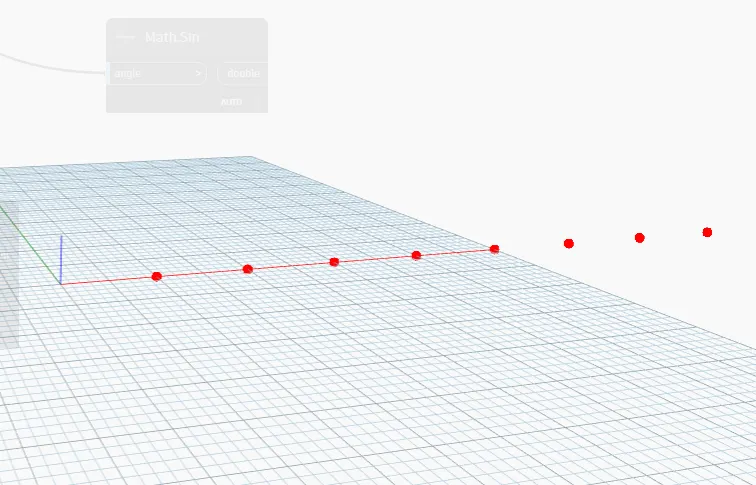
- Insert the product
- Add value to the code block
- Connect the code block to the Z of points by coordinate
- Connect Math.sin as y of points by coordinate
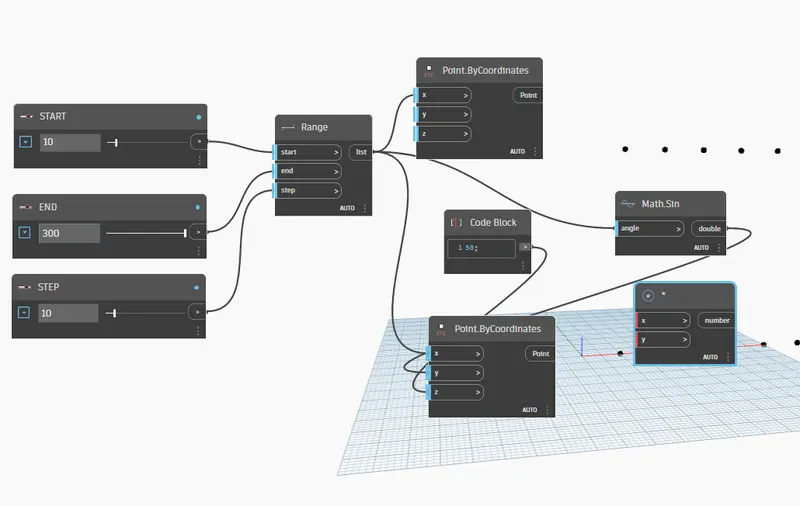
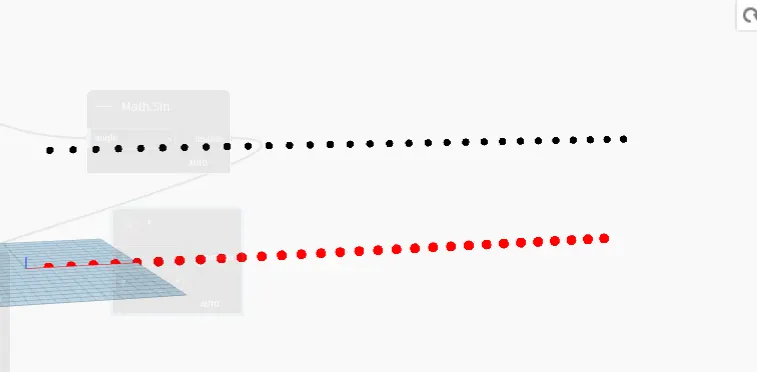
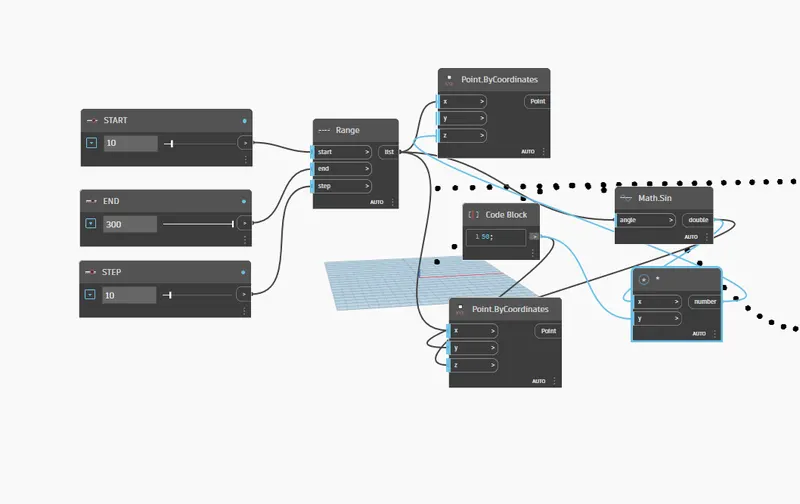
- Connect code block with y of product
- Connect math.sin with x of product
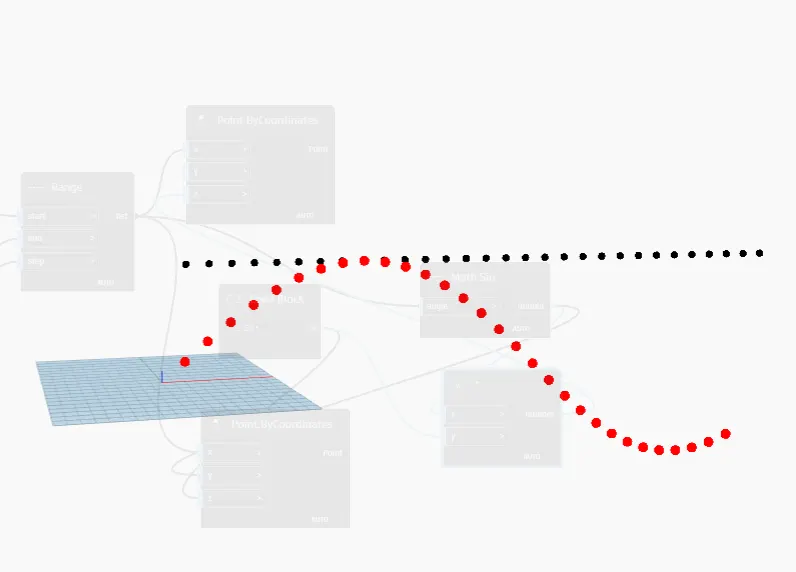
- Then we need two nurbs and one list option
- connect two points by coordinate with the nurbs
- connect nurbs with the list
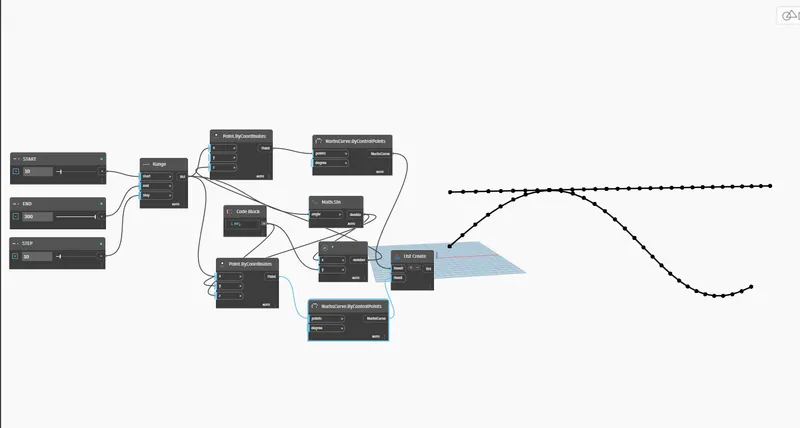
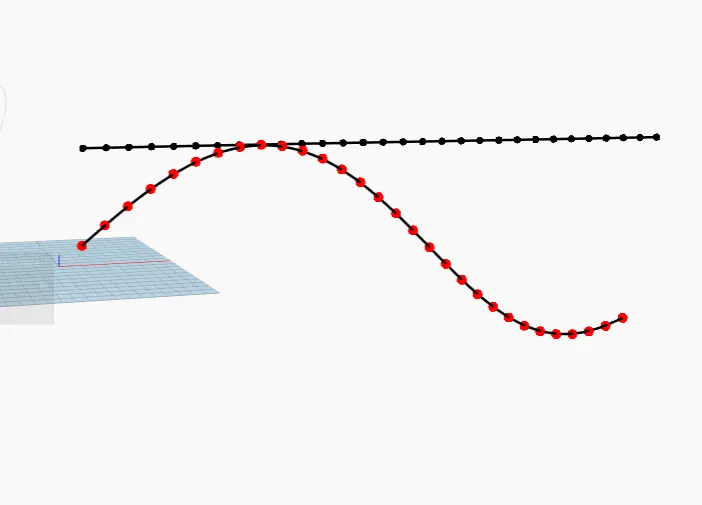
- Then insert the surface by loft and connect it with the list
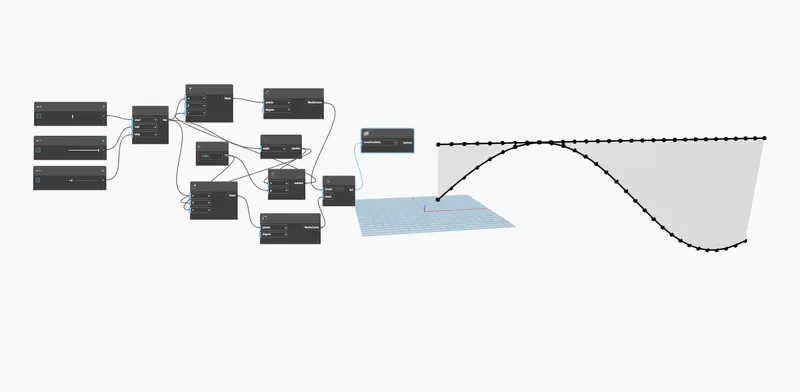
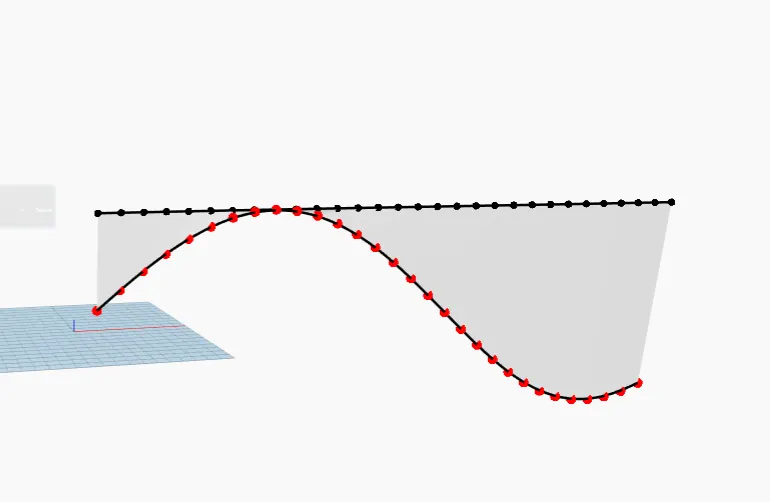
RESULT
--------------------------------------------------------------------------------------------------------------------------------------------
2AIM
Create a conceptual layout of floor plan in dynamo . Using the tools available in dynamo link the lines to appropriate model elements in Revit by choosing the wall types and wall parameters. Make use of the sliders to slide through the height of the wall and length of the wall.
INTRODUCTION
- Autodesk Dynamo is a programming environment that requires no programming experience .
- Dynamo enables designers to create visual logic so they can explore a wide range of parametric conceptual designs using logic, simple data and analysis without the need to create a physical phototype. Dynamo also automates repetitive design tasks so designers can use their productive time more wisely.
- There are two versions of Dynamo
- Dynamo Studio
- Dynamo Revit
MAIN BENIFITS
- Generation of sophisicated designs using simple data , logic and analysis
- Rapid testing and iteration of designs
- Solutions to complex geometric problems
- Automation of repetitive tasks
- Realistic risk studies
- Communication with Revit, Robot , Rhinocerous, Navisworks,Excel,Google Sheets, SAP2000
PROCEDURE
STEP1
- Open revit software
- Select new architectural template
- Go to the manage tab click on the dynamo
- Dynamo window will open
- Click new on dynamo window
STEP2
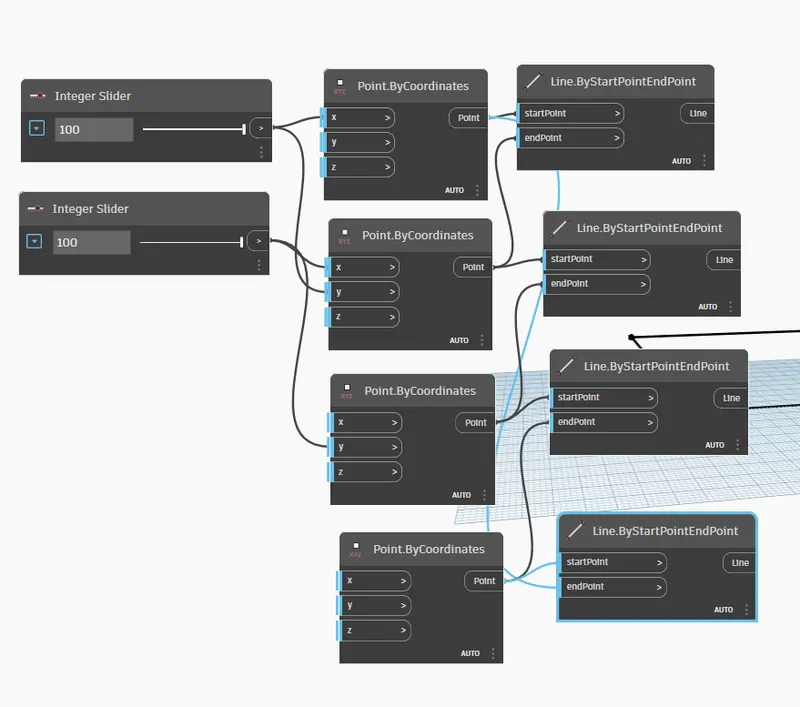
- From library select 2 integer slider and 4 points by coordinates
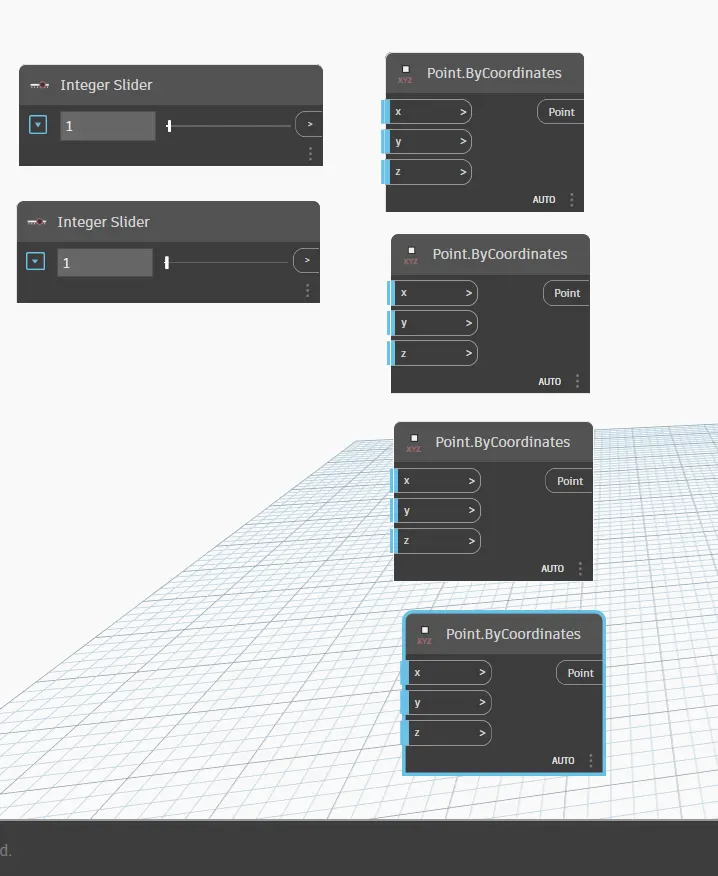
- Connect integerslider and points by coordinates and make 4 points
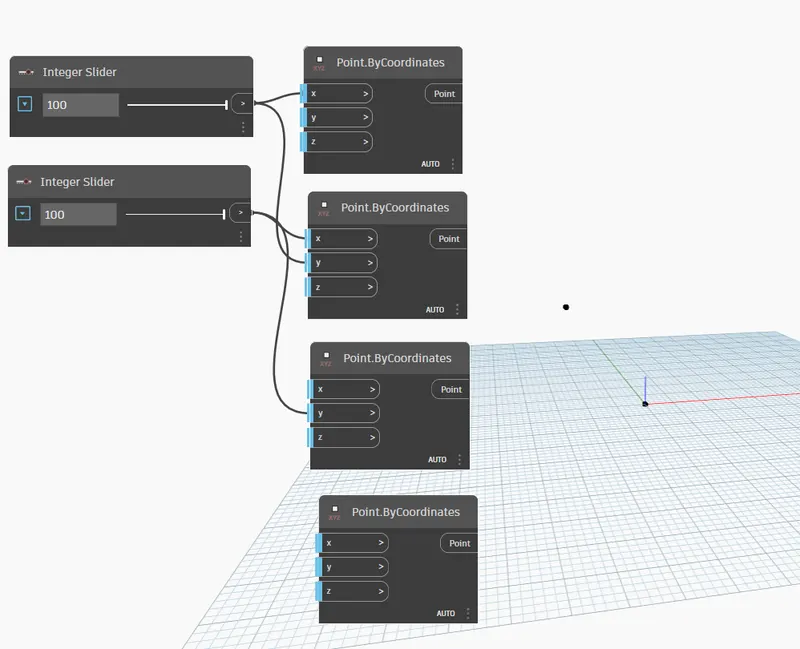
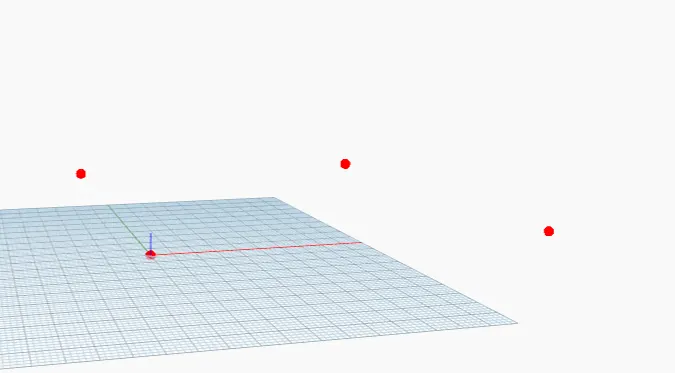
- From library select 4 line by start and end point
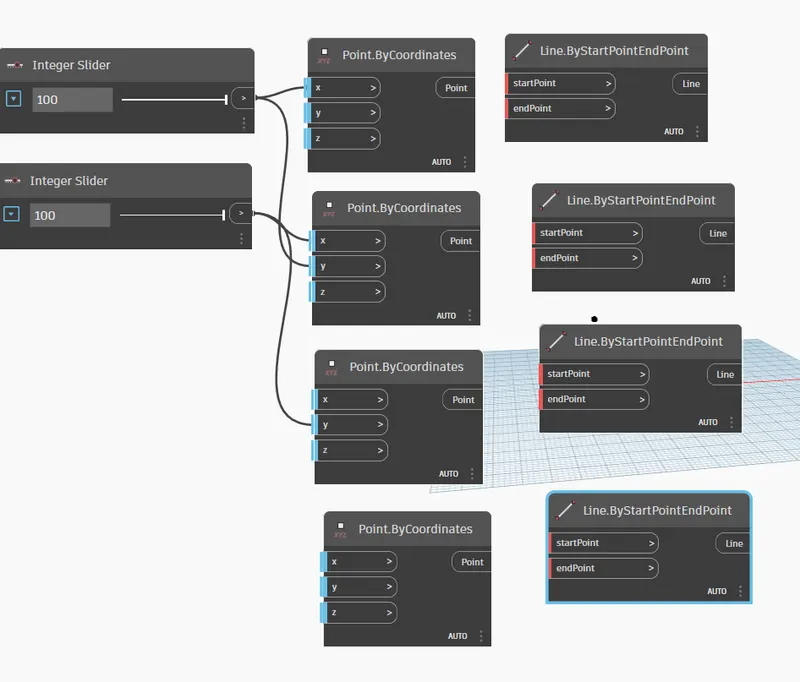
- Connect first point by coordinates start point of the first line by start and end point of fouth line by start and end point
- Connect third point by coordinates start point of third line by start and end point and end point of second line by start and end point
- Connect fourth point by coordinates start point of fourth line by start and end point and end point of third line by start and end point
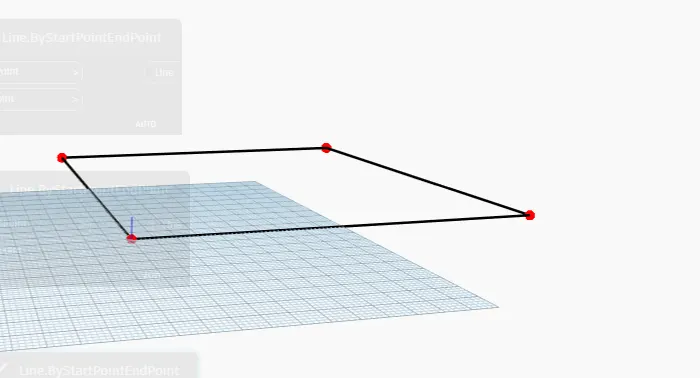
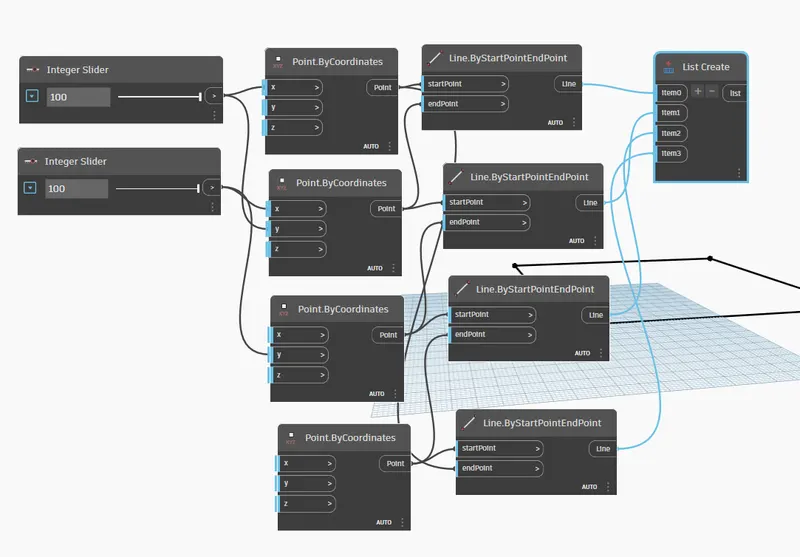
- Connect all line by start and end point with list
STEP3
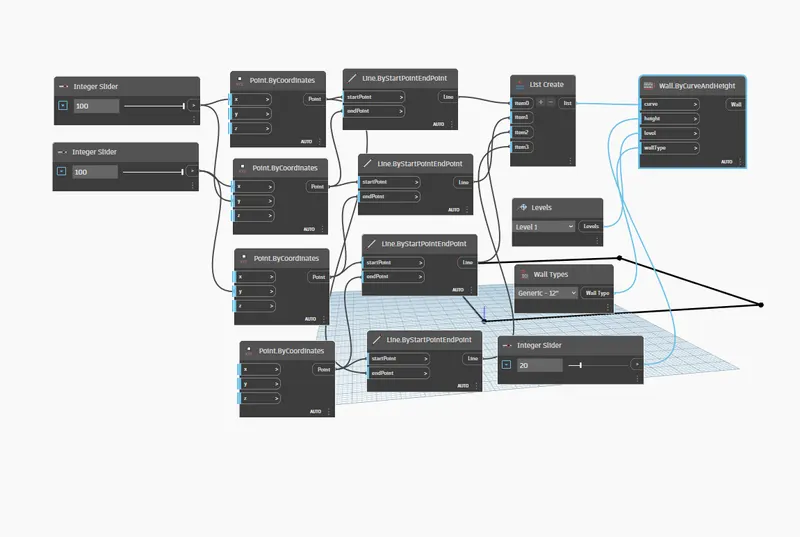
- From library select levels , wall type ,integer slider, wall by curve and height
- select the level as level wall and wall type as generic12" and integer slider as 20
- Connect list with wall curve of wall by curve and height
- levels with levels
- integer slider with the height
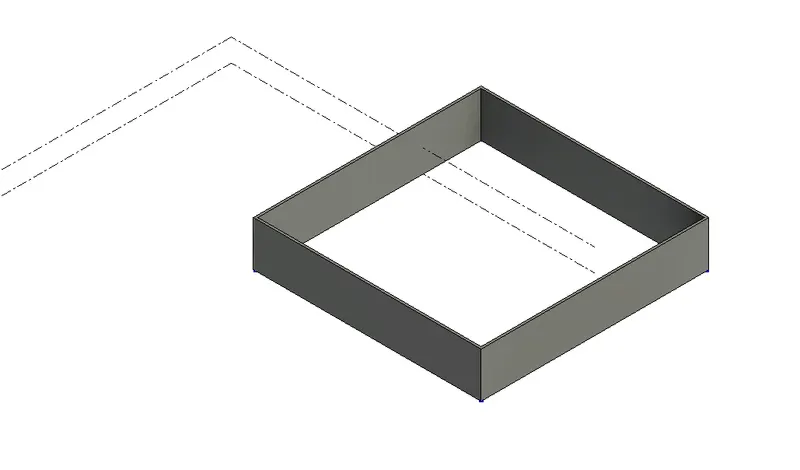
STEP4
- From library select floor type , floor by outlines and levels
- connect with levels , list and floor type
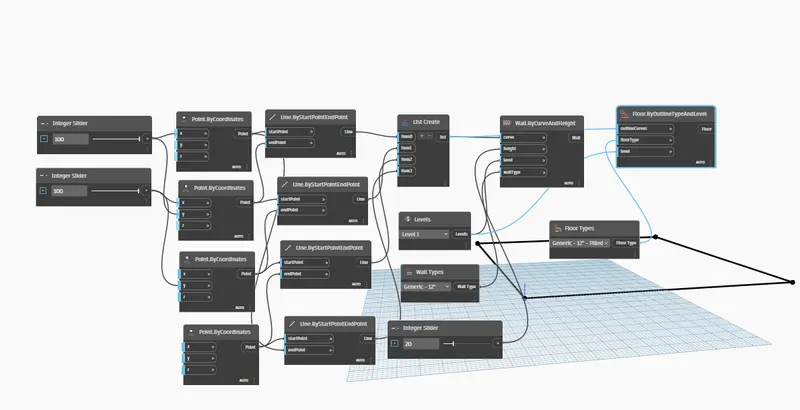
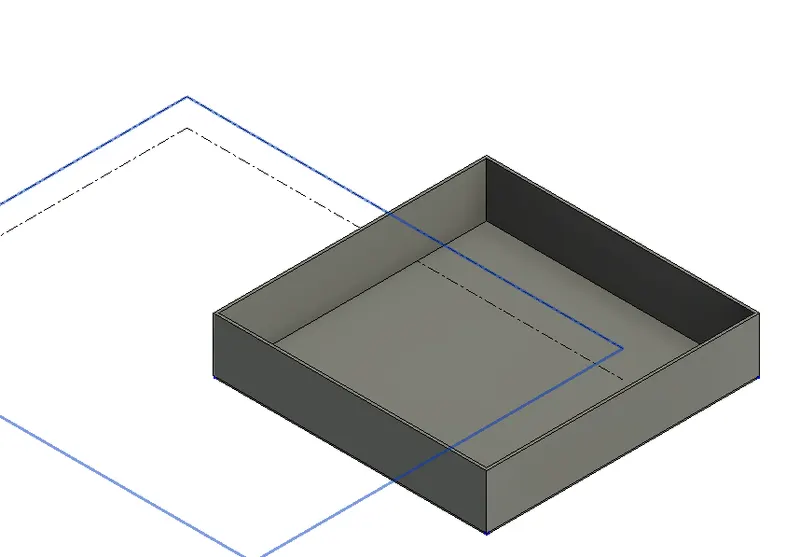
RESULT
---------------------------------------------------------------------------------------------------------------------------------------------
3AIM
Create an array of model elements in Revit. Use dynamo to vary the properties of model elements by using the slider or code block
INTRODUCTION
- Autodesk Dynamo is a programming environment that requires no programming experience .
- Dynamo enables designers to create visual logic so they can explore a wide range of parametric conceptual designs using logic, simple data and analysis without the need to create a physical phototype. Dynamo also automates repetitive design tasks so designers can use their productive time more wisely.
- There are two versions of Dynamo
- Dynamo Studio
- Dynamo Revit
MAIN BENIFITS
- Generation of sophisicated designs using simple data , logic and analysis
- Rapid testing and iteration of designs
- Solutions to complex geometric problems
- Automation of repetitive tasks
- Realistic risk studies
- Communication with Revit, Robot , Rhinocerous, Navisworks,Excel,Google Sheets, SAP2000
PROCEDURE
STEP1
- Open revit software
- Select new architectural template
- Draw an array of column
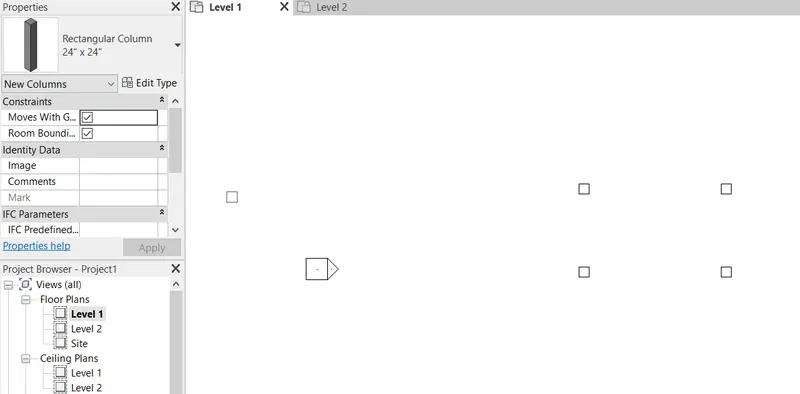
STEP2
- Go to the manage tab click on the dynamo
- Dynamo window will open
- Click new on dynamo window
STEP3
- From the library select 'select model element',rotation and integer slider
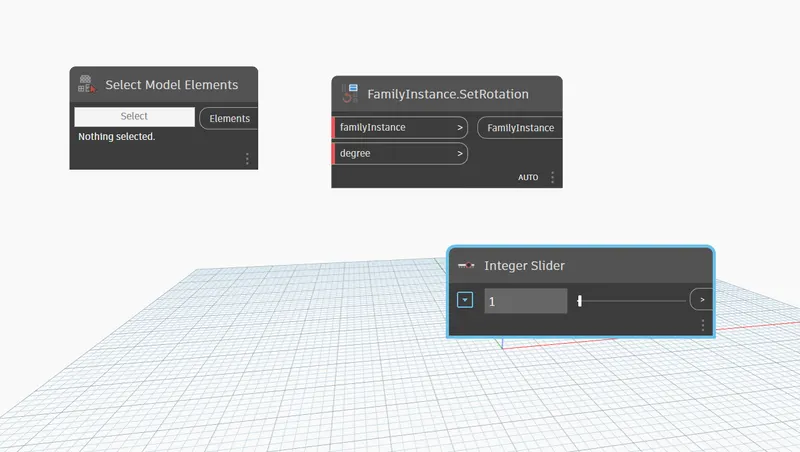
- Click on the select option and select the column from revit
- Connect select model element with set rotation
- connect integer with set rotation
- set integer as 45
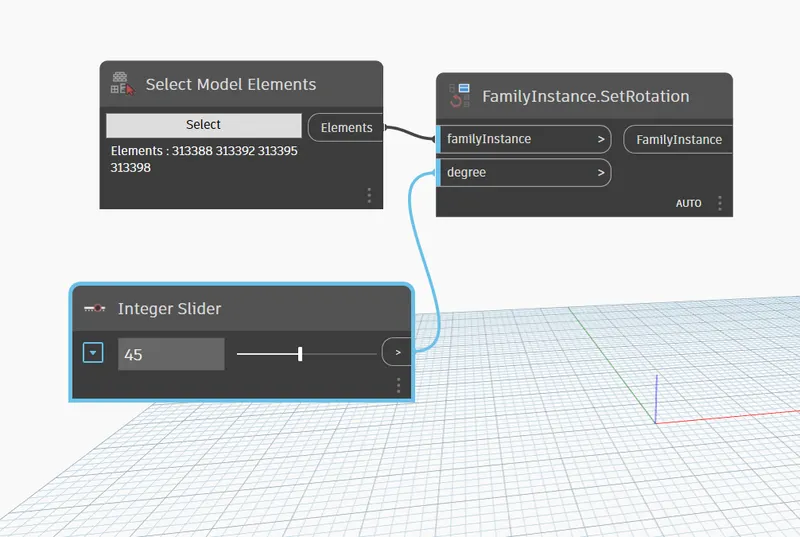

RESULT
---------------------------------------------------------------------------------------------------------------------------------------------
4AIM
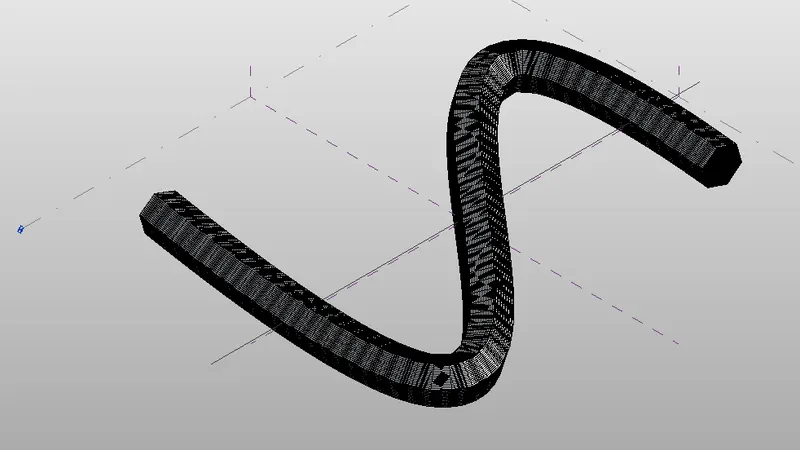
Create a conceptual mass in Revit and develop a parametric column by dividing the surfaces and apply the concepts similar to used in parametric walkway modelling. Use triangular bent or square shaped panels to add finish to the parametric column
INTRODUCTION
- Autodesk Revit is a building information modelling software tool for architects , landscape architects , structural engineers , mechancial, electrical and plumbing (MEP) engineers, designers and contractors .
- The software allows users to design a building and structure and its component in 3D , annotate the model with 2D drafting elements , and access the building information from the building model's database.
- The revit sotware offers the following
- Revit customization and support
- Revit plugin development
- Revit mobile app development
- Custom Revit add-ins for MEP
- Some of the major advantages of revit are as follows
- parametric modelling
- collaboration
- coordination
- scheduling
- energy analysis
- rendering presentation
- construction documentation
PROCEDURE
STEP1
- Open revit software
- Select new family
- select conceptual mass
- open mass file
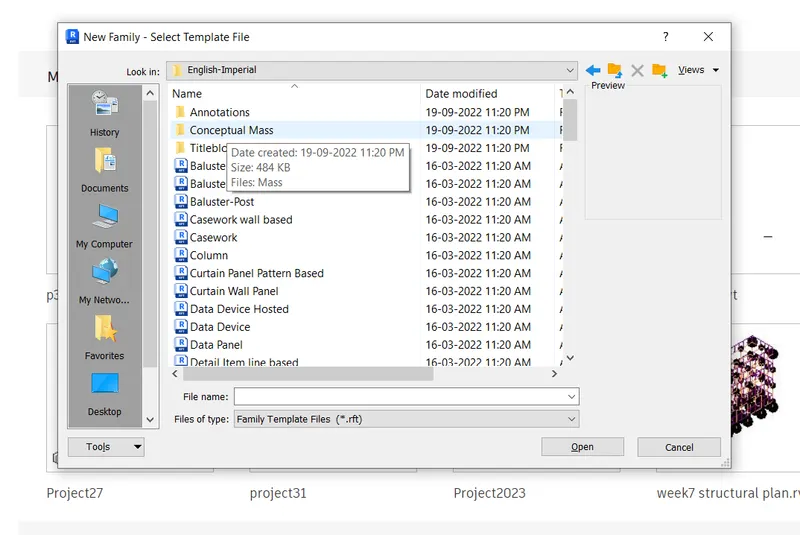
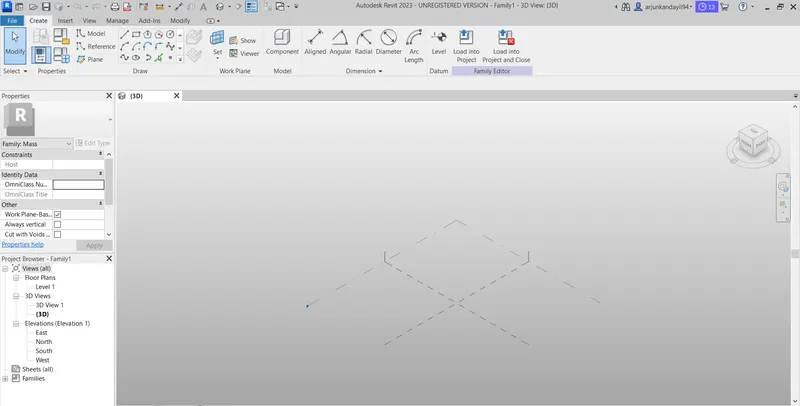
- Set level
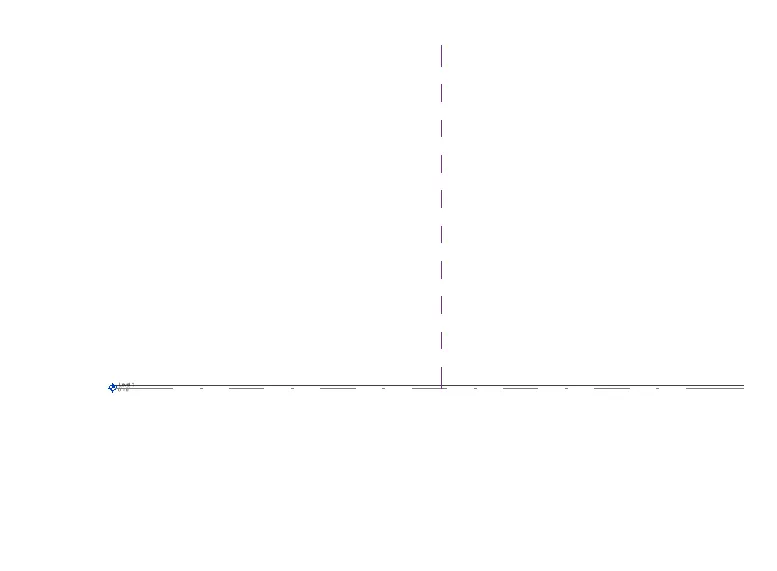
STEP2
- Open the floor plan level one
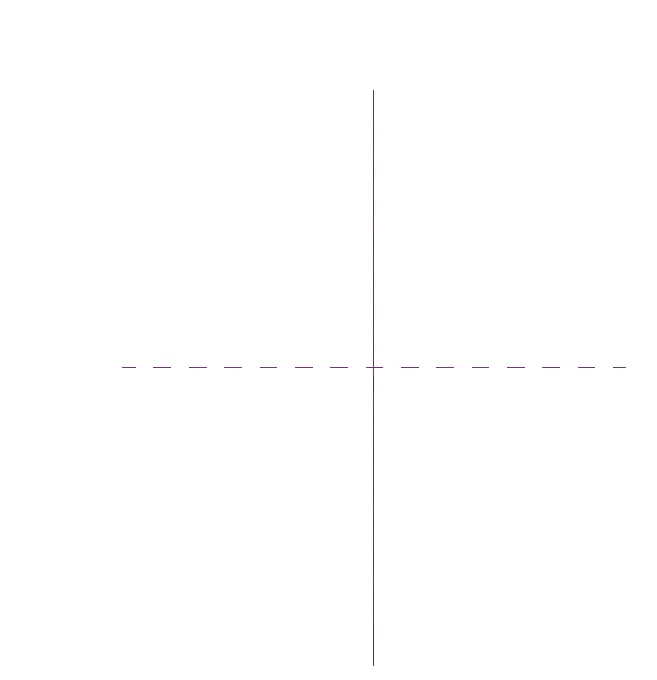
- Then go to model and select spline
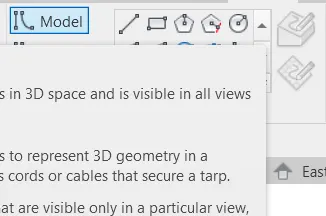
- Draw a curve
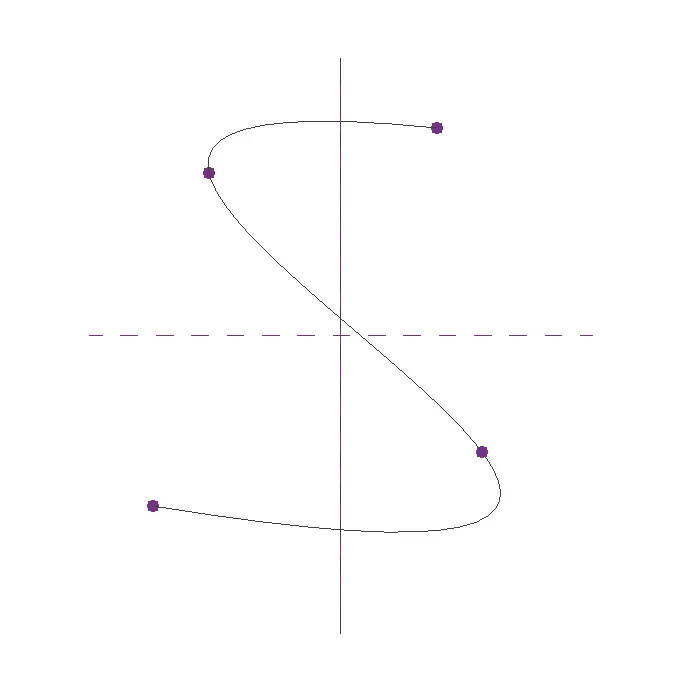
STEP3
- Then go to 3D
- set the work plane
- draw polygon on the plane
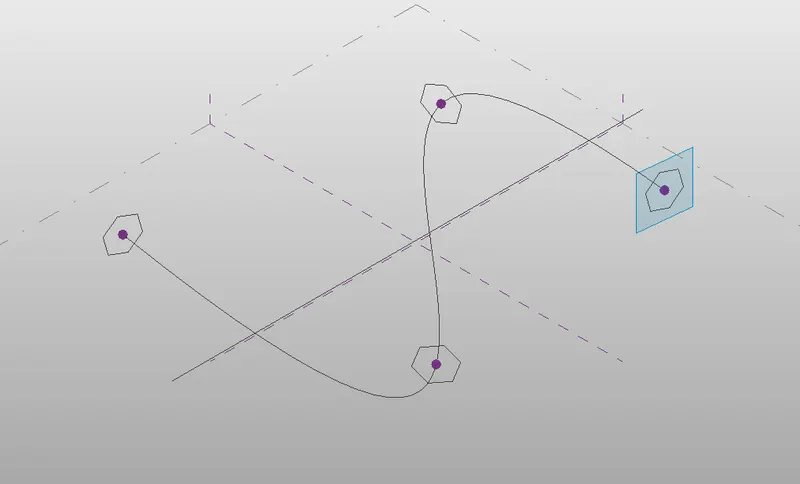
STEP4
- Select the curve
- select the starting polygon
- click on the create form
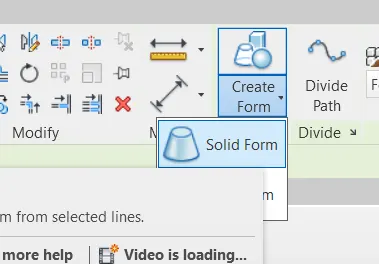
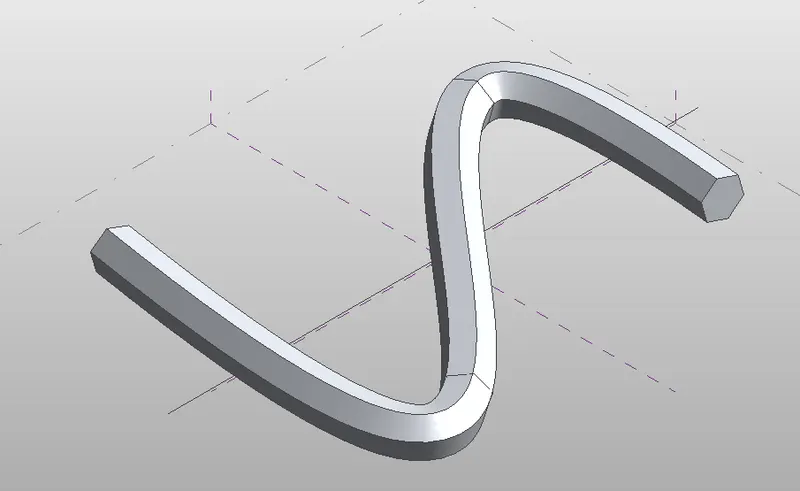
STEP5
- Select the form
- then filter it
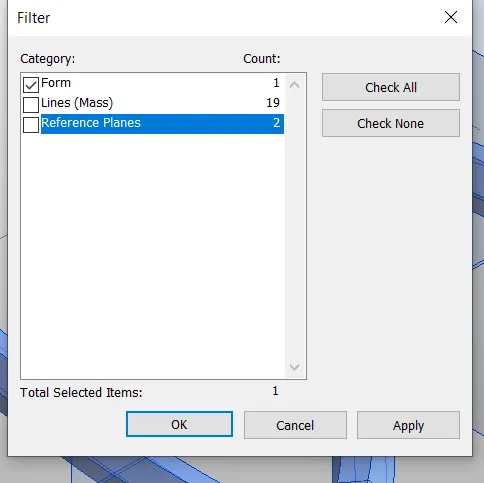
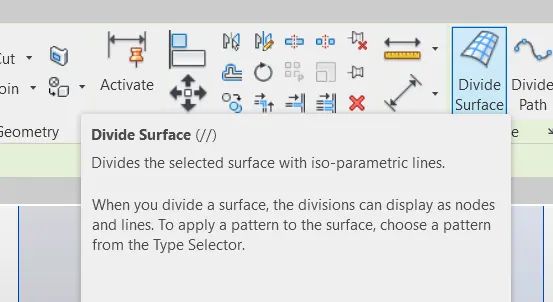
- then select the divide option
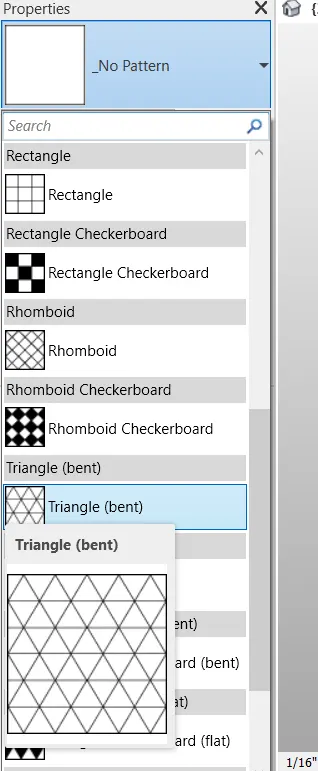
- select the traingular bend
STEP6
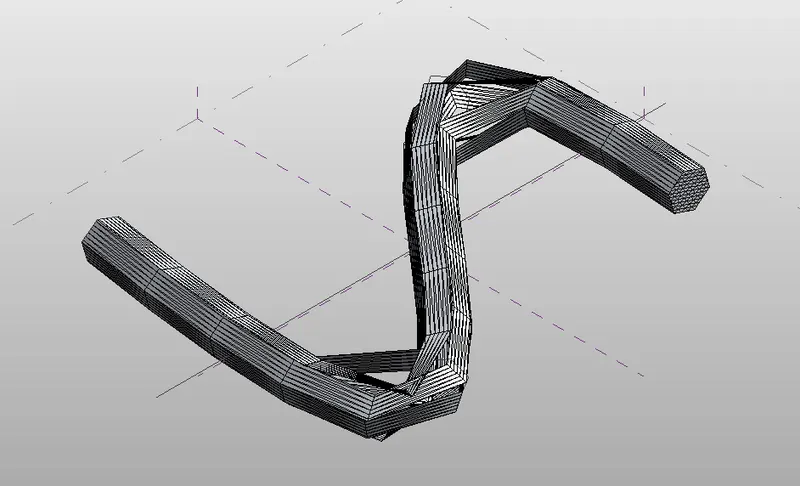
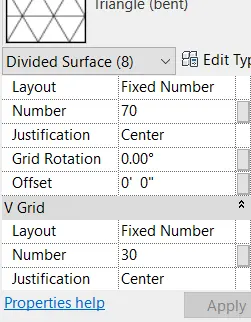
- inoder to avoid the sharp surfaces first filer it to divide surface
RESULT
------------------------------------------------------------------------------------------------------------------------------------------
5AIM
Use Dynamo to work on developing a Parametric Stadium. List your parameters and use the visual programming approach to complete the modelling, You can use the concepts discussed in parametric high rise tower in class for reference.
INTRODUCTION
- Autodesk Dynamo is a programming environment that requires no programming experience .
- Dynamo enables designers to create visual logic so they can explore a wide range of parametric conceptual designs using logic, simple data and analysis without the need to create a physical phototype. Dynamo also automates repetitive design tasks so designers can use their productive time more wisely.
- There are two versions of Dynamo
- Dynamo Studio
- Dynamo Revit
MAIN BENIFITS
- Generation of sophisicated designs using simple data , logic and analysis
- Rapid testing and iteration of designs
- Solutions to complex geometric problems
- Automation of repetitive tasks
- Realistic risk studies
- Communication with Revit, Robot , Rhinocerous, Navisworks,Excel,Google Sheets, SAP2000
PROCEDURE
STEP1
- Open revit software
- Select new architectural template
- Go to the manage tab click on the dynamo
- Dynamo window will open
- Click new on dynamo window
STEP2
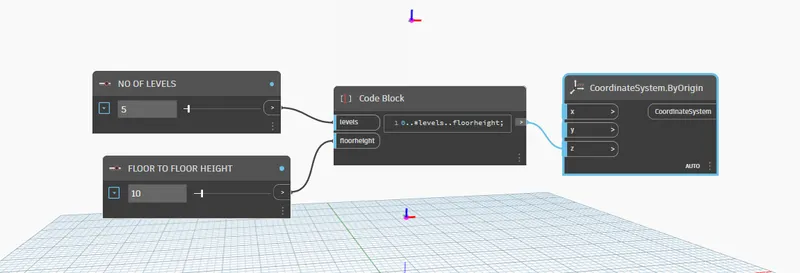
- From library search integer slider and make 2 integer slider and name it as no of levels and floor to floor height
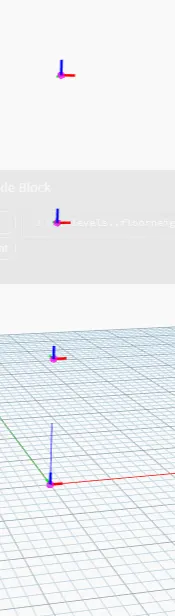
- insert code block and points by coordinate systen by origin
- connect them
STEP3
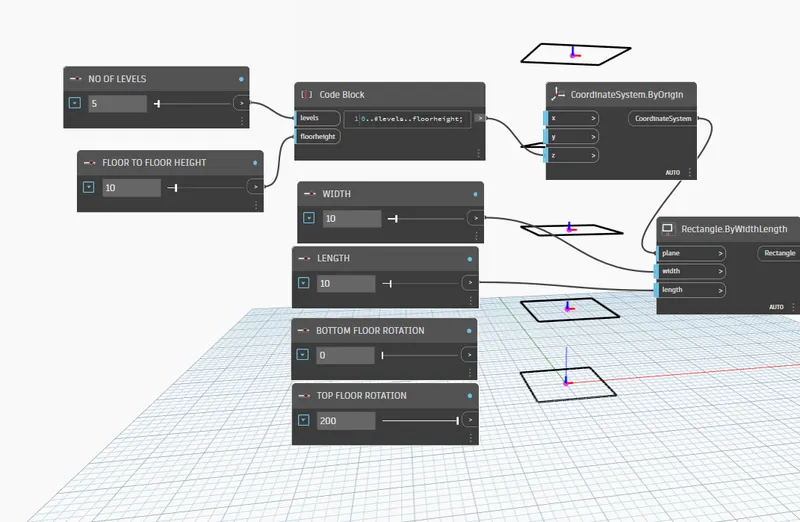
- Insert 4 integer slider
- insert a code block
- insert a rectangle by origin
- name the integer slider as width, length, bootom floor rotation,top floor rotation
- give values
- connect them
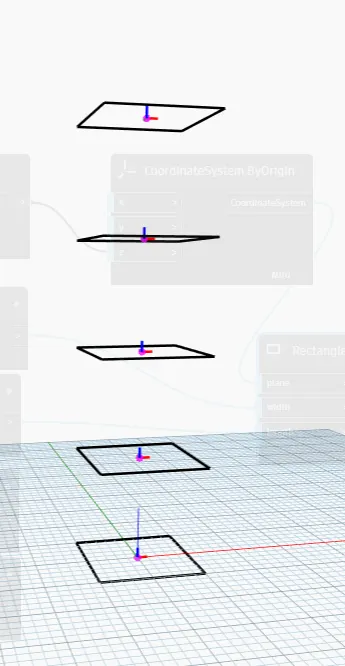
STEP4
- Insert the point.origin
- vector.zaxsis
- insert geometry.rotate
- connect them
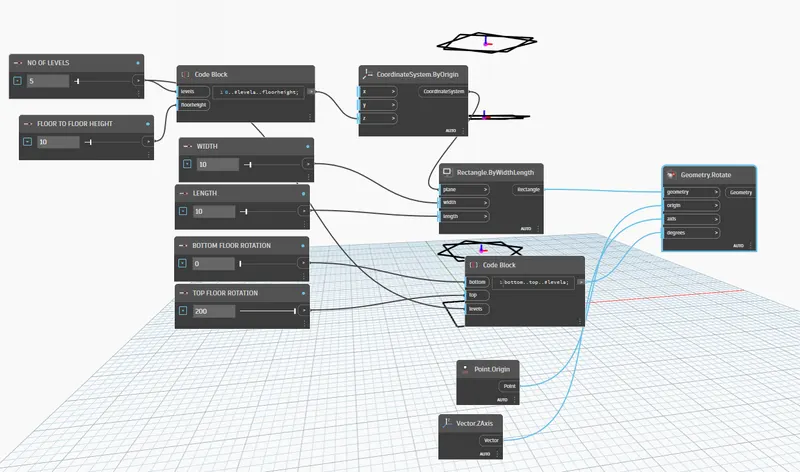
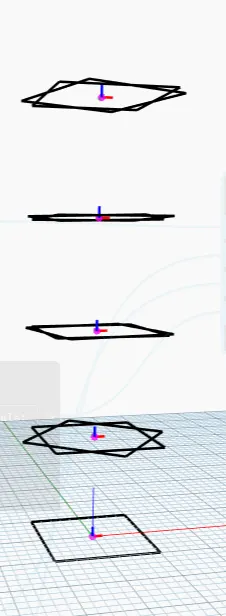
STEP5
- Insert polysurface.by loft
- connect with geometry.rotate
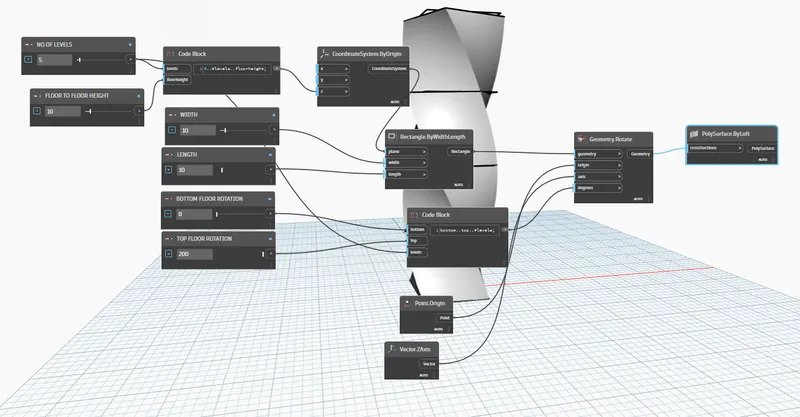
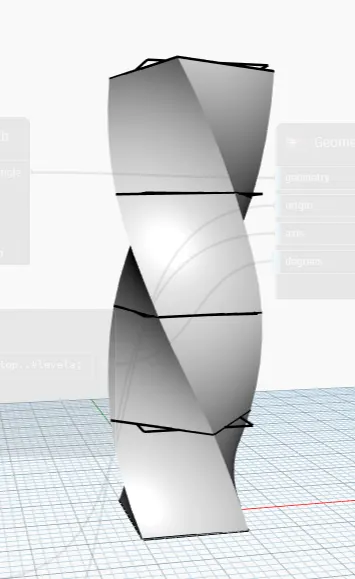
RESULT
---------------------------------------------------------------------------------------------------------------------------------------------