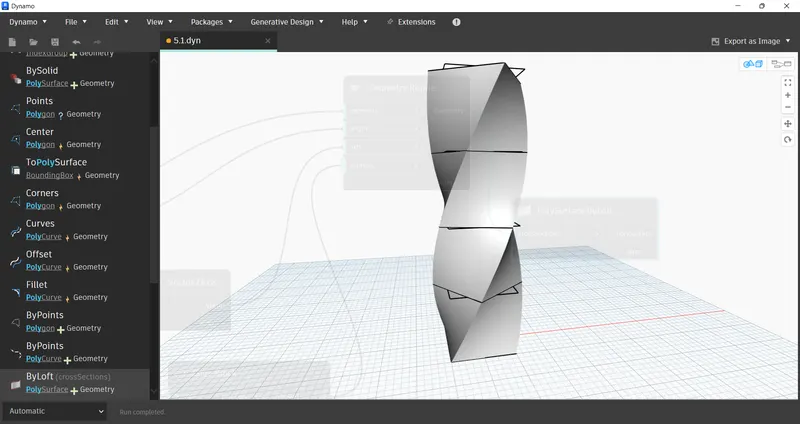
Creating Conceptual mass in REVIT and Creation of Sinusoidal curve and a Parametric stadium using Dynamo
Q.1 Ans
Aim: Create a Set of sinusoidal point and curves and surface out of the curve.
Procedure:
Step 1: Go to revit software open the file with any of the template.
Step 2: Go to Manage tab -> Visual programing panel -> Dynamo. Open a new file of dynamo.
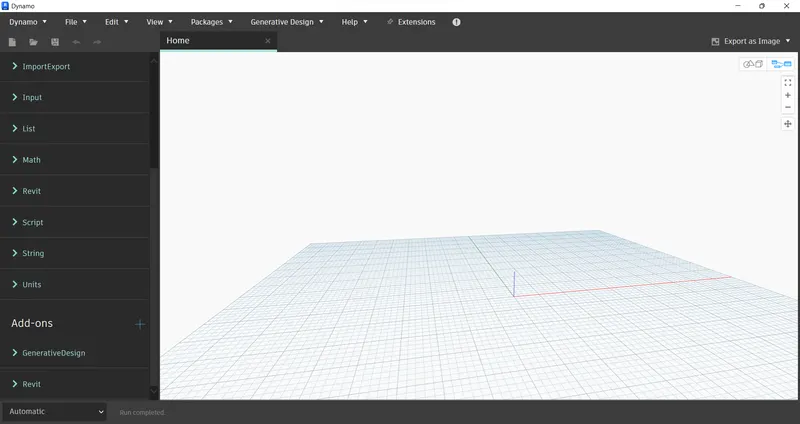
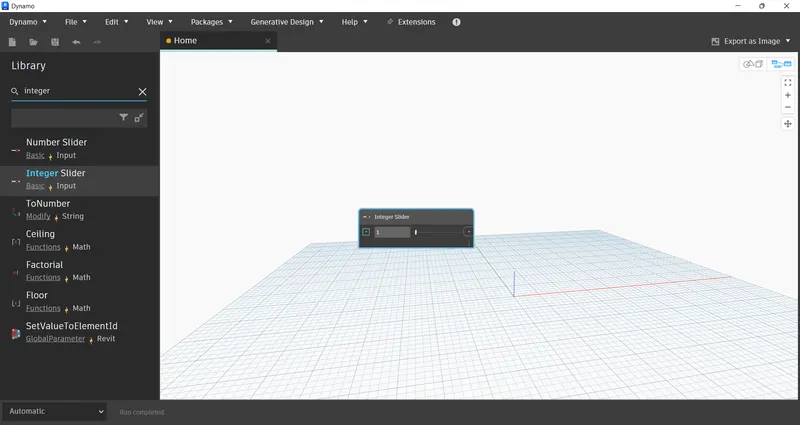
Step 3: Add the Integer slider from the search bar and copy it for three more times. Add values in the integer slider with respect to the range of line.
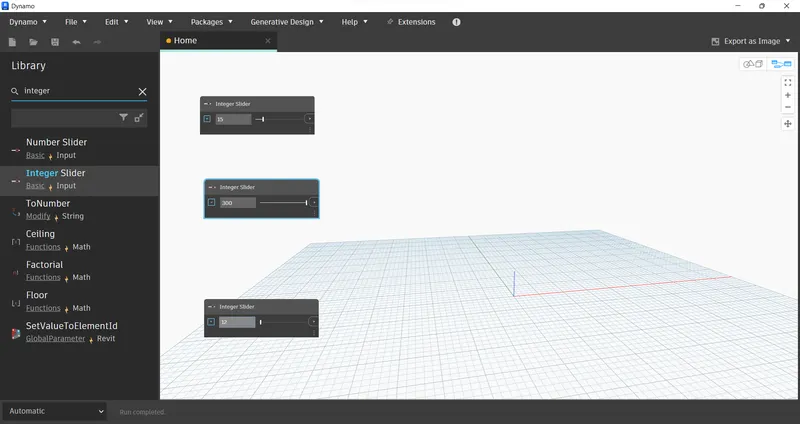
Step 4: Add the new command of Range for the range of Line. Connect this three integer slider to the range.
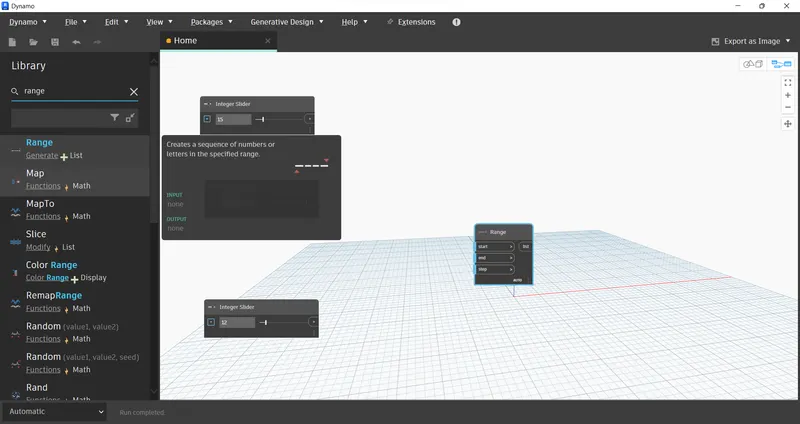
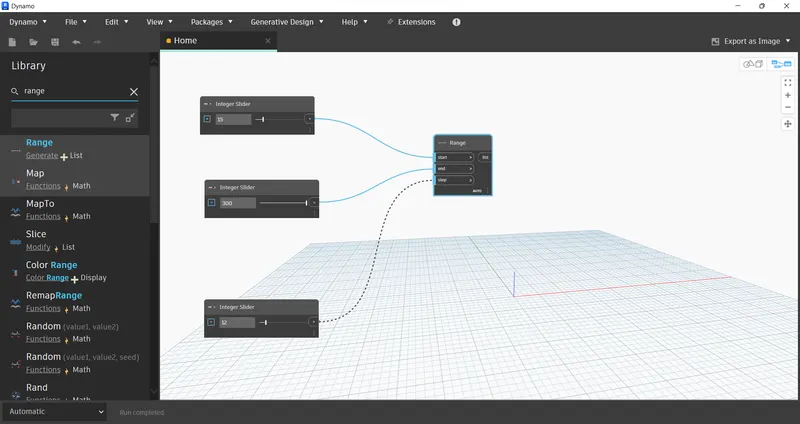
Step 5: To add the point add the commands from sreach bar as point bycordinates(x,y,z) and as we creating two lines add the two windows of point by cordinate.
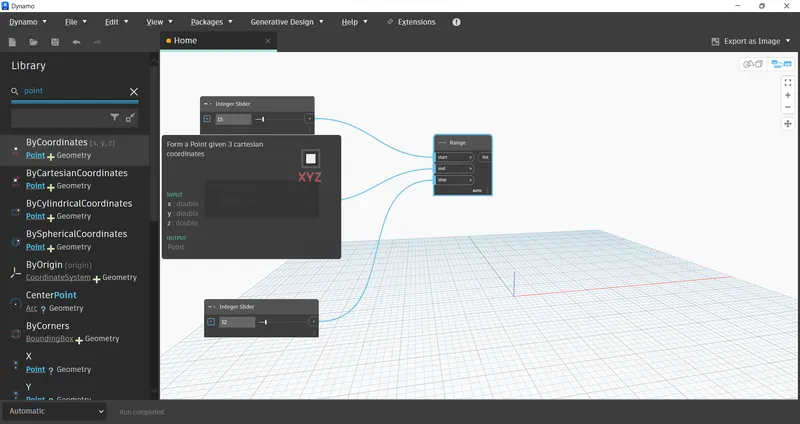
Step 6: Add the code block and to create a curved line add math.sin.
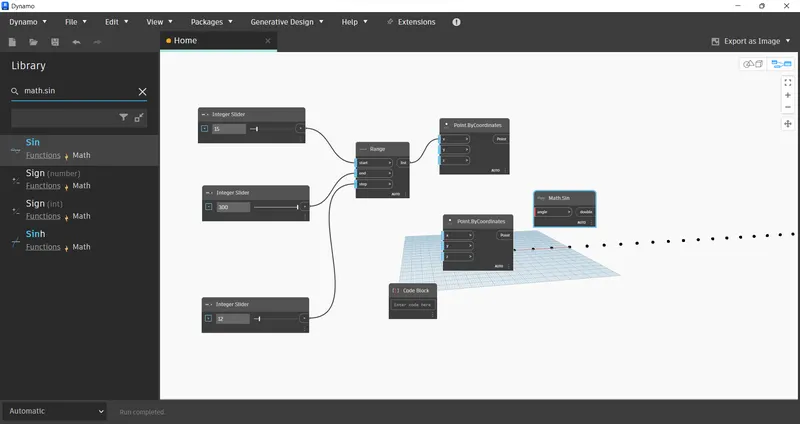
Step 7: Now connect the range to x of pointbycordinate the poits will be added in x direction with the same range we have considered in iteger slider.
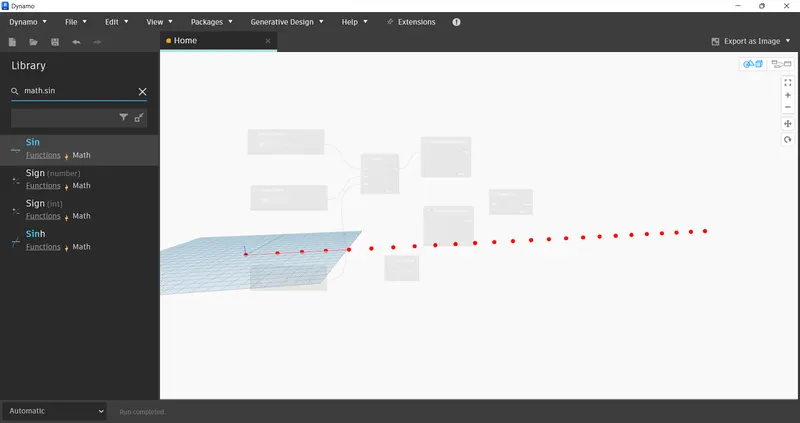
Step 8: Add the value in code block to set the range for curved portion.
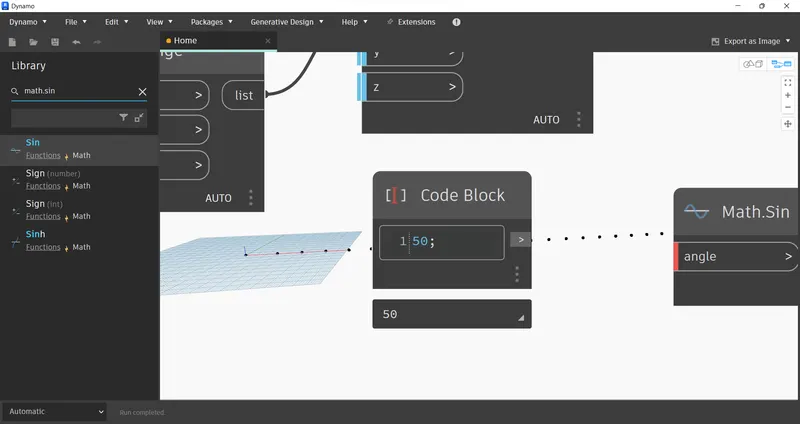
Step 9: Connect the range to the math.sin to create an angle to curved line.
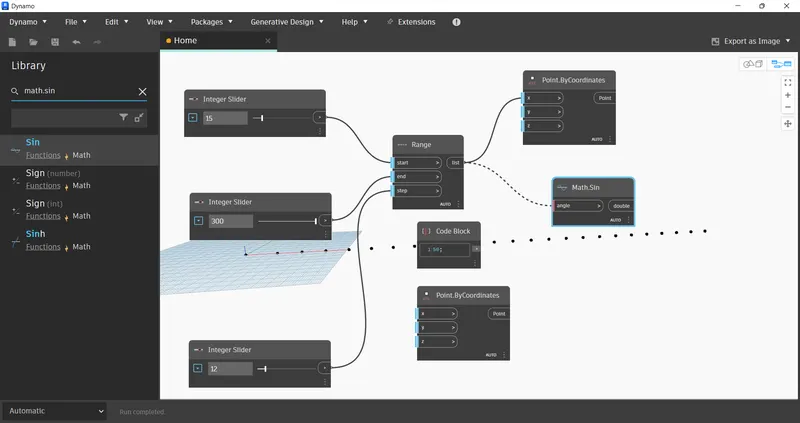
Step 10: Now connect therange to second pointbycordinate to create a second line.
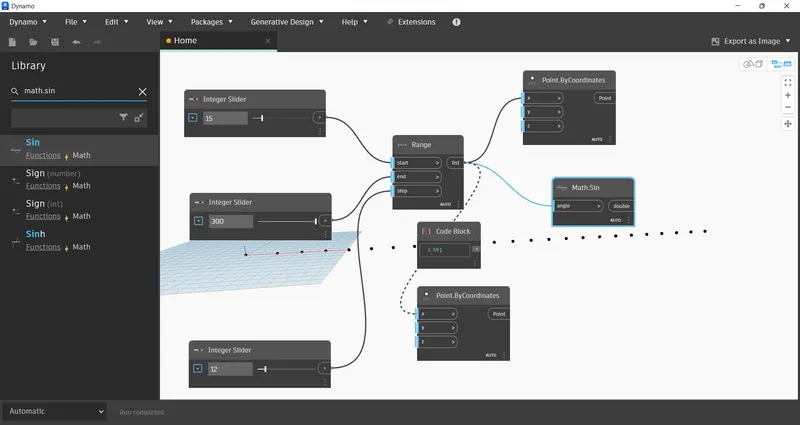
Step 10: Add the product command to created a ranged curved portion. Connect the code block and math.sin to second pointbycordinate.
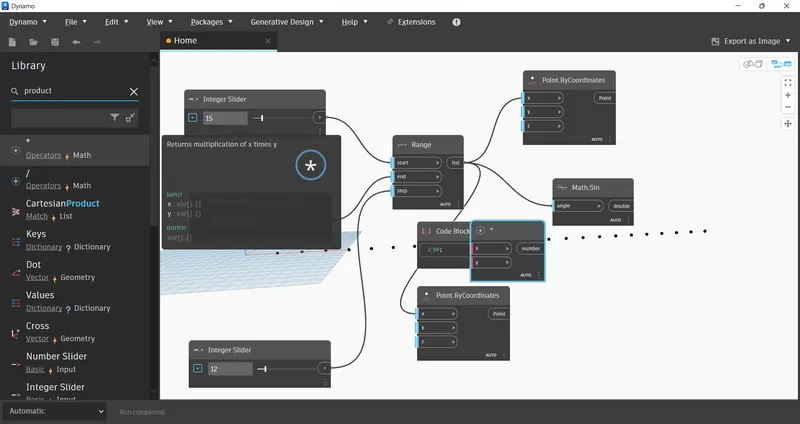
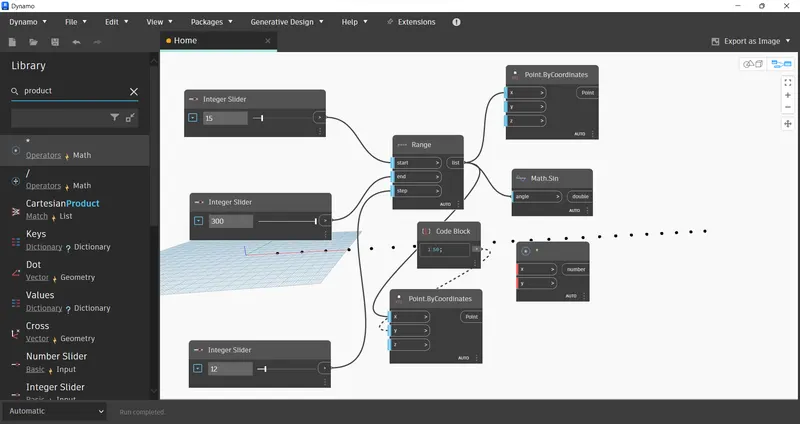
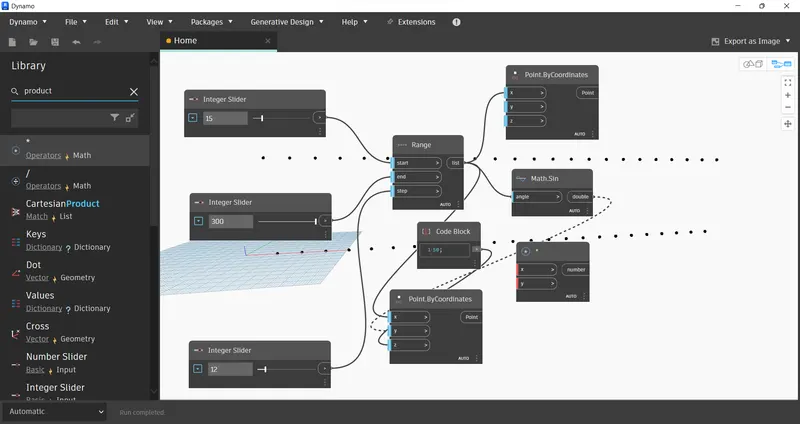
Step 11: Connect the math.sin and code block to x and y respectively.
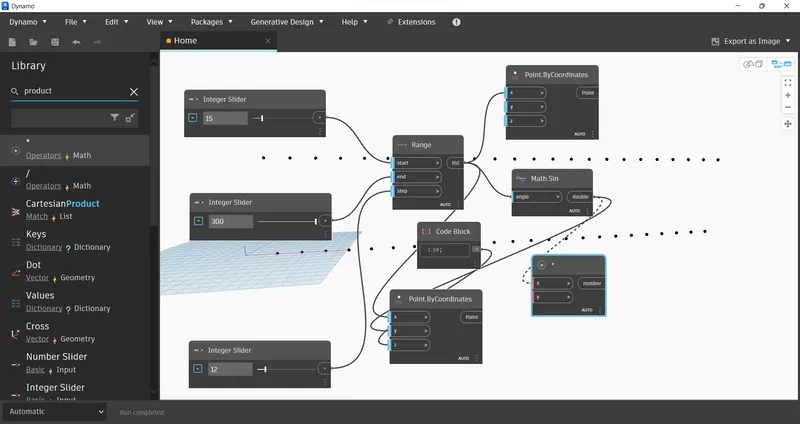
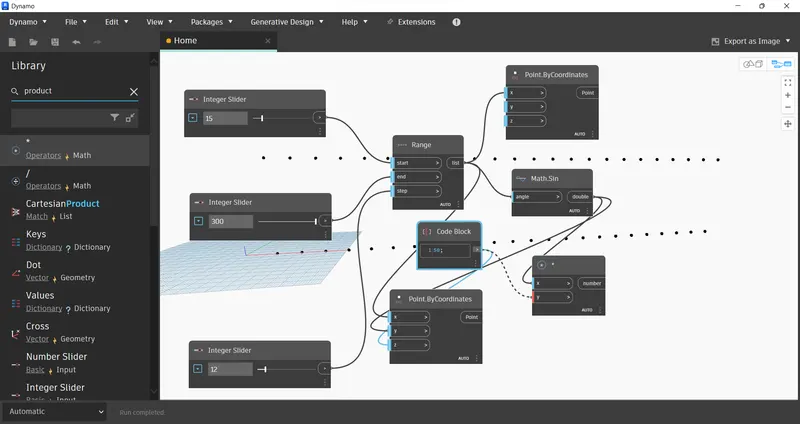
Step 12: Connect first point by cordinate to product output i.e. number. It create a curved line.
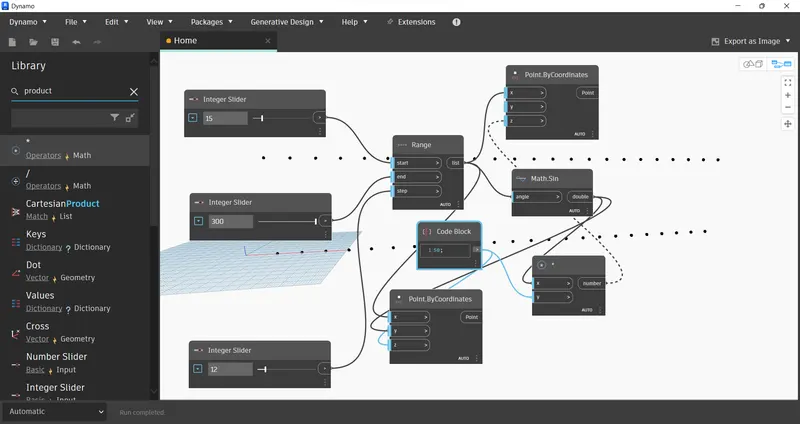
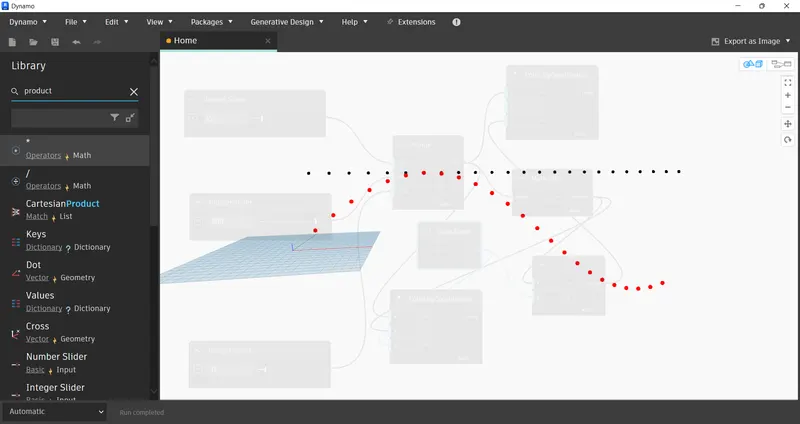
Step 13: To create a line connecting to this point.
a. Add two nurbscurve.bycordinate point to create a curved line and a straight line which connecting the points.
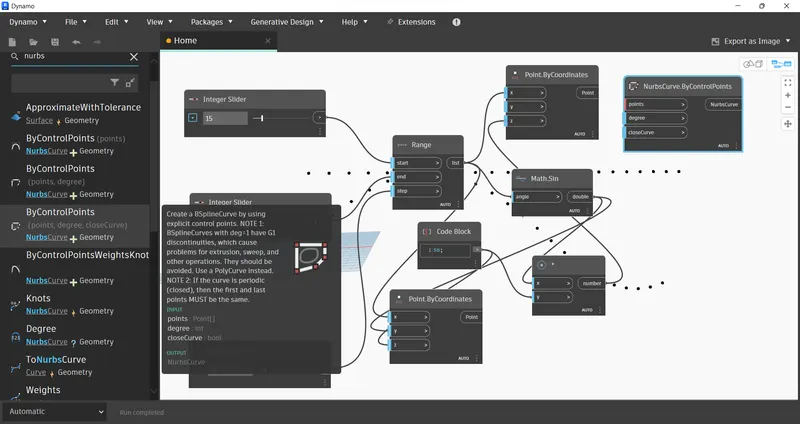
b. Add list create for the lines and go to "+" icon and add one more. Create two list for two lines.
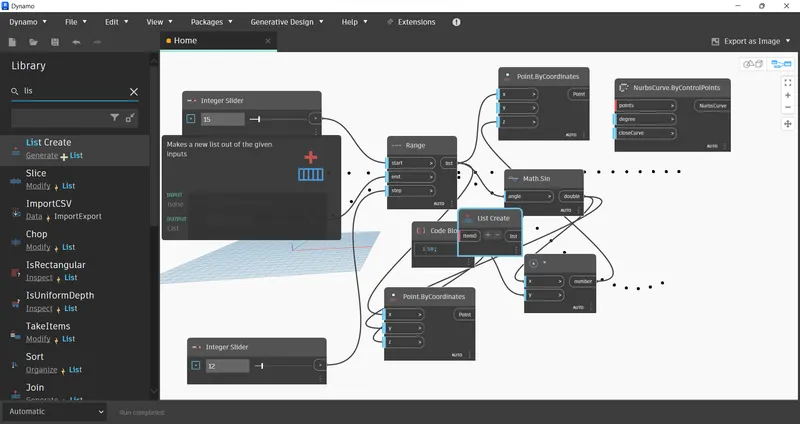
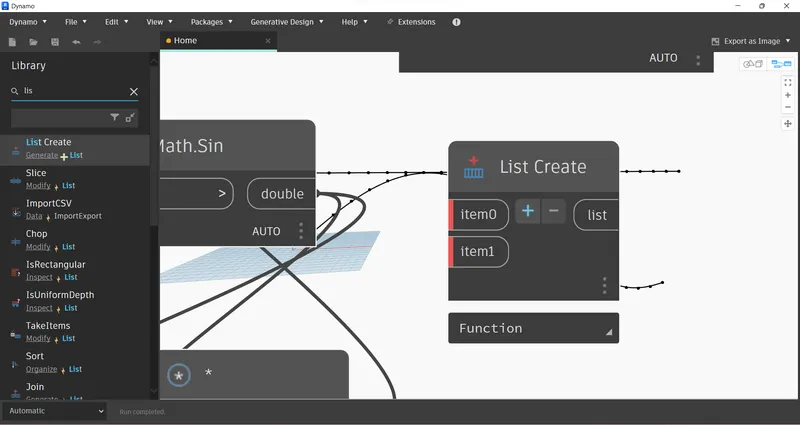
Step 14: Connect the two nurbscurve to list create one by one.
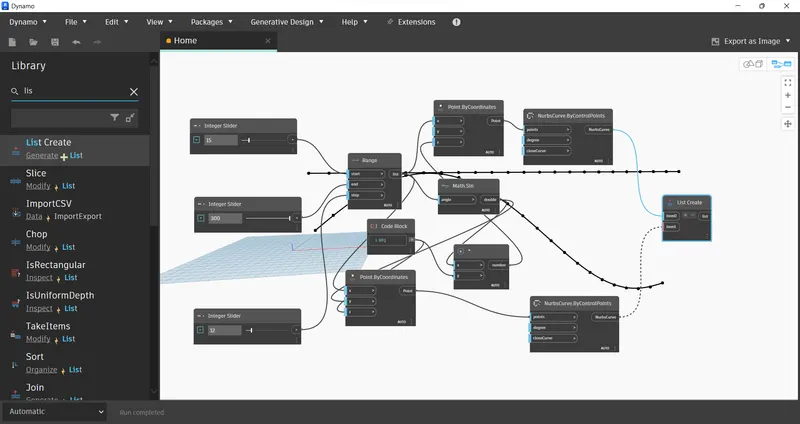
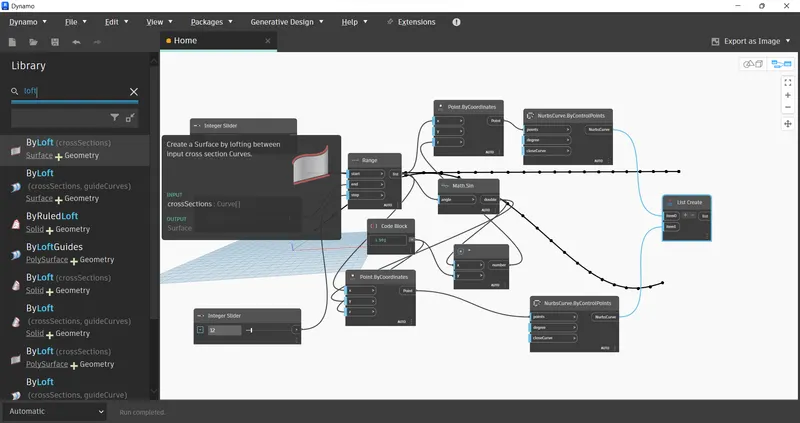
Step 15: To create a surface add byloft command and connect this to list.
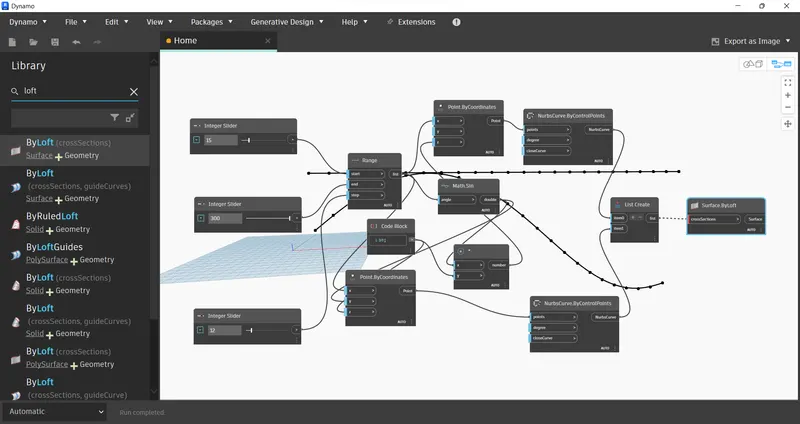
Result:
The two lines are created with sinusoidal points and surface is created which is connecting to this lines.
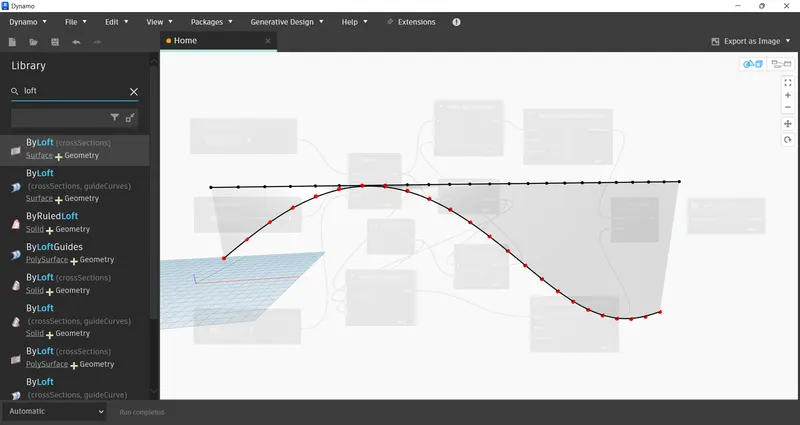
Q.2 Ans
Aim: Create a cenptual layout of floor plan in Dynamo.
Procedure:
Step 1: To create a floor point we will considering the walls and floors for the plan. So we are assuming four point for the refference of the wall.
a. Add the integer slider with respect to x and y. Provide some cordinates to the integer slider.
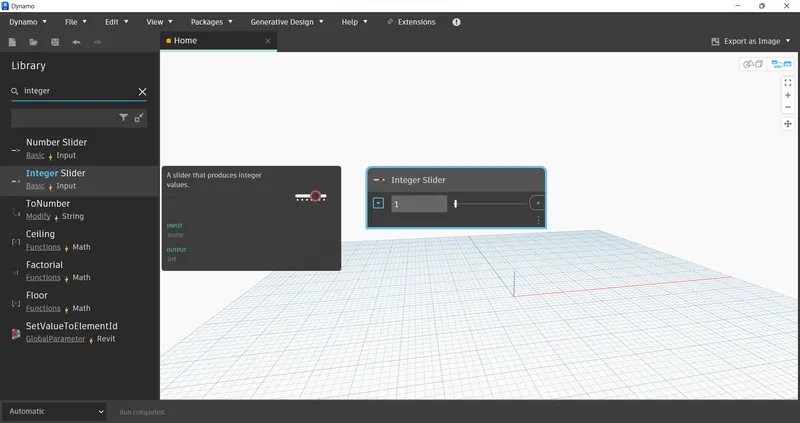
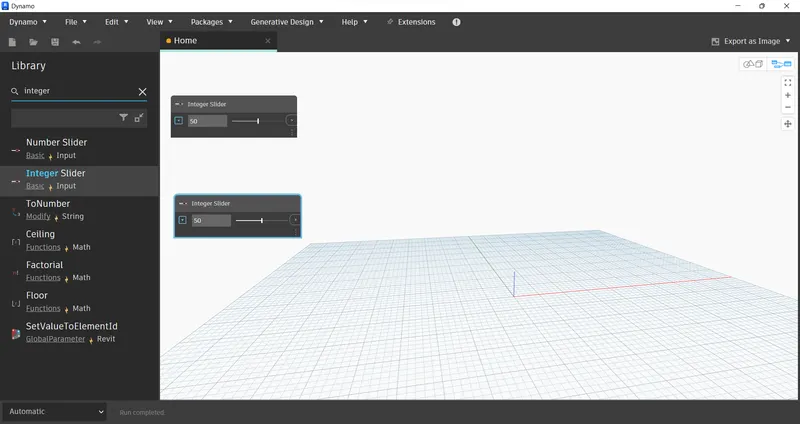
Step 2: To create a rectangle we have to create four point at the corner. Add point.bycordinate.
To create four points we are adding four point.bycordinate.
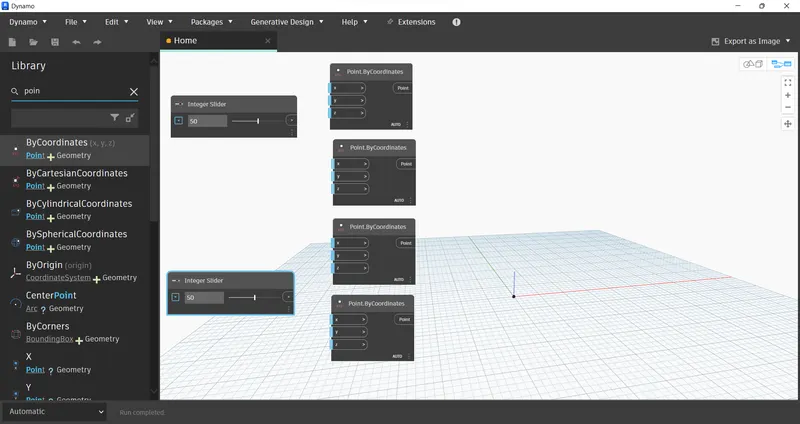
Step 3: Connect first integer slider to x and y cordinate as shown below. As we connected the points the refference lines will be added.
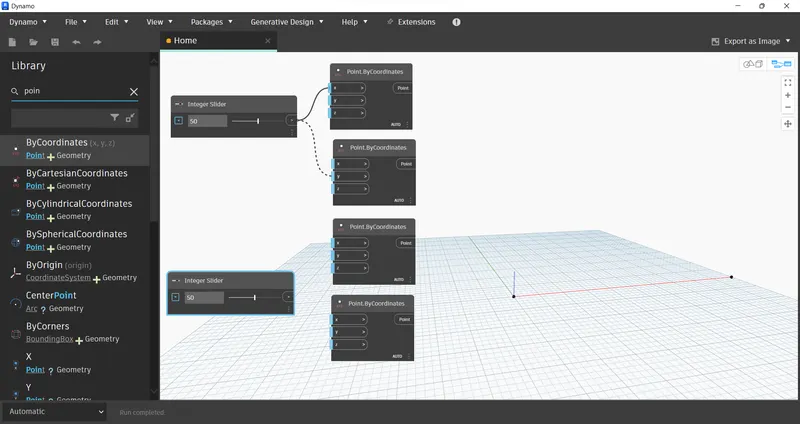
a. Connect all the integer points to point.bycordinate for each so it will create the refference line also.
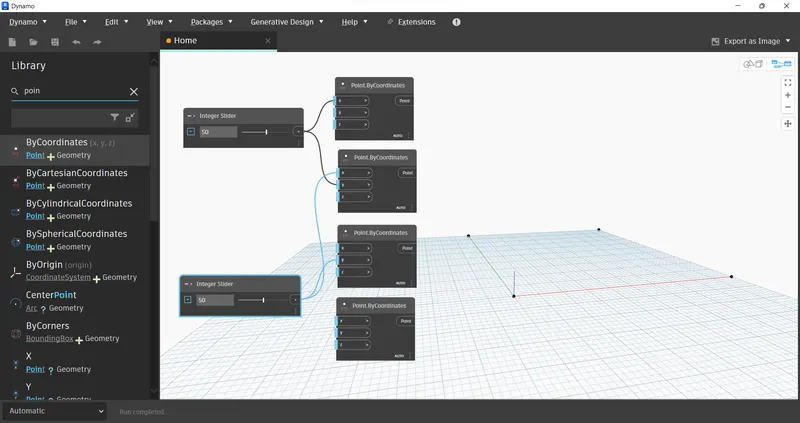
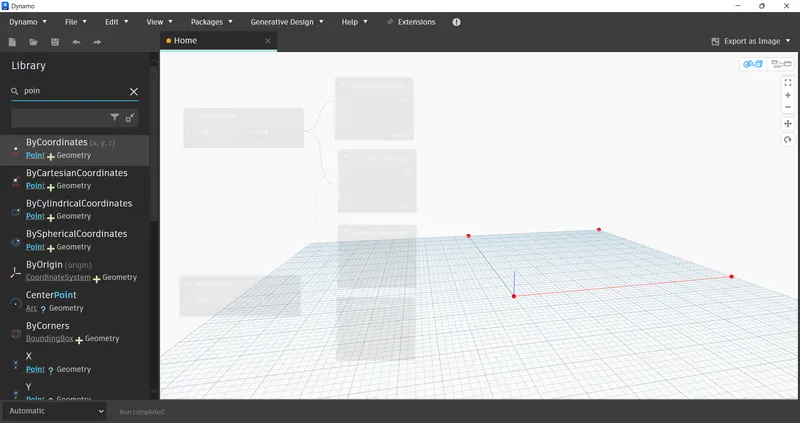
Step 4: To create a line to refference line or to connect the point.
a. Add the line.bystartendpoint.
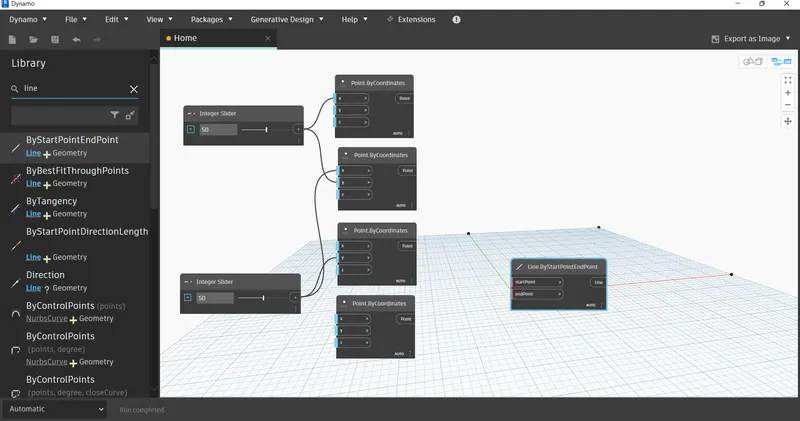
Step 5: Connect the windows as shown in figure below the lines will be created.
a. To connect all the lines simonteniously.
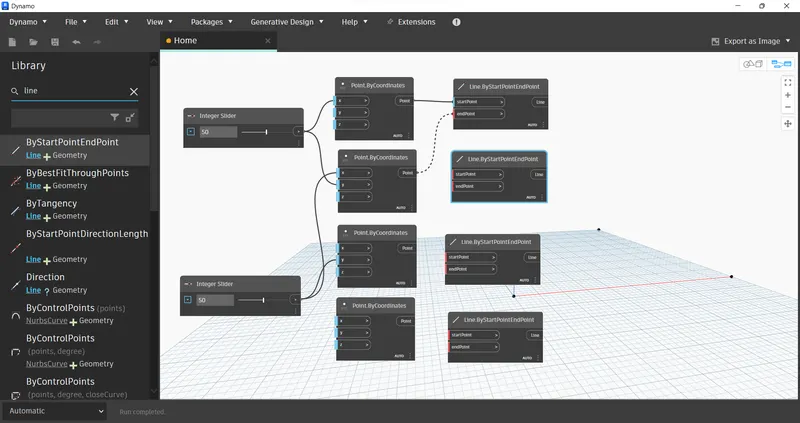
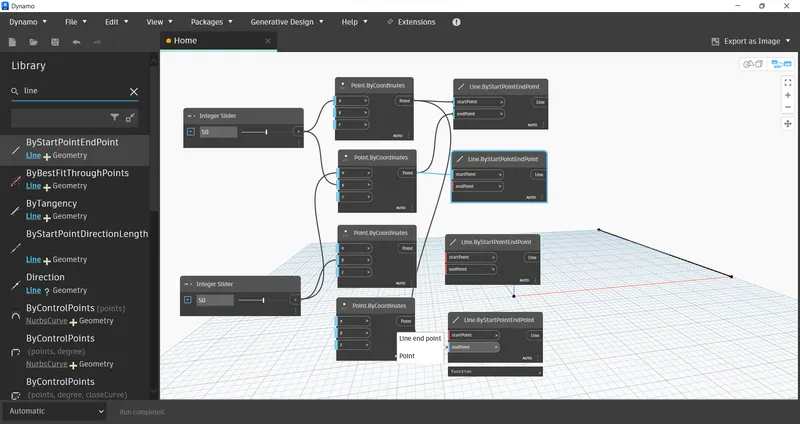
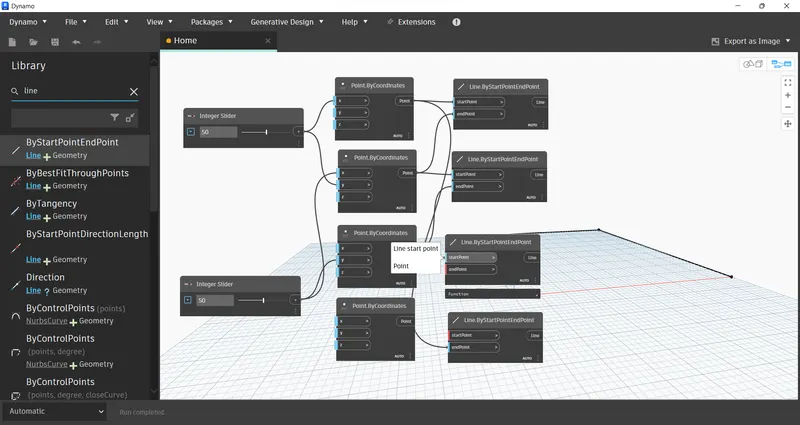
b. All the lines are connected now.
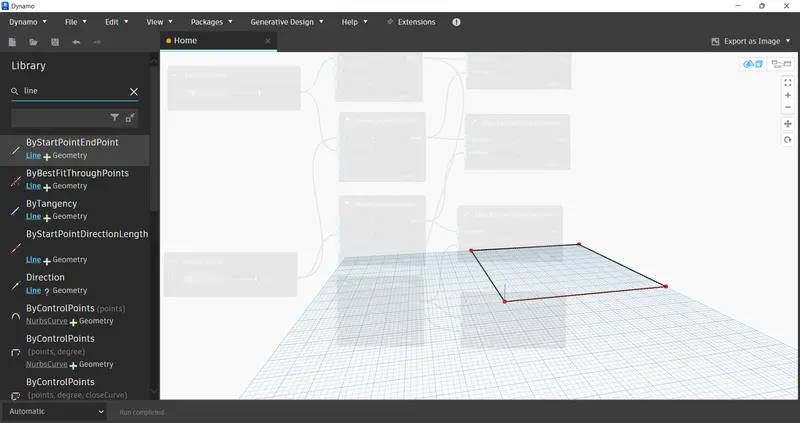
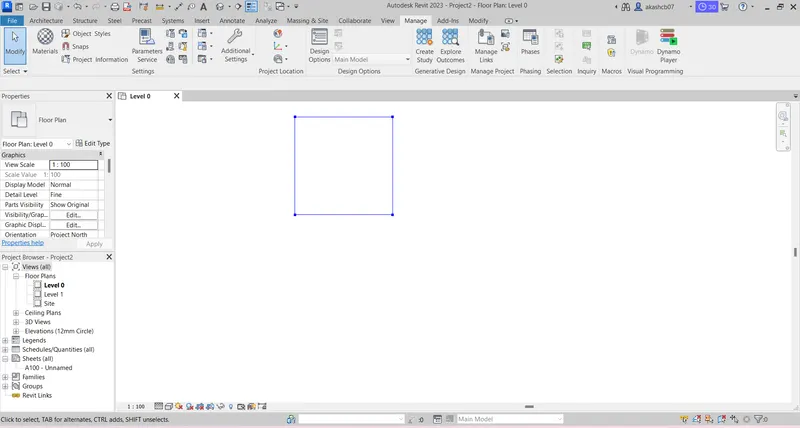
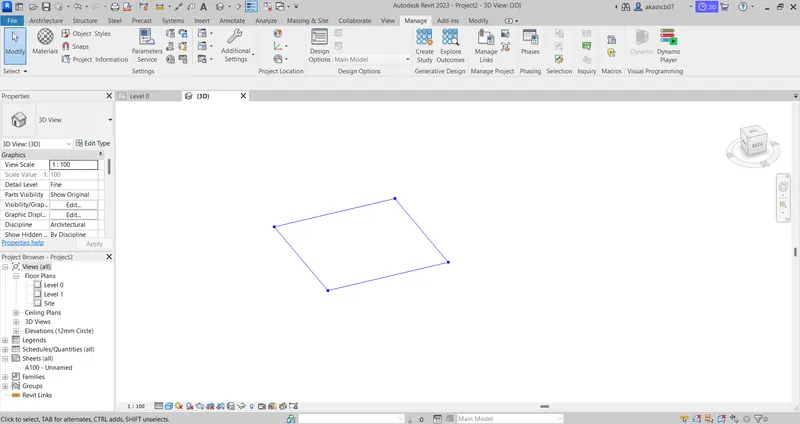
c. Go to revit and check the lines will be created in revit also.
Step 6: Add list create and by using the icon "+" add four items to create four lines.
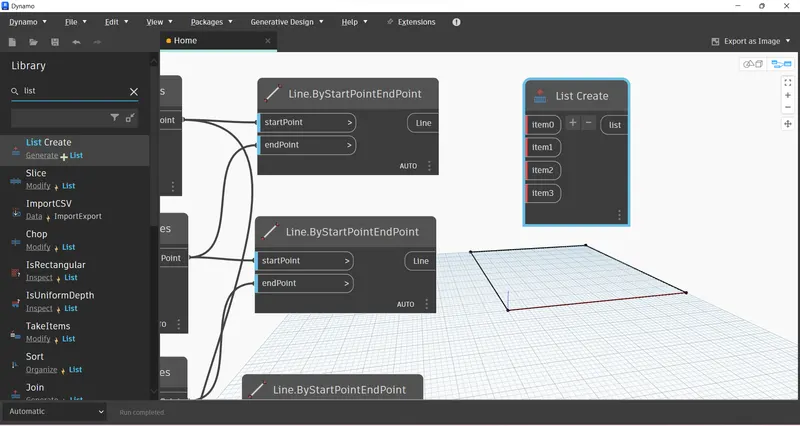
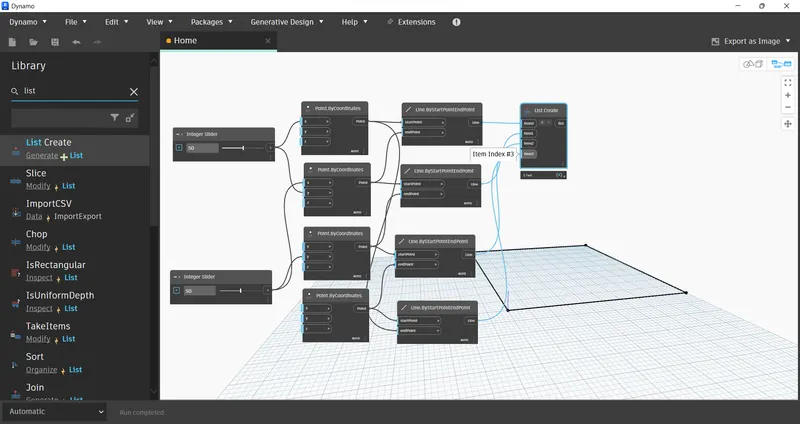
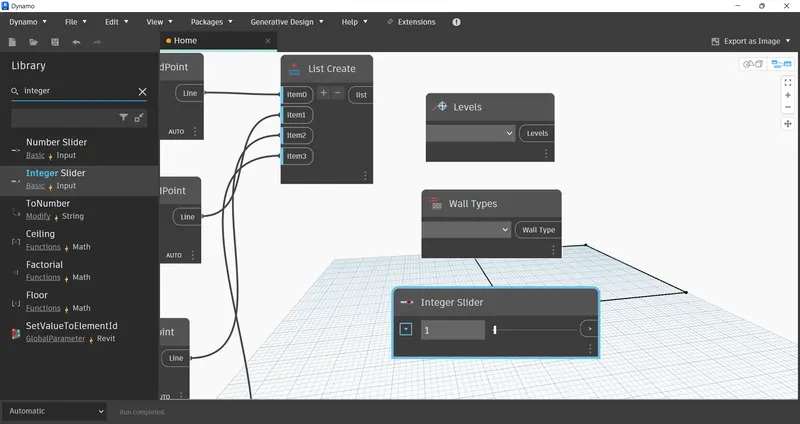
Step 6: Add three windows to add walls.
a. Add level for the base point of wall add the type of wall and add integer slider to provide the height to the wall.
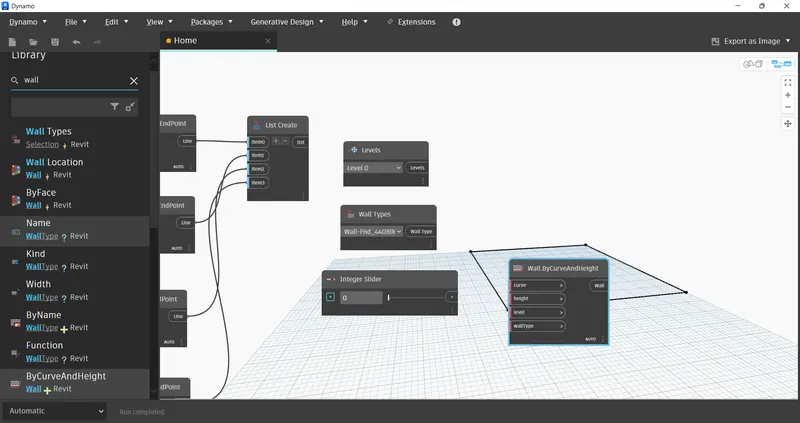
b. Add level, wall type and height parameters. Create a new wall.bycurevandheight.
c. Connect the level to level integer slider to height and wall type to wall and list to curve in wall.bycurvedandheight.
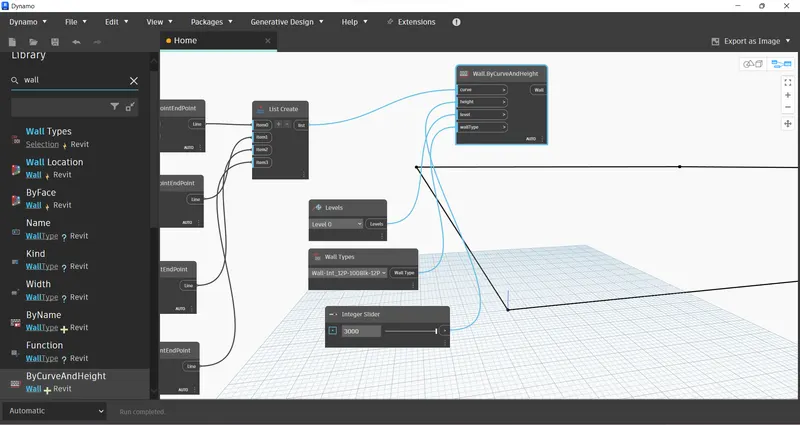
d. Wall are created go to revit and check.
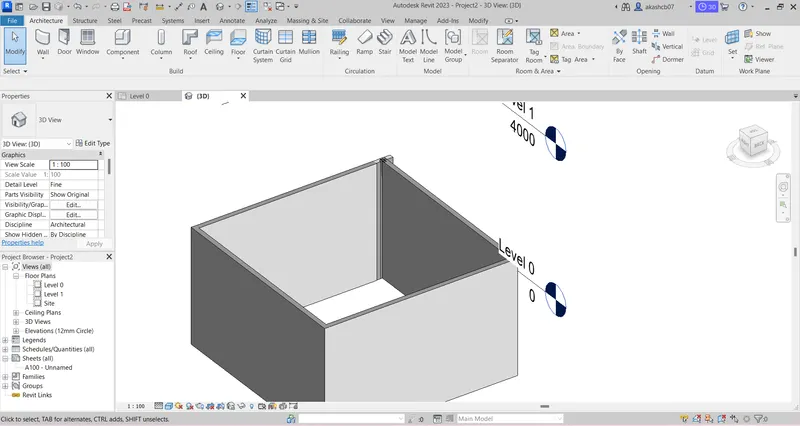
Step 7: To add the floor.
a. Add two command floor type and floor.byoutlinetypeandlevel.
b. Add floor type and connect the list to curved floortype to floor type and level to level in floor.bycurvedtypeandlevel.
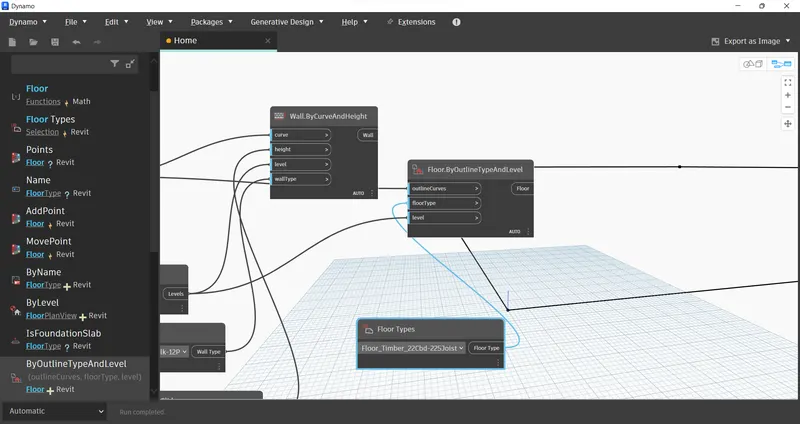
Result: The wall are created and floor is added by the Dynamo.
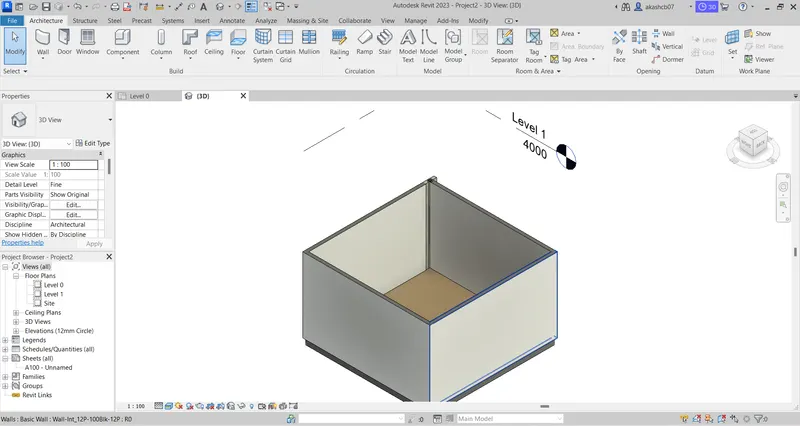
Q.3 Ans
Aim: Create an array of model element in revit. Use dynamo to vary the properties of model element by using the slider or block.
Procedure:
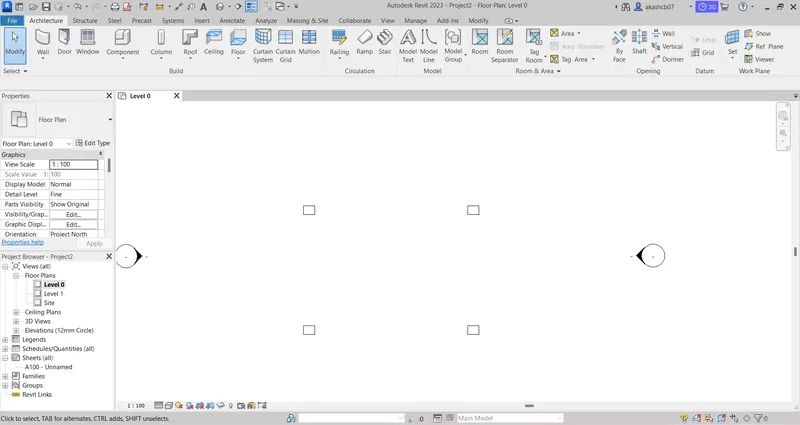
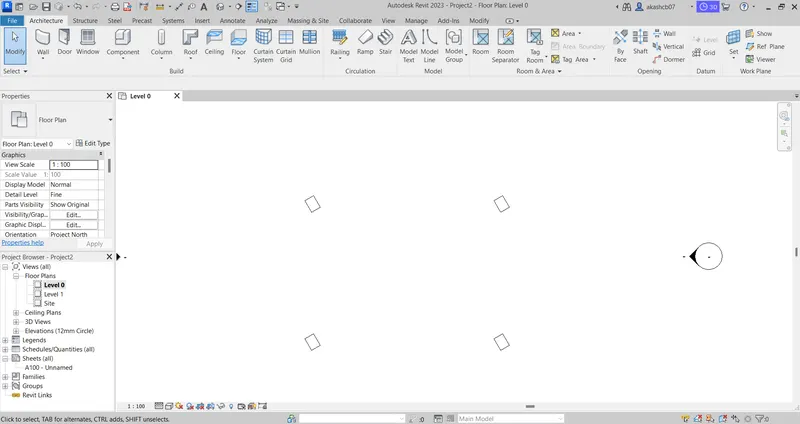
Step 1: Go to Architecture -> Build panel -> Select the column by architecture. Add four columns with random spacing and dimension.
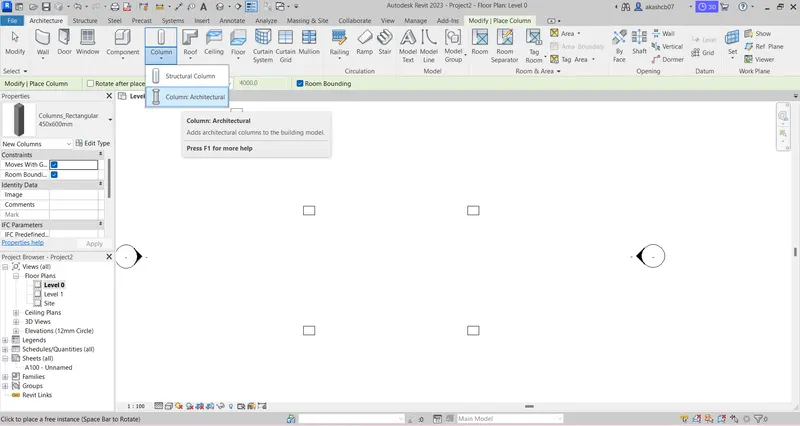
Step 2: Go to Dynamo add select model elements.
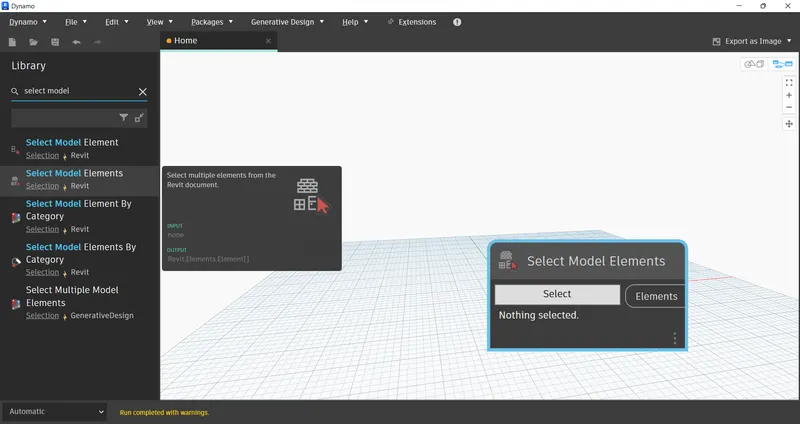
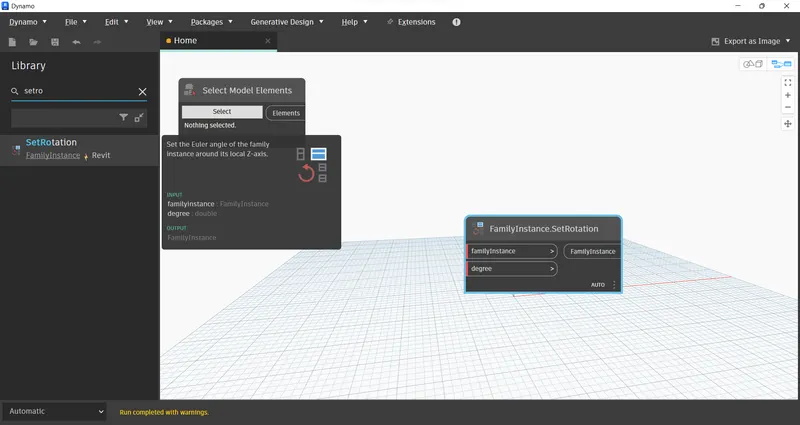
Step 3: Add familyinstance.setresolution to change the resolution with respsect to floor.
Step 4: Go to Select the columns from architectural columns.
a. The selcted columns will be shown in select.modelelements.
b. Add some value for the integer slider for rotation.
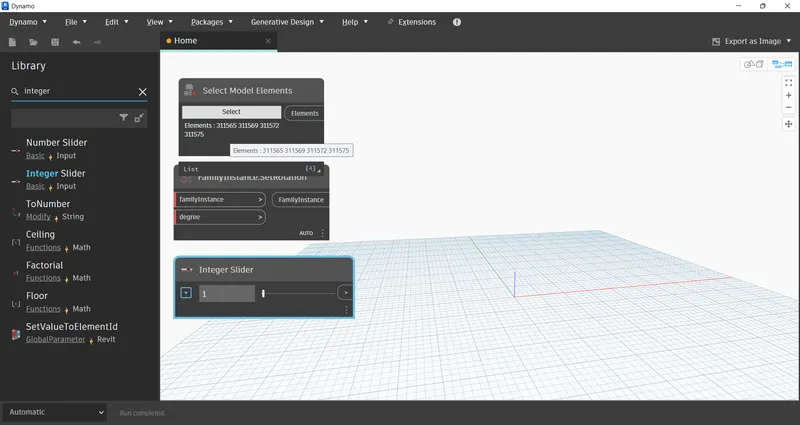
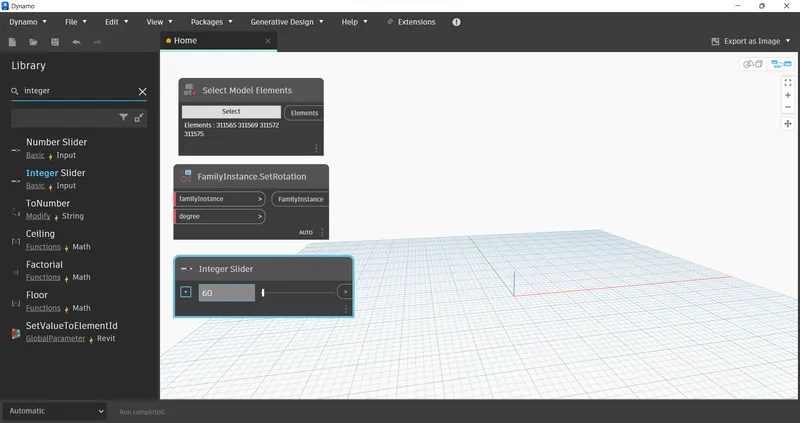
Step 5: Connect the selected column to familyinstance and integer slider to degree.
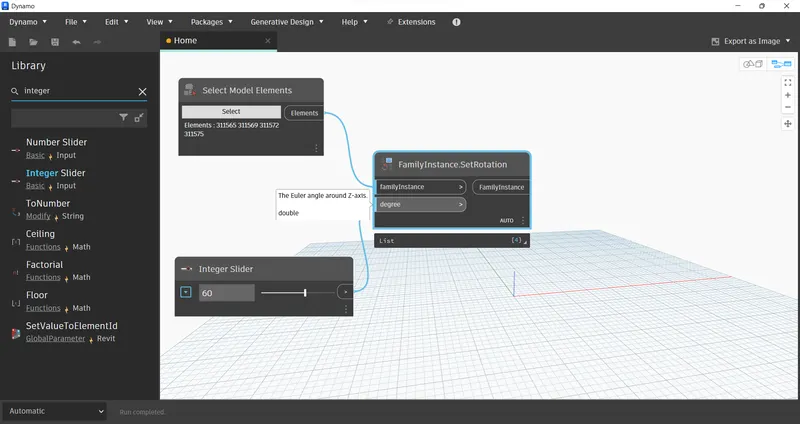
Result: The coluns are rotated with respected degree.
Q.4 Ans
Aim: Create a conceptual mass in revit.
Procedure:
Step 1: open a revit file with any of the template. Go to File -> New -> to add a conceptual mass.
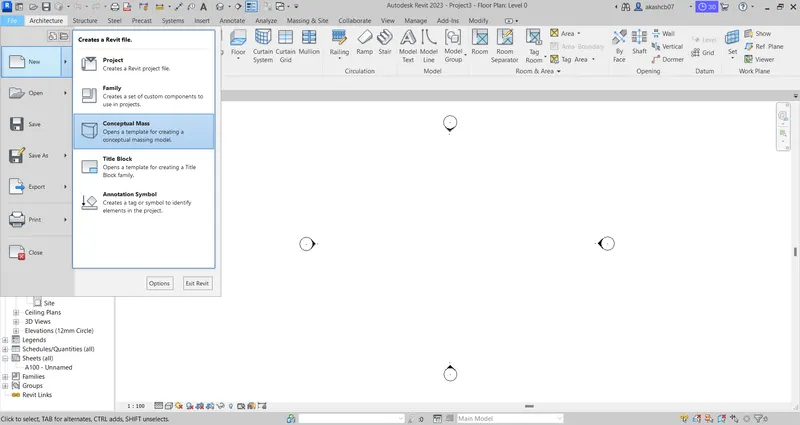
a. From conceptual mass folder select a metric mass template.
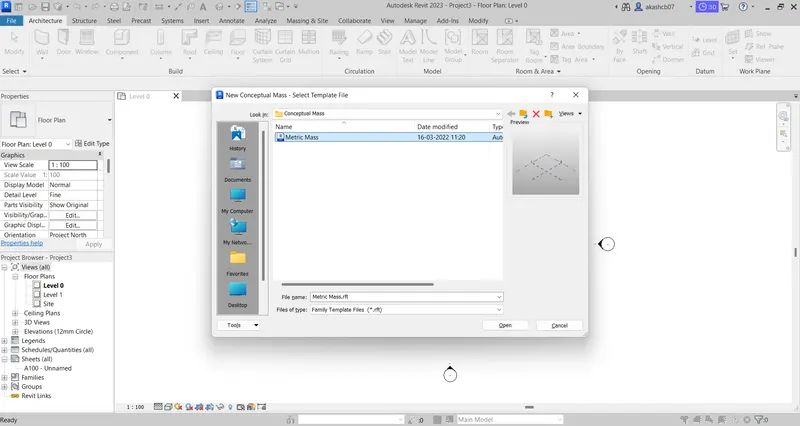
b. The matric mass template will be open.
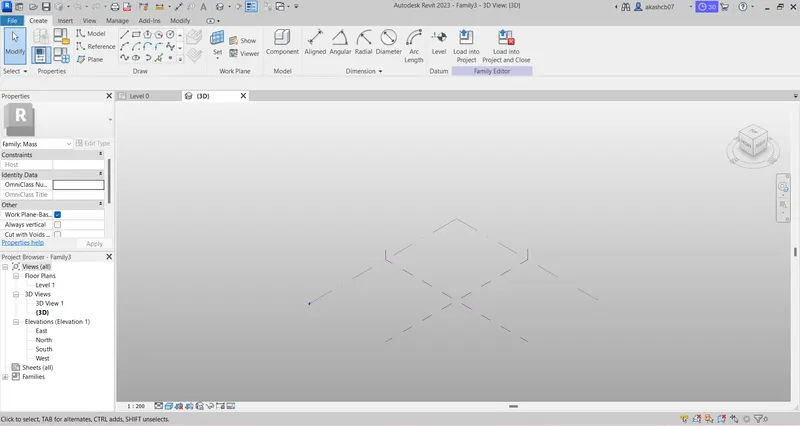
c. Go to elevation of any direction and create a new level to add a conceptual mass.
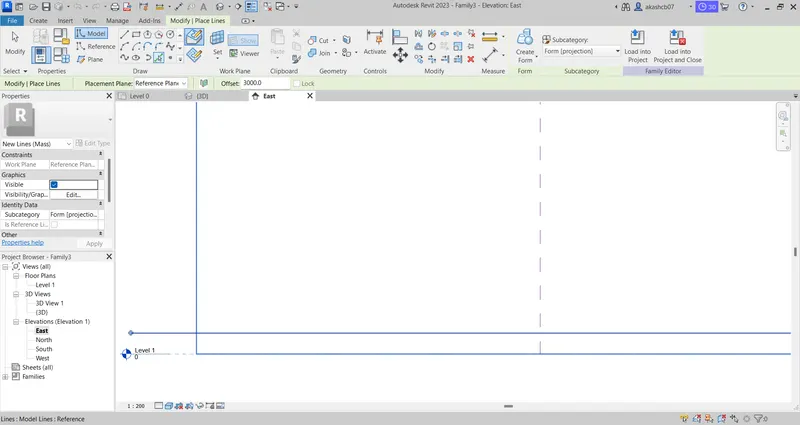
d. Go to Create -> Lines -> Draw window and create a sline with a random distance.
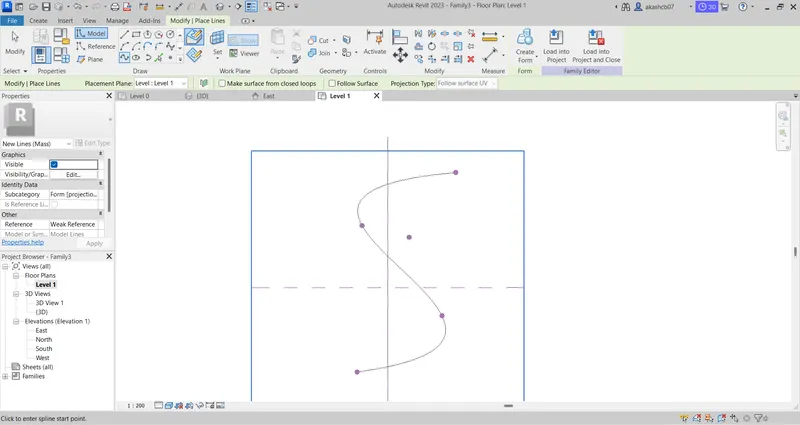
Step 2: Select each point created on line and set the reference plane.
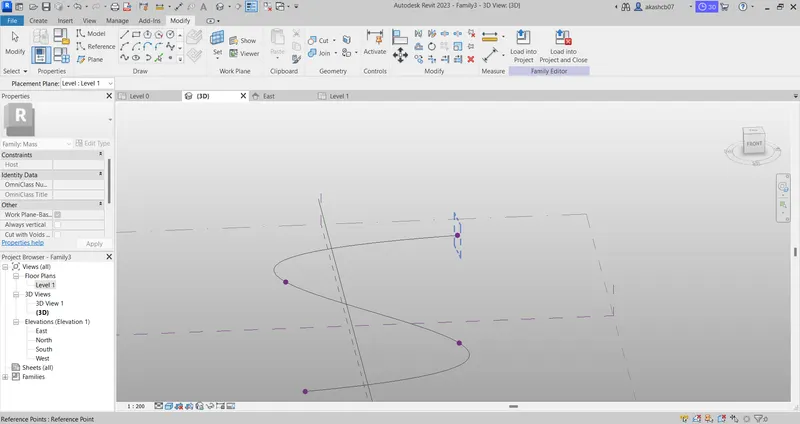
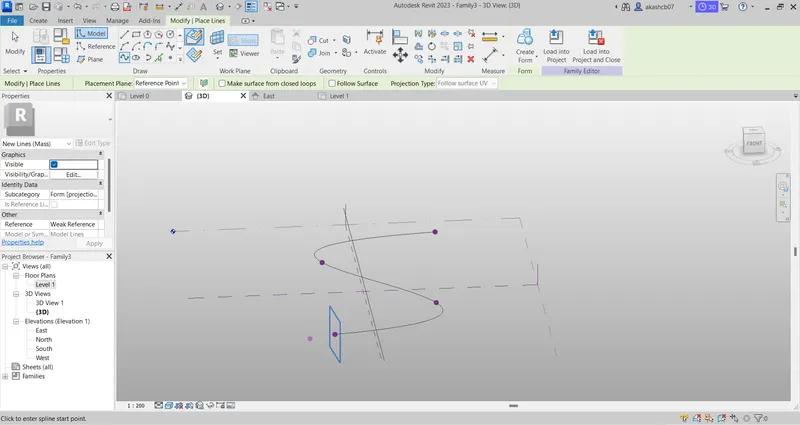
Step 3: Create a model on selected refference plane. Select each point and create model on each refference plane.
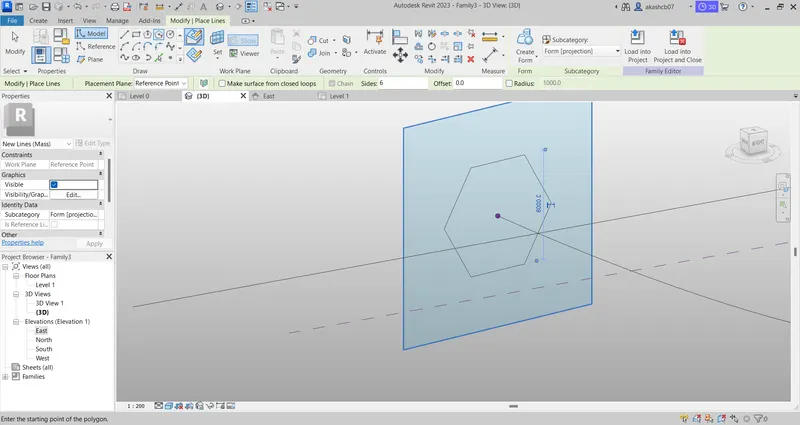
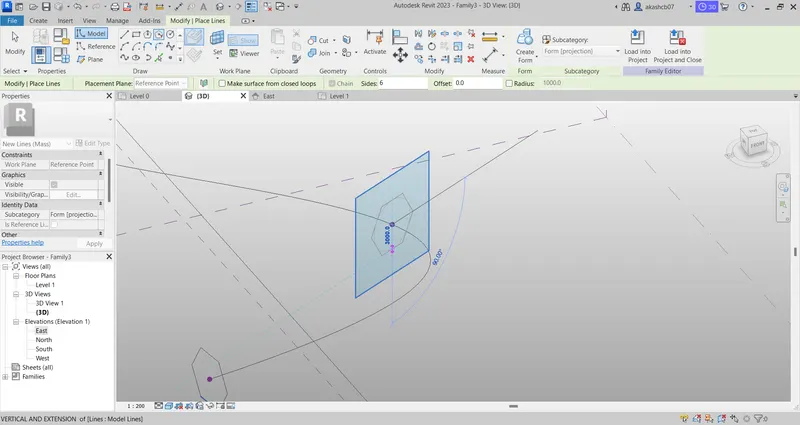
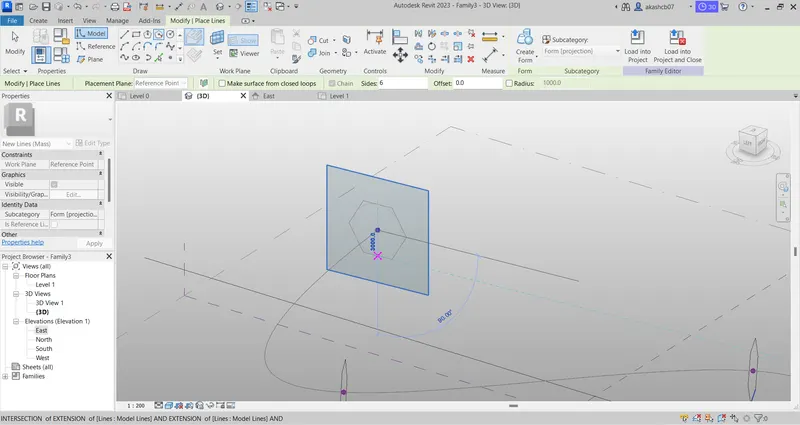
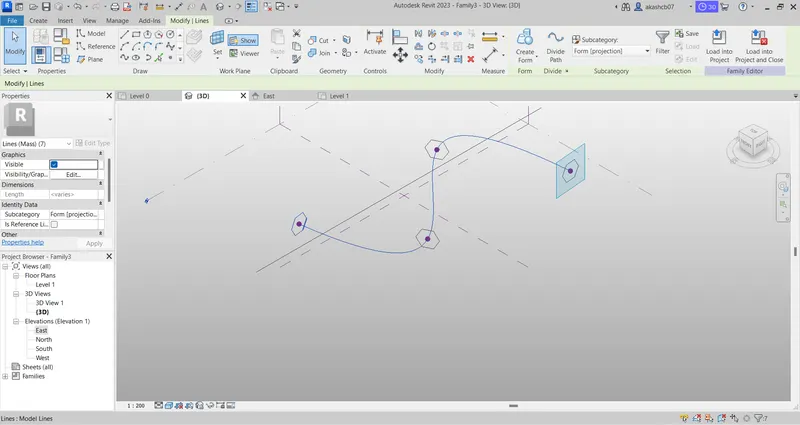
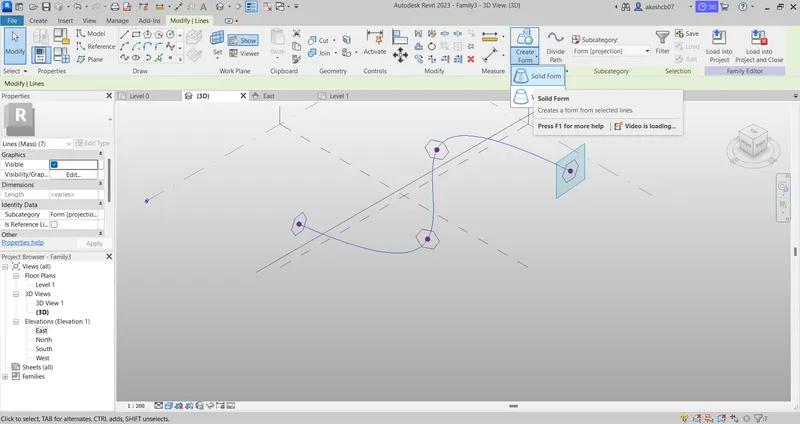
Step 4: Go to create form use dropdown mwnu and select a solid form. The solid form will be created.
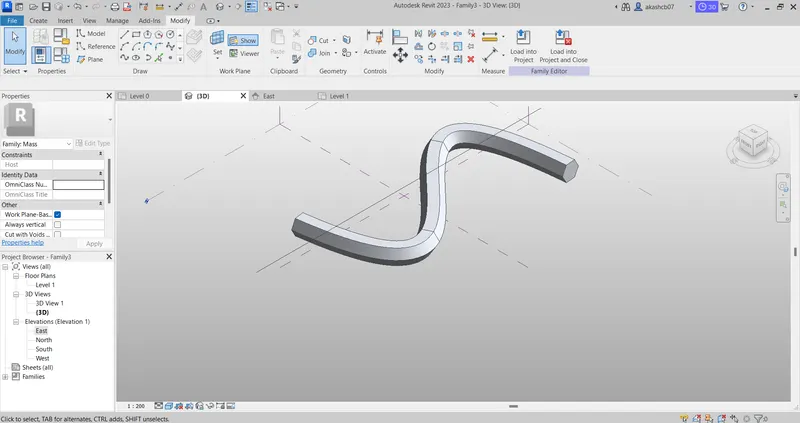
Step 5: Select the created form and devide into mesh.
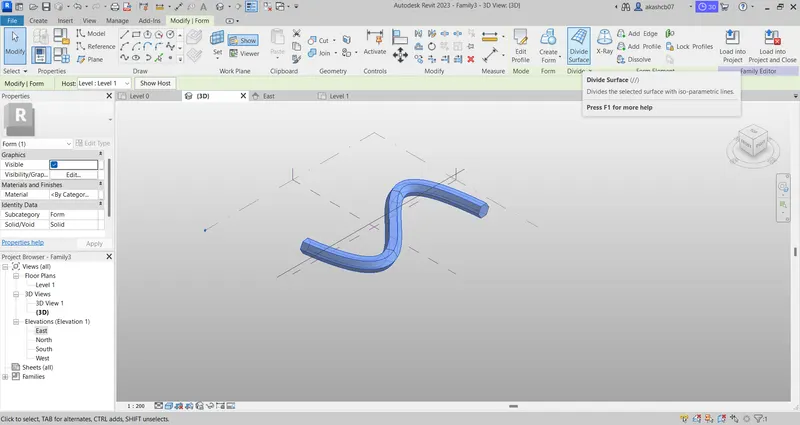
a. The model will be converted into mesh surface.
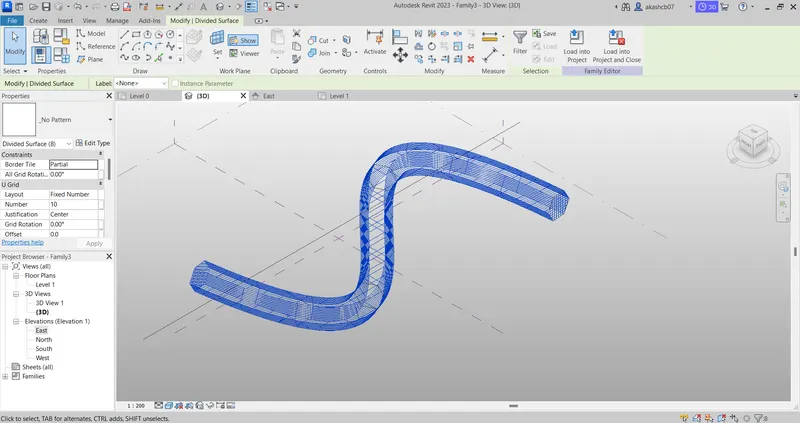
b. Go to properties and select the pattern for mesh as triangular (bent).
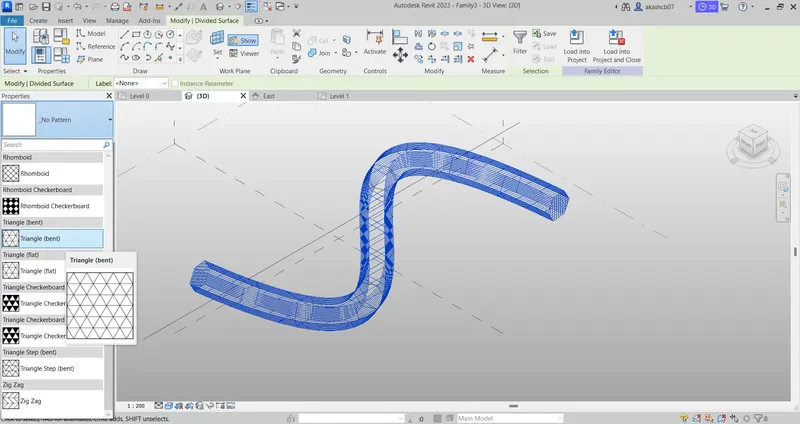
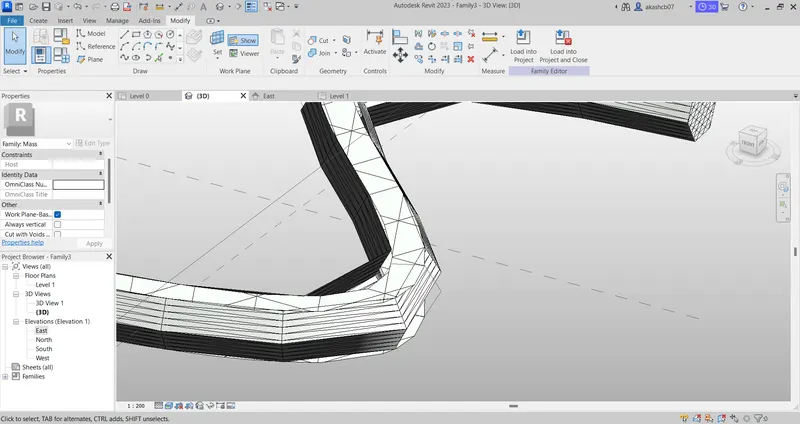
Result: The solid form is converted into a devided mesh surface with triangular (bent) pattern.
Q.5 Ans
Aim: Use Dynamo to work on developing a Parametric Stadium.
Procedure:
Step 1: Create a new file in Dynamo.
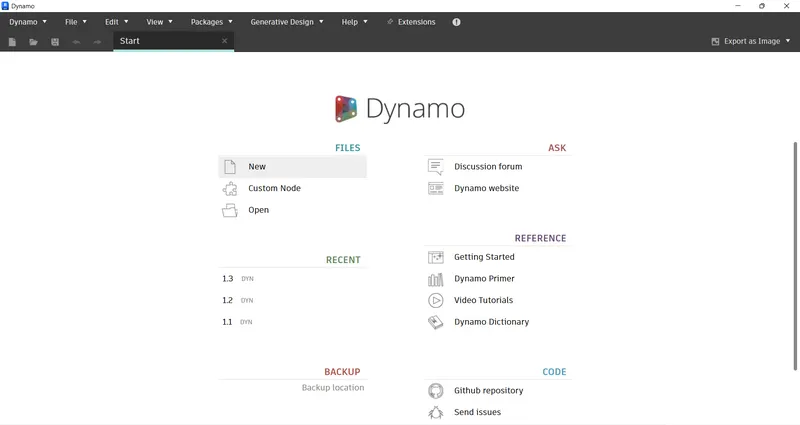
a. Add two integer silder.
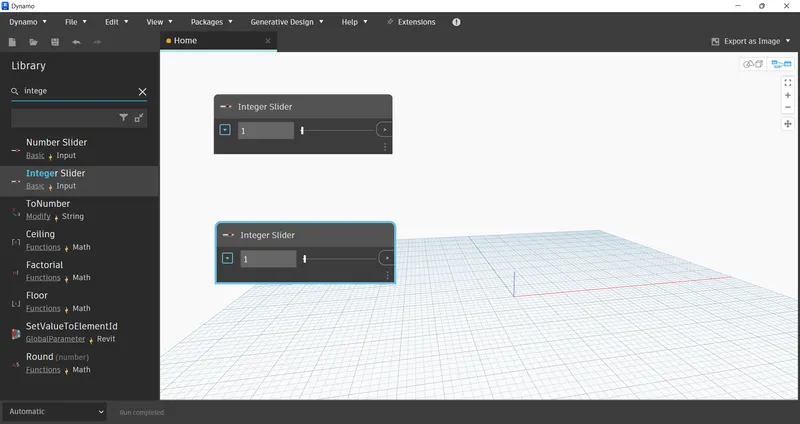
b. Rename it as No. of levels and floor height.
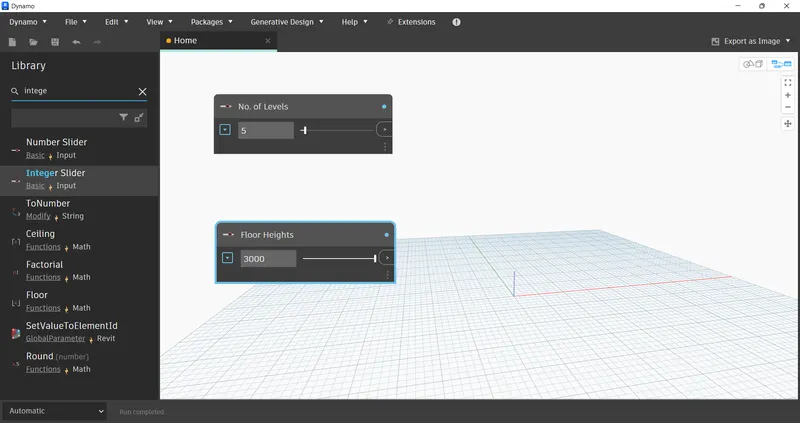
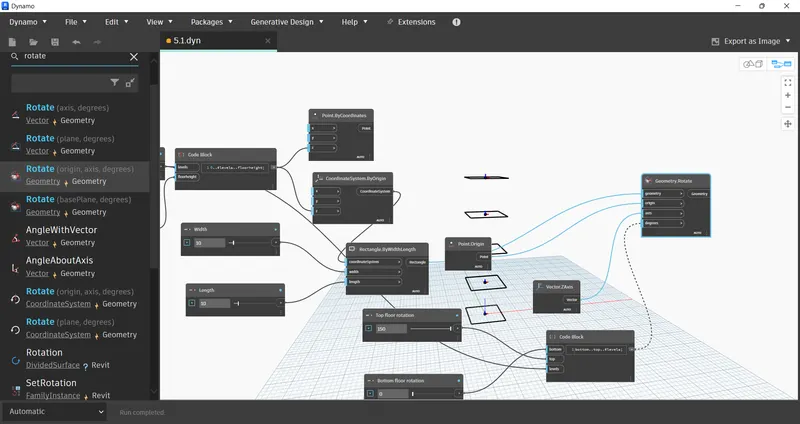
c. Add code block and add the code for levels and height. Connect the no. of levels to levels and floor height to floor height in code block.
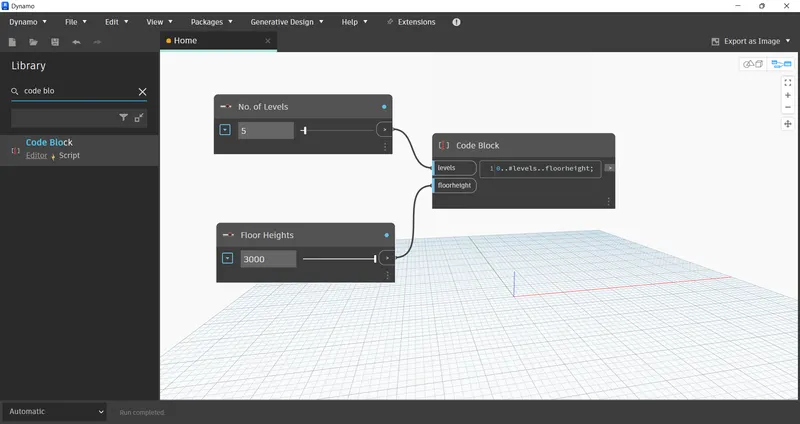
Step 2: Add the cordinate system by origin and connect the code block to z cordinate.
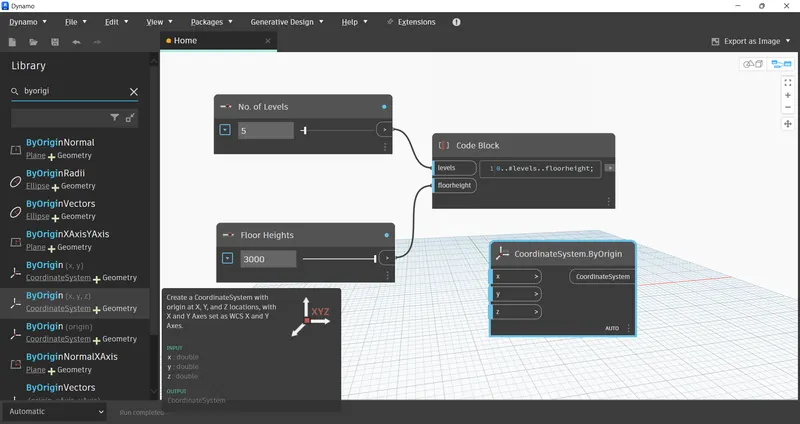
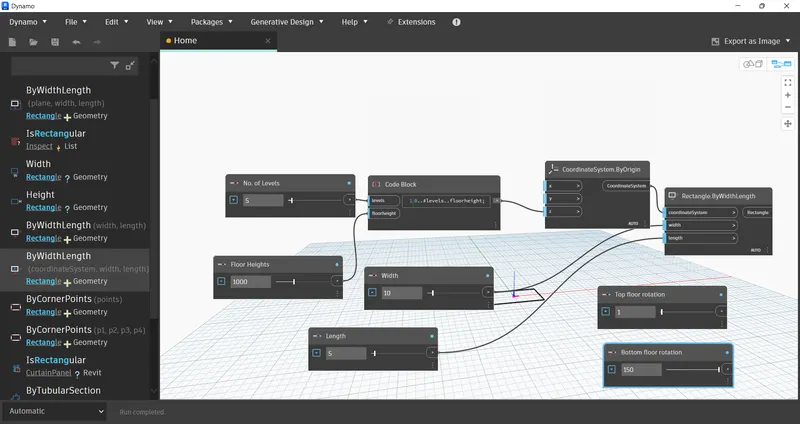
Step 3: Add four integer slider and rename it with.
a. Add the names as Width, Length, Bottom Floor rotation and Top Floor rotation.
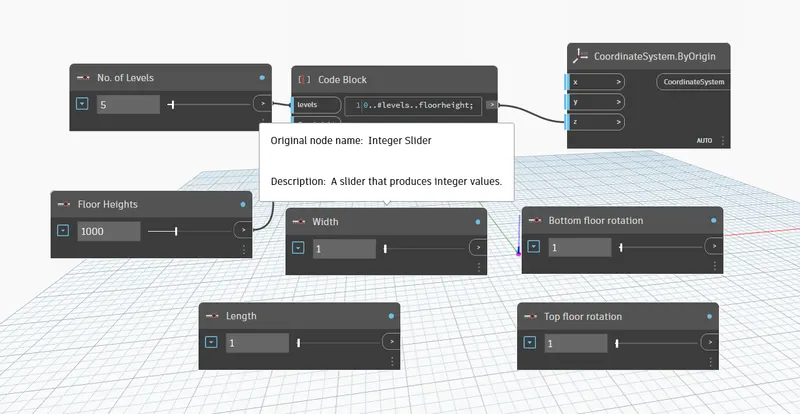
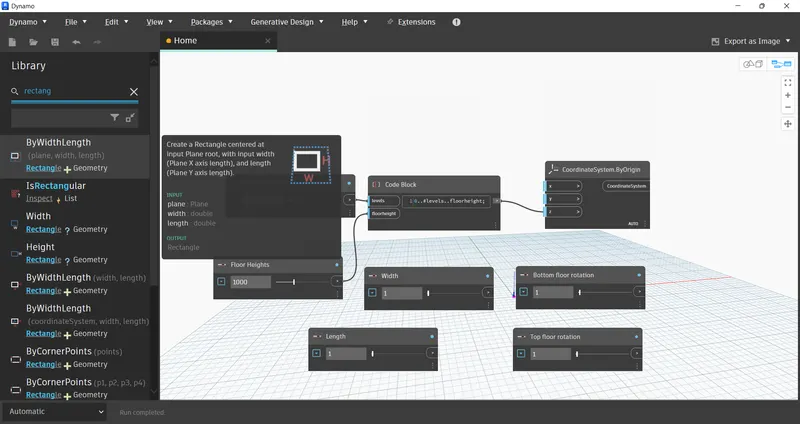
b. Add values for width and length.
c. Add Rectangle.bywidthandlength connect the width and length.
d. Rectangle will be created.
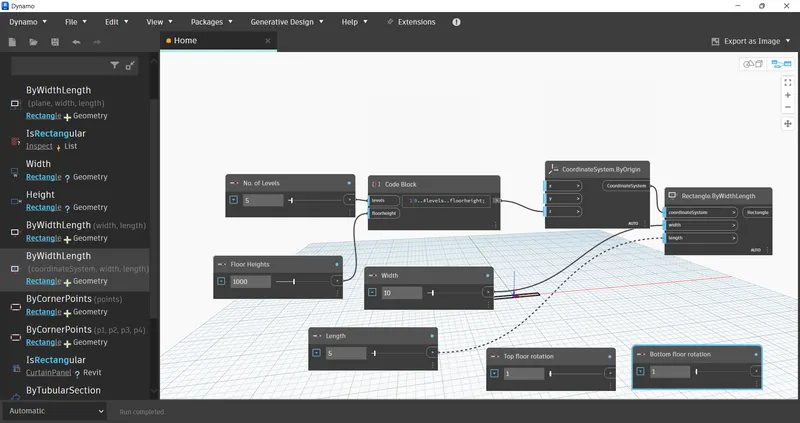
Step 4: Add cordinates for Top and bottom floor rotation.
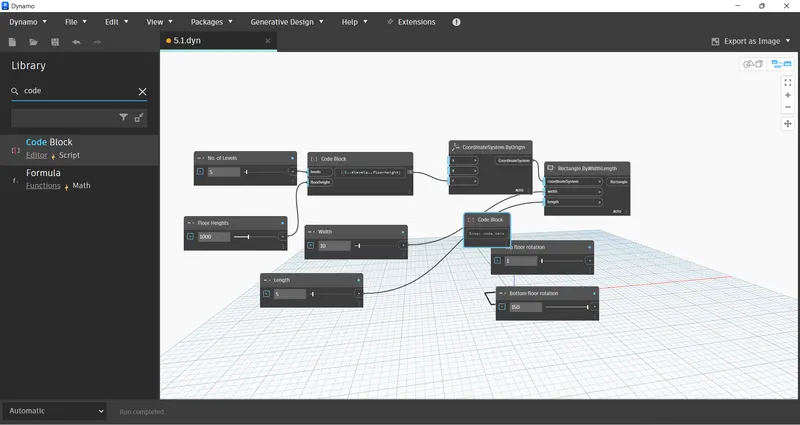
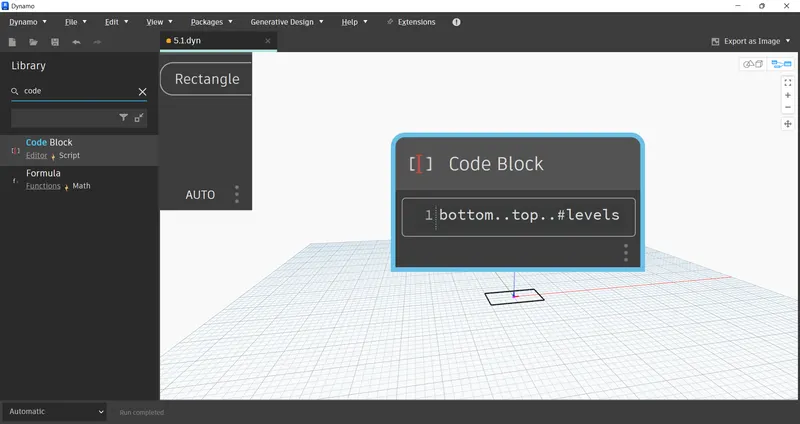
a. Add the code blocks and add codes for bottom top and levels.
b. Connect the no.of level to levels, bottom floor rotation to bottom and top floor rotation to top.
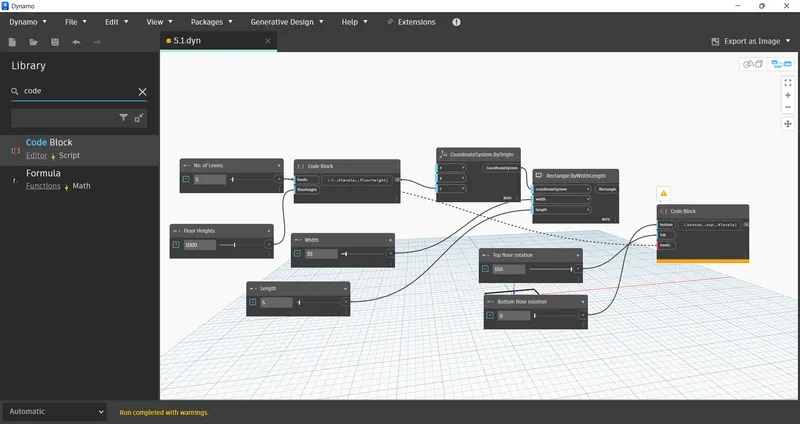
c. The rectangles will be created at the levels.
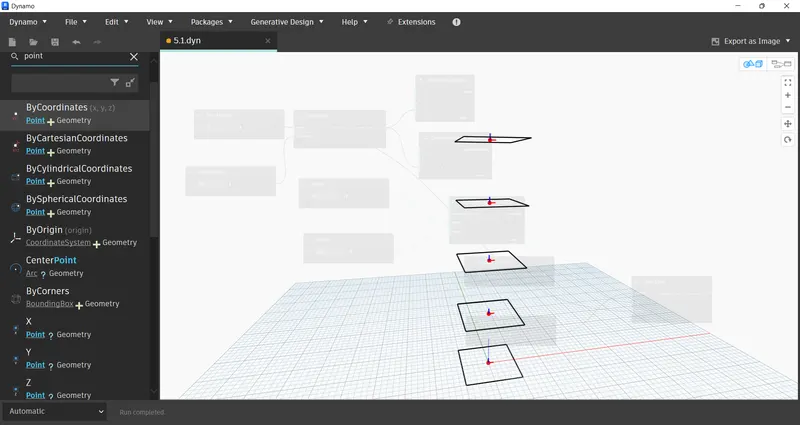
Step 5: Add point.origin and vector.zaxis.
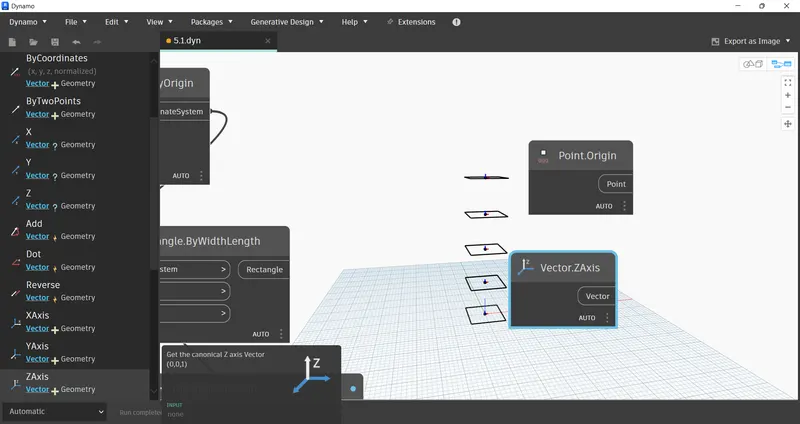
a. Add geometryrotate for rotation of floor.
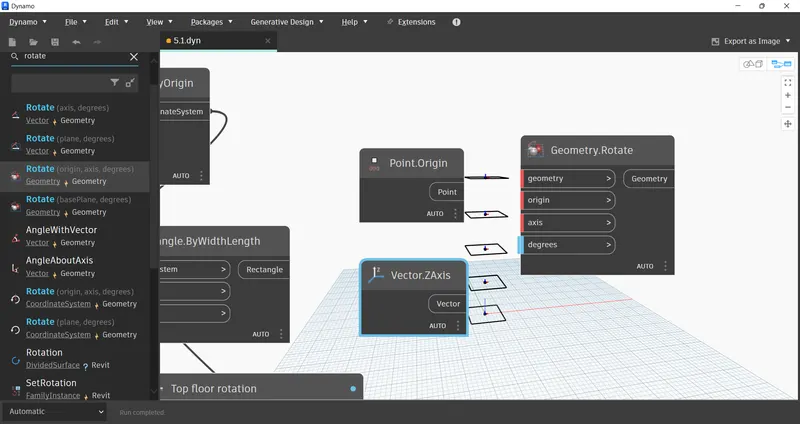
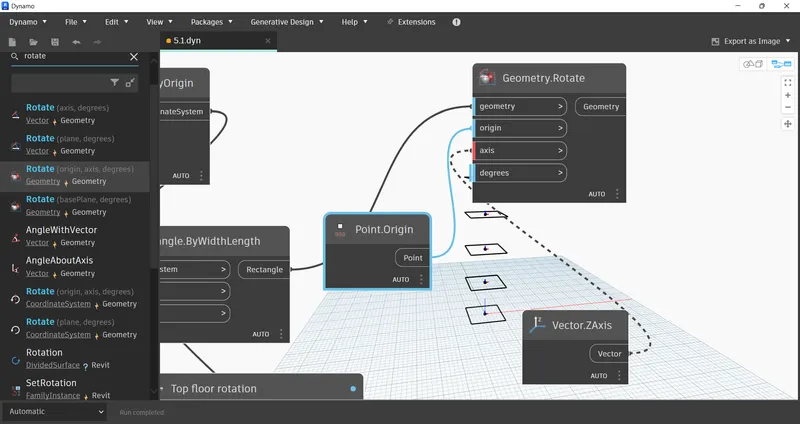
b. Add point.origin to origin, rectangle to geometry,vector.zaxis to axis and code block to degree.
Step 6: To create surface use surface.byloft. Create
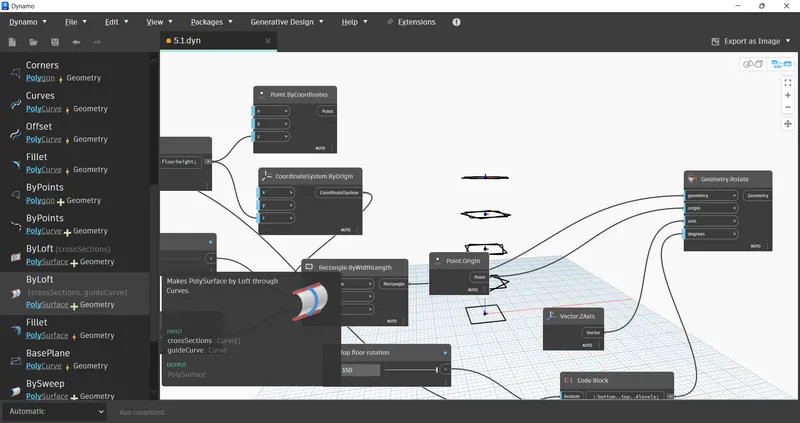
a. Connect this geometry to cross section it will create a surface to levels and floors.
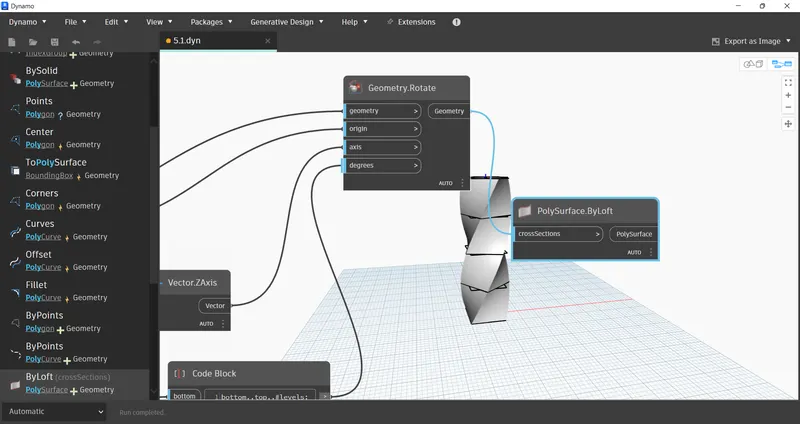
Result: The parametric stadium will be created.