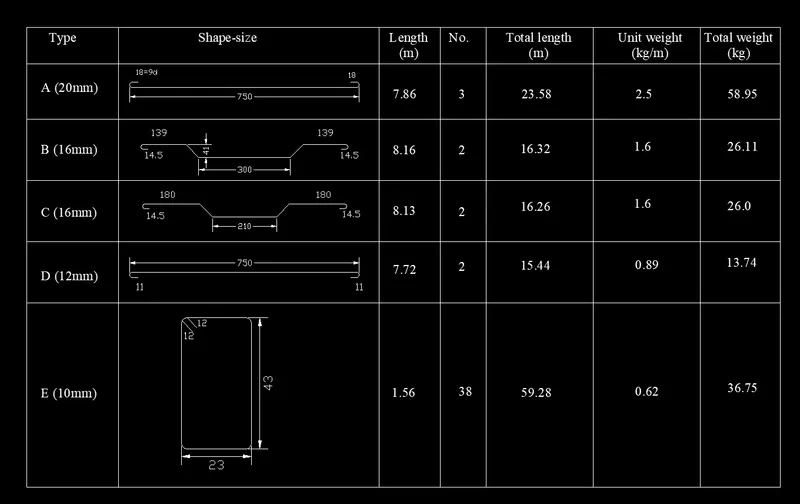
Creating Bar Bending schedule, Different Door types, and Creation of standard drawing templates using AutoCad
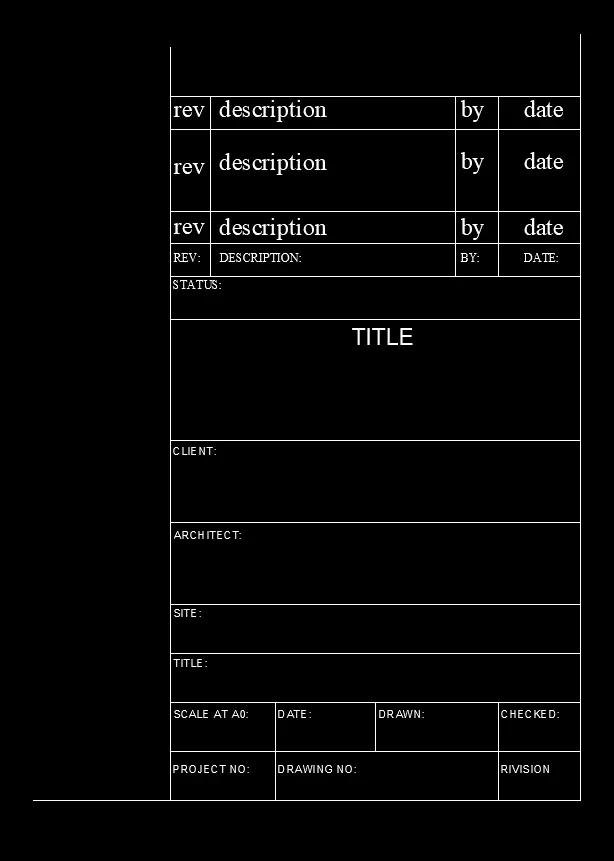
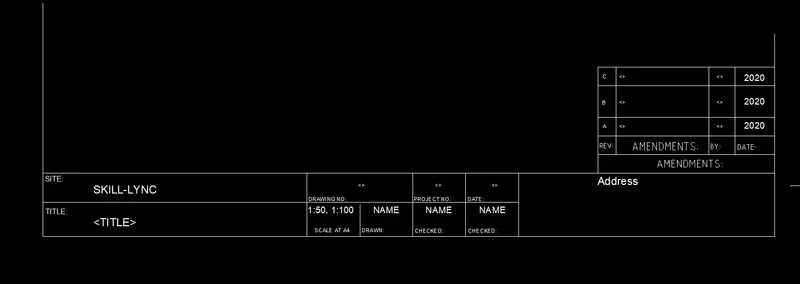
1. Create the templates as shown in Figures. Take the size of the title block as per industry standards or you can assume it as per the size of the paper. Use text and attributes wherever required. After creating the title block you need to save it as a block with names: Custom1_titleblock and Custom2_titleblock, respectively.
AIM:
Create the template as shown in the figure:
REQUIRED TOOLS:
LINE
OFFSET
TRIM
TEXT
BLOCK
INSERT
PROCEDURE:
Drawn one horizontal line with assumptions and one vertical line by using Line Command
Invoking the tool:
COMMAND: L >
OFFSET
COMMAND: OF>
Offset the lines by assumptions and prepare the former as shown in the figure.
TEXT:
Command: MT>
By using the Mtext written the given data
Used the different FONT styles.
BLOCK:
Converting the drawing into Block
Command: B>
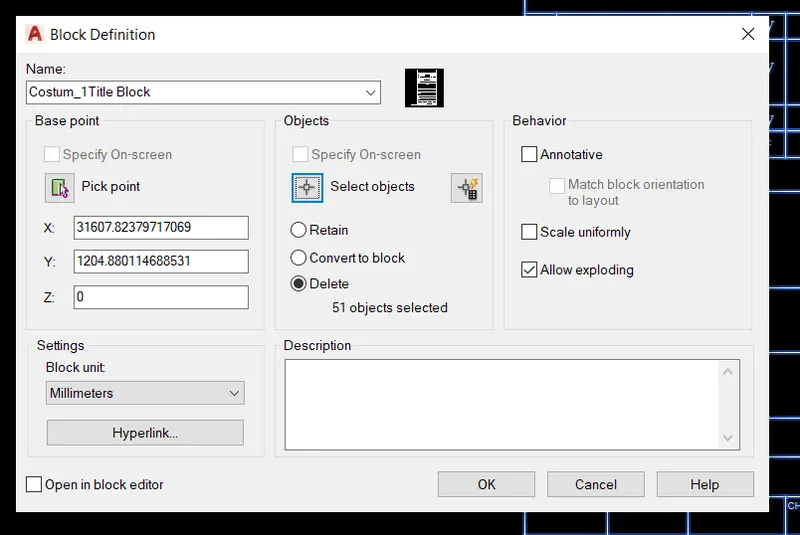
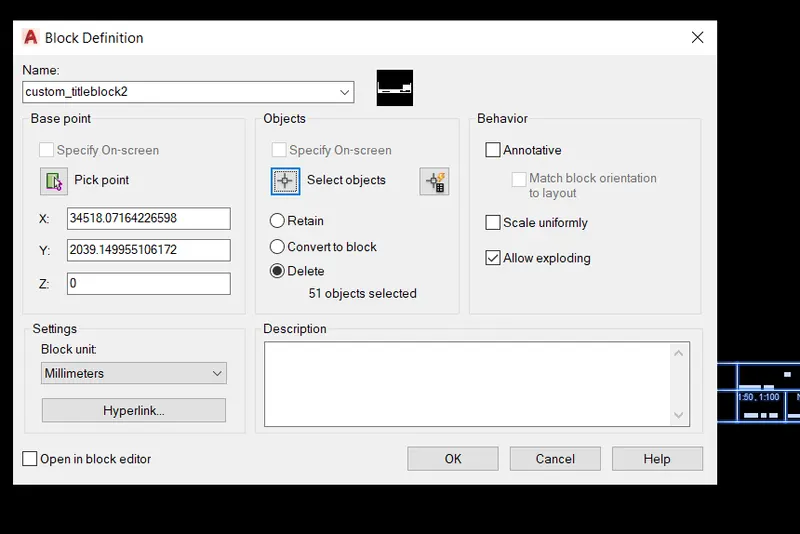
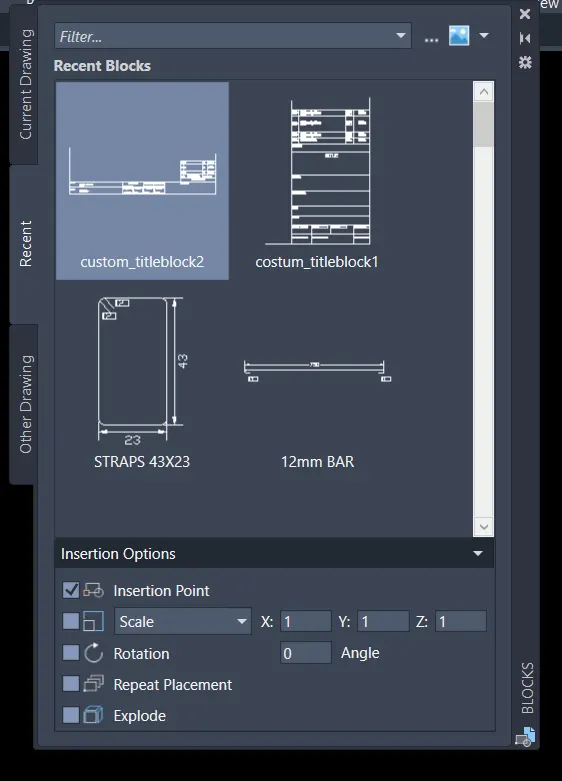
RESULT:
Templates are created by the assumption of dimensions and used various tools and commands.
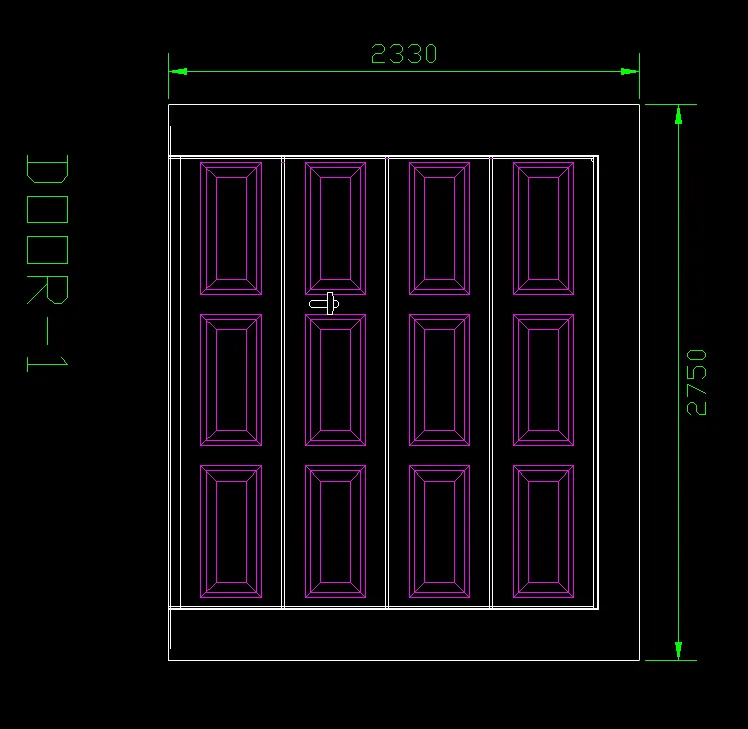
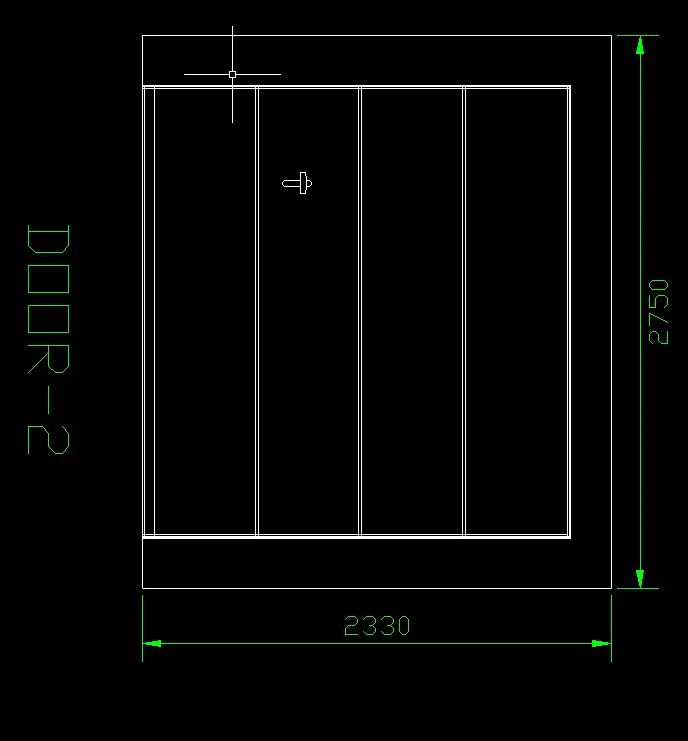
2. Create the doors type for warehouse as shown in the Figure. You need to create each door type as per standard size or given dimensions. Create the blocks of this door type after creating them.
AIM:
Create the Doors type for the warehouse as shown in the figure.
REQUIRED TOOLS:
IMPORTING THE PDF
SCALE
RECTANGLE
EXPLODE
LINE
OFFSET
TRIM
TEXT
DIMENSIONS
BLOCK
INSERT
PROCEDURE:
Importing the pdf file of the DOOR into the current drawing
Invoking the tool:
RIBBON: INSERT> IMPORT PDF.
SCALE:
Scaling the drawing for getting the same dimension of the door
Invoking the tool:
Command: SC>
SKETCHING THE NEW DOOR DRAWING:
Creating the rectangle with a dimension of 2330 X 2750
Invoking the tool:
COMMAND: REC>
EXPLODE:
Invoking the tool:
COMMAND: EXPLODE>
Exploding the rectangle for offsetting the lines.
OFFSET:
Invoking the tool:
COMMAND: OFF>
Offset the vertical and horizontal line for creating the door frames and styles,
Dimensions are taken from the reference drawing and offset the lines.
TRIM:
Trimmed the extended offset lines over the frames
Invoking the tool:
COMMAND: TR>>
CREATINGTING THE PATTERNS:
By using the rectangle tool create the patterns and offset the thickness for the pattern and create as shown in the reference drawing.
DIMENSIONS:
COMMAND: DIMLIN>
Plot the dimension of the door.
RESULT:
Sketchup the drawing by using various tools and commands, dimensions are taken from the reference drawing.
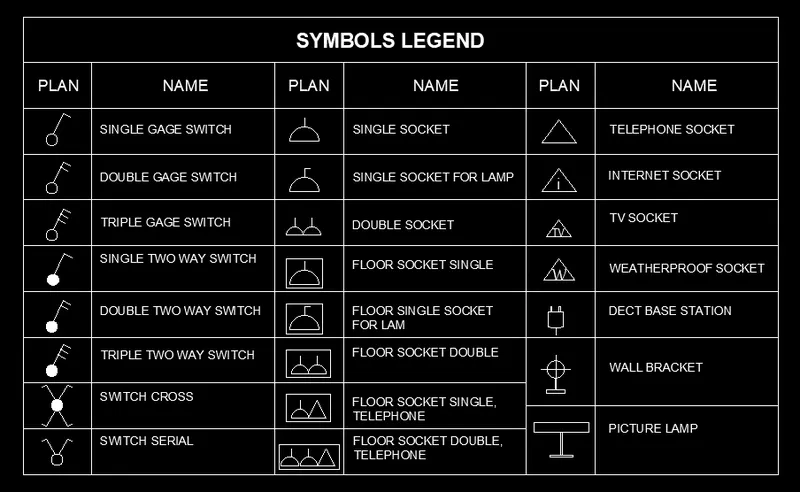
3. Create each symbol as a block with the name given in the legend. After creating the blocks arrange them in the legend as shown in the Figure.
AIM:
To create each symbol as a block with the name given in the legend and arrange it in the legend
REQUIRED TOOLS:
LINE
POLYGON
ARC
RECTANGLE
CIRCLE
TEXT
OFFSET
BLOCK
INSERT
PROCEDURE:
Creating the Symbols as shown in the reference drawing by using the various tools and commands
then it converts into the blocks:
BLOCK:
COMMAND: B>
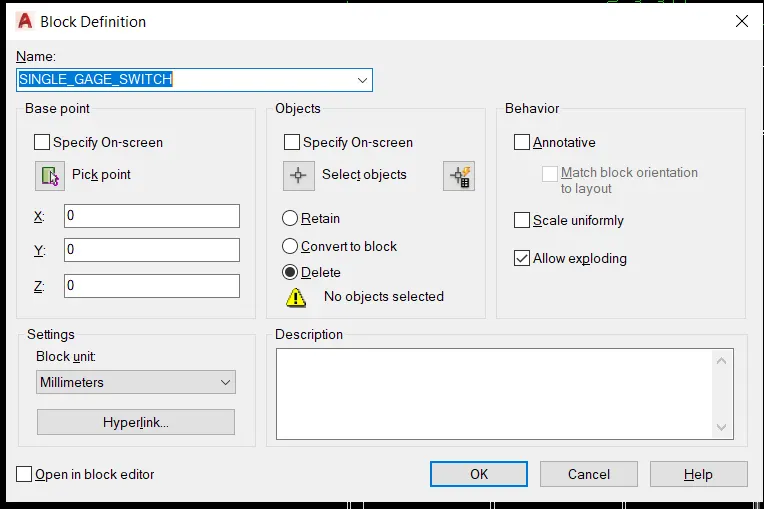
After creating all symbols as BLOCK creating one TABLE and insert the blocks in the table by creating the LEGENDS.
INSERT:
Invoking the tool:
COMMAND: I>
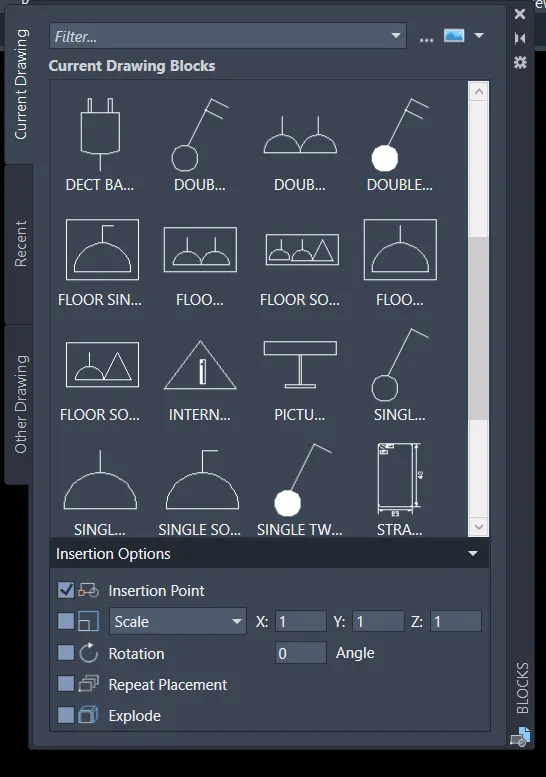
TEXT:
Written the name of the symbols by using the MTEXT tool and choosing the ARIAL font style.
RESULT:
Creating the symbol legends by using the various commands.
4. Create the door type for a residential building as a block. Save the name of the blocks as type. Use given dimensions or assume dimensions as per industry standards.
AIM:
To create the door type for a residential building as a block and save the block with dimensions of the Door.
REQUIRED TOOLS:
RECTANGLE
LINE
OFFSET
TRIM
CIRCLE
ARC
DIMENSIONS
TEXT
BLOCK
INSERT
PROCEDURE:
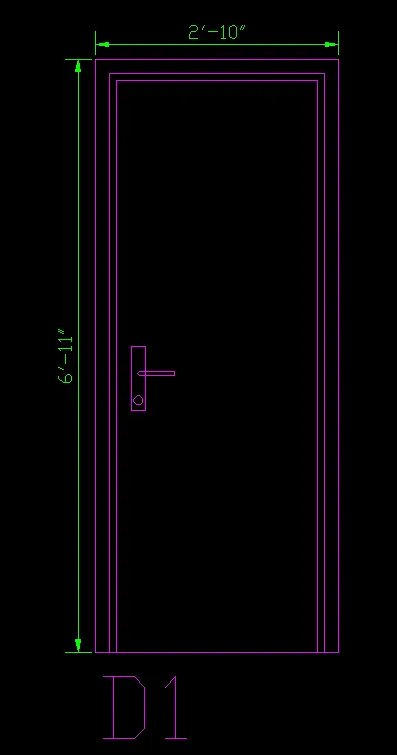
SKETCHING THE D1 DOOR:
Creating the different LAYERS for the doors.
Invoking the tool:
Layers Properties > creat New Layer>
Given the name of the layer and selected line type and color of the layer etc.,
Creating the door frames with given dimensions and some doors are assumed the dimensions.
RECTANGLE:
COMMAND: REC>
Creating the door frame with a dimension of 2'-10" x 6'-11"
OFFSET:
command: OF>
Offset the door frame as 5" and 2"
HANDLE AND LOCKER:
Creating by using the Rectangle tool.
DIMENSIONS:
COMMAND: DIMLIN>
Plot the dimension of the door.
RESULT:
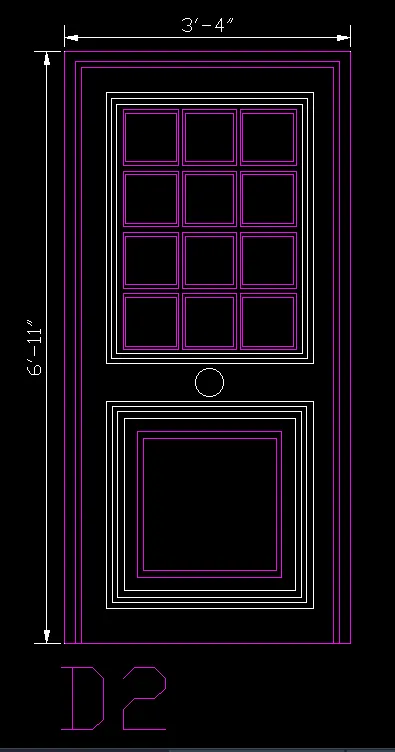
SKETCHING THE D2 DOOR:
RECTANGLE:
COMMAND: REC>
Creating the door frame with a dimension of 3'-4" x 6'-11"
OFFSET:
command: OF>
Offset the door frame as 5" and 2" and patterns are created by offsetting the rectangles patterns
Creating by using the Rectangle tool.
DIMENSIONS:
COMMAND: DIMLIN>
Plot the dimension of the door.
RESULT:
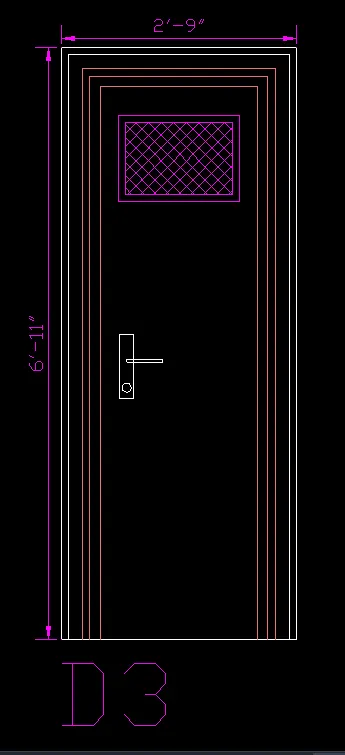
SKETCHING THE D3 DOOR:
RECTANGLE:
COMMAND: REC>
Creating the door frame with a dimension of 2'-9" x 6'-11"
OFFSET:
command: OF>
Offset the door frame as 2" and 4" and patterns are created by offsetting the rectangles patterns
Creating by using the Rectangle tool.
DIMENSIONS:
COMMAND: DIMLIN>
Plot the dimension of the door.
HANDLE AND LOCKER:
Creating by using the Rectangle tool.
HATCH:
COMMAND: H>
Hatch the window portions with ANSI37 Pattern
RESULT:
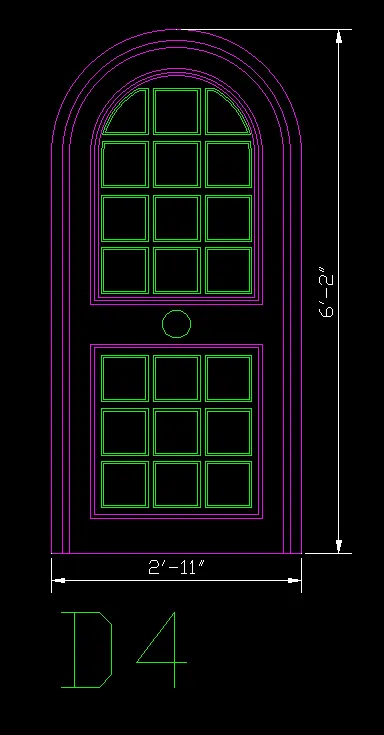
SKETCHING THE D4 DOOR:
RECTANGLE:
COMMAND: REC>
Creating the door frame with a dimension of 2'-11" x 6'-2"
ARC:
Create the ARC for the door
Invoking the tool:
RIBBON> HOME>ARC>START CENTER END POINT>
select the top corners of the door ARC will be produced.
OFFSET:
command: OF>
Offset the door frame as 5" and 2" and patterns are created by offsetting the rectangles and ARC patterns
Creating by using the Rectangle tool.
DIMENSIONS:
COMMAND: DIMLIN>
Plot the dimension of the door.
RESULT:
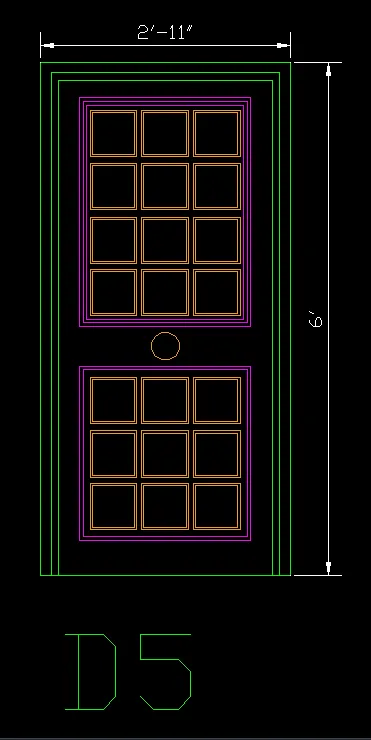
SKETCHING THE D5 DOOR:
RECTANGLE:
COMMAND: REC>
Creating the door frame with a dimension of 2'-11" x 6'
OFFSET:
command: OF>
Offset the door frame as 5" and 2" and patterns are created by offsetting the rectangles.
Created one rectangle pattern and copy to another position by using the MIRROR tool.
Created one circle of 2" in between the
DIMENSIONS:
COMMAND: DIMLIN>patterns.
Plot the dimension of the door.
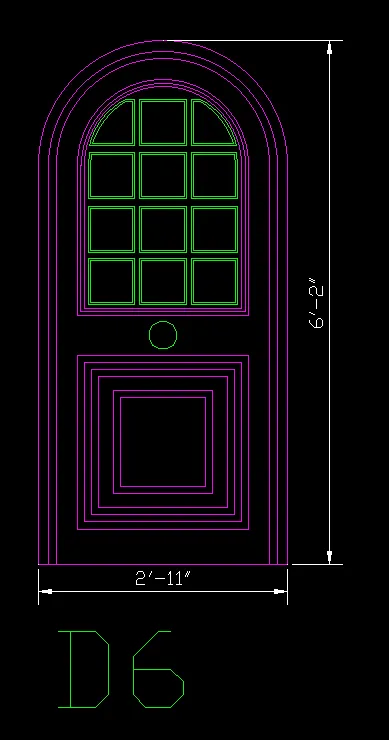
SKETCHING THE D6 DOOR:
RECTANGLE:
COMMAND: REC>
Creating the door frame with a dimension of 2'-11" x 6'-2"
ARC:
Create the ARC for the door
invoking the tool:
HOME> ARC> START CENTER END>
Selected the required arc type and created the ARC on the door.
OFFSET:
command: OF>
Offset the door frame as 5" and 2" and patterns are created by offsetting the rectangles and ARC patterns
Creating by using the Rectangle and ARC tool.
DIMENSIONS:
COMMAND: DIMLIN>
Plot the dimension of the door.
5. Create each shape as a block as shown in the Figure. Save the block and insert them on the table as shown in the Figure.
AIM:
To Create each shape as a block as shown in the figure, and save the drawing as a block and insert it on the table.
REQUIRED TOOLS:
LINE
FILLET
DIMENSIONS
TEXT
PROCEDURE:
Setting out the dimensions and units, start the drawing,
LINE:
COMMAND:L>
Create the line with the given dimensions and selected thickness of the line.
FILLET:
COMMAND: F>
Given the radius as 18
Hooks are created by using the FILLET tool
DIMENSIONS:
COMMAND: DIMLIN>
Plotting the dimensions of the bars by selecting points.
Hoock length is written by using the text command
Command: MT>
select the place where the text is required and change the FONT style of the text as TIMES NEW ROMAN
BLOCK:
Converting the drawn figures into BLOCK
Naming the blocks with the dia of the bar
TABLE:
Creating the table by using LINE and OFFSET tool
INSERT:
Invoking the tool:
COMMAND: I>
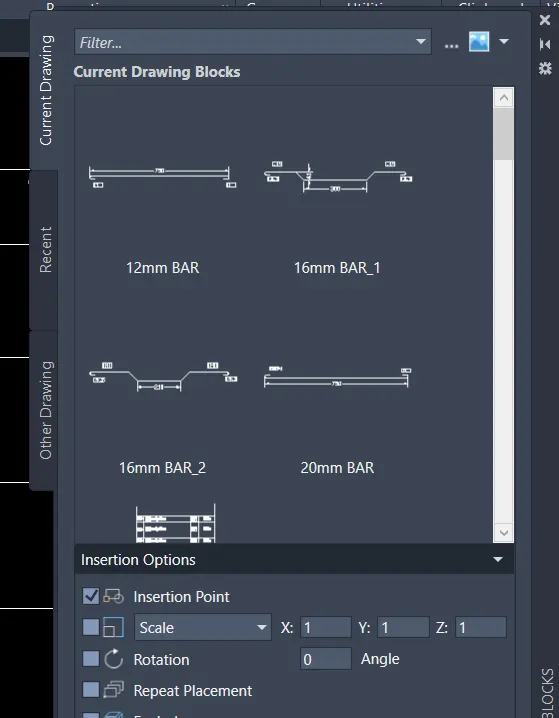
Select blocks and insert them on the table at the respective places
TEXT:
command: MT>
Select the place to write the data and choose the FONT style as ARIAL.
RESULT:
Creating the Bar Bending Schedule by using various tools and commands.