Creating Bar Bending schedule, Different Door types, and Creation of standard drawing templates using AutoCad
1)
AIM:
-To create the templates and need to take the size of title block as per industry standards.
-And need to save them as a block names as Customi_titlebox and Custom_titlebox.
INTRODUCTION:
• Drawing template files are drawings that store styles, settings, layers, and layouts in a drawing including title blocks.
• When you create a new drawing based on a drawing template, the new drawing gets a copy of the styles in the template, but it is a one-time copy.
COMMANDS USED:
• Limits command,Single Text command,Line command,Dimlinear command,Trim command,Object snap command,Offset command,Units command,Dimstyle command,Extend command, Block command
PROCEDURE:
Step:-1
First we need to draw the line horizontal line with the length of 66.63mm
• Next we need to draw the line vertically upwards with the length of 158mm.
• Next again draw the line horizontally backwards with the length of 66.63mm.
• Next join the previous line and the first line to form a rectangle.
• Next we take the first row of offset with the length of 5mm at the top.
• Next we draw the second row of offset with the length of 10mm.
• Next we draw the third row of offset with the length of 5mm.
• Draw the fourth row of offset with the length of 5mm.
• Draw the fifth row of offset with the length of 8mm.
• Draw the sixth row of offset with the length of 30mm.
• Draw the seventh row of offset with the length of 15mm.
• Draw the eighth row of offset with the length of 15mm.
• Draw the 9 th row of offset with the length of 20mm.
• Draw the 10th row of offset with the length of 20mm.
• Draw the 11th row of offset with the length of 10mm.
• Draw the 12th row of offset with the length of 15mm.
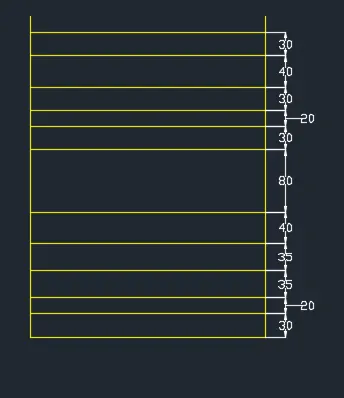
• Next we need to draw remaining rows and columns required in the drawing.
• Next we use the single text command to write the text in the rows and columns where ever required.
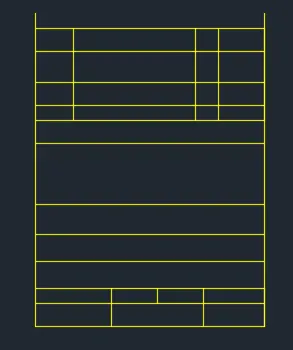
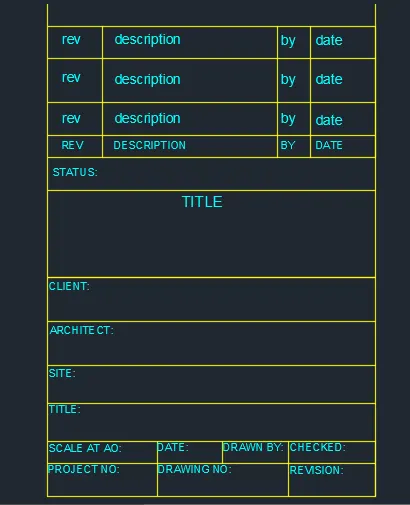
• After entering the texts we need to save the title box as a block with the name as Customi_titlebox.
• We use the block command to save the title box as a block, as shown in the below picture.
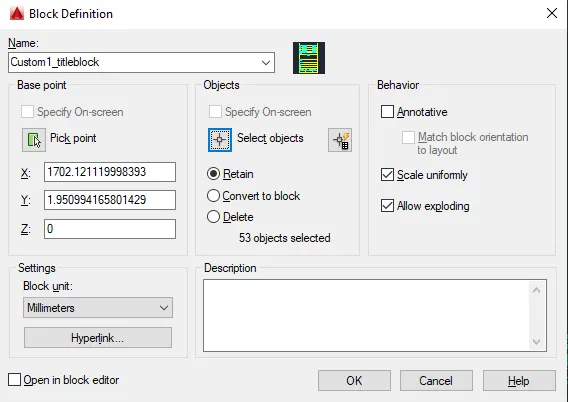
• Now enter the block command in the command box.
• Next click the pick point and pick the point of the title box • Next select the objects in the figure and press enter.
• Then select the option 'convert to box'.
• Next we have to turn on the scale uniformly!
• Then after press the ok buttom to finish.
• Finally the title box is created as a block with the name as Custom1_titlebox.
'
Step:-2
• First we have to draw the horizontal line with the length of 252mm.
• Next we have to draw the vertical line from previous line with the length of 46mm.
• Next again draw the horizontal line from the previous line with the length of 252mm.
• Next we join the first line and the last line at the left side of the figure.
• Next we have to draw the rectangle at the right corner of the figure at the top.
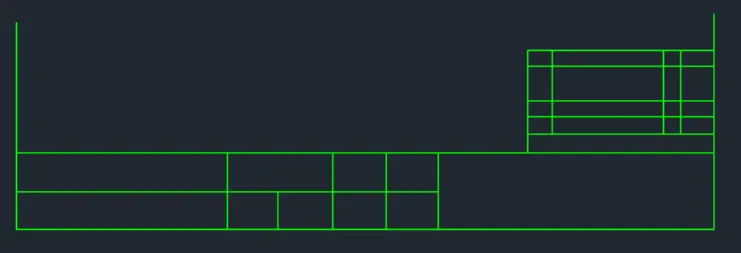
• Next we need to draw remaining rows and columns required in the drawing.
• Next we use the single text command to write the text in the rows and columns where ever required.
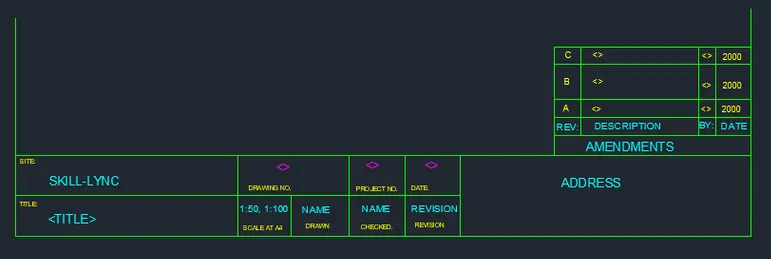
• After entering the texts we need to save the title box as a block with the name as Customi_titlebox.
• We use the block command to save the title box as a block, as shown in the below picture.
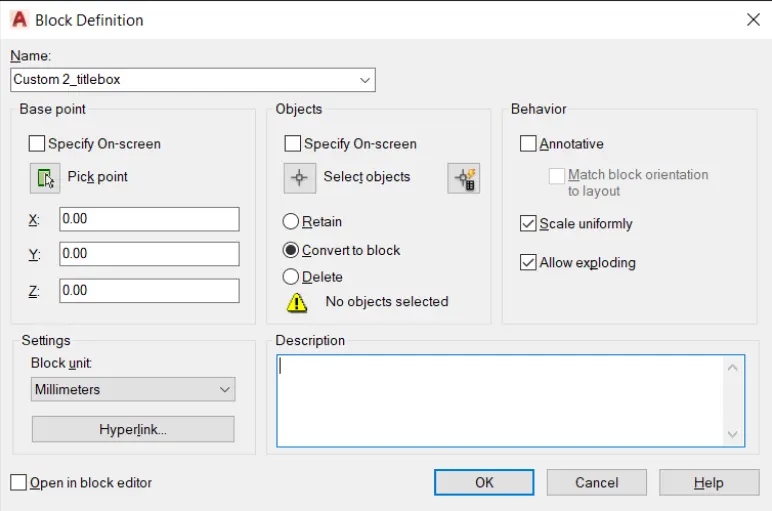
• Now enter the block command in the command box.
• Next click the pick point and pick the point of the title box.
• Next select the objects in the figure and press enter.
• Then select the option 'convert to box'.
• Next we have to turn on the scale uniformly.
• Then after press the ok buttom to finish.
• Finally the title box is created as a block with the name as Custom 2_titlebox.
OUTPUT:
-The required templates are created
2)
AIM:
To create the doors type for warehouse and need to create each door type as per standard size. And to create the blocks of door type after creating them.
INTRODUCTION:
• Doors are drawn in plan view as a heavy line in small-scale drawings, or as a double line, to indicate their thickness, in larger-scaled plans.
• A swing door has a thinner curved line drawn to denote the direction of its swing.
• The drawings of doors are drawn by the architects in the construction projects.
COMMANDS USED: Limits command,Single Text command, Line command ,Dimlinear command,Trim command,Line weight command,Line type command.Object snap command,Offset command,Units command,Dimstyle command,Extend command,Block command
PROCEDURE:
Door 1:
• First we draw the line with the length of 2300mm horizontally forward.
• Next we need to draw the vertical line upwards with the length of 2750mm.
Again draw the line horizontally backwards at the top with the length of 2330mm.
• Next join the first line and the previous line to form the rectangle.
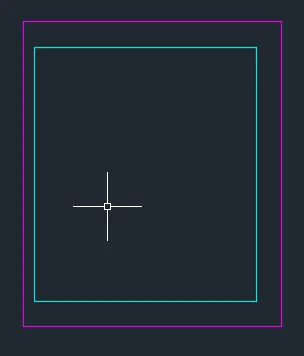
• Next draw the lines inside the rectangle with equal distance of line to line.
• Then next do the offset for the lines with the length of 50mm.
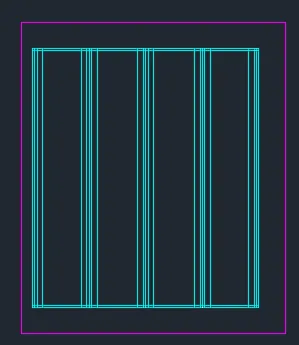
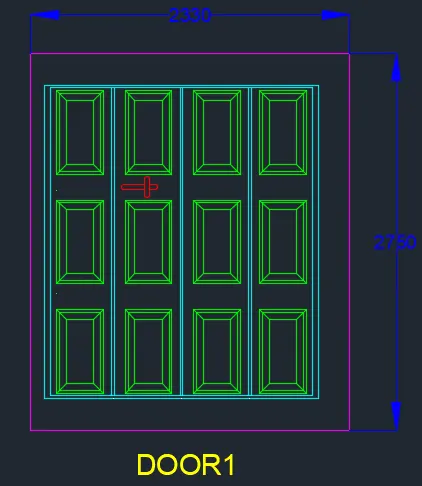
• Next we have to draw the rectangle boxes on the door as shown in the below figure.
• Next we have to put the dimensions in the drawing.
• And also give the name for the door using the single text command.
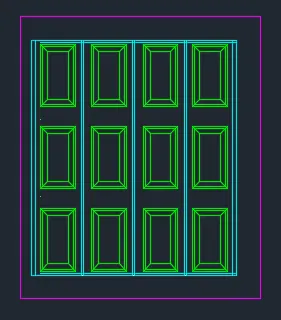
•Take rectangle command
• Specify corner point anywhere and dimension , Length as 300, Width as 50 . Enter
• Take rectangle command and Specify corner point anywhere , enter dimension Length as 50, Width as 150 Enter , Take fillet option , Multiple Use the fillet command to provide the arc at both the ends of rectangle
• Move the another rectangle and place in proper positon as it will show handle as shown below 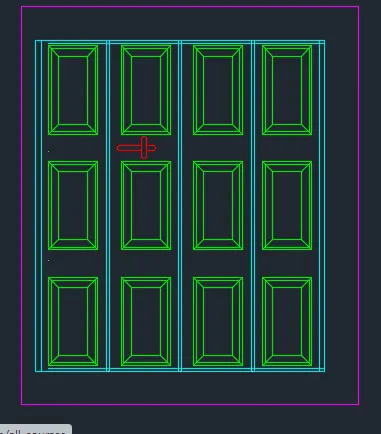
• Select Text Style and type Door 1
•Then select linear dimensions and Provide required dimension.
• After entering the texts we need to save the door as a block with the name as DOOR-1.
• Next we use the block command to create the block for the door we drawn in autocad.
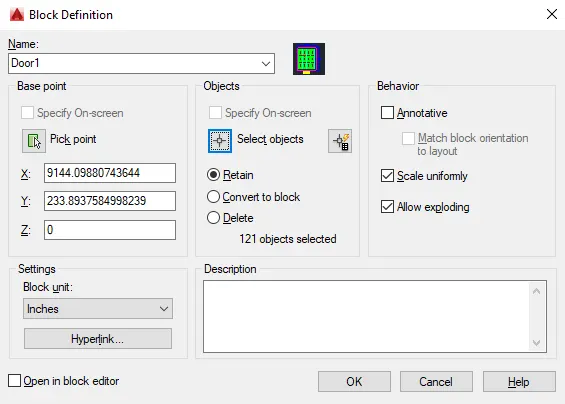
• Next click the pick point and pick the point of the door.
• Next select the objects in the figure and press enter.
• Then select the option 'convert to box'.
• Next we have to turn on the scale uniformly.
• Then after press the ok buttom to finish.
• The block is created for the door drawn in the autocad as shown in the below figure.
Door 2:
• First we draw the line with the length of 2300mm horizontally forward.
• Next we need to draw the vertical line upwards with the length of 2750mm.
• Again draw the line horizontally backwards at the top with the length of 2330mm.
• Next join the first line and the previous line to form the rectangle.
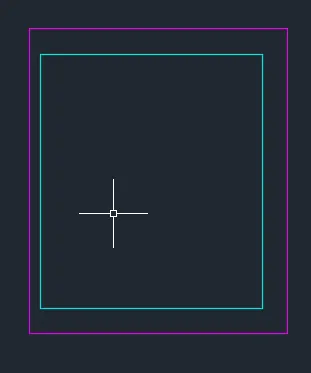
. Next draw the lines inside the rectangle with equal distance of line to line .
Then next do the offset for the lines with the length of 50mm
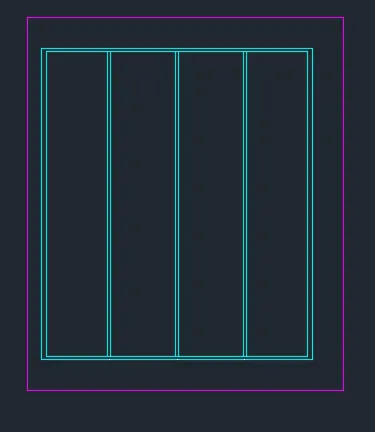
. Next we have to put the dimensions in the drawing .
And also give the name for the door using the single text command
•Take rectangle command
• Specify corner point anywhere and dimension , Length as 300, Width as 50 . Enter
• Take rectangle command and Specify corner point anywhere , enter dimension Length as 50, Width as 150 Enter , Take fillet option , Multiple Use the fillet command to provide the arc at both the ends of rectangle
• Move the another rectangle and place in proper positon as it will show handle as shown below
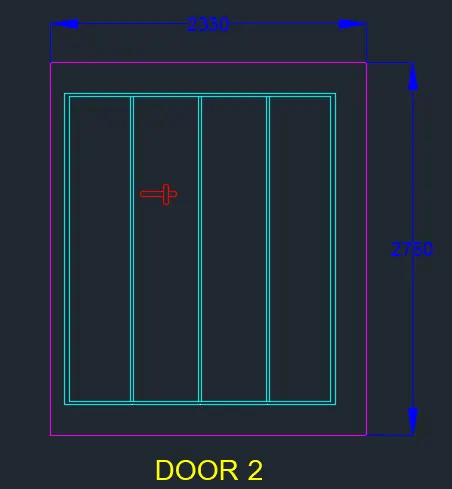
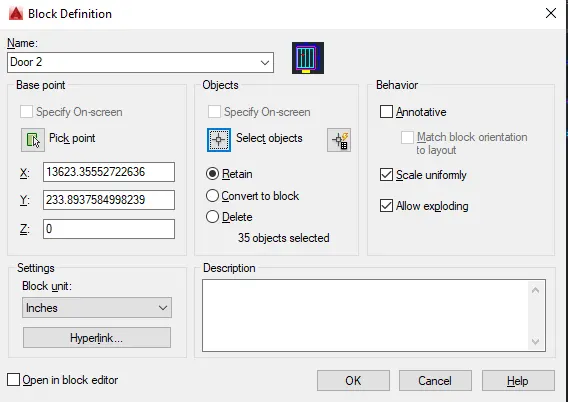
• After entering the texts we need to save the door as a block with the name as DOOR-2.
• Next we use the block command to create the block for the door we drawn in autocad.
• Next click the pick point and pick the point of the door.
• Next select the objects in the figure and press enter.
• Then select the option 'convert to box'.
• Next we have to turn on the 'scale uniformly
• Then after press the ok buttom to finish.
• The block is created for the door drawn in the autocad as shown in the below figure.
OUTPUT:
- Door type as per standard size or given dimensions.
3)
Aim:
To create electrical legend
1. Create each electrical symbol
2. Creating them as block
3. Arranging them in legends
Introduction:
-An electrical drawing is a type of technical drawing that provides visual representation describing electrical - systems or circuits
-They are sometimes referred to as wiring diagrams and are used to explain the design to electricians or other workers who will use them to help install or repair electrical systems.
Procedure:
Creating electrical symbols Single gang switch:
Draw a circle of radius 64mm and with line draw an inclined line vertical and horizontal line perpendicular to the inclined as required.

Double gang switch:
Draw circle and draw two horizontal lines and a vertical incline line. Triple gang switch: Draw circle, 1 vertical incline line and three horizontal lines.

Triple gang switch:
Draw circle, 1 vertical incline line and three horizontal lines.

Single two-way switch:
Draw same as single gang switch and with donout command give internal dia as zero and for external diameter select it in the circle.

Double two way switch:
Draw same as double gang switch and create donout.

Triple two-way switch:
Draw same as triple gang switch and create donout.

Switch cross:
Create a circle and donout inside and with line command draw an inclined vertical and perpendicular horizontal. Mirror the line in both directions.

Switch serial:
Copy the switch cross and delete two bottom lines, remove the donout also.

Single socket:
Create a circle, divide it into half and draw a line at the top.

Single socket for lamp:
From the single socket, draw a horizontal line perpendicular to vertical

Double socket:
Draw the single socket and copy it to create same and place it using snap on.

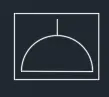
Floor socket single:
Draw a rectangle surrounding single socket.
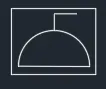
Floor single socket for lamp:
Draw a rectangle surrounding single socket for lamp
Floor socket double:
Create two single socket and place a rectangle surrounding it.
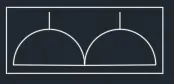
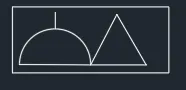
Floor socket single telephone:
Draw a single socket, a triangle and surrounded by a rectangle.
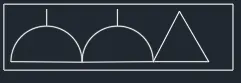
Floor socket double telephone:
draw 2 single socket and a triangle surrounded by a rectangle.
Telephone socket:
Draw a triangle

Internet socket:
Insert text "i" in the triangle.

Tv socket:
Insert text "TV' in the triangle.

Weatherproof socket:
Insert text "w" in the triangle.

Duct base section:
Draw a rectangle - select the bottom grip point - select add vertex - then pull the vertex to create a bend, with line draw the lines.
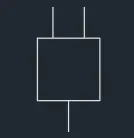
Wall bracket:
With rectangle draw the base, create a circle, draw a line connecting the rectangle and circle, draw a cross line inside the circle.
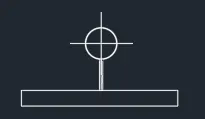
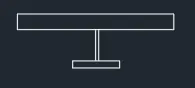
Picture lamp:
draw two rectangles connected by a line as shown
Creating them as block: Command "B" give name as single gang switch-pick a point - select object (created single gang switch) - tick scale uniformly and allow exploding options.
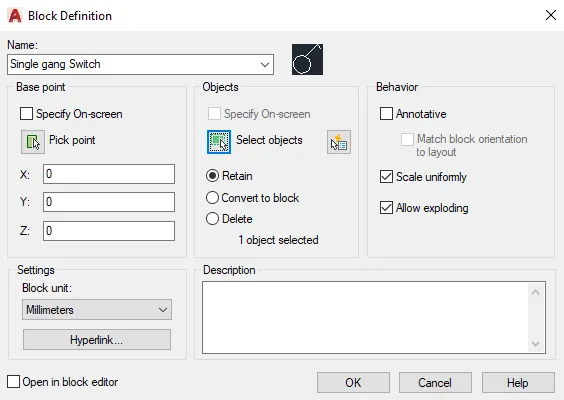
Similarly define each one of them as block giving the respective names.
Do the same procedure for the remaining symbols.
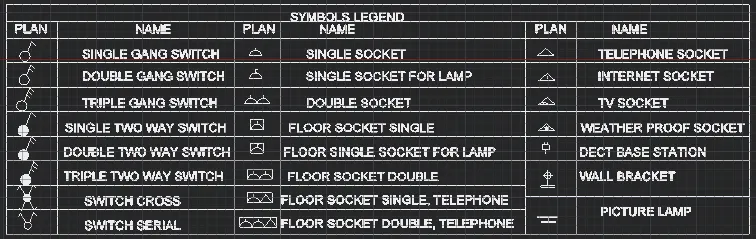
Creating and arranging hem in layers: First create a rectangular table having 10 rows and 6 columns.
Place each of the blocks in the respective rows and columns.
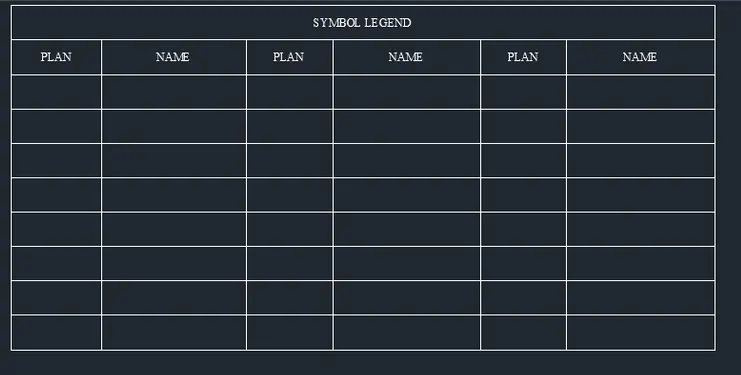
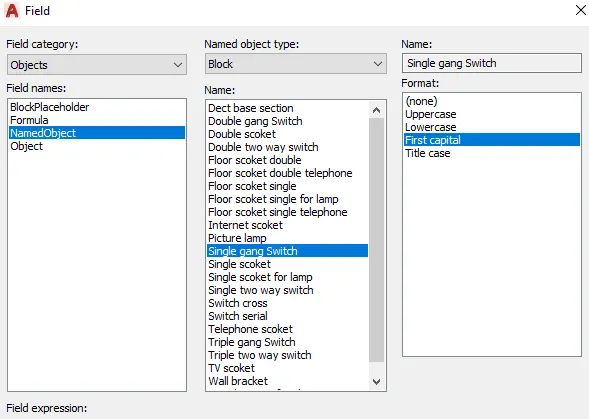
To enter text with the block from the insert tab-select field-select object -select block.
E.g.: for single gang switch - select from the field. - select uppercase in format
OUTPUT:
- Arrangement of created blocks in the legend as shown in the Figure.
4)
Aim:
To draw the doors of residential project and create it as block
INTRODUCTION:
• Doors are drawn in plan view as a heavy line in small-scale drawings, or as a double line, to indicate their thickness, in larger-scaled plans.
• A swing door has a thinner curved line drawn to denote the direction of its swing.
• The drawings of doors are drawn by the architects in the construction projects.
Procedure:
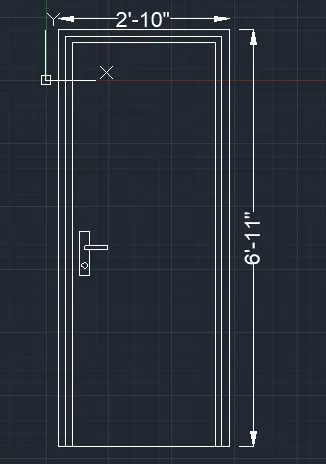
1). D1 - 2'10" x 6'11":
Draw rectangle with dimension 2'10" and 6'11".
Draw offset 1.5" for frame.Draw offset 1" for shutter.
Draw lock by two rectangles perpendicular to each other and fillet the corners with radius 0.1"and circle.
Write text by multiline text "D1".
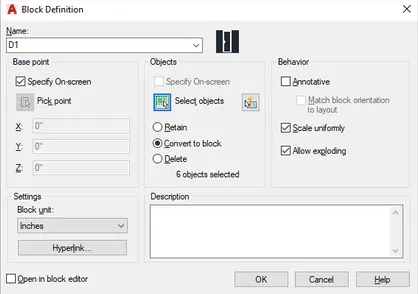
Create it as block "B"- give name as "type-D1" -pick a corner point- select the object. then block is created.
2). D2 - 3'4" x 6'11":
Draw rectangle with dimension 3'4" and 6'11".Draw offset 1.5" for frame.
Draw offset 1" for shutter.
Draw rectangle for panel 1'11" and 29.1", then offset 1" two times.
Draw a rectangle 5.4" x 5.7", offset 0.3".
Copy it with copy command "co" - select mode - select the rectangle-select array-enter no: of array as 3-place it as required.
Copy the 3 rectangles to 4 rows.
For the second panel draw a rectangle of 1'11" x 2'0.6". Offset 1" 3 times
Draw another rectangle inside this of 1'0.8" x 1' 1.2" and offset 1".
Draw lock by circle in between the two panels.Write text by multiline text "D2".
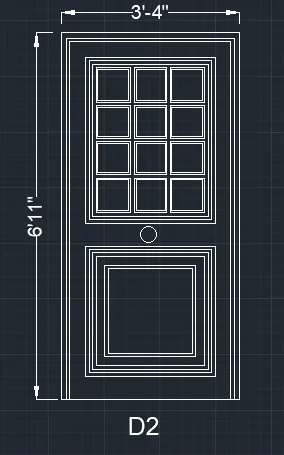
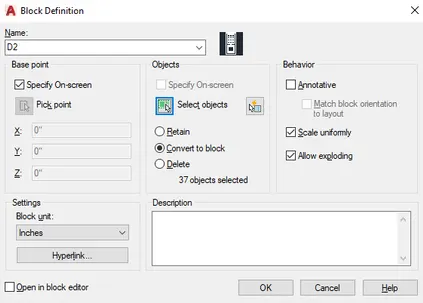
Create it as block "B"- give name as "type-D2"-pick a corner point- select the object, then block is created.
3). D3 -2'9" X 6'11":
Draw a rectangle of 2'9" X 6'11". Offset 1" for thickness,2"offset for frame, 1" thickness.
Offset 1.5" as shutter thickness.
Draw a rectangle at the top for ventilation 1'3" x 9.3", give offset 1" for thickness.
Hatch inside the rectangle.
Create lock by rectangle two of them, perpendicular to each other and a circle.
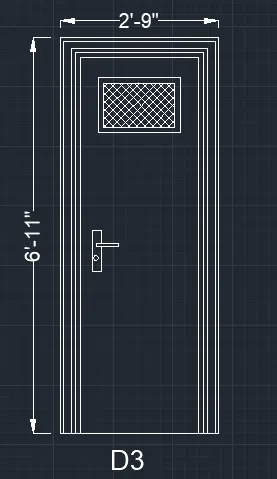
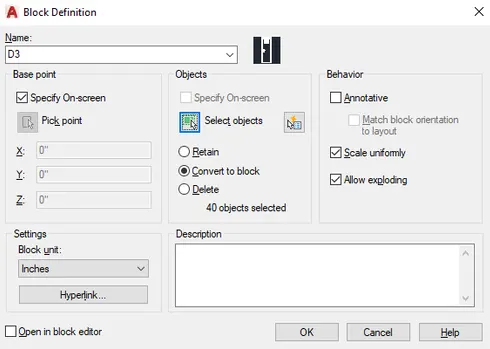
Create it as a block Command "B" - give name as type d3-pick point- select object -tick scale uniformly and explode all.
4). D4 - 3'9" x 87":
Draw rectangle "REC" of dimension 3'9" X 6'10".
Explode it and create an arc with 2-point method with both point as the endpoints.
Offset the arc and the line with 1.5" and then 1".
Offset 8" from arc and rectangle for panel and divide it into two.
Take 1" offset 2 times to show the thickness on top figure and bottom rectangle
Create rectangles inside the panel. For lock, create a circle.
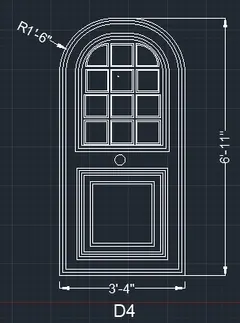
Make it a block, name as type D4 - pick a point and select the object tick the dialogue box of uniform scale and explode all.
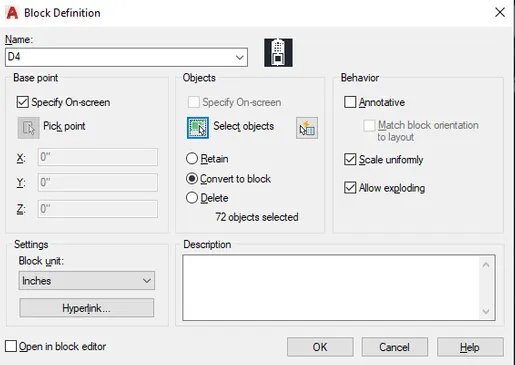
5). D5 - 3'5" X 6'8":
Draw a rectangle of 3'5" X 6'8"Offset 1.5" for frame.
Offset l" as shutter thickness.
Create another rectangle inside with offset 4.4".
Create another rectangle on the bottom 2'2.9" x 22.6"Offset 1" two times for both rectangles.
Create rectangle inside for panels with offset 0.5".
Copy it for 3 columns and 4 rows.
Similarly copy it in bottom rectangle for 3 rows and 3 columns.
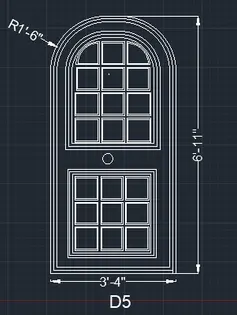
Create it as a block Command "B" - give name as type D5-pick point- select object -tick scale uniformly and explode all.
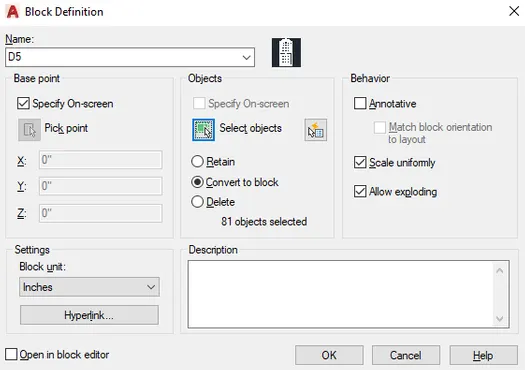
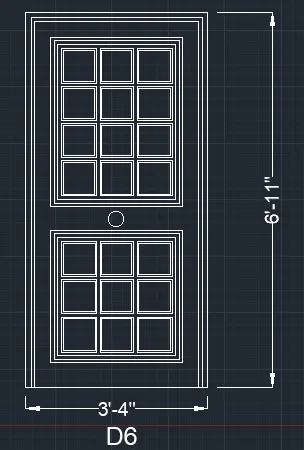
6). D6 - 3'5" x 7" 11.6":
Draw rectangle "REC" of dimension 3'5" x 7'11.6".
Explode it and create an arc with 2-point method with both point as the endpoints.
Offset the arc and the line with 1.5" and then 1" for frame.
Offset 8" from arc and rectangle for panel and divide it into two.
Take 1" offset 2 times to show the thickness on top figure and bottom rectangle.
Create rectangles inside the top panel, 3 row and 4 columns.
For bottom panel, offset the rectangles by 1" 3 time as and 3.3" and again 1"For lock, create a circle.
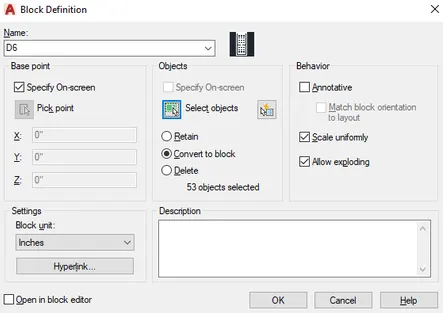
Make it a block , name as type D6-pick a point and select the object tick the dialgue box of uniform scale and explode all.
Make it a block , name as type D6-pick a point and select the object tick the dialgue box of uniform scale and explode all.
OUTPUT:
The door type for residential building as a block as per given dimensions (or assumed dimensions) as per industry standards.
5)
AIM:
Create each shape as a block
INTRODUCTION:
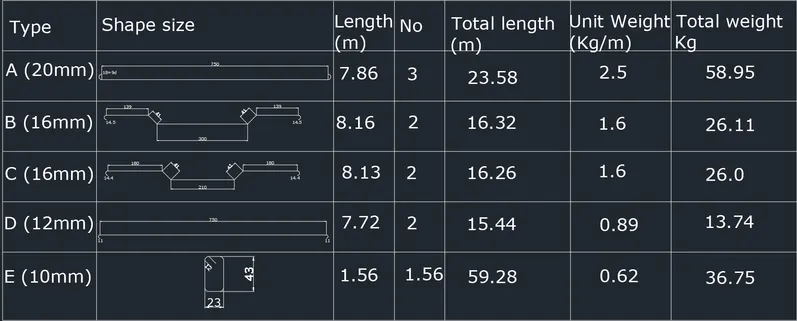
•Bar Bending Schedule (BBS) is basically the representation of bend shapes and cut length of bars as per structure drawings
•BBS is prepared from construction drawings
•For each member separate BBS is prepared because bars are bended in various shapes depending on the shape of member.
PROCEDURE:
creating bend bending diagrams.
type A
• draw a line of 750mm and a circle of radius at end points.

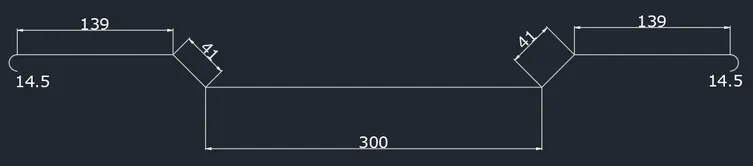
type B
• select a line first distance towards right is 139.
• next fidtance of 41 downwards at an angle 315.
• next distance at 150 at right side.
• draw a arc of radius 16 and a 14.5 length horizontal line arc end.
• select full object and mirror to get to opposite side.
type C
• select a line ,first distance towards right is 180
• next fidtance of 41 downwards at an angle 315.
• next distance at 105 at right side.
• draw a arc of radius 16 and a 14.4 length horizontal line arc end.
• select full object and mirror to get to opposite side

type D
• draw a line of 750 and a arc of 11 on both side.

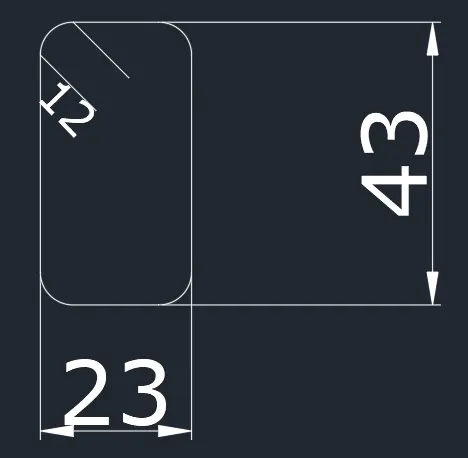
type E
• draw a rectangle of 23x43 and fillet with radius 5 and draw a hook of 12 on one side of fillet points.
Creating each of them as block by using Command -"B'- give name as A - pick a point- select the object - select delete - tick box of scale
uniformly and explode all.
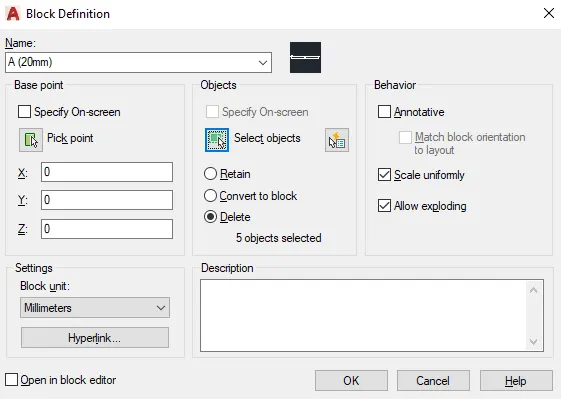
Similarly create 5 blocks: A,B,C,D,E and insert each of the bars as blocks.
Inserting blocks in the table
Create a table with rectangle and divide it into 6 rows and 7 columns With multiline text enter type, shape size, length, no, total length, unit
weight, total weight and all other text. By command Tinsert each of the block in respective columns.
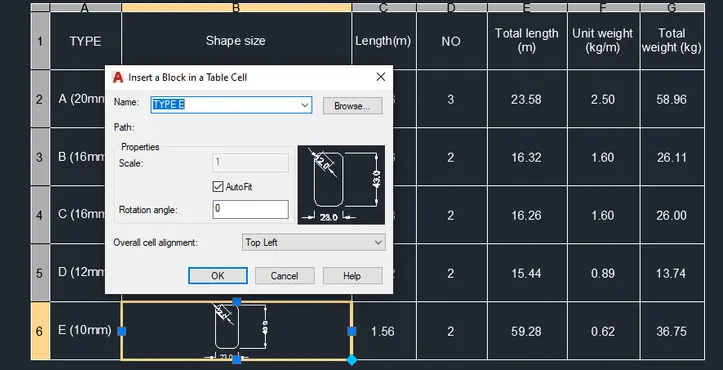
OUTPUT:
-Bar shape are drawmn with detail as a block as shown in the Figure.
-Save the block are saved and inserted in table as shown in the Figure