Creating Bar Bending schedule, Different Door types, and Creation of standard drawing templates using AutoCad
AIM:Create the doors type for warehouse.
INTRODUCTION: commonaly used door are roller shutter type made oup of steels.given two types of doors are usually used for warehouse or large industries.
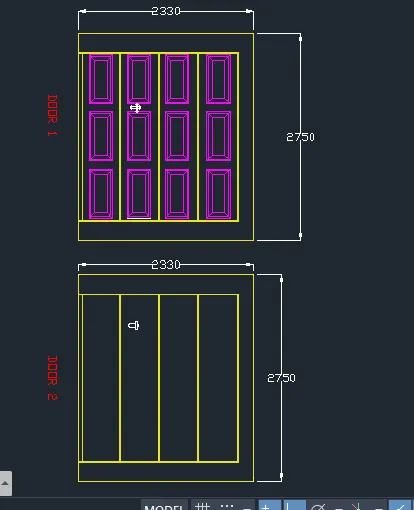
the dimension of given doors are 2330x2750 alone with frames.
block is defined as is a collection of objects that are combined into a single named object and can be instered as required place and times.
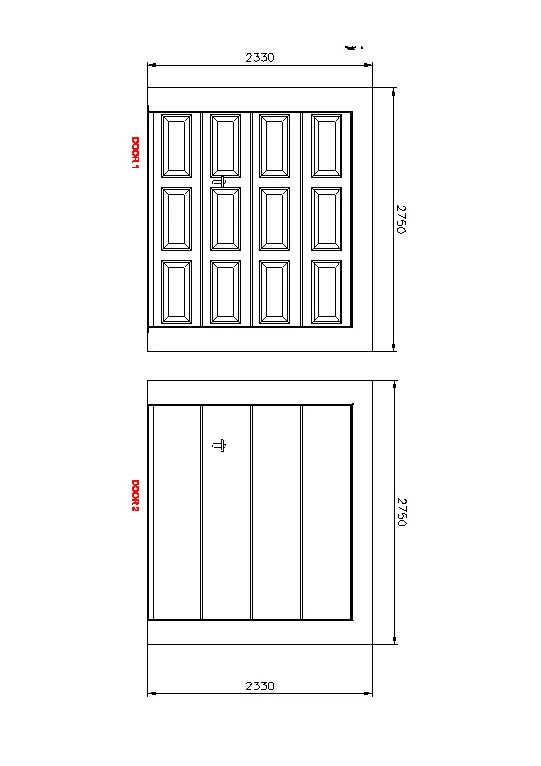
DOOR 1-
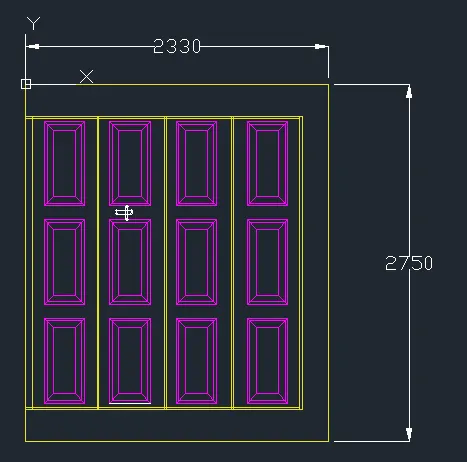
- set the units as decimal.
- set the limits and use zoom command to set page.
- ortho mode,osnap is on.
- select line and speify first coordinate as 2300 keeping cursor to right.
- specify next coordinate as 2750 keeping cursor towards north.
- next coordinate as 2300 keeping cursor to left.
- click on close command .
- select offset command and enter distance as 250.
- offset three sides of the door.
- offset at distance 20 to make panels.
- for making of rectangalur box portion inside, make a rectangle of 650x300.
- offset the rectangle at distance 20.
- repeat the offset comman and select second rectangle,enter distance 50.
- select the whole box and enter join command.
- select the whole box and specify pick point as center and place at center of each panels in 3 rows.
- for making door handle,use rectangle and fillet toll.
- select the dimensions tool and measure the sides.
- select mtext and specify height with 90 degree rotation and enter the name .
- create the layers for boxes,door frame and text.
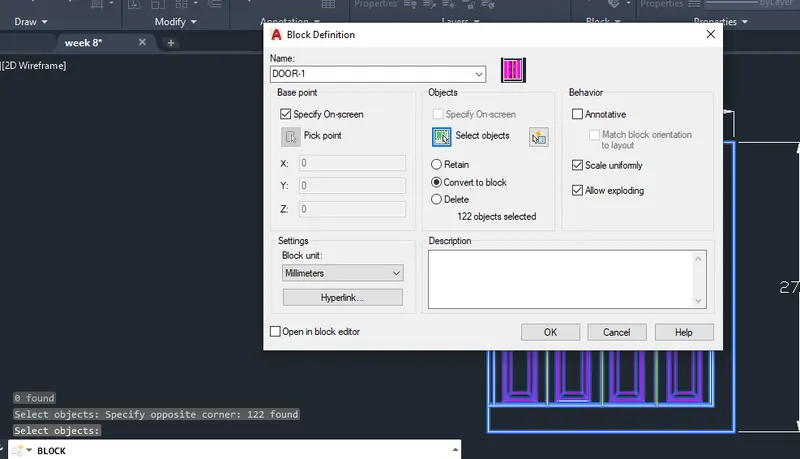
- for making an object block,enter B for block command- enter the name as DOOR-1.
- select base point as speicfy on screen.
- select the object from screen.
- select convert to block radiant.
- select always exploding and scale unifromity.
- enter ok.
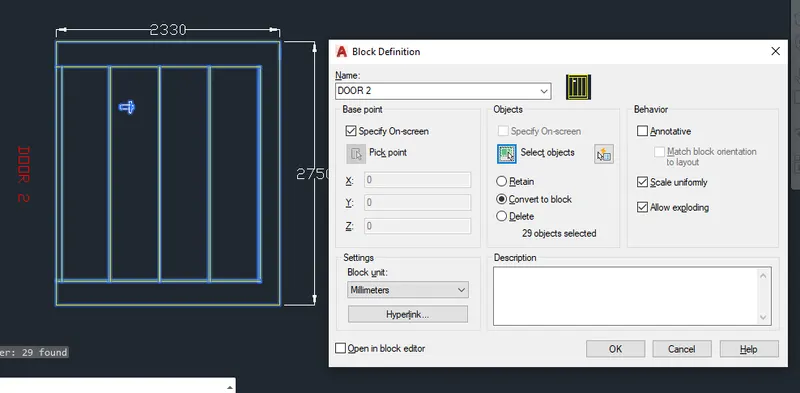
DOOR 2
- for making of door-2, drag all the end lines and panel lines from door -1.
- draw a horizontal line and offset at distance 2750.
- trim the unwanted lines.
- measure the distance using linear dimensions.
- for making an object block,enter B for block command- enter the name as DOOR-2.
- select base point as speicfy on screen.
- select the object from screen.
- select convert to block radiant.
- select always exploding and scale unifromity.
- enter ok.
RESULT:
AIM: Create the door type for residential building as a block.
INTRODUCTION: residential building as different doors depending on the usuage example:glazed door,sliding doors,pivot door etc.
PROCEDURE:
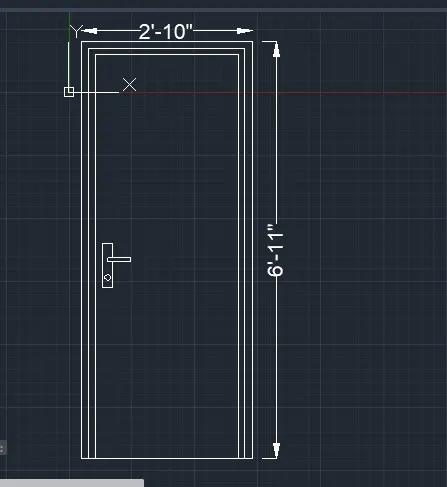
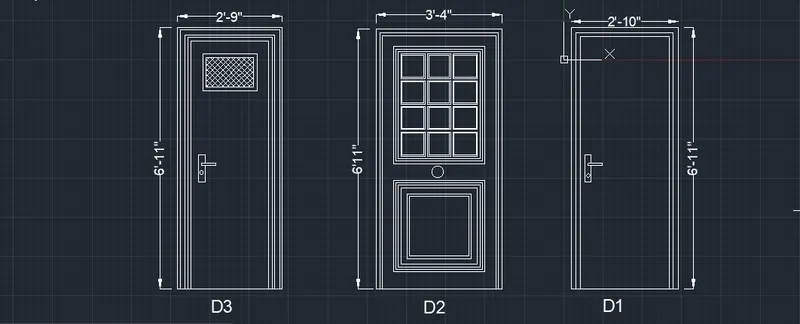
D1
- set the units in engineering with precision.
- select rectangle and enter dimensions as 6'11"x 2'10".
- select offset and enter distance as 2".
- select rectangle and offset.
- repeat the same for offset rcetangle.
- for making door handle use rectangle,fillet and circle command.
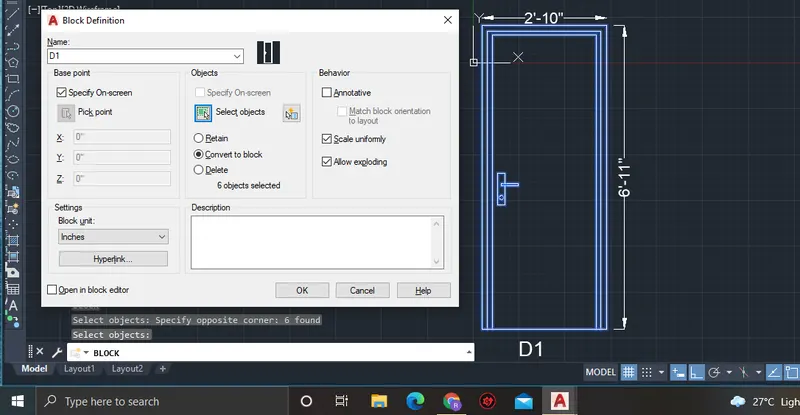
- for making an object block,enter B for block command- enter the name as D1.
- select base point as speicfy on screen.
- select the object from screen.
- select convert to block radiant.
- select always exploding and scale unifromity.
- enter ok.
D2
- select rectagle and enter distance as 6'11"x3'4".
- offset the rectangle at distance 2".
- repeat the command and offset second rectangle at distance 1".
- trim the bottom line and extend the lines.
- for making of upper frame portion,select rectangle and enter dimensions as 3'2"x2'4".
- offset the rectangle at distance 1",2" and 3".
- make a rectangle of diemension of 8"x8" at 4th recatngle top corner.
- offset the rectangle at distance 6".
- use rectangle array and select points,sepcify row as 4 and column as 3.
- for lower frame portion,make a rectangle of distance 3'2"x2'4".
- offset the rectangle at distances 1",2"3",5" and 6".
- on the geometric center,at center of rectangle make a circle of radius 2".
- use linear dimension for meausre.
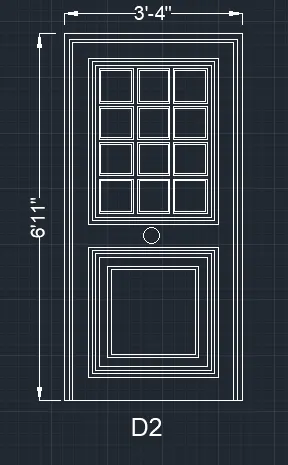
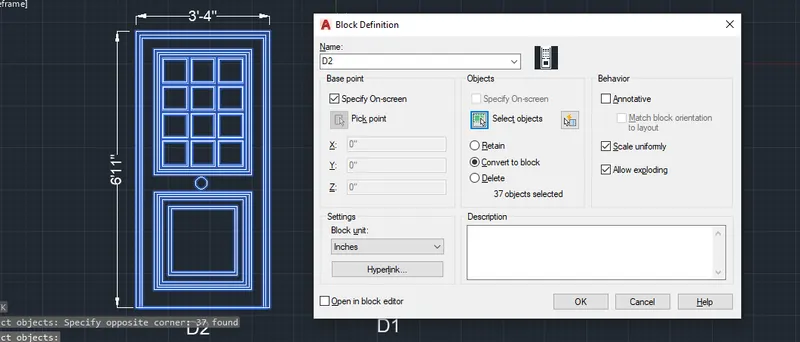
- for making an object block,enter B for block command- enter the name as D2.
- select base point as speicfy on screen.
- select the object from screen.
- select convert to block radiant.
- select always exploding and scale unifromity.
- enter ok.
D3
- make rectangle of dimensions 6'11"x2'9".
- offset the rectangle at distance 1",3"4" and 5".
- for inside frame,draw rectangle of side 1.5' each.
- offset the rectangle at distance 1".
- for door handle use line,fillet and circle.
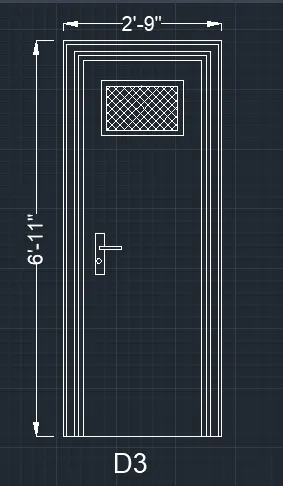
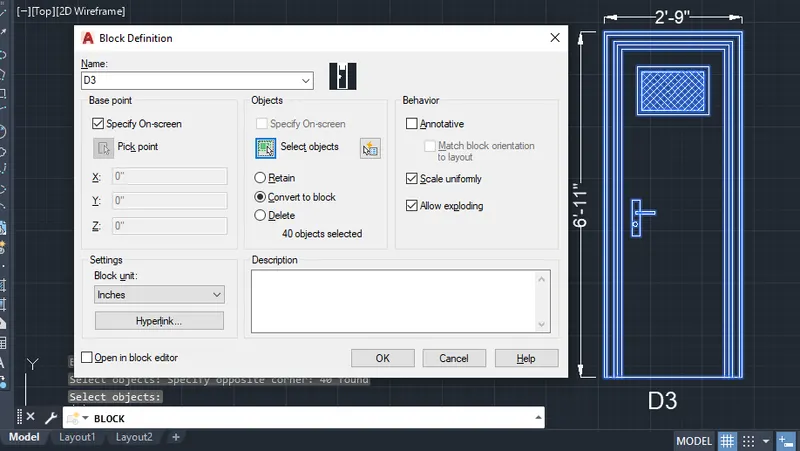
- for making an object block,enter B for block command- enter the name as D3.
- select base point as speicfy on screen.
- select the object from screen.
- select convert to block radiant.
- select always exploding and scale unifromity.
- enter ok.
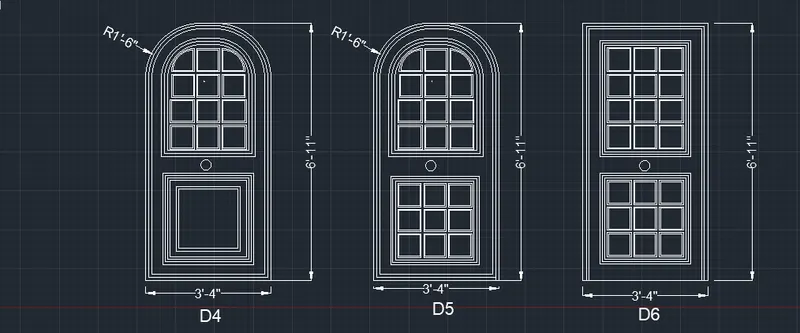
D4
- draw a rectangle of dimension 6'11"x3'4".
- select fillet command from modify tool,speicfy the radius as 1'6".
- select two sides of rectangle and fillet .
- select the obatined object and join.
- offset the object at distance 2",3",7",8" and 9".
- draw rectangle of sides of each 7".
- select the rectangle array and enter row=4 and column=3.
- fillet the top side rectangle.
- for bottom frame draw a rectangle of sides 2'5" each.
- offset the rectangle at distance 1",2"3",6" and 7".
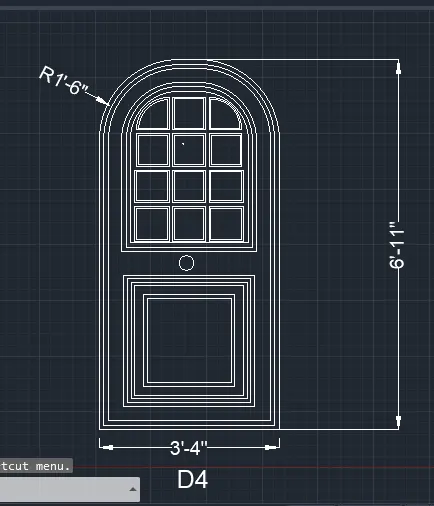
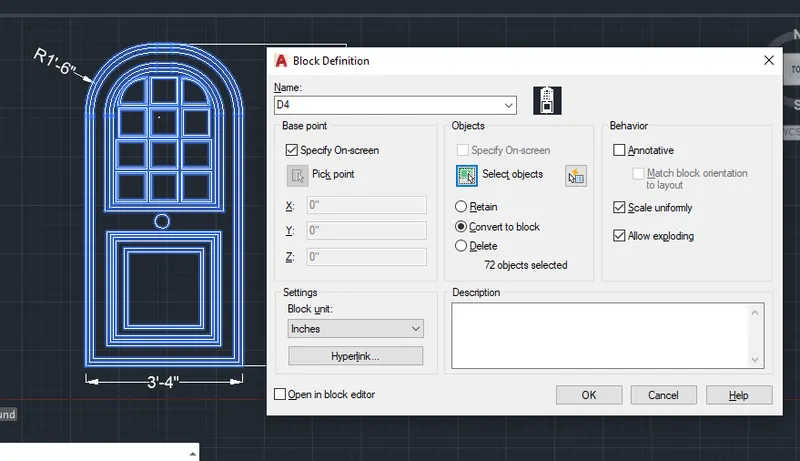
- for making an object block,enter B for block command- enter the name as D4.
- select base point as speicfy on screen.
- select the object from screen.
- select convert to block radiant.
- select always exploding and scale unifromity.
- enter ok.
D5
- draw a rectangle of dimension 6'11"x3'4".
- select fillet command from modify tool,speicfy the radius as 1'6".
- select two sides of rectangle and fillet .
- select the obatined object and join.
- offset the object at distance 2",3",7",8" and 9".
- draw rectangle of sides of each 7".
- select the rectangle array and enter row=4 and column=3.
- fillet the top side rectangle.
- for bottom frame,draw a rectangle of 2'5" each side, offset at distance 1",2" and 3".
- draw a rectangle of 8"x8" at corner.
- offset the rectangle at distance 0.5".
- now select rectnagle array and specify row and column as 3.
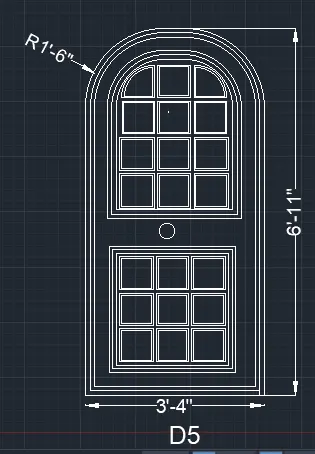
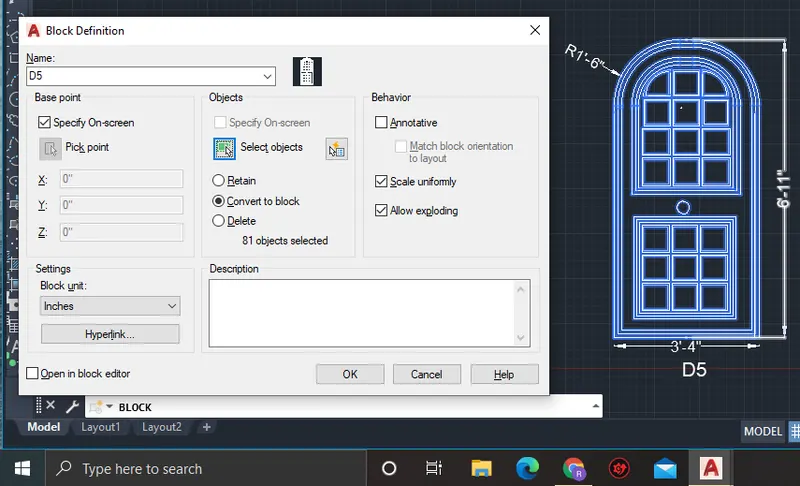
- for making an object block,enter B for block command- enter the name as D5.
- select base point as speicfy on screen.
- select the object from screen.
- select convert to block radiant.
- select always exploding and scale unifromity.
- enter ok.
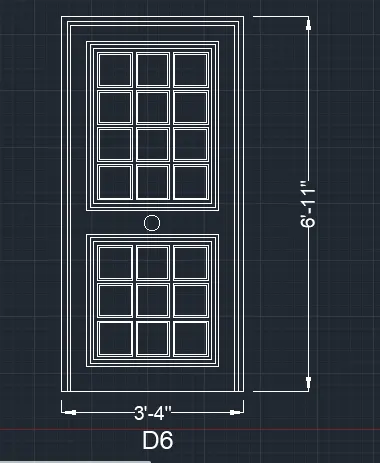
D6
- select rectagle and enter distance as 6'11"x3'4".
- offset the rectangle at distance 2".
- repeat the command and offset second rectangle at distance 1".
- trim the bottom line and extend the lines.
- for making of upper frame portion,select rectangle and enter dimensions as 3'2"x2'4".
- offset the rectangle at distance 1",2" and 3".
- make a rectangle of diemension of 8"x8" at 4th recatngle top corner.
- offset the rectangle at distance 6".
- use rectangle array and select points,sepcify row as 4 and column as 3.
- for bottom frame,draw a rectangle of 2'5" each side, offset at distance 1",2" and 3".
- draw a rectangle of 8"x8" at corner.
- offset the rectangle at distance 0.5".
- now select rectnagle array and specify row and column as 3.
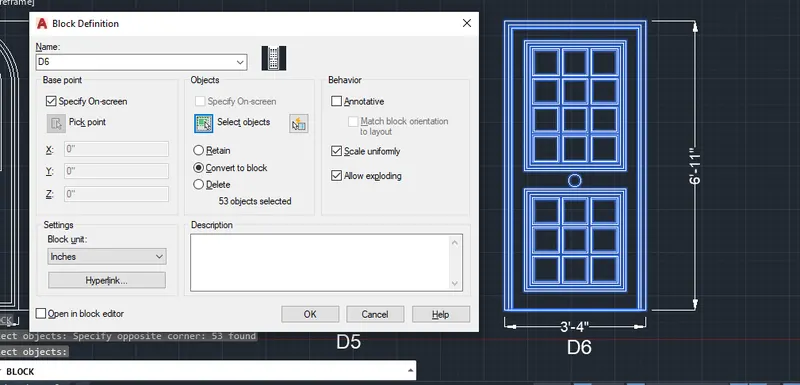
- for making an object block,enter B for block command- enter the name as D5.
- select base point as speicfy on screen.
- select the object from screen.
- select convert to block radiant.
- select always exploding and scale unifromity.
- enter ok.
RESULT:
AIM:Create the templates
INTRODUCTION: Take the size of the title block as per industry standards.
block is defined as is a collection of objects that are combined into a single named object and can be instered as required place and times.
PROCEDURE:
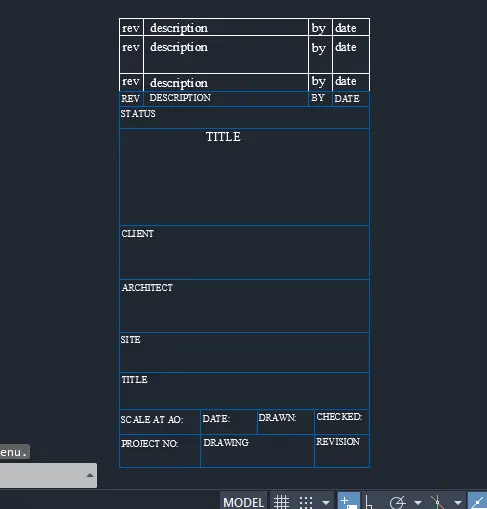
CUSTOM1_title block:
- type TAB for table command, create a table of rows 11 and column 2.
- edit the text command in table setting.
- select colums and merge.
- similarly for rows also select and merge.
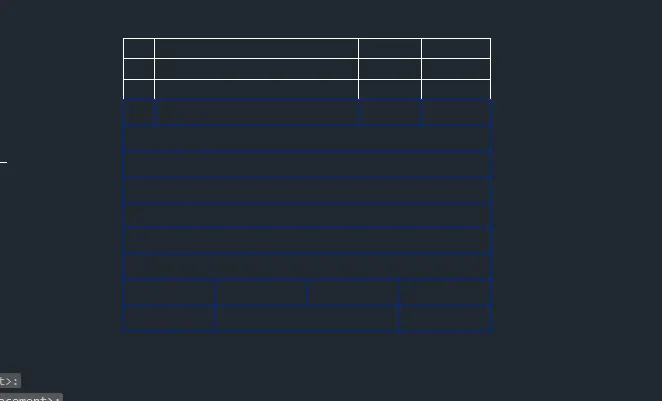
- select table and enter the data.
- for making an object block,enter B for block command- enter the name as CUSTOM1_title block.
- select base point as speicfy on screen.
- select the object from screen.
- select convert to block radiant.
- select always exploding and scale unifromity.
- enter ok.
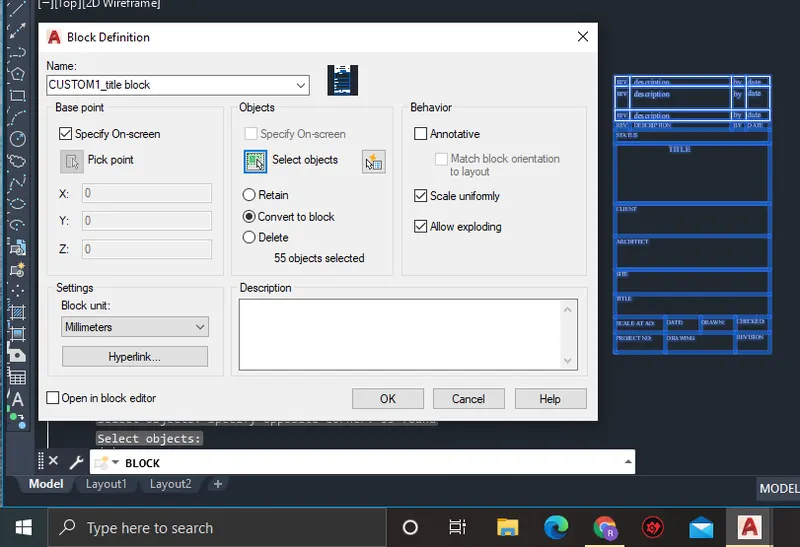
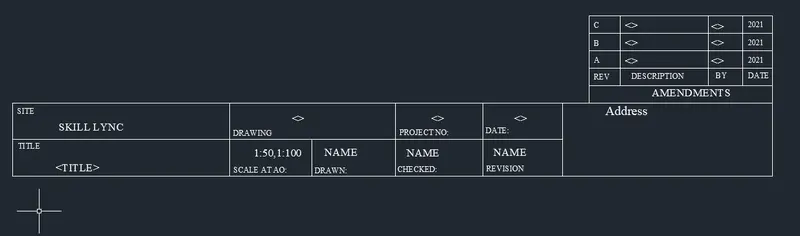
CUSTOM2_title block:
- type TAB for table command, create a table of rows 3 and column 4.
- repeat the command ,enter row=1 and column=6.
- edit the text command in table setting.
- select colums and merge.
- similarly for rows also select and merge.
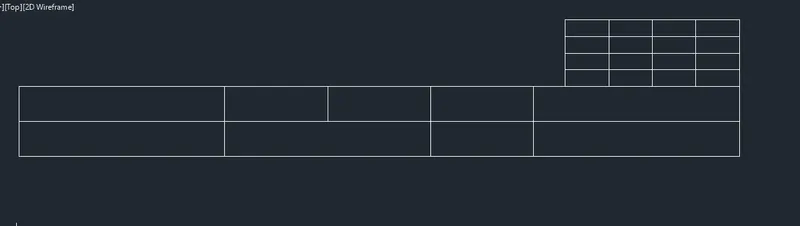
- select table and enter the data.
- for making an object block,enter B for block command- enter the name as CUSTOM2_title block.
- select base point as speicfy on screen.
- select the object from screen.
- select convert to block radiant.
- select always exploding and scale unifromity.
- enter ok.
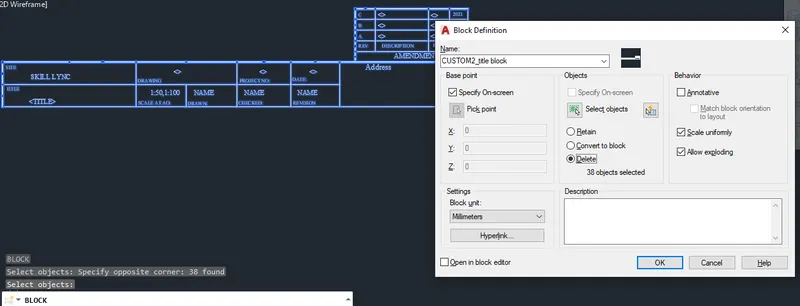
RESULT:
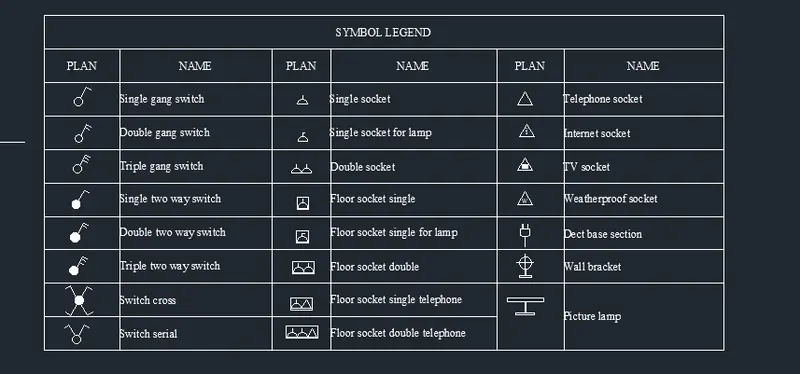
AIM:Create each symbol as a block with the name given in the legend
PROCEDURE:
creatio of each symbol and making them as block.
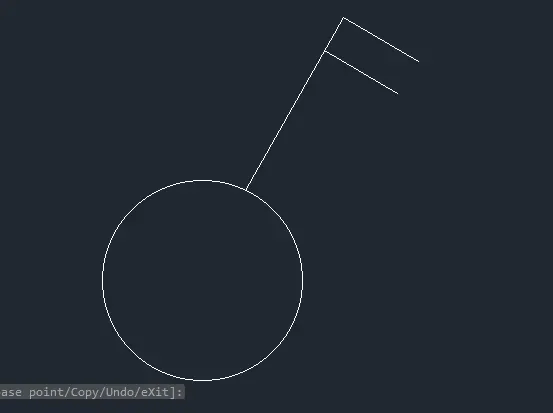
- for single gang switch- draw a circle 150 and a L line at 30 degree angle on circle.
- for double gang switch-from single gang draw a parallel horizontal line to L line.
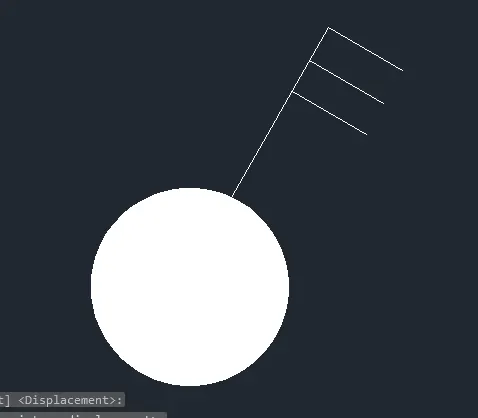
- for triple gang switch- draw one more parallel horizontal line for dounle gang.
- for single two-way switch- make a solid hatch for single switch.
- double two way switch- make a solid hatch to double gang switch.
- triple two way swicth- make a solid hatch to triple gang switch.
- switch cross- draw a circle with radius 150 and draw a x line intersection and trim the lines inside circle. solid hatch the circle.
- switch serial- from switch cross trim bottom cross line and remove solid hatch.





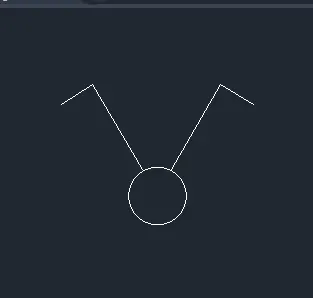
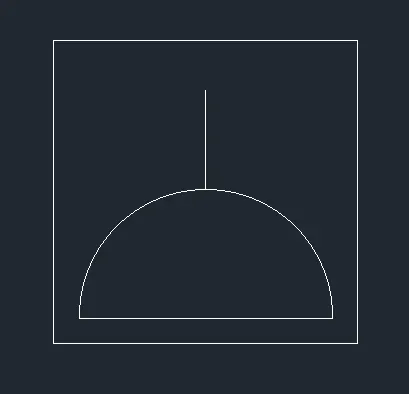
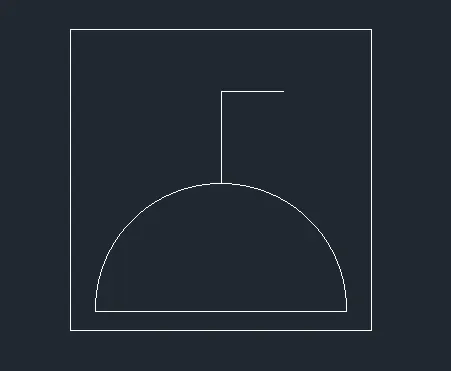
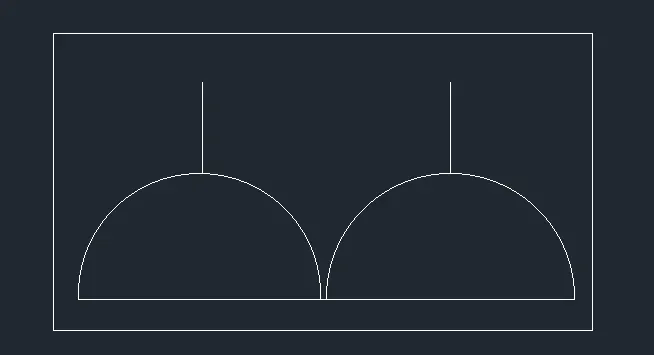
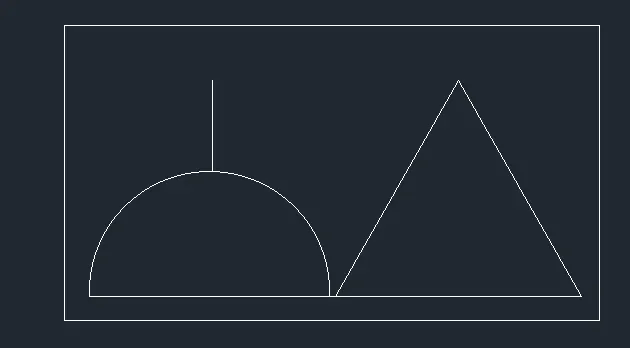
- single socket- draw a cricle and a hozintal line at cneter of cirrcle. trim the half circle and draw a vertical line at top of circle.
- single socket for lamp-from single socket, draw a horzintal line at end of vertical line.
- double socket-mirror the single socket and keep the refrence copy.
- floor socket single- draw a rectangle frame for single socket.
- floor single socket lamp- draw a rectangle frame for single socket for lamp.
- floor socket double- draw a rectangle frame for double socket.
- floor socket single telephone- draw a triangle for single socket and draw a rectangle frame .
- floor socket dpuble telephonne- draw a triangle for double socket and draw a rectangle frame.
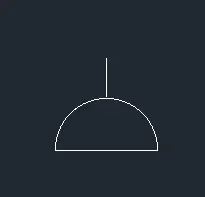
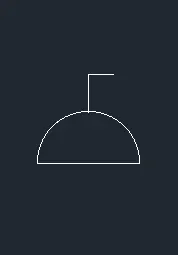
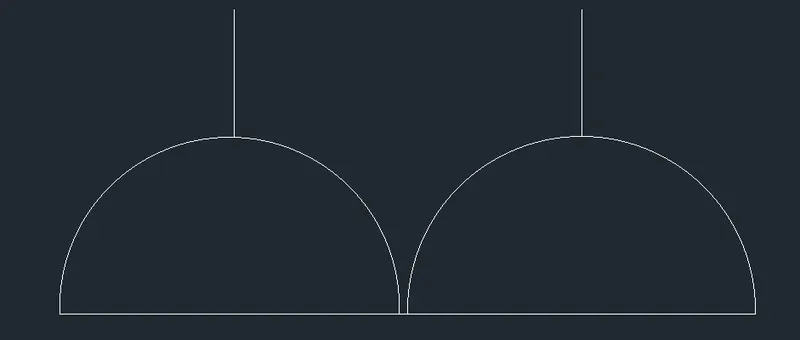
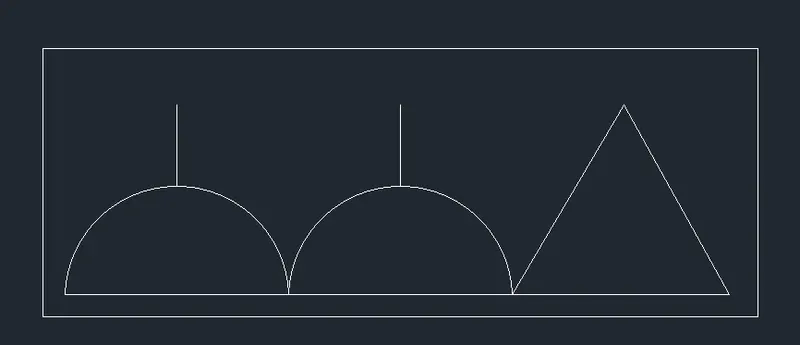
- telephone socket- draw a triangle.
- internet socket:insert a i text in triangle.
- tv socket- insert a TV text i triangle.
- weatherproof socket:insert W text inside triangle.
- duct base section-draw a rectangle,draw a center vertical line and offset both side. trim center line at top and offset line at bottom.
- wall bracket-draw a rectangle,create a circle and draw a + mark.
- picture lamp-draw a rectangle of differing size and connect both by line.




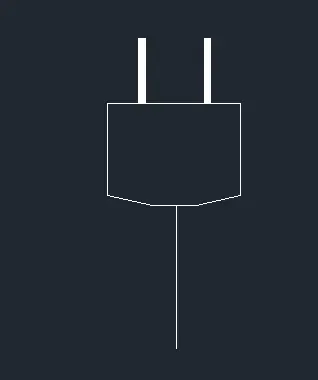
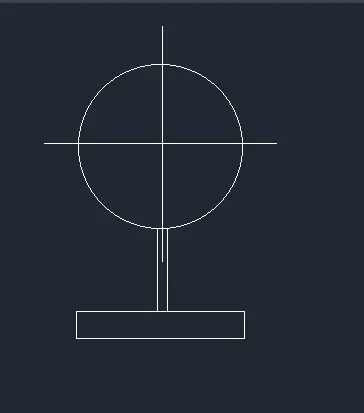
- creation of block:
- for making an object block,enter B for block command- enter the name as single switch.
- select base point as speicfy on screen.
- select the object from screen.
- select convert to block radiant.
- select always exploding and scale unifromity.
- enter ok.
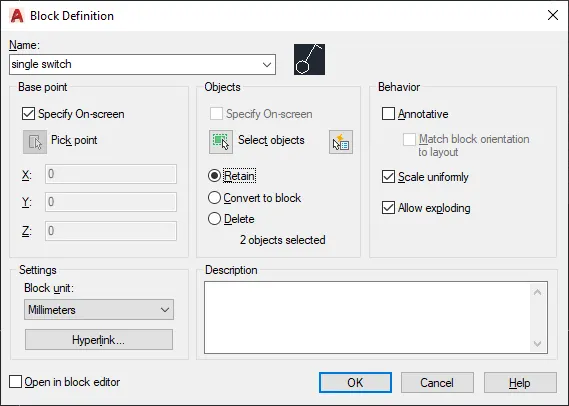
- similarly follow for all symbols.
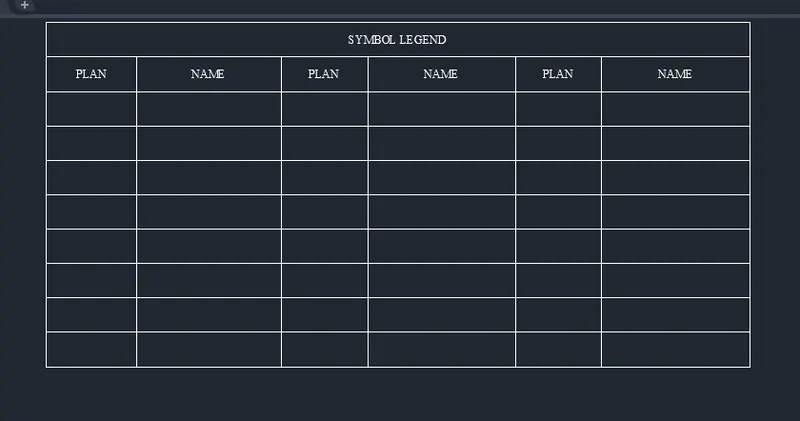
- for making table,select table command and enter row-8 and column as 6.
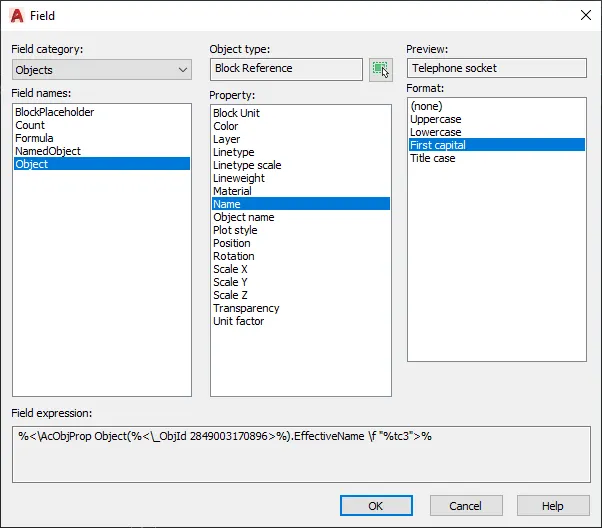
- for insertion of text in block,select field -then object-select block.
RESULT:
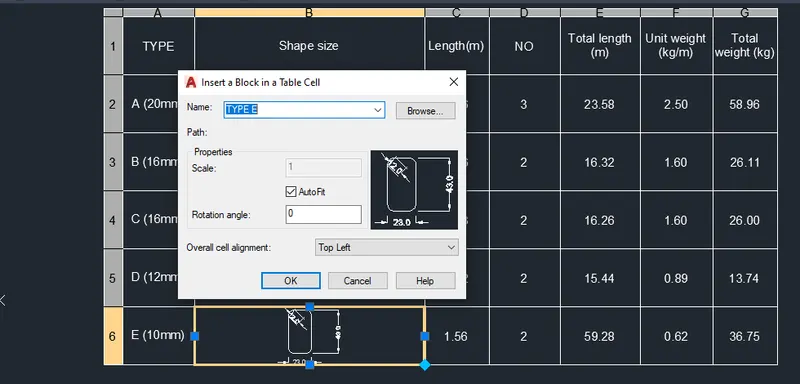
AIM:Create each shape as a block
PROCEDURE:
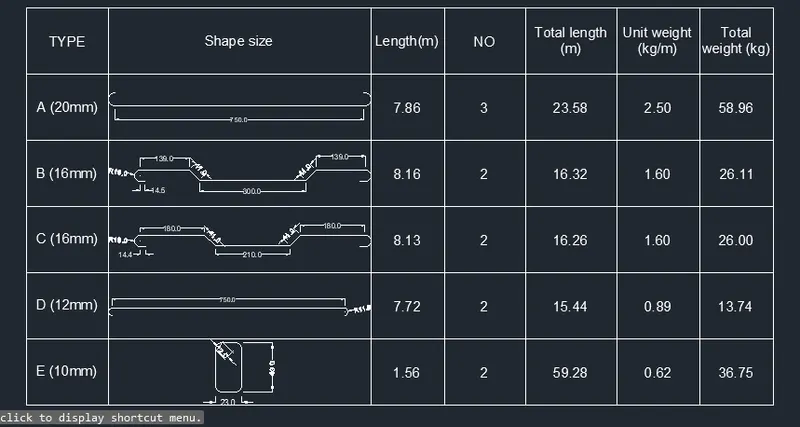
creating bend bending diagrams.
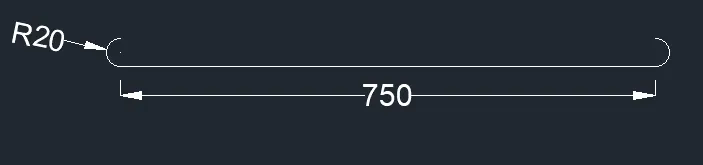
type A- draw a line of 750mm and a circle of radius at end points.
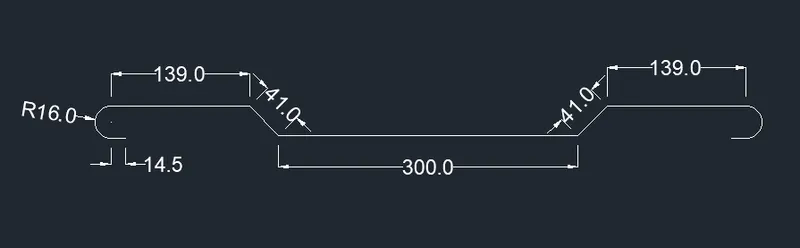
type B-
- select a line ,first distance towards right is 139.
- next fidtance of 41 downwards at an angle 315.
- next distance at 150 at right side.
- draw a arc of radius 16 and a 14.5 length horizontal line arc end.
- select full object and mirror to get to opposite side.
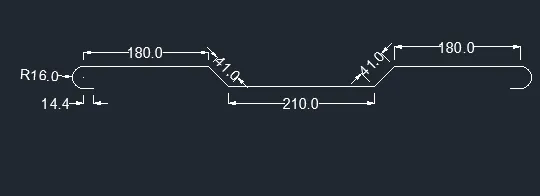
type C-
- select a line ,first distance towards right is 180
- next fidtance of 41 downwards at an angle 315.
- next distance at 105 at right side.
- draw a arc of radius 16 and a 14.4 length horizontal line arc end.
- select full object and mirror to get to opposite side
type D-draw a line of 750 and a arc of 11 on both side.

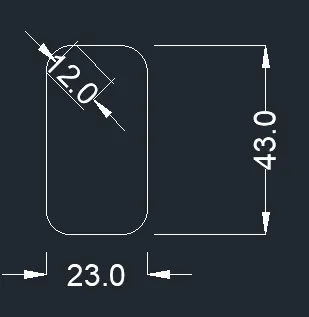
type E-draw a rectangle of 23x43 and fillet with radius 5 and draw a hook of 12 on one side of fillet points.
making of block:
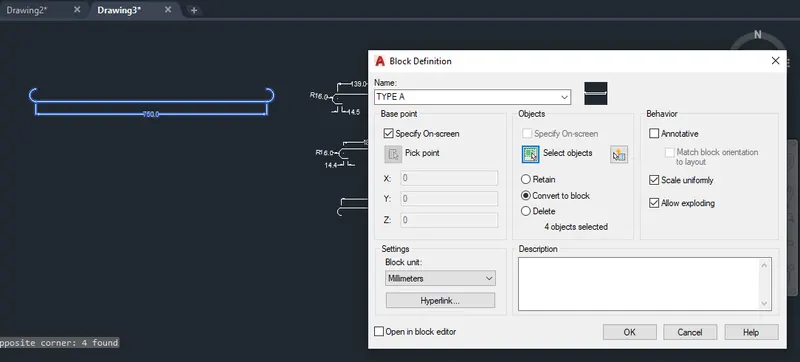
- for making an object block,enter B for block command- enter the name as type A.
- select base point as speicfy on screen.
- select the object from screen.
- select convert to block radiant.
- select always exploding and scale unifromity.
- enter ok.
making a table:
- select a table command and enter column=7 and row=5.
- click on cell to enter the data.
- right click on cell-insertion-block-select block-ok.
RESULT: