Creating Bar Bending schedule, Different Door types, and Creation of standard drawing templates using AutoCad
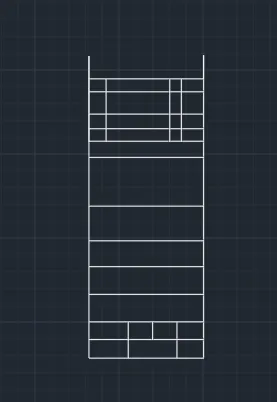
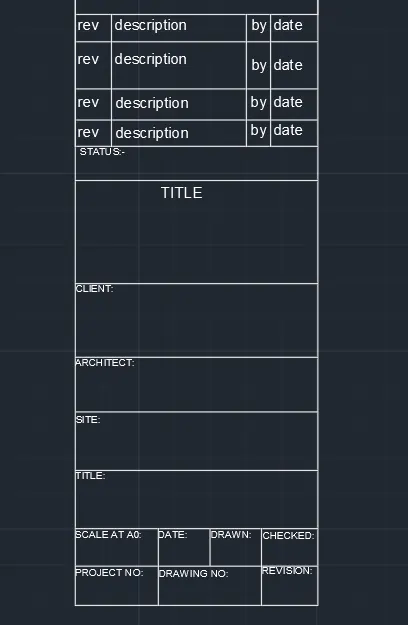
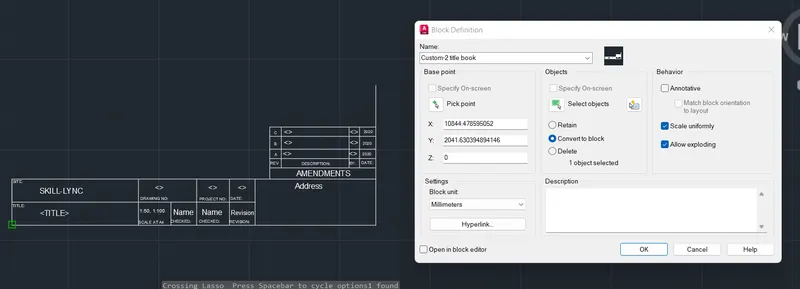
AIM-1. Create the templates as shown in Figures. Take the size of the title block as per industry standards or you can assume it as per the size of the paper. Use text and attributes wherever required. After creating the title block you need to save it as a block with names: Custom1_titleblock and Custom2_titleblock, respectively.
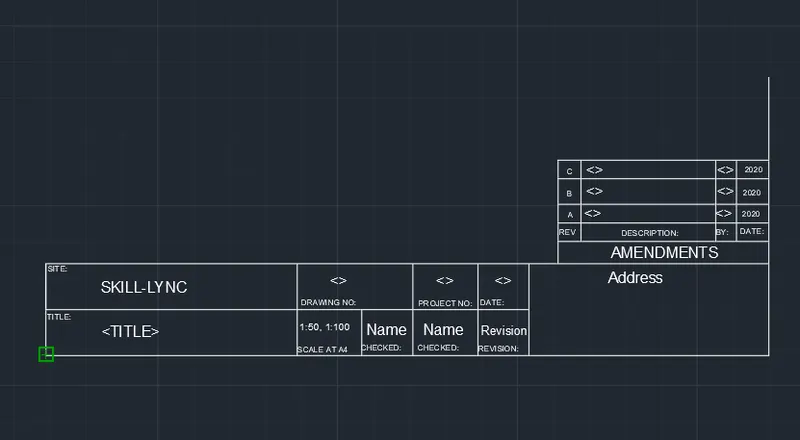
- Procedure-
- Type command units set unit to decimal
- select line and Rec command draw horizontal and vertical lines and rectangle
- Using Text command insert text
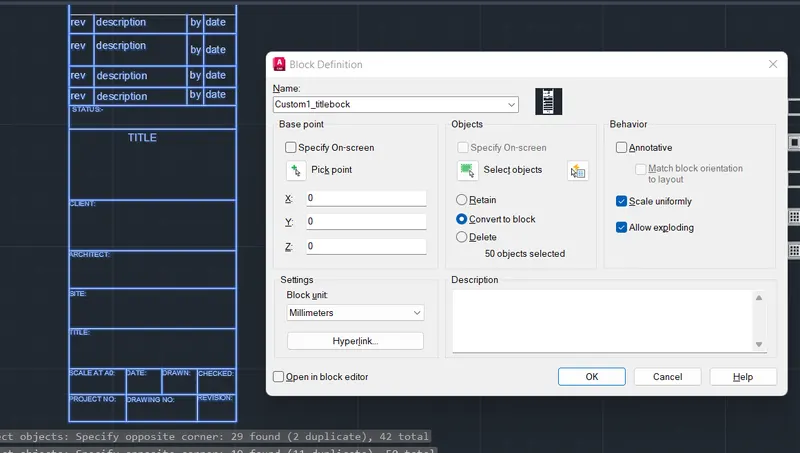
- In command Type B for block
- Bock defination will appear
- Type name as Custom1_titleblock and Custom2_titleblock
- Click on select object, select the drawing and press enter.
- click on pick a point in the block defination
- Select the corner of the drawing
- Click on ok.
Result-
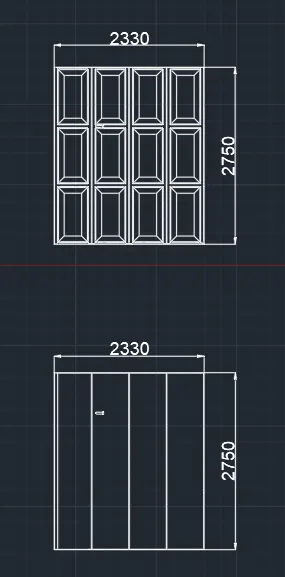
AIM-2. Create the doors type for warehouse as shown in the Figure. You need to create each door type as per standard size or given dimensions. Create the blocks of this door type after creating them.
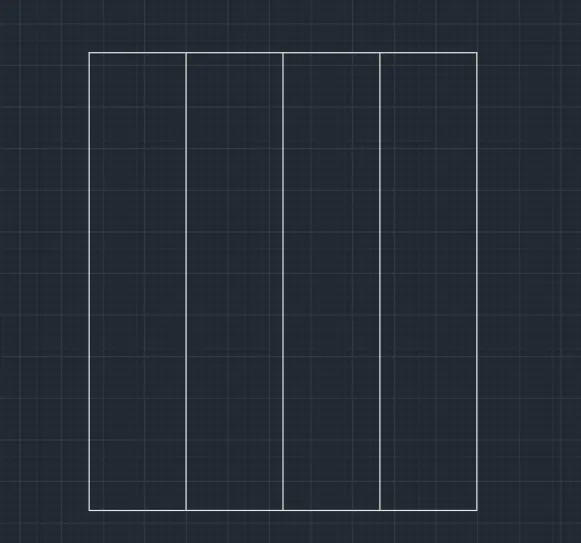
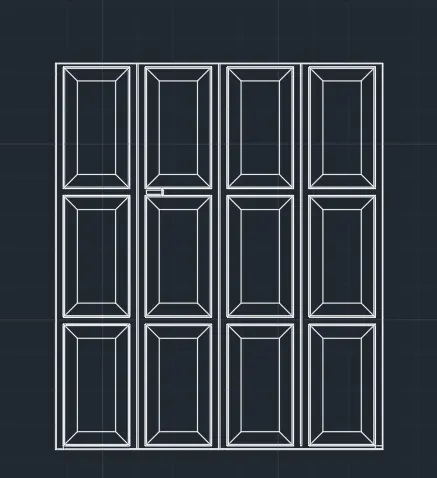
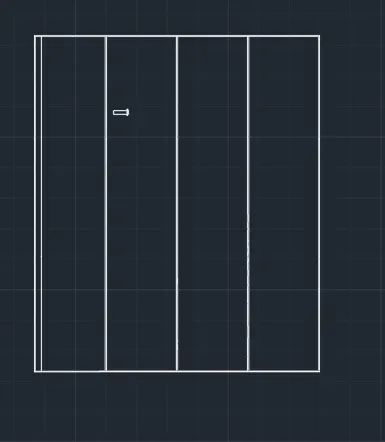
PROCEDURE-
- Type command units set unit to decimal
- select l Rec command draw rectangle of 2330x2750mm
- Divide the rectangle in Four parts
- In command Type B for block
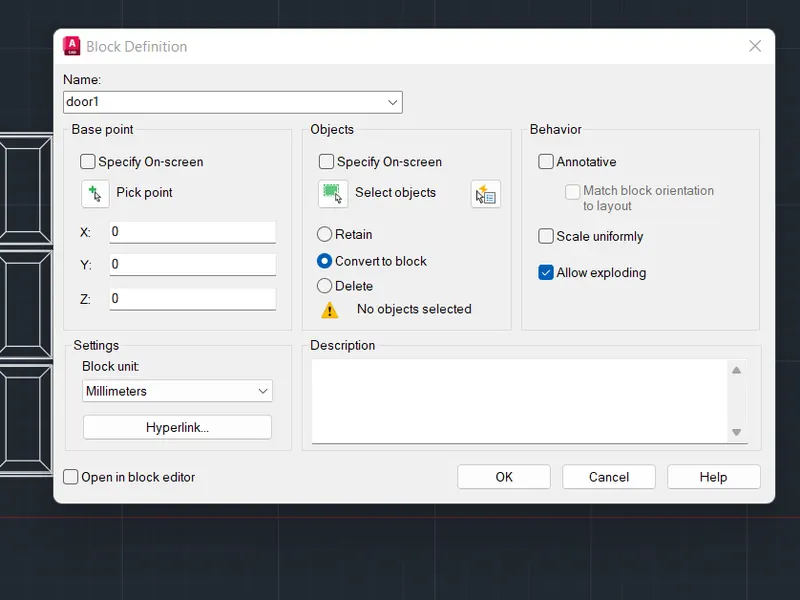
- Block defination will appear
- Type name as Door1 & door 2
- Click on select object, select the drawing and press enter.
- click on pick a point in the block defination
- Select the corner of the drawing
- Click on ok
- Select linear dimension and insert dimenstion
- Repeat the step for Door2
Result-
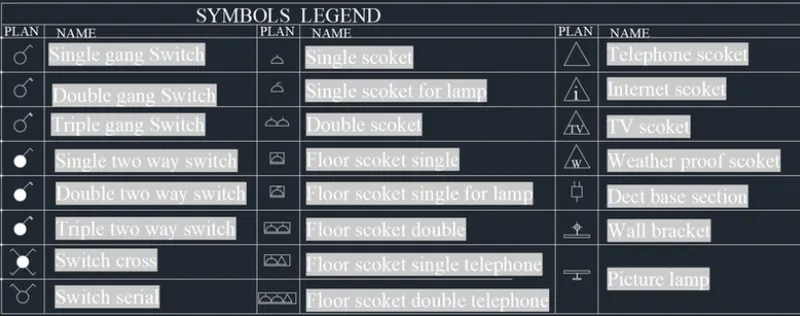
AIM- Create each symbol as a block with the name given in the legend. After creating the blocks arrange them in the legend as shown in the Figure.
Procedure-
- Type units select decimal
- Select circle from the ribbon menu
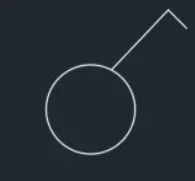
- Draw a single gang switch
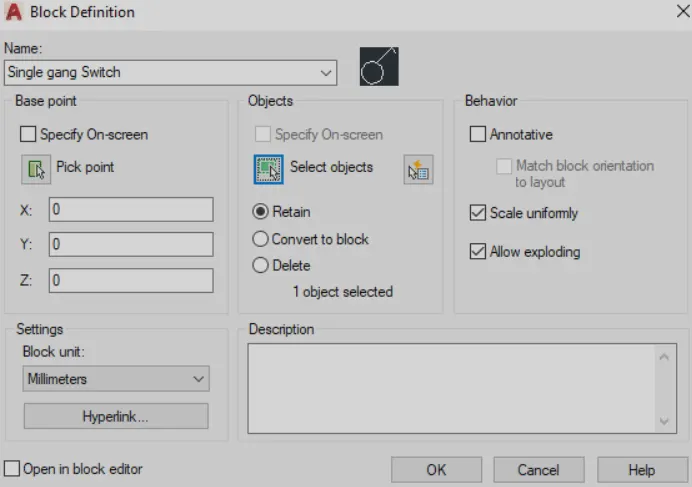
- Type B command for block
- In Block defination enter name as single gang switch select the object and then press enter
- pick a point
- Then press ok
- Repeat the step for the symbol and create the block
- By using Rec, line command draw a table
- Add text to in the table
- Insert Block select from the libraries
Result-
AIM- Create the door type for residential building as a block. Save the name of the blocks as type. Use given dimensions or assume dimensions as per industry standards.
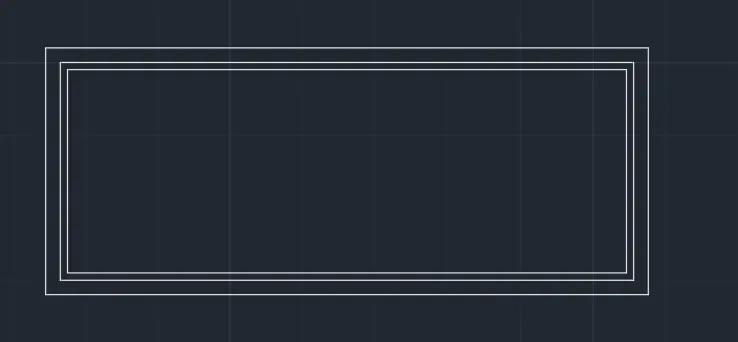
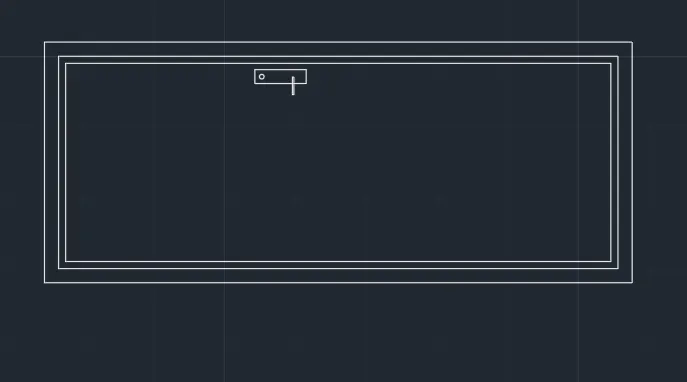
1). D1 - 2'10" x 6'11" :
- Draw rectangle with dimension 2'10" and 6'11".Draw offset 1.5" for frame.Draw offset 1" for shutter.
- Draw lock by two rectangles perpendicular to each other and fillet the corners with radius 0.1"and circle.Write text by multiline text "D1".
- Create it as block "B"- give name as "type-D1" -pick a corner point- select the object. then block is created.
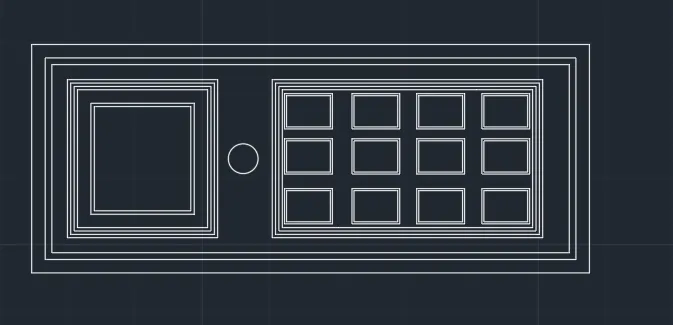
2). D2 - 3'4" x 6'11" :
- Draw rectangle with dimension 3'4" and 6'11".Draw offset 1.5" for frame.Draw offset 1" for shutter.
- Draw rectangle for panel 1'11" and 2'9.1", then offset 1" two times.Draw a rectangle 5.4" x 5.7", offset 0.3".
- Copy it with copy command "co" - select mode - select the rectangle- select array-enter no: of array as 3 -place it as required.Copy the 3 rectangles to 4 rows.
- For the second panel draw a rectangle of 1'11" x 2'0.6". Offset 1" 3 timesDraw another rectangle inside this of 1'0.8" x 1' 1.2" and offset 1".
- Draw lock by circle in between the two panels.Write text by multiline text "D2".
- Create it as block "B"- give name as "type-D2" -pick a corner point- select the object, then block is created.
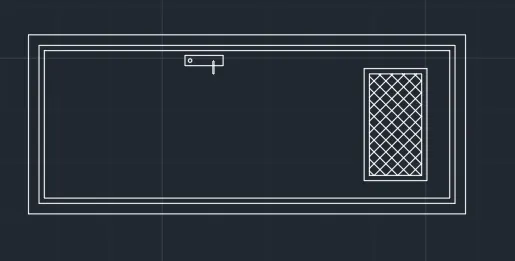
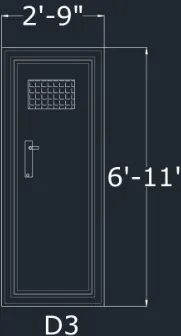
3). D3 -2'9" x 6'11" :
- Draw a rectangle of 2'9" x 6'11".
- Offset 1" for thickness ,2"offset for frame, 1" thickness. Offset 1.5" as shutter thickness.
- Draw a rectangle at the top for ventilation 1'3" x 9.3", give offset 1" for thickness.Hatch inside the rectangle.
- Create lock by rectangle two of them, perpendicular to each other and a circle.
- Create it as a block Command "B" - give name as type d3 -pick point- select object -tick scale uniformly and explode all.
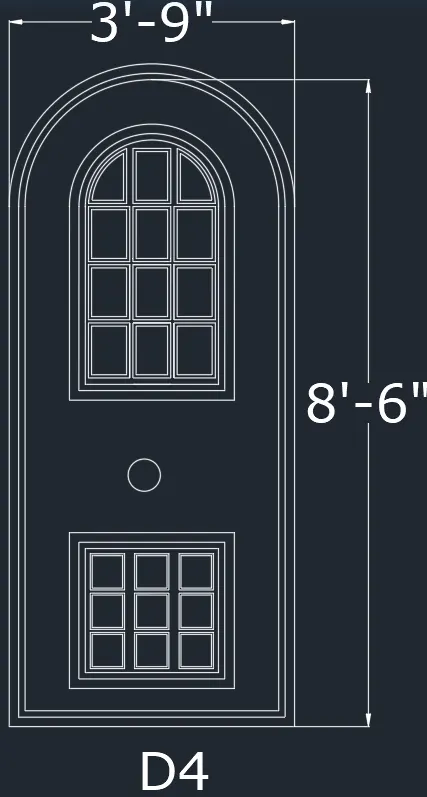
4). D4 - 3'9" x 8'7" :
- Draw rectangle "REC" of dimension 3'9" x 6'10".Explode it and create an arc with 2-point method with both point as the endpoints.Offset the arc and the line with 1.5" and then 1".
- Offset 8" from arc and rectangle for panel and divide it into two .Take 1" offset 2 times to show the thickness on top figure and bottom rectangle.Create rectangles inside the panel.
- For lock, create a circle.
- Make it a block, name as type D4 - pick a point and select the object tick the dialogue box of uniform scale and explode all.
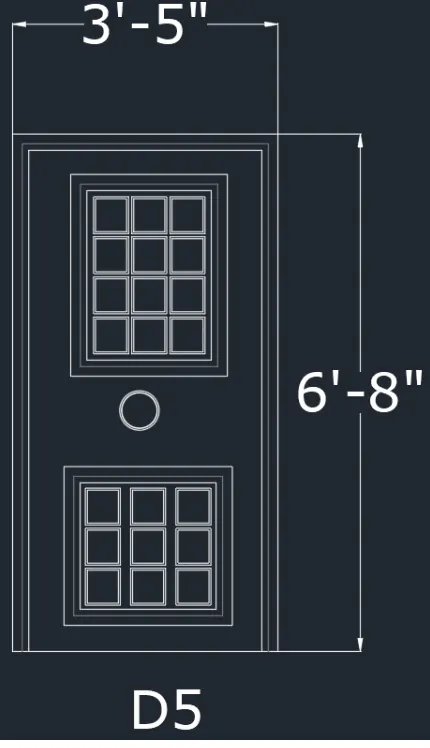
5). D5 - 3'5" x 6'8" :
- Draw a rectangle of 3'5" x 6'8".Offset 1.5" for frame.Offset 1" as shutter thickness.Create another rectangle inside with offset 4.4".
- Create another rectangle on the bottom 2'2.9" x 2'2.6".Offset 1" two times for both rectangles.
- Create rectangle inside for panels with offset 0.5".Copy it for 3 columns and 4 rows.Similarly copy it in bottom rectangle for 3 rows and 3 columns.
- Create it as a block Command "B" - give name as type D5 -pick point- select object -tick scale uniformly and explode all.
6). D6 - 3'5" x 7' 11.6" :
- Draw rectangle "REC" of dimension 3'5" x 7'11.6".Explode it and create an arc with 2-point method with both point as the endpoints.Offset the arc and the line with 1.5" and then 1" for frame.
- Offset 8" from arc and rectangle for panel and divide it into two.Take 1" offset 2 times to show the thickness on top figure and bottom rectangle.Create rectangles inside the top panel, 3 row and 4 columns.
- For bottom panel, offset the rectangles by 1" 3 time as and 3.3" and again 1".For lock, create a circle.
- Make it a block ,name as type D6 - pick a point and select the object tick the dialgue box of uniform scale and explode all.
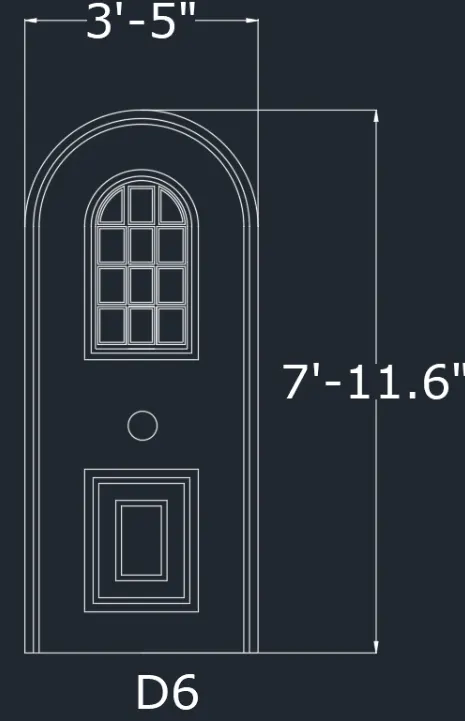
Result: The doors are created and are made into blocks.
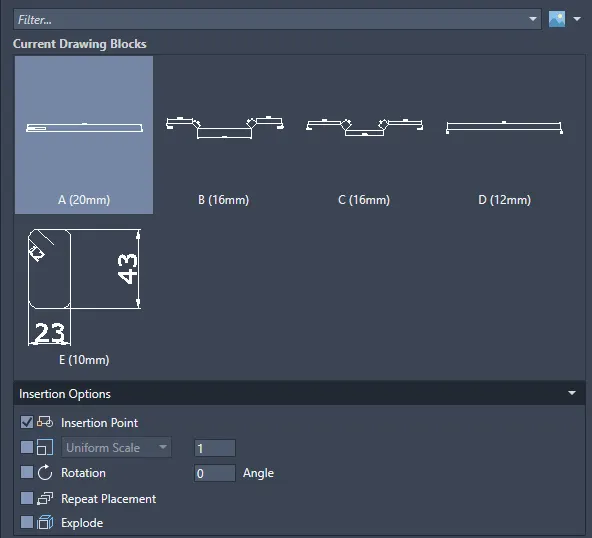
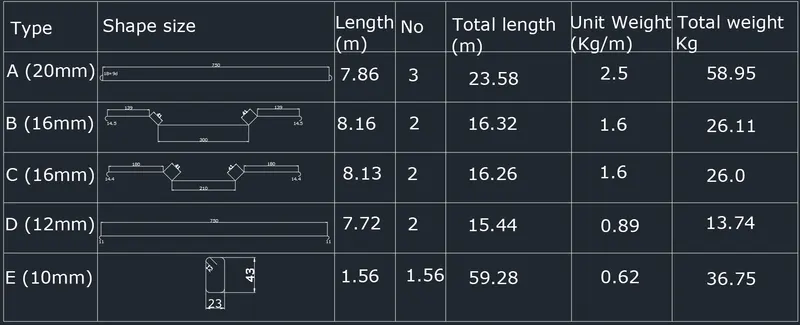
AIM-5. Create each shape as a block as shown in the Figure. Save the block and insert them on the table as shown in the Figure.
- Drawing each shape.
- Creating it as block.
- Inserting it in table as Bar bending schedule.
Procedure:
1).Drawing each shape:
A -20mm :
Draw a line of 750cm for straight bar.Create arc for the bend. Create on one side and mirror it on another side.

B-16mm :
Draw line of 300mm for straight bar.Draw vertical line of 41cm and extend a horizontal line and draw a line inclined at 45 degree from the base of vertical line up to horizontal line.
Trim off the unwanted lines.Copy the same on the other side.Draw a horizontal line of 139cm and copy it on other side .Draw bend with arc and mirror the same on other side.
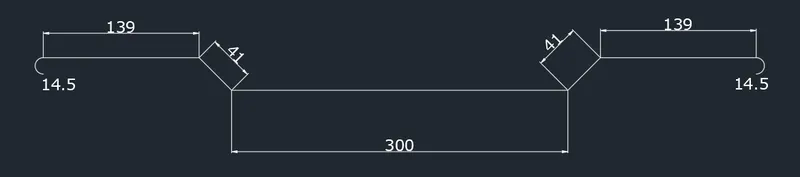
C -16mm :
Draw a line of 210cm .Draw vertical line of 41cm and extend a horizontal line and draw a line inclined at 45 degree from the base of vertical line up to horizontal line.
Trim off the unwanted lines.Copy the same on the other side.Draw a horizontal line of 180cm and copy it on other side.Draw bend with arc and mirror the same on other side.

D -12mm :
Draw a line of 750cm for straight bar.Draw an arc downwards.Mirror it on the other side.

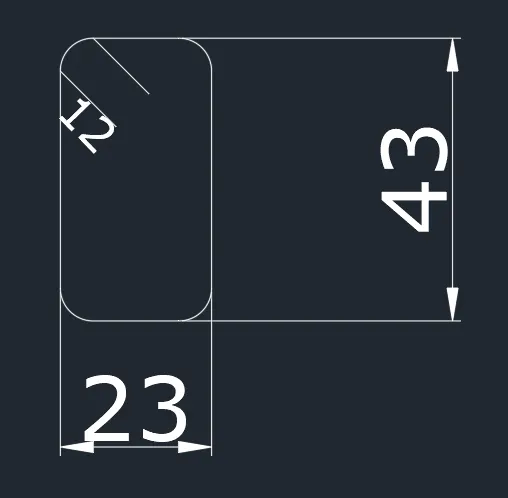
E- 10mm :
Draw a rectangle of 23cm and 43 cm.Fillet the corner with fillet radius 5cm.Draw two line of 120cm.
Creating each of them as block by using Command -"B'- give name as A - pick a point- select the object - select delete - tick box of scale uniformly and explode all.
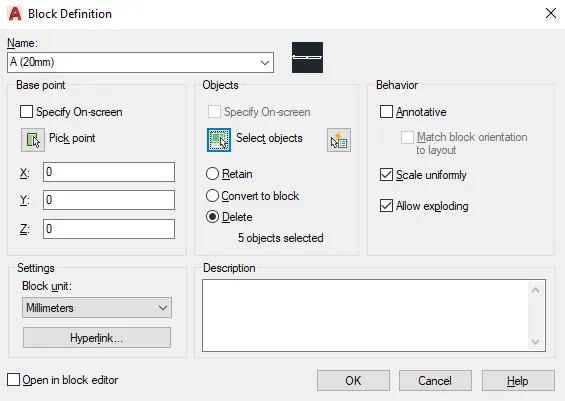
Similarly create 5 blocks: A,B,C,D,E and insert each of the bars as blocks.
Inserting blocks in the table:
Create a table with rectangle and divide it into 6 rows and 7 columns.With multiline text enter type, shape size, length, no, total length, unit weight, total weight and all other text.By command "I" insert each of the block in respective columns.
Result:
RESULT:
Bars are drawn and made it as blocks and inserted it in table as bar bending schedule.