Creating Bar Bending schedule, Different Door types, and Creation of standard drawing templates using AutoCad
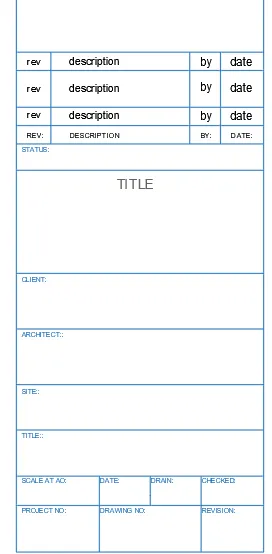
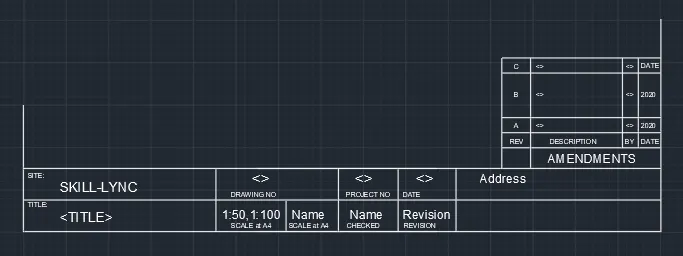
1)To create the templates title block and need to save it as a block with names.
Procedure:
- Take a rec command for rectangle and create a rectangle
- Next take the offset command
- Make a table for the placing of the text
- Take the command mtext select the base point and choose desirable height
- Next copy the and place the text and then edit as per the required of the text.
- Change the texts and size as per the plan.
- Use block command box for the block and select the object and pickup point
- Similarly use the command to store all the blocks
Result:
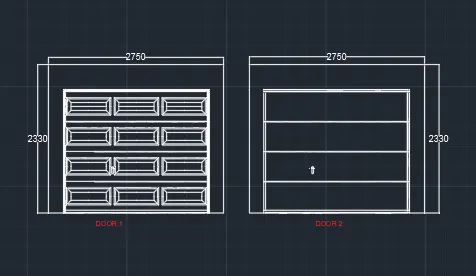
2.To Create the doors type for warehouse and after Creating the blocks of this door type
Procedure :
- Take a rec command for rectangle and create a rectangle
- Next take the offset command and make offset from the four side rectangle
- Divide the into four segments
- To Create the doors type for warehouse create a rectangle or creation of door
- Next take the offset command first make the offset of 10mm and 30mm for next one.
- Now take the copy command and select the object and place it
- Use block command and select the object and pickup point and next click on for the creation of the block
Result:
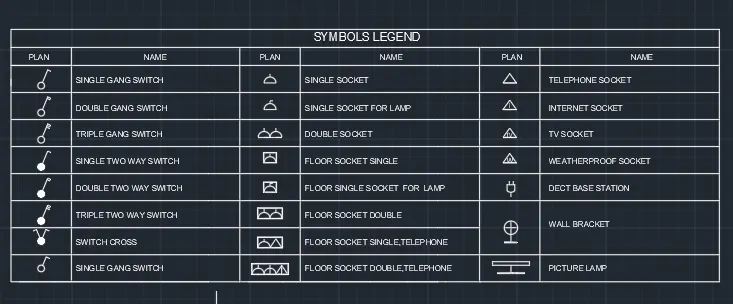
3.Create each symbol as a block with the name given in the legend. After creating the blocks arrange them in the legend.
Procedure :
- Use circle command to draw the switch plans
- Copy the plan and make modifications as per plan
- Use arc command adn traingle command to make socket plans.
- Use block command to select the object and pickup point and click on for the creation of the block
- Draw tables as per the space
- Use multitext command to type the text
Result :
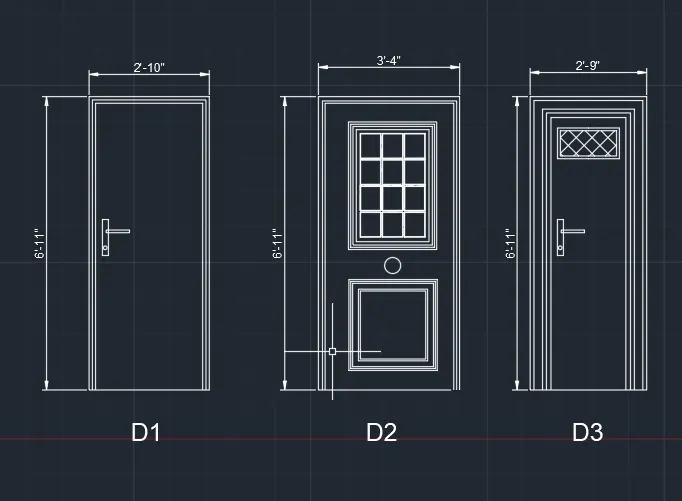
4.To create the door type for residential building as a block.
Procedure:
- Take a rec command for rectangle and draw of 2'10"x6'11"
- Use offset command of 2" to draw the first offsets and 4" offset to draw next offset
- Take a rec command for rectangle and draw of 3'4"x6'11"
- Use offset command of 2" to draw the first offsets and 4" offset to draw next offset
- USe hatch command to make hatch inside the rectangle
- Take a rectang command for rectangle and draw of 2'10"x6'11"
- Next take a offset command of 2" and then 1" for the creation of frame
- Next take a rectangle of 1'x1' and take offset of 1"
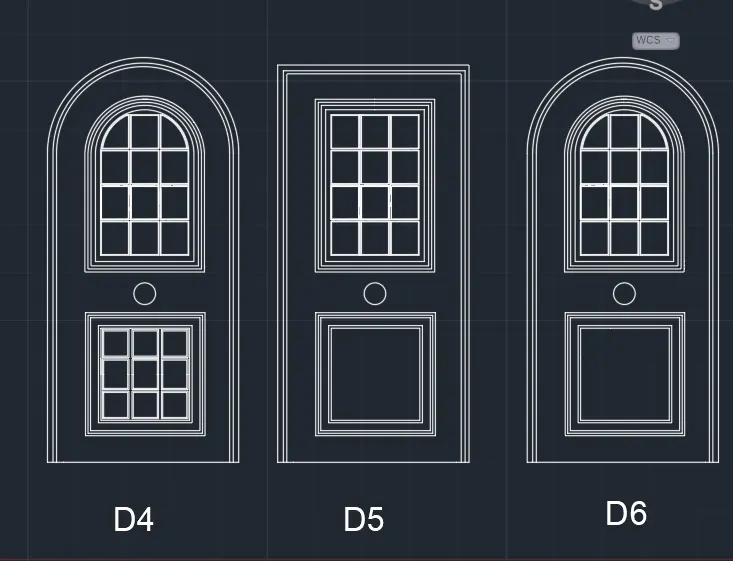
- Use rectang command for rectangle and draw of 3'4""x6'11"
- Use offset command of 2" and then 1" for the creation of frame
- Next take thearc command and draw a arc from first end to second end
- Next trim the bottom surface Next take a offset command of 2" and then 1" for the creation of frame
- Take a rec command for rectangle and draw of 3'4""x6'11"
- Use offset command of 2" and then 1" for the creation of frame
- Draw another rectangle inside it and give the offset of 1" for the creation of frame
- Take a rec command for rectangle and draw of 3'4""x6'11"
- Next take a offset command of 2" and then 1" for the creation of frame
- Now draw another rectangle inside it and give the offset of 1" for the creation of frame
- Next take the arc command and draw a arc from first end to second end
- Use block command to save it as block and choose pickup point and save it as door 1 , door 2 , door 3, door 4, door 5 and door 6.
Results :
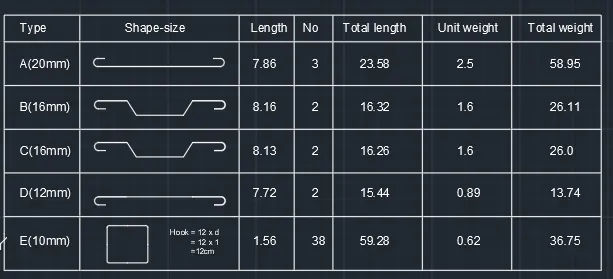
5.To create each shape of the as a block as shown and insert them on the table.
Procedure:
- Shape A
- Use line command of length 750
- Make circles at the ends of the line with radius of 9 and trim the extra lines
- Next take dim command dimension it and text it as per requirement
- Shape B
- Take line command of length 300
- At the end draw a line with length of 41
- Join the other with angle of 45 from the end point draw a line 139
- Draw a circle of 14.5mm
- Next trim the extra lines and mirror it on other side
- Shape C
- First take line command of length 210
- At the end draw a line with length of 41mm and join the other with angle of 45mm
- From the end point draw a line 160 length in horizontal and draw the circle of 14.4 and trim the extra lines command dimension it
- Shape D
- First take line command of length 750mm
- Next make a circle at the end of the line with radius of 11 and trim the extra lines
- Shape E
- Take a rectangle command and draw a rectangle and take the filet command and take the radius of 12 mm
- Use block command to save them as blocks.
- Use rectangle command and draw the table and divide the cloumns and rows.
- Insert blocks that were preiviously saved
- Use multitext command to insert the text in table.
Result: