Creating Bar Bending schedule, Different Door types, and Creation of standard drawing templates using AutoCad
Aim:
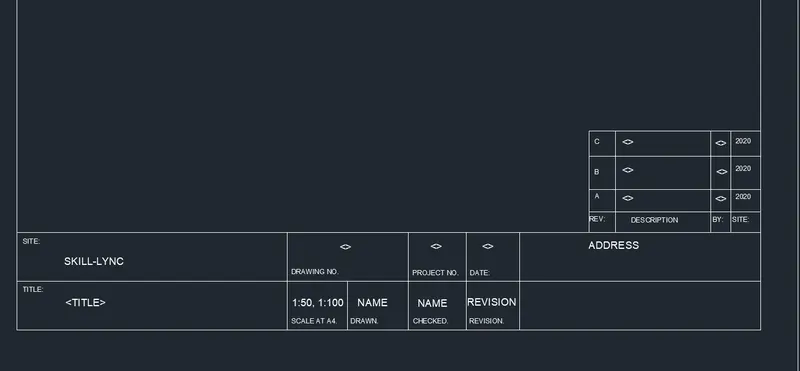
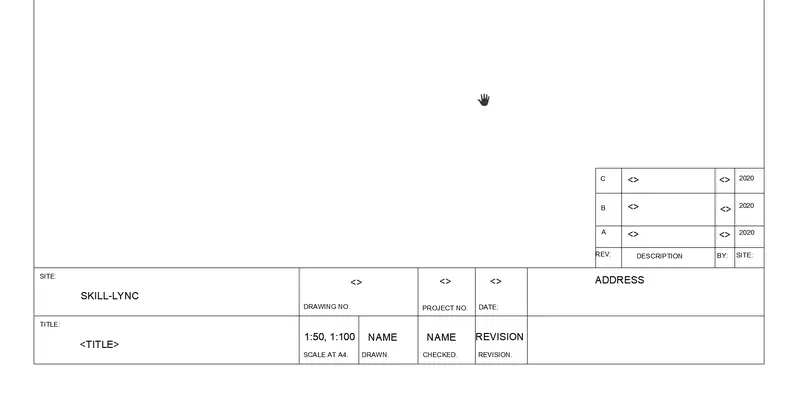
To create the template of the give figure and create the title block as per the industry standards. Create title block as a block.
Procedure:
- Open the Autocad software and open the new drawing file as metric.
- Set the units as decimal and preciaion as 0.
- Set the limit by using 'limmax' command in command prompt and enter the value 100000,100000.
- Create a rectangle of size 1230mmx880mm.
- Explode the rectangle by using explode command.
- Offset the top and bottom line at a distance of 20.5mm.
- Offset the left and right side at a distance of 19.5mm.
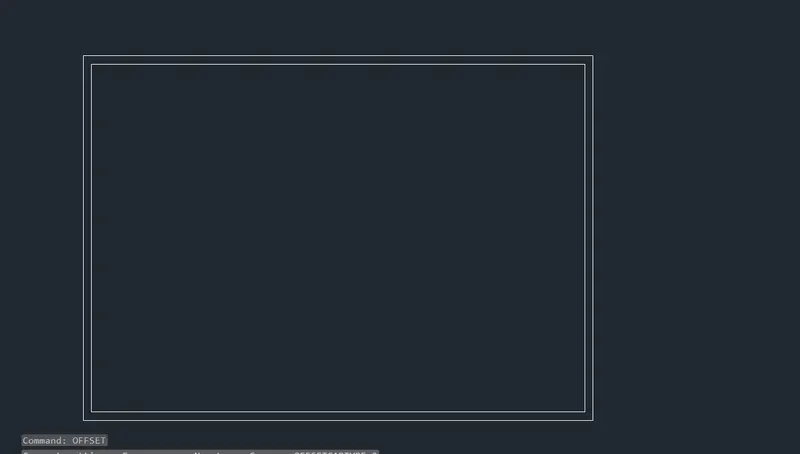
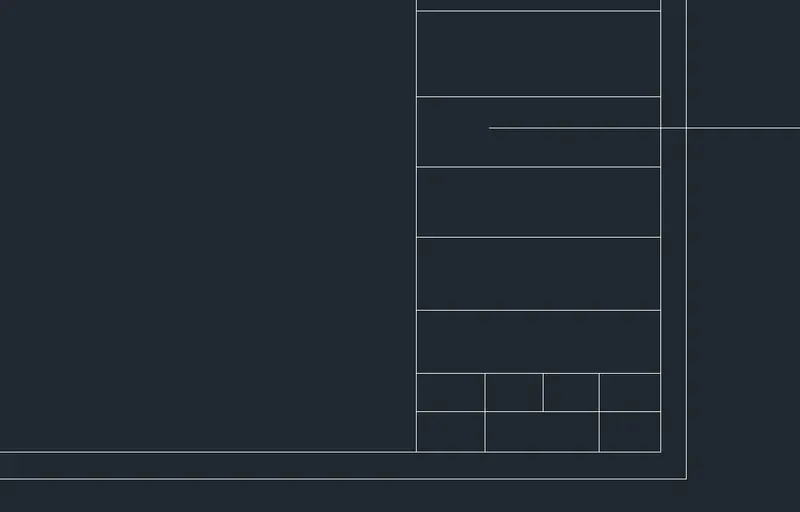
- Offset the right side trimmed size of the line at a distance of 185mm.
- Offset the top line of the sheet at a distance of 65mm.
- This is the dimension of the title block.
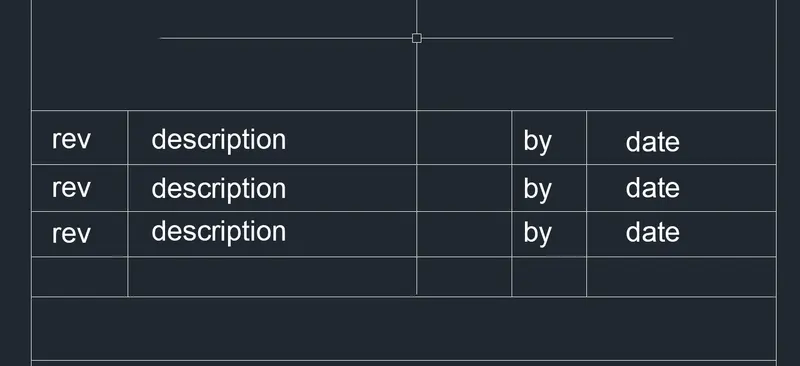
- Cerate table by using the offset and trim command.
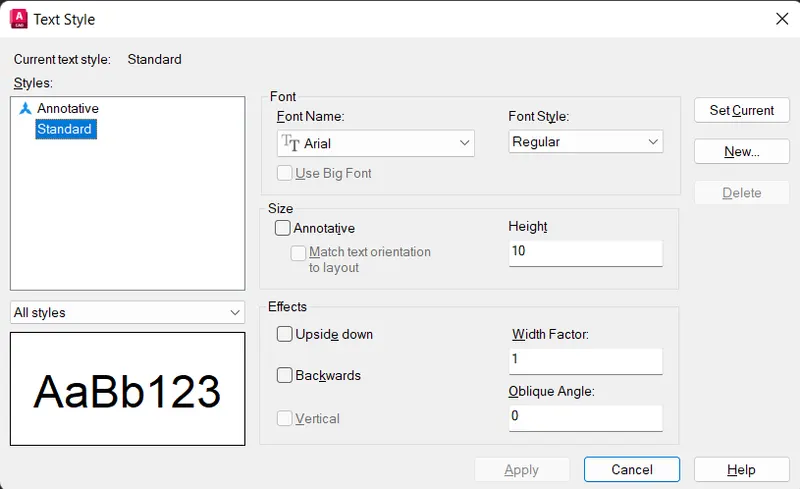
- Create a text style by using 'ST' text style and create the style as Arial, text height as 5mm.
- Create the text in the template wherever required.
- Then create the attribute defination of title block by using 'attdef' command.
- Enter the tag as 'TITLE' , prompt as 'Enter the title' and default as '
Aim:
To create the template of the give figure and create the title block as per the industry standards. Create title block as a block.
Procedure:
- Open the Autocad software and open the new drawing file as metric.
- Set the units as decimal and preciaion as 0.
- Set the limit by using 'limmax' command in command prompt and enter the value 100000,100000.
- Create a rectangle of size 1230mmx880mm.
- Explode the rectangle by using explode command.
- Offset the top and bottom line at a distance of 20.5mm.
- Offset the left and right side at a distance of 19.5mm.
- Offset the right side trimmed size of the line at a distance of 185mm.
- Offset the top line of the sheet at a distance of 65mm.
- This is the dimension of the title block.
- Cerate table by using the offset and trim command.
- Create a text style by using 'ST' text style and create the style as Arial, text height as 5mm.
- Create the text in the template wherever required.
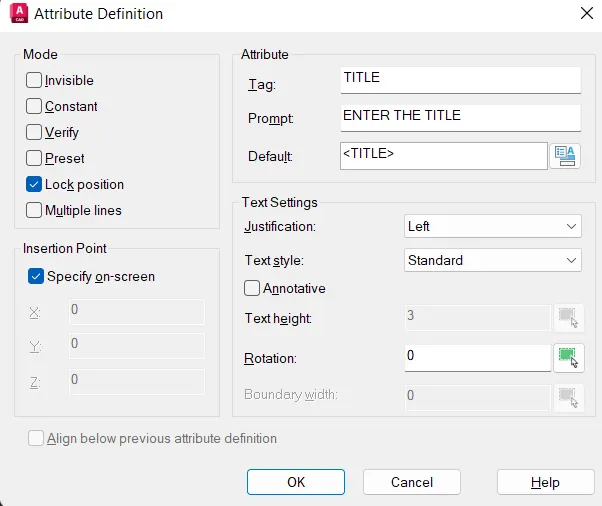
- Then create the attribute defination of title block by using 'attdef' command.
- Enter the tag as 'TITLE' , prompt as 'Enter the title' and default as '<TITLE>'
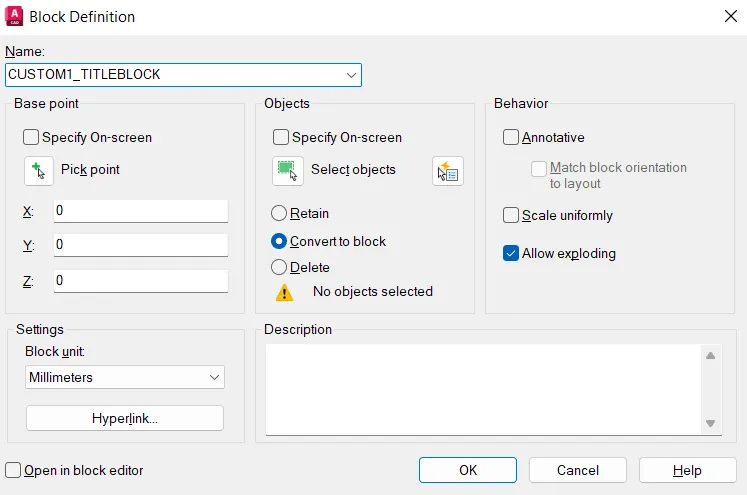
- Create block of the title block by typing 'B' in the command prompt.
- Enter the block title as CUSTOM1_TITLE BLOCK
- Select the title block and attribute also to create the block.
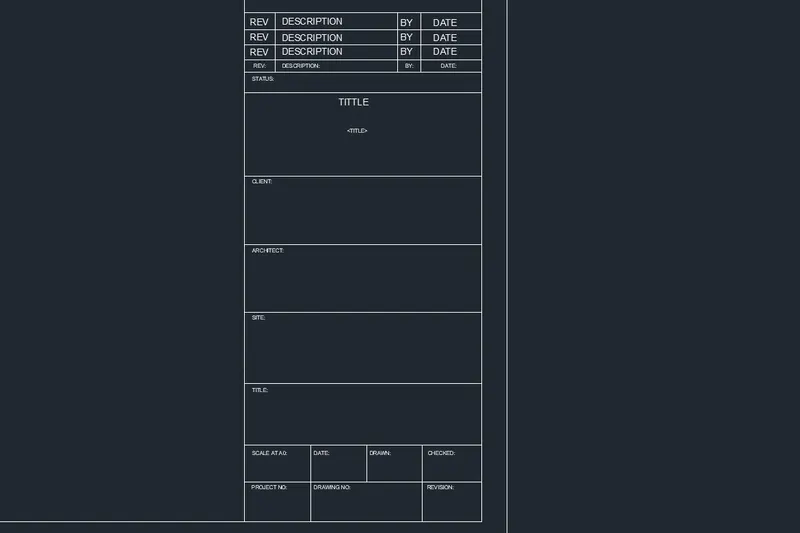
- Create the text and place it into the template wherever needed.
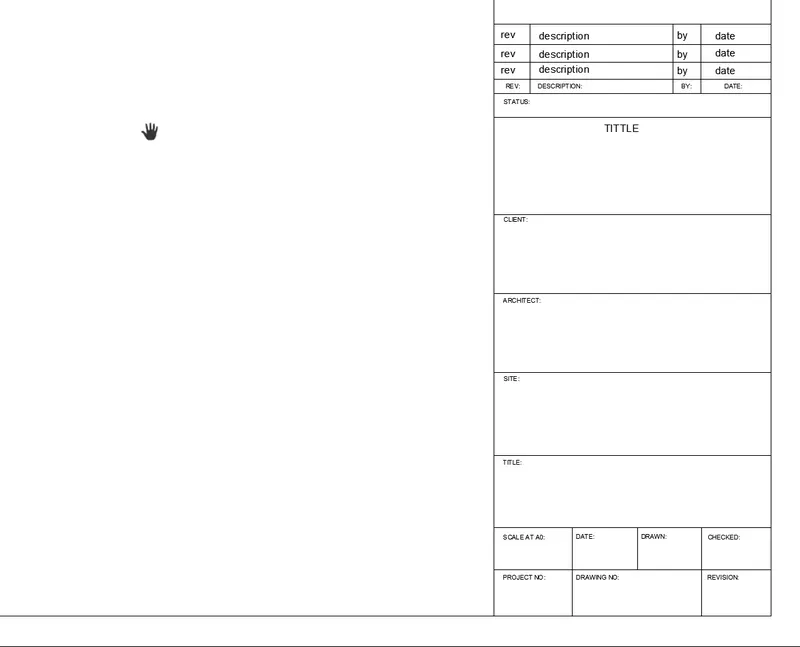
- Create the second template.
- By following the previous template creation procedure to create the second template.
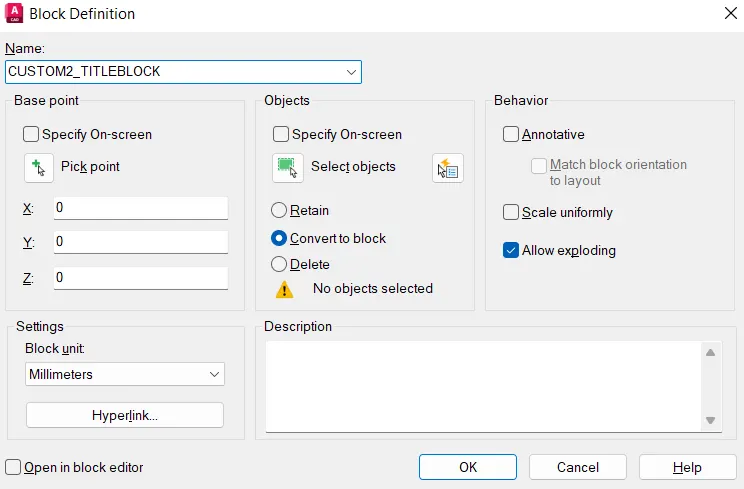
- Define the title block as CUSTOM2_TITLEBLOCK.
- Create the text and place it to the template wherever needed.
Result:
The template as shown in the figure is created and the title blocks is also created as a blocks. The title blocks are saved in the name of CUSTOM1_TITLEBLOCK and CUSTOM2_TITLEBLOCK.
Aim:
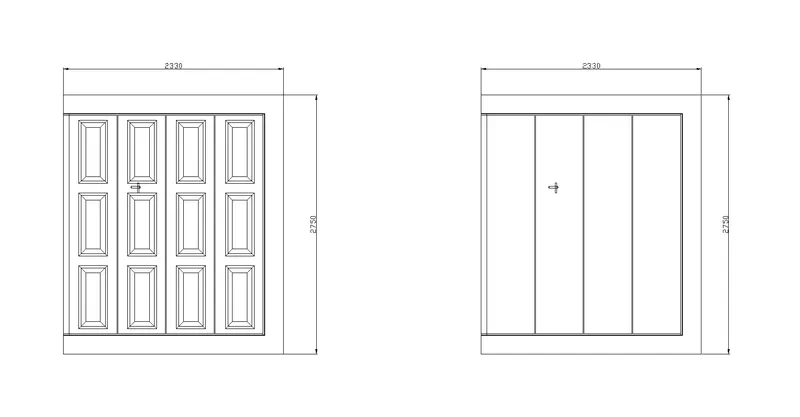
To create the doors type for warehouse as shown in the figure and create blocks of this door type.
Procedure:
- Create the rectangle of size 2330mmX2750mm.
- Explode the rectangle created by using 'ecplode' command.
- Offset the top, bottom and right side at a distance of 200mm.
- Offset the left side at a distance of 60mm.
- Use trim tool to remove the unwanted lines.
- offset the to, bottom and right side at a distance of 5mm and 15mm respectively.
- Divide the bottom line into 4 segments and left side line into 3 segments.
- Create command line in the created points.
- Offset the command line at a distance of 100mm in top and bottom of the lower left corner.
- Offset the command line at a distance of 50mm in left and right of the lower left corner.
- Create a rectangle at the offseted lines.
- Offset the rectangle at a distance of 10mm and 25mm respectively.
- create a line at the four corners that connect the edge of the inner and outer rectangle.
- Array the create inner object of column distance 518mm, 4 numbers and rows distace 770mm, 3 numbers.
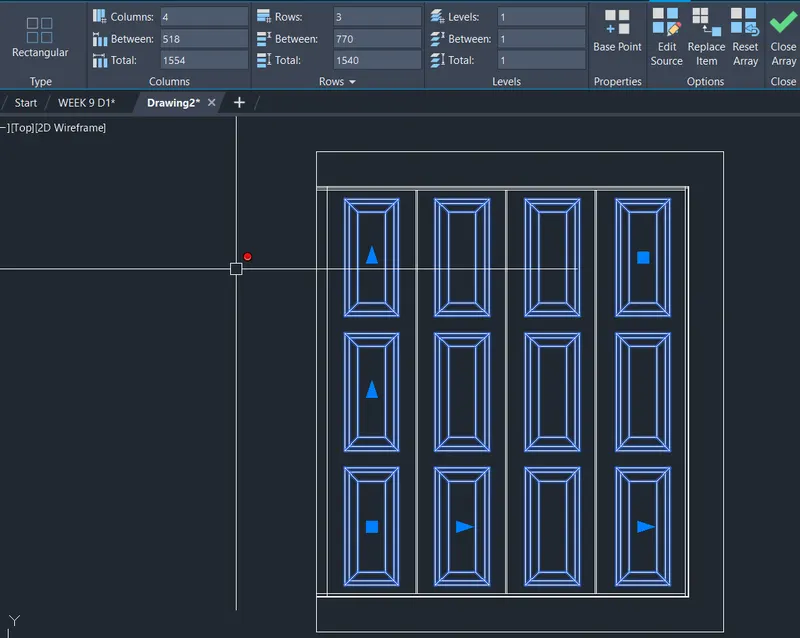
- Create the handle like object at the left top side of the door using rectangle and fillet command.
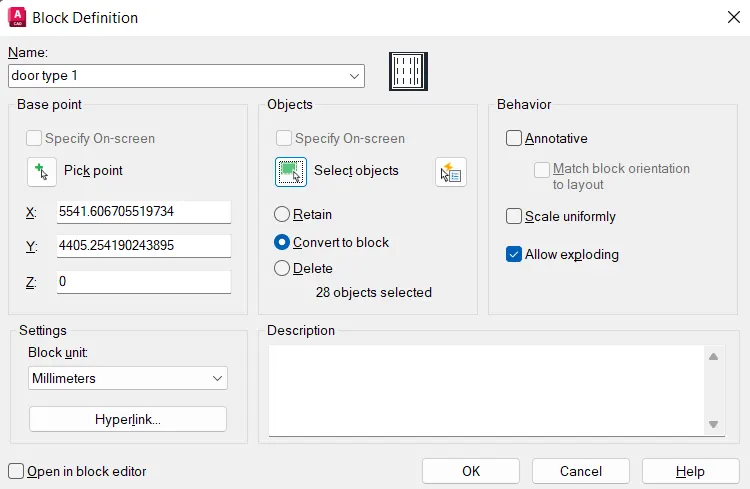
- Create the block of the door and name it door type 1.
- Create the type 2 door by following the same procedure followed in the door type 1 creation.
- Except the arrayed object in the door.
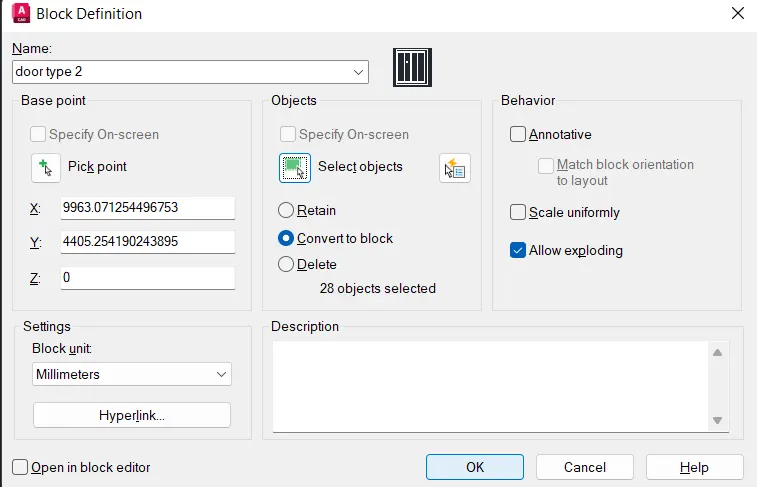
- Create the block of the object with the name of door type 2.
Result:
The doors type for warehouse as shown in the figure is created and the blocks of this doors type is also created.
Aim:
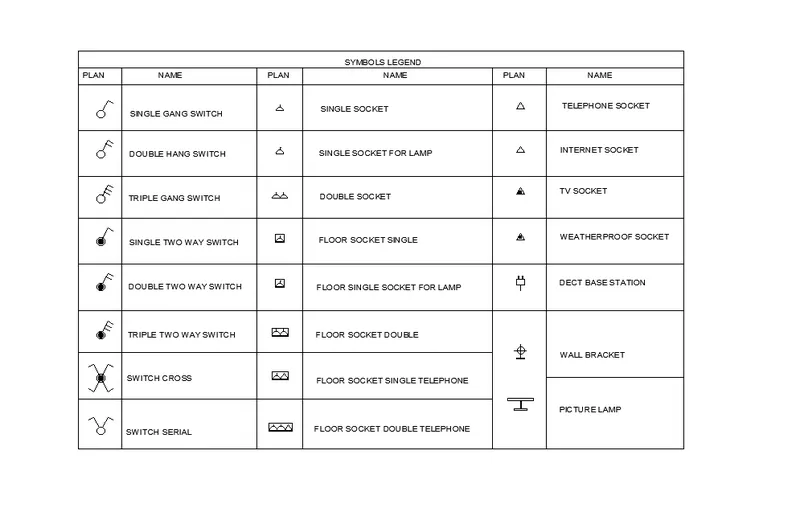
To create each symbol as a block with the name given in the legend and arrange the blocks in the legend.
Procedure:
- Create the symblos by using the circle, line, rectangle and offset tools.
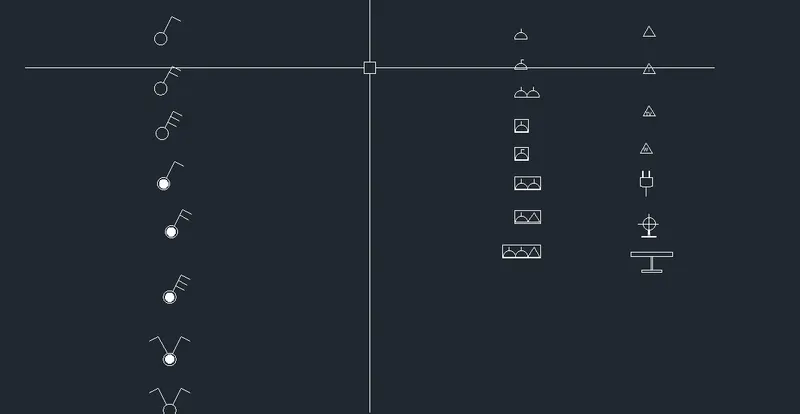
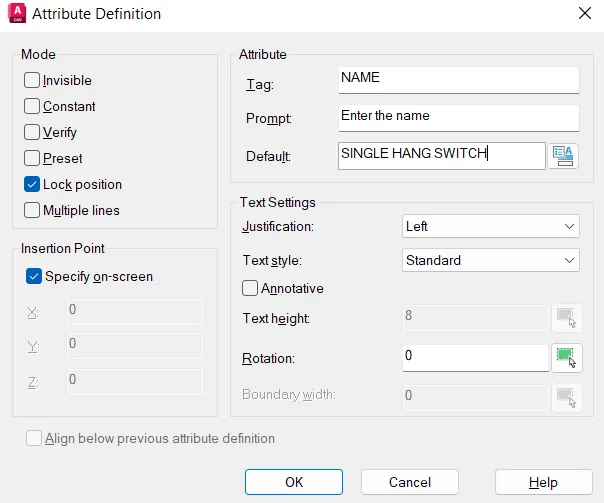
- Create attributes of the of the block name to the each block.
- attribute tag as Name, Prompt as enter the name and Default as SINGLE HANG SWITCH.
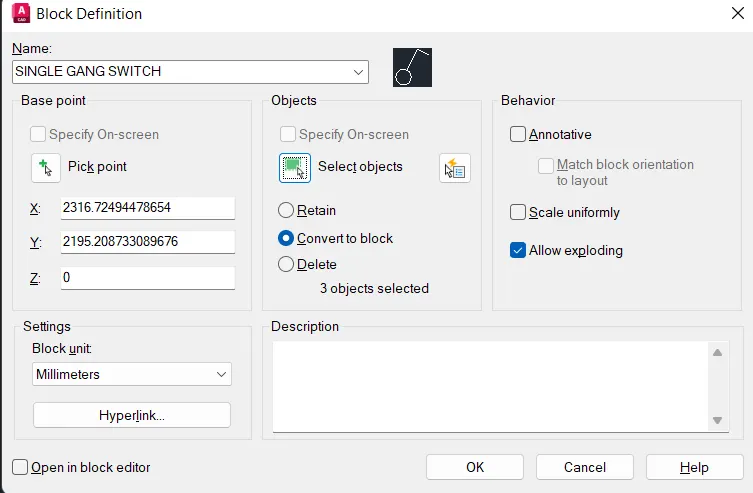
- Create the block of the created symbols and attributes with the name of the symbol.
- Create the table of the legend by using the command line and trim command.
- Create the text of height 8mm that is set in the text style manager.
- Create the text to the table.
- Insert the blocks created and arrange into the table.
- After arrange them in the table.
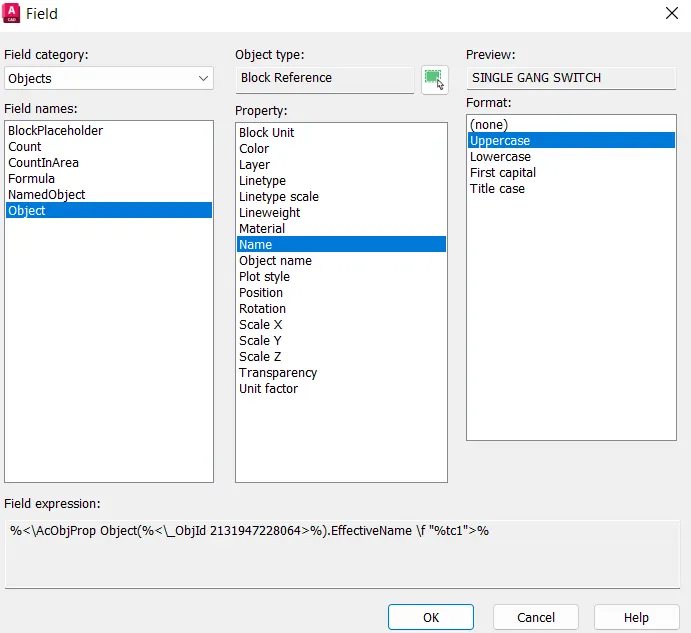
- Use field option in the insert tab, select the field category as 'OBJECT' and select the object. property as 'NAME' and select the format then click OK.
- Insert the created attribue to the each block.
Result:
The symbols are created as a block with the name given in the legend and created blocks are arranged in the legend.
Aim:
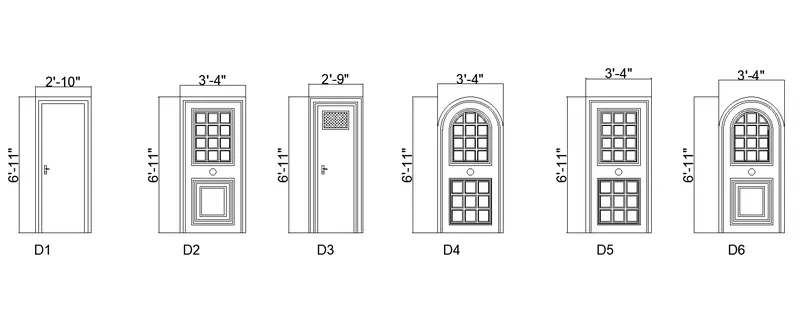
To create the door types for residential building as a block.
Procedure:
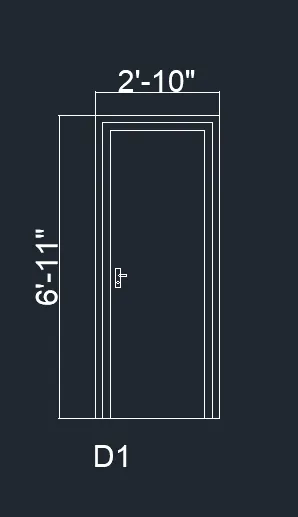
- Create the door 1.
- Create a rectangle of size 2'-10''X6'-11'' byusing rectangle tool.
- Offset the rectangle at a distance of 2'' and 4'' respectively.
- Explode the offseted rectangles.
- Trim the bottom lines and extend the lines to meet the bottom line of the first rectangle.
- Explode the first created rectangle and offset the bottom line at a distance of 4'
- At the 4' create the handle object by using rectangle, circle and fillet tools.
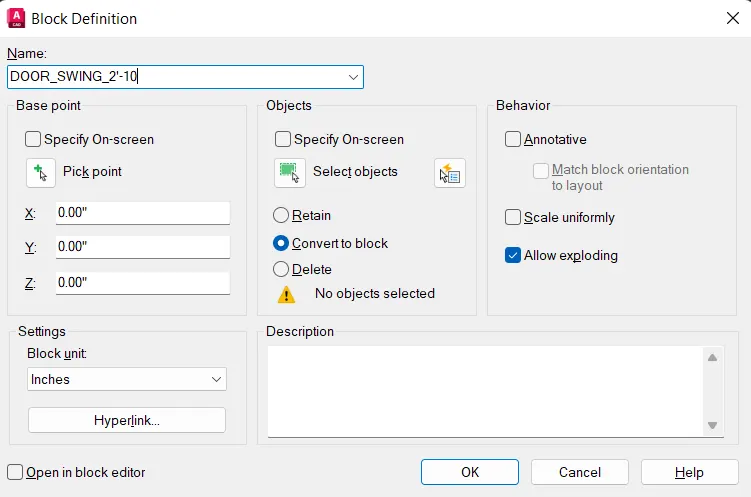
- Create the block of the door as a name of Single DOOR_SWING_2'-10.
- Create the 2nd door type.
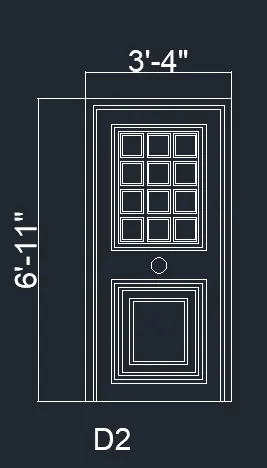
- Create a rectangle of size 3'-4'''X6'-11'' byusing rectangle tool.
- Offset the rectangle at a distance of 2'' and 1'' respectively.
- Explode the offseted rectangles.
- Trim the bottom lines and extend the lines to meet the bottom line of the first rectangle.
- Offset the bottom line of the first rectangle at a distance of 4'
- Create a circle of radius 2''
- Offset the center line, right, left anf top line at a distance of 2''
- Create the rectangle of the offseted line.
- Offset the rectangle at a distance of 1''
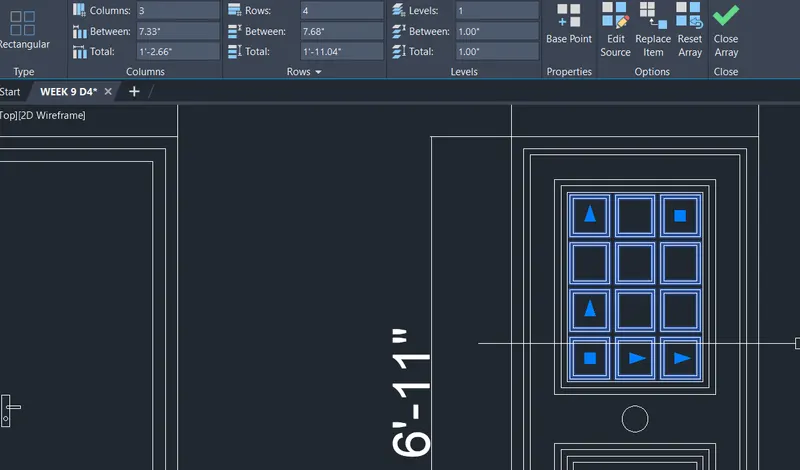
- Explode the created rectangle and divide the bottom and left side line into 3 and 4 segments respectively.
- Create construction lines at all the created points.
- create a rectangle to connect the lower left corner of the command lines.
- Offset the retangle at a distance of 1''
- Create array of the recently created rectangle of column distance 7.33'', 3 numbers and rows of distance 7.68'', 4 numbers.
- Create the rectangle of size 2'-3''X2'-4''in the lower part of the door.
- Offset it at a distance of 1'' and the following dimensions 1'', 1'', 2'' and 1''
- Use trim tools to remove the unwanted lines.
- Create the block of the door as a name of Single DOOR_SWING_3'-4.
- Create 3rd door type.
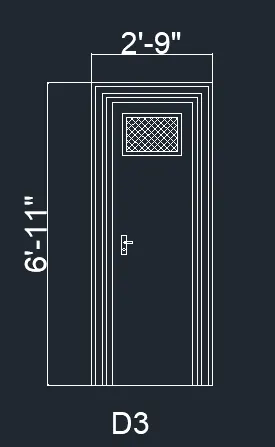
- Create a rectangle of size 2'-9''X6'-11''
- Offset the rectangle at a distance of 1'' and 2''
- Explode the created offset and remove the bottom lines.
- Extend the lines to meet the bottom line.
- Copy the handle of the door 1 and place in it.
- Then create a rectangle of size 1'-4''X0'-11''
- Offset the rectangle at a distance of 1''
- Hatch the inner surface of the rectangle.
- Create the block of the door as a name of Single VISION_DOOR_2'-9''
- Create the 4th door type.
- Follow the 2nd door type procedure to create this door type.
- Create a rectabgle at the lower left corner of the lower part rectangle.
- Offset it at a distance of 1''
- Array the created object of column distance of 8'', 3 numbers and rows distance 8.76'', 3 numbers.
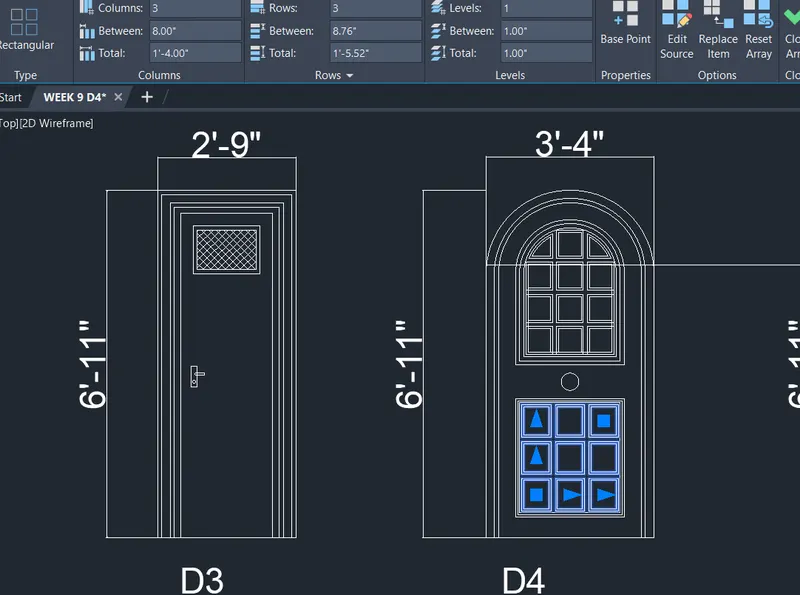
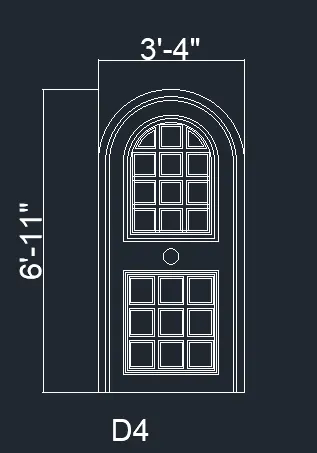
- Fillet the top line and offseted lines at a distance of 1'-7'' in both left and right side.
- Use trim tools to remove the unwanted lines.
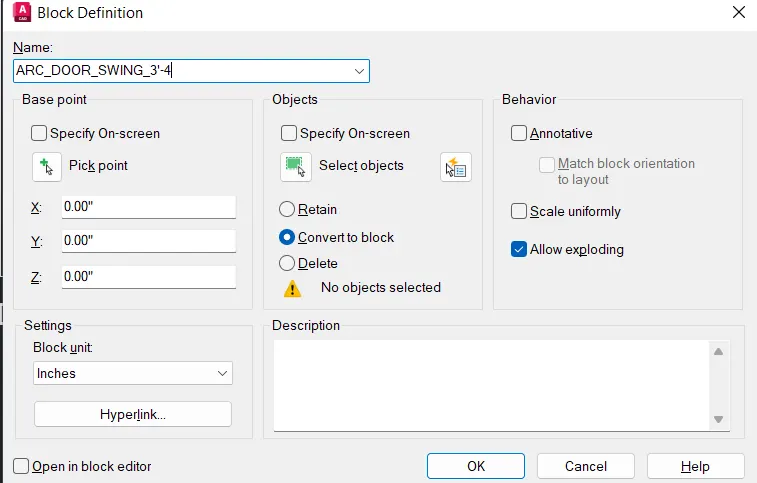
- Create the block of the door as a name of Single ARC_DOOR_SWING_3'-4.
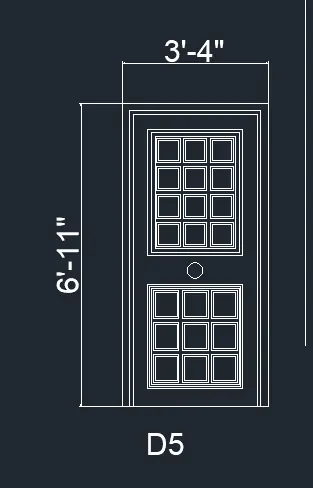
- Create d5 type door.
- Copy the d2 door type and place it.
- Remove the bottom offseted rectangle by using trim command.
- Copy the array in d4 type door and paste in it in the same position of the door.
- Use trim tools to remove the unwanted lines.
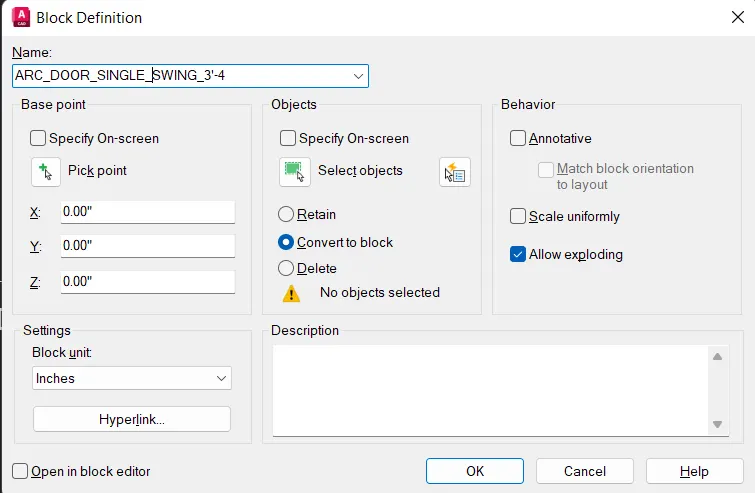
- Create the block of the door as a name of Single ARC_DOOR_SINGLE_SWING_3'-4.
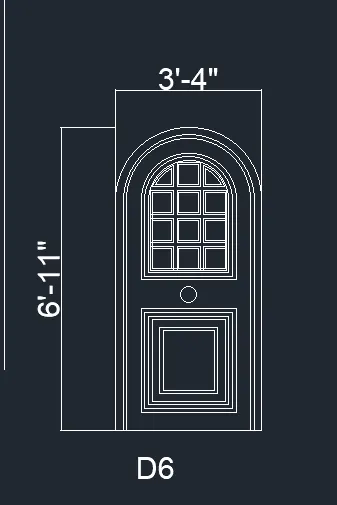
- Create d6 type door.
- Copy the d2 door type and place it.
- Remove the bottom offseted rectangle by using trim command.
- Copy the bottom rectangular part in type 2 door and place in it in the same position of the d6 type door.
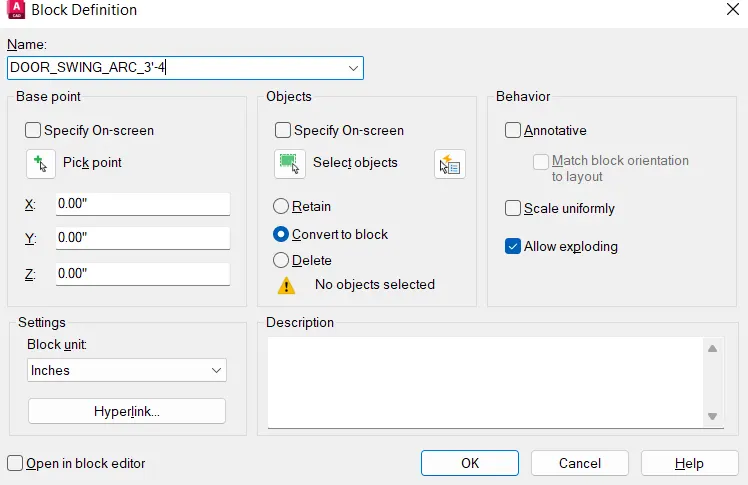
- Create the block of the door as a name of Single ARC_DOOR_SINGLE_SWING_3'-4.
Result:
The door types for residential building is created and each door type is created as a block.
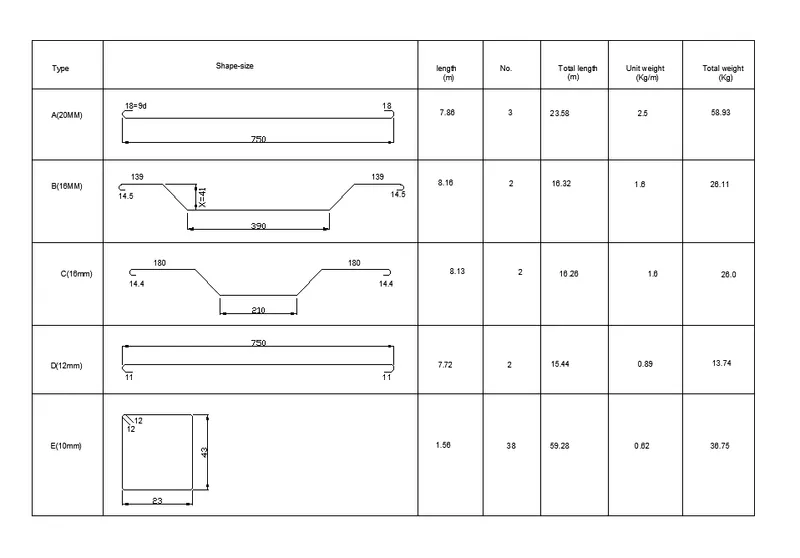
Aim:
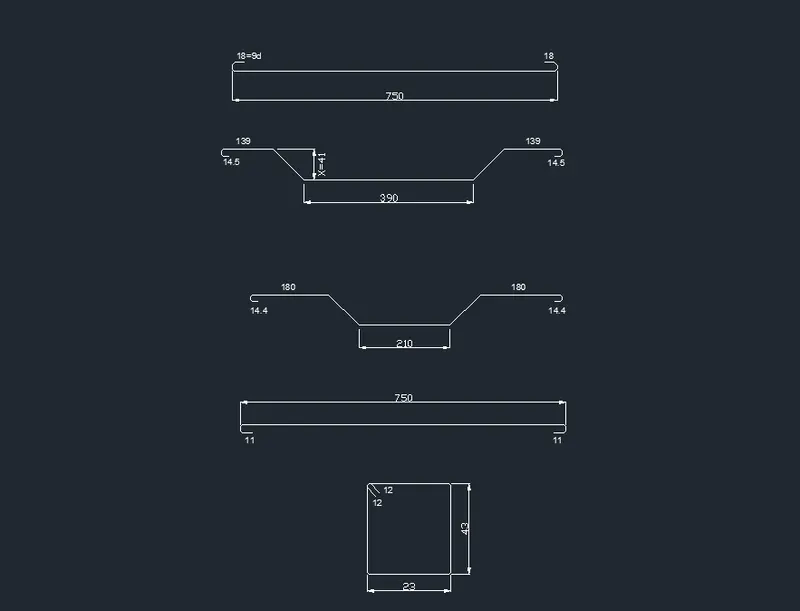
To create each shape as a block as shown in the figure and insert them on the table.
Procedure:
- Using line, rectangle, fillet and copy tool draw the shapes of reinforcement.
- Define the attribute of the esch shapes.
- Enter the attribute tag as 'TITLE', prompt as 'Enter the bar type', defalut as 'A(20mm)
- Create all other rows like the title attribute creation.
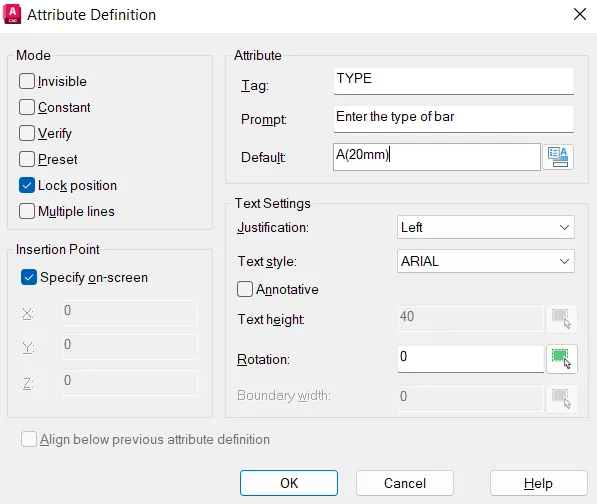
- Like this define attribute to all other shapes.
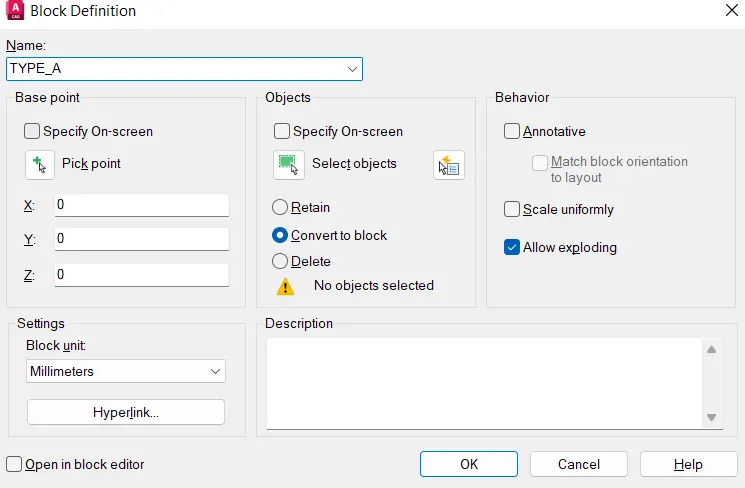
- Define block of the each shape with the attributes.
- Define the block name as 'TYPE_A'
- Create table like as shown in the figure.
- Use construction lines, offset and trim tools to create the table.
- Insert the blocks and arrange it to the table one by one.
Result:
Each shape is created as a block and inserted on the table as shown in the figure.