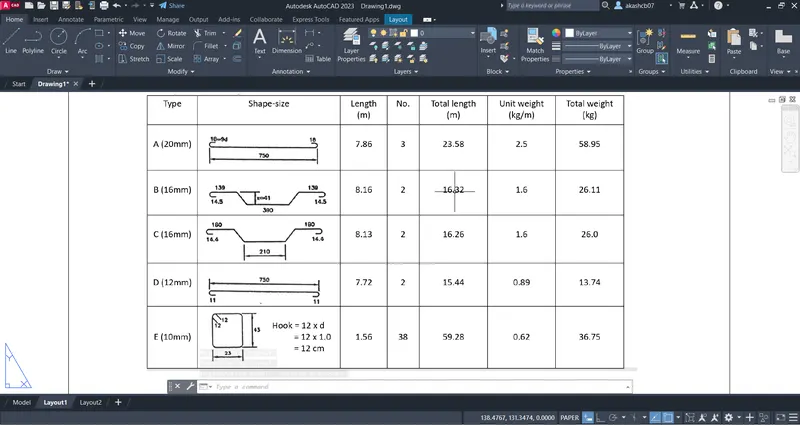
Creating Bar Bending schedule, Different Door types, and Creation of standard drawing templates using AutoCad
Q.1 Ans
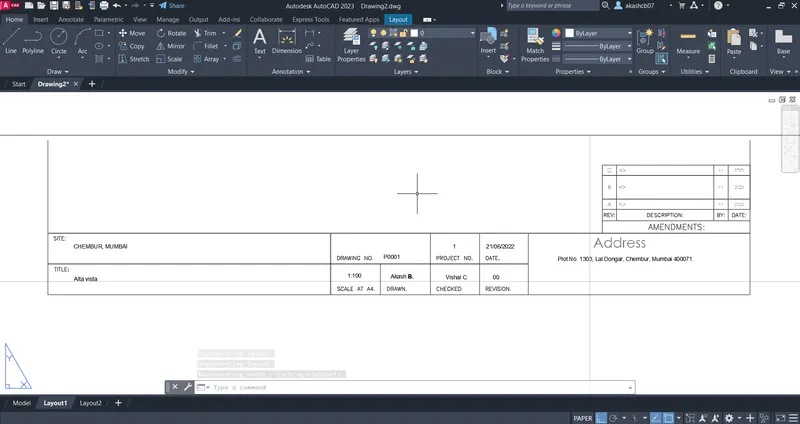
Aim: Create a Tiltleblocks as custom1_titleblock and custom2_titleblock
Procedure:
Step 1:
a. Use the "Line" command and draw the template for titleblock.
b. Use the "Mtext" command and add the text for titleblock.
c. Create a layers for text and lines.
d. Add different layers for different text and commands.
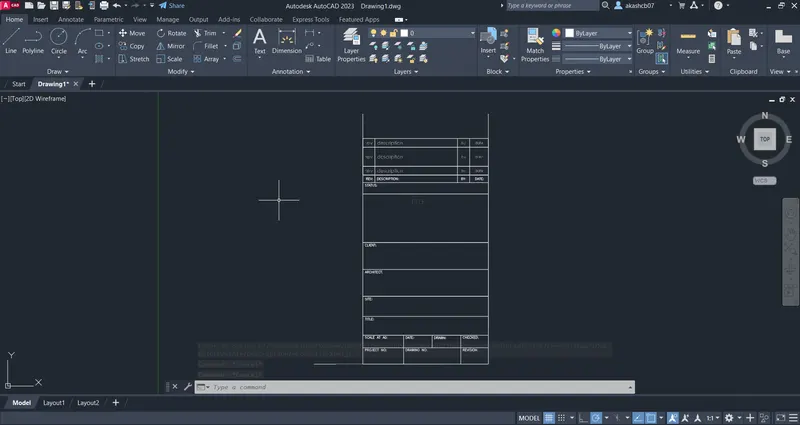
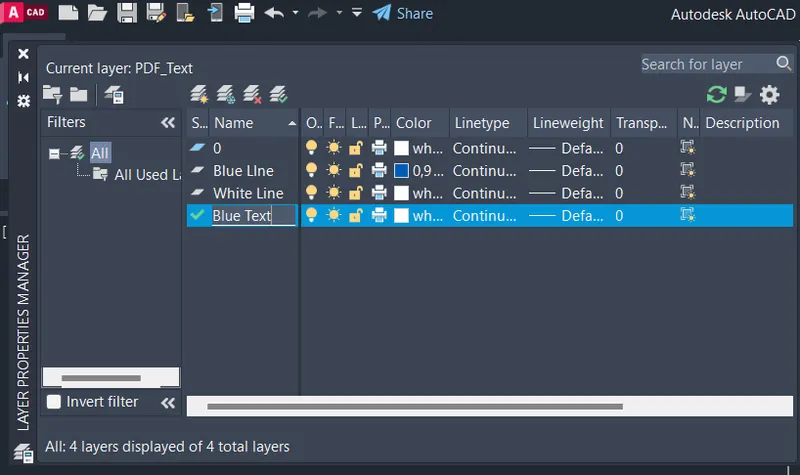
e. Go to Block Panel -> Create a new Block -> Select the titleblock.
f. Add the name for the selected titleblock as custom1_titleblock.
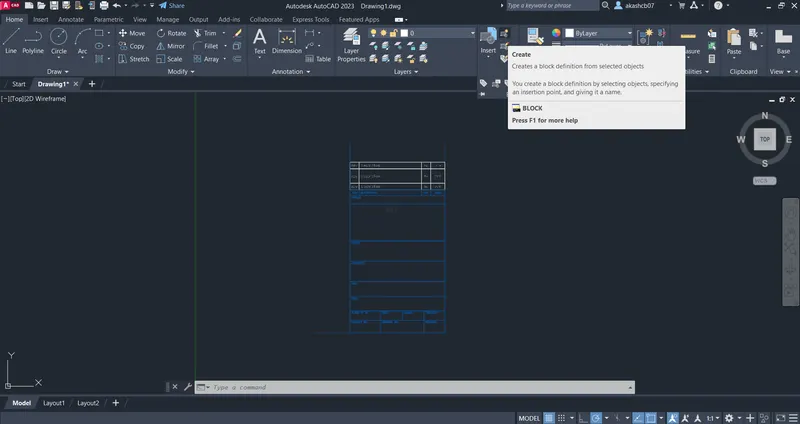
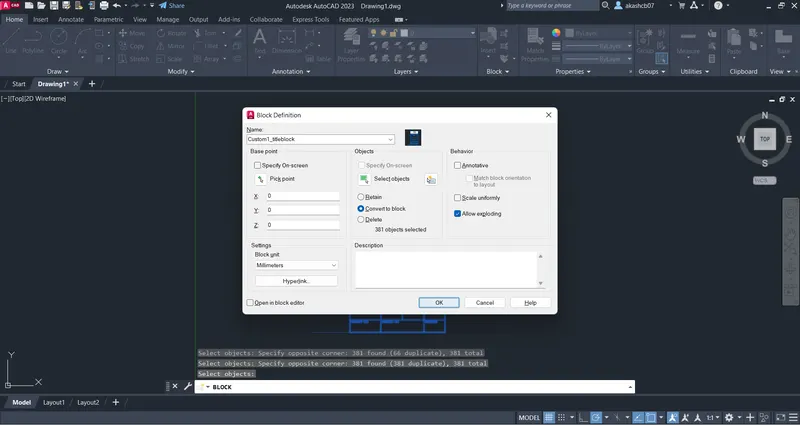
Result: Custom1_titleblock.
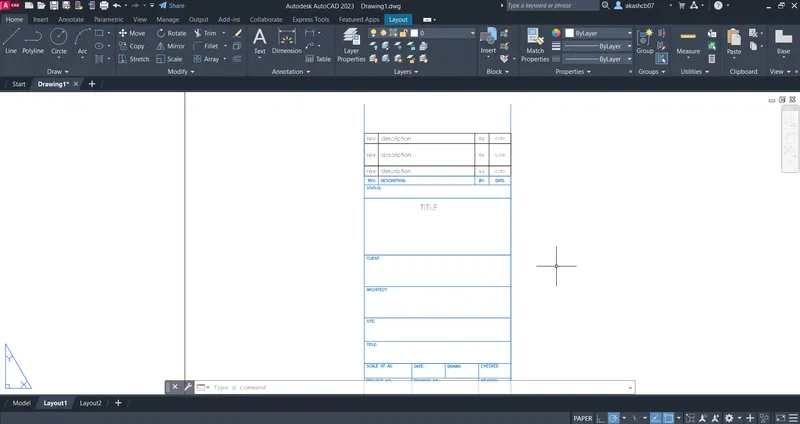
Step 2:
a. Use the same commands for the same titleblock.
b. Proivde the data in the titleblock as project information like Name of the project, location, scale and date etc.
c. Use only one layer for text and lines of the titleblock.
d. Go to Block Panel -> Create a new Block -> Select the titleblock.
e. Create a new block as custom2_titleblock.
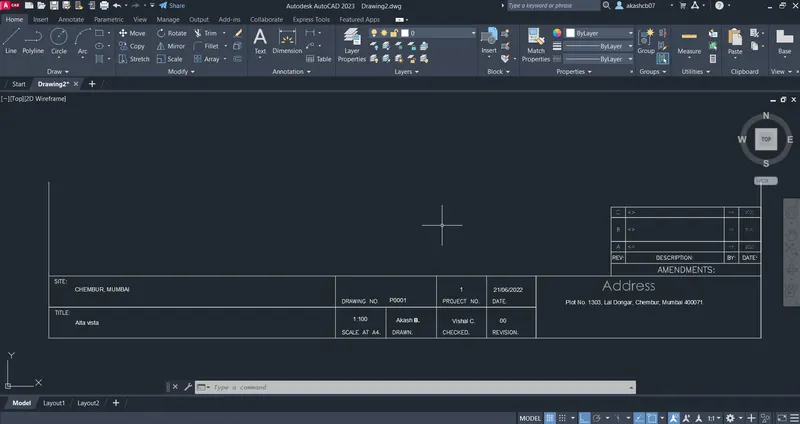
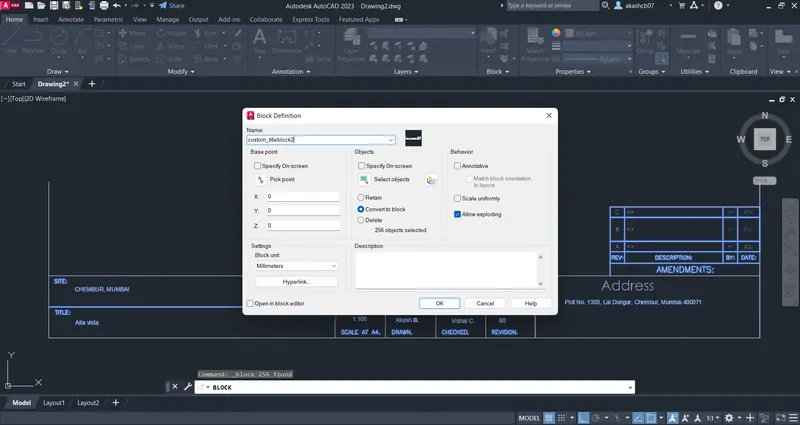
Result : Custom2_titleblock.
Q.2 Ans
Aim: Create a Door style as per standard size and also create a block for them.
Procedure:
Step 1:
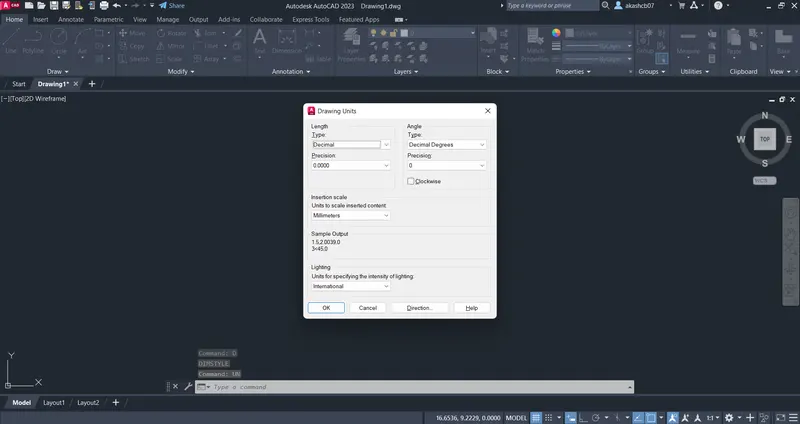
a. Set the unit for drawing as decimals.
b. Set the page margin i.e. limit for the drawing as limax 100,100.
c. Set the limit as 0,0.
Step 2:
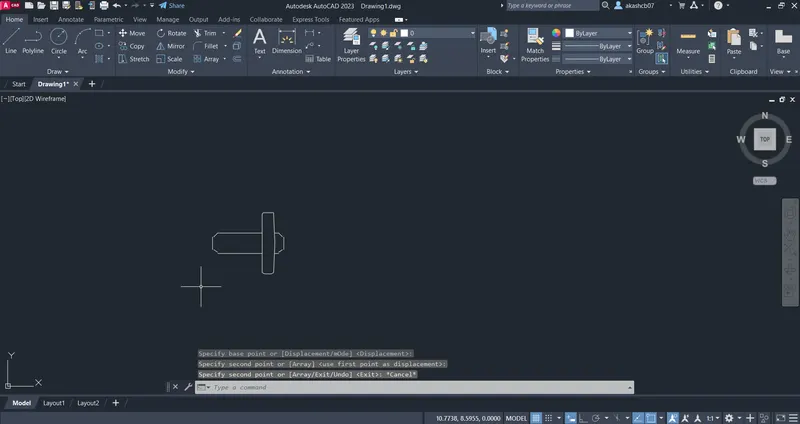
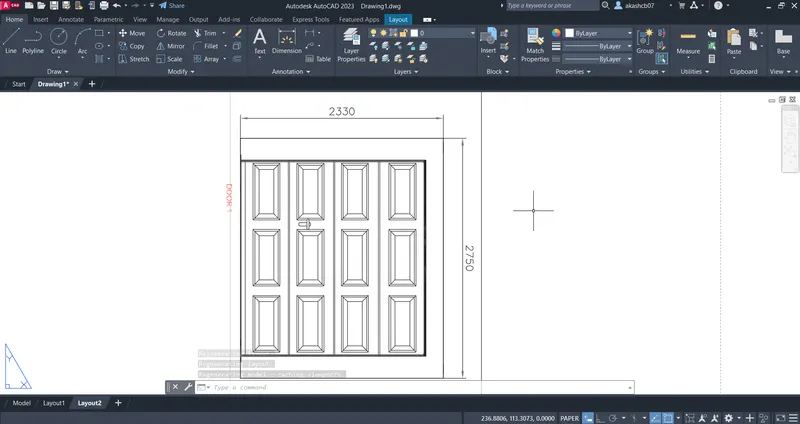
a. Use the "Line" command and draw the panel of the door.
b. Use the rectangle command for block design of the door.
c. Use the fillet with appropriate radius for the curved edged.
d. Use the "mtext" command for texts. (Or Go to Home Tab -> Annotation Panel -> Text for the same tool.)
e. Use the "DIMLIN" command to add the dimensions. (Or Go to Home Tab -> Annotation Panel -> Dimension for the same tool.)
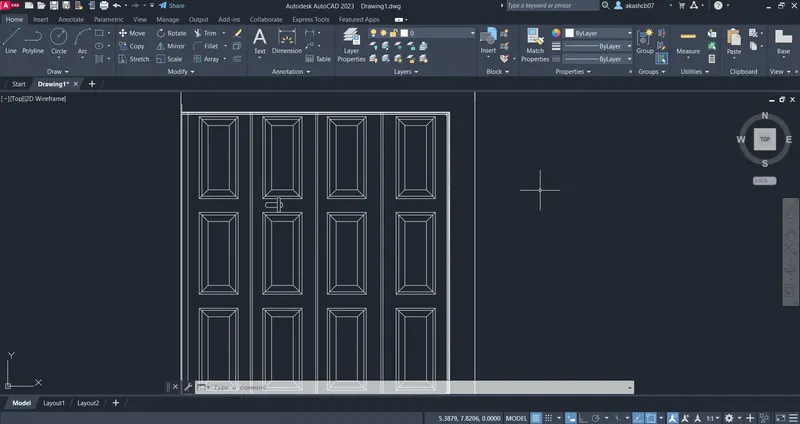
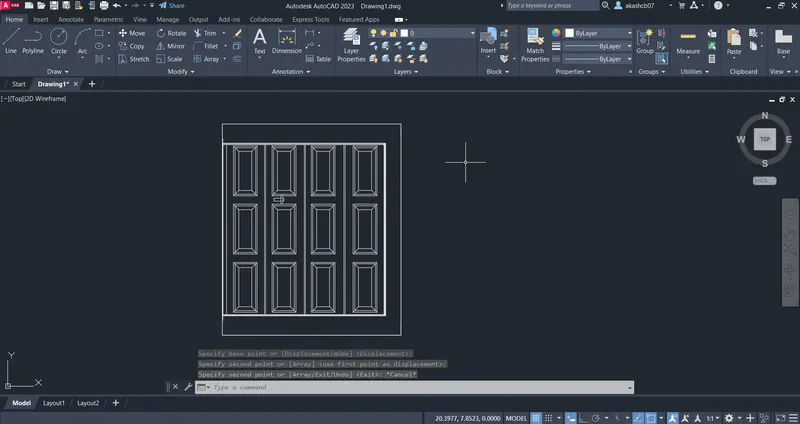
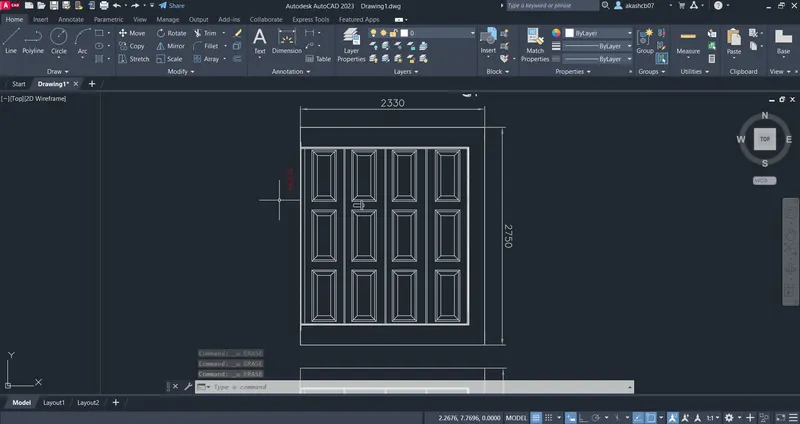
f. Go to Block Panel -> Create a new Block -> Select the Door.
g. Create a block for a door as Door1_warehouse.
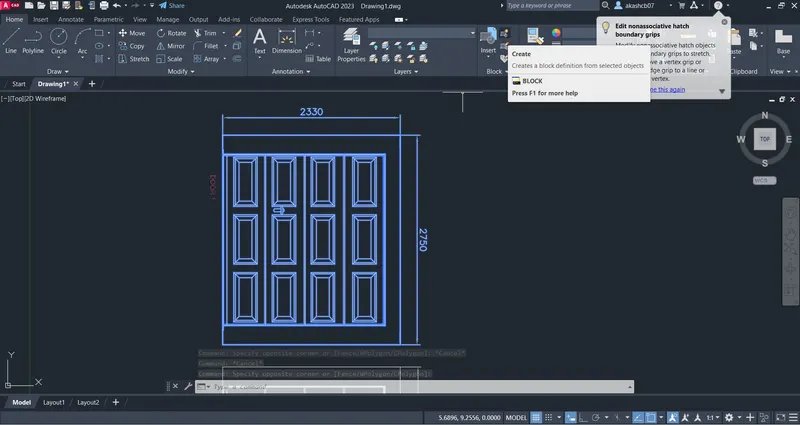
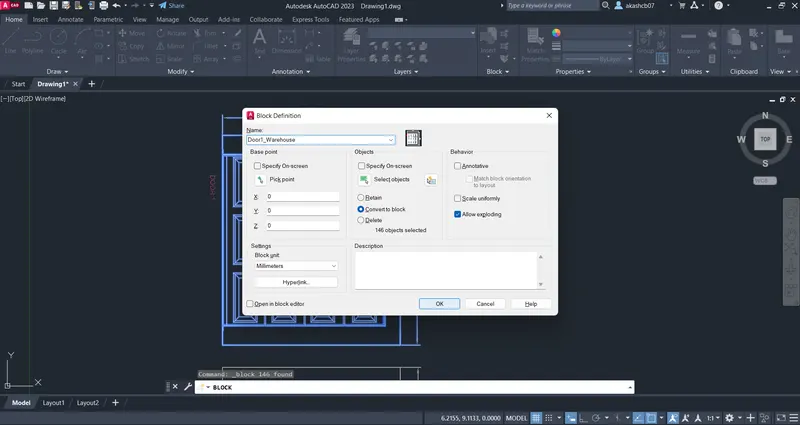
Result: Door1_warehouse.
Step 3:
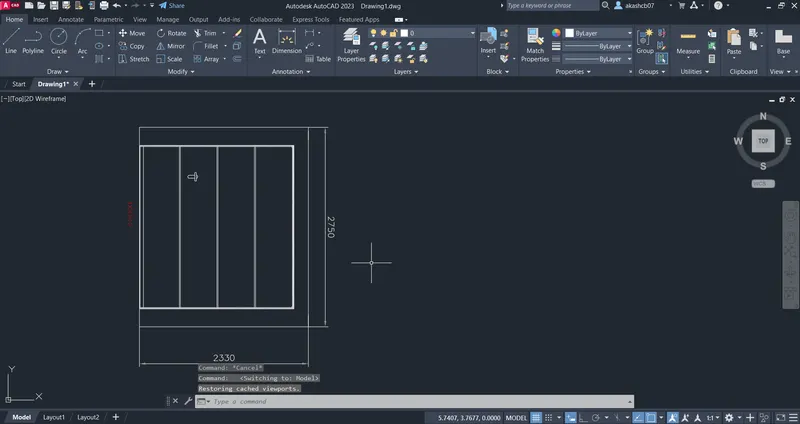
a. Use the "Line" command and draw the panel of the door.
b. Use the rectangle command for block design of the door.
c. Use the fillet with appropriate radius for the curved edged.
d. Use the "mtext" command for texts. (Or Go to Home Tab -> Annotation Panel -> Text for the same tool.)
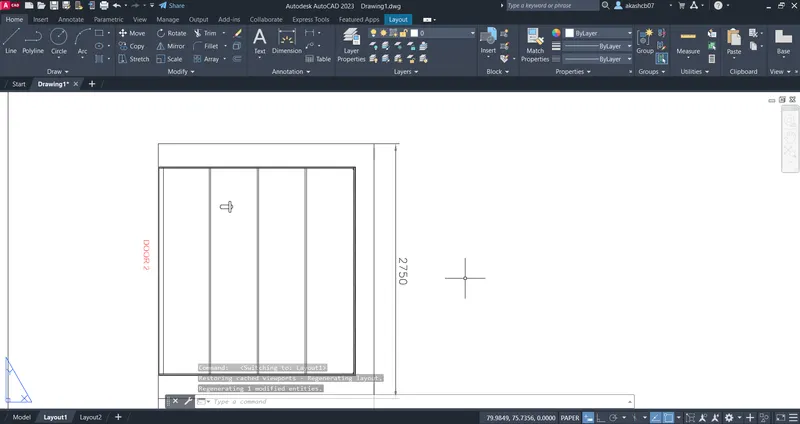
e. Use the "DIMLIN" command to add the dimensions. (Or Go to Home Tab -> Annotation Panel -> Dimension for the same tool.)
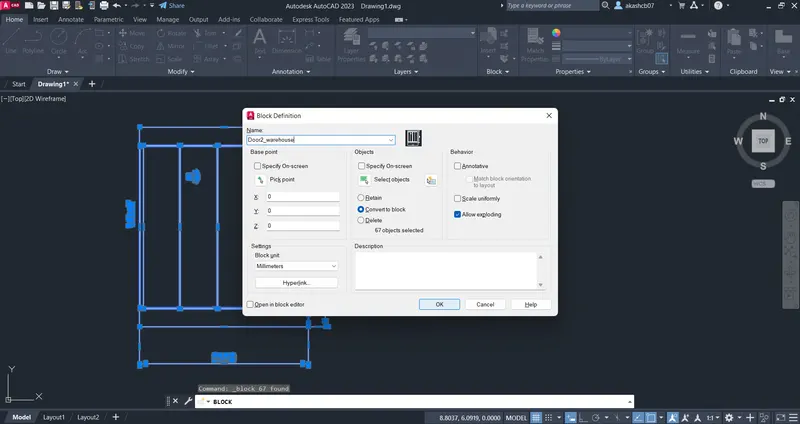
f. Go to Block Panel -> Create a new Block -> Select the Door.
g. Create a block for a door as Door2_warehouse.
Q.3 Ans
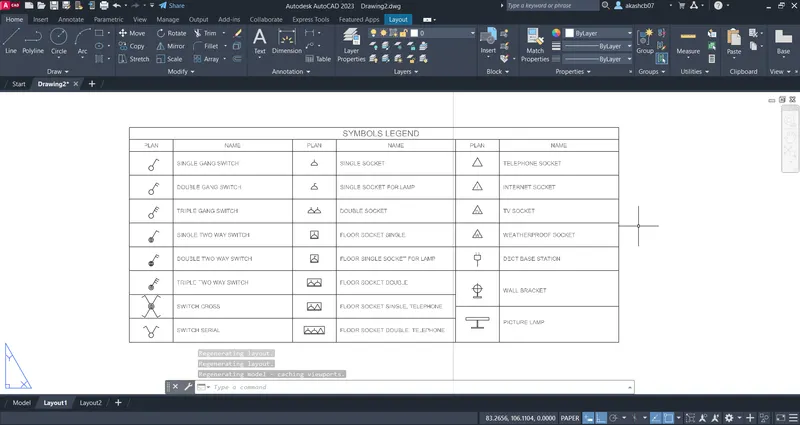
Aim: Create each symbol and save it as a block and add them into the legends.
Procedure:
Step 1:
a. Use the "Line" command to create a line.
b. Use the "circle" command to create a circle for the symbol.
c. Use the "mtext" command to add text in the symbols and legends.
d. Go to Block Panel -> Create a new Block -> Select the Symbol.
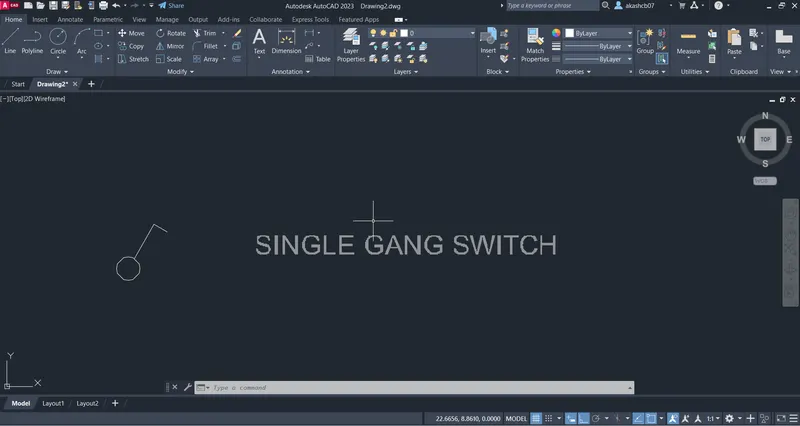
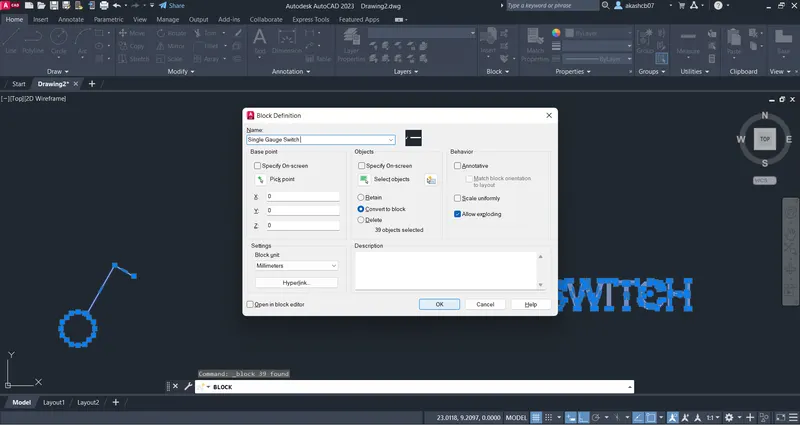
e. Use the same procedure for the all other symbols and text.
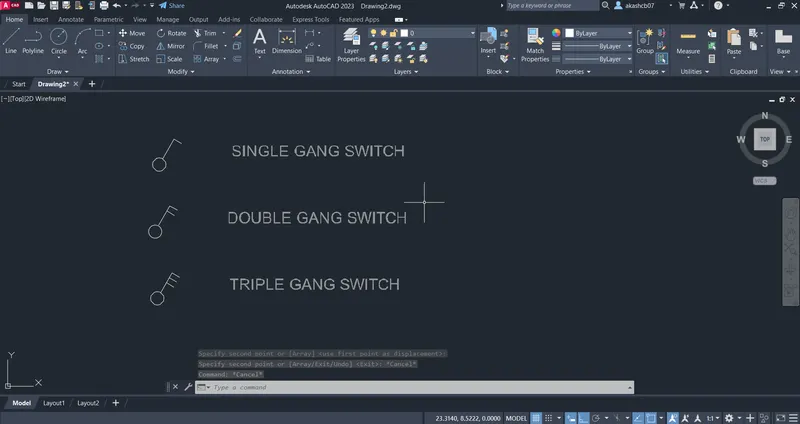
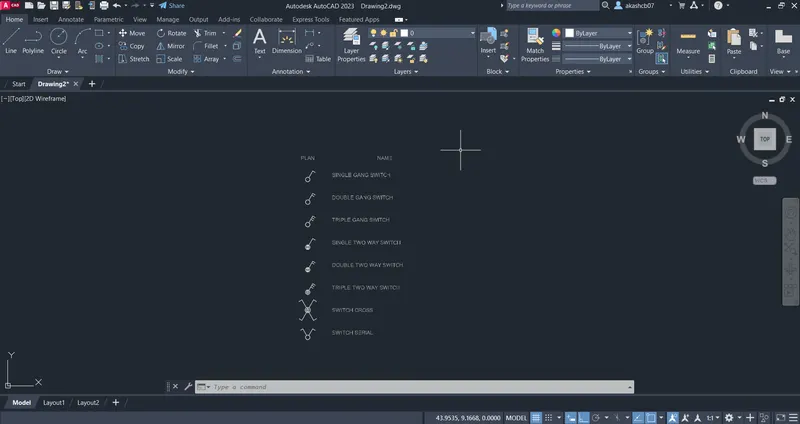
f. Repeat the same procedure to create a socket symbol and block.
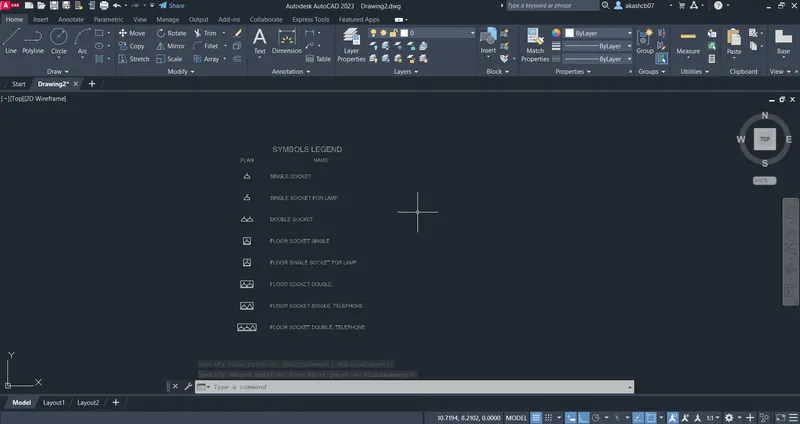
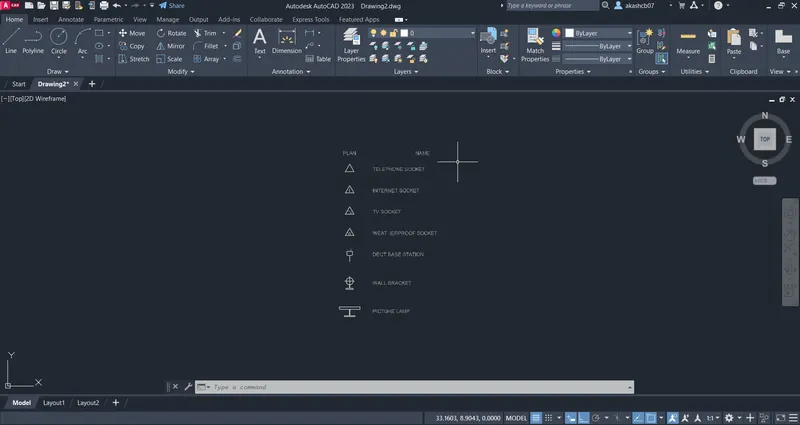
g. Create a table for the symbols which is created.
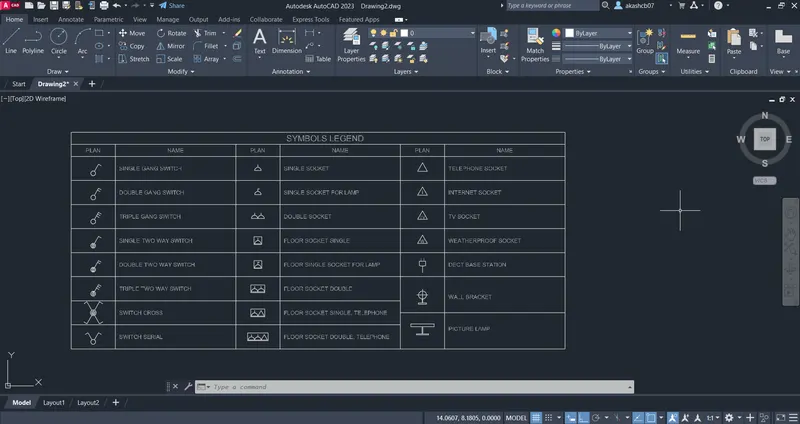
Result: The block is created and legend is created.
Q.4 Ans
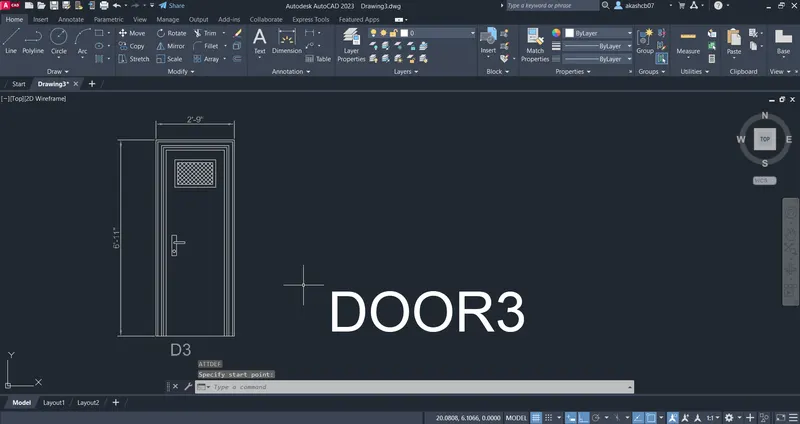
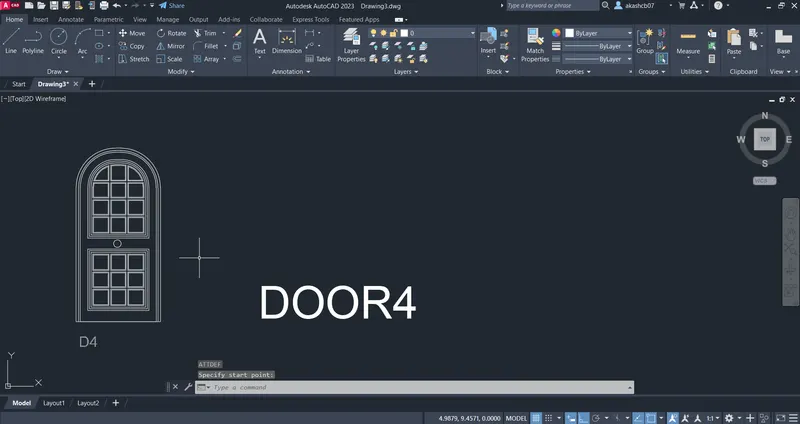
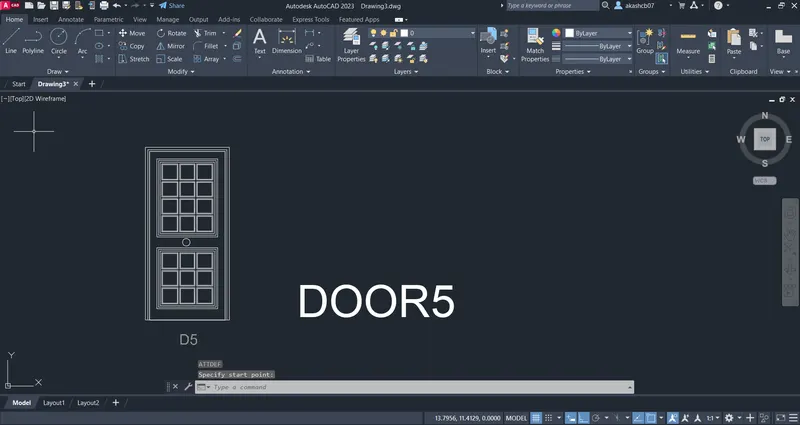
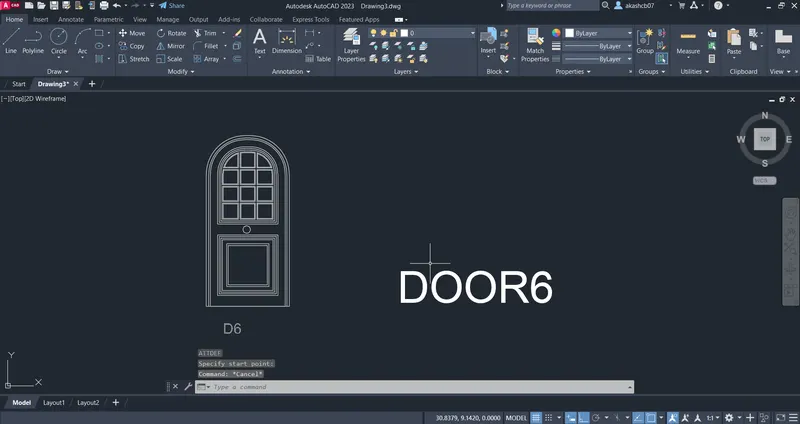
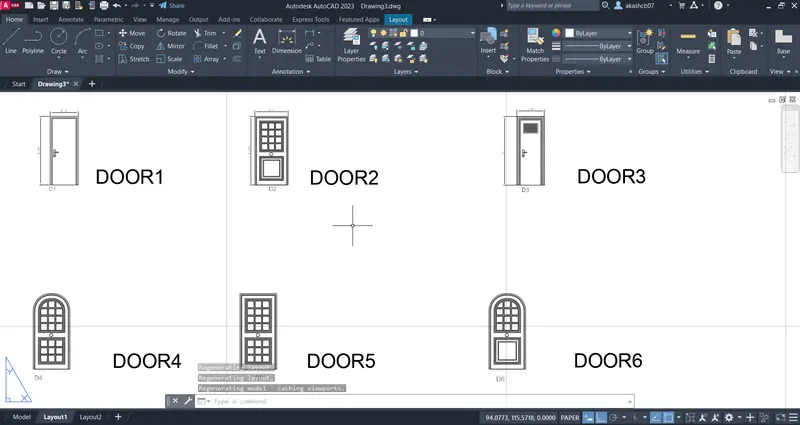
Aim: Create a Door type for residential building as a block.
Procedure:
Step 1:
a. Set the unit for drawing as decimals.
b. Set the page margin i.e. limit for the drawing as limax 100,100.
c. Set the limit as 0,0.
Step 2:
a. Use the "Line" command and draw the panel of the door.
b. Use the rectangle command for block design of the door.
c. Use the fillet with appropriate radius for the curved edged.
d. Use the "mtext" command for texts. (Or Go to Home Tab -> Annotation Panel -> Text for the same tool.)
e. Use the "DIMLIN" command to add the dimensions. (Or Go to Home Tab -> Annotation Panel -> Dimension for the same tool.)
f. Go to Block Panel -> Create a new Block -> Select the Door.
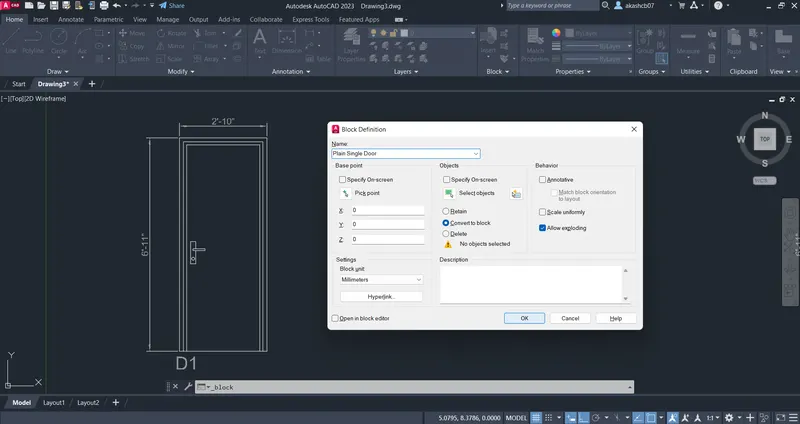
e. Use the ATT command and change the block name as "DOOR1".
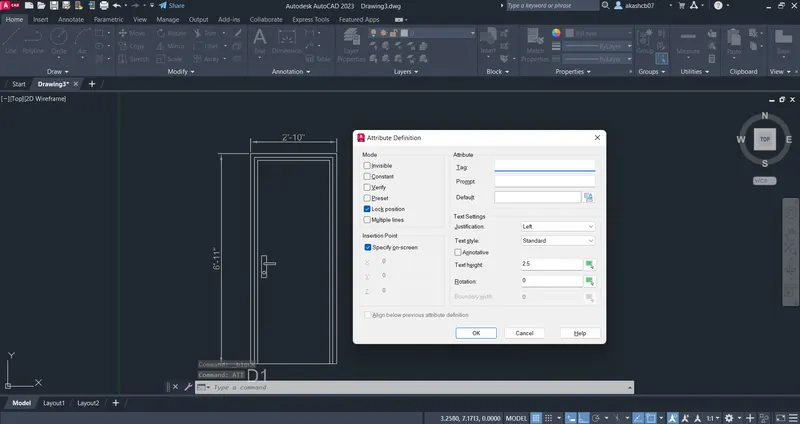
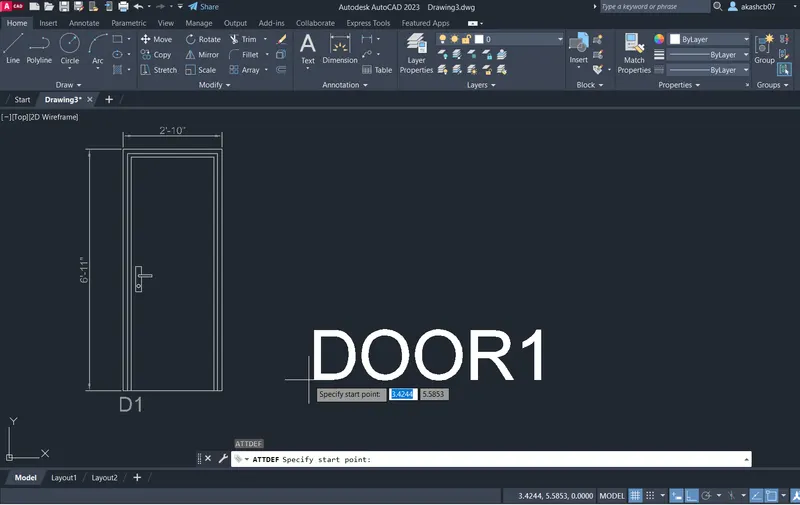
f. Repeat the same procedure for remaining doors.
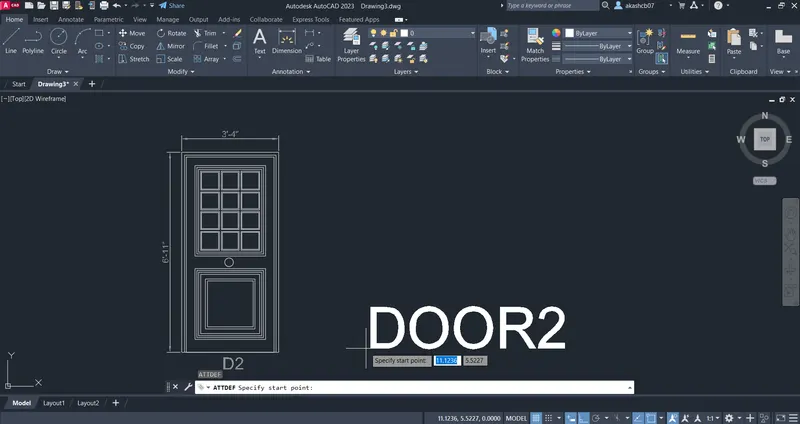
Result:
Q.5 Ans
Aim: Create each shape of bar bent up schedule as a block and add it into the table.
Procedure:
Step 1:
a. Set the unit for drawing as decimals.
b. Set the page margin i.e. limit for the drawing as limax 100,100.
c. Set the limit as 0,0.
Step 2:
a. Use the "Line" command and draw the panel of the door.
b. Use the rectangle command for block design of the door.
c. Use the fillet with appropriate radius for the curved edged.
d. Use the "mtext" command for texts. (Or Go to Home Tab -> Annotation Panel -> Text for the same tool.)
e. Use the "DIMLIN" command to add the dimensions. (Or Go to Home Tab -> Annotation Panel -> Dimension for the same tool.)
f. Go to Block Panel -> Create a new Block -> Select the shape of bar.
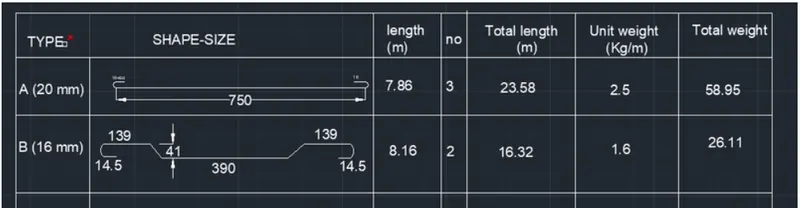
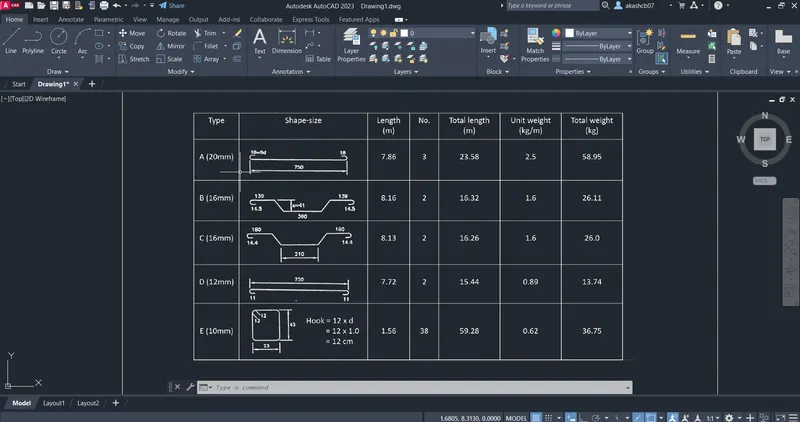
Result: