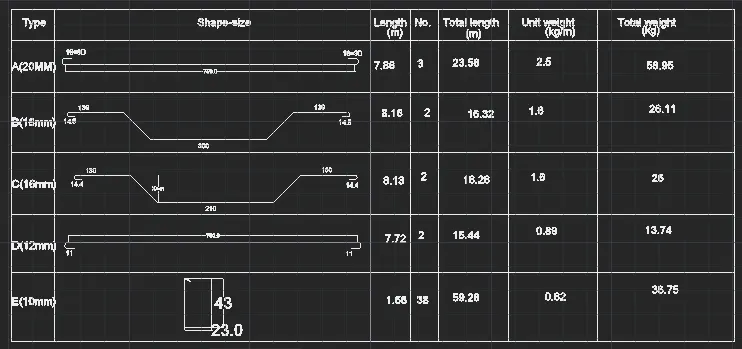
Creating Bar Bending schedule, Different Door types, and Creation of standard drawing templates using AutoCad
Q1:
Aim: To create templates and convert as shown in the figure using AutoCAD.
Procedure:
In the command prompt type UNITS and press enter.
Select the required units and select the required insertion scale.
Select layer settings from ribbon tab.
From the layer settings tab select create layer option.
Enter the required layer name, select the line type and color.
Set the created layer as current layer.
In the ribbon tab, select line tool.
Specify the starting point using cursor.
Draw the line of required length and press enter.
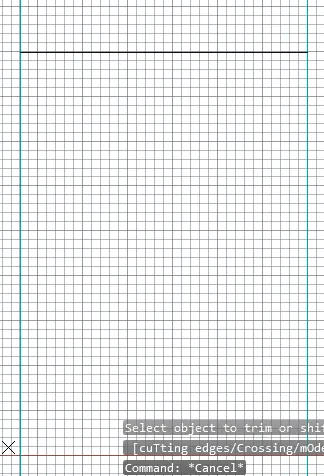
Type offset in the command prompt and press enter.
Enter the offset distance in the command prompt.
Select the object to offset.
Repeat the offset command as per the required dimensions.
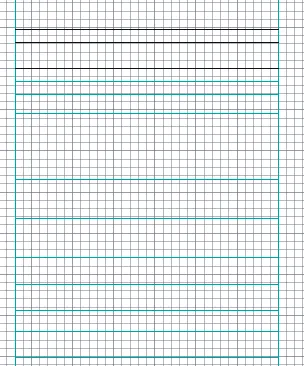
Select text tool from ribbon tab and press enter.
Select the single line text option.
Using cursor mention the starting point of text.
Specify the angle of rotation and press enter.
Now the enter the required text.
Specify the next point to enter the text.
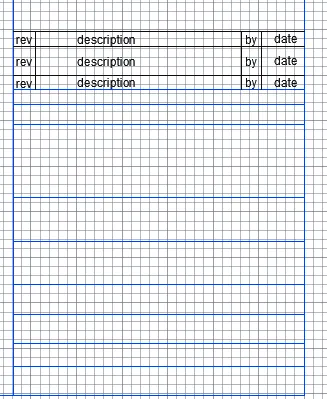
From the ribbon tab, select line tool.
Specify the starting point using cursor.
Draw the line of required length and press enter.
Select layer settings from ribbon tab.
From the layer settings tab select create layer option.
Enter the required layer name, select the line type and color.
Set the created layer as current layer.
Now, select text tool from ribbon tab and press enter.
Select the single line text option.
Using cursor mention the starting point of text.
Specify the angle of rotation and press enter.
Now the enter the required text.
Specify the next point to enter the text.
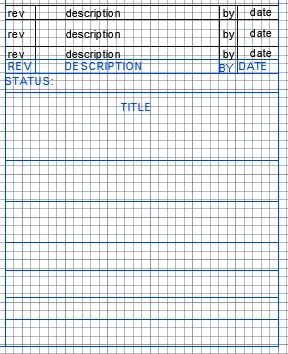
From the ribbon tab, select line tool.
Specify the starting point using cursor.
Draw the line of required length and press enter.
Select text tool from ribbon tab and press enter.
Select the single line text option.
Using cursor mention the starting point of text.
Specify the angle of rotation and press enter.
Now the enter the required text.
Specify the next point to enter the text.
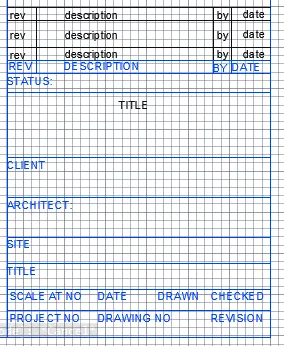
From the ribbon tab, select the line tool.
Specify the starting point from the bottom and draw a vertical line.
Press esc.
Press spacebar to reintiate the previous command that is the line command.
Draw the vertical line as per the template.
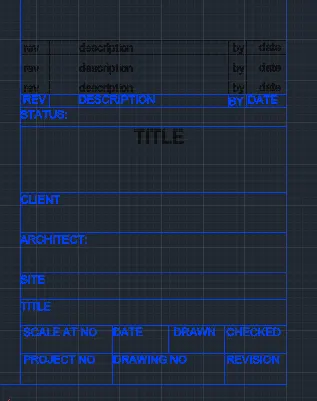
Type "B" in the command prompt and press enter.
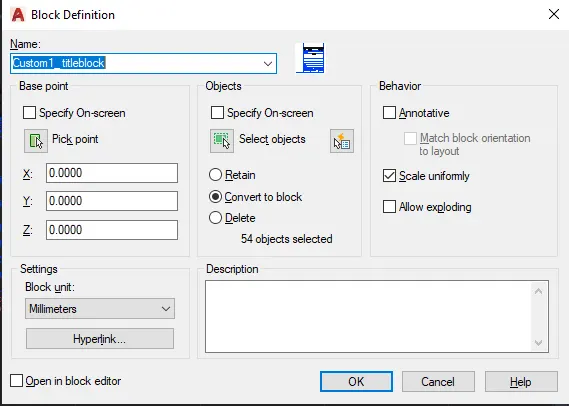
In the block definition tab, enter the name of the block.
Click on the "pick point" and in the workspace click on the created object to mention the pick point.
Then click on the "select objects" and in the workspace select the mentioned object using cursor.
Click ok.
In the command prompt type insert and press enter.
Created block will be shown, click on it.
Based on the pick point object can be placed anywhere in the required place.
From the ribbon tab, select line tool.
Specify the starting point using cursor.
Draw the line of required length and press enter.
Select layer settings from ribbon tab.
From the layer settings tab select create layer option.
Enter the required layer name, select the line type and color.
Set the created layer as current layer.
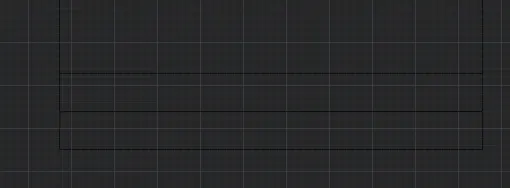
From the ribbon tab, select line tool.
Specify the starting point using cursor.
Draw the line of required length and press enter.
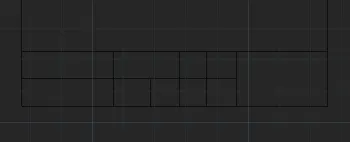
Select text tool from ribbon tab and press enter.
Select the single line text option.
Using cursor mention the starting point of text.
Specify the angle of rotation and press enter.
Now the enter the required text.
Specify the next point to enter the text.
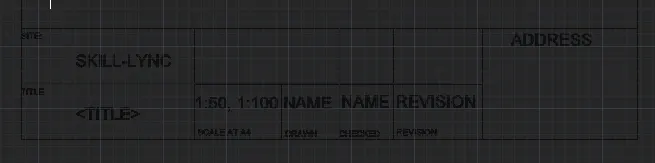
Select text tool from ribbon tab and press enter.
Select the single line text option.
Using cursor mention the starting point of text.
Specify the angle of rotation and press enter.
Now the enter the required text.
Specify the next point to enter the text.
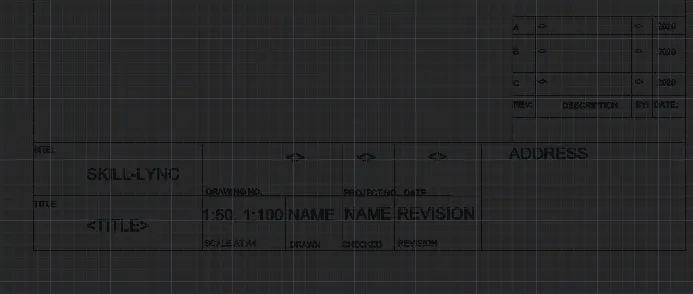
From the ribbon tab, select line tool.
Specify the starting point using cursor.
Draw the line of required length and press enter.
Select text tool from ribbon tab and press enter.
Select the single line text option.
Using cursor mention the starting point of text.
Specify the angle of rotation and press enter.
Now the enter the required text.
Specify the next point to enter the text.
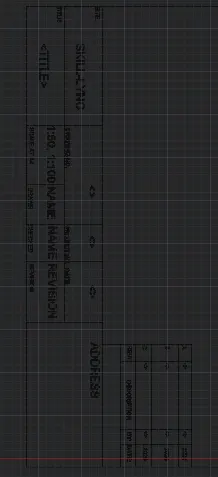
Type "B" in the command prompt and press enter.
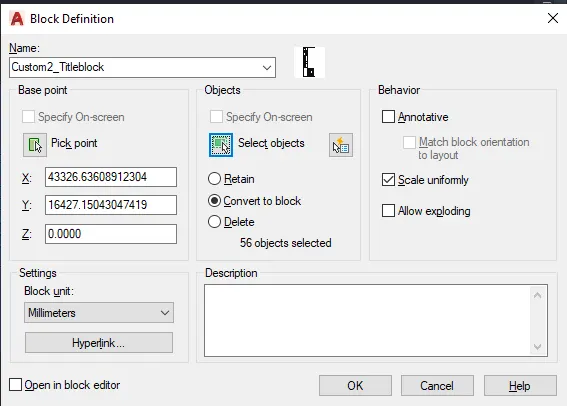
In the block definition tab, enter the name of the block.
Click on the "pick point" and in the workspace click on the created object to mention the pick point.
Then click on the "select objects" and in the workspace select the mentioned object using cursor.
Click ok.
In the command prompt type insert and press enter.
Created block will be shown, click on it.
Based on the pick point object can be placed anywhere in the required place.
Q2:
Aim: To create door type for warehouse as given in the figure using AutoCAD
Procedure:
In the command prompt type UNITS and press enter.
Select the required units and select the required insertion scale.
Select layer settings from ribbon tab.
From the layer settings tab select create layer option.
Enter the required layer name, select the line type and color.
Set the created layer as current layer.
In the ribbon tab, select line tool.
Specify the starting point using cursor.
Draw the line of required length and press enter.
Type offset in the command prompt and press enter.
Enter the offset distance in the command prompt.
Select the object to offset.
Repeat the offset command as per the required dimensions.
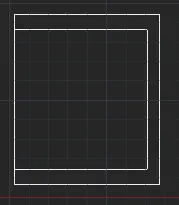
Select reactangle tool from ribbon tab and press enter.
Specify the starting point and drag the cursor to create a rectangle.
Type offset in the command prompt and press enter.
Enter the offset distance in the command prompt.
Select the object to offset.
Repeat the offset command as per the required dimensions.
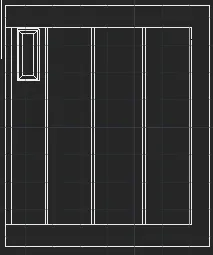
Select the created rectangle using cursor.
Type "copy" in the command prompt and press enter.
Select the base point and press enter.
Move the copied object and place in horizontal direction as per the required drawing.
Now select the previously created objects and type copy in the command prompt.
Select the base point and press enter.
Place the copied objects.
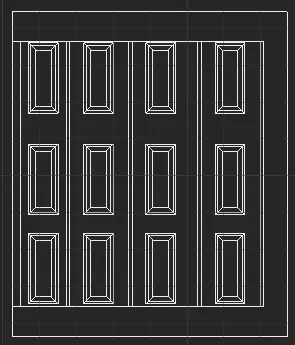
Select the dimension tool from ribbon tab.
Specify the starting point and mention the next point to display the dimensions.
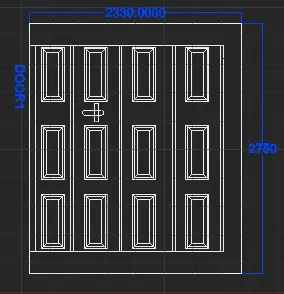
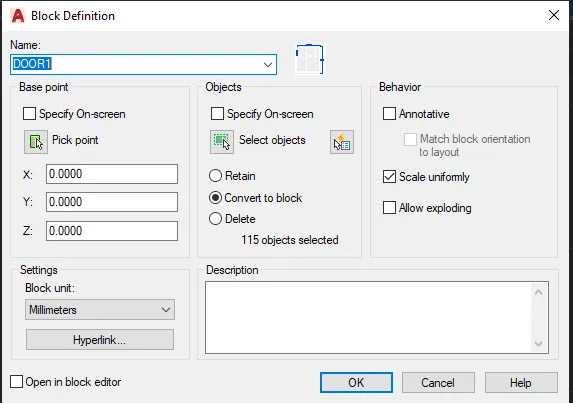
Type "B" in the command prompt and press enter.
In the block definition tab, enter the name of the block as "DOOR1".
Click on the "pick point" and in the workspace click on the created object to mention the pick point.
Then click on the "select objects" and in the workspace select the mentioned object using cursor.
Click ok.
In the command prompt type insert and press enter.
Created block will be shown, click on it.
Based on the pick point object can be placed anywhere in the required place.
Type insert in the command prompt and press enter.
From the insert tab select the created block to place it.
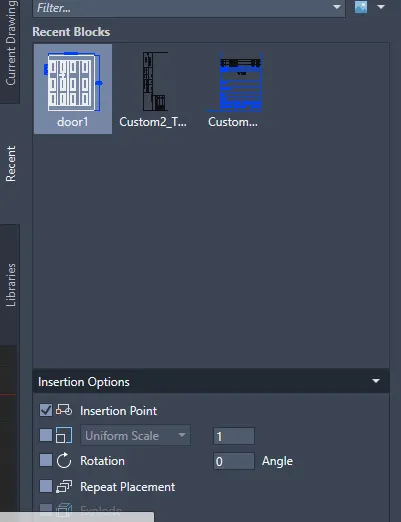
Place the block in the required space based on the pick point.
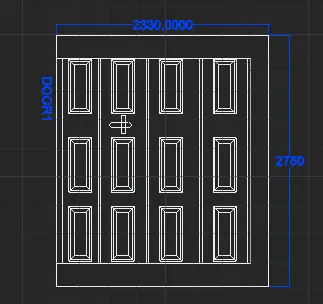
Select the outer line of previously created object except the rectangles.
Type copy in the command prompt and press enter.
Select the base point and press enter.
Move the object in the downward direction and place it.
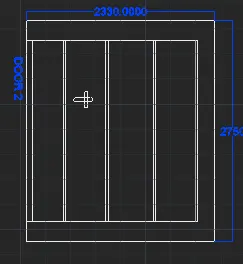
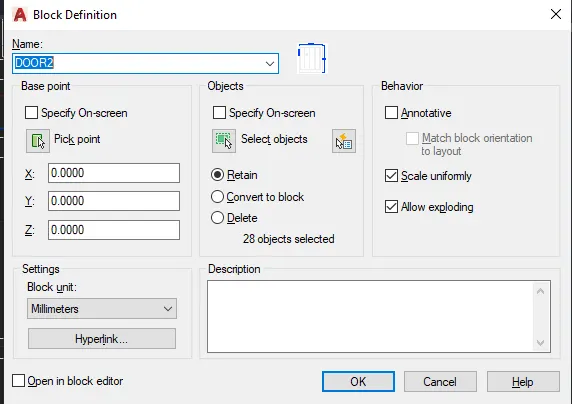
Type "B" in the command prompt and press enter.
In the block definition tab, enter the name of the block as "DOOR1".
Click on the "pick point" and in the workspace click on the created object to mention the pick point.
Then click on the "select objects" and in the workspace select the mentioned object using cursor.
Click ok.
In the command prompt type insert and press enter.
Created block will be shown, click on it.
Based on the pick point object can be placed anywhere in the required place.
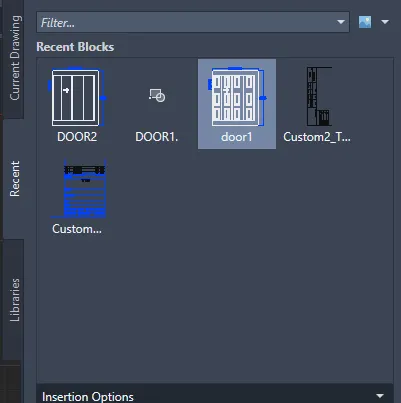
Type insert in the command prompt and press enter.
From the insert tab select the created block to place it.
Q3:
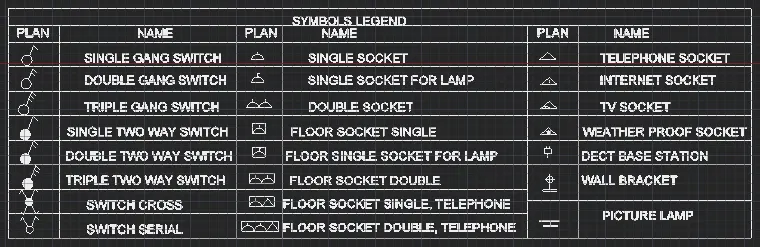
Aim: To draw the given figure using AutoCAD.
Procedure:
In the command prompt type UNITS and press enter.
Select the required units and select the required insertion scale.
Select layer settings from ribbon tab.
From the layer settings tab select create layer option.
Enter the required layer name, select the line type and color.
Set the created layer as current layer.
In the ribbon tab, select line tool.
Specify the starting point using cursor.
Draw the line of required length and press enter.
Type offset in the command prompt and press enter.
Enter the offset distance in the command prompt.
Select the object to offset.
Repeat the offset command as per the required dimensions.
Select text tool from ribbon tab and press enter.
Select the single line text option.
Using cursor mention the starting point of text.
Specify the angle of rotation and press enter.
Now the enter the required text.
Specify the next point to enter the text.
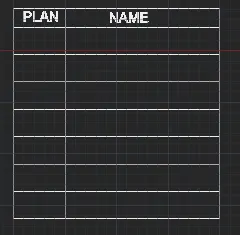
Copy the previously created objects using cursor.
Type "copy" in the command prompt and press enter.
Select the base point and press enter.
Move the copied object and place in horizontal direction as per the required drawing.
Now select the previously created objects and type copy in the command prompt.
Select the base point and press enter.
Place the copied objects.
Select text tool from ribbon tab and press enter.
Select the single line text option.
Using cursor mention the starting point of text.
Specify the angle of rotation and press enter.
Now the enter the required text.
Specify the next point to enter the text.
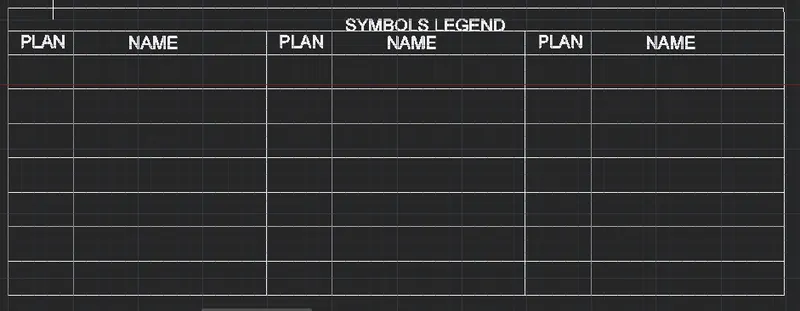
Select the circle tool from ribbon tab and press enter.
Specify the starting point and press enter.
Using cursor draw the required circle.
Press esc.
Select line tool from ribbon tab and press enter..
Draw the line of required length and press enter.
Press spacebar, using line command draw the required line.
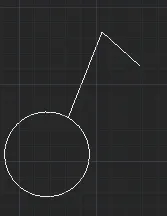
Type "B" in the command prompt and press enter.
In the block definition tab, enter the name of the block as "Single gang switch".
Click on the "pick point" and in the workspace click on the created object to mention the pick point.
Then click on the "select objects" and in the workspace select the mentioned object using cursor.
Click ok.
In the command prompt type insert and press enter.
Created block will be shown, click on it.
Based on the pick point object can be placed anywhere in the required place.
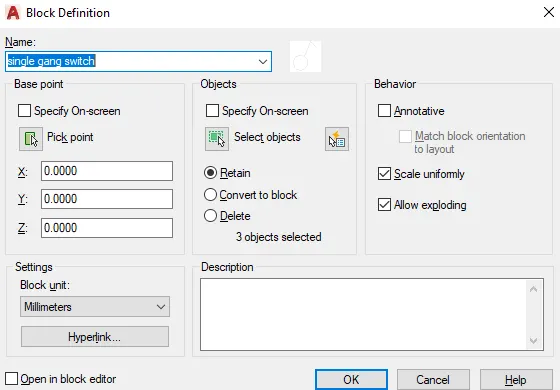
Select the circle tool from ribbon tab and press enter.
Specify the starting point and press enter.
Using cursor draw the required circle.
Press esc.
Select line tool from ribbon tab and press enter..
Draw the line of required length and press enter.
Press spacebar, using line command draw the required line.
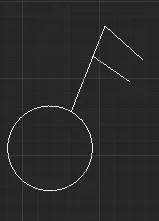
Type "B" in the command prompt and press enter.
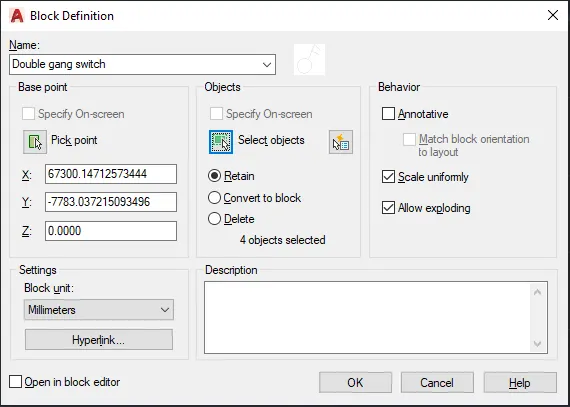
In the block definition tab, enter the name of the block as "Double gang switch".
Click on the "pick point" and in the workspace click on the created object to mention the pick point.
Then click on the "select objects" and in the workspace select the mentioned object using cursor.
Click ok.
In the command prompt type insert and press enter.
Created block will be shown, click on it.
Based on the pick point object can be placed anywhere in the required place.
Select the circle tool from ribbon tab and press enter.
Specify the starting point and press enter.
Using cursor draw the required circle.
Press esc.
Select line tool from ribbon tab and press enter..
Draw the line of required length and press enter.
Press spacebar, using line command draw the required line.
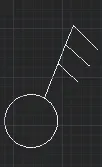
Type "B" in the command prompt and press enter.
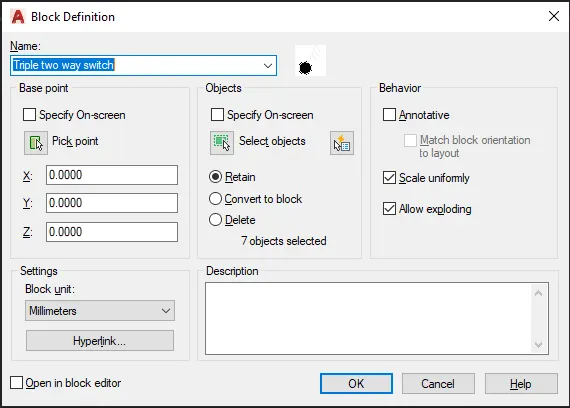
In the block definition tab, enter the name of the block as "Triple two way switch".
Click on the "pick point" and in the workspace click on the created object to mention the pick point.
Then click on the "select objects" and in the workspace select the mentioned object using cursor.
Click ok.
In the command prompt type insert and press enter.
Created block will be shown, click on it.
Based on the pick point object can be placed anywhere in the required place.
Type "B" in the command prompt and press enter.
In the block definition tab, enter the name of the block as "Double two way switch".
Click on the "pick point" and in the workspace click on the created object to mention the pick point.
Then click on the "select objects" and in the workspace select the mentioned object using cursor.
Click ok.
In the command prompt type insert and press enter.
Created block will be shown, click on it.
Based on the pick point object can be placed anywhere in the required place.
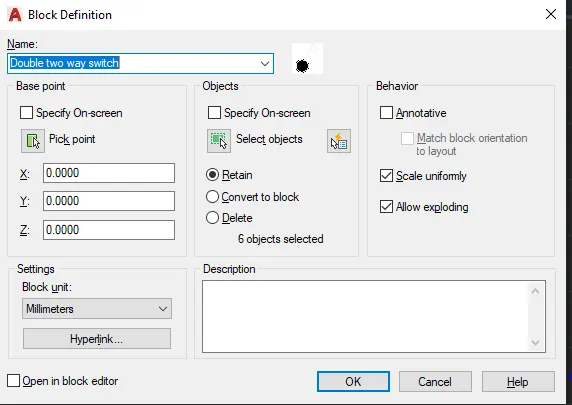
Type "B" in the command prompt and press enter.
In the block definition tab, enter the name of the block as "Single two way switch".
Click on the "pick point" and in the workspace click on the created object to mention the pick point.
Then click on the "select objects" and in the workspace select the mentioned object using cursor.
Click ok.
In the command prompt type insert and press enter.
Created block will be shown, click on it.
Based on the pick point object can be placed anywhere in the required place.
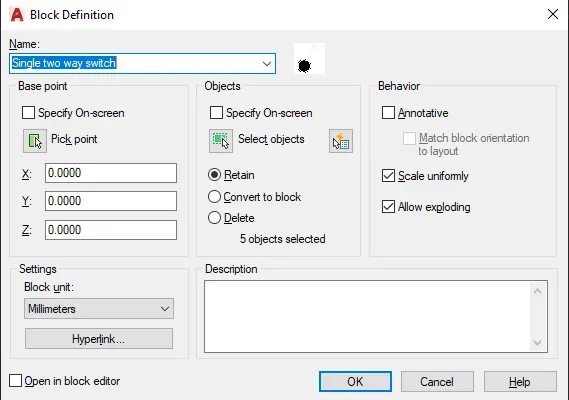
Type "B" in the command prompt and press enter.
In the block definition tab, enter the name of the block as "Switch cross".
Click on the "pick point" and in the workspace click on the created object to mention the pick point.
Then click on the "select objects" and in the workspace select the mentioned object using cursor.
Click ok.
In the command prompt type insert and press enter.
Created block will be shown, click on it.
Based on the pick point object can be placed anywhere in the required place.
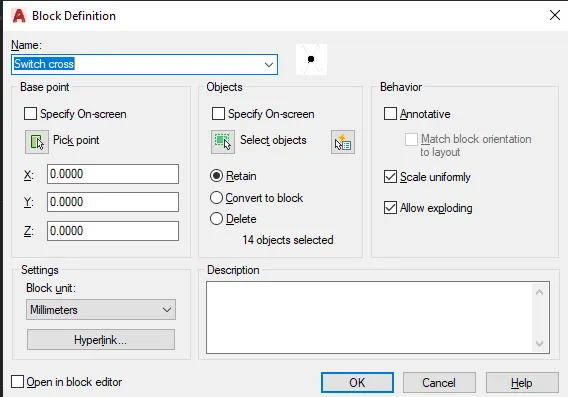
Type "B" in the command prompt and press enter.
In the block definition tab, enter the name of the block as "Switch serial".
Click on the "pick point" and in the workspace click on the created object to mention the pick point.
Then click on the "select objects" and in the workspace select the mentioned object using cursor.
Click ok.
In the command prompt type insert and press enter.
Created block will be shown, click on it.
Based on the pick point object can be placed anywhere in the required place.
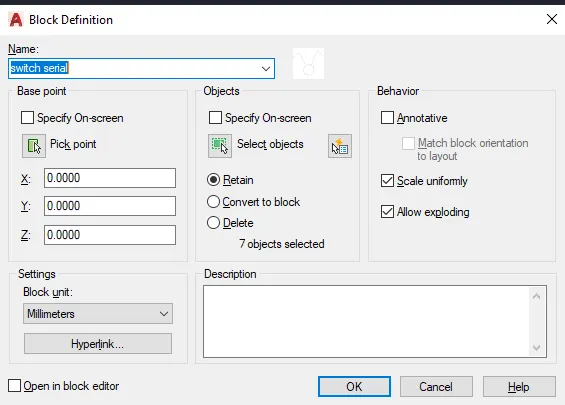
Type "B" in the command prompt and press enter.
In the block definition tab, enter the name of the block as "single socket".
Click on the "pick point" and in the workspace click on the created object to mention the pick point.
Then click on the "select objects" and in the workspace select the mentioned object using cursor.
Click ok.
In the command prompt type insert and press enter.
Created block will be shown, click on it.
Based on the pick point object can be placed anywhere in the required place.
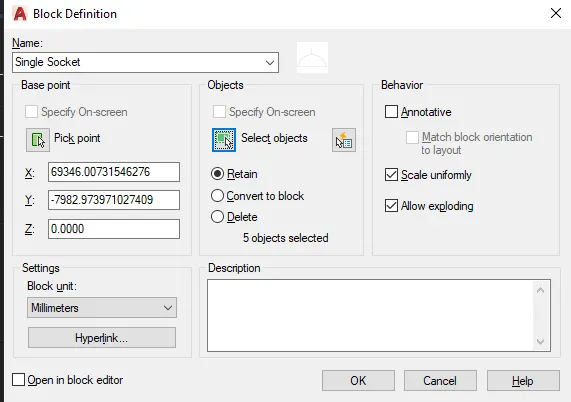
Type "B" in the command prompt and press enter.
In the block definition tab, enter the name of the block as "Single socket for lamp".
Click on the "pick point" and in the workspace click on the created object to mention the pick point.
Then click on the "select objects" and in the workspace select the mentioned object using cursor.
Click ok.
In the command prompt type insert and press enter.
Created block will be shown, click on it.
Based on the pick point object can be placed anywhere in the required place.
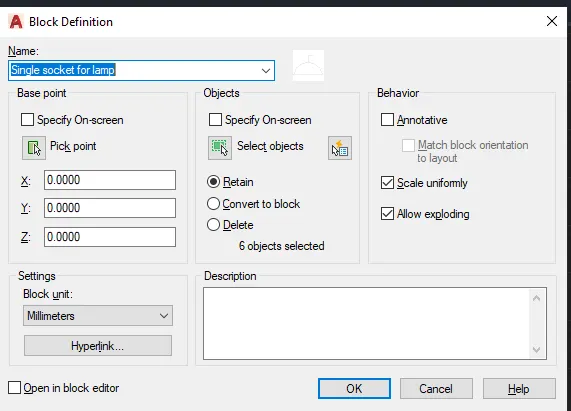
Type "B" in the command prompt and press enter.
In the block definition tab, enter the name of the block as "Floor socket single".
Click on the "pick point" and in the workspace click on the created object to mention the pick point.
Then click on the "select objects" and in the workspace select the mentioned object using cursor.
Click ok.
In the command prompt type insert and press enter.
Created block will be shown, click on it.
Based on the pick point object can be placed anywhere in the required place.
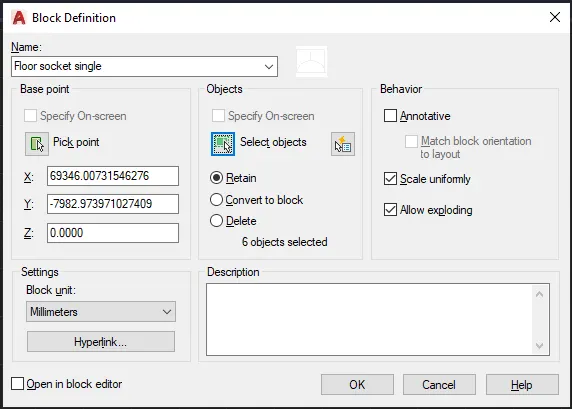
Type "B" in the command prompt and press enter.
In the block definition tab, enter the name of the block as "Double socket".
Click on the "pick point" and in the workspace click on the created object to mention the pick point.
Then click on the "select objects" and in the workspace select the mentioned object using cursor.
Click ok.
In the command prompt type insert and press enter.
Created block will be shown, click on it.
Based on the pick point object can be placed anywhere in the required place.
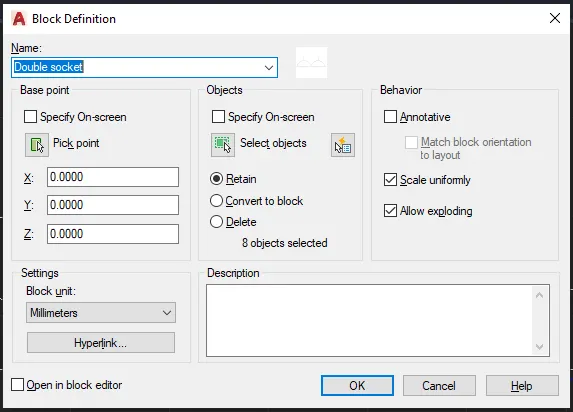
Type "B" in the command prompt and press enter.
In the block definition tab, enter the name of the block as "Floor socket double".
Click on the "pick point" and in the workspace click on the created object to mention the pick point.
Then click on the "select objects" and in the workspace select the mentioned object using cursor.
Click ok.
In the command prompt type insert and press enter.
Created block will be shown, click on it.
Based on the pick point object can be placed anywhere in the required place.
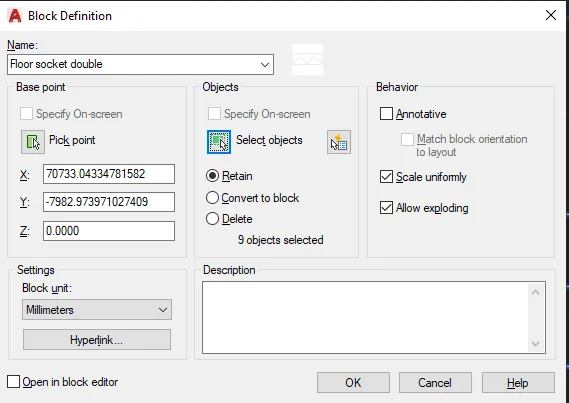
Type "B" in the command prompt and press enter.
In the block definition tab, enter the name of the block as "Floor socket single, Telephone".
Click on the "pick point" and in the workspace click on the created object to mention the pick point.
Then click on the "select objects" and in the workspace select the mentioned object using cursor.
Click ok.
In the command prompt type insert and press enter.
Created block will be shown, click on it.
Based on the pick point object can be placed anywhere in the required place.
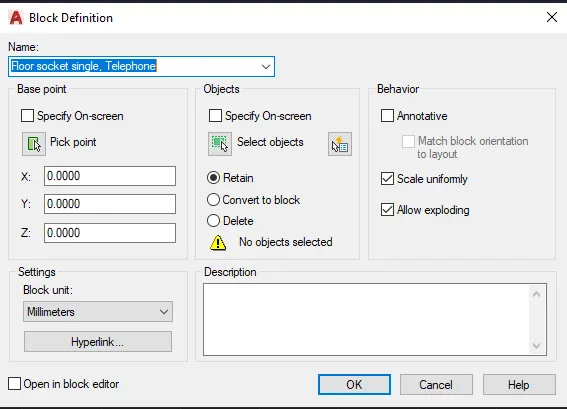
Type "B" in the command prompt and press enter.
In the block definition tab, enter the name of the block as "Floor socket double telephone".
Click on the "pick point" and in the workspace click on the created object to mention the pick point.
Then click on the "select objects" and in the workspace select the mentioned object using cursor.
Click ok.
In the command prompt type insert and press enter.
Created block will be shown, click on it.
Based on the pick point object can be placed anywhere in the required place.
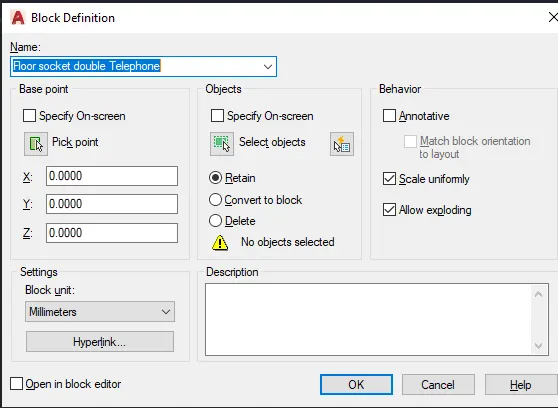
Type insert in the command prompt and press enter.
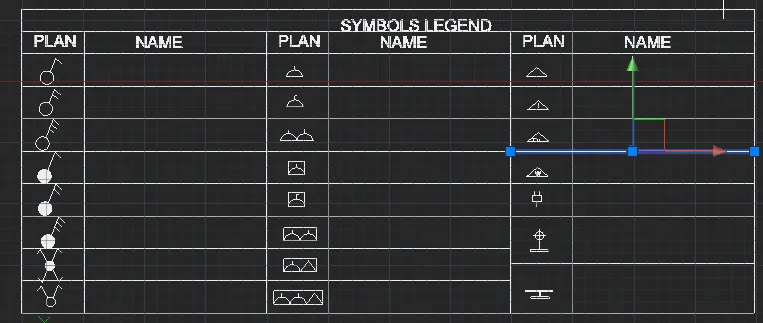
All the created blocks will appear.
Select the required block and insert.
Similarly insert all the required block
Select text tool from ribbon tab and press enter.
Select the single line text option.
Using cursor mention the starting point of text.
Specify the angle of rotation and press enter.
Now the enter the required text.
Specify the next point to enter the text.
Q4:
AIM: To create the door type as block using AutoCAD.
PROCEDURE:
In the command prompt type UNITS and press enter.
Select the required units and select the required insertion scale.
Select layer settings from ribbon tab.
From the layer settings tab select create layer option.
Enter the required layer name, select the line type and color.
Set the created layer as current layer.
In the ribbon tab, select line tool.
Specify the starting point using cursor.
Draw the line of required length and press enter.
Type offset in the command prompt and press enter.
Enter the offset distance in the command prompt.
Select the object to offset.
Repeat the offset command as per the required dimensions.
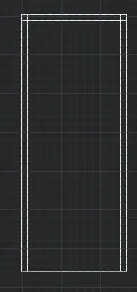
Type offset in the command prompt and press enter.
Enter the offset distance in the command prompt.
Select the object to offset.
Repeat the offset command as per the required dimensions.
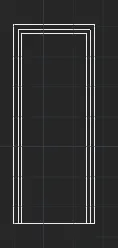
Draw a line using line tool from ribbon tab.
Draw a rectangle using line command.
Press esc.
Using circle tool from ribbon tab draw a circle.
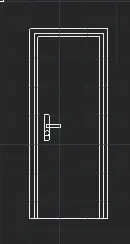
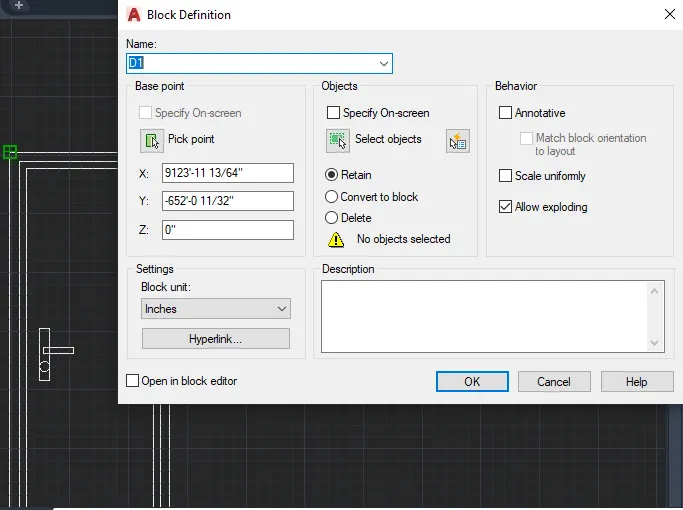
Type "B" in the command prompt and press enter.
In the block definition tab, enter the name of the block as "D1".
Click on the "pick point" and in the workspace click on the created object to mention the pick point.
Then click on the "select objects" and in the workspace select the mentioned object using cursor.
Click ok.
In the command prompt type insert and press enter.
Created block will be shown, click on it.
Based on the pick point object can be placed anywhere in the required place.
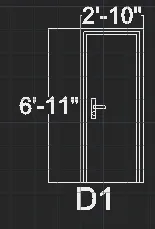
Select the dimensioning tool from ribbon tab and press enter.
Mention the starting point and end point to display the dimensions.
Similarly measure the required dimensions.
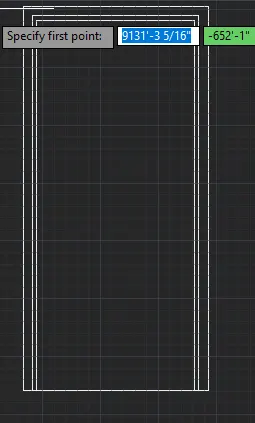
In the ribbon tab, select line tool.
Specify the starting point using cursor.
Draw the line of required length and press enter.
Type offset in the command prompt and press enter.
Enter the offset distance in the command prompt.
Select the object to offset.
Repeat the offset command as per the required dimensions.
Select rectangle from ribbon tab and press enter.
Specify the starting point and drag the cursor to create a rectangle.
Press esc.
Type offset in the command prompt and press enter.
Specify the offset distance and select the object to offset.
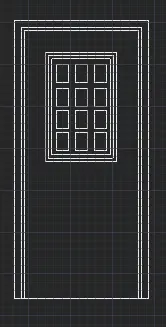
Select the circle tool from ribbon tab and press enter.
Create a circle.
Select rectangle tool from ribbon tab.
Draw the required rectangle.
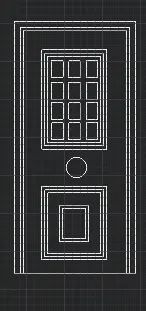
Type "B" in the command prompt and press enter.
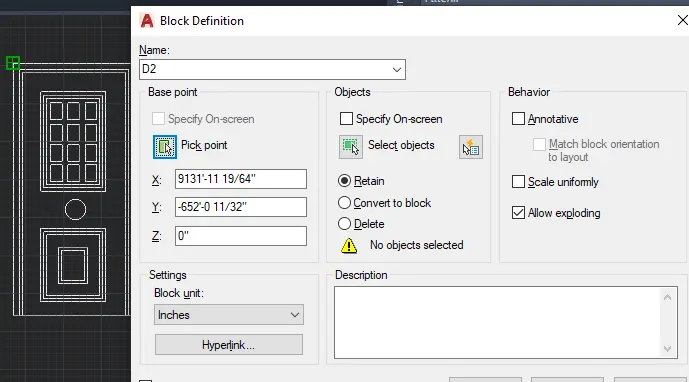
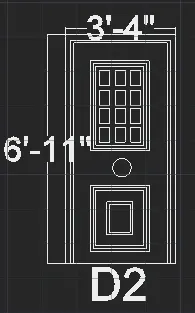
In the block definition tab, enter the name of the block as "D2".
Click on the "pick point" and in the workspace click on the created object to mention the pick point.
Then click on the "select objects" and in the workspace select the mentioned object using cursor.
Click ok.
In the command prompt type insert and press enter.
Created block will be shown, click on it.
Based on the pick point object can be placed anywhere in the required place.
In the ribbon tab, select line tool.
Specify the starting point using cursor.
Draw the line of required length and press enter.
Type offset in the command prompt and press enter.
Enter the offset distance in the command prompt.
Select the object to offset.
Repeat the offset command as per the required dimensions.
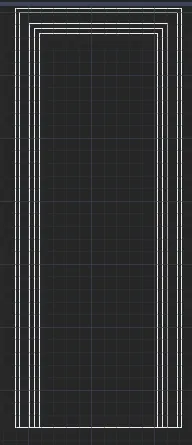
Draw a line using line tool from ribbon tab.
Draw a rectangle using line command.
Press esc.
Using circle tool from ribbon tab draw a circle.
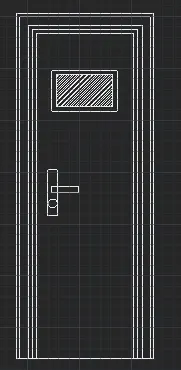
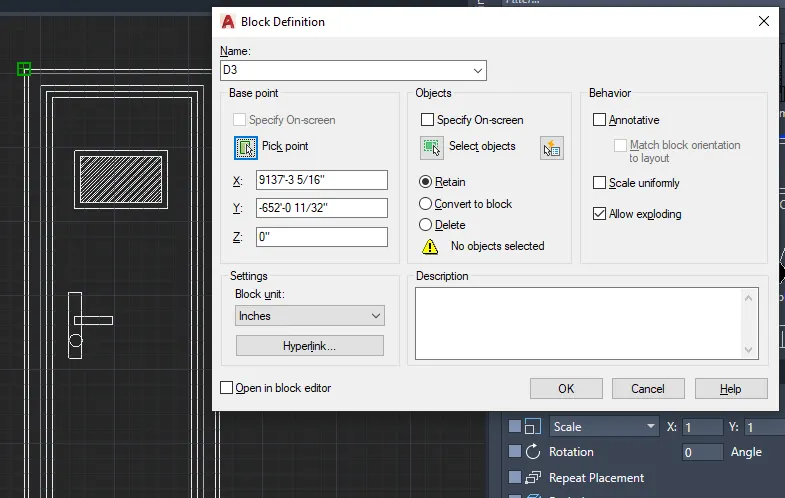
Type "B" in the command prompt and press enter.
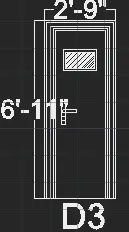
In the block definition tab, enter the name of the block as "D3".
Click on the "pick point" and in the workspace click on the created object to mention the pick point.
Then click on the "select objects" and in the workspace select the mentioned object using cursor.
Click ok.
In the command prompt type insert and press enter.
Created block will be shown, click on it.
Based on the pick point object can be placed anywhere in the required place.
In the ribbon tab, select line tool.
Specify the starting point using cursor.
Draw the line of required length and press enter.
Select arc tool from line ribbon tab.
From the drop down list select "start,end, direction" and press enter.
Type offset in the command prompt and press enter.
Enter the offset distance in the command prompt.
Select the object to offset.
Repeat the offset command as per the required dimensions.
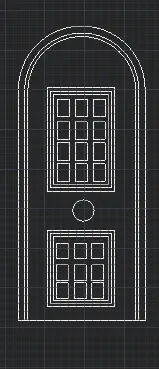
Select arc tool from line ribbon tab.
From the drop down list select "start,end, direction" and press enter.
Type offset in the command prompt and press enter.
Enter the offset distance in the command prompt.
Select the object to offset.
Repeat the offset command as per the required dimensions.
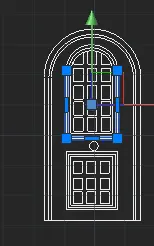
Type "B" in the command prompt and press enter.
In the block definition tab, enter the name of the block as "D4".
Click on the "pick point" and in the workspace click on the created object to mention the pick point.
Then click on the "select objects" and in the workspace select the mentioned object using cursor.
Click ok.
In the command prompt type insert and press enter.
Created block will be shown, click on it.
Based on the pick point object can be placed anywhere in the required place.
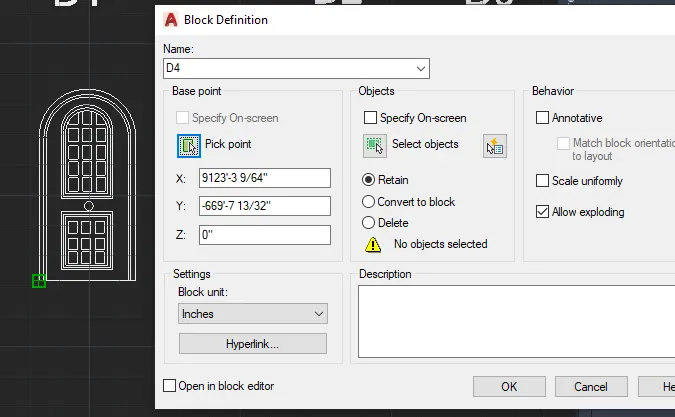
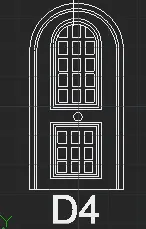
Type "B" in the command prompt and press enter.
In the block definition tab, enter the name of the block as "D5".
Click on the "pick point" and in the workspace click on the created object to mention the pick point.
Then click on the "select objects" and in the workspace select the mentioned object using cursor.
Click ok.
In the command prompt type insert and press enter.
Created block will be shown, click on it.
Based on the pick point object can be placed anywhere in the required place.
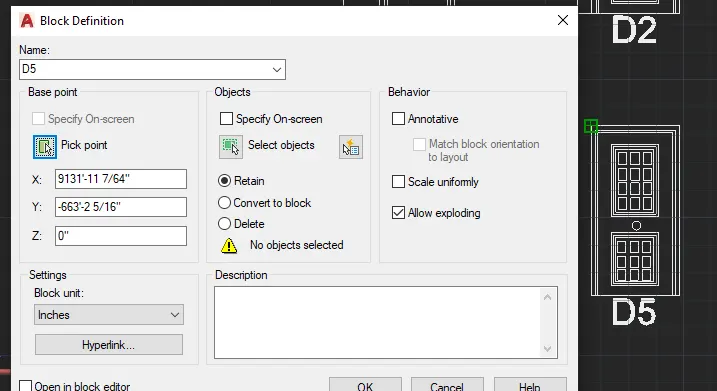
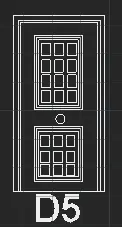
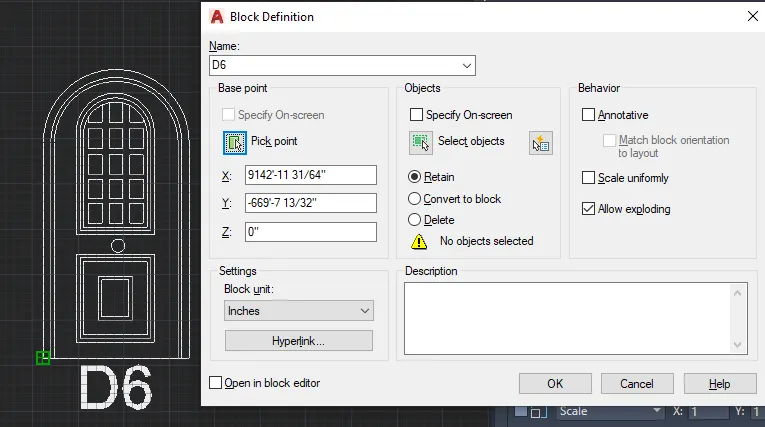
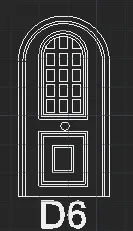
Type "B" in the command prompt and press enter.
In the block definition tab, enter the name of the block as "D6".
Click on the "pick point" and in the workspace click on the created object to mention the pick point.
Then click on the "select objects" and in the workspace select the mentioned object using cursor.
Click ok.
In the command prompt type insert and press enter.
Created block will be shown, click on it.
Based on the pick point object can be placed anywhere in the required place.
Q6:
Aim:
Procedure:
In the command prompt type UNITS and press enter.
Select the required units and select the required insertion scale.
Select layer settings from ribbon tab.
From the layer settings tab select create layer option.
Enter the required layer name, select the line type and color.
Set the created layer as current layer.
From the ribbon tab, select line tool.
Specify the starting point using cursor.
Draw the line of required length and press enter.
Select the arc tool from the ribbon tab and press enter.
From the drop down list, select start,end and direction option.
Similarly on the other side create the arc.

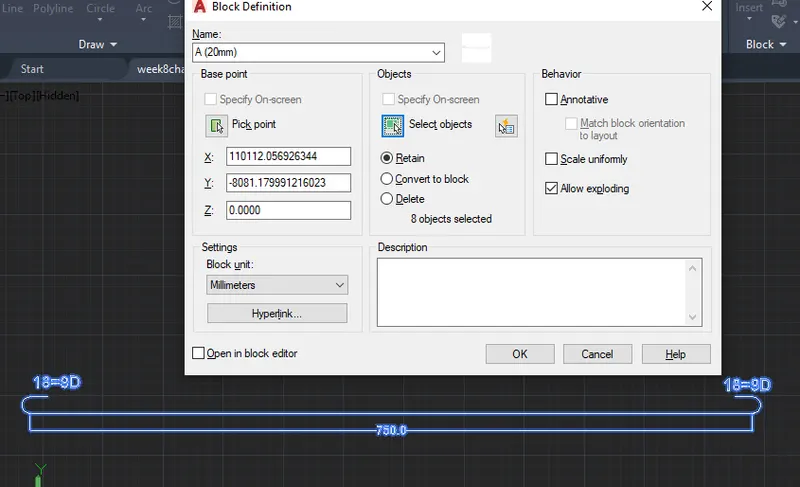
Type "B" in the command prompt and press enter.
In the block definition tab, enter the name of the block as "A(20mm)".
Click on the "pick point" and in the workspace click on the created object to mention the pick point.
Then click on the "select objects" and in the workspace select the mentioned object using cursor.
Click ok.
In the command prompt type insert and press enter.
Created block will be shown, click on it.
Based on the pick point object can be placed anywhere in the required place.
From the ribbon tab, select line tool.
Specify the starting point using cursor.
Draw the line of required length and press enter.
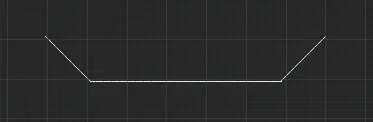
Specify the next point as (@150<135) and press enter.
Specify the next point as (@150<45) and press enter.
From the ribbon tab, select line tool.
Specify the starting point using cursor.
Draw the line of required length and press enter.
Select the arc tool from the ribbon tab and press enter.
From the drop down list, select start,end and direction option.
Similarly on the other side create the arc.

Select dimesnion tool from ribbbon tab and press enter.
Specify the starting and end point to display the dimensions.

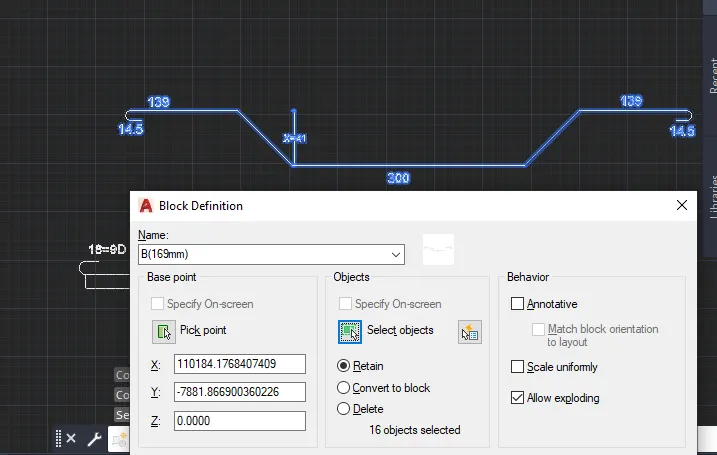
Type "B" in the command prompt and press enter.
In the block definition tab, enter the name of the block as "B(169mm)".
Click on the "pick point" and in the workspace click on the created object to mention the pick point.
Then click on the "select objects" and in the workspace select the mentioned object using cursor.
Click ok.
In the command prompt type insert and press enter.
Created block will be shown, click on it.
Based on the pick point object can be placed anywhere in the required place.
Type "B" in the command prompt and press enter.
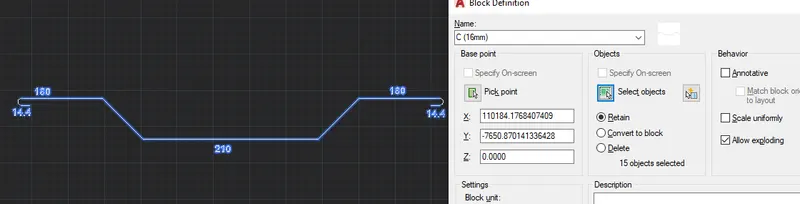
In the block definition tab, enter the name of the block as "C(16mm)".
Click on the "pick point" and in the workspace click on the created object to mention the pick point.
Then click on the "select objects" and in the workspace select the mentioned object using cursor.
Click ok.
In the command prompt type insert and press enter.
Created block will be shown, click on it.
Based on the pick point object can be placed anywhere in the required place.

Type "B" in the command prompt and press enter.
In the block definition tab, enter the name of the block as "D(12mm)".
Click on the "pick point" and in the workspace click on the created object to mention the pick point.
Then click on the "select objects" and in the workspace select the mentioned object using cursor.
Click ok.
In the command prompt type insert and press enter.
Created block will be shown, click on it.
Based on the pick point object can be placed anywhere in the required place.
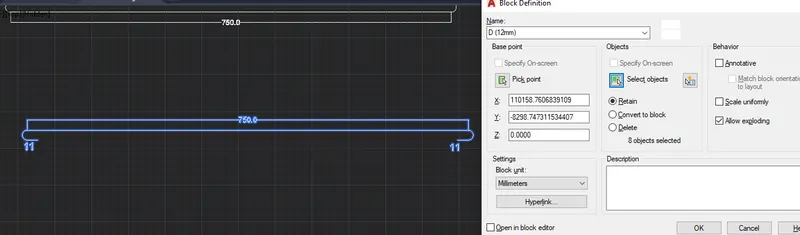

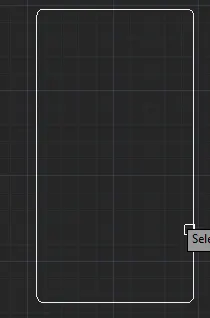
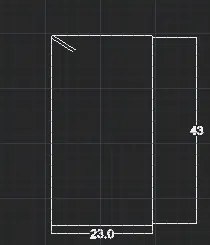
Select rectangle tool from ribbon tab and press enter.
Specify the starting point and drag the cursor to create the rectangle.
Type fillet in the command prompt and press enter.
Specify the radius as per the requirement.
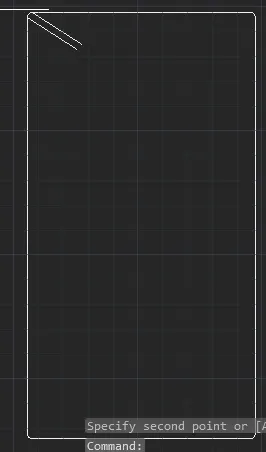
Select line tool from the ribbon tab.
Select the starting point as top filleted object and draw a line.
Again draw a line using line tool.
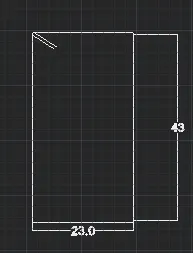
Select dimension tool from ribbon tab and press enter.
Select the first point and menstion the end point.
Now the dimension displays.
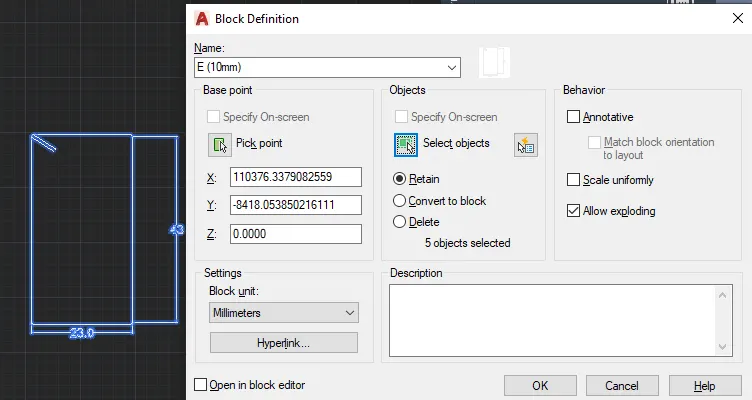
Type "B" in the command prompt and press enter.
In the block definition tab, enter the name of the block as "D(12mm)".
Click on the "pick point" and in the workspace click on the created object to mention the pick point.
Then click on the "select objects" and in the workspace select the mentioned object using cursor.
Click ok.
In the command prompt type insert and press enter.
Created block will be shown, click on it.
Based on the pick point object can be placed anywhere in the required place.
Select the line tool from ribbon tab and press enter.
Specify the starting point and press enter.
Draw another line in downward direction.
Similarly draw all the lines.
Press esc.
Select line tool from ribbon tab and press enter.
Specify the starting point and press enter.
Draw another line in horizontal direction.
Similarly draw all the lines.
Press esc.
Select text tool from ribbon tab and press enter.
Select the single line text option.
Using cursor mention the starting point of text.
Specify the angle of rotation and press enter.
Now the enter the required text.
Specify the next point to enter the text.
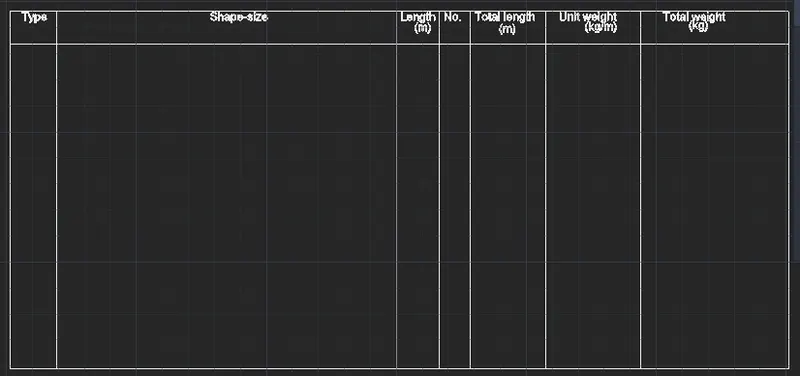
Select line tool from ribbon tab and press enter.
Specify the starting point and press enter.
Draw another line in horizontal direction.
Similarly draw all the lines.
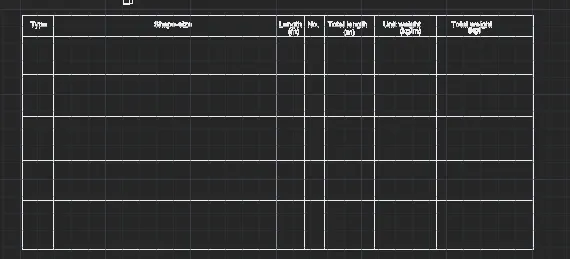
Select text tool from ribbon tab and press enter.
Select the single line text option.
Using cursor mention the starting point of text.
Specify the angle of rotation and press enter.
Now the enter the required text.
Specify the next point to enter the text.
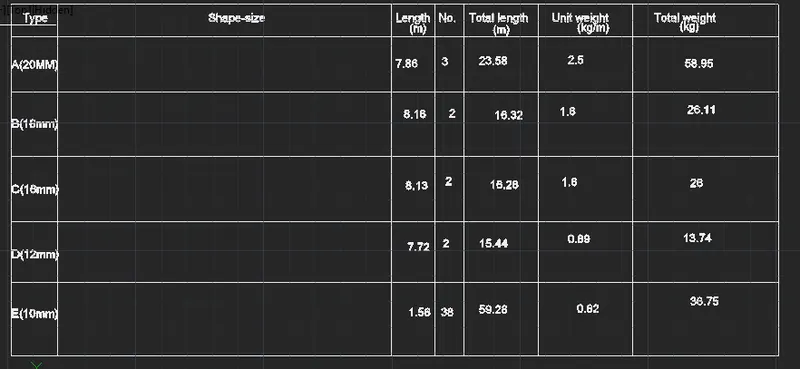
Type insert in the command prompt and press enter.
From the insert box, select A and place in the required place.
From the insert box, select B and place in the required place.
From the insert box, select C and place in the required place.
From the insert box, select D and place in the required place.
From the insert box, select E and place in the required place.