Creating Bar Bending schedule, Different Door types, and Creation of standard drawing templates using AutoCad
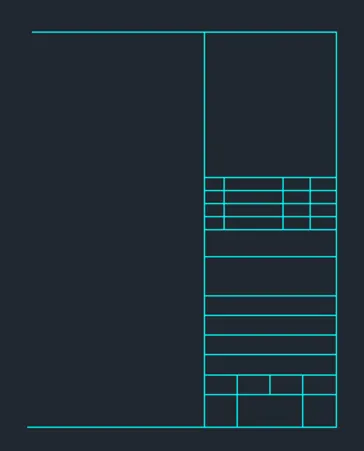
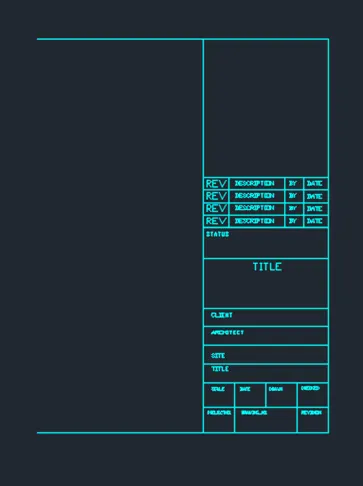
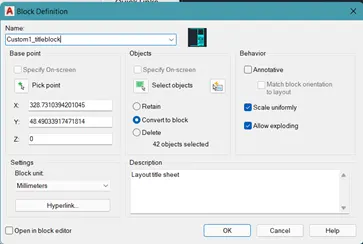
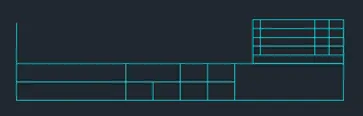
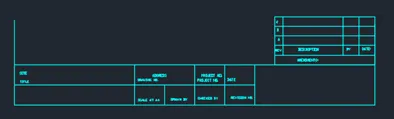
AIM_1: Create the templates as shown in the Figures. Take the size of the title block as per industry standards or you can assume it as per the size of the paper. Use text and attributes wherever required. After creating the title block you need to save it as a block with the names: Custom1_titleblock and Custom2_titleblock, respectively.
INTRODUCTION: In the following question the main aim is to draw the title sheet and then add the text using the attribute command. Once the text is added then the whole figure is converted into a block. The step-by-step procedure for the same is shown below in the procedure.
PROCEDURE:
- Take the line command and draw the outer boundary of the sheet.
- Now using the trim, offset, fillet, and line command draw the whole sheet.
- Now use the attribute command which is given in the insert menu.
- Give different attributes as shown in the sheets and thus add all the texts using the attribute command.
- Once all the attributes are added change the whole sheet into a block using create block tool from the insert menu.
- Create the block and give it a name as CUSTOM1_TITLEBLOCK.
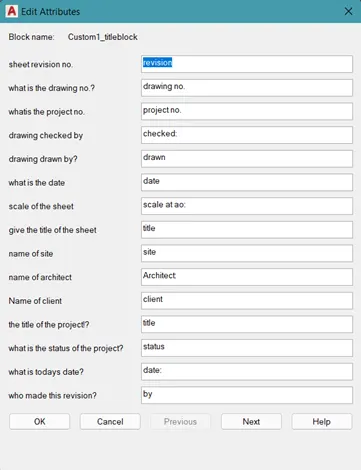
- When the block is created, the edit attribute table will popup which will ask all the questions which you added in the prompt while creating the attributes.
- Give the answers and create the sheet as required by you.
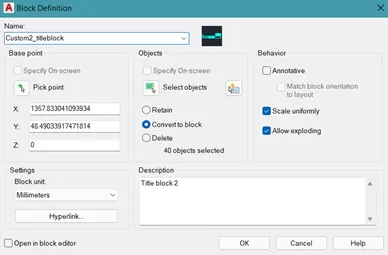
- Now for the second sheet, follow the same procedure as the first sheet.
- At the end give the name of the block of the second sheet as CUSTOM2_TITLEBLOCK.
RESULTS: Two different blocks of the name CUSTOM1_TITLESHEET, and CUSTOM2_TITLESHEET are formed using the attribute command. The snips of the procedure for the same are attached below.
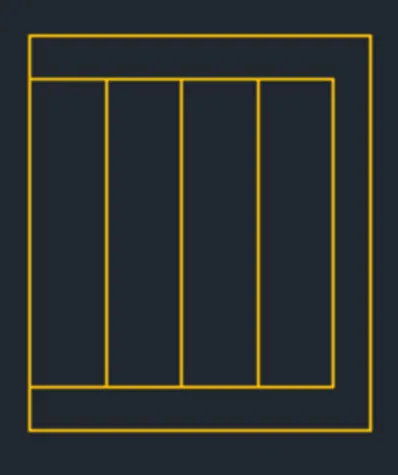
AIM_2: Create the doors type for the warehouse as shown in the Figure. You need to create each door type as per standard size or given dimensions. Create the blocks of this door type after creating them. The step-by-step procedure for the same is shown below in the procedure.
INTRODUCTION: In the following question, the main aim is to draw the elevations of different types of doors, of which some have designed panels and some are normal flush doors. Both the doors are drawn as asked by the challenger and then converted to a block. The step-by-step procedure for the same is shown below in the procedure.
PROCEDURE:
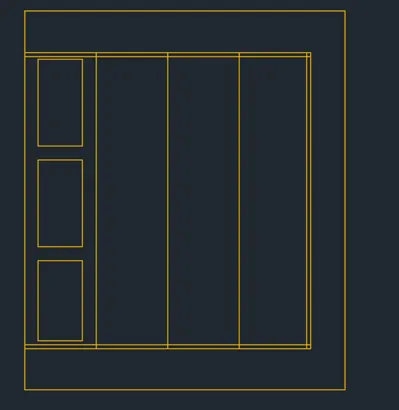
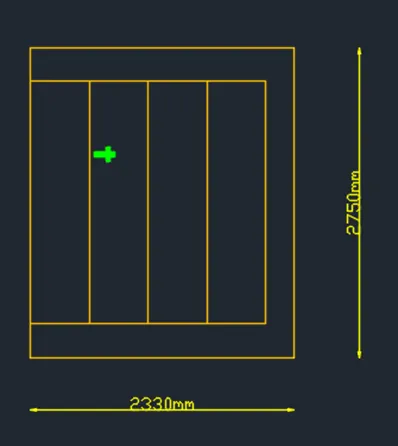
- Take the rectangle command and draw a rectangle of 2330x2750 dimension.
- Explode the rectangle and then take an offset of 300 from each side to make a section for panels of the door.
- Now divide the offset line into four parts and thus panels are formed.
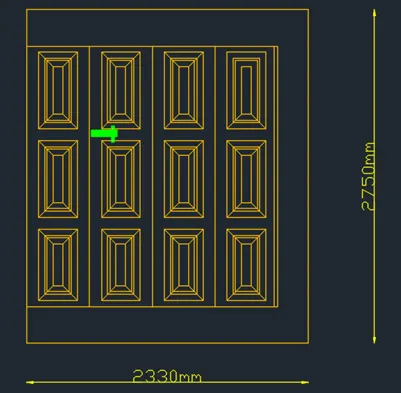
- Now draw the design of the 1st panel as shown in the below snip.
- Once the 1st panel is drawn, all the rest panels are created using the mirror tool.
- After the panels are created properly. the doorknob is created.
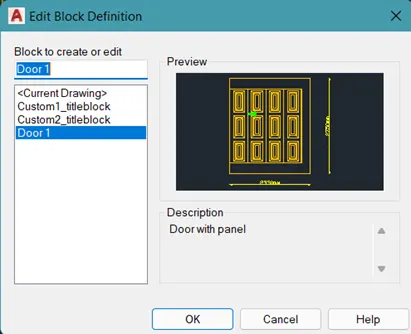
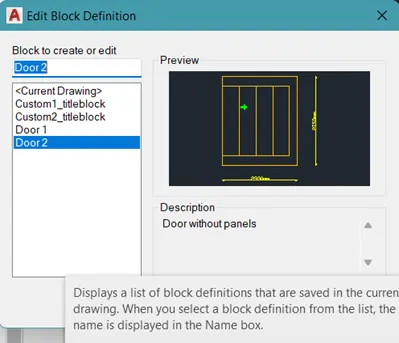
- Once the whole door is ready, it is converted to a block using the block command or choosing the create block section in the insert menu.
- For the second door, the same procedure is followed from start to end.
RESULTS: Two different types of blocks of doors are formed. The snips of the procedure for the same are attached below.
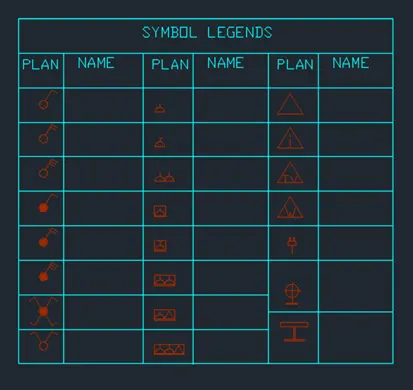
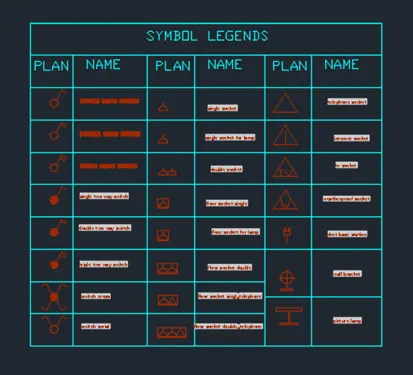
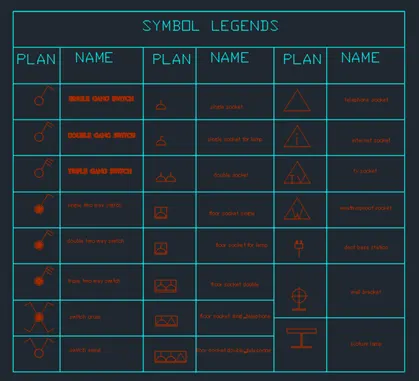
AIM_3: Create each symbol as a block with the name given in the legend. After creating the blocks arrange them in the legend as shown in the Figure.
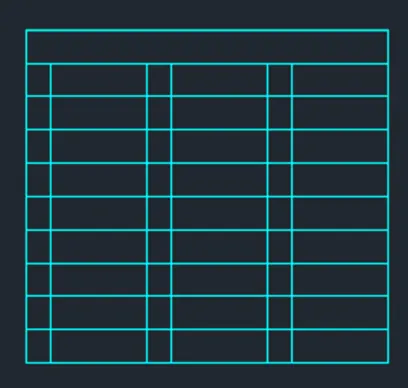
INTRODUCTION: In the following question the main aim is to draw a table called symbol legends. In this table, different types of symbols which are commonly used in plotting the drawings on the sheets are drawn and each of them is converted into blocks. The table shows the symbols and their name of it. Here the names are added using the field tool. The step-by-step procedure for the same is shown below in the procedure.
PROCEDURE:
- Take the rectangle command and draw the outer boundary of the table, and explode the rectangle using explode tool.
- now using the offset command draw the whole table.
- Once the table is drawn, start drawing all the different types of symbols one by one.
- Once drawn all the symbols, start making each of the symbols as a block and give the name of the blocks as specified in the codes, and save them as blocks.
- Now as the symbols are formed as a block, but still the names are yet to be added to the table for each symbol.
- Now click on the insert menu and then go to the field tool.
- As the tool start, it asks to select an option from the drop-down list.
- Select an object in both lists and then select the block you want to add the name of.
- Once selected the object, the list will ask what you want to add. Click on the name option.
- The name will be then added once you click on the place where you want the name to be added.
- Add names for each symbol using the field tool.
RESULTS: A symbol legends table is formed, where all the symbols are blocks that are named according to the I.S. standards, and the names of the symbols are added using the field tool. The snips of the procedure for the same are attached below.
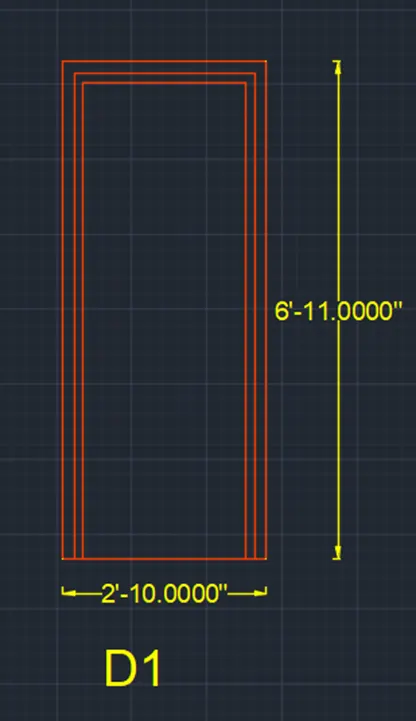
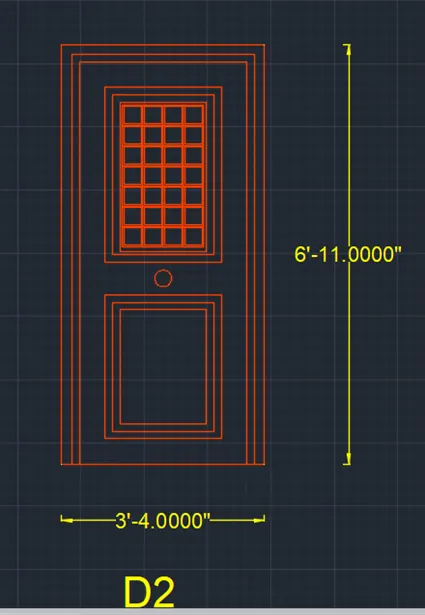
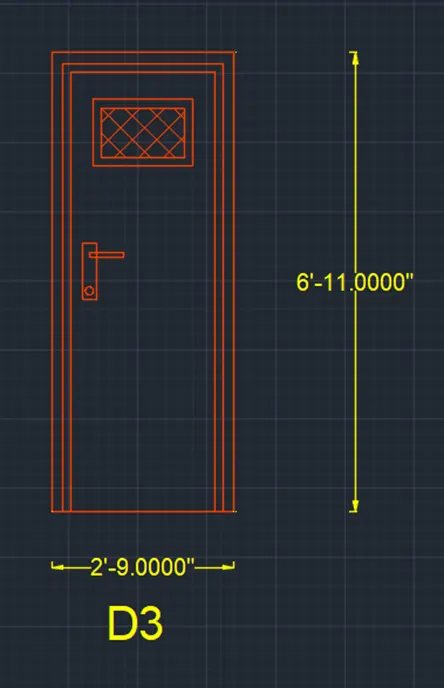
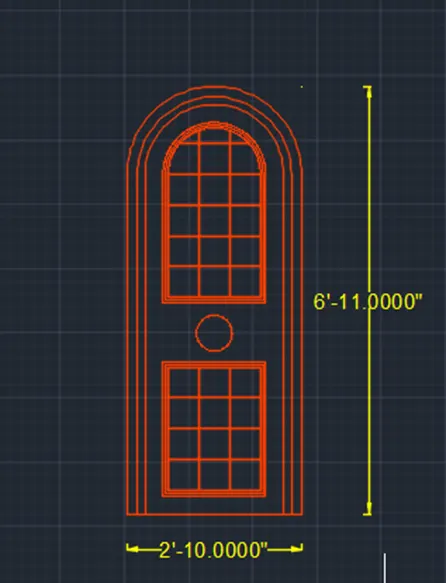
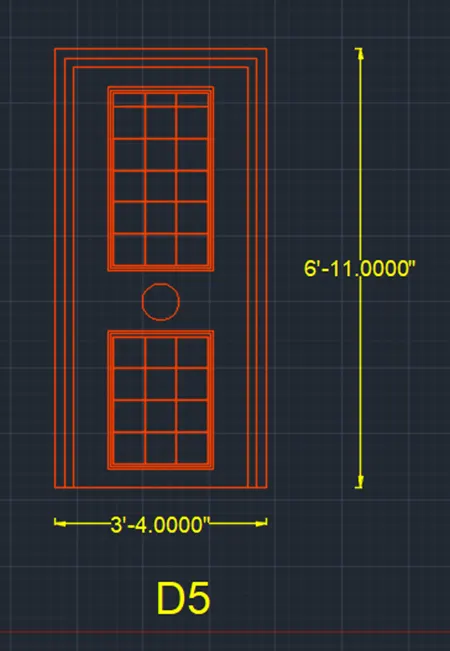
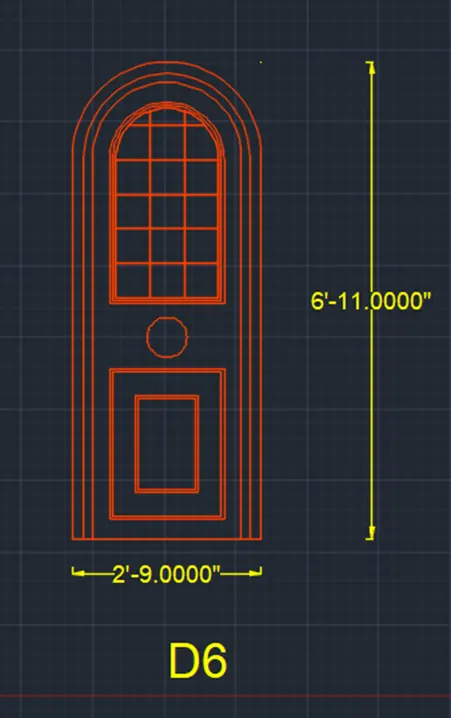
AIM_4: Create the door type for a residential building as a block. Save the name of the blocks as type. Use given dimensions or assume dimensions as per industry standards.
INTRODUCTION: In the following question, the main aim is to draw the elevations of different types of doors, of which some have designed panels and some are normal flush doors. All the six doors are drawn as asked by the challenger and then converted to a block. The step-by-step procedure for the same is shown below in the procedure.
PROCEDURE:
- Take the rectangle command and draw a rectangle.
- Take the offsets of 2" and 1.5" to draw the frame of the door.
- Now draw the designs of the panels as and where required, using the rectangle, trim, offset and line commands.
- After the panels are created properly. the doorknob is created.
- Once the whole door is ready, it is converted to a block using the block command or choosing the create block section in the insert menu.
- For all doors, the same procedure is followed from start to end.
RESULTS: As a result, we can get six different types of blocks of doors, which can be used wherever required in future projects The snips of the procedure for the same are attached below.
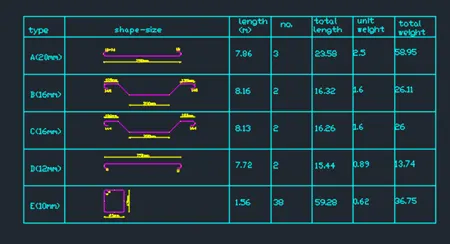
AIM_5: Create each shape as a block as shown in the Figure. Save the block and insert them into the table as shown in the Figure.
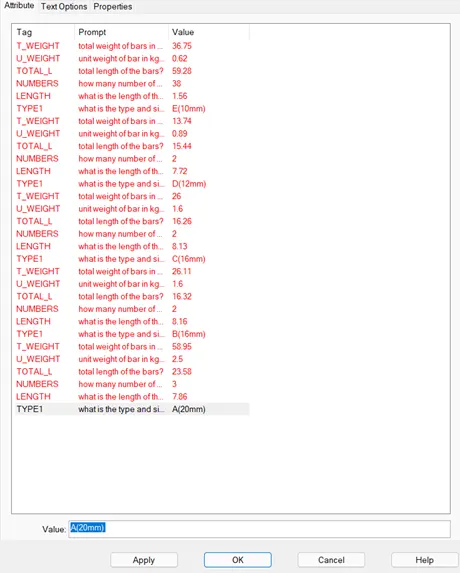
INTRODUCTION: In this question, the main aim is to draw the schedule of bent-up bars. The plan of the bars is converted into the blocks and the whole data added to the table is added using the attribute tool. The step-by-step procedure for the same is shown below in the procedure.
PROCEDURE:
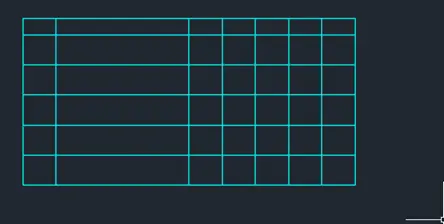
- Take the rectangle command and draw the outer boundary of the table, and explode the rectangle using explode tool.
- now using the offset command draw the whole table.
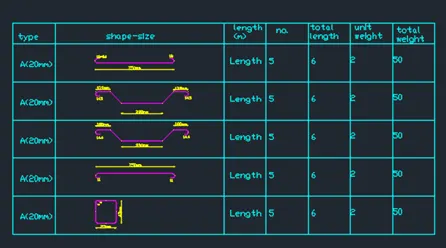
- Once the table is drawn, start drawing all the different types of bent-up bars one by one.
- Once all the bars are drawn, start making each of them as a block and give the name of the blocks as specified in the codes, and save them as blocks.
- Now as the bars are formed as a block, but still the data is yet to be added to the table for all.
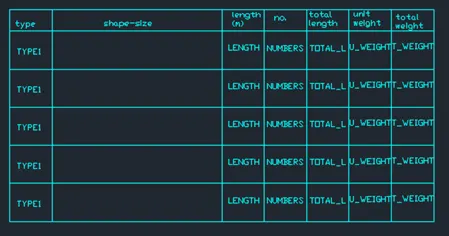
- Now use the attribute command which is given in the insert menu.
- Give different attributes as shown in the sheets and thus add all the texts using the attribute command.
- Once all the attributes are added change the whole sheet into a block using create block tool from the insert menu.
- Create the block.
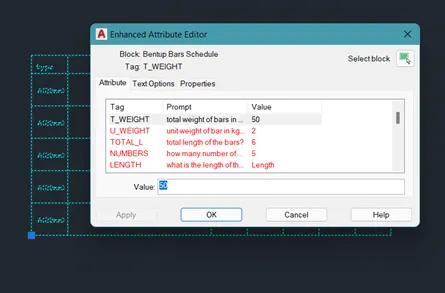
- When the block is created, the edit attribute table will popup which will ask all the questions which you added in the prompt while creating the attributes.
- Give the answers and create the sheet as required by you.
RESULTS: The whole sheet is drawn using the attribute style of adding the text. The bars are also formed as the blocks. The snips of the procedure for the same are attached below.