Creating a Wardrobe detailed drawing, Floor Plan, Kitchen Layout and Column Detail using AutoCad
AIM: the elevation and details of a wardrobe.
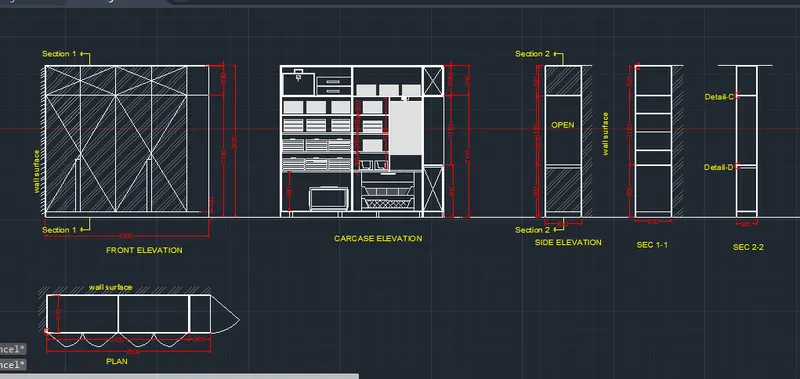
INTRODUCTION: given wadrobe details consist of front,side elevation and plan along with carcase elevation.
wadrobe size is of 2800x2600 and 5 partions
PROCEDURE:
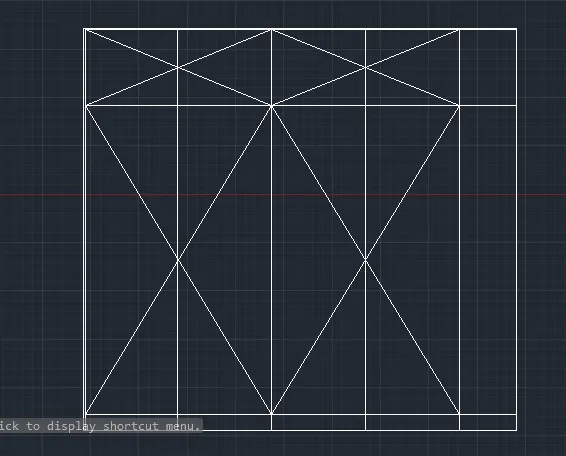
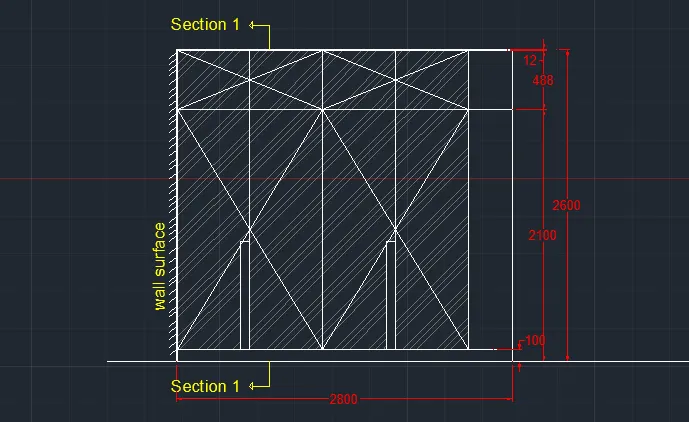
front elevation :
- set unit as milimeters and set limax as 4000,4000.
- select rectangle command and gievn dimensions as 2800,2600.
- offset top side with distance 12,500 and 2500.
- offset right side with distance 365 and from present line offset at 608.75.
- for croos lines,use line command and draw diagonal sides.
- for text and dimensions, select layer properties and add new two layer with preferred colurs as text and dimensions respectively.
- select linear dimensions and measure the sides.
- for text,select text command and specify height as 100.
- for section 1,use mutlileader to enter the name.
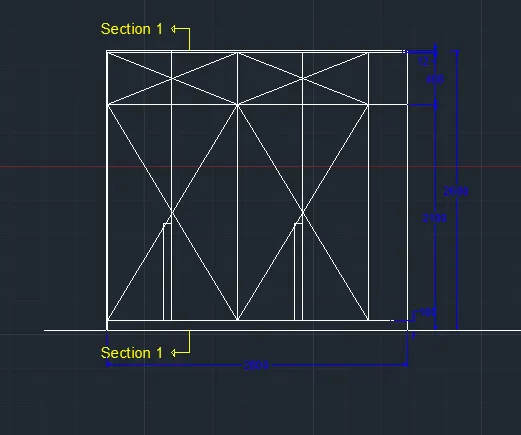
- select hatches and keep the pattern as GOST-GROUND with scale factor 20.
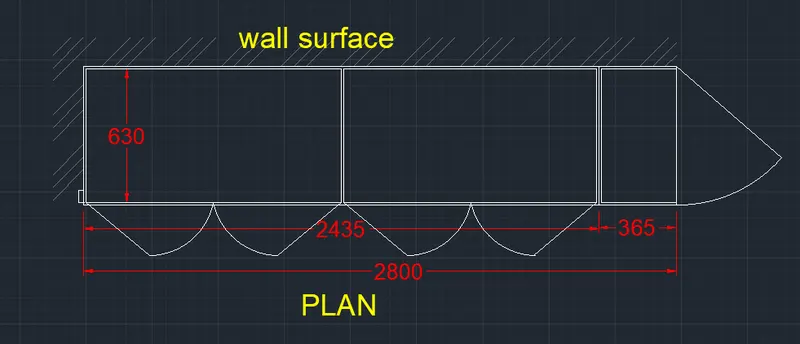
Plane:
- drag down the borders lines from front elevation portion .
- draw a horizontal line and offset that with distance 12,642 and 654.
- now offset vertical lines with distance 12 on one side.
- for making of opening doors, use line arc comand.
- also measure dimensions and use text command also.
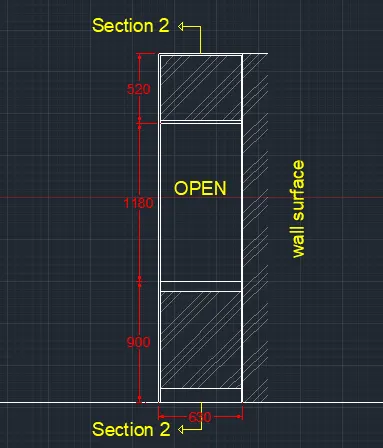
Side elevation:
- extended the horizontal lines of front elevation.
- draw a vertical line and offset at distance of 630.
- similarly offset inwards at distance of 12.
- repeat dimension and text command.
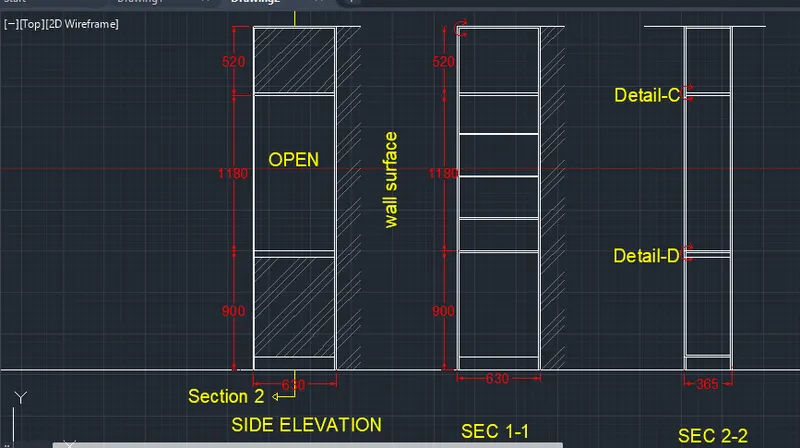
Section1-1 and 2-2
- drag all the lines from front elevation marked sec 1-1 and from side elevation.
- offset vertical line at distance 630 for sec 1-1 and 365 for sec 2-2.
- then offset inwards at distance 12.
- for sec 1-1 offset middle 1800 distance portion at distance 300 for next 4 boxes.
- repeat same dimension and text commands.
Carcase elevation:
- recreate a rectangle of 2800x2600.
- offset vertical line with distance of 12,1235,243.
- then top horizotal line with distance keeping previous offset lines as 12,508,320,320,320,320,680.
- trim unwanted lines.
- offset all interior lines with distance 12.
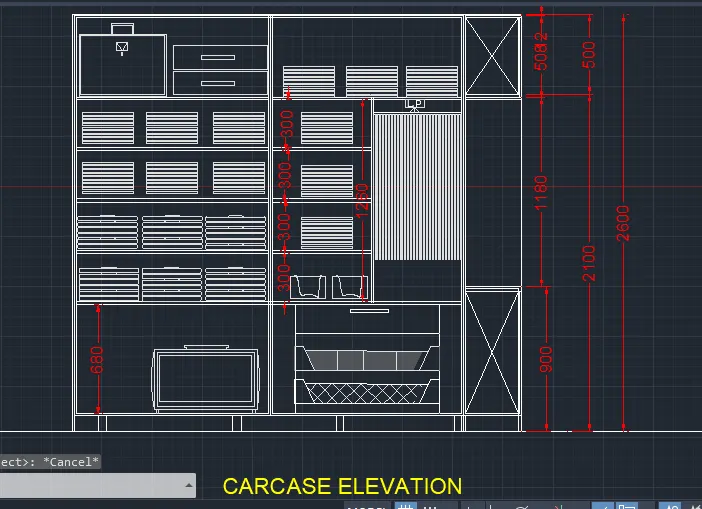
RESULT:
AIM: Create the Kitchen Layout
INTRODUCTION: In given kitchen floor plan is of 4300mmx3200mm along with slabs and chimney.This is drafted using draw,modify tools and dimension are used for measuring the lengths.
PROCEDURE:
- ctrl+n for new page setting.
- choose metric scale and quick setting.
- enter UN for units and select decimals with 0 precision.
- enter LIMAX and enter 6000,6000.
- enter ZOOM and select ALL.
- ortho and snap mode is ON.
- create a rectangle of dimensions 4300x3200.
- offset 230 otwards to create the walls.
- for making of door,draw a horizontal line an doffset 500 o each sides.
- now trim thr potion and use line and arc command to make door.
- select hatch with pattern ANSI43 and provide scale factor 20.
- select the portion to be made colour and use hatch-solid.
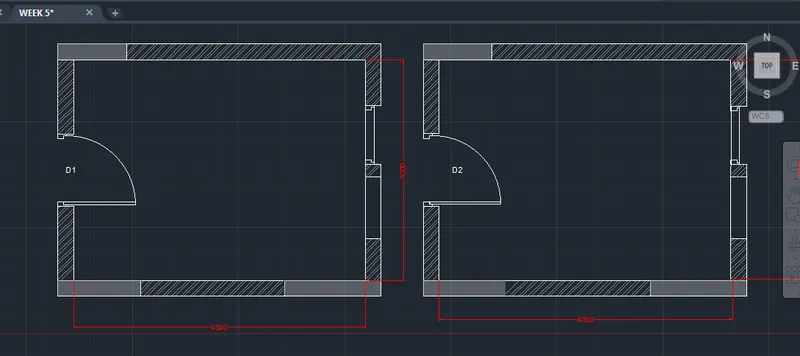
- for making snack counter,offset bottom horizontal line with 600 and 1500.
- offset right veritcal at distance 700 and 1300.
- for bottom slab portion in 1st plan, make a rectangle of 900x650,450x600 and 560x600.
- place rectangles in order by selecting corner point as base point.
- now poffset interior sides with distance of 20 in all boxes.
- for upper slab prtio also follow similar way of making rectangle,placing and offset.
- use text command with certain height to enter names and create a annotation with A1,A2 so on for boxes name.
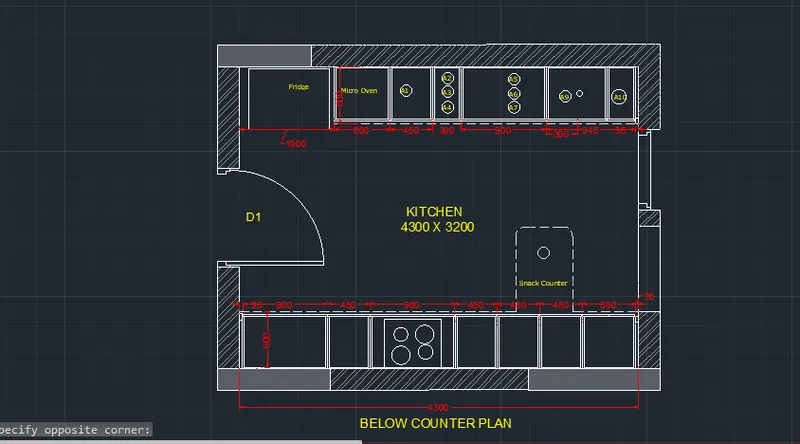
- similarly procedure for snack counter and slab making as mentioned above for next plan also.
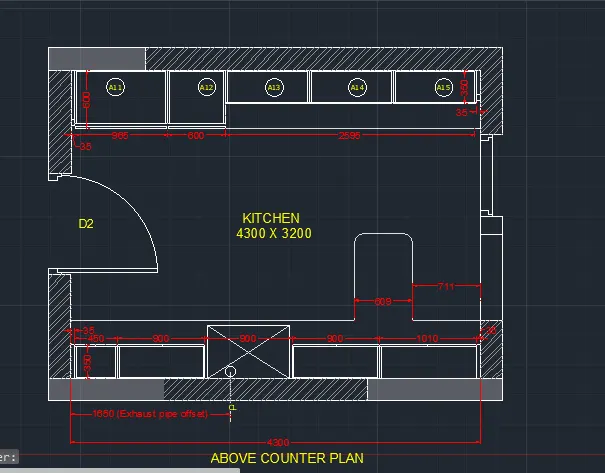
RESULT:
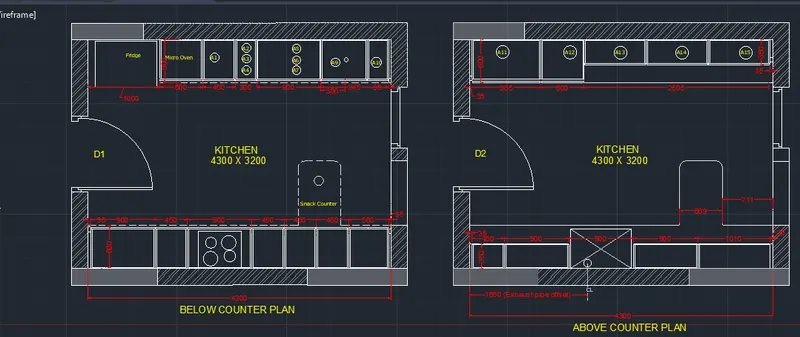
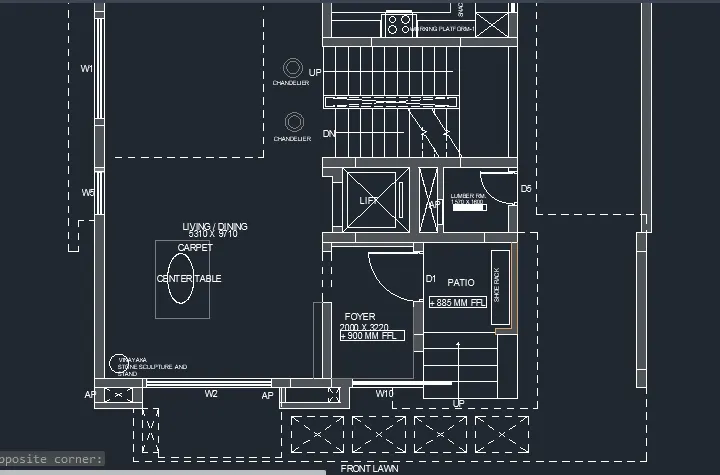
AIM: Sketch the column details
PROCEDURE:
- set the units as decimal with milimeters.
- set limax as 20000,20000.
- zoom command with all for set of page.
- now select costruction line and draw both horizontal and vertical line.
- now offset at distance 250 for wall thickness.
- similalry offset baased on gievn dimensions.
- trim the unwanted offset lines.
- for making of interior decorative like lights,fridge use circle,rectangle and line command.
- for making of doors, make a frame using rectangle and then arc to make the door opening.
- simialry for making of window, make a frame using rectangle and offset cetral line both sides.
- for text, select single line text with height 150.
- for dimensions, select linear dimensions and measure.
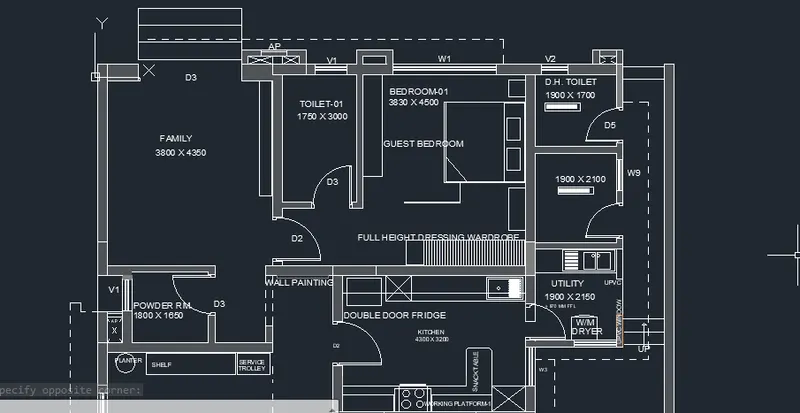
- for making of stairs,create a rectangle and draw a center horizontal line and offset vertical line with 250 distance for 6 steps.
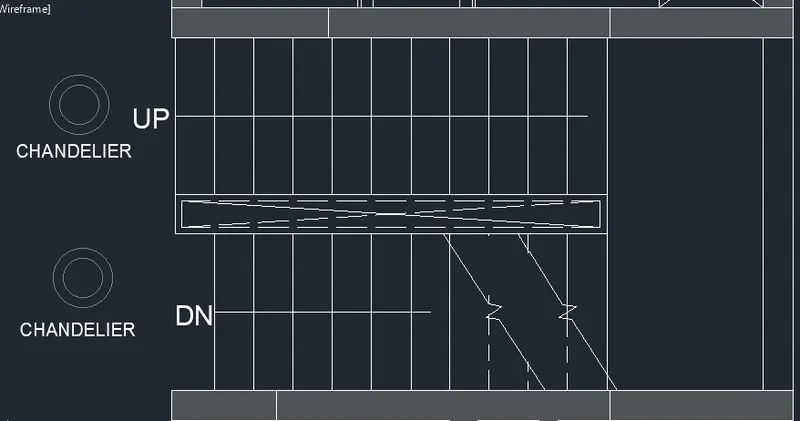
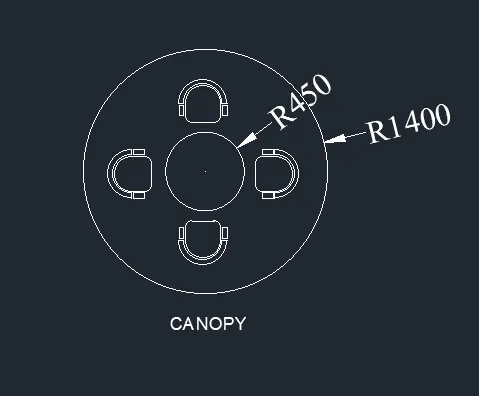
- for making of canopy,In the menu bar click on rectangular or in the command prompt type rec specify the length of the rectangle as 650 specify the width of the rectangle as 300.
- In the command prompt type FILLET of radius 100.00. In the menu bar select circle with 2-point.
- centre is the midpoint of the line and diameter is 450 and with same center draw one more cirle of radius 1400.
AIM:Sketch the column details.
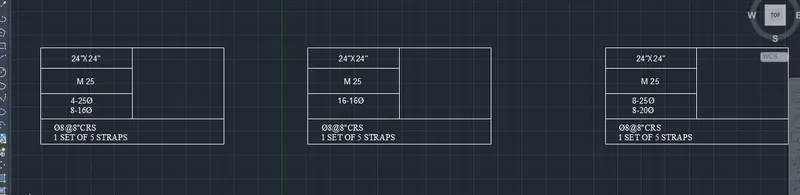
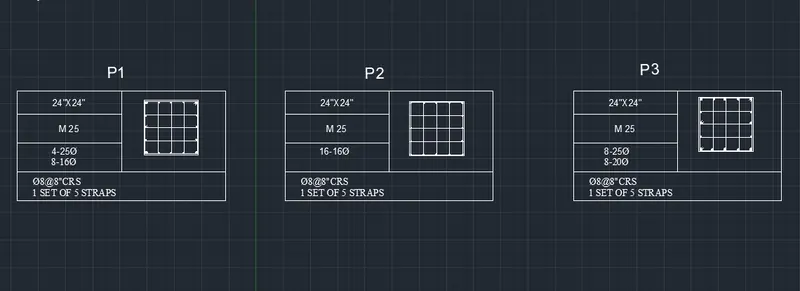
introduction: given is bar bending schedule column with its mix type,bar diamter and its number.
12mm-0.32" dia
16mm-0.64" dia
25mm-1" dia
20mm-0.78" dia
PROCEDURE:
- set the units as engineering and to inches.
- set the limax limits and use aoom command for setting papers.
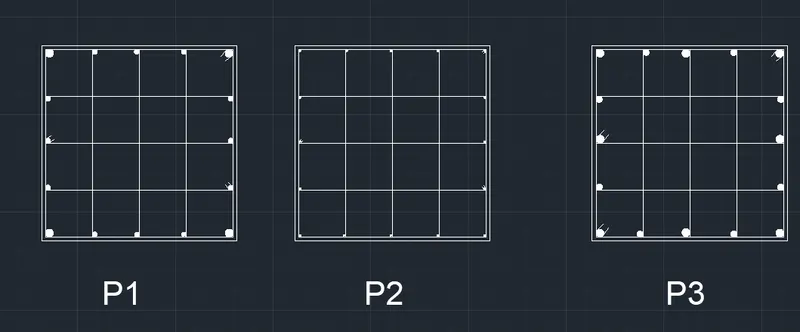
- for making P1 column,select rectangle and eter dimension as 24"x24".
- then offset 0.5" inwards and divide the box into equal 4 columns and rows.
- now for bars,select circle with diamter and make circle of 1" and 0.62".
- select and paste 1'' diamter at coners and remaing point other circle.
- similarly repeat the same for P2 and P3.
- now enter TAB for table command and set text.
- also enter 1 column and 3 rows.
- now select 2nd rows and merge.
- enter the data i the table.
- select P1 drafting and paste in table.
- similar for P2 and P3.
RESULT:
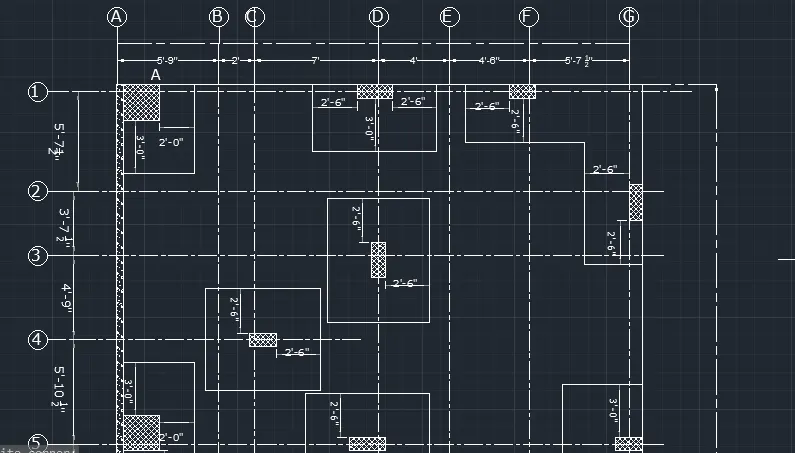
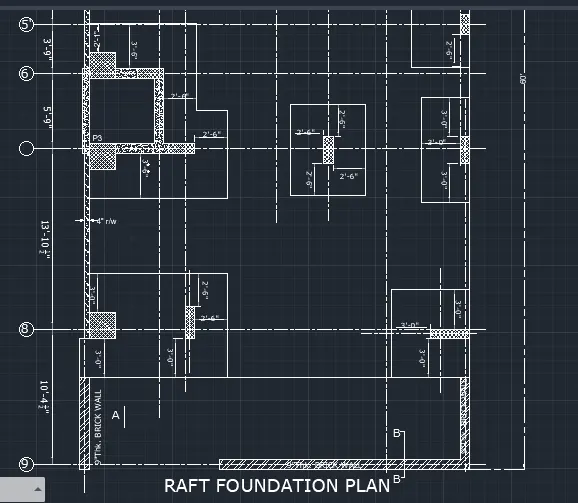
AIM: Draw the Raft Layout
INTRODUCTION: Given a raft foundation of dimension 29'-7" and 60'.Assume the column size 24”x24”, 9” x 24”, 9” x 18”, and 9’ x 24”.
PROCEDURE:
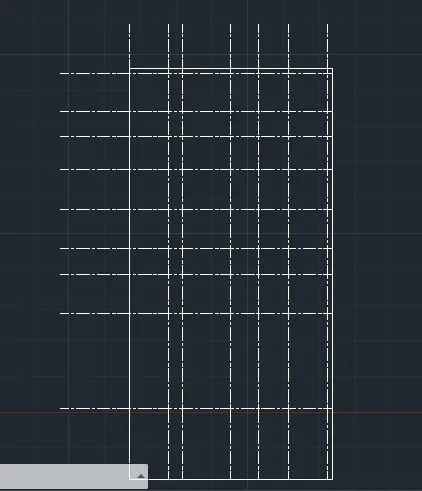
- select line command and specify first coordinate as 29'-7".
- next coordinate as 0,60'.
- specify next coordinate as -29'-7",0.
- click on close command.
- offset vertical and horizontal lines as per given distance.
- set the linetype as ISODASH with scale factor as 1'.
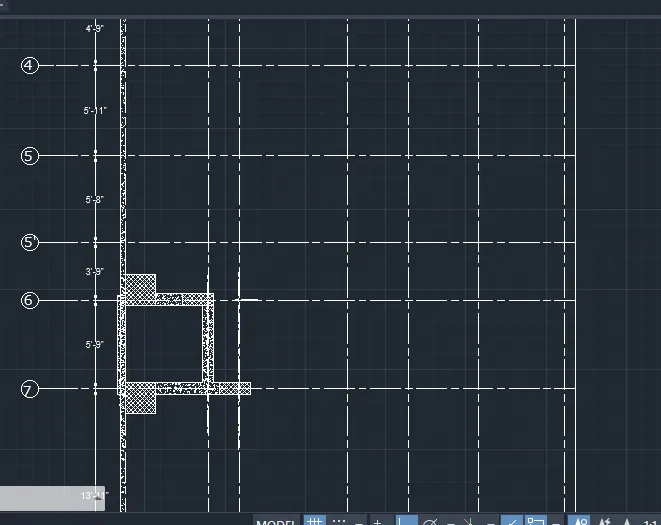
- draw colums with assumed size using rectangle for all different sizes.
- copy and paste at required marking.
- for hatche,use ACAD-CONC with scale factor 5" for wall and ANIS137 for columns.
- select linear dimensions and next select continous dimension.
- also use text command from annotation tool bar, with height 6".
RESULT: