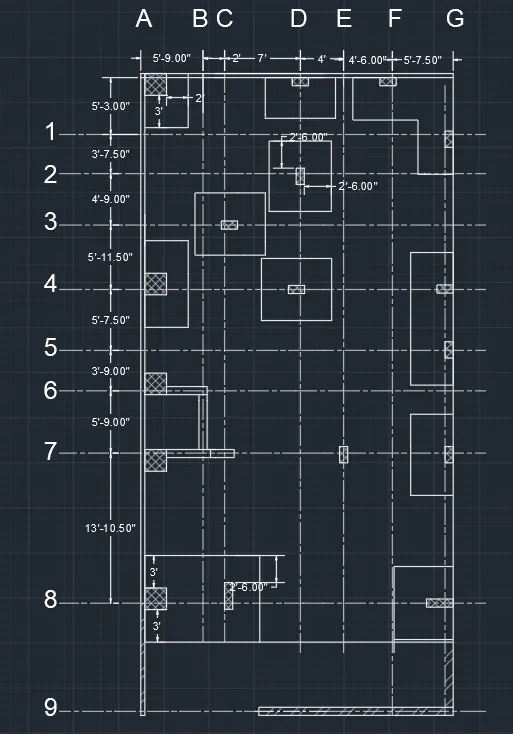
Creating a Wardrobe detailed drawing, Floor Plan, Kitchen Layout and Column Detail using AutoCad
1)
Aim :
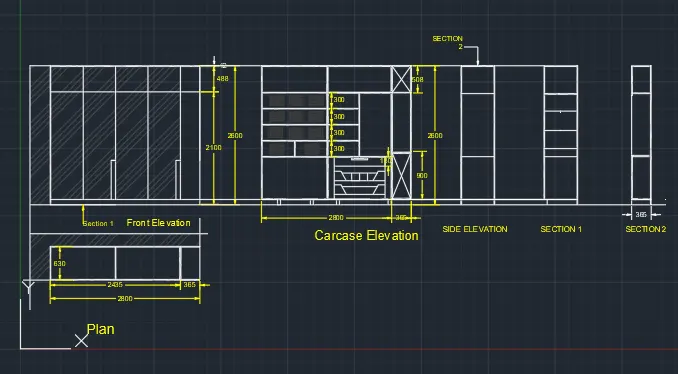
To draw the elevation and details of a wardrobe by using autocad.
Procedure:
step1:
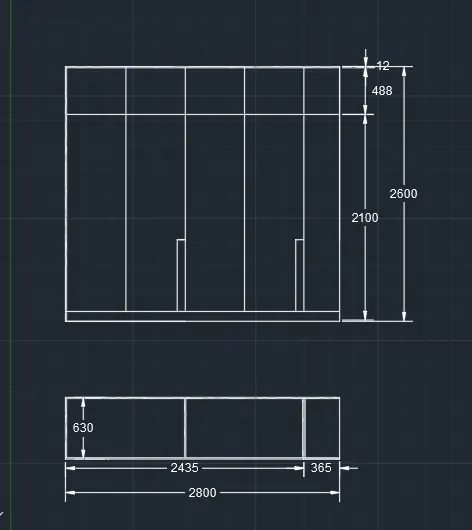
Make a rectangle of 2800x2600mm
Use OFFSET command for 12mm offset at three sides of rectangle
Take the offset of 488mm from top and 100mm from bottom
Step2 :
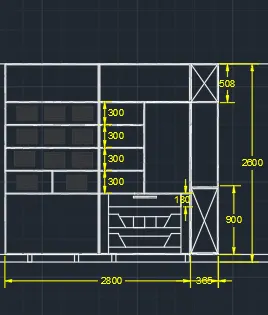
Draw a rectangle of 2800x2600 using command rectang
Take offset of 100mm from bottom to top
Then take offset of 680mm, 300mm,300mm,300mm and 488mm as shown in the drawing
Take offset 12mm for outer sides and 20 offset for innerwalls
Step3 :
Draw a rectangle of 630x2600 using command rectang
Take a offset of 10mm from bottom
Take offset of 900mm ,1180mm and 520mm.
Take the offset of 20mm for all the lines take the line command and draw the wall surface area
Step4:
Draw a rectangle of 630x2600 than starta work from bottom to top
Take a offset of 10mm from bottom next take a offset of 900mm and take offset of 300mm four times inside
Take the offset of 20mm for all the lines take the line command and draw the wall surface area
Give the proper dimensions using the DIMCONTINUE command Take the text command write and edit the text were required
Step 5:
Draw a rectangle of 365x2600 using rectang
Take the offset of 100mm from the bottom
Take offset of 900mm,1180mm and 520mm
Take the offset of 20mm for all the lines
Step 6:
Give the proper dimensions using the DIMCONTINUE command for all the draft
Write the texts with annotate option
2)
Aim:
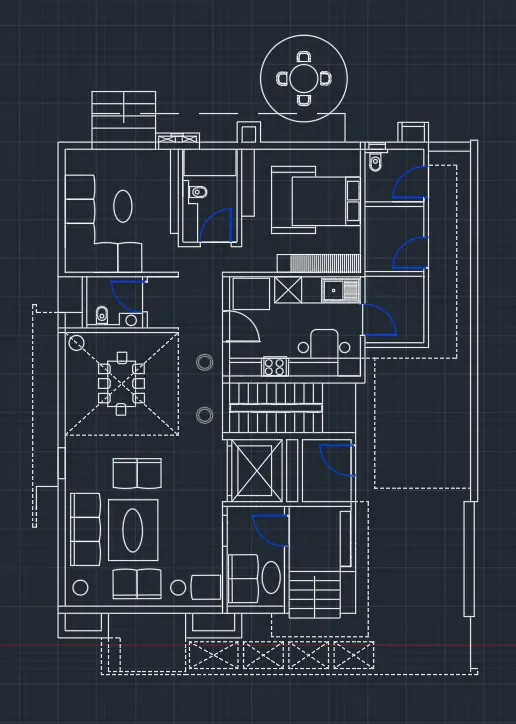
To draw the floor plan
Introduction:
To draw the floor plan
Procedure:
Step:1
Draw a horizontal XLINE
From the end draw a rectangle of dimensions 3800 x 4350 vertically
Draw consecutive ossfets of 1650mm and 9710mm and 3200mm directly below them.
On the lower right part draw rectangles of 1570 x 1600 ,2150 x 2100 and 200 x 3220
Draw the outermost lines as per the draft ang change line properties to dashed lines
Draw offsets to draw external and internal walls.
Step2:
Create the layers from the layers properties
Tap on the new layer and create the layers of walls,dimensions and windows
Step4:
To create door draw an arc using 2 points and radius or a circle command .
Step 5:
For Staircase draw a line with 300mm for tread and riser for the 150mm
Result :
3)
Aim:
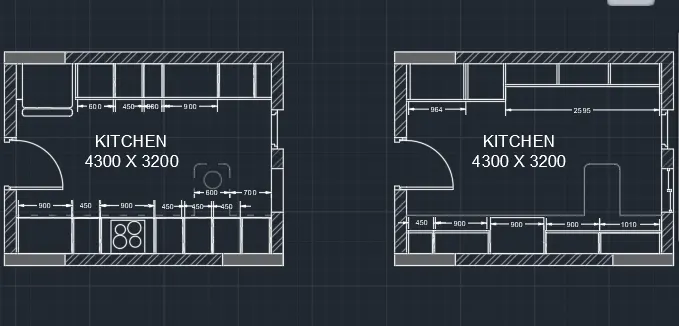
To Create the Kitchen Layout
Introduction:
To Create the Kitchen Layout by using AutoCad
Procedure:
Step1:
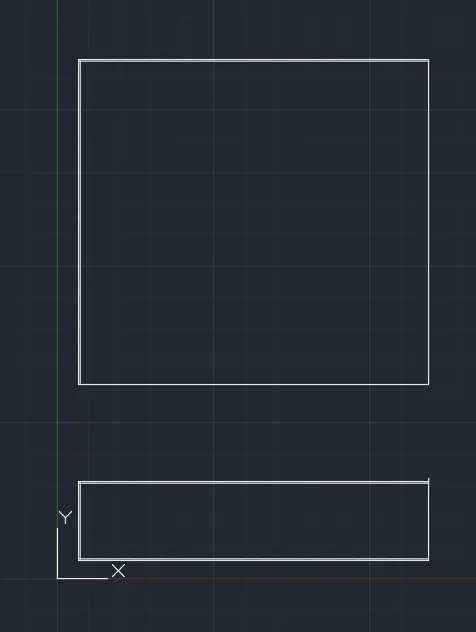
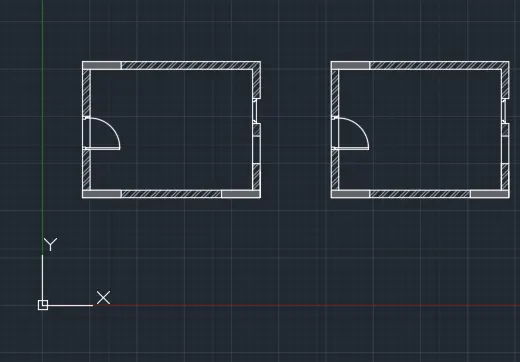
Draw a rectangle by typing the command "REC" in command box of 4300x3200
Take the offset command make an offset
Make door and window with arc as per the draft
Step 2 :
Copy the rectangle and and paste it at the right side
Step 3:
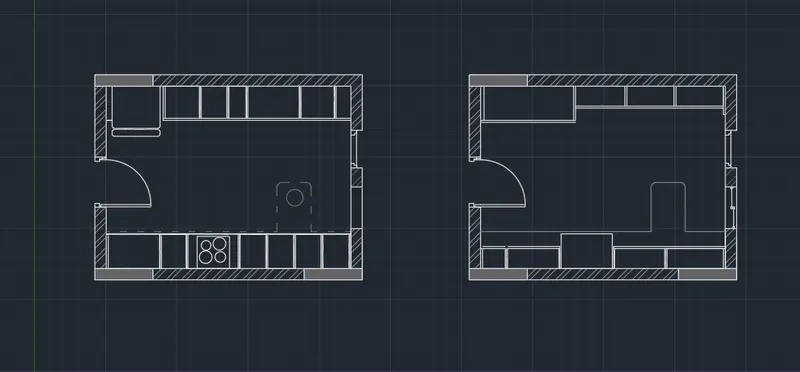
We have two drafts now
Draw the necessary inner rectangles as per the drawing
Change the transpiracy to 50% for the mentioned lines and change the type to dashed lines.
Step4:
Use multitext option to state the dimensions
Result:
4):
Aim:
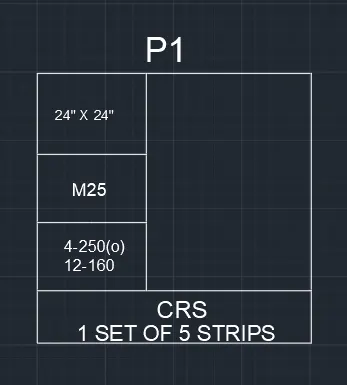
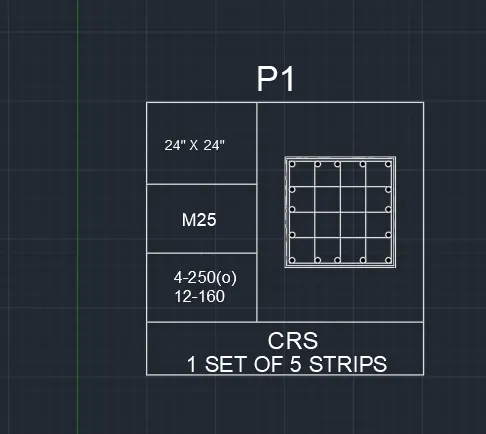
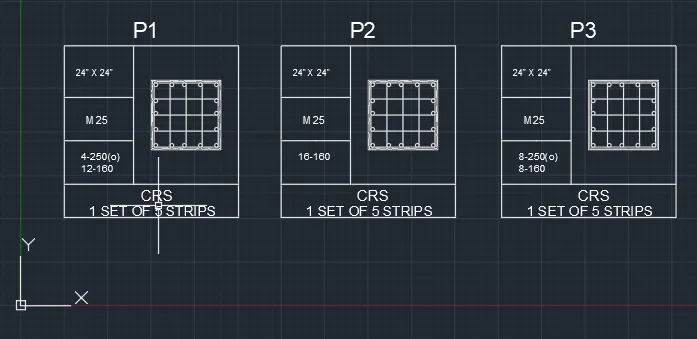
To sketch the column details
Procedure:
Step1:
Change the dimension unit to engineering inches
Draw a rectangle using command rectang
Use offsets to divide the rectangle into three parts
Draw another rectangle on the right side
Step2:
Copy the draft and use Array option to create 2 more identical drafts.
Step3:
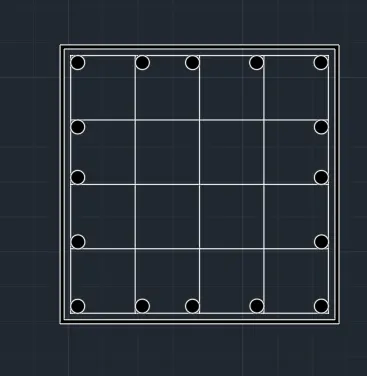
Take the circle with tangent, tangent, radius take the two tangent point and draw arc circle
Use array command to draw the rest of circles.
Use hatch command to fill the circles
Step3:
Use multitext to type the given texts
Result:
5)
Aim:
To Draw the Raft Layout
Procedure:
Step1:
Use XLINES and draw the outer walls as per the given dimensions
Draw interior lines as per dimensions
Change the inner lines transpiracy and type of line to dashed
Step2:
Use rectangle command to draw columns.
Use copy and select array to draw the rest of the columns
Step3:
Use the hatch command and keep the scale factor to 1 and select points
Step5:
Use TEXT command and annotate the lines using alphabets horizontally and numbers vertically
Mark all the dimensions by using command dimcontinue
Result: