Creating a Wardrobe detailed drawing, Floor Plan, Kitchen Layout and Column Detail using AutoCad
CHALLENGE WEEK - 6
AutoCADD Essential
Question no.1:
- AIM:
- To draw the elevation and details of a wardrobe.
- To use text and dimensions.
- Procedure:
- Select the line tool.
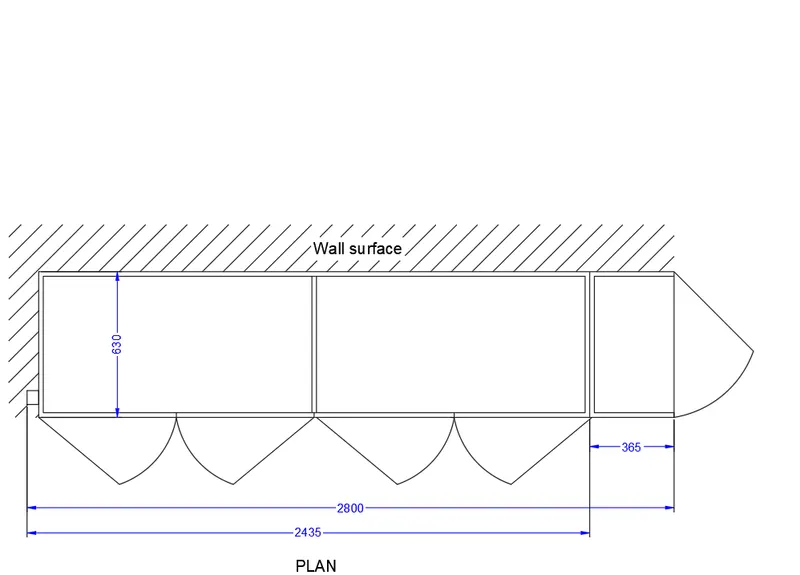
- Initially the plan view or the top view of the wardrobe is sketched.
- Draw a rectangle of size 2800x630
- And offset the rectangle to 20mm.
- Offset the left edges to 2435mm and again to middle of 2435mm.
- Thus the plan view is got.
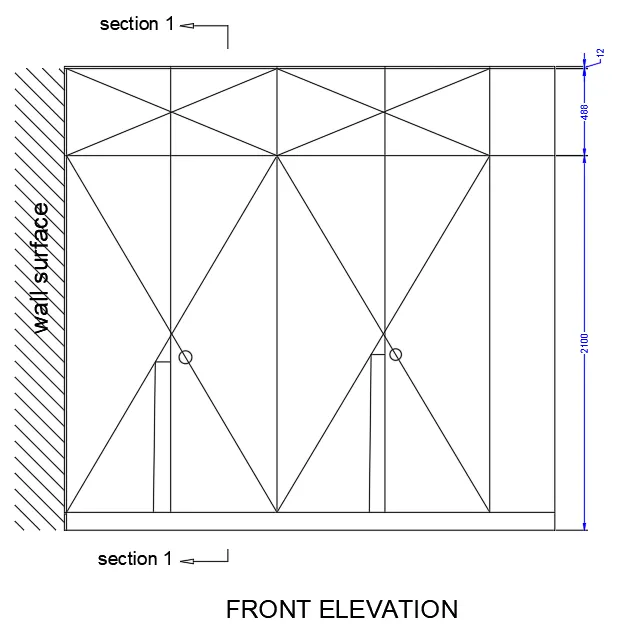
- The for the front elevation.
- Draw a rectangle of 2800x2800
- Offset the same for 12mm on top and left edges.
- Offset the bottom edge for 440mm.
- left edge for 365mm.
- And then the remaining space is splitted into two half which has a total length of 2435mm.
- Then that space further divided in its middle points.
- Thus the front elevation is obtained.
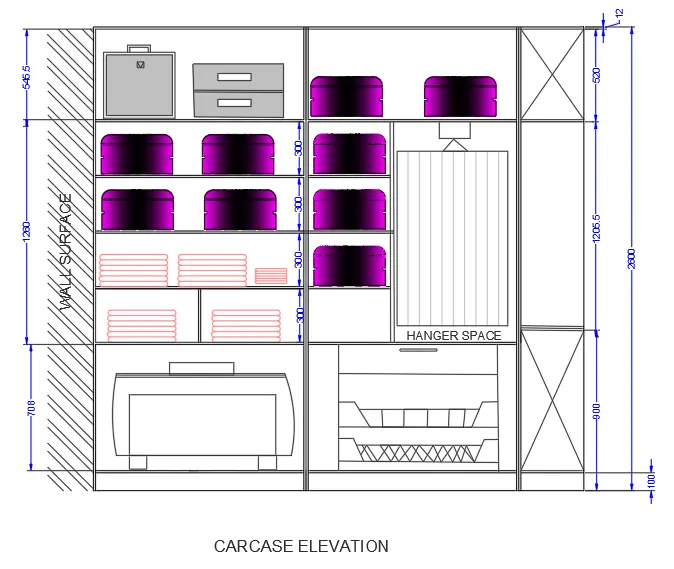
- Then the carcase is same as front elevation sizes and dividings.
- Except for different shelves in 300mm is divided and the right space is left for a hanger space.
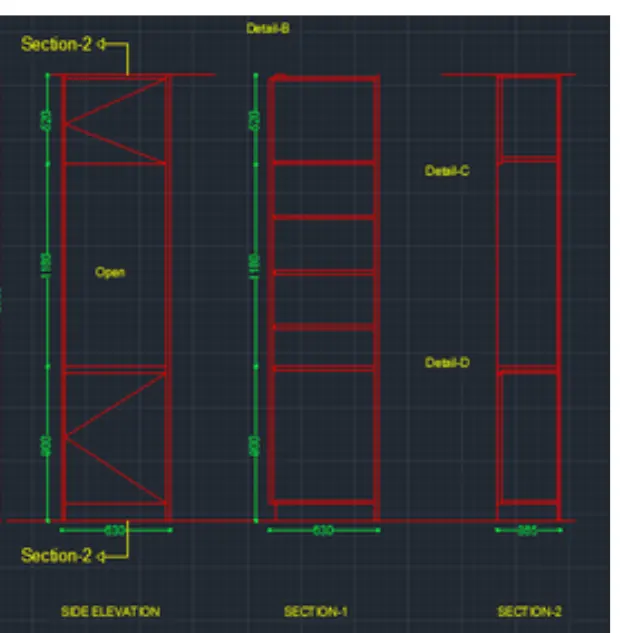
- Then two sections cut from the Front and carcase elevations.
- Then same shelf dividings are shown in the sections.
 ,
,
 ,
,
- RESULT:
- The elevation and details of a wardrobe is successfully created.
- All units are in mm.
- The drawing contains the texts of required sizes.
Question no.2:
- AIM:
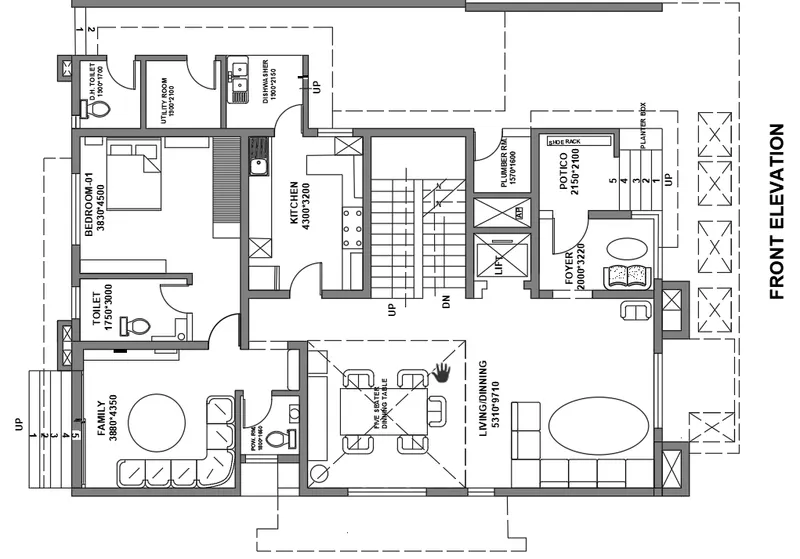
- To draw the floor plan of a residential building.
- To use text and dimensions.
- Procedure:
- Select the line tool.
- Offset command is used to required thickness of the walls.
- Arc commands are used to draw the doors in the the diagram.
- The door after beign drawn are converted to blocks and copied to required places.
- Windows are drawn with line and offset commands.
- Doors and windows are set in separate layers.
- Walls are set in walls layers.
- Dimensions and texts are set in separate text layers.
- Required rooms sizes are marked in the respective rooms.
- The obtained drawing after the procedure is displayed below.
- RESULT:
- The draw the floor plan of a residential building is successfully created.
- All units are in mm.
- The drawing contains the texts of required sizes.
Question no.3:
- AIM:
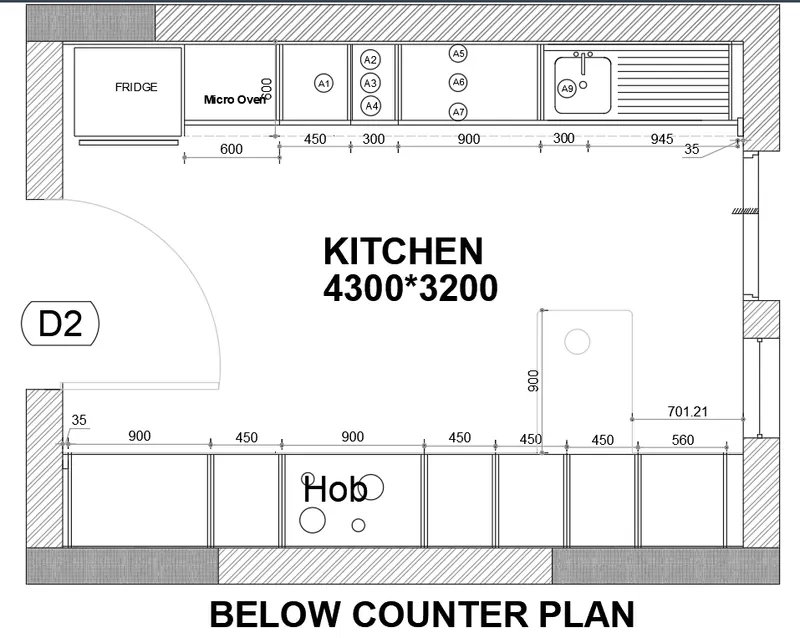
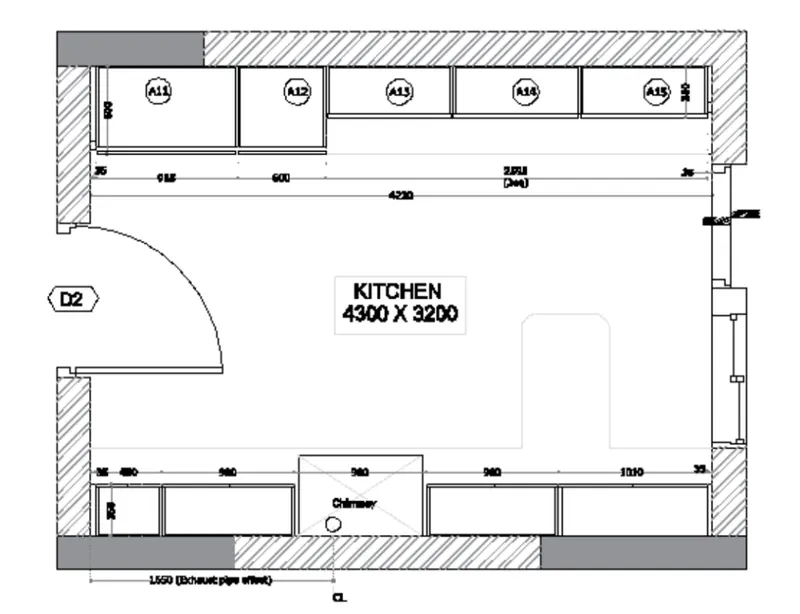
- To create the kitchen layout.
- To use text and dimensions.
- Procedure:
- Select the line tool.
- Offset command is used to required thickness of the walls.
- Arc commands are used to draw the doors in the the diagram.
- The door after beign drawn are converted to blocks and copied to required places.
- Windows are drawn with line and offset commands.
- Walls are set in walls layers.
- Dimensions and texts are set in separate text layers.
- Required rooms sizes are marked in the respective rooms.
- The obtained drawing after the procedure is displayed below.
- RESULT:
- The Kitchen Layout successfully created.
- All units are in mm.
- The drawing contains the texts of required sizes.
Question no.4:
- AIM:
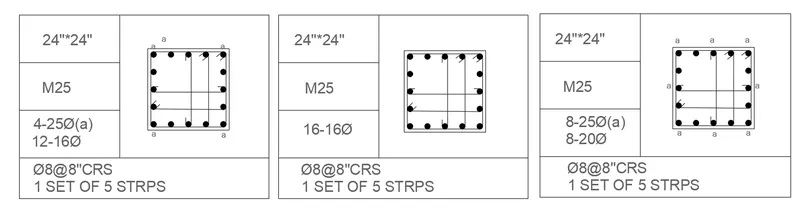
- To Sketch the column details
- To use text and dimensions.
- Procedure:
- Select table creation tool.
- Create a table with two column.
- The first column with 3 rows and last common row for both columns.
- The right column is left with empty space.
- Now the table is copied another 2 times.
- Now every empty column space of the table is placed with column drawing.
- The left column of the table is filled with values of the column.
- RESULT:
- The Sketch of the column details is successfully created.
- All units are in mm.
- The drawing contains the texts of required sizes.
Question no.5:
- AIM:
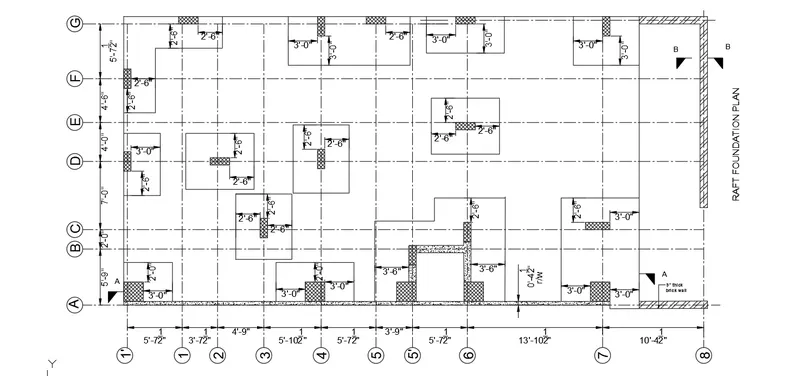
- To Draw the Raft Layout
- To use text and dimensions.
- Procedure:
- Select the line tool.
- The column lines are drawn using centre line.
- The walls are drawn using wall layer.
- The measurement for respective columns are drawn.
- The required column center lines are drawn.
- RESULT:
- The Raft Layout successfully created.
- All units are in Architectural units.
- The drawing contains the texts of required sizes.