Creating a Wardrobe detailed drawing, Floor Plan, Kitchen Layout and Column Detail using AutoCad
TASK 1:
Question 1:
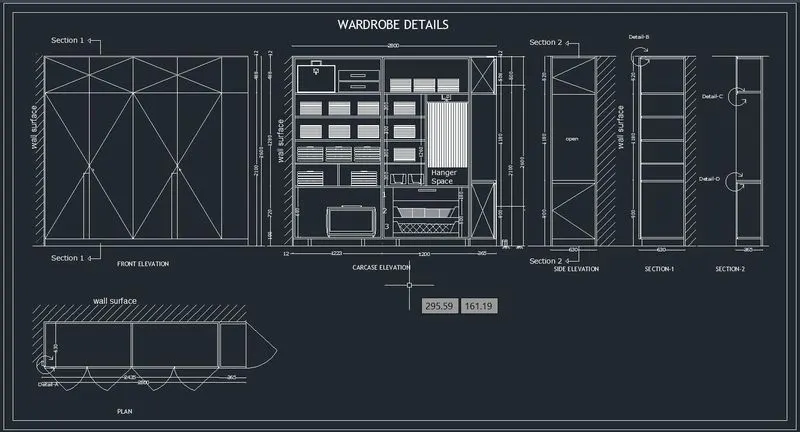
Draw the elevation and details of a wardrobe as shown in the Figure below. After sketching, you need to provide the dimensions and text with the use of layers. Use proper text styles and dimension methods to document it. Also, assume dimensions, wherever needed.
Note: All dimensions are in mm.
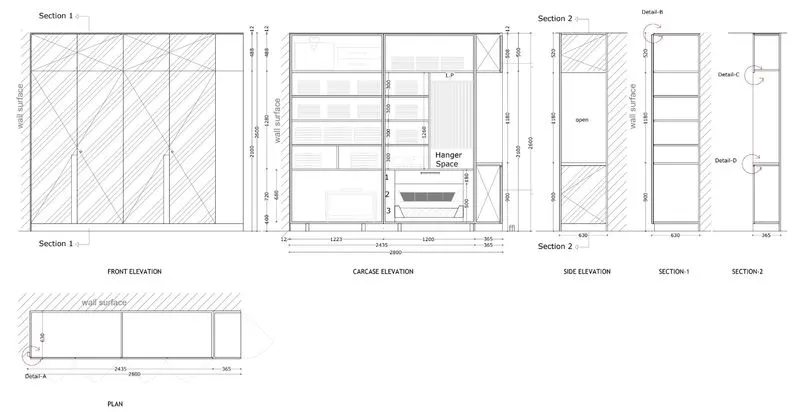
AIM:
To draw the elevation and details of a wardrobe as shown in the Figure below. After sketching, you need to provide the dimensions and text with the use of layers.
PROCEDURE:
- Go to START MENU, select AutoCAD 2023
- Click on START DRAWING .DWG File
- In the Command line type in: STARTUP [ENTER]
- Enter new value of startup: 1
- Go to Application Menu and select New
- Next select the 'Engineering' unit system from the 'Advanced Setup' option.
- Set the Units to "mm" by using the command 'un'.
- Set the limits by entering LIMITS in the Command tab. The lower-left corner is specified as 0,0, and the upper-right corner is specified as 100,100.
Commands used:
- Line command,
- Dimlinear command,
- Text command,
- Offset,
- Trim,
- Extend.
TASK 2:
Question 2:
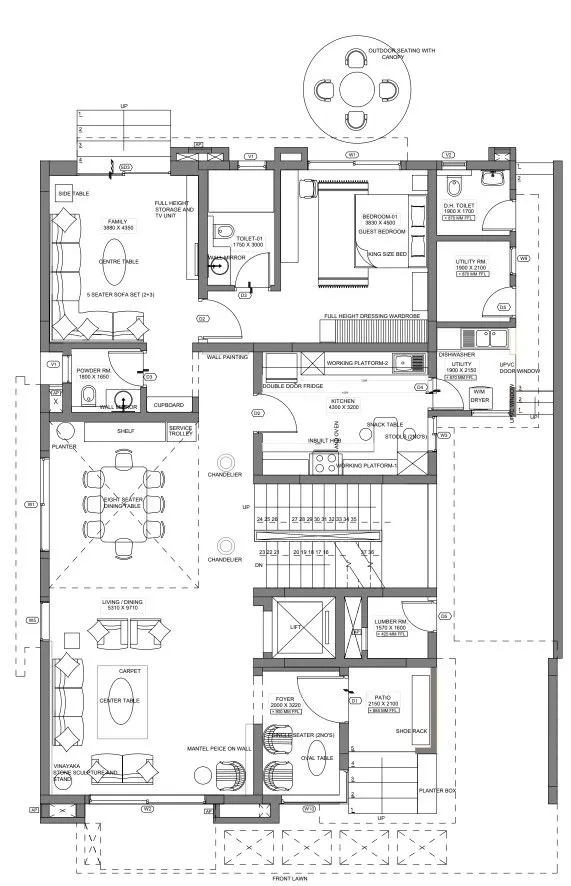
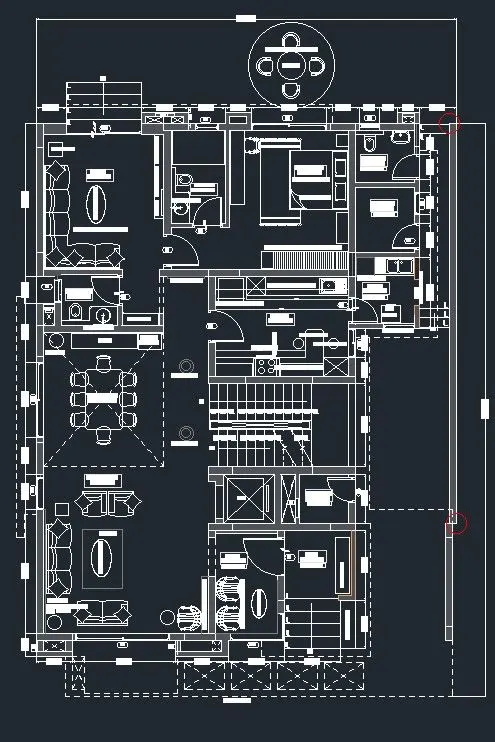
Draw the floor plan as shown in the Figure. Use the proper drafting tools to sketch the plan. Do not hatch or draw the furniture. You need to draw the floor plan with the following:
Note: You can also import the Floor_Plan.pdf into your current drawing and start working on the project. You need to scale the imported pdf file using reference option. All dimensions are in mm.
1. Walls (Exterior and Interior).
Wall Thickness: Exterior Wall- 230mm, Interior Wall: 150 mm. (Wherever Required)
2. Doors and Windows: Assume the size of the doors and window.
2.1 Stairs: Tread-300mm, Riser-150mm.
3. Insert Text wherever required.
4. Insert the dimensions using proper dimension techniques.
AIM:
To draw the floor plan as shown in the Figure. Use the proper drafting tools to sketch the plan. Do not hatch or draw the furniture. You need to draw the floor plan with the following:
1. Walls (Exterior and Interior).
Wall Thickness: Exterior Wall- 230mm, Interior Wall: 150 mm. (Wherever Required)
2. Doors and Windows: Assume the size of the doors and window.
2.1 Stairs: Tread-300mm, Riser-150mm.
3. Insert Text wherever required.
4. Insert the dimensions using proper dimension techniques.
PROCEDURE:
- Go to START MENU, select AutoCAD 2023
- Click on START DRAWING .DWG File
- In the Command line type in: STARTUP [ENTER]
- Enter new value of startup: 1
- Go to Application Menu and select New
- Next select the 'Engineering' unit system from the 'Advanced Setup' option.
- Set the Units to "mm" by using the command 'un'.
- Set the limits by entering LIMITS in the Command tab. The lower-left corner is specified as 0,0, and the upper-right corner is specified as 100,100.
Commands used:
- Line command,
- Circle command,
- ellipse command,
- Dimlinear command,
- Text command,
- Offset,
- Trim,
- Extend,
- Hatch...
TASK 3:
Question 3:
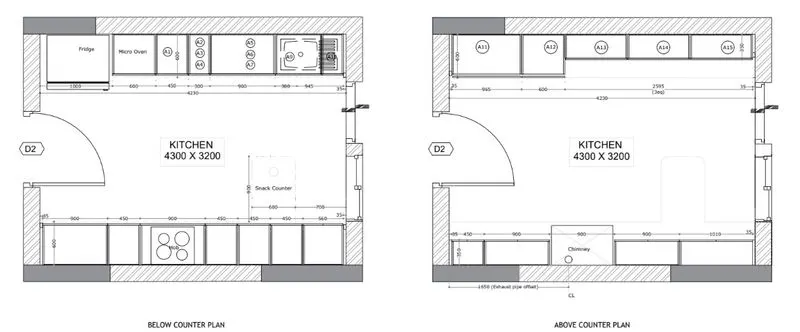
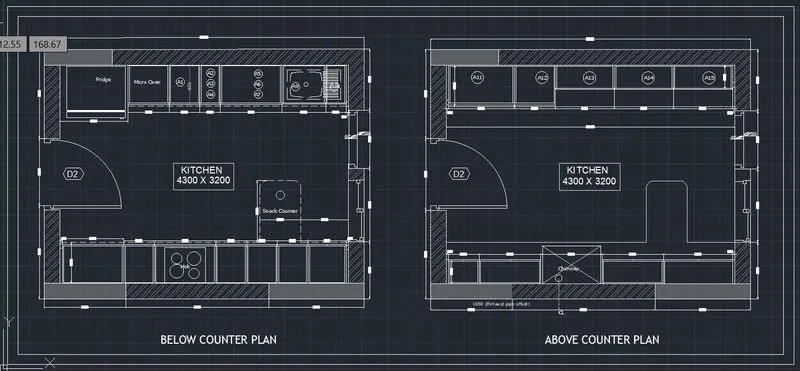
Create the Kitchen Layout as shown in the Figure below. Also, use proper dimension techniques to dimension the kitchen layout. Also, insert text wherever required. All dimensions are in mm.
AIM:
To create the Kitchen Layout as shown in the Figure below. Also, use proper dimension techniques to dimension the kitchen layout. Also, insert text wherever required. All dimensions are in mm.
PROCEDURE:
- Go to START MENU, select AutoCAD 2023
- Click on START DRAWING .DWG File
- In the Command line type in: STARTUP [ENTER]
- Enter new value of startup: 1
- Go to Application Menu and select New
- Next select the 'Engineering' unit system from the 'Advanced Setup' option.
- Set the Units to "mm" by using the command 'un'.
- Set the limits by entering LIMITS in the Command tab. The lower-left corner is specified as 0,0, and the upper-right corner is specified as 100,100.
Commands used:
- Line command,
- Arc command,
- Dimlinear command,
- Text command,
- Offset,
- Trim,
- Extend,
- Hatch...
TASK 4:
Question 4:
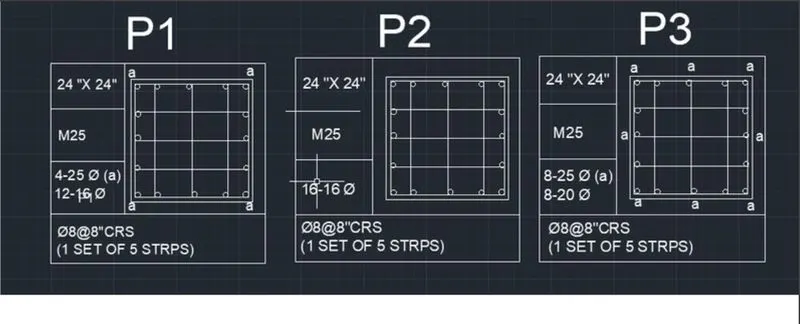
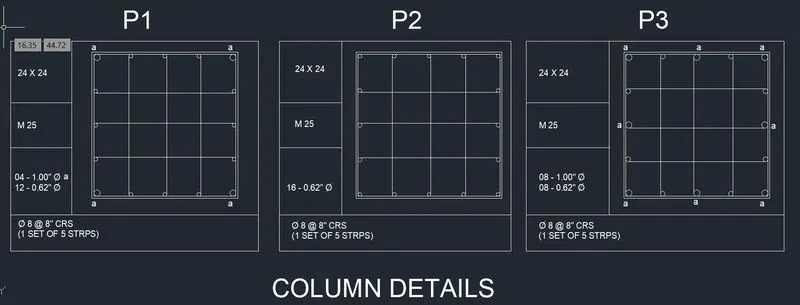
Sketch the column details as shown in Figure. Insert dimensions and text in the figure. Refer to the bar sizes from the schedule.
8mm ---- 0.31 Inches,
25mm--- 1 inches,
16mm—0.62 inches.
AIM:
To sketch the column details as shown in Figure. Insert dimensions and text in the figure. Refer to the bar sizes from the schedule.
PROCEDURE:
- Go to START MENU, select AutoCAD 2023
- Click on START DRAWING .DWG File
- In the Command line type in: STARTUP [ENTER]
- Enter new value of startup: 1
- Go to Application Menu and select New
- Next select the 'Decimal' unit system from the 'Advanced Setup' option.
- Set the limits by entering LIMITS in the Command tab. The lower-left corner is specified as 0,0, and the upper-right corner is specified as 100,100.
Commands used:
- Line command,
- Circle command,
- Dimlinear command,
- Text command,
- Offset,
- Trim,
- Extend,
- Hatch...
TASK 5:
Question 5:
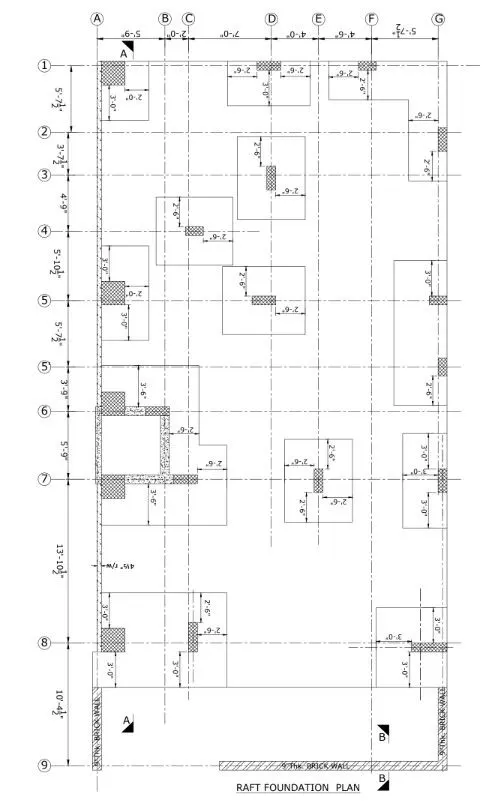
Draw the Raft Layout as shown in the Figure. Assume the column size as per your knowledge. You can take the sizes as: 24”x24”, 9” x 24”, 9” x 18”, and 9’ x 24”. You can import the raft_foundation.pdf to ensure the missing dimensions.
AIM:
To draw the Raft Layout as shown in the Figure. Assume the column size as per your knowledge. You can take the sizes as: 24”x24”, 9” x 24”, 9” x 18”, and 9’ x 24”. You can import the raft_foundation.pdf to ensure the missing dimensions.
PROCEDURE:
- Go to START MENU, select AutoCAD 2023
- Click on START DRAWING .DWG File
- In the Command line type in: STARTUP [ENTER]
- Enter new value of startup: 1
- Go to Application Menu and select New
- Next select the 'Architectural' unit system from the 'Advanced Setup' option.
- Set the Units to "mm" by using the command 'un'.
- Set the limits by entering LIMITS in the Command tab. The lower-left corner is specified as 0,0, and the upper-right corner is specified as 100,100.
Commands used:
- Line command,
- Dimlinear command,
- Text command,
- Offset,
- Trim,
- Extend,
- Hatch...
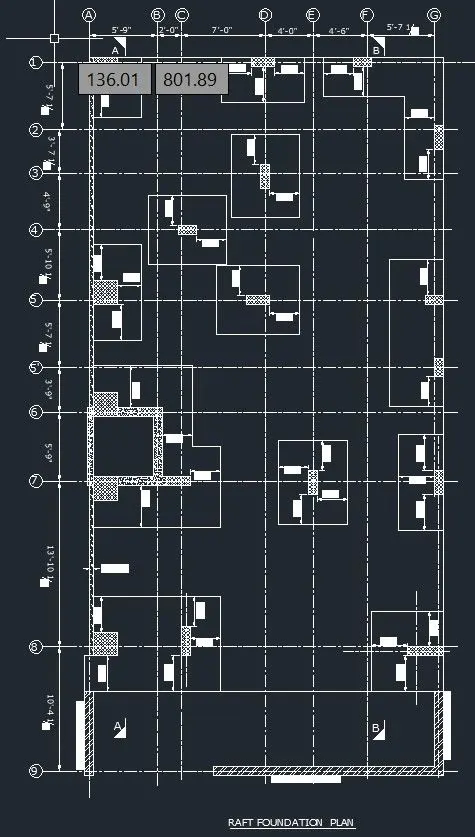
Thus the Challenge 6 is completed.