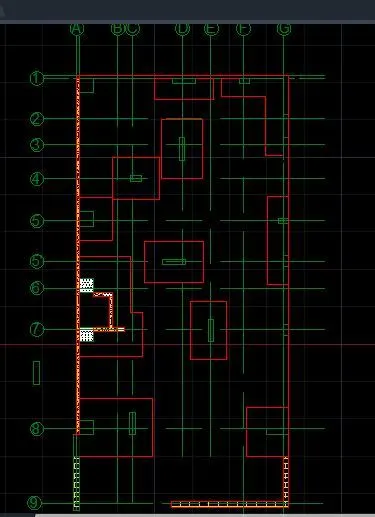
Creating a Wardrobe detailed drawing, Floor Plan, Kitchen Layout and Column Detail using AutoCad
Q1:
Aim: To draw the elevation and details of a wardrobe as shown in the Figure using AutoCAD.
Procedure:
In the command prompt type "UNITS" and press enter.
Select the units as "decimal" and insertion scale as "Millimeters".
Click ok.
Type "limits" in the command prompt and press enter.
Select "off" from the command prompt.
Type "Xline" in the command promp and press enter.
Type "v" and press enter.
Place the vertical xline anywhere in the workspace and press "esc".
Type "offset" in the command prompt and press enter.
Specify the off set distance as 2800. and select the vertical line to offset.
Press "esc".
Type "offset" in the command prompt and press enter.
Specify the off set distance as 12. and select the vertical line to offset.
Press "esc".
Type "Xline" in the command promp and press enter.
Type "H" and press enter.
Place the horizontal xline anywhere in the workspace and press "esc".
Type "offset" in the command prompt and press enter.
Specify the off set distance as 100. and select the horizontal line to offset.
Press "esc".
Type "offset" in the command prompt and press enter.
Specify the off set distance as 2100. and select the previously offsetted line.
Press "esc".
Type "offset" in the command prompt and press enter.
Specify the off set distance as 488. and select the previously offsetted line.
Press "esc".
Type "offset" in the command prompt and press enter.
Specify the off set distance as 12. and select the previously offsetted line.
Press "esc".
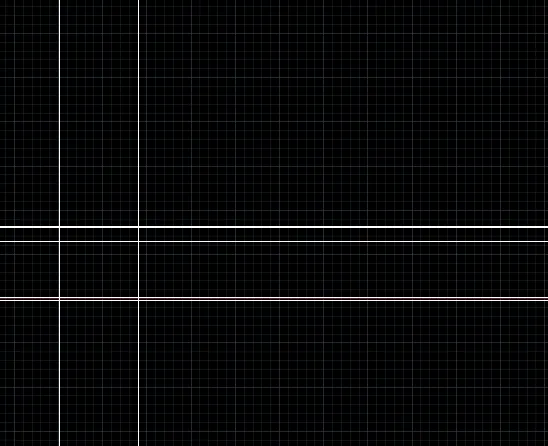
Below the previously created object, draw a line using line tool from ribbon connecting the two vertical xlines.
Type "offset" in the command prompt and press enter.
Specify the off set distance as 12. and select the previously created line.
Press "esc".
Type "offset" in the command prompt and press enter.
Specify the off set distance as 630. and select the previously created line.
Press "esc".
Type "offset" in the command prompt and press enter.
Specify the off set distance as 12. and select the previously offsetted line.
Press "esc".
Type "offset" in the command prompt and press enter.
Specify the off set distance as 12 and select the horizonatl line.
Press "esc".
Type "offset" in the command prompt and press enter.
Specify the off set distance as 1217.5 and select the same horizonatl line.
Press "esc".
Type "offset" in the command prompt and press enter.
Specify the off set distance as 12 and select previously offsetted line.
Press "esc".
Type "offset" in the command prompt and press enter.
Specify the off set distance as 1217.5 and select previously offsetted line.
Press "esc".
Type "offset" in the command prompt and press enter.
Specify the off set distance as 12 and select previously offsetted line.
Press "esc".
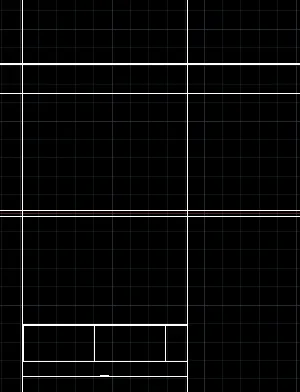
Select trim command from the ribbon tab.
Click on the line to trim, trim the unwanted lines.
Type "offset" in the command prompt and press enter.
Specify the off set distance as 518.75 and select vertical line.
Press "esc".
Type "offset" in the command prompt and press enter.
Specify the off set distance as 518.75 and select the previously offsetted line.
Press "esc".
Type "offset" in the command prompt and press enter.
Specify the off set distance as 518.75 and select the previously offsetted line.
Press "esc".
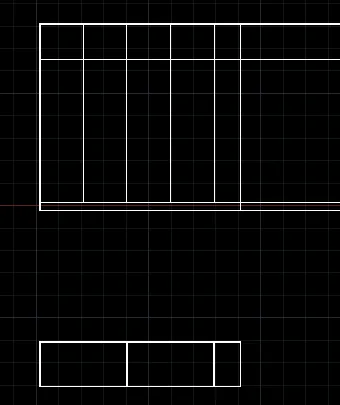
In the ribbon tab, select layer properties.
Click on new layer in the layer properties.
Create the layer as "transparent" and change the transparency value to 70.
Set as current layer.
Edit the def points and change the color to red.
Close the properties tab.
Select line tool from ribbon tab and specify the first point as left bottom corner point.
Draw a diagonal line connecting right top corner.
Press "esc".
Similarly draw the lines using line tool according to the given figure.
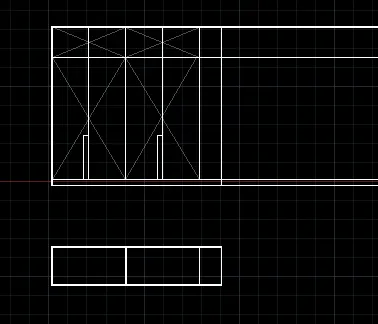
Within the vertical XLine draw another vertical line using line tool.
Type "offset" in the command prompt and press enter.
Specify the off set distance as 12 and select the previously created line.
Press "esc".
Type "offset" in the command prompt and press enter.
Specify the off set distance as 100 and select the horizontal line.
Press "esc".
Type "offset" in the command prompt and press enter.
Specify the off set distance as 12 and select the top horizontal line.
Press "esc".
Type "offset" in the command prompt and press enter.
Specify the off set distance as 488 and select the previously created line.
Press "esc".
Type "offset" in the command prompt and press enter.
Specify the off set distance as 12 and select the previously created line.
Press "esc".
Select the trim command from ribbon tab and trim the unwanted lines.
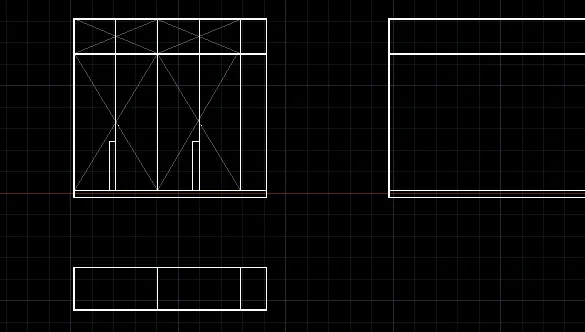
Type "offset" in the command prompt and press enter.
Specify the off set distance as 1223 and select the horizontal line.
Press "esc".
Type "offset" in the command prompt and press enter.
Specify the off set distance as 12 and select the previously offsetted line.
Press "esc".
Type "offset" in the command prompt and press enter.
Specify the off set distance as 300 and select the previously offsetted vertical line.
Press "esc".
Type "offset" in the command prompt and press enter.
Specify the off set distance as 12 and select the previously offsetted line.
Press "esc".
Type "offset" in the command prompt and press enter.
Specify the off set distance as 300 and select the previously offsetted vertical line.
Press "esc".
Type "offset" in the command prompt and press enter.
Specify the off set distance as 12 and select the previously offsetted line.
Press "esc".
Type "offset" in the command prompt and press enter.
Specify the off set distance as 300 and select the previously offsetted vertical line.
Press "esc".
Type "offset" in the command prompt and press enter.
Specify the off set distance as 12 and select the previously offsetted line.
Press "esc".
Type "offset" in the command prompt and press enter.
Specify the off set distance as 300 and select the previously offsetted vertical line.
Press "esc".
Type "offset" in the command prompt and press enter.
Specify the off set distance as 12 and select the previously offsetted line.
Press "esc".
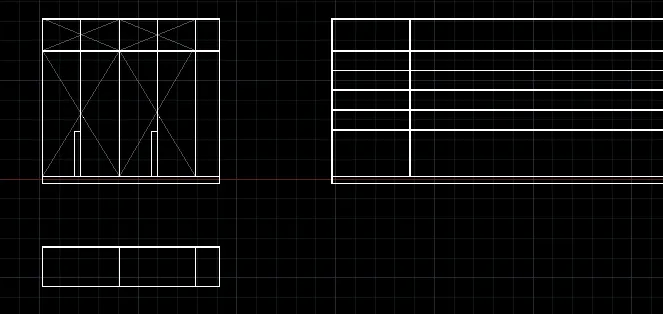
Type "offset" in the command prompt and press enter.
Specify the off set distance as 1200 and select the previously offsetted line.
Press "esc".
Type "offset" in the command prompt and press enter.
Specify the off set distance as 12 and select the previously offsetted line.
Press "esc".
Type "offset" in the command prompt and press enter.
Specify the off set distance as 365 and select the previously offsetted line.
Press "esc".
Type "offset" in the command prompt and press enter.
Specify the off set distance as 12 and select the previously offsetted line.
Press "esc".
Use trim command to attain the required dimension as per figure
Select the all the lines other than transparent line.
Click on the layer setting and set the current layer as def points.
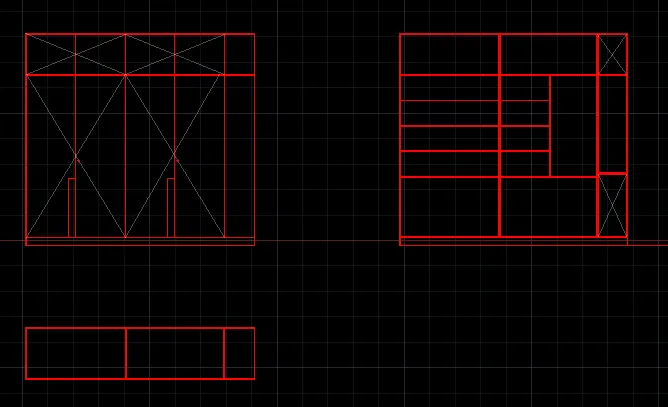
Select line tool from ribbon tab.
Specify the starting point along the same direction and plane of previosuly created line.
Specify the length as 2488 in the vertical direction and press enter.
press esc.
Type "offset" in the command prompt and press enter.
Specify the off set distance as 12 and select the previously created line.
Press "esc".
Select line tool from ribbon tab.
Specify the starating point as end point offsetted line.
Specify the length as 630 in the horizontal direction and press enter.
Press esc.
Type "offset" in the command prompt and press enter.
Specify the off set distance as 12 and select the previously offsetted line.
Press "esc".
Type "offset" in the command prompt and press enter.
Specify the off set distance as 520 and select the last created horizontal line.
Press "esc".
Type "offset" in the command prompt and press enter.
Specify the off set distance as 1180 and select the previously offsetted line.
Press "esc".
Type "offset" in the command prompt and press enter.
Specify the off set distance as 30 and select the previously offsetted line.
Press "esc".
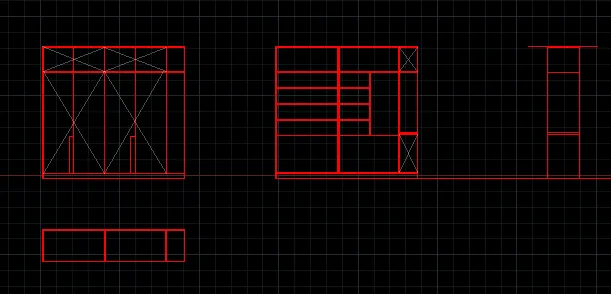
Select line tool from ribbon tab.
Type "offset" in the command prompt and press enter.
Specify the off set distance as 12 and select the previously created line.
Press "esc".
Select line tool from ribbon tab.
Specify the starating point as end point offsetted line.
Specify the length as 630 in the horizontal direction and press enter.
Press esc.
Type "offset" in the command prompt and press enter.
Specify the off set distance as 12 and select the previously offsetted line.
Press "esc".
Type "offset" in the command prompt and press enter.
Specify the off set distance as 520 and select the last created horizontal line.
Press "esc".
Type "offset" in the command prompt and press enter.
Specify the off set distance as 300 and select the previously offsetted line.
Press "esc".
Type "offset" in the command prompt and press enter.
Specify the off set distance as 12 and select the previously offsetted line.
Press "esc".
Type "offset" in the command prompt and press enter.
Specify the off set distance as 300 and select the previously offsetted line.
Press "esc".
Type "offset" in the command prompt and press enter.
Specify the off set distance as 12 and select the previously offsetted line.
Press "esc".
Type "offset" in the command prompt and press enter.
Specify the off set distance as 300 and select the previously offsetted line.
Press "esc".
Type "offset" in the command prompt and press enter.
Specify the off set distance as 12 and select the previously offsetted line.
Press "esc".
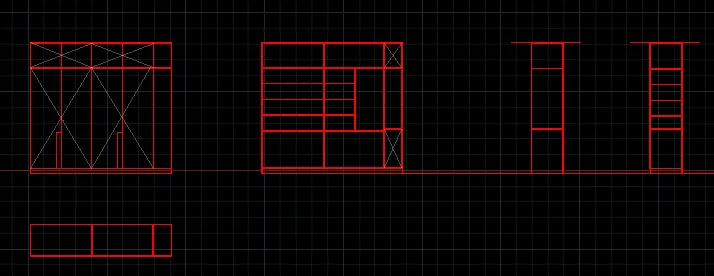
Select line tool from ribbon tab.
Draw a vertical line of 2500 and horizontal line of 365 length.
Type "offset" in the command prompt and press enter.
Specify the off set distance as 365 and select the vertical line.
Press "esc".
Type "offset" in the command prompt and press enter.
Specify the off set distance as 12 and select the previously offsetted line.
Press "esc".
Type "offset" in the command prompt and press enter.
Specify the off set distance as 12 and select the previously offsetted line.
Press "esc".
Type "offset" in the command prompt and press enter.
Specify the off set distance as 12 and select the top horizontal line.
Press "esc".
Type "offset" in the command prompt and press enter.
Specify the off set distance as 520 and select the previously offsetted line.
Press "esc".
Type "offset" in the command prompt and press enter.
Specify the off set distance as 12 and select the previously offsetted line.
Press "esc".
Type "offset" in the command prompt and press enter.
Specify the off set distance as 1180 and select the previously offsetted line.
Press "esc".
Type "offset" in the command prompt and press enter.
Specify the off set distance as 12 and select the previously offsetted line.
Press "esc".
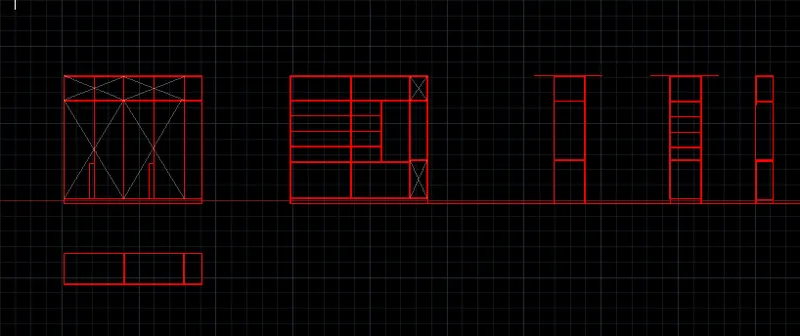
Select layer settings tool from ribbon tab.
Select "create new layer" and name the layer as "text and dimensions".
Select the color.
Set the created layer as "current layer".
Select the dimension tool from the ribbon tab.
Specify the starting point and ending point.
Select the continue option from the command prompt to continue to dimensioning.
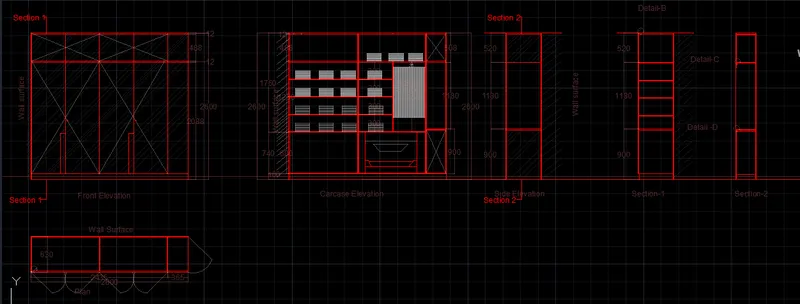
Q2:
Aim: To draw the floor plan as shown in the Figure using AutoCAD
PROCEDURE:
In the command prompt type "UNITS" and press enter.
Select the units as "decimal" and insertion scale as "Millimeters".
Click ok.
Type "limits" in the command prompt and press enter.
Select "off" from the command prompt.
Type "XLine" in the command prompt and press enter.
Tyep "V" in the command prompt and press enter.
Place the vertical xline and press "esc".
Type "XLine" in the command prompt and press enter.
Tyep "H" in the command prompt and press enter.
Place the horizontal xline and press "esc".
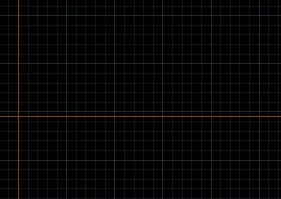
Type "offset" in the command prompt and press enter.
Specify the offset distance as per the required standards.
Repeat the offset command until the outer walls are formed.
Then, type trim in the command prompt and press enter.
Trim the unwanted lines projecting out.
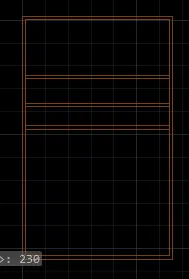
Type "offset" in the command prompt and press enter.
Specify the offset distance as 9710 and press enter.
Type "offset" in the command prompt and press enter.
Specify the offset distance as 150 and press enter.
Repeat the same procedure for sketching.
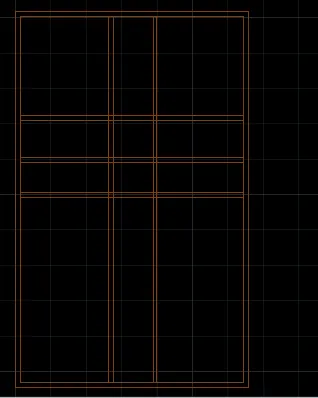
Select trim tool from the ribbon tab.
Trim the wall created using offset to attain required rooms.
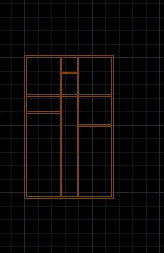
Type "offset" in the command prompt and press enter.
Specify the offset distance as 3200 and press enter.
Specify the bottom lline to offset and press enter.
Type "offset" in the command prompt and press enter.
Specify the offset distance as 230 and press enter.
Select the previously offsetted line and press enter.
Type "offset" in the command prompt and press enter.
Specify the offset distance as 1600 and press enter.
Select the previously offsetted line and press enter.
Type "offset" in the command prompt and press enter.
Specify the offset distance as 230 and press enter.
Select the previously offsetted line and press enter.
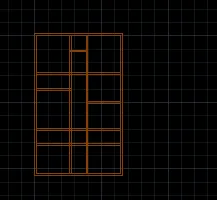
Use trim tool from ribbon tab to trim the lines.
Select the line to trim to obtain required room dimension.
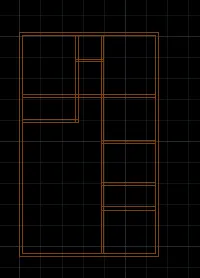
Use line tool from ribbon tab.
Draw a line to specify a room oin the right bottom corner.
Type "offset" in the command prompt and press enter.
Specify the offset distance as 230 and press enter.
Select the previously created line and press enter.
Use line tool from ribbon tab.
Draw a horizontal line to specify a room in the right bottom corner.
Type "offset" in the command prompt and press enter.
Specify the offset distance as 230 and press enter.
Select the previously created line and press enter.
Use trim tool from ribbon tab.
Trim the bottom line to obtain room of required dimension
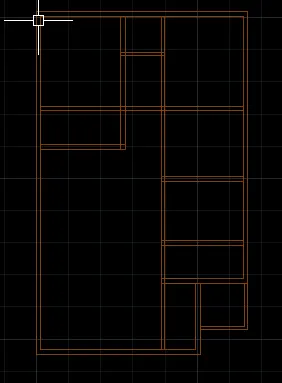
Use line tool from ribbon tab.
Draw a line above the previously created room to specify a room.
Type "offset" in the command prompt and press enter.
Specify the offset distance as 230 and press enter.
Select the previously created line and press enter.
Use line tool from ribbon tab.
Draw a horizontal line to specify a room in the right bottom corner.
Type "offset" in the command prompt and press enter.
Specify the offset distance as 230 and press enter.
Select the previously created line and press enter.
Use trim tool from ribbon tab.
Trim the bottom line to obtain room of required dimension
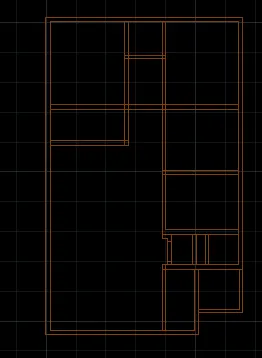
Use line tool from ribbon tab.
Draw a horizontal line from the top right corner of required length.
Press "esc".
Use line tool from ribbon tab.
Draw a vertical line from the last created line of required length.
Press "esc".
Type "offset" in the command prompt and press enter.
Specify the offset distance as 230 and press enter.
Select the horizontal line and press enter.
Select the vertical line and press enter.
Type "offset" in the command prompt and press enter.
Specify the offset distance as 1700 and press enter.
Select the horizontal line
Press "esc".
Type "offset" in the command prompt and press enter.
Specify the offset distance as 230 and press enter.
Select the previously offsetted line
Press "esc".
Type "offset" in the command prompt and press enter.
Specify the offset distance as 2100 and press enter.
Select the previously offsetted line
Press "esc".
Type "offset" in the command prompt and press enter.
Specify the offset distance as 230 and press enter.
Select the previously offsetted line
Press "esc".
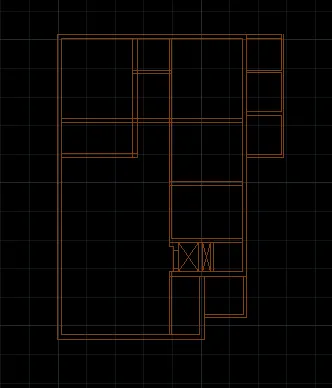
Use line tool from ribbon tab.
Draw a vertical line from the top right corner of required length.
Press "esc".
Type "offset" in the command prompt.
Specify the offset distance as 230 and select the vertical line.
Press "esc"
Again draw a vertical from a offset distance using line tool from ribbon tab.
Type "offset" in the command prompt.
Specify the offset distance as 230 and select the vertical line.
Press "esc"
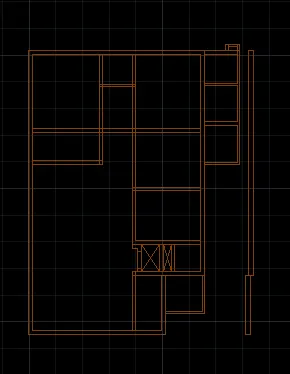
Draw line of required length using line tool from ribbon tab to create staircase.
Also from the other end draw a line of required length.
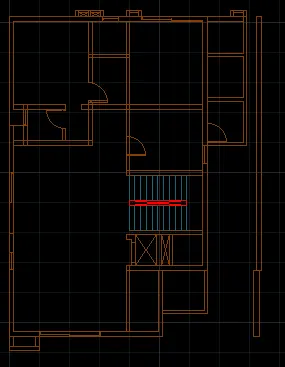
In the centre space draw a rectangle using rectangle tool from the ribbon tab.
Type "offset" in the command prompt and press enter.
Since the thread length is 300mm, specify the offset distance as 300.
Select the line and do multiple offset until required flight is obtained.
Repeat the same procedure on the downward direction also.
Click on the layer tool from the ribbon tab.
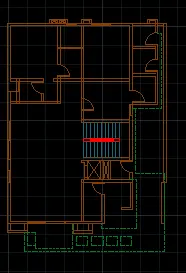
In the layer setting, create a layer to indicate dash lines.
Select the "line type" and thenclick load.
From the displayed line type select the suitable line type and press ok.
Set the layer as current layer.
Select line tool from ribbon tab.
Draw the line according to the figure given.
Select text tool from ribbon tab.
From the drop down, select single line text.
Place the pointer where the text has to be inserted and click.
Now type "living and dining 5310x9710".
Place the pointer in the next point where the text has to be inserted and click.
Similarly insert the all the text as mentioned in the figure.
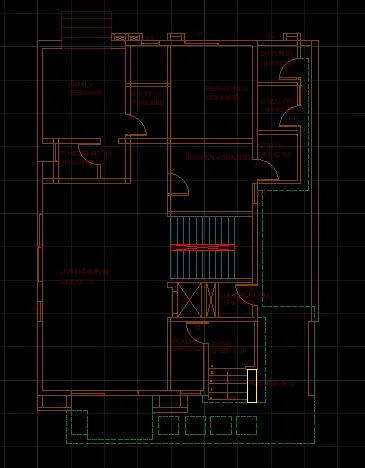
AIM: To create kitchen layout as shown in figure using AutoCAD.
Procedure:
In the command prompt type "UNITS" and press enter.
Select the units as "decimal" and insertion scale as "Millimeters".
Click ok.
Type "limits" in the command prompt and press enter.
Select "off" from the command prompt.
Type "XLine" in the command prompt and press enter.
Tyep "V" in the command prompt and press enter.
Place the vertical xline and press "esc".
Type "XLine" in the command prompt and press enter.
Tyep "H" in the command prompt and press enter.
Place the horizontal xline and press "esc".
Type "offset" in the command prompt and press enter.
Specify the offset distance as 230.
Select the horizontal line to offset.
Now select the vertilcal line to offset.
Type "offset" in the command prompt and press enter.
Specify the offset distance as 4300.
Select the vertical line to offset and press esc.
Type "offset" in the command prompt and press enter.
Specify the offset distance as 3200.
Select the Horizontal line to offset and press esc.
Type "offset" in the command prompt and press enter.
Specify the offset distance as 230.
Select the horizontal line to offset.
Now select the vertilcal line to offset.
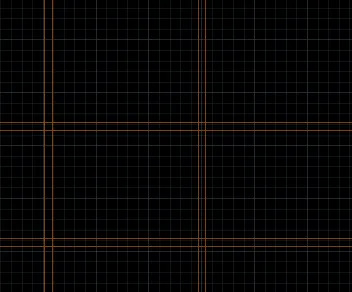
Select trim tool from ribbon tab.
Trim the portion required for sketching the door.
Select arc tool from ribbon tab.
From the drop down, select "start, end and direction".
Now specify the starting and ending point.
Move the cursor to specify the direction of door opening.
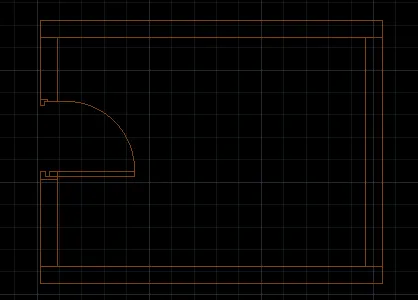
Type "offset" in the command prompt and press enter.
Specify the offset distance as 600.
Select the top horizontal line to offset and press esc.
Type "offset" in the command prompt and press enter.
Specify the offset distance as 800.
Select the top horizontal line to offset and press esc.
Type "offset" in the command prompt and press enter.
Specify the offset distance as 600.
Select the bottom horizontal line to offset and press esc.
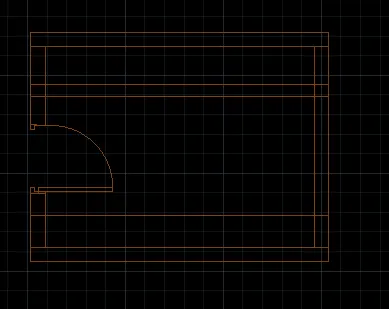
Select line tool from ribbon tab.
Specify the starting indicating the position of window.
Use rectangle tool from rtibbon tab to draw the separation.
Again use line tool to draw the next window.
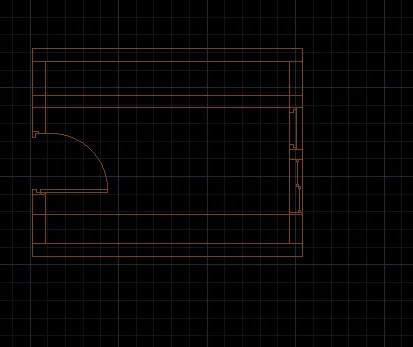
Use line toiol from riibbon tab.
Draw a line of length 800 in the negative y direction.
Use offset command to offset the line upto distance of 1000.
Draw a line of length 550 in the negative y direction.
Use offset command to offset the line upto distance of 600.
Draw a line of length 550 in the negative y direction.
Use offset command to offset the line upto distance of 450.
Draw a line of length 550 in the negative y direction.
Use offset command to offset the line upto distance of 300.
Draw a line of length 550 in the negative y direction.
Use offset command to offset the line upto distance of 900.
Draw a line of length 550 in the negative y direction.
Use offset command to offset the line upto distance of 300.
Draw a line of length 550 in the negative y direction.
Use offset command to offset the line upto distance of 945.
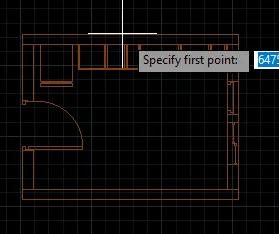
Draw a line of length 550 in the negative y direction.
Use offset command to offset the line upto distance of 900.
Draw a line of length 550 in the negative y direction.
Use offset command to offset the line upto distance of 450.
Draw a line of length 550 in the negative y direction.
Use offset command to offset the line upto distance of 900.
Draw a line of length 550 in the negative y direction.
Use offset command to offset the line upto distance of 450.
Draw a line of length 550 in the negative y direction.
Use offset command to offset the line upto distance of 450.
Draw a line of length 550 in the negative y direction.
Use offset command to offset the line upto distance of 450.
Draw a line of length 550 in the negative y direction.
Use offset command to offset the line upto distance of 560.
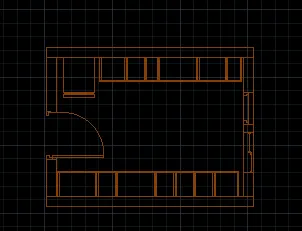
Select the entire object in the workspace.
Type "copy" in the command prompt and press enter.
Select the bottom left corner point as base point.
Move the copy of the object in the positive X-direction and place it.
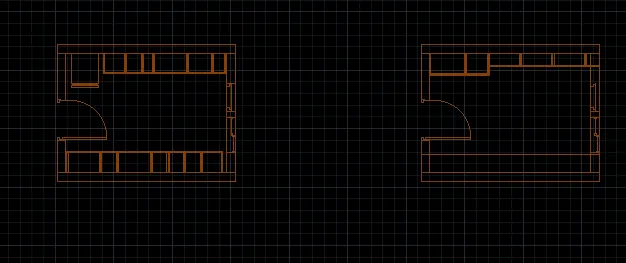
Similarly draw a line of length 550 in the negative y direction.
Use offset command to offset the line upto distance of 965.
Draw a line of length 550 in the negative y direction.
Use offset command to offset the line upto distance of 600.
Draw a line of length 550 in the negative y direction.
Use offset command to offset the line upto distance of 865.
Draw a line of length 550 in the negative y direction.
Use offset command to offset the line upto distance of 865.
Draw a line of length 550 in the negative y direction.
Use offset command to offset the line upto distance of 865.
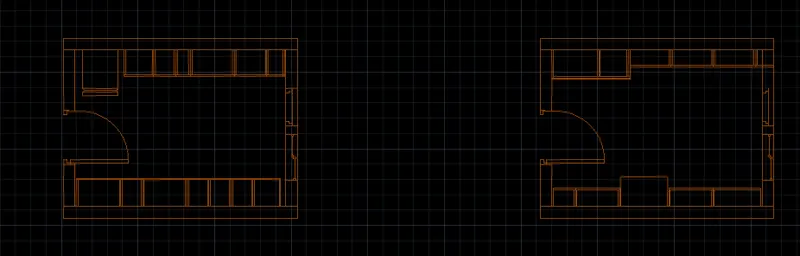
Selectb the dimension tool from the ribbon tab.
Sprecify the starting point and end point.
Move the cursor to adjust the position of dimnesions.
Press "c" or click "continue" in the command prompt.
Select the basepoint from the dimensioning has to continue.
Move the cursor to next point and click to display the dimensions.
Similarly repeat the same procedure to display the dimensiosn.
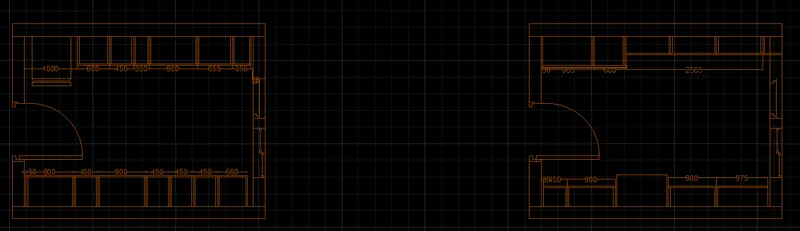
Select text tool from ribbon tab.
From the drop down, select single line text.
Place the pointer where the text has to be inserted and click.
Type Fridge and click on the next point where the text has to be inserted.
Similarly enter all the text
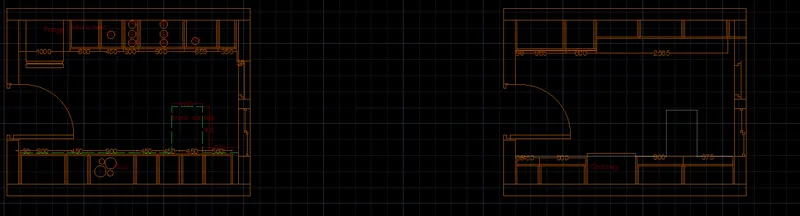
Select text tool from ribbon tab.
From the drop down, select single line text.
Place the pointer where the text has to be inserted and click.
Type Kitchen "4300x3200".
In the annotate tool, click manage text style.
In the dialogue box chnage the text height and click apply.
Select the text and go the annotate tool, select standard.
Now the text height is changed.
Select text tool from ribbon tab.
From the drop down, select single line text.
Place the pointer where the text has to be inserted and click.
Type Kitchen "4300x3200".
In the annotate tool, click manage text style.
In the dialogue box chnage the text height and click apply.
Select the text and go the annotate tool, select standard.
Now the text height is changed.
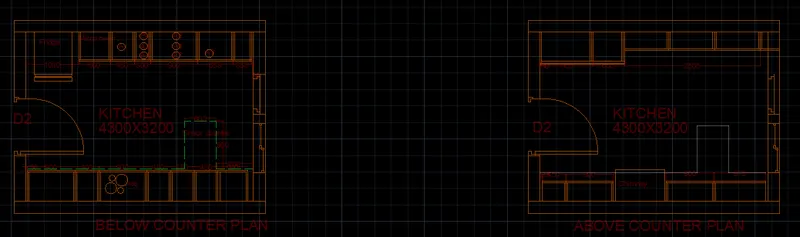
Q4:
Aim: To sketch the column details as given in the figure using AutoCAD.
Procedure:
Type "UNITS" in the command prompt and press enter.
In the unit tab, select the type as "Architectural" and insertion scale as "inches".
Click ok.
Select rectangel tool from the ribbon tab.
Specify the starting point as (0,0) and press enter.
Specify the starting point in the workspace.
Drage the rectangle to fix tye dimension as per the required size.
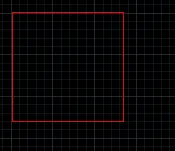
Select line tool from ribbon tab.
Draw a vertical line inside the rectangle as per the figure.
Press "esc".
Draw a Horizonttal line inside the rectangle as per the figure.
Press "esc".
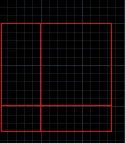
Type "offset" in the command prompt and specify the suitable offset distance.
Offset the same line for two times.
Use trim tool from ribbon tab to trim unwanted lines.
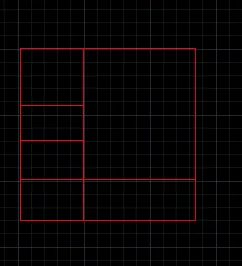
Select the entire object using cursor.
Type "copy" in the command prompt and press enter.
Select the base point as right bottom corner point.
Move the copied object in horizontal direction and click to paste it.
Again move in the same direction to again paste.
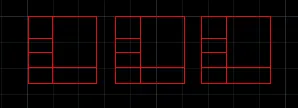
Select "text" tool from ribbon tab.
From the drop down list select "single line" text.
Now the keep the pointer in the left box and click as per the alignment required.
Type the text as 24"x24" and click on the place where the text has to be entered.
Type the text as "M25" and click on the place where the text has to be entered.
Type the text as 4-25`phi` 12-16`phi` and click on the place where the text has to be entered.
Type the text as `phi`8@8"CRS (1 SET OF 5 STRPS) and click on the place where the text has to be entered.
Now press "esc".
Similarly type the other texts in the required alignment.
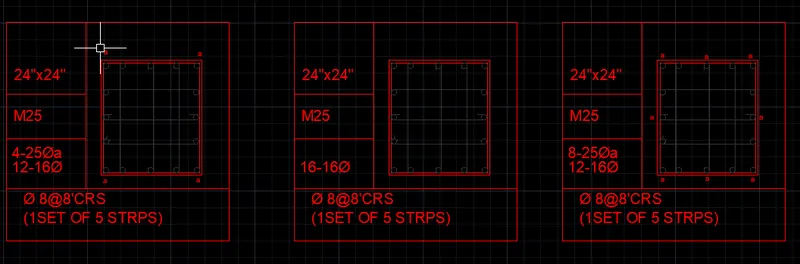
Q5:
Aim: To draw the Raft Layout as shown in the Figure using Autocad.
Procedure:
Type "UNITS" in the command prompt and press enter.
In the unit tab, select the type as "Architectural" and insertion scale as "inches".
Click ok.
Select the linetype tool from the ribbon tab.
Click load.
From the dialogue box, select "long dash short dash" and click ok.
Select line tool from ribbon tab.
Specify the starting point in workspace.
Draw a line of length 53'5" in the vertical direction and press "esc".
Specify the starting point in workspace.
Draw a line of length 26'9" in the horizontal direction and press "esc".
Type "offset in the command prompt and press enter.
Specify the offset distance as 53'5".
Selec the horizontal line to offset.
Press esc.
Type "offset in the command prompt and press enter.
Specify the offset distance as 26'9".
Selec the vertical line to offset.
Press esc.
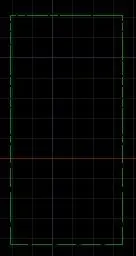
Type "xline" in the command prompt.
Press "v" in the command prompt and place line.
Type "xline" in the command prompt.
Press "H" in the command prompt and place line.
Type "offset in the command prompt and press enter.
Specify the offset distance as 5'6".
Selec the vertical XLine to offset.
Press esc.
Type "offset in the command prompt and press enter.
Specify the offset distance as 2'.
Selec the previously offsetted vertical XLine to offset.
Press esc.
Type "offset in the command prompt and press enter.
Specify the offset distance as 7'.
Selec the previously offsetted vertical XLine to offset.
Press esc.
Type "offset in the command prompt and press enter.
Specify the offset distance as 4'.
Selec the previously offsetted vertical XLine to offset.
Press esc.
Type "offset in the command prompt and press enter.
Specify the offset distance as 4'6".
Selec the previously offsetted vertical XLine to offset.
Press esc.
Type "offset in the command prompt and press enter.
Specify the offset distance as 5'7.5".
Selec the previously offsetted vertical XLine to offset.
Press esc.
Similarly in the horizontal direction use offset tool.
Type "offset in the command prompt and press enter.
Specify the offset distance as 10'4.5".
Selec the horizontal XLine to offset.
Press esc.
Type "offset in the command prompt and press enter.
Specify the offset distance as 13'10.5".
Selec the previously offsetted horizontal XLine to offset.
Press esc.
Type "offset in the command prompt and press enter.
Specify the offset distance as 5'9".
Selec the previously offsetted horizontal XLine to offset.
Press esc.
Type "offset in the command prompt and press enter.
Specify the offset distance as 3'9".
Selec the previously offsetted horizontal XLine to offset.
Press esc.
Type "offset in the command prompt and press enter.
Specify the offset distance as 5'7.5".
Selec the previously offsetted horizontal XLine to offset.
Press esc.
Type "offset in the command prompt and press enter.
Specify the offset distance as 5'10.5".
Selec the previously offsetted horizontal XLine to offset.
Press esc.
Type "offset in the command prompt and press enter.
Specify the offset distance as 3'7.5".
Selec the previously offsetted horizontal XLine to offset.
Press esc.
Type "offset in the command prompt and press enter.
Specify the offset distance as 5'7.5".
Selec the previously offsetted horizontal XLine to offset.
Press esc.
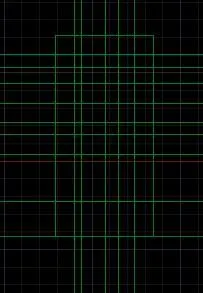
Select circle tool from ribbon tab.
Draw a small circle by specifying centre and radius randomly.
Press esc.
Select the circel and type "copy" in the command prompt.
Place the copied object in places where it is required as per the figure.
Select text tool from ribbon tab.
From drop down select single line text.
Place the cursor the inside the circle to insert text.
Type the text as "1" and click on the next point to insert text.
Similarly enter the text to mention the section name.
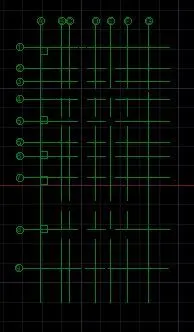
Select rectangle tool from ribbon tab.
Specify the starting point and select dimensions.
Enter the length as 24" and width as 24"
Press esc.
Select rectangle tool from ribbon tab.
Specify the starting point and select dimensions.
Enter the length as 9" and width as 24"
Press esc.
Select rectangle tool from ribbon tab.
Specify the starting point and select dimensions.
Enter the length as 9" and width as 18"
Press esc.
Place the created the rectangles in the grid points as given in figure.
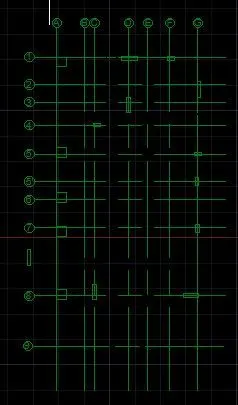
To draw the footing marking, use line tool from ribbon tab.
From the face D1 column draw a line of length 2'6" on either direction.
Connect the lines to form the footing.
Similarly draw the footing for the other grid/columns.
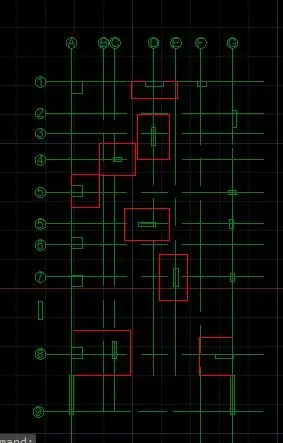
To draw the Lshaped combined footing use line tool from ribbon tab.
Draw a line of length 2'6" in the downward direction.
Specify the next point as (@7'1.5",0) and press enter.
Specify the next point as (@0,6'1.5") and press enter.
Specify the next point as (@2'6",0) and press enter.
Press esc.
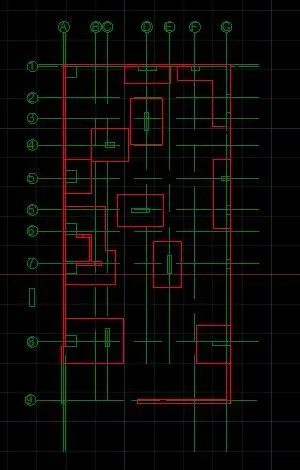
Select hatch tool from ribbon tab.
From the hatch dialogue box select hatch indicating concrete.
Select the as per the required visibility.
Place the cursor where hatch is to be done and click.
Again click on hatch tool from ribbon tab.
From the hatch dialogue box select hatch indicating btrickwork.
Select the as per the required visibility.
Place the cursor where hatch is to be done and click.