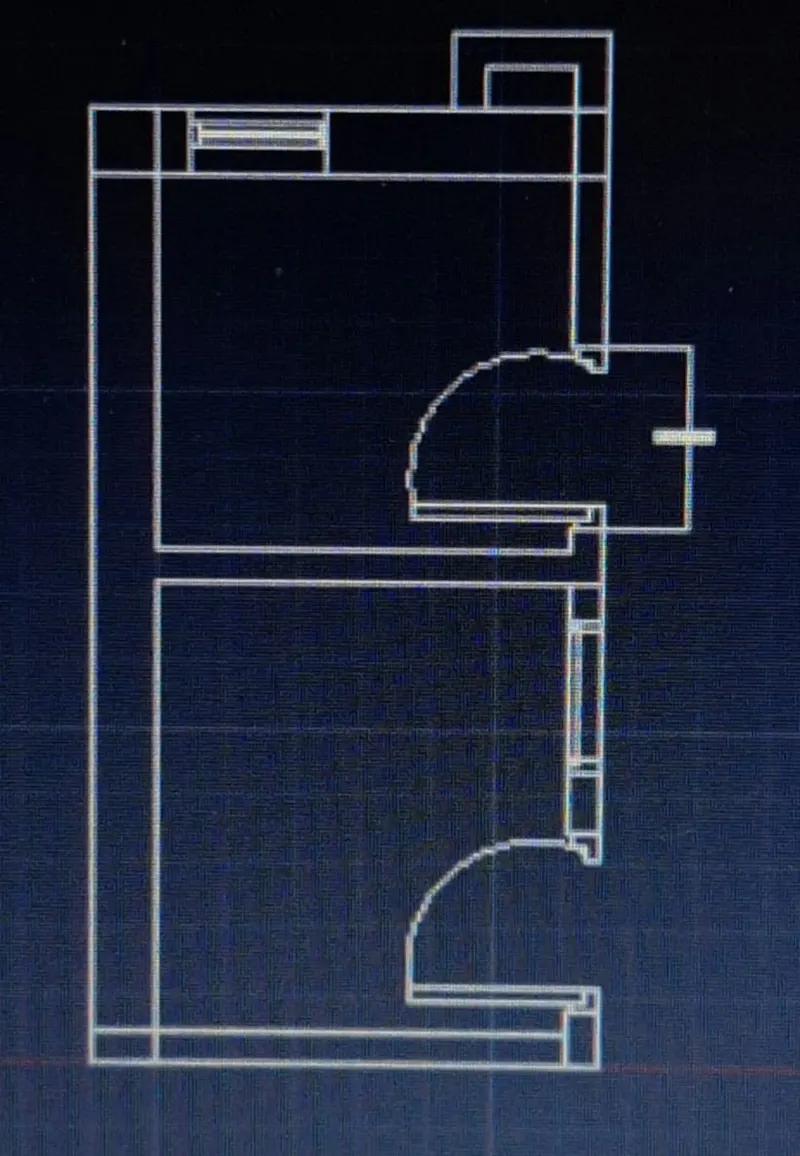
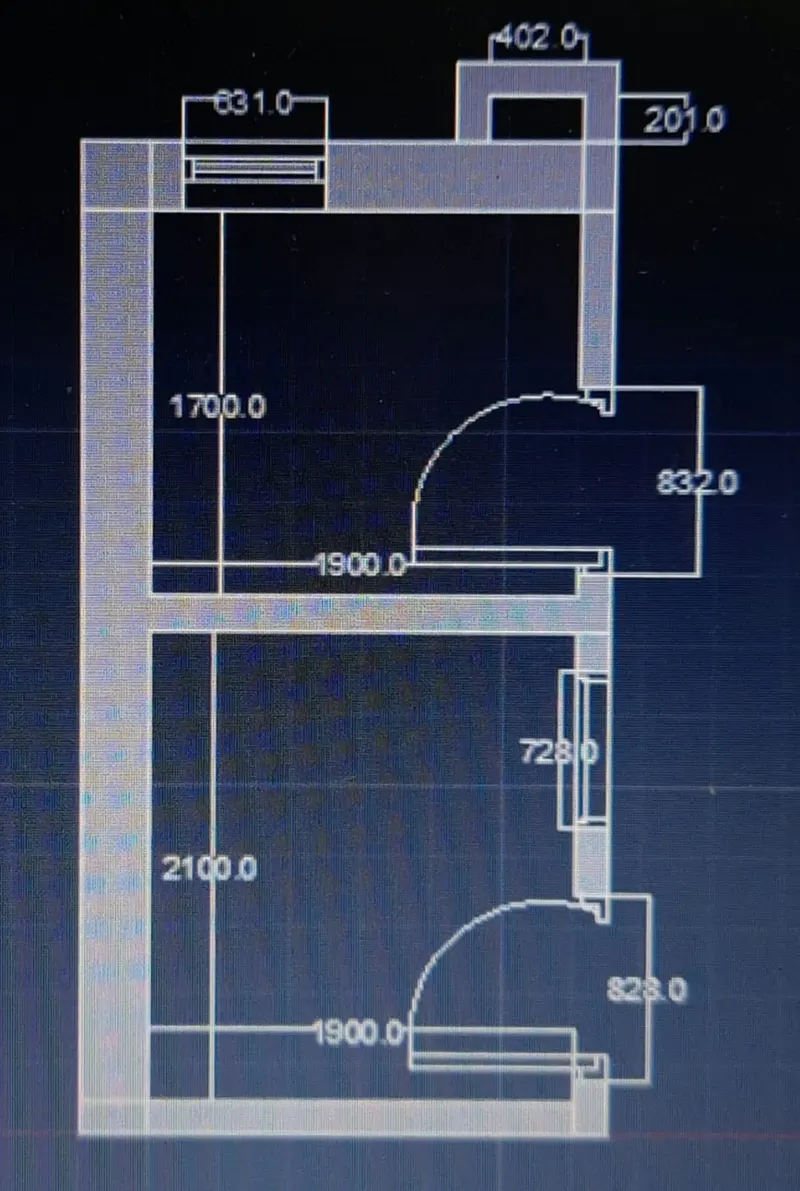
Creating a Residence Layout, Seating plan, Toilet and Utility room plan using AutoCad
1)AIM- To sketch the given residential layout using Autocad.
Procedure:-
.Type 'units' in the command prompt & press enter.
.Select the type as Engineering & insertion scale as 'inches' click ok.
.Type limits in the command prompt.
.In the command prompt,specify the lower limit (0,0) & upper limit as (100',100').
.Press ENTER.
.Type X line in the command prompt & press enter.
.Type V to activate vertical Xline.
.Place the Xline in the left of the workspace & press Esc.
.Type X line in the command prompt & press Enter.
.Type H to activate vertical X line.
.Place the X line in the workspace such that it, forms the corner point & Press Esc.
.Type trim in the command prompt press Enter.
.Click the corner lines to trim.
Step 2:-
.Type 'offset' in the command prompt & press Enter.
.Enter the offset distance as 9".
.Apply the offset to both the lines present in the workspace.
.Press 'Esc'.
.Type 'Offset' in the command prompt & press enter.
.Enter the offset distance as 6".
.Apply offset to horizontal line in the positive y direction.
.Press Esc.
.Type 'offset' in the command prompt & press Enter.
.Enter the offset distance as 9".
.Apply offset to previously created line in the positive Y direction.
.Press Esc.
.Type 'offset' in the command prompt & press Enter.
.Enter the offset distance as 6'8".
.Apply offset to previously created line in the positive Y direction.
.Press Esc.
.Type 'offset' in the command prompt & press Enter.
.Enter the offset distance as 4'5".
.Apply offset to previously created line in the positive Y direction.
.Press Esc.
.Type 'offset' in the command prompt & press Enter.
.Enter the offset distance as 11'.
.Apply offset to previously created line in the positive Y direction.
.Press Esc.
.Type 'offset' in the command prompt & press Enter.
.Enter the offset distance as 4'5".
.Apply offset to previously created line in the positive Y direction.
.Press Esc.
.Type 'offset' in the command prompt & press Enter.
.Enter the offset distance as 4'6".
.Apply offset to previously created line in the positive Y direction.
.Press Esc.
.Type 'offset' in the command prompt & press Enter.
.Enter the offset distance as 4'5".
.Apply offset to previously created line in the positive Y direction.
.Press Esc.
.Type 'offset' in the command prompt & press Enter.
.Enter the offset distance as 12'.
.Apply offset to previously created line in the positive Y direction.
.Press Esc.
.Use fillet tab in the ribbon tab or type fillet in the command prompt.
.Use fillet tab to join two intersecting lines.
.Type trim in the command & press enter.
.Use the trim tool to remove unwanted lines.
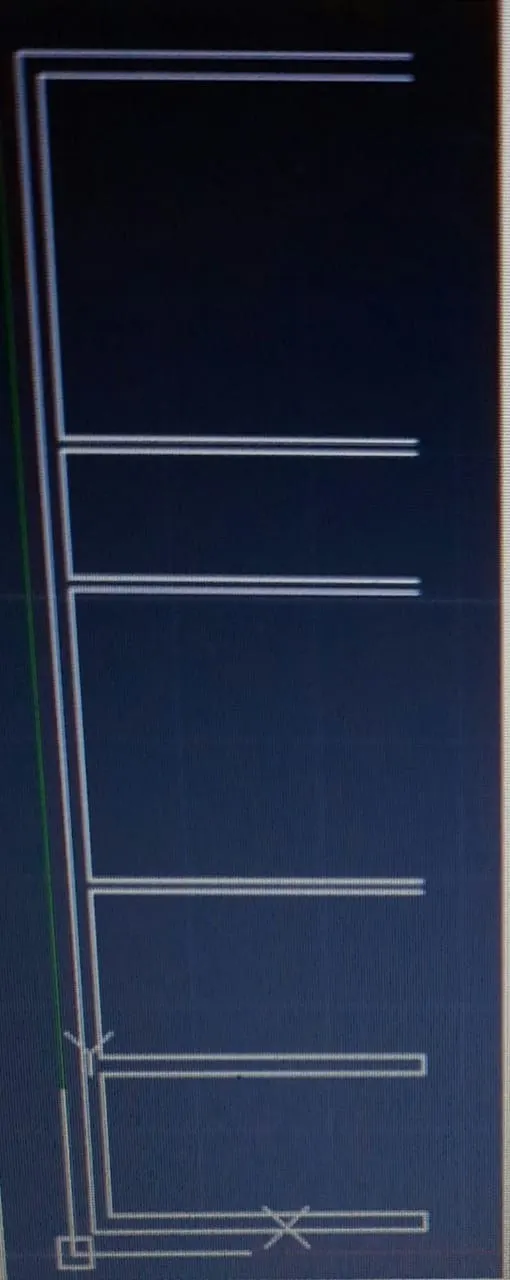
STEP 3:-
.Type 'offset' in the command prompt & press Enter.
.Enter the offset distance as 11'7.5"'.
.Apply offset to the 12' length vertical line created in previous step.
.Press Esc.
.Type 'offset' in the command prompt & press Enter.
.Enter the offset distance as 4'5''.
.Apply offset to the previously created line.
.Press Esc.
.Type 'offset' in the command prompt & press Enter.
.Enter the offset distance as 11'6".
.Apply offset to the previously created line.
.Press Esc.
.Type 'offset' in the command prompt & press Enter.
.Enter the offset distance as 9".
.Apply offset to the previously created line.
.Press Esc.
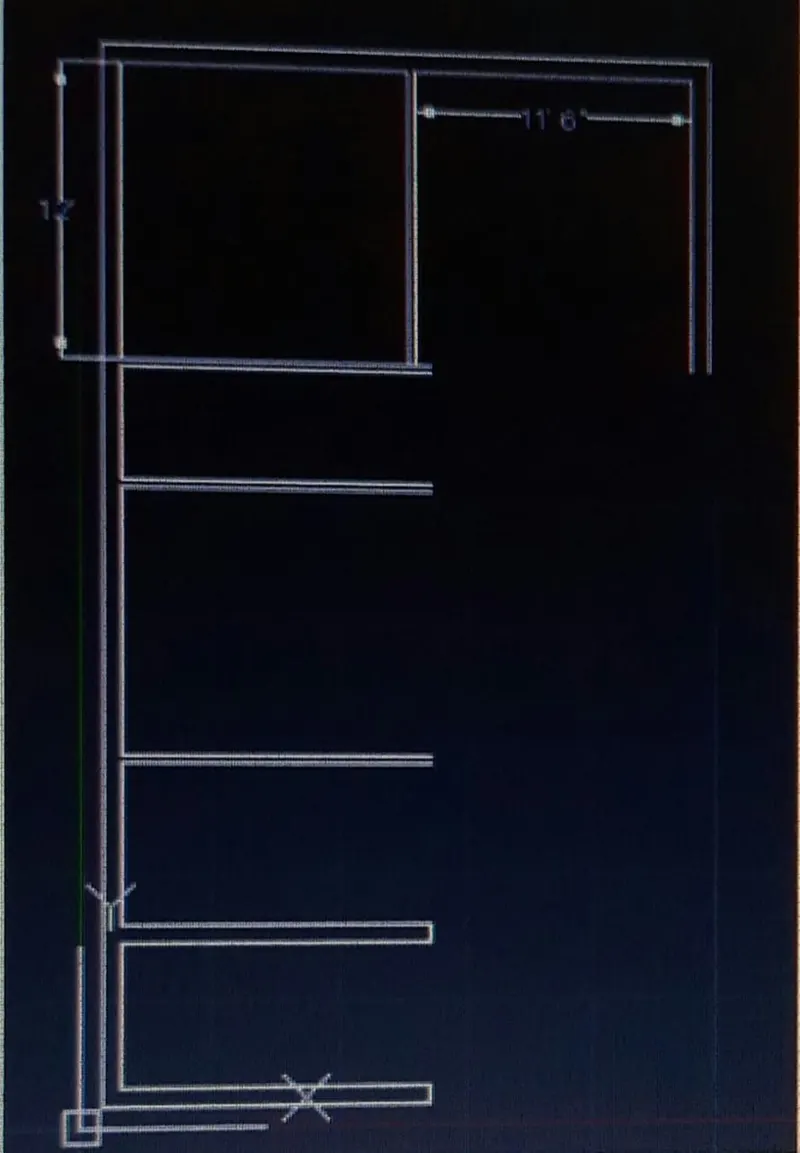
STEP 4:-
.Type 'offset' in the command prompt & press Enter.
.Enter the offset distance as 12".
.Apply offset to the 11'6" length vertical line previously created step.
.Press Esc.
.Type 'offset' in the command prompt & press Enter.
.Enter the offset distance as4'5".
.Apply offset to the previously created line.
.Press Esc.
.Type 'offset' in the command prompt & press Enter.
.Enter the offset distance as 11'.
.Apply offset to the previously created line.
.Press Esc.
.Type 'offset' in the command prompt & press Enter.
.Enter the offset distance as 9''.
.Apply offset to the previously created line.
.Press Esc.
.Type X line in the command prompt & press Enter.
.Type V to activate vertical X line.
.Type 'offset' in the command prompt & press Enter.
.Enter the offset distance as 9''.
.Apply offset to the previously created line.
.Press Esc.
.Use fillet tab in the ribbon tab or type fillet in the command prompt.
.Use fillet tab to join two intersecting lines.
.Type trim in the command & press enter.
.Use the trim tool to remove unwanted lines.
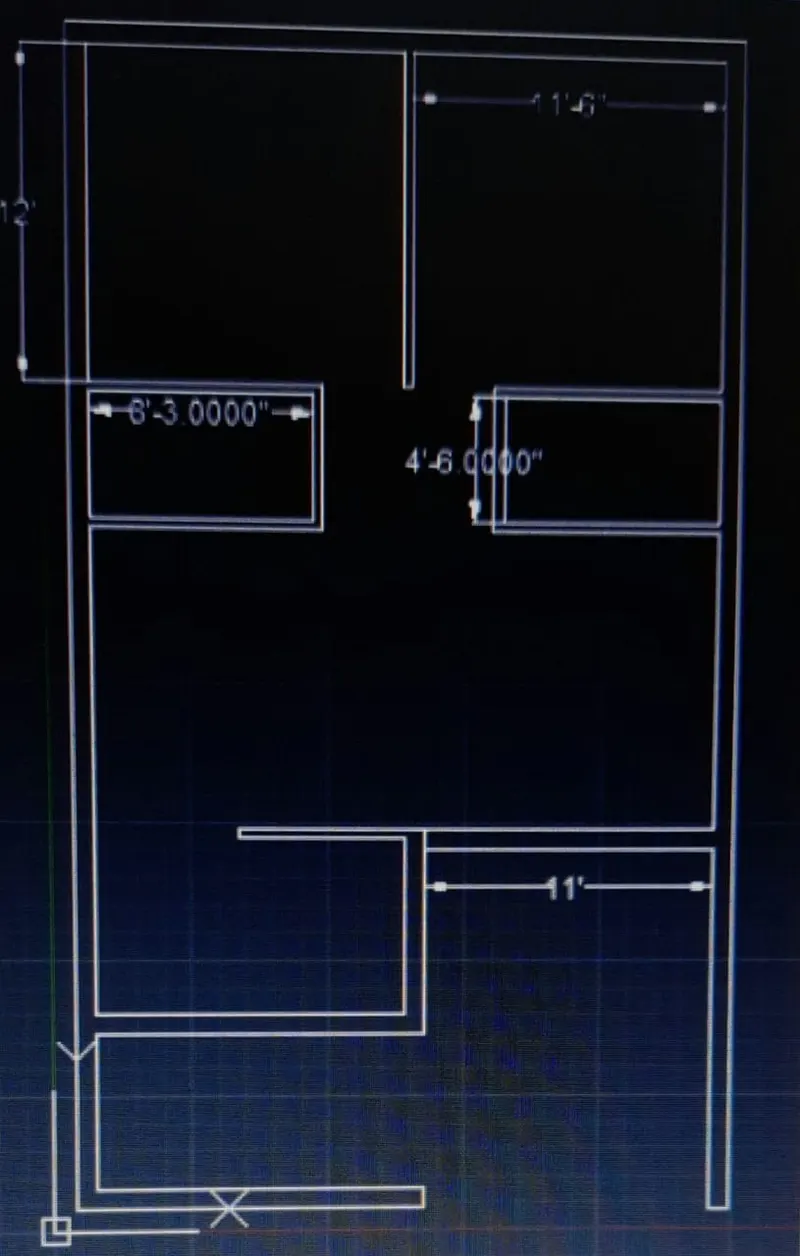
STEP 5:-
.To create D1, select the circle tool from the ribbon tab.
.Select the corner point as the centre Where D1 should be placed.
.Drag the circle until it teaches the endpoint.
.To create D2 draw a line of random length opposite to the orientation.
.Offset the line to the distance of 2'6".
.Use the trim command to remove the between lines.
.Use the circle tool from the ribbon tab use the corner point as centre & draw a circle according to door dimension.
.Use the trim command to remove the unnecessary circle.
.Similarly to create D3, draw a line of random length opposite to the orientation.
.Offset the line the distance of 3'3".
.Use the trim command to remove the between lines.
.Use the circle tool from the ribbon tab use the corner point as center & draw a circle according to door dimension.
.Use the trim command to remove the unnecessary circle.
.To the window of 6' length offset the line up to a distance of 1'3".
.Then offset a line for a distance of 6'.
.Use line command to join the center of offset lines.
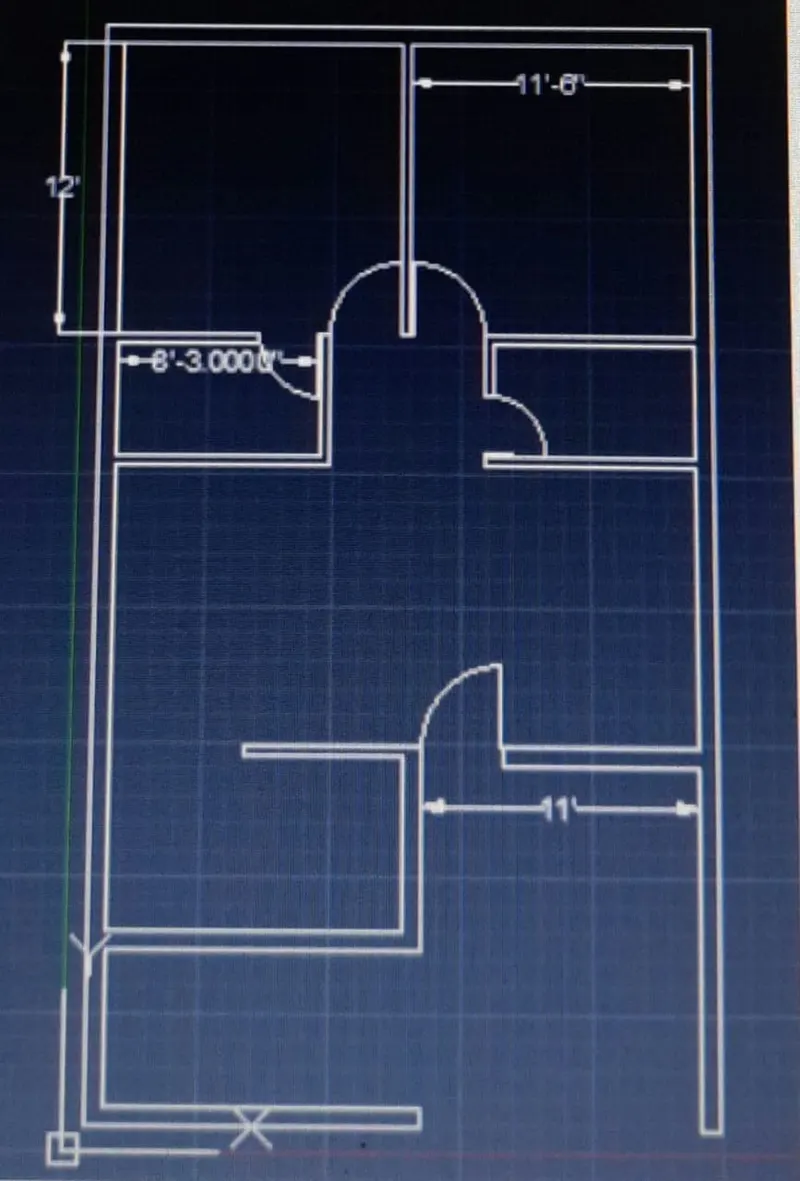
STEP 7:-
.Near the staircase area draw a line of length of 3'.
.Type X line in the command prompt & press Enter.
.Enter the offset distance as1'& select the 3' line to offset.
.repeat the offset for 9 times.
.Use the line tool from the ribbon tab to connect the lines.
.Type copy in the command prompt & select the staircase objects.
.Choose the basement such that it is placed adjacent.
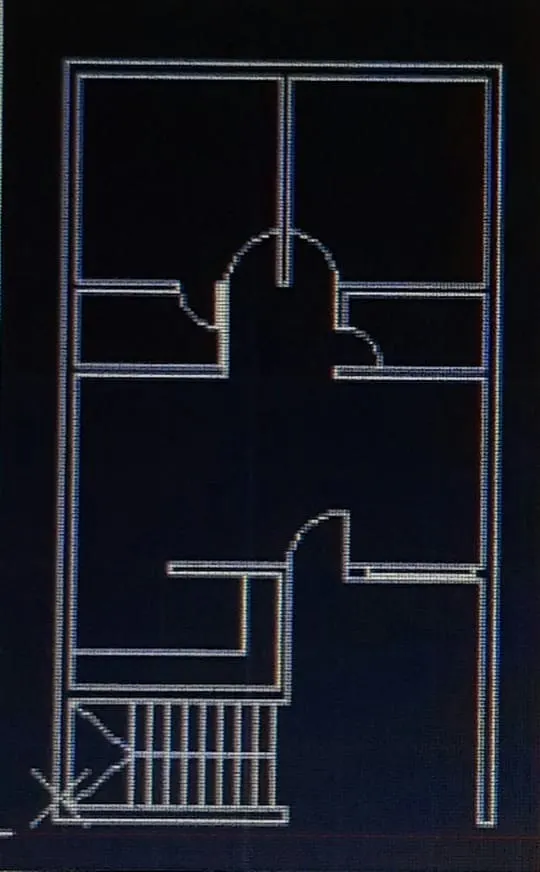
STEP 8:-
.Type 'LAYER' in the command prompt & press enter.
.Layer property manager dialogue box opens.
.Click on the new layer icon to add a new layer.
.A layer with the name layer 1 creates.
.Click on the rename layer1 to the wall.
.Modify the colour using the colour option so that this layer differentiate from others.
.In the workspace select all the lines indicating the walls.
.Click the layer tab from the ribbon tab.
.From the drop-down list select walls.
.Now the layer has been set.
.Similarly create,edit & assign the layer for doors, windows,text,& dimensions.
.Type 'DIMSTYLE' in the command prompt & press enter.
.From the Modify dimension tab select primary units.
.Select the unit format as Architectural tab & click ok.
.Select the dimension tool from the ribbon tab.
.Specify the first point & second point to measure the dimension.
.Repeat the dimension tool for measuring all the lines.
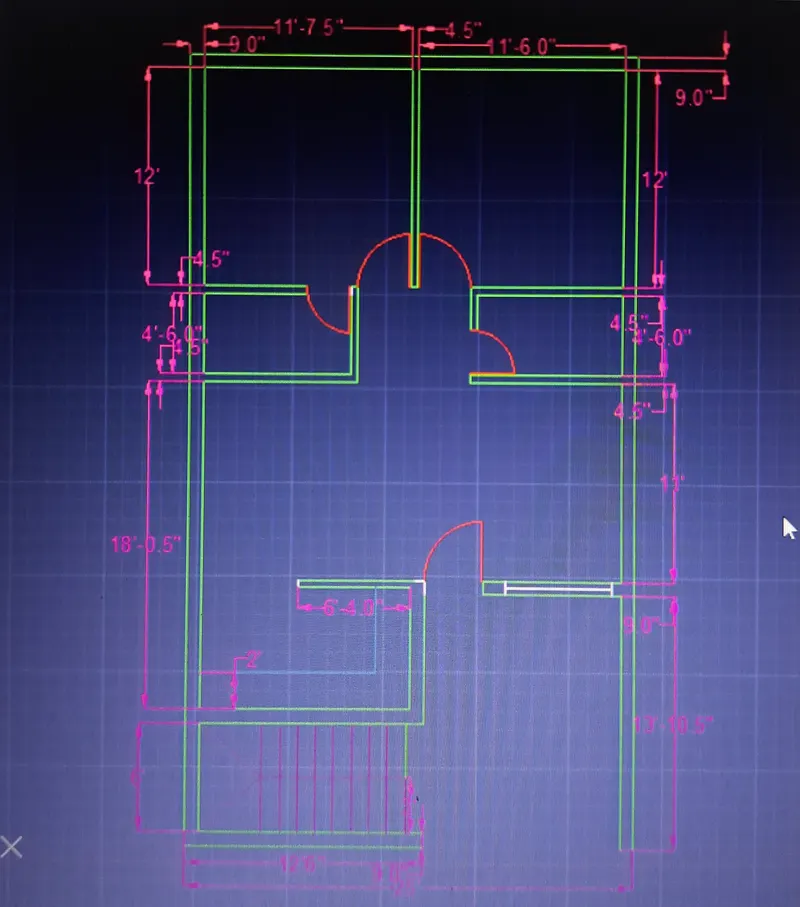
2)Aim-To sketch a seating plan for outdoor canopy using Autocad.
Procedure
STEP 1:-
.The units in the command prompt & press Enter.
.Select the type as 'DECIMAL' & insertion scale as 'Millimeter'.
.Click ok.
.Type 'LIMITS'in the command prompt.
.In the command prompt ,select 'off'.
.Press Enter.
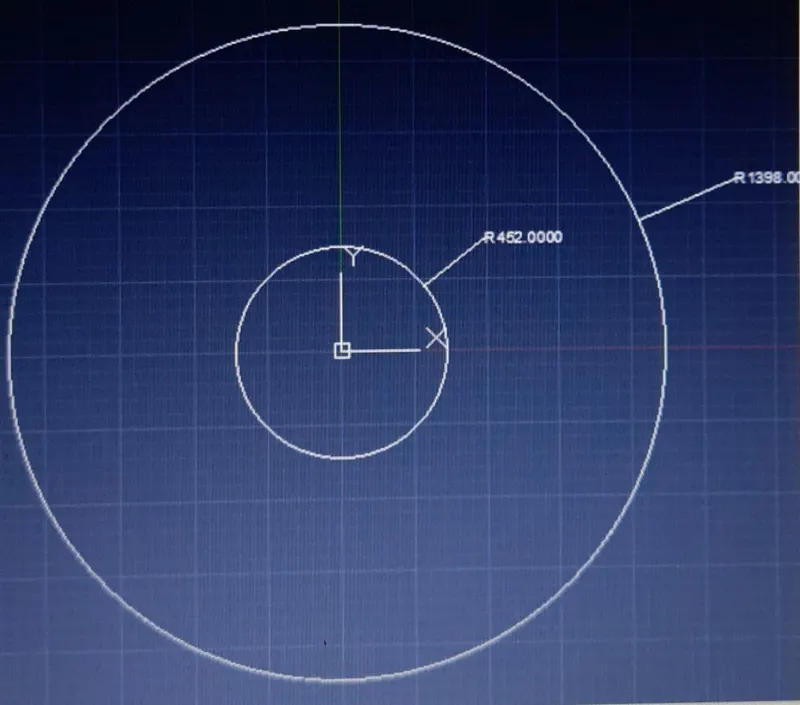
.Select the circle tool from the ribbon tab. From the drop-down list, select center radius.
.Specify the center as (0,0)
.In the command prompt & press enter.
.Enter the radius as 1398 in the command prompt & press enter.
.A circle with a radius of 1398mm is created.
STEP 2:-
.Select the circle tool from the ribbon tab.
.From the drop-down list ,select center radius .
.Specify the center as (0,0) in the command prompt & press enter.
.Enter the radious as 452 in the command prompt & press enter.
.A circle is created with radious of 452mm.
STEP 3:-
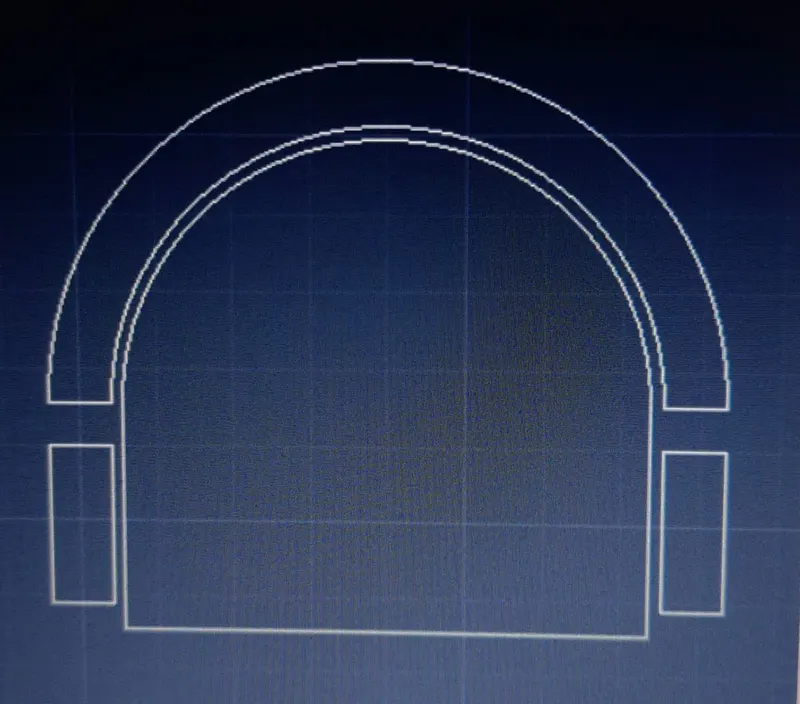
.To create a chair follow the steps below.
.Select line tool from the ribbon tab.
.Draw a horizontal line of length 424mm.
.Draw a vertical line of length 200mm from starting & ending point of previously created line in positive Y direction.
.From ribbon tab,select arc command.
.From drop down list select start,end,direction.
.Select the start & end point from the end point of previously created line.
.Select the direction according to the requirement.
.Type 'offset' in the command prompt & press Enter.
.Enter the offset distance as 10mm & select the previously created in arc.
.Press Esc.
.Type 'offset' in the command prompt & press Enter.
.Enter the offset distance as 50mm & select the previously created in arc.
.Press Esc.
.Join the end of arc by using line command.
.Select the rectangle tool from ribbon tab.
.Draw 2 rectangle of assume size & align them properly.
STEP 4:-
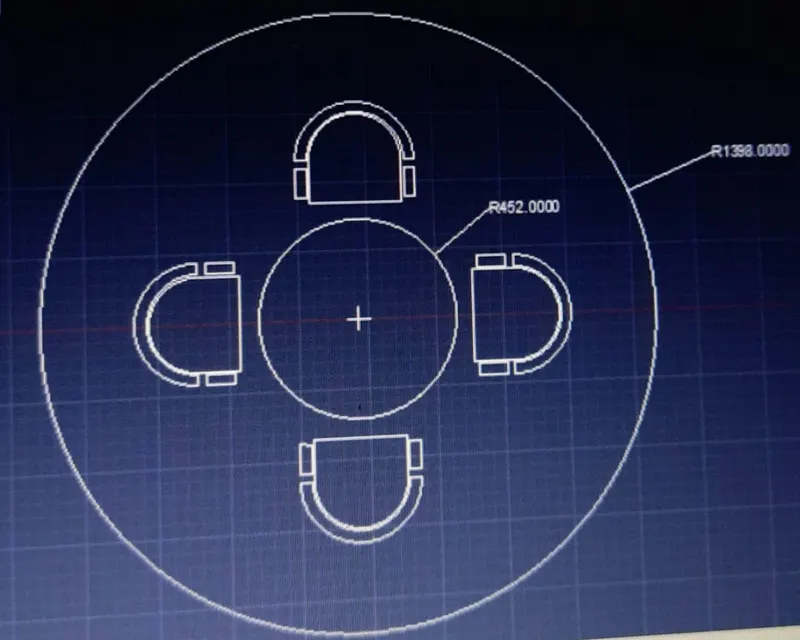
.Place the created chair inside 1392mm radious circle align it properly according to the sketch.
.Type array in the command prompt & press enter.
.Select the object created in the previous step.
.Select the path around which the array should be created.
.Select the path as 452mm radious circle.
.Adjust the direction such that required objects are created as perbthe requirement.
3)AIM-To sketch the part plan for the toilets & utilities room using Autocad.
Procedure
.The units in the command prompt & press Enter.
.Select the type as 'DECIMAL' & insertion scale as 'Millimeter'.
.Click ok.
.Type 'LIMITS'in the command prompt.
.In the command prompt ,select 'off'.
.Press Enter.
.Type X line in the command prompt & press Enter.
.Type V to activate vertical Xline.
.Place the X line in the left of the workspace & press Esc.
.Type Xline in the command prompt & press Enter.
.Type H to activate vertical Xline.
.Place the Xline in the workspace such that it forms the corner point & press Esc.
STEP 2:-
.Type 'offset in the command prompt & press enter.
.Entervthe offset distance as 300mm in the command prompt.
.Select the vertical Xline & click by keeping the cursor on the right side.
.Again type 'offset' in the command prompt & press enter.
.Enter the offset distance as 150mm in the command prompt.
.Select the horizontal X line & click by keeping the cursor in upward direction.
STEP 3:-
.Type 'offset in the command prompt & press Enter.
.Enter the offset distance as 1900mm in the command prompt.
.Select the vertical X line & click by keeping the cursor on right side.
.Enter the offset in the command prompt & press enter.
.Enter the offset distance as150mm in the command prompt.
.Select the vertical X line & click by keeping the cursor on the right side.
STEP 4:-
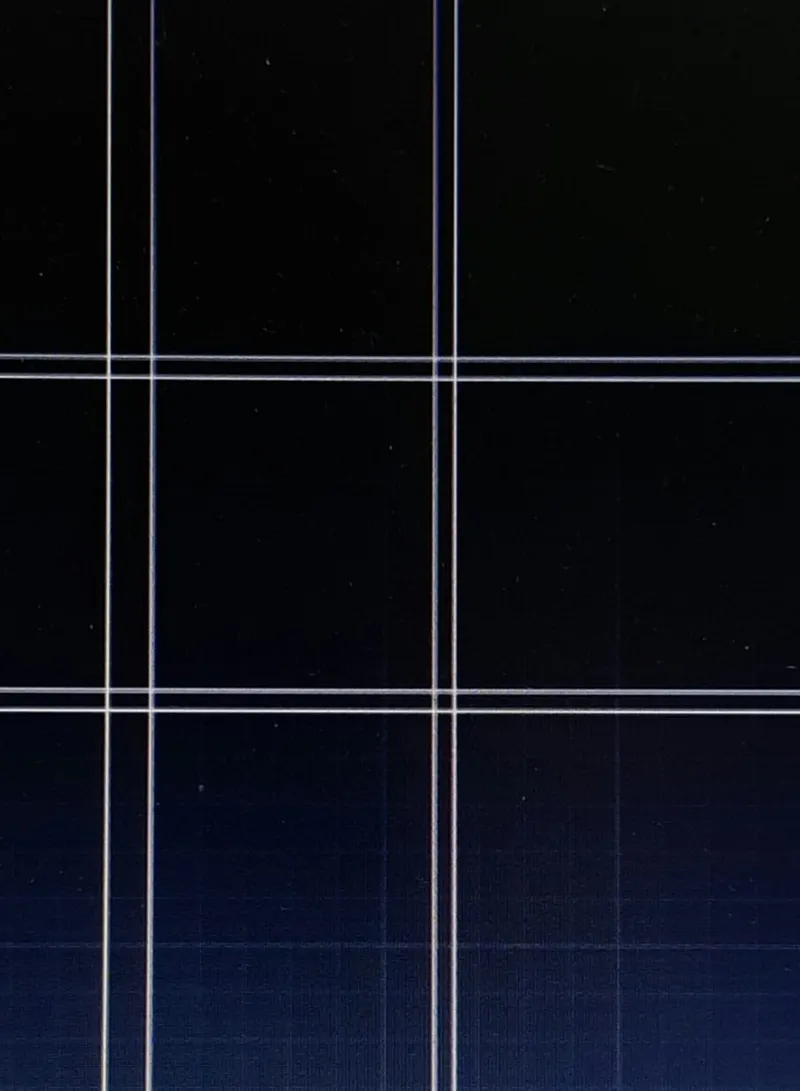
.Type 'offset in the command prompt & press Enter.
.Enter the offset distance as 2100mm in the command prompt.
.Select the vertical X line & click by keeping the cursor on upward direction.
.Enter the offset in the command prompt & press enter.
.Enter the offset distance as150mm in the command prompt.
.Select the vertical X line & click by keeping the cursor on upward direction.
STEP 5:-
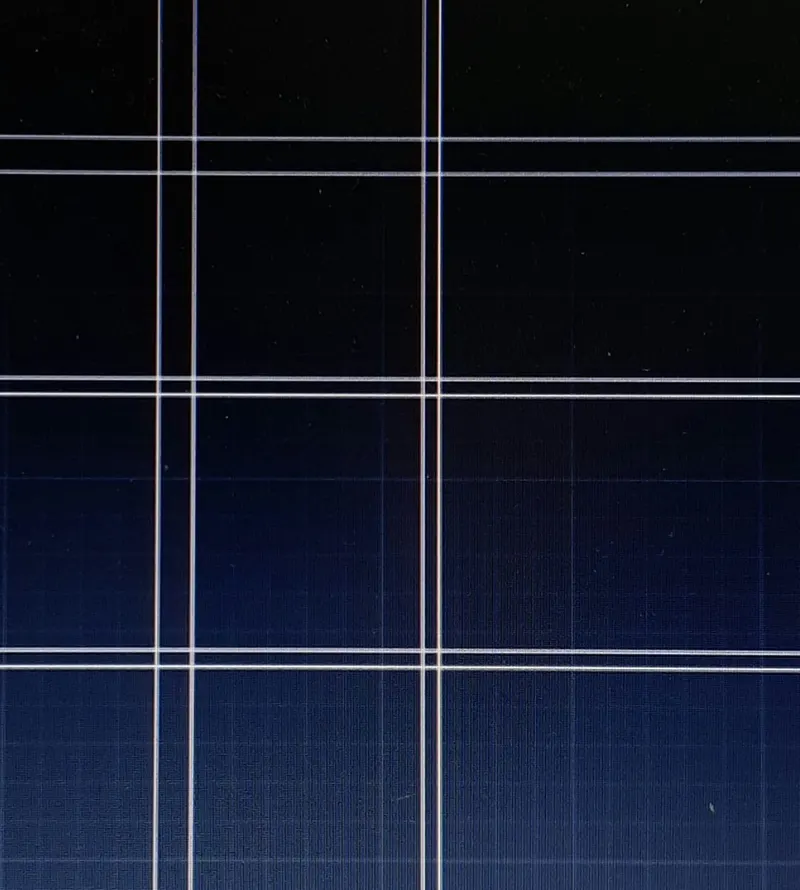
.Type 'offset in the command prompt & press Enter.
.Enter the offset distance as 1700mm in the command prompt.
.Select the vertical X line & click by keeping the cursor on upward direction.
.Enter the offset in the command prompt & press enter.
.Enter the offset distance as 300mm in the command prompt.
.Select the vertical X line & click by keeping the cursor on upward direction.
STEP 6:-
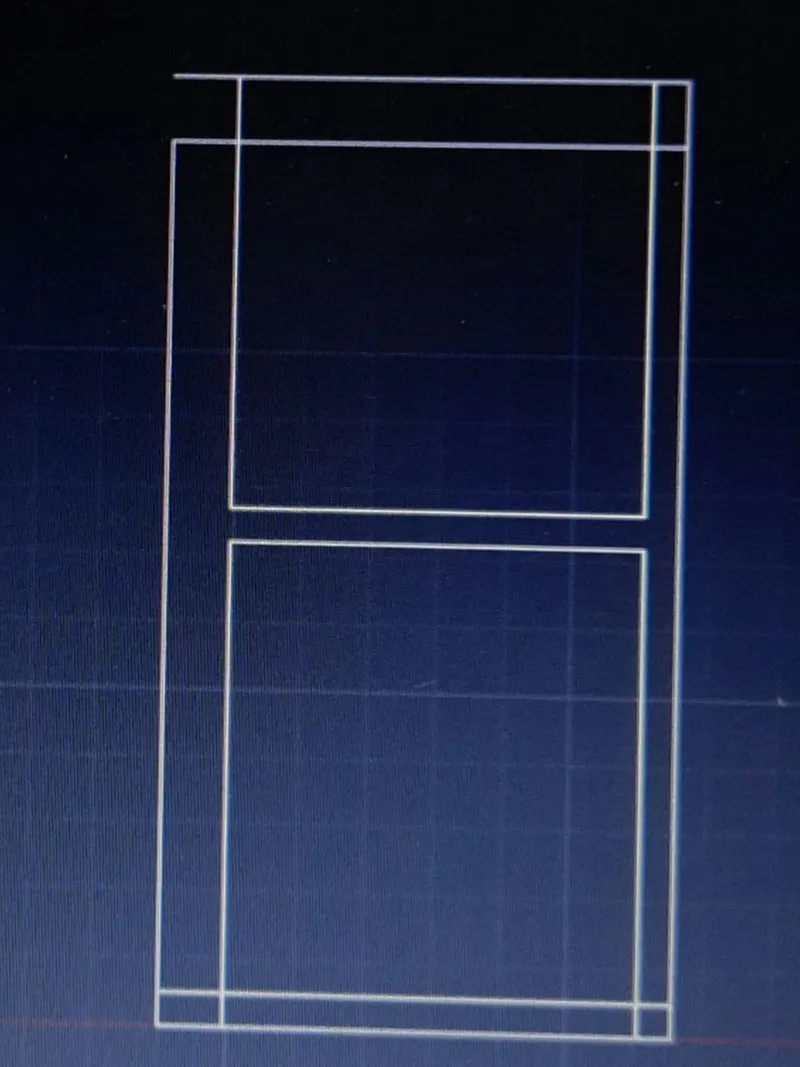
.Type 'TRIM' in the command prompt & press enter.
.Trim command is activated.
.As per the sketch given trim of the intersection,corner & unnecessary lines.
STEP 7:-
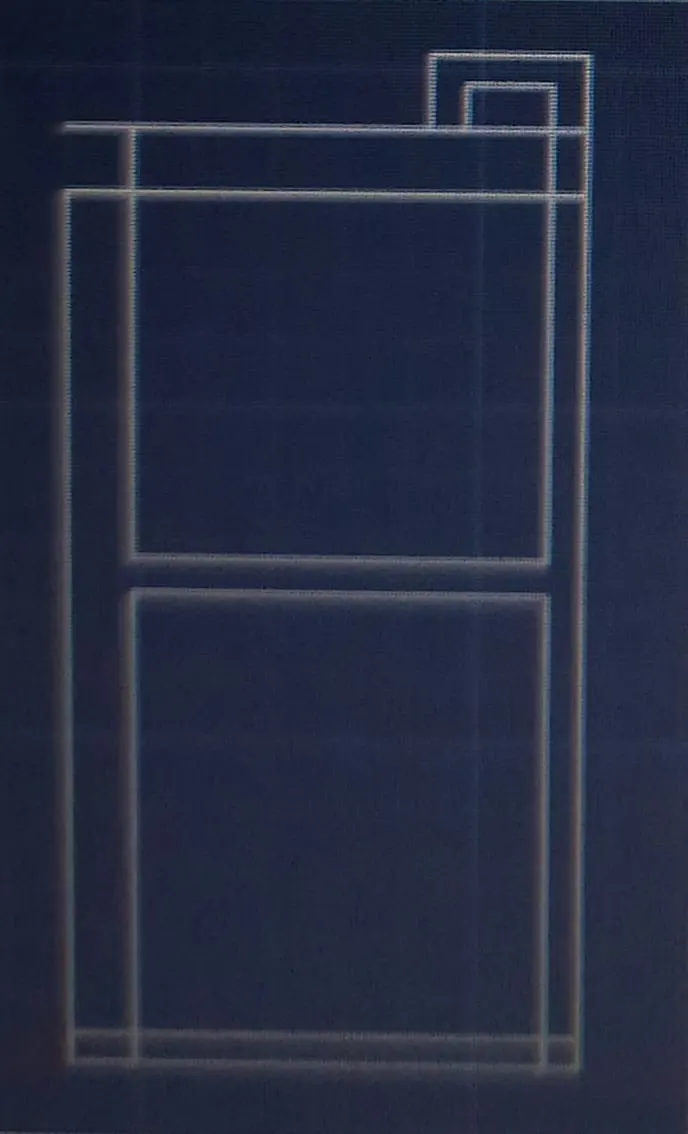
.Select rectangle tool from the ribbon tab.
.Specify the starting point as left top corner point.
.Select 'DIMENSION' from the command prompt.
.Enter the length as 402 & press enter.
.Enter the breadth as 201 7 press enter.
.Type 'OFFSET' in the command prompt .
.Type the offset distance as 150 & select the rectangle.
.Press Esc.
.Type 'TRIM' in the command prompt & press enter.
.Trim of the offsetted rectangle projected downwards.
STEP 8:-
.Use line tool from ribbon tab.
.Draw a line of random length for reference purpose .
.Type 'OFFSET' in the command prompt & press enter.
.Specify the offset distance as 100 & select the line.
.Press Esc.
.Again type 'OFFSET' in the command prompt & press enter.
.Specify the offset distance as 832 & select the line.
.Press Esc.
.Use trim command from ribbon tab.
.Trim unnecessary lines.
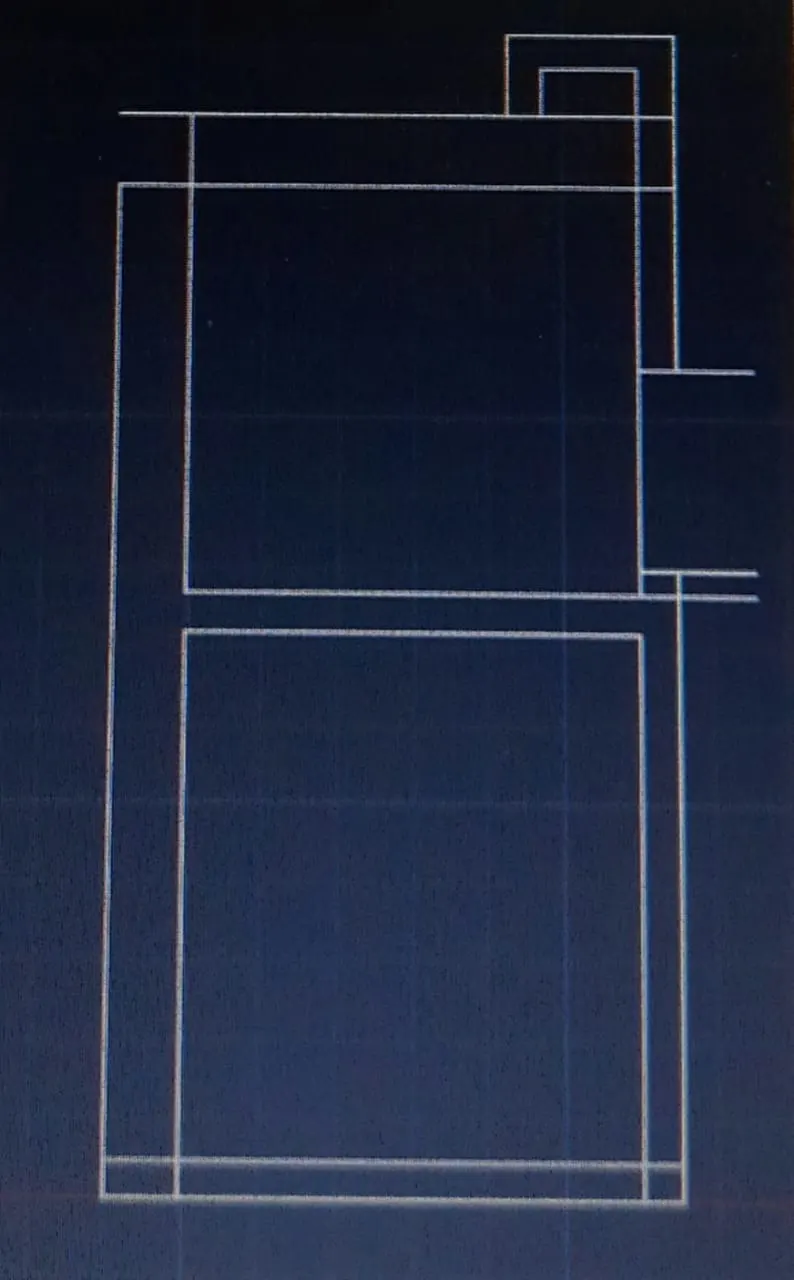
STEP 9:-
.Draw a door of length of 832mm using rectangle command from ribbon tab.
.Select 'ARC' tool from ribbon tab.
.Select start,end,direction from the drop-down list.
.Specify the start & end direction according to the given sketch.
.Use trim tool from the ribbon tab to remove unwanted lines.
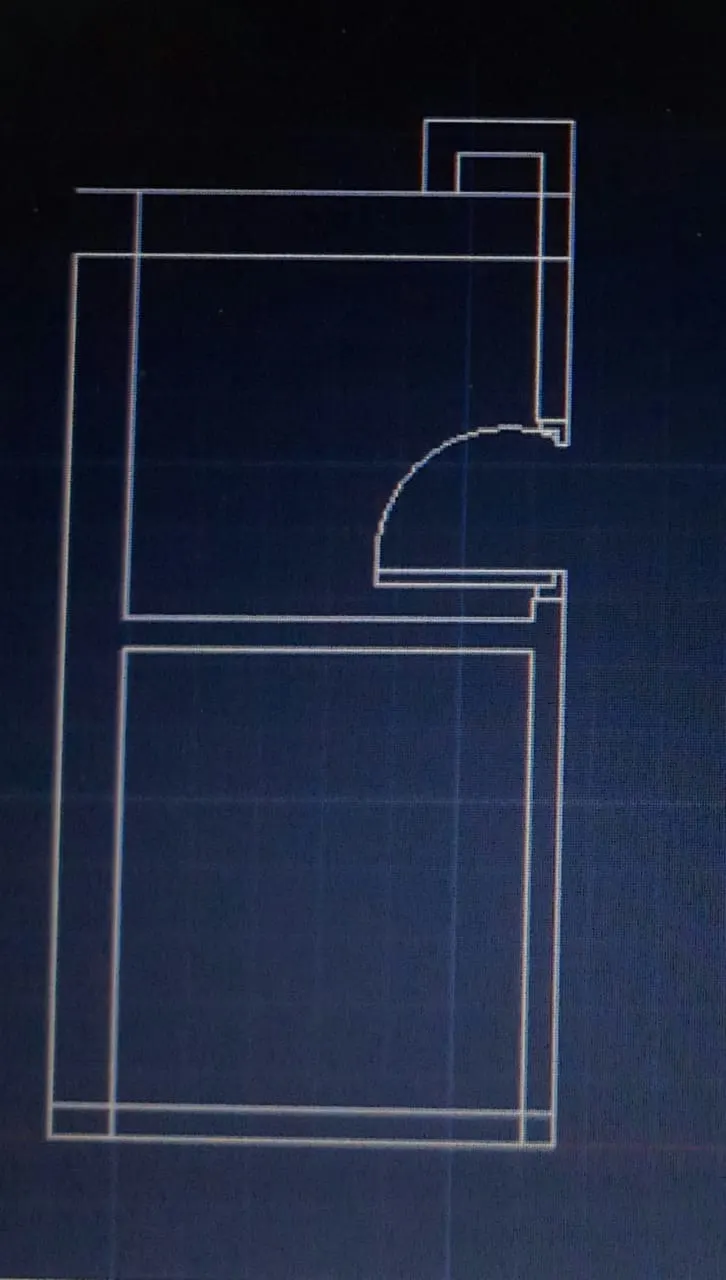
STEP 10:-
.Draw a door of length 828 mm using rectangle command from ribbon tab.
.Start 'ARC' tool from ribbon tab.
.Select start,end,direction from the drop-down list.
.Specify the start & end direction according to the given sketch.
.Use trim tool from the ribbon tab to remove unwanted lines.
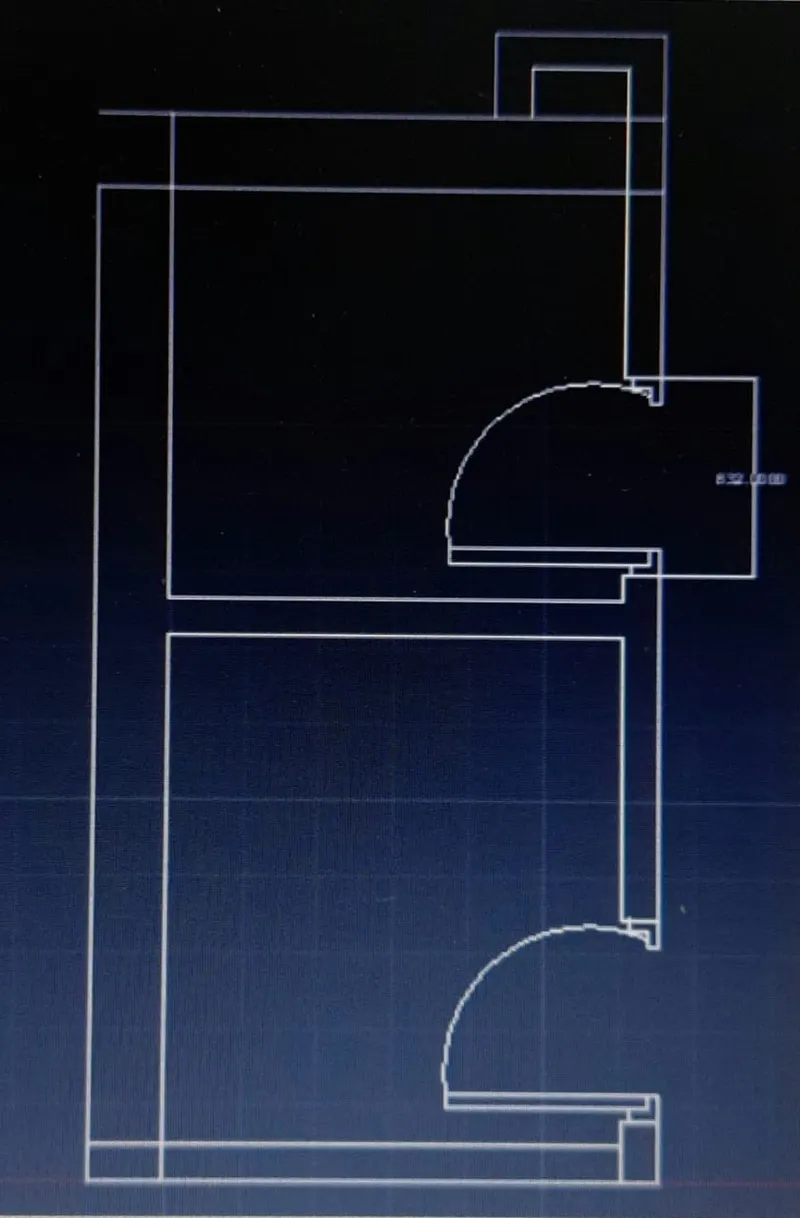
STEP 11:-
.Using the line tool from the ribbon tab, Draw a line at the left top corner.
.Type 'OFFSET' in the command prompt & press enter.
.Specify the offset distance as 100 & select Enter.
.Select the line to offset.
.Type 'OFFSET' in the command prompt & press enter.
.Specify the offset distance as 631 & select Enter.
.Select the line to offset.
.Draw a small rectangle using the rectangle tool on both sides.
.Draw a line connecting the bottom of the rectangle.
.Using offset command,repeat offset command 3 times.
.Draw a horizontal using line tool from ribbon tab.
.Offset the line to distance of 728mm.
.Using the trim command, trim the unwanted projecting lines.
.Draw a small step using line command along both the corner of window using line command.
.At the end point of step draw a rectangle.
.Copy & paste the same rectangle on the other side too.
.Draw a line from mid point of first rectangle joining the mid point other rectangle using line command.