Creating a Residence Layout, Seating plan, Toilet and Utility room plan using AutoCad
1.
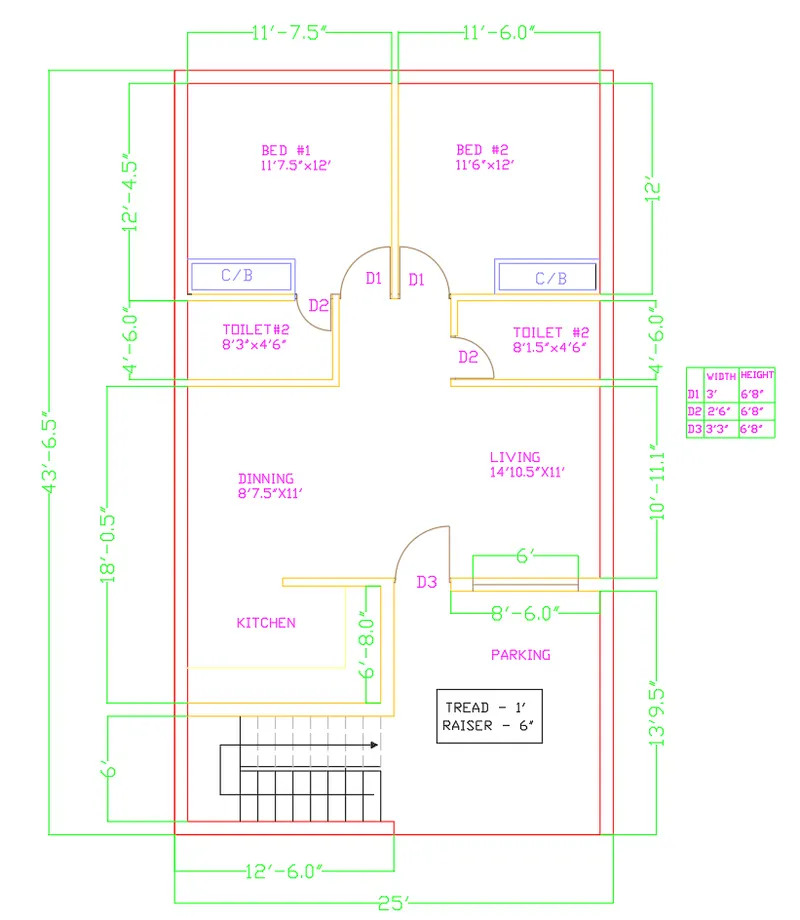
Aim: To draw the Residence Plan as shown in figure.
Introduction: Using the plan detail with different layers we have drawn the plan using command:
- Line command
- Fillet command
- Trim command
- Circle command
- Text command
- Dimension command
Procedure:
- Set units as engineering feet and inch and set limmax as 60',60'
- According to drawing the Plan outer to outer length is 46'6.5"x25' using line command draw the this area
- Then offset the outter wall 9" inside so that we get our outter wall
- Let me divide the rooms rom north side which have two bed room from eadt side wall offset it to 11'6" and Esc then off the wall again with 4.5" to get particean wall fro bed rooms
- Now the north side inner wall is offsetted 12' towards south so that our bed rooms will be completed and the particien wall for toilet is created
- According to drawing the door open is provided to room and a cub-board is provided on the south side wall of room along with doors
- Again the Wall is offset to 4'6" to complete the toilet and from east side wall 8'1.5" to complete east side toilet
- Then the west side wall is offset to 8'3" to complete the west side toilet according to drawing the door opening are given
- Then again now offset the south side wall with 6' toward north so we will get our steps.
- Again from steps wall offset it to 6'8" and again offset it with 4.5" to complete the kitchen now offset the kitch inner wall with 2' t get kitchen slap to work
- Then now the dinning and living that we already got when we offset the kitch wall so now just make a main enterence 3'3"" as shown in figure to complete it and next to main enterence there is a window 6' in 9" wall just offset the outer wall 4.5" towards inside and then l enter to get midpoint and draw a line the offset it 3' on and and 3' on right to get our window
- Now from west wall off set 3' to get landing and then offset it 1' to get steps
- Now check the dimension and complete drawing with text.
Conclusion: By these command we will get the plan
2.
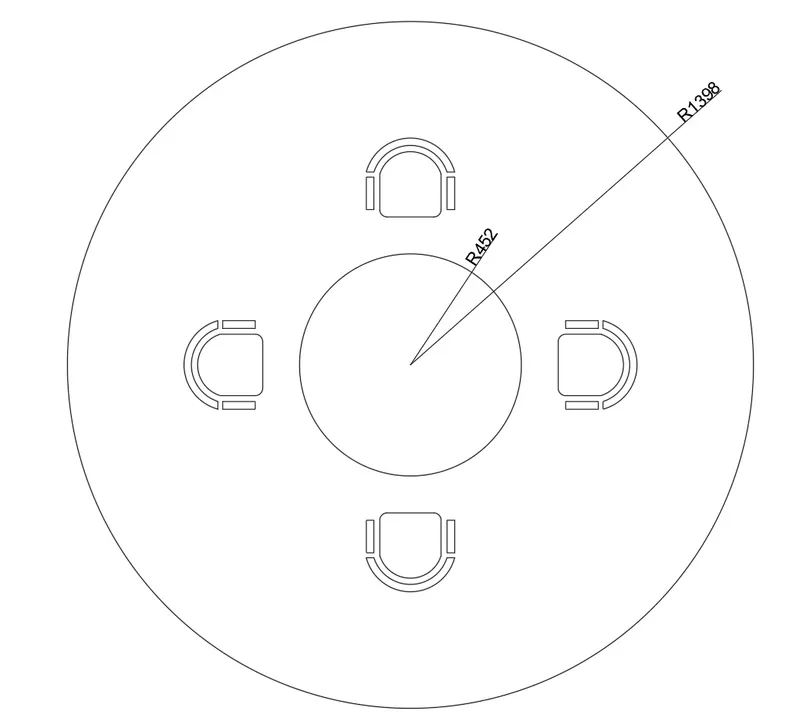
Aim: To draw the outdoor canopy as shown in figure with some imaginary dimension.
Introduction: I have drawn the drawing using Dimension shown in and figure and soe dimension according to drawing i have imagined it command used in this is
- Circle command
- Line command
- Fillet command
- Arc command
- Offset command
- Rotate command
- Copy command
- Dimension command
Procedure:
- Set unit as decimal mm and limits 2000,2000
- Now draw two circle with radius of 452 and 1398 with same center
- To draw the canopy from the quadernt of the circle i gace 150mm space and draw a live with 200mm and in left side endpony again a line toward 270 degree 150mm adn same in right side endpoint
- Using Arc command i have drwam the arc to comple the inner part of canopy
- Then offset the arc with 10mm and again offset ith with 50mm now join the both end as shown in figure
- Using fillet command i have completed that fillet section inthat rectangle area
- Then copy 3 times and rotated it according to drawing and i have placed it to complete the drawing.
Conclusion: By these command we will get the plan
3.
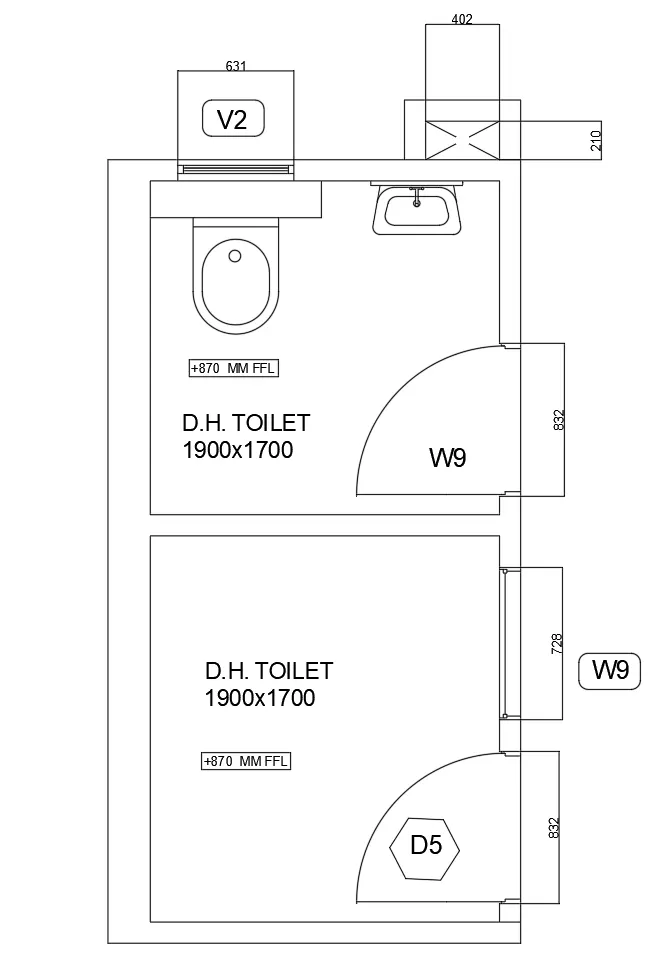
Aim: To draw the toilet and utilities room as shown in figure.
Introduction: I have drawn the drawing using Dimension shown in and figure and soe dimension according to drawing i have imagined it command used in this is
- Line command
- Offset command
- Fillet command
- Trim command
- Test command
- Dimension command
Procedure:
- Set unit as decimal mm and limits is 5000,5000
- According to give dimensions the room width and length will be 2350x4400mm
- Draw that dimension and offset the west side wall with 300mm and left side wall with 150mm
- The north side wall is offset with 300mm and south side wall is offset with 150mm as shown figure
- For D.H.Toilet the outside wall is offset with 1700 mm towards soth side and again offset it with 150mm to get particien wall
- Again the particien wall is offset with 2100mm to get Utility rm
- Doors and window are provided as shown in figure with dimensions
- With some assumption i have draw the toilet basin and hand wash basin.
Conclusion: By these command we will get the plan