Creating a Residence Layout, Seating plan, Toilet and Utility room plan using AutoCad
1. Residence Plan:
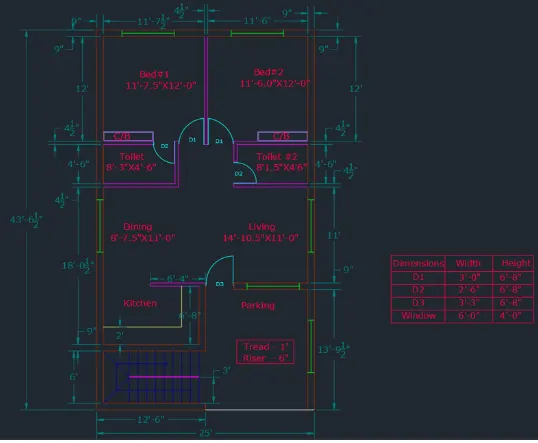
Sketch the layout of a residence as shown in the Figure 1. Consider all dimensions as reference to sketch the unit plan. Also the text in the layout are only for reference. Assume the missing dimensions. Also, refer the schedule for size of the doors.
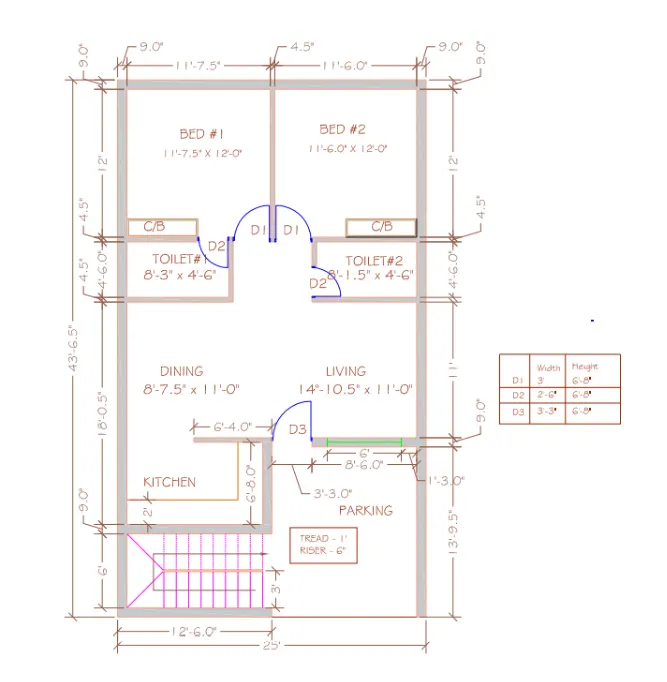
Aim: To draw the layout of a residence plan.
introduction: AutoCAD consists of a number of drawing and modification tools. Among the modification toolss are
chamfer,fillet,offset,object snap, rotate,copy,move,mirror,trim,entend and join Chamfer: A chamfer is an angled line that meets the endpoints of two straight 2D objects its a sloped transition between two surfaces or adjacent faces on a 3D solid. We type CHA for this tool in command bar
drafting a following tools by using following commands like, by using object snap elliptical command, by using arcs commands construction lines and ray tools, divide and measure tool, and by Using modity commands like mirror, trim, entand explode, lenghten, align, break and join command, and manage layers in autoCAD 2019
Fillet: The fillet command is used to create rounded edges between the adjacent lines and faces in 2D and 3D. It is also used to connect two tangent arcs in 2D.Type F
Offest: Creates concentric circles, parallel lines, and parallel curves.Type O in the command bar
Object Snap: Object snaps provide a way to specify precise locations on objects whenever we are prompted for a point within a command.Type OS in the command bar
Rotate: Rotates objects around a base point. Wcan rotate selected objects around a base point to an absolute angle. We type RO and rotate the object accordingly
Copy: Copies objects a specified distance in a specified
direction.We can enter C in the command line
Move: Moves objects a specified distance in a specified direction.Type M in the command bar
Mirror: Creates a mirrored copy of selected objects. Wcan create objects that represent half of a drawing, select them, and mirror them across a specified line to create the other half. Type MI in the command bar
Trim: Trims objects to meet the edges of other objects.
Type TR in the command bar.
Extent: Extends objects to meet the edges of other objects.It extend objects, first select the boundaries. Then press Enter and select the objects that you want to extend. To use all objects as boundaries, press Enter at the first Select Objects prompt
Join: Joins the endpoints of linear and curved objects to create a single object, it combines a series of finite linear and open curved objects at their common endpoints to create a single 20 or 3D object. The type of object that results depends on the types of objects selected, the type of object selected first, and whether the objects are coplanar
INITIALLY:
Start by typing ONEW in the command box
• Advanced Setup > Set the Units, Angle, Angle measure, Angle direction and area.
After settings provide the lower limit and upper limit.
Now we can start the sketching.
Commands used:
1. XL-V OR XL-H.
2. Offset.
3. Fillet.
4. Extend
5. Trim.
Procedure:
First create a new AutoCAD file with imperial settings.
Make sure that in units the type is "Engineering" (as the dimension is in feet and inches) and
also set the precision.
Set the limits with command 'LIMITS" specify the left corner points and right corner points
and enter zoom all ("z-a").
Draw construction lines by command "XL-V", for vertical and 'XL-H' for horizontal.
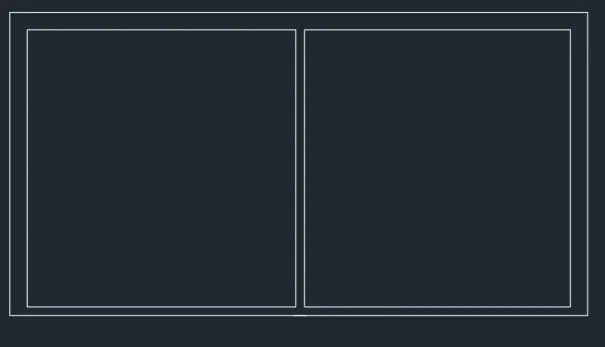
bed room 1:
Take offset of both construction lines of 9" by using command "O give offset distance as
0'9 in the command box.
Then take the offset of 117.5" to the +x direction and offset of 12-y direction so that the room
is formed.
Again, give offset to the both lines with 4.5" so that the wall thickness is created.
Trim off the unwanted lines.
bed room 2:
Give offset from the wall thickness of bed 1 towards +x direction of 11'6".
Offset the 9" to create wall on right side.
Extend the line of 12 from bed 1 towards this line. Command "EX" select the line to where it should be extended 4.5" offset line of bed 2.
Trim off the rest of the lines.
toilet 1:
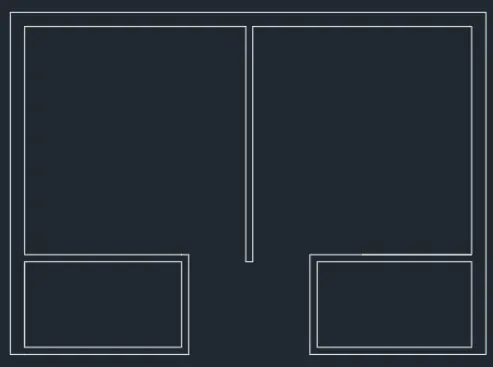
Offset 4'6" downwards then also offset 4.5" wall.
Extend the left side wall towards the line 4'6" and the
wall
From that line offset 8'3" towards + x direction and offset the wall of 4'5" also.
Trim off the unwanted lines.
toilet 2:
Extend the wall thickness of bed 2 to the 4'6" line. Offset a distance of 81.5" towards - x direction and also 4'5" wall thickness.
Trim off the unwanted lines.
dining and living room:
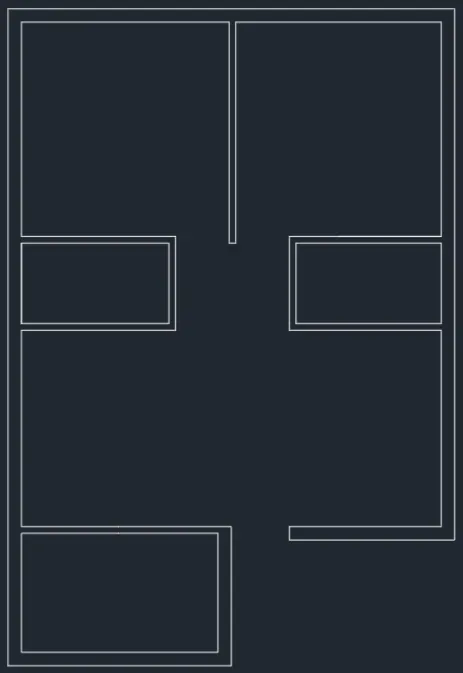
Give offset of II' from the wall of toilet and also the wall of 9"
Extend the left wall towards the II' line and 9" line.
Use fillet to join this line and the wall of toilet 2.
Give an offset of 87.5" to understand the partition between the dining and living
Trim off the wall thickness of dinning and offset it as 4.5".
kitchen:
Give an offset from the dinning wall of 6'8" and give an offset of 9" for the wall thickness.
Extend the left wall towards this line.
Give an offset of 11" towards + x direction and offset the
wall thickness as 9".
parking and staircase room:
Draw offset of 12'6" to draw the parking, then give offset of 9" towards inside.
Give offset 13'9.5" from the living wall towards
downwards. Extend both side lines towards this line.
Extend outer wall of kitchen, so that the staircase room is defined.
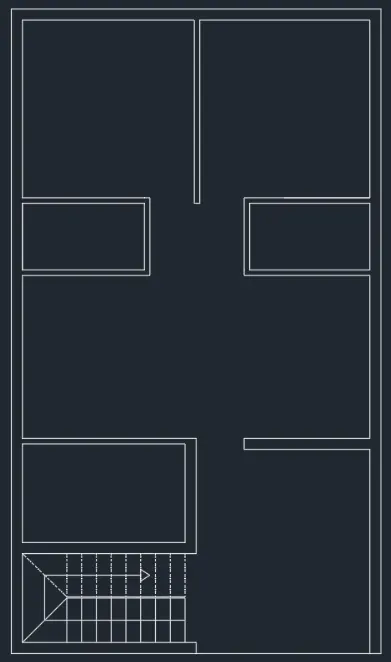
Drawing staircase:
Given: thread: l'
riser: 6"
Give a wall thickness of 9" for the staircase room.
Divide the staircase room by giving offset of 3' from the front wall thickness.
Give an offset of 1.96" to show the handrail (Assume,5cm is usually given)
Draw offset of l'(thread) to draw the stairs in plain view.
Draw 9 offsets as there are 9 risers for 8 steps.
Trim of the lines between the handrails and give the other side as dotted lines (it indicates that it is the upward stairs, not visible when viewing ground floor plan)
For that select the lines and change the line type to ISO dash.
Mark the direction of stairs.
doors:
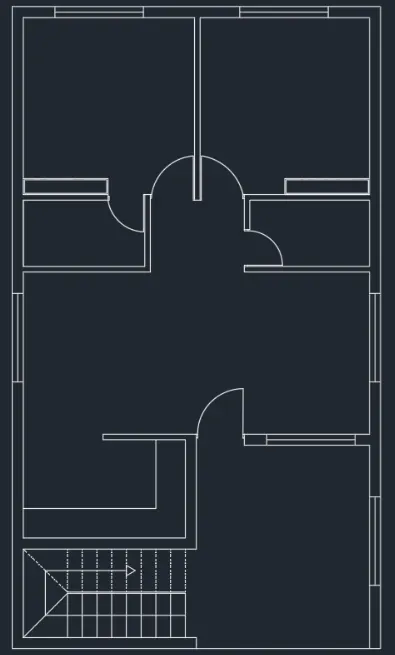
Trim all the door openings with their respective width D1 3, D2- 26, D3-33",
For open kitchen, trim the line retaining a distance of 6'4" from right side of kitchen.
Draw doors creating a hinge of 0.5" from the midpoint of both the wall, then drawing a circle with one point on the midpoint of one hinge and other the midpoint of another hinge.
Place the windows:
For living, take an offset of 1'3", this is where the window
starts (as it is given)
Using line command draw a line of 6' from the centre of
offset line inside the wall thickness.
Draw windows wherever necessary: from middle portion of a wall draw a line, from the midpoint of that line give the distance i.e., the width of the window, then join the other side. w1-6' w2-4' v-2'
Trim all the unwanted lines and fillet the corners with
fillet radius zero. Command: "F" - select both the lines (fillet radius is zero by default)
Drawing the kitchen slab and cupboards:
Offset a distance of 2' to make the kitchen slab.
Draw the cupboard by creating a rectangle Command "REC"-specify base point - click on dimension -give dimension as 5' x 2'.
Copy the rectangle to another bedroom also.
Placing each component in Layer.
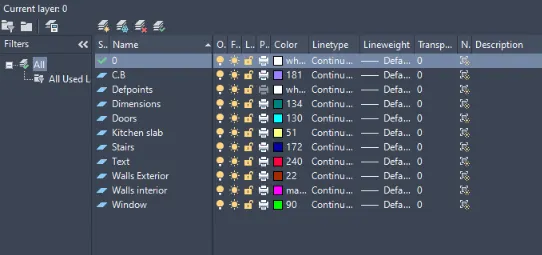
From layer property- create new layer - create 8 layers each for wall, door, window, stairs, kitchen slab and cupboard.
Name each layer as wall, door, window, stairs, kitchen slab,dimensions,text and cupboard and give different colours, so that it can be identified separately.
Select the objects and place it in respective layers.
Result:The layout of a residence plan is drawn.
2. Sketch the seating plan for an outdoor canopy. Assume the dimensions for the seating. Also, consider the dimensions in mm.
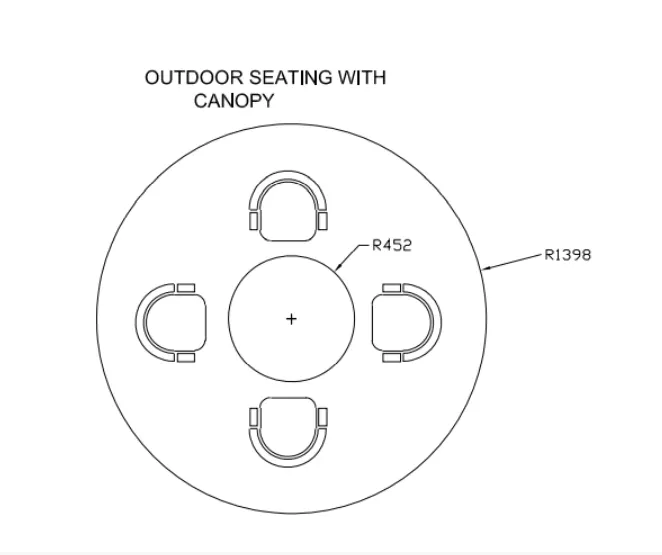
Aim: To draw the seating plan for an outdoor canopy.
Commands used:
1. Circle.
2. Offset.
3. Fillet.
4. Extend.
5. Trim.
Procedure:
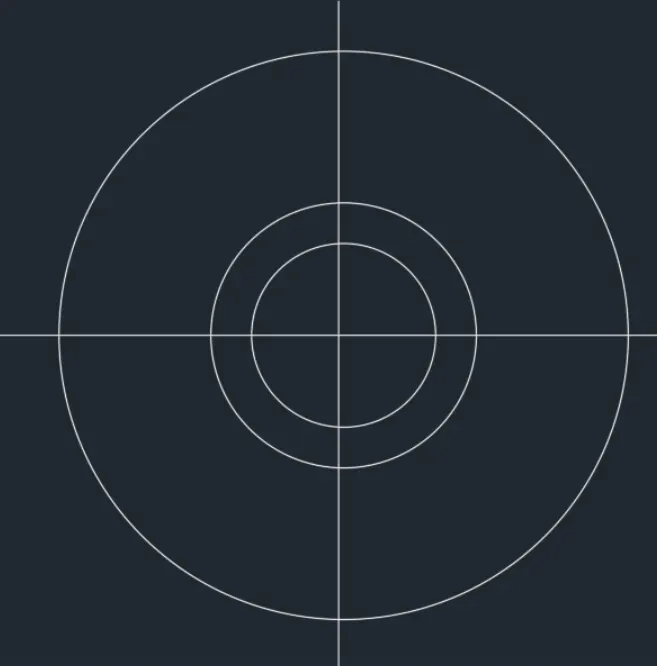
Creating circles:
Select metric units as the diamensions is in mm. Draw a circle with acommand "C" select a centre point anfd give the radius as 1398mm.
Draw another circle with same centre with radius
452mm.
Draw an offset of 200mm from the inner circle to determine the position of chairs.
Draw lines along the diameter of the bigger circle.
chairs:
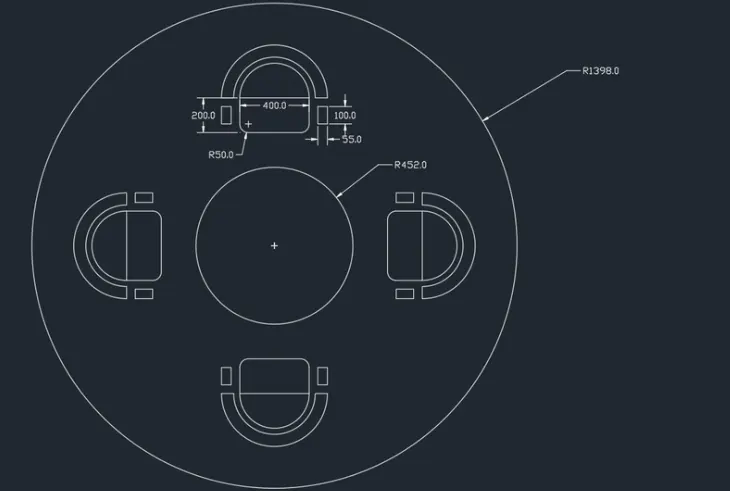
Draw a rectangle with command "REC" giving dimensions as 400 mm and 200 mm.
Draw an arc with start-centre and end method with the end points and centre of the side(400mm) of rectangle.
Draw another rectangle of 55mm x100mm for the handle of the chair Command: "REC" -select the base point and click on dimension and give as 55mm and 100mm.
Copy it on the other side so that both handles are
formed.
Fillet the corner of rectangle by 50mm Command "O" give the fillet radius as 50mm and select the two lines. and trim off the unwanted line.
Move the chair and place it such a way that it touches
the offset 200mm circle. By using Command "M"- select
the base point and move it.
Mirror the chair to the opposite side -Command "MI" - select the base point and draw the reference line where we need to mirror.
Rotate the chair and move it so that the chair in left side is created Command "RO" -select the base point and rotate to desired angle.
Again, mirror the chair so as to create chair in right side.
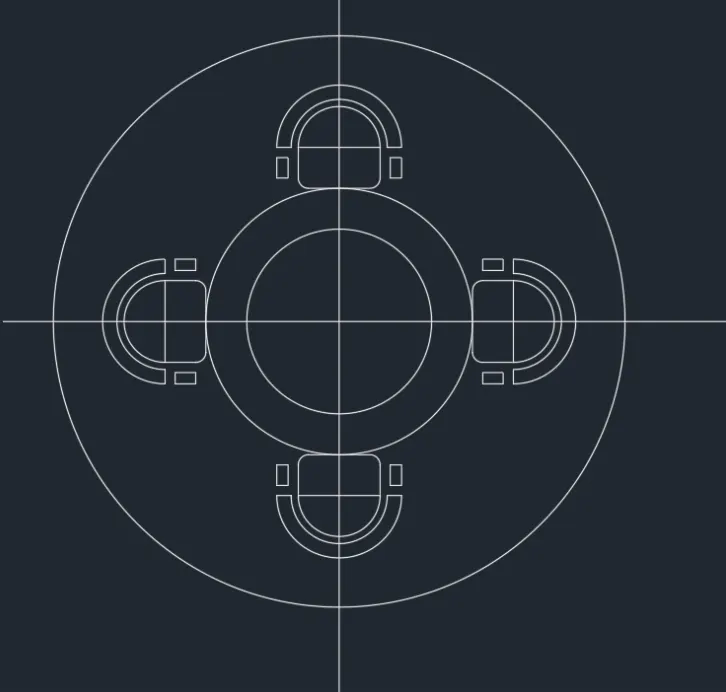
Delete the lines and offset circles.
Result:The seating plan for an outdoor canopy is drawn.
3. Sketch the part plan for the toilers and utilities room. Consider the outer wall thickness as 300mm and inner wall thickness as 150mm. Also, assume the missing dimension, Texts, dimensions, and hatches are only for references. Also, symbols for toilets and w/c are also for references.
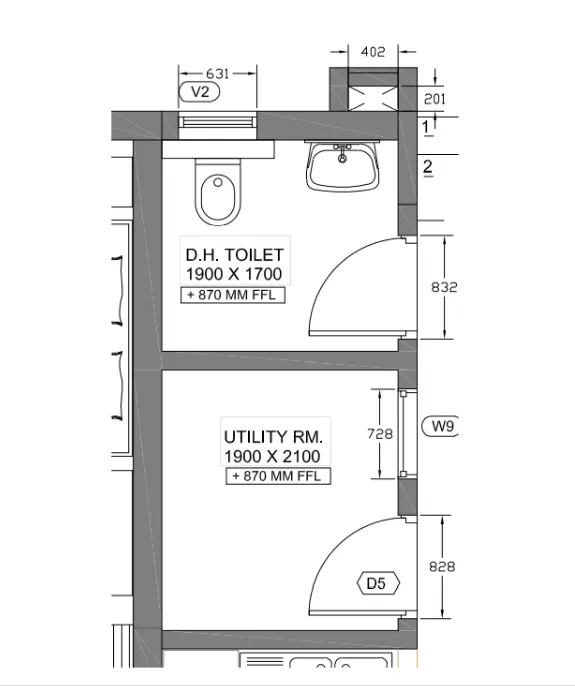
Aim: To draw plan for the toilers and utilities room.
Commands Used:
1. XL-V OR XL-H.
2. Offset.
3. Fillet.
4. Extend.
5. Trim. 6.
Design centre.
Procedure:
First create a new Auto Cad file with metric units.
Set the limits with command "LIMITS" .Specify the left corner points and right corner points and enter zoom all.
Draw construction lines by command "XL-V" for vertical and "XL-H" for horizontal
Trim the left side and bottom position of the constru lines.
Drawing utility room:
Draw an offset of 300mm from the left side of vertical construction line and an offset of 150mm from the
bottom horizontal construction line.
Draw an offset of 2100 mm upwards and offset of 1900 mm towards the right side and give the wall thickness of150mm and 300mm respectively.
Drawing DH Toilet:
Draw an offset of 1700 mm upwards and wall thickness of 300 mm as it is the external wall, and a room is formed.
Trim off the rest of the construction lines.
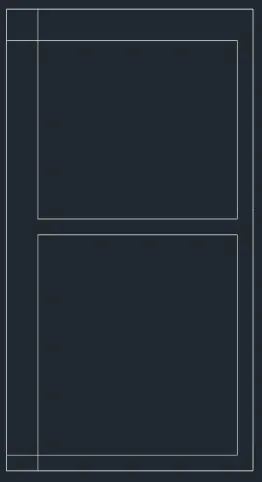
opening for doors:
From toilet, after offset of 100mm, give another offset of 832mm and trim to form the door opening by creating 12.5 mm hinge and then draw circle to the midpoint of other side of wall .Trim off the rest of circle to form an arc.
Draw window of 728mm in the utility room and a
ventilator of 631 mm in toilet room.
Draw the duct shown behind the toilet room by offset at a distance of 201 mm and 150mm wall thick ness
upwards.
Extend the wall of toilet towards it and offset 402 mm, offset wall thickness as 150mm. Fillet the corners of the room.
Drawing of utility symbols:
In the command line enter "DS" and select en-us -home utility select the symbols by draging them into Auto Cad screen and place whereever required.
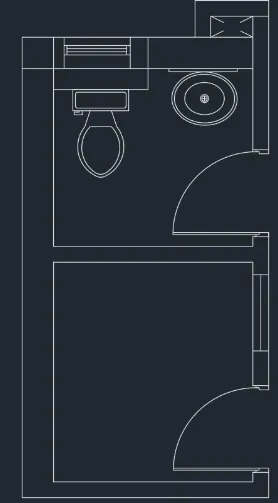
The Toilers and Utility room plan was created using AutoCAD.
Result:The plan for the toilers and utilities room is drawn.
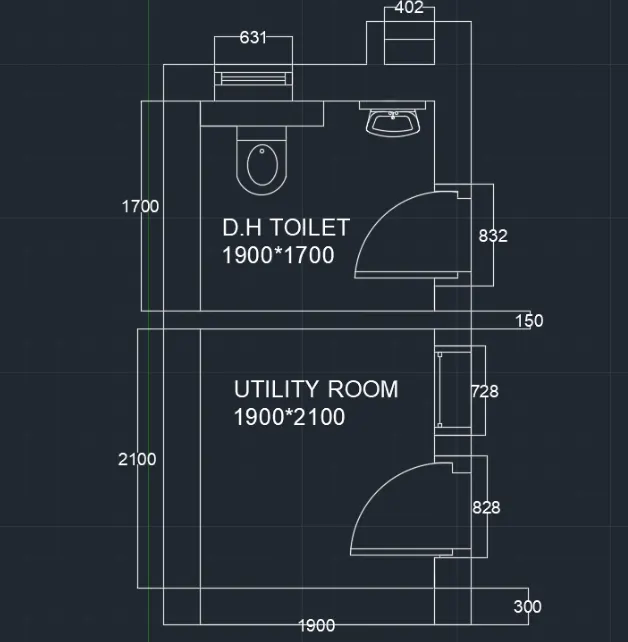
CONCLUSION:
All result of each drawing has been attached which was taken from AutoCAD.