Creating a Residence Layout, Seating plan, Toilet and Utility room plan using AutoCad
The layout of The Residence
Aim:
Sketch the layout of a residence using various tools of AutoCAD
Procedure:
Starting from the origin of UCS i.e. (0,0)
- Open AutoCAD
- Open a new drawing sheet
Setting of Units
- Type UN in command penal for Unit window
- Choose Architectural amongst the dropdown with the unit to scale inserted content as Inches
The setting of the Architectural system of dimensions
- Home>Annotation>Dimension Style
- Choose style ISO-25>Modify>Primary Units
- Choose Architectural amongst the dropdown with the precision of 0.5” precision
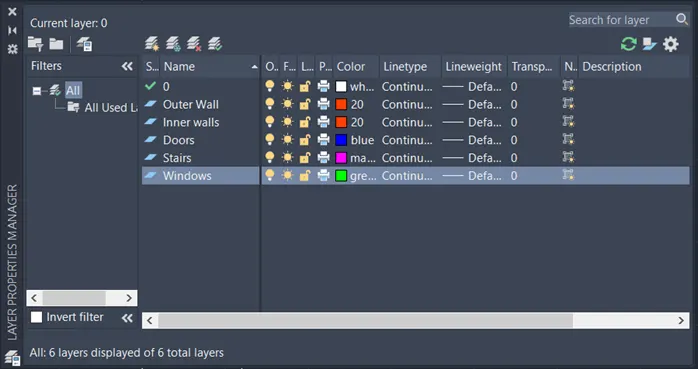
Creating of various layers
- Home>Layers>Layer properties
- Creation of new layers such as shown below with different colors codings
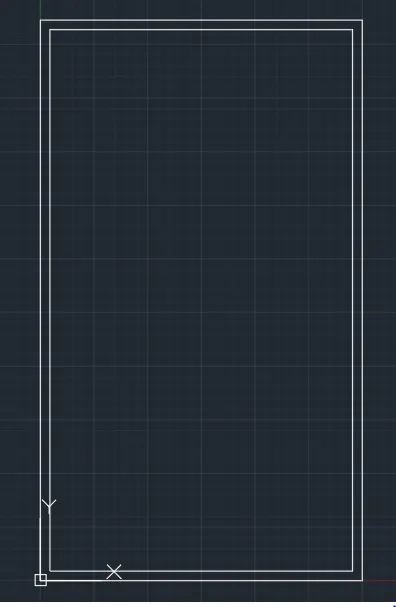
Drawing Outside walls of 9” thickness
- Make a RECT of 25’ length and 43’6.5” height
- OFFSET it inside by 9” for outer wall thickness
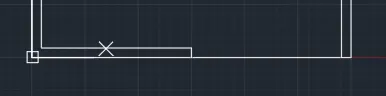
Reduction 12’6” in Outer wall for the main entrance
- ERASE half of the inner line (12’6”) of the outer wall
- LINE 9” across the thickness for the closing of the wall
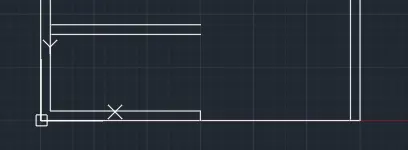
Drawing of 9” wall between kitchen and stairs
- OFFSET upper line of the bottom wall by 6’
- Further, OFFSET it by 9” to make the thickness
Drawing of 2 nos of 9” wall between Kitchen and Parking
- For the wall between Kitchen and Parking, draw a LINE of 6’8” from the right end of the wall
- OFFSET it by 9”
- Draw 6’4” LINE from the left side on top for 4.5” wall
- OFFSET it by 4.5” towards upper
- Use FILLET command to joint all the ends with zero radius
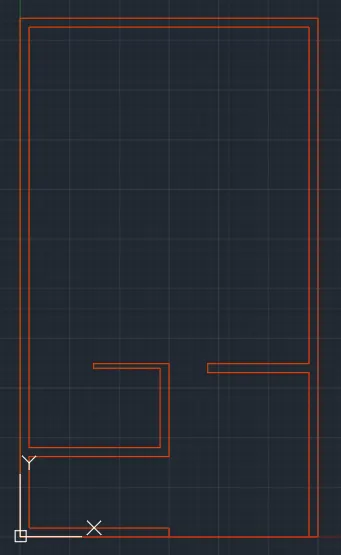
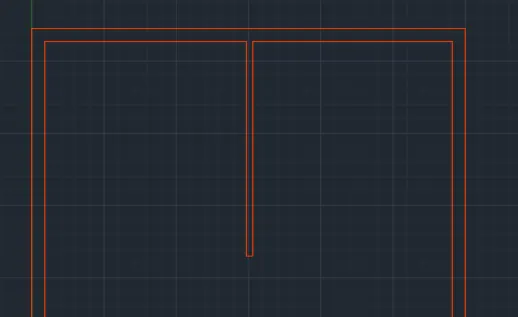
Creating Inner wall between Bedroom 1 and Bedroom 2
- OFFSET left side wall by 11’7.5”
- Further, OFFSET it by 4.5” for thickness
- TRIM upper end to make it continuous
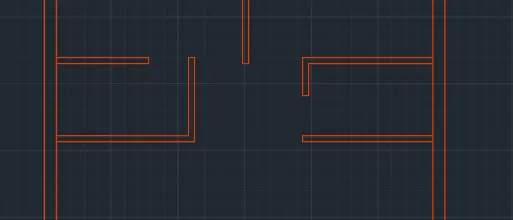
Drawing Toilet #1 with gates of 2’6” width
- Draw a LINE of 8’3” from 18’0.5” above the kitchen 9” wall
- OFFSET it by 4.5” to make the thickness
- Draw a LINE of 4’6” length from the end of 4.5” wall to Y-Axis
- OFFSET it by 4.5” for thickness
- For the top wall of toilet #1, leave a space of 2’6” and draw LINE with 4.5” OFFSET to join it with 9” wall
Drawing Toilet #2 with gates of 2’6” width
- Repeat the same procedure as above with opening for the gate of 2’6” in 4’6” length wall
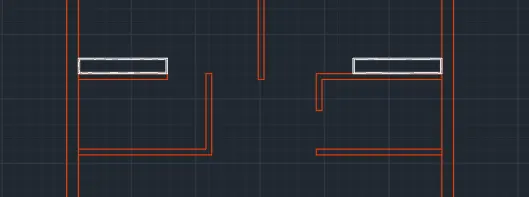
Drawing of C/B in both Bedrooms with the size of 5’9” x 1’
- Draw a RECT with a length of 5’9” and 1’ height
- OFFSET rectangle by 1” for thickness
- COPY this to the upper side of Toilet #2
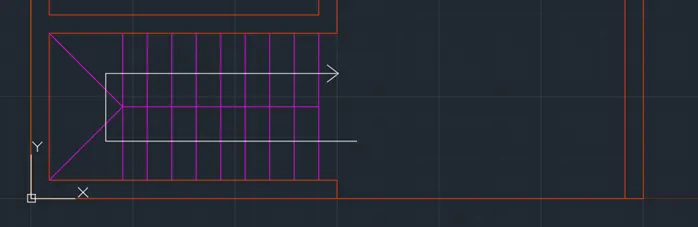
Drawing of Stairs with Tread 1’ and riser of 6”
- First, create a line at 3’ as a divider line of steps
- Draw LINE and join both corners of 9” wall with a divider line
- Draw a LINE of 6’ for steps with center at tri-junction intersection
- OFFSET it by 3” to show steps
- Draw a LINE with a head arrow to show the line of movement on stairs
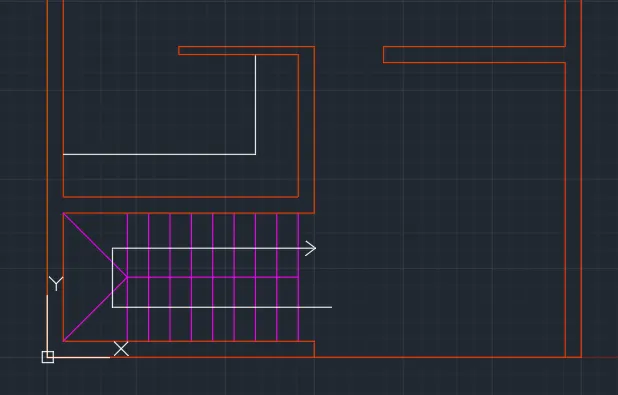
Drawing of Kitchen slab of 2’
- OFFSET by 2’ the inner line walls of kitchen 9” wall
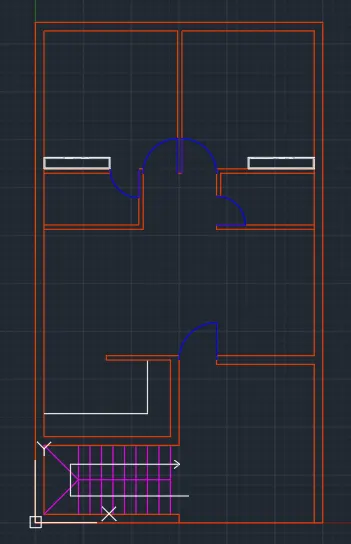
Drawing the Gates of Size D1, D2 and D3
- For D1, draw a line of 3’ along the wall of Bedroom #1
- Make an ARC of 3’ radius and angle of 90 degrees to show the movement of the door in the clockwise direction
- For another bedroom door D1, MIRROR the first D1 for Bedroom #2
- For D2, draw a line of 2’6” along the wall of Toilet #1
- Make an ARC of 2’6” and an angle of 90 degrees to show the movement of the door in the clockwise direction
- For another toilet door D2, ROTATE in the desired direction and place at Toilet #2
- For D3, draw a line of 3’3” perpendicular to the wall of parking and living room
- Make an ARC of 3’3” and angle of 90 degrees to show the movement of the door in the anticlockwise direction
Window Drawing
- Draw a line OFFSET of 1’3” from D3 door and again OFFSET at 6’
- Joint midpoints of these two lines
- Assign them window layer with green color
Dimensions Measurement
- Open Dimension style dialogue box and set text height 1’, arrow height 9” and offset from the line as 4”
- To begin with type DIMLIN in the command bar and measure the dimension of 43’6.5” and 25’
- Use the same command and measure 6’ and then continue with DIMCONT command for continuous measurement on a side
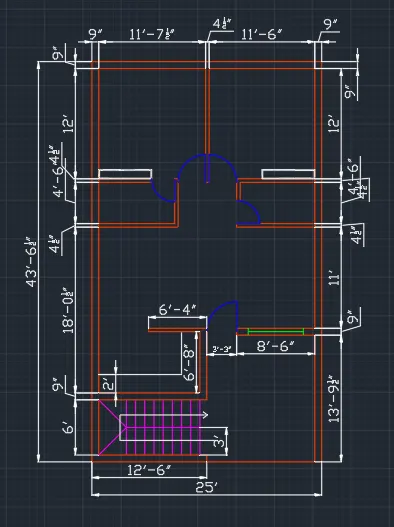
Text Input in drawings
- Type TEXT command or Go to Home>Annotation>Text
- Set the type of text, text height, etc from Dimension style under annotation penal
- Put cursor in Bed #1, Bed #2, Toilet #1, Toilet #2, Dining, Living, Kitchen, Parking, and C/B to type respective names with internal dimensions
- Doors are marked with Coding D1 to D3, whose dimensions are shown separately as follow
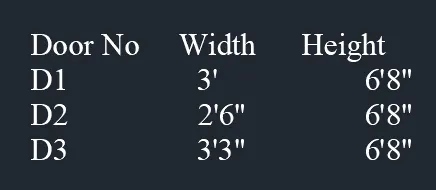
Fill all walls with solid colors
- Put HATCH command
- Choose color no 8 with solid filling for outer and inner walls
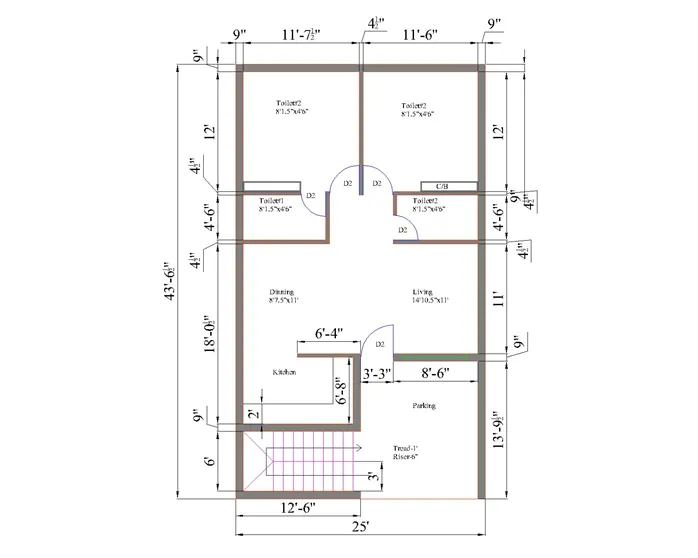
Result:
Outdoor Seating with Canopy
Aim:
Sketch the seating plan for an outdoor canopy using various tools of AutoCAD
Procedure:
Starting from the origin of UCS i.e. (0,0)
- Open AutoCAD
- Open a new drawing sheet
Setting of Units
- Type UN in command penal for Unit window
- Choose Decimal amongst the dropdown with the unit to scale inserted content as Millimeter
Setting of Dimension Style
- Navigate to Home>Annotation>Dimension Style
- Choose ISO25 and click on modify
- Set Primary Unit as Decimal with the precision of double-digit
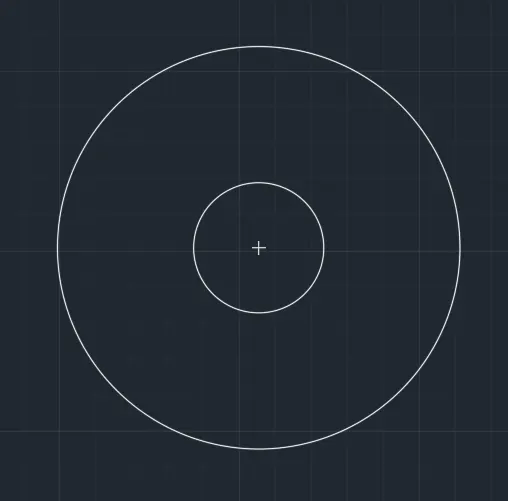
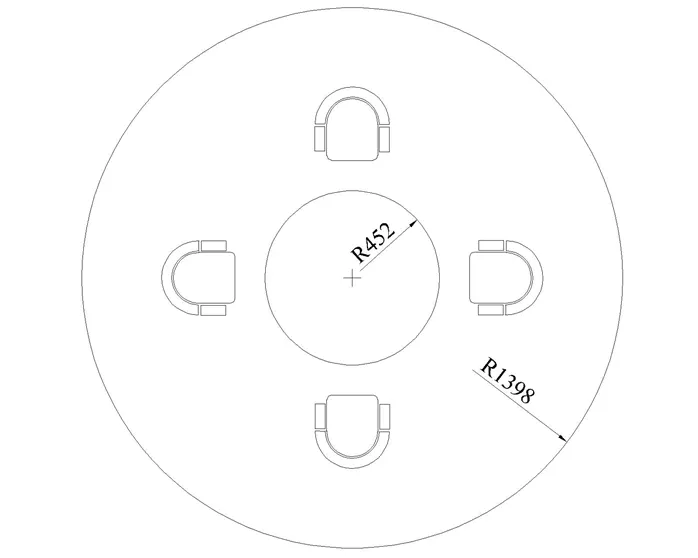
Draw a concentric outer and inner circle
- Type CIRCLE command and put the center at (0,0)
- Using the above command type radius of 1398mm and 452mm to make two circles
- Mark the center of the circles using CENTERMARK command
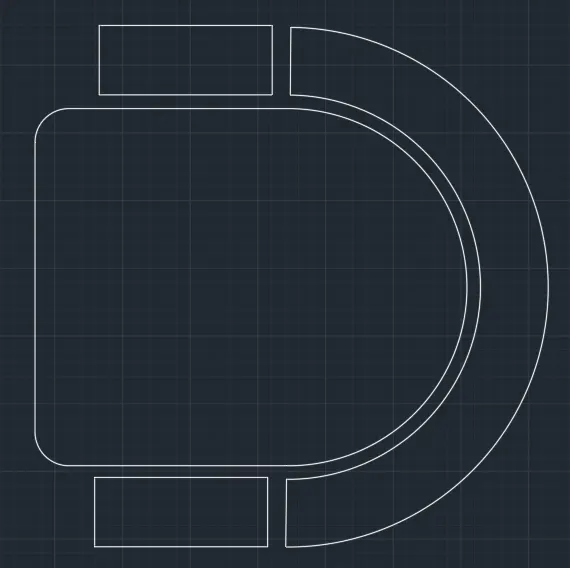
Drawing of chairs
- Type ARC command and use “Start, End, Angle” option
- Choose start and end angle and put 180-degree arc angle
- OFFSET the above arc by 50mm to outside
- Join the ends of both arcs
- Draw small rectangles on front of both ends of the arc using RECTANG command
- OFFSET by 10mm for inner arc to make seating area of the chair
- Extend this Arc using LINE command to make a rectangular part
- FILLET the corners of the rectangle by radius method
- Placing of the chair around the inner circle
- Now COPY and ROTATE the chair to place 4 chairs at the interval of 90 degrees around the inner circle
Dimension Drawing
- Use DIMRADIUS command to mark the radius of both circles
Results:
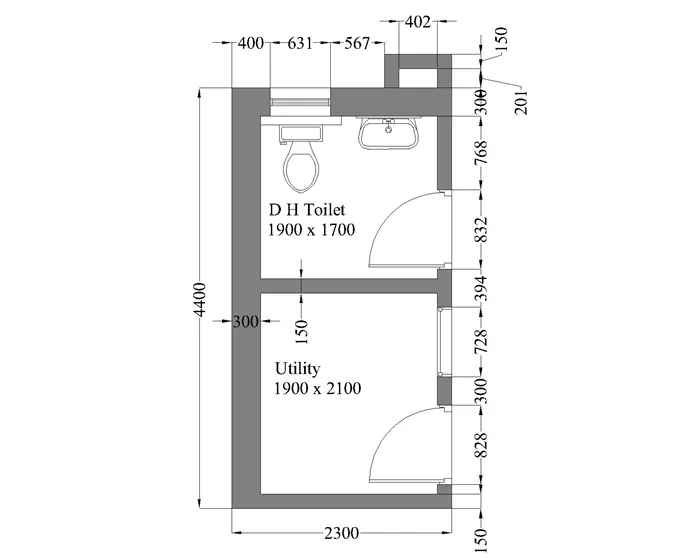
Plan for Toilets and Utility Room
Aim:
Sketch the part plan for the toilets and utility room
Procedure:
Starting from the origin of UCS i.e. (0,0)
- Open AutoCAD
- Open a new drawing sheet
Setting of Units
- Type UN in command penal for Unit window
- Choose Decimal amongst the dropdown with the unit to scale inserted content as Millimeter
Setting of Dimension Style
- Navigate to Home>Annotation>Dimension Style
- Choose ISO25 and click on modify
- Set Primary Unit as Decimal with the precision of double-digit
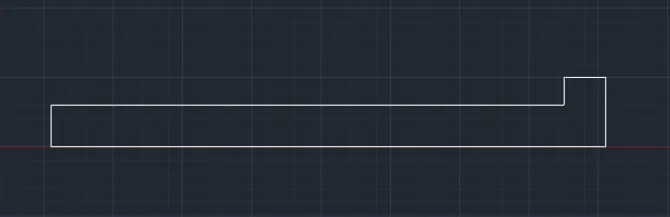
Drawing of bottom 150 mm wall
- Use LINE command from 0,0 to make line up to D5
- OFFSET this line by 150 mm and join the ends
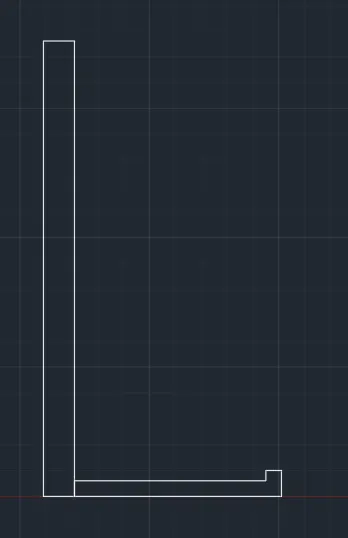
Drawing of left-hand side 300 mm wall
- Use LINE command to draw the line of 4400 mm length
- OFFSET it by 300 mm
- Use FILLET command to join both ends
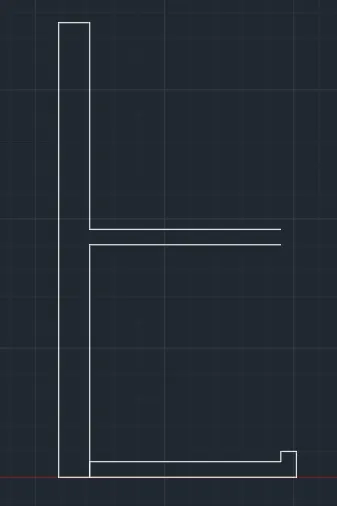
Drawing of 150 mm wall between Utility and Toilet
- OFFSET bottom wall upper line by 2100 mm
- Another OFFSET of 150 mm of this to make the thickness of the wall
- TRIM the left end to make it continuous with 300 mm thickness wall
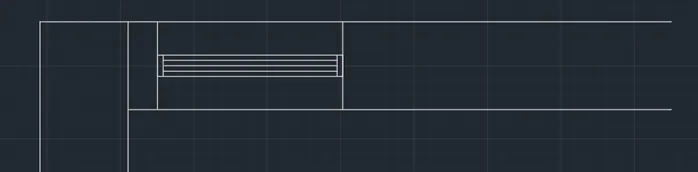
Drawing of Top 300 mm wall with 631 mm length window V2
- OFFSET mid 150 mm wall upper line by 1700 mm to the upper side
- Another OFFSET to make its thickness of 300 mm
- OFFSET Left end line of top 300 mm wall by 100 mm to right and another OFFSET to 731 mm for window
- Draw lines of windows using LINE, RECT, and COPY command
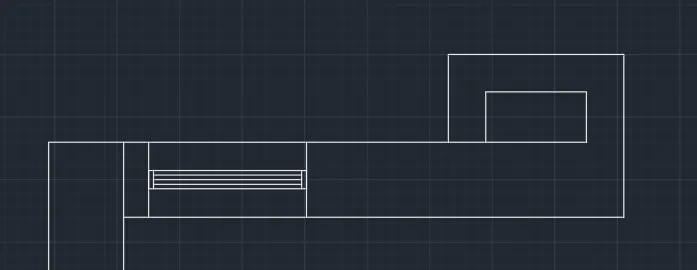
Drawing of Top Opening of 402x201 mm
- First Draw a LINE of 201 mm length from 300 mm wall top corner in Perpendicular Direction
- OFFSET it by 150 mm to right
- Draw 402 mm length line to the left at perpendicular to 201 mm line
- OFFSET it by 150 mm
- Make another left side wall of 150 mm thickness
- FILLET all corners with zero radius
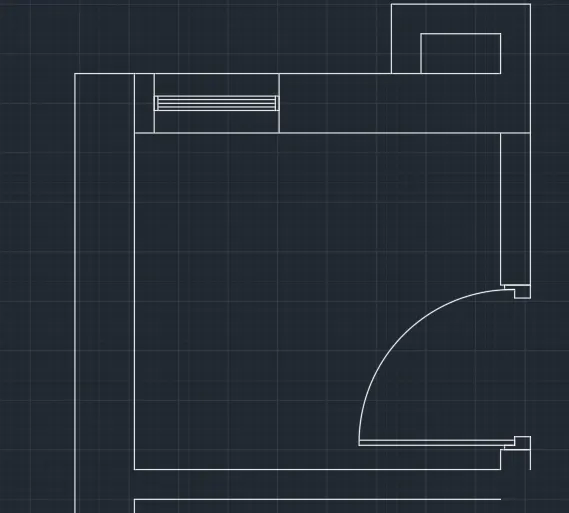
Draw Toilet wall with Door of 832 mm length
- Draw a LINE of 100 from the middle wall and OFFSET by 150 mm for thickness
- Draw a spacing of 832 mm using OFFSET command
- Join the upper portion of to top 300 wall thickness
- For Door first, draw a polygon using PLINE at the top end
- MIRROR this polygon to another end
- Draw RECT for the door on the down end
- Draw ARC using start, end, and angle method
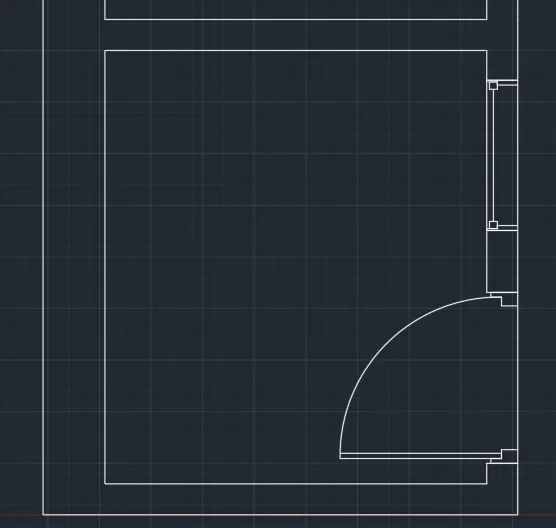
Draw Front wall of a Utility room with Window and Door
- OFFSET bottom line by 828 mm for door opening
- Make further OFFSET for 300 mm for 150 mm wall
- Join this 150 mm wall by lines on both ends
- Further OFFSET by 728 mm for window opening
- Copy the offset part and join with an intermediate 150 mm wall
- COPY polygon from the above door and fit for this door ends
- Draw RECT as door and join it by ARC command for complete door drawing
- As for the window, draw LINE at both side
- Draw another LINE in between with RECT at the end for the window
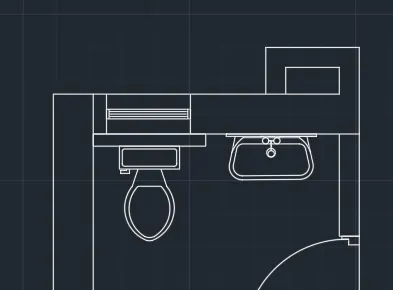
Draw washbasin and other in toilet room
- Draw the RECT at the back of the toilet
- Press CTRL+2 and load the design center
- Select toilet block from standard home designer blocks
- For washbasin First, draw RECT at the back of the basin
- Draw Outer boundary of the basin with LINE and FILLET these at the corner by radius
- Draw Internal boundary by OFFSET command
- Draw wall side line of the inner boundary with FILLET and LINE command
- To make another boundary towards the wall, COPY inner boundary back part and past it
- Use ARC with 3 points commands to give it a circular end
- Draw water tap using CIRCLE and LINE commands
Draw Texts in drawing
- Home>Annotation>Text
- Put texts in Toilet and Utility Boxes
Drawing of Dimensions:
- Type DIMLIN in couple with DIMCONT for series dimensions
- For individual dimensions type DIMLIN and measure these
Hatching of walls
- Use HATCH command to fill the walls with color nos 8
Results:
Conclusion:
Drawing the layout of a residence gives in hand practice for the future drawing of residential plans. During the drawing of a plan, for time-bound and efficient drafting, the drafter has to use the plethora of commands in a smart way. In this residential plan, the use of commands like – LINE, RECT, OFFSET, COPY, MOVE, ROTATE, TEXT, DIMENSION, etc. was executed.
For sketching of seating plan of an outdoor canopy, use of various commands like – CIRCLE, FILLET, RECT, LINE, etc. was done.
The Part plan of Toilets and Utility rooms gives in the practice of commands like LINE, COPY, MOVE, FILLET, ROTATE, ARC, RECT, etc. Use of design center was also done to import predetermined block for ease of drawing. The design center can be opened by pressing CTRL key with 2.