Creating a Residence Layout, Seating plan, Toilet and Utility room plan using AutoCad
- AIM:- Creating a Residence Layout, Seating plan, Toilet, and Utility room plan using AutoCad.
- Introduction: In this project, a depiction of the housing plan is given for the student to get an idea of the work. This project involves the uses of various tools such as-
- Line tool
- Circle tool
- Arc tool
- Chamfer tool
- Fillet tool
- Offset tool
- Dimstyle command
- Text command.
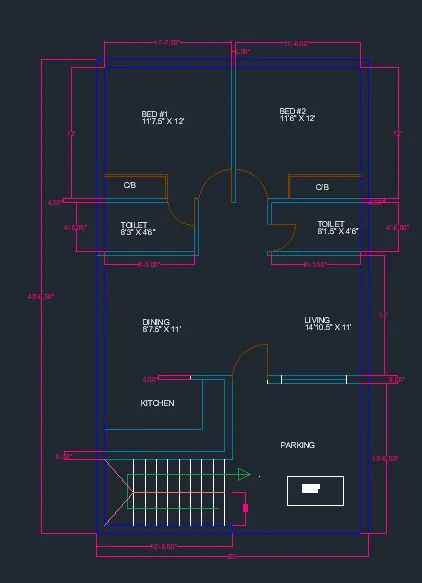
- Aim:- FIGURE-1: RESIDENCE PLAN
- Procedure:-
- Steps:
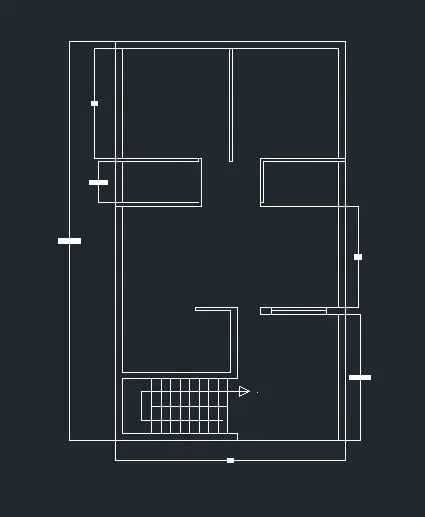
- Type XLINE in the command box to select the construction line command and draw a horizontal and a vertical line.
- Type UN in the command box to open the unit dialogue box and change the units to Engineering and precision to 0'00".

- Type O in the command box to select the offset tool.
- Offset the vertical line at a distance of 25' and the horizontal line at 43'6.5".
- Select the trim tool and trim the excessive lines.
- Again select the offset tool and specify the distance as 9" for the outer wall.
- Offset all the four sides walls.
- Again offset the second-top horizontal line at a distance of 12' for room length and then at 4.5" inner wall.
- Again offset the second line of the inner wall at the distance of 4'6" for toilet length and then at 4.5" for the inner wall.
- Again take the offset tool and offset the second line made for the toilet at a distance of 11' and then at 9" for the support wall and also draw a line at 4.5" for later use.
- From the line drawn at 4.5" offset the line at 6'8" and then at 9".
- Agin select the offset tool and offset the vertical line at a 12'6" distance and then at 4.5".
- Trim/Extend the desired parts as per the requirements.
- To draw the stairs select the last trimmed line, copy it, and select the array option.
- Specify the number of arrays as 10 with the specified distance of 1', and put it horizontally on the left side.
- Draw a line to show an arrow to depict the direction of the motion on the stairs.
- Select trim tool and trim off the parts not required.
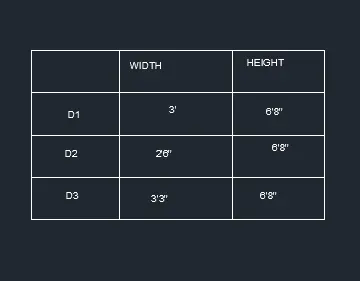
- Draw separate circles with radii 3' for door D1, 2'6" for door D2 and 3'3" for door D3.
- Draw two diameters on all the circles perpendicular to each other.
- Trim off the undesired part and place the required part of the circles in place of the doors.
- Also, use copy and rotate tools where necessary.
- Use the text tool to label the drawings.
- RESULT:
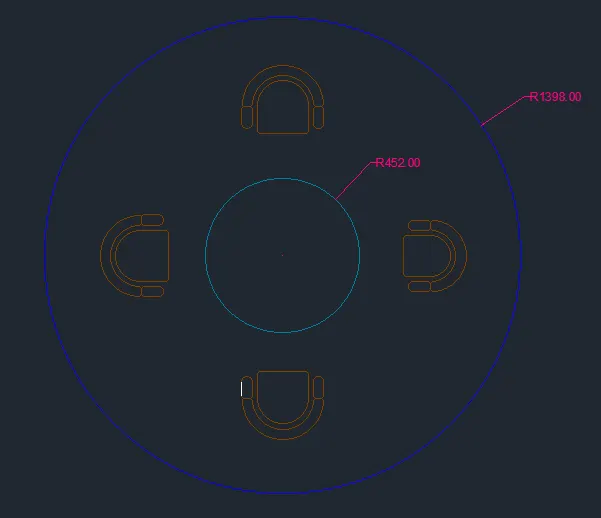
- Aim:- FIGURE-3: Outdoor Seating with Canopy
- Procedure:-
- Steps:
- Type C in the command box to select the circle tool.
- Draw two concentric circles with radii 452mm and 1398mm.

- Take the center as the assistance and draw 4 circles of equal radius on the 4 sides of the inner circle.
- Draw diameters on the circles and trim half the circle.
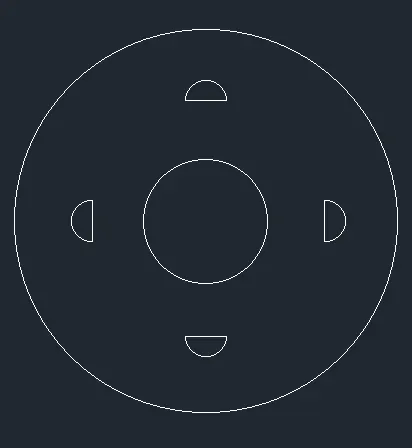
- Select the offset tool and specify the distance as 30mm and offset all the circles.
- Again select the offset tool and specify the distance as 60mm and offset all the circles.
- Type F in the command box to select the fillet tool.
- Select the radius option and specify the radius as 20mm.
- Select the objects to fillet.
- Specify the dimensions.
- RESULT:
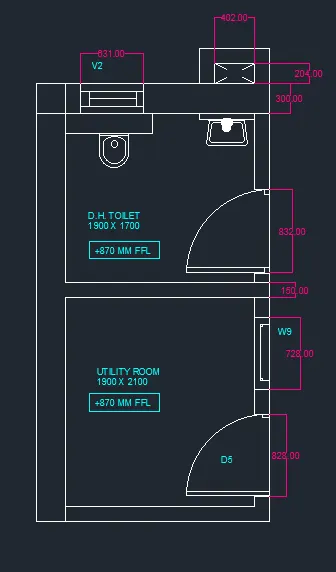
- Aim:- FIGURE-3: Toilet and Utility Rooms
- Procedure:-
- Steps:
- Type XLINE in the command box to draw two construction lines horizontally and vertically.
- Select the offset tool and offset the vertical line at a distance of 2350mm.
- Again select the offset tool and offset the horizontal line at a distance of 4400mm.
- Select the trim tool and trim off the extra lines.
- Now to draw the outer walls offset the lines at 300mm and to draw the inner walls offset the lines at 150mm.
- For the toilet, offset the inner horizontal line at a distance of 1700mm and then at 150mm.
- The rest of the space will be left for the utility room.
- Draw lines of 631mm for ventilator V2.
- Draw lines of 728mm for window W9.
- Select the circle tool to draw two separate circles of radii 832mm and 828mm.
- Draw the diameters of the circle and trim the non-required part for the doors.
- Place the doors at the desired positions.
- Specify the dimensions.
- RESULT: