Creating a Residence Layout, Seating plan, Toilet and Utility room plan using AutoCad
AIM
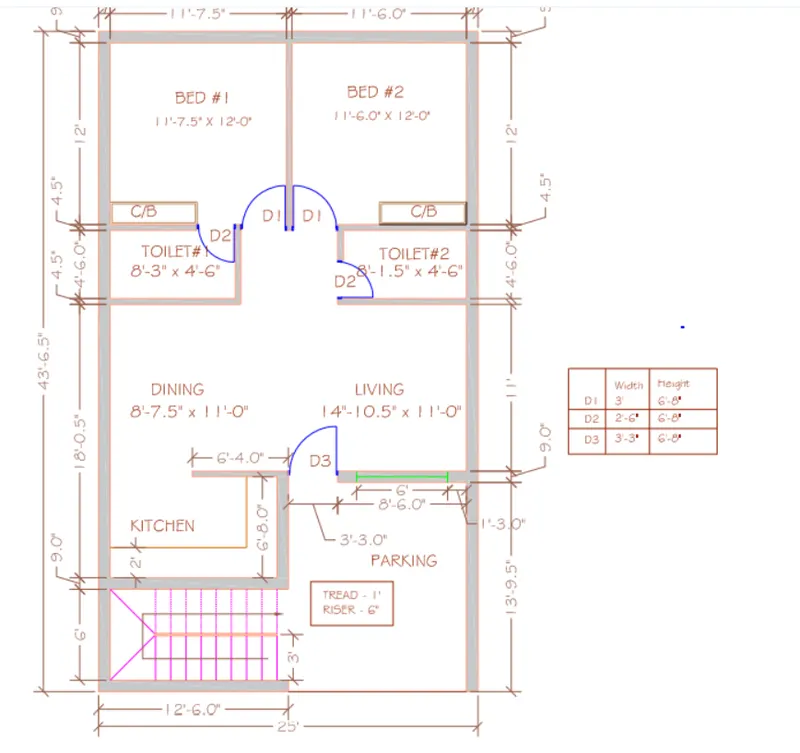
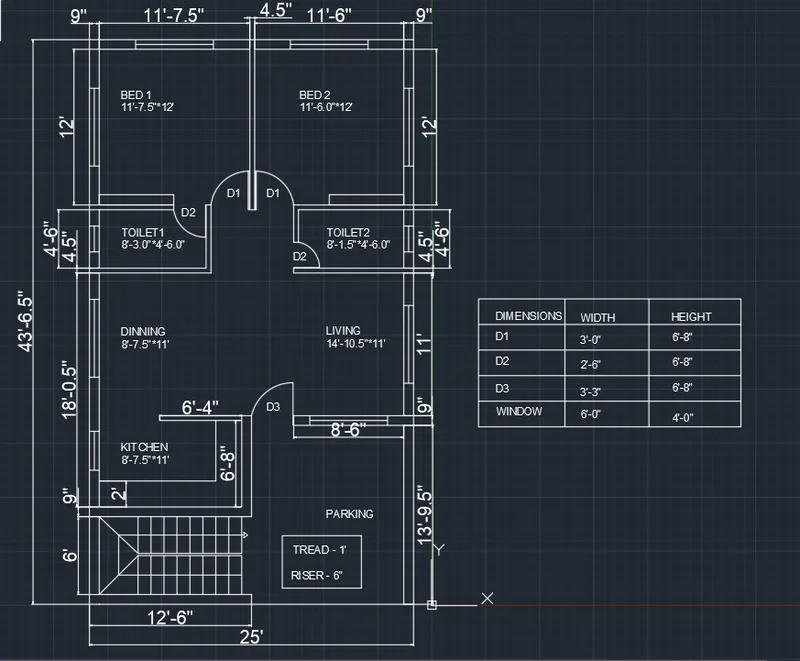
To sketch the layout of a residence as shown in the Figure
PROCEDURE
- Open a new file
- In the command line type units , select engineering(dimensions will be in feet and inches), and also set the precision
- In the command line type 'LIMITS' and specify the limits at lower left corner as(0,0) and upper right corner as (100',100')
- Then zoom all
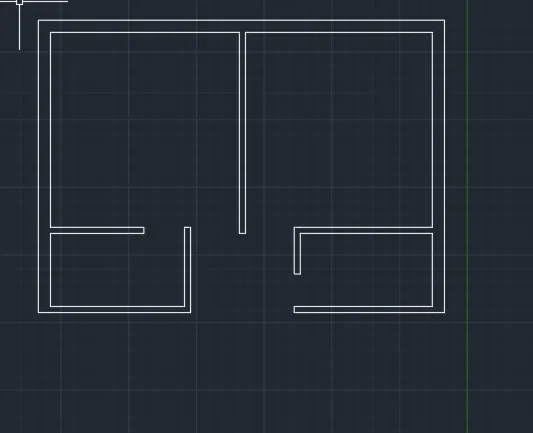
STEP 1 DRAWING BED ROOM 1 AND 2
BEDROOM 1
- Draw construction lines by using the command "XL-V" for vertical and "XL-H" for horizontal
- Using offset command take offset of 9" on vertical line and 4.5" on horizontal line
- then offset 11'-7.5" in the +x direction and offset line by 4.5" so that wall thickness id formed
- offset 12' in the +y direction and agian offset it by 9" for wall thickness
- trim off the unwanted lines
BEDROOM 2
- give offset from the wall thickness of bedroom 1 towards +x direction of 11'-6"
- offset 9" to create wall on right side
- extend the line of 12' in the bedroom 1to 2 and also extend the bottom line of bedroom 1 to 2
- trim off the unwanted lines and
STEP 2 TOILET 1 AND 2
TOILET 1
- offset 4'-6" downwards and again offset by 4.5" for wall
- extend the left side of the bedroom 1 to the offsetted line
- from the offsetted line offset 8'-3" towards +ve x direction and offset 4.5" for wall thickness also
- trim off the unwanted lines
TOILET 2
- extend the wall thickness of bed 2 to 4'-6" line
- offset a distance of 8'-1.5" in the -ve x direction and offset 4.5" for wall thickness
- trim off the unwanted lines and trim the openings for the doors with their respective given width for all rooms
STEP 3 DINNING AND LIVING, KITCHEN , PARKING , STAIRCASE ROOM
DINNING AND LIVING
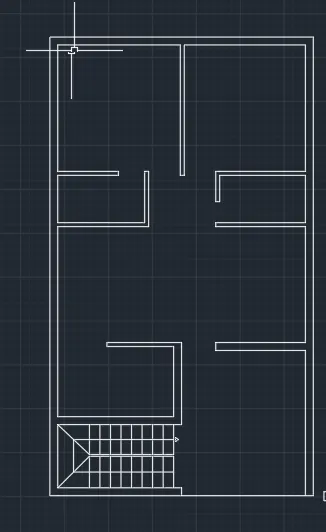
- offset 11' from the toilet wall and also offset 9" for wall thickness
- extend the left wall towards line
- use fillet to join this line and wall of toilet 2
- also extend right side wall to 11'
- trim off the unwanted lines and opening for living room
KITCHEN
- offset the dinning wall of 6'-8" downwards and give an offset of 9" for wall thickness
- extend the left wall towards the line
- offset 11' line towards +ve x direction and offset it by 9" for wall thickness
- for open kitchen trim the excess portion by retaining a distance of 6'-4" from the right side of kitchen
PARKING , STAIRCASE ROOM
- offset the kitchen wall downwards to adistance of 6' and offset it again by 9" for wall thickness
- extend the left side kitchen wall to the offsetted line
- offse the living room wall to 13'-9.5" downwards extend the right side line to the offsetted line
- trim off the unwanted lines
STAIRCASE
- Given: thread =1',riser=6"
- divide the staircase room by offsetting 3' and again offset 2" to show the handrail
- offset the 6' line at 3' and aagin offset line at 1' repeat it until 8 steps are formed
- trim off the unwanted lines
- steps on the other side of the handrail is given as dotted as it is upward stairs and not visible when viewing from ground floor
- for dotted lines select the line and change the line to ISO dash
- mark the direction of stairs
STEP 4 DOORS , WINDOWS , KITCHEN SLAB AND CUPBOARDS
DOORS
- trim all the door openings with their given width
- draw hinge with respect to that draw circle
- trim off the unwanted lines
WINDOWS
- draw wherever necessary
- from the start point of window draw a line and then offset the distance of the window and then connect the two lines centre point
- in living room draw line at 1'-3" and offset this line by 6' and the draw a line connecting midpoint of these two lines
KITCHEN SLAB AND CUPBOARDS
- offset a distance of 2' to make the kitchen slab
- can make cupboard by creating rectangle
- copy the rectangle to other bedroom also
STEP 5
LAYER
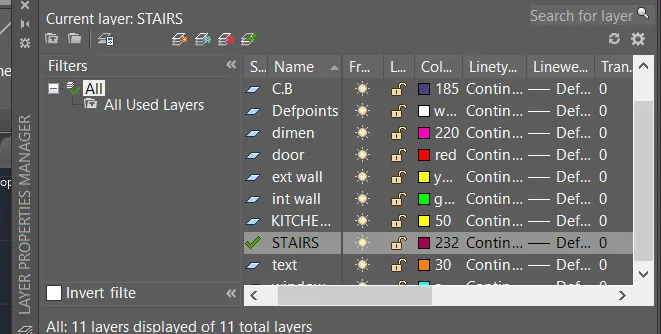
- from layer property create new layer
- create 9 such layers , internal wall, external wall, slab , cupboard , window , door , dimension , stairs, text
- by providinding different colours for different layers so that they can be easily identified
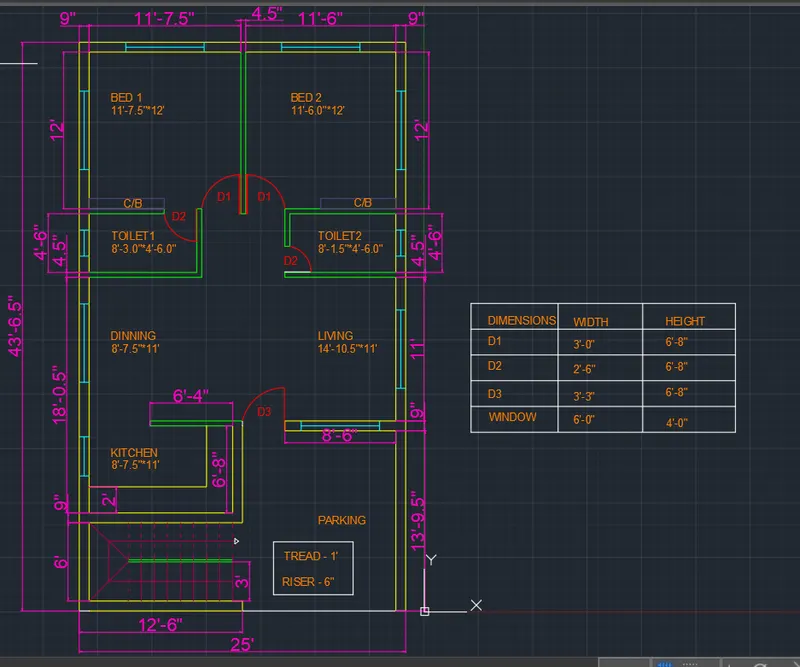
RESULT
Layout of residential plan is drawn
AIM
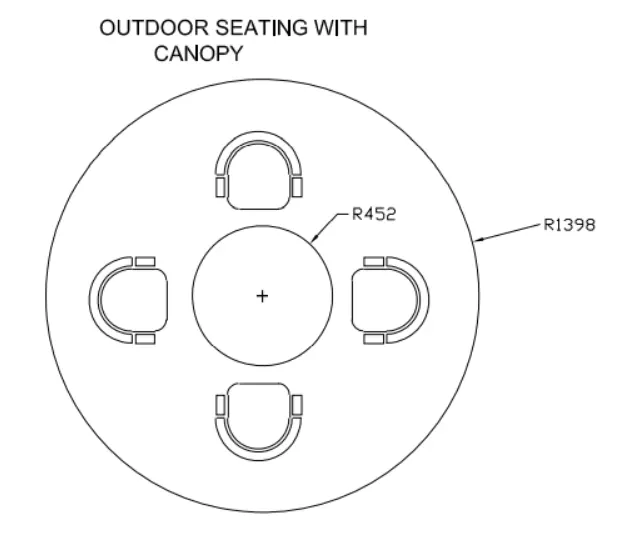
To Sketch the seating plan for an outdoor canopy
PROCEDURE
- Open a new file
- select metric units as the dimension in mm
- set the limits using limit command and specify the lower left corner and upper right corner and zoom all
- use the circle command 'C' select a point as center and draw acircle of radius 1398mm
- with the same center draw another circle of radius 452 mm
- offset the smaller circle by 100 mm to determine the position of the chairs
- draw lines along the diameter of the circle
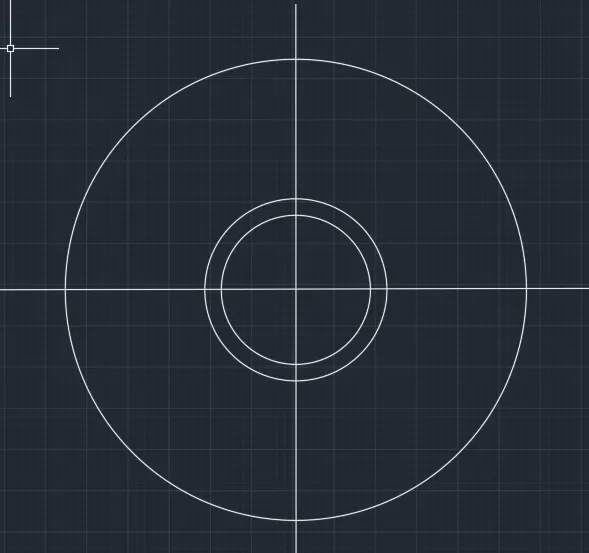
DRAWING CHAIRS
- draw rectangle with command 'REC' giving dimensions as 300*200mm
- draw arc using start , center and end in the 300 mm side
- draw another rectangle of 40*100 mm as handle of the chair and place it in both side
- draw circle from the 300mm midpoint and offset by 40mm trim the unwanted lines
- fillet the bottom corner of the rectangle by 50 mm
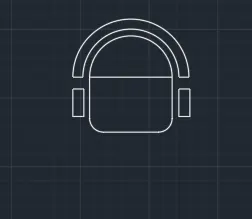
- move the chair by using the command 'M' and move towards the offsetted 100mm circle
- then rotate the chair using 'RO' command then mirror it other side using comand 'MI'
- same way place other two sides also
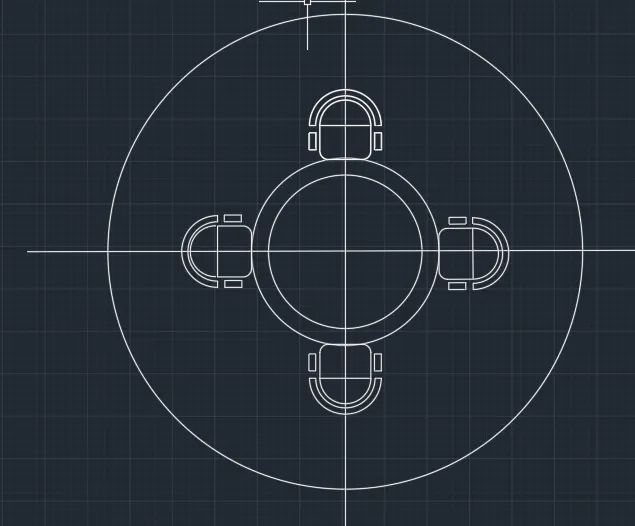
RESULT
Seating plan of outroor canopy is drawn
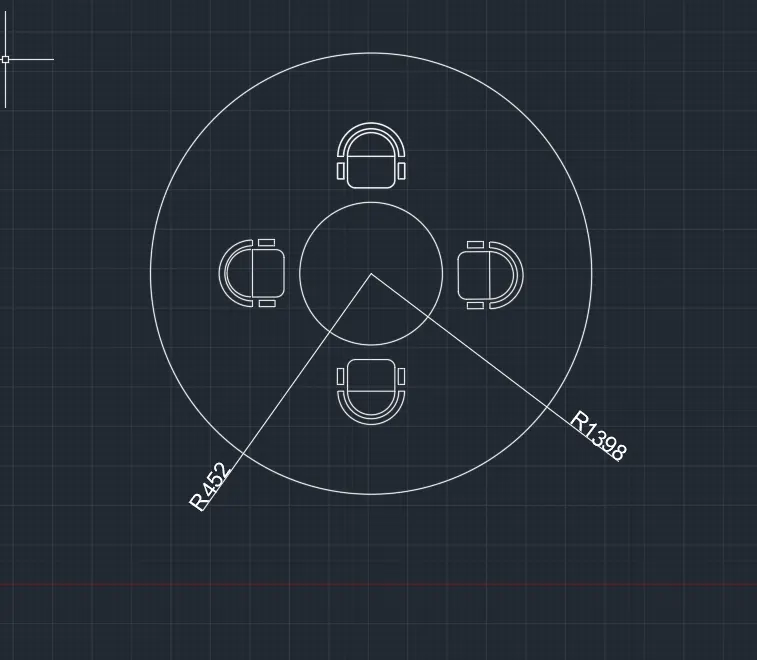
AIM
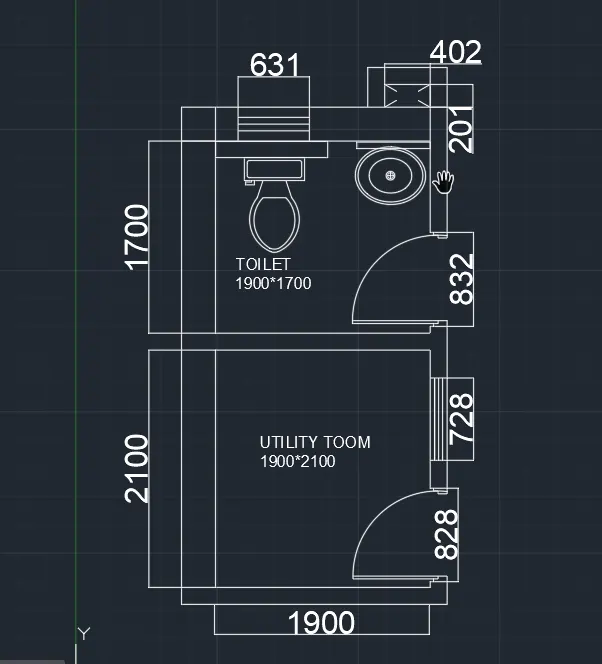
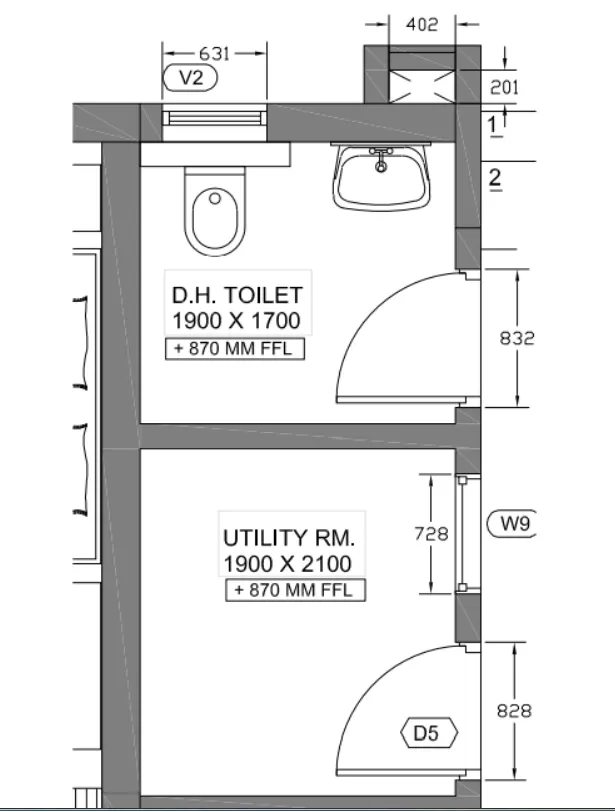
To Sketch the part plan for the toilers and utilities room
PROCEDURE
- Open a new file
- select metric units as the dimension in mm
- set the limits using limit command and specify the lower left corner and upper right corner and zoom all
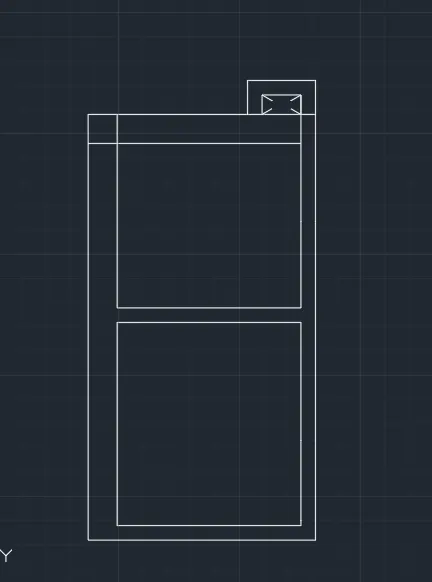
- Draw construction lines by using the command "XL-V" for vertical and "XL-H" for horizontal
- draw an offset of 300mm from the left side of vertical line and 150mm from the bottom horizontal line
- offset 2100 mm upwards and offset it again by 150 so that the wall thickness is formed
- offset 1900 mm right side and offset it again by 300mm
- utility room is formed
- draw an offset of 1700 mm upwards and offset it again by 300 mm
- trim off the unwanted lines
- offset the 300 mm line to a distance of 201 mm and again offset it by 150 mm
- extend the right side wall using extend command
- offset the extended line by 402 mm and offset it agin by 150mm
- trim off the unwanted lines
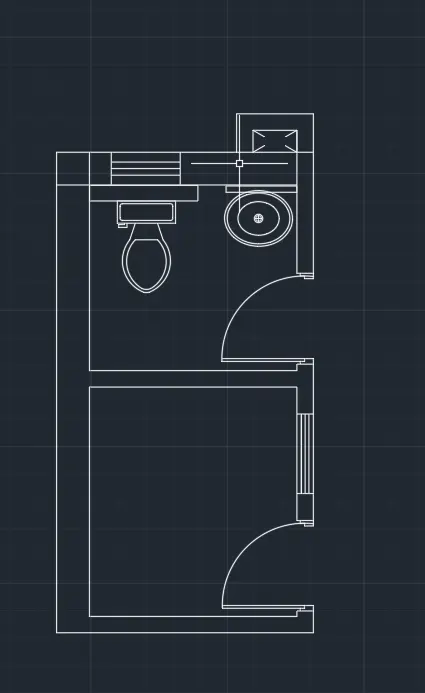
DOORS
- from utility room after 100mm offset give another offset by 828
- trimoff the unwanted lines
- provide a hinge and with mid point of two walls draw a circle and trim off the unwanted lines
- same way create door in the toilet
WINDOWS
- draw window of size 728mm in the utility room and a ventilator of 631mm in toilet room
DRAWING SYMBOLS
- menubar select view in that design centre from that select toilet , insert block and place it the required place
- same way can place sink also
RESULT
given plan of toilet and utility room is drawn