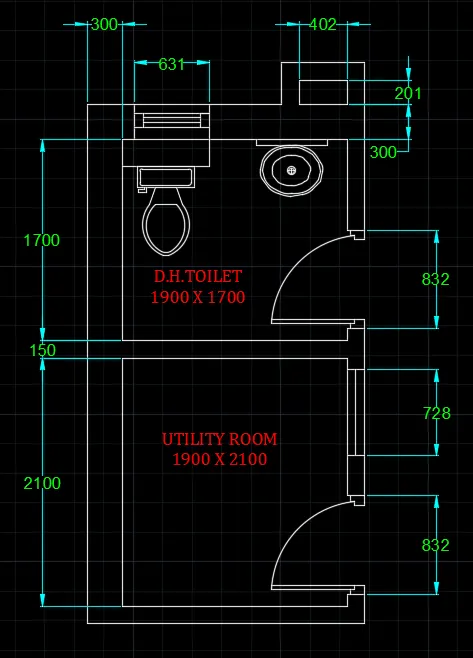
Creating a Residence Layout, Seating plan, Toilet and Utility room plan using AutoCad
AIM:
Creating a Residence Layout, Seating plan, Toilet and Utility room plan using AutoCad
Command Used:
- Xline (Vertical and horizontal)
- Trim
- Offset
- Extend
- Fillet
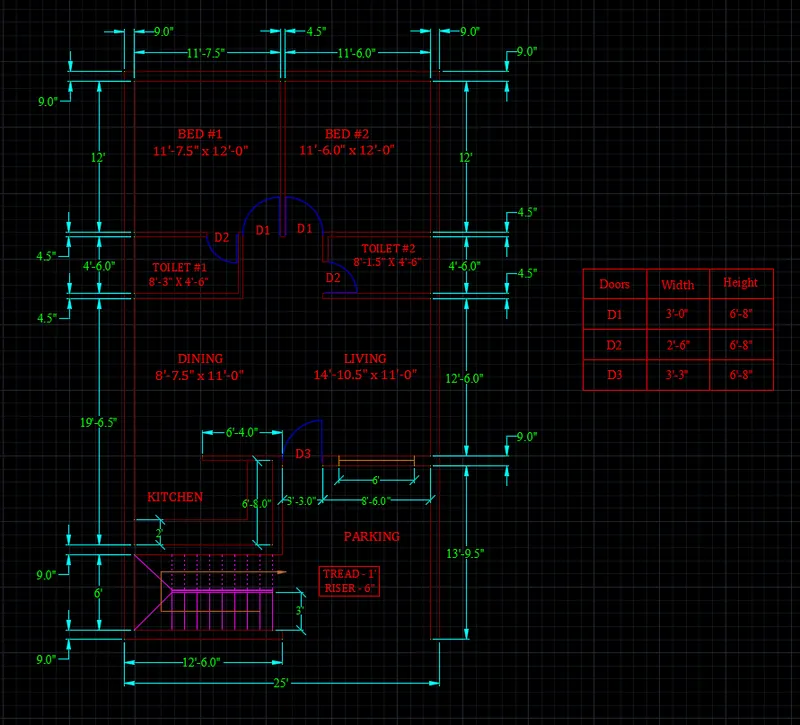
Sketch 1: Residence Plan
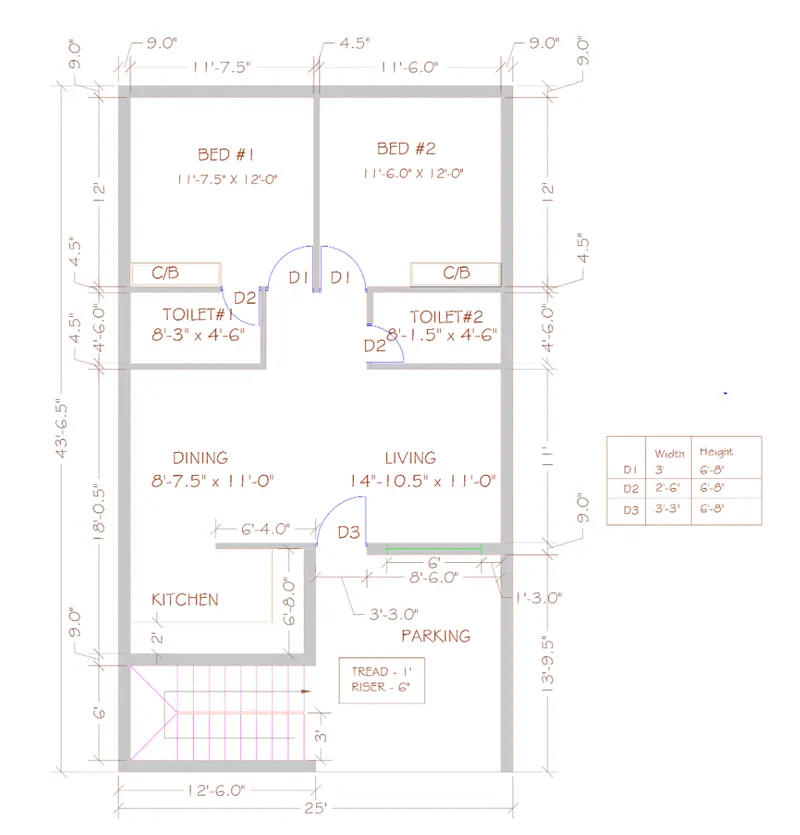
Procedure:
Step 1: Inserting layers
- Create 5 layers named
- Walls
- Dimensions
- Doors
- Stairs
- Text
- Windows
- Extent
- Assign different Colors to layers
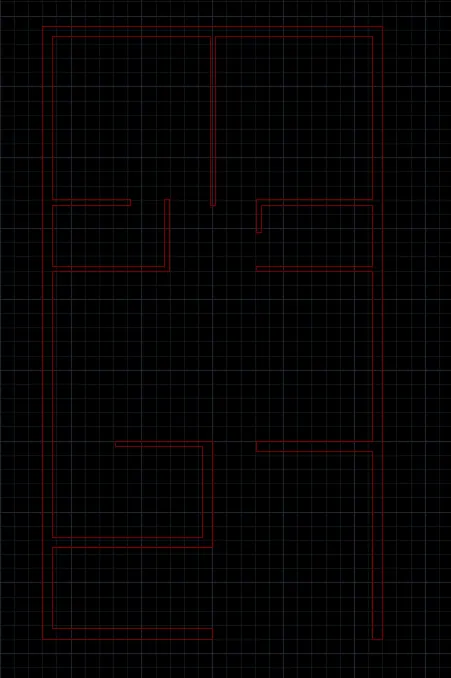
Step 2: Creating walls
- Select the Walls layer as cuurent layer
- Use xline to make a vertical and horizontal line
- Now use offset command to make exterior wall of thickness 9" in vertical xline
- Now take an offset of 23'6" from the left wall for the right wall and also offset it upto 9" for wall width
- Now take an offset of 11'9" from right wall and also an offset of 9" again.
- Now from horizontal xline make an offset of 9" and then an offset of 6' and also take 9" offset for wall
- now take an offset of 13'9.5" from horizontal xline wall and again an offset of 9"
- Now trim the unnecessary line for clarity
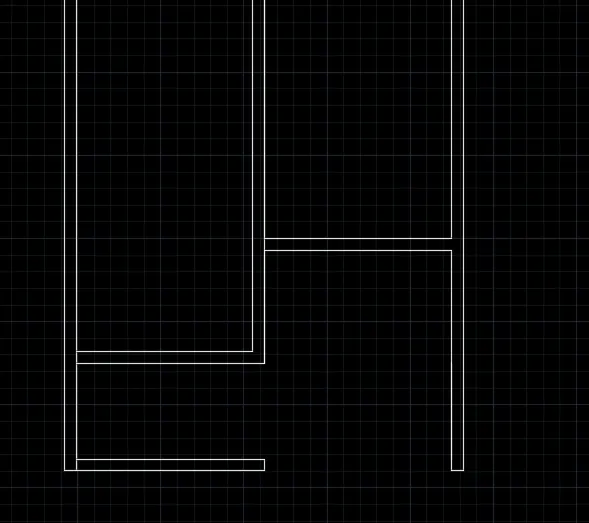
- Now take an offset of 6'8" towards upper direction for Kitchen inner wall and again an offset of 4.5" for thickness of wall
- Take an offset of 6'4.0" for the length of that wall and trim the remaining part
- Now for the length of wall between parking and living room take an offset of 8'6.0" from right exterior wall and trim the remaining portion
- Now take an offset of 43'6.5" from inner side of lowermost wall and use extent to extend it to both side
- again offset the line at 9" for thickness of wall
- trim the remaining part above
- Take an offset of 12' from the upper wall and again an offset of 4.5" for thickness
- Now take an offset of 11' 7.5" from lest wall and 11'6.0" from right wall and trim
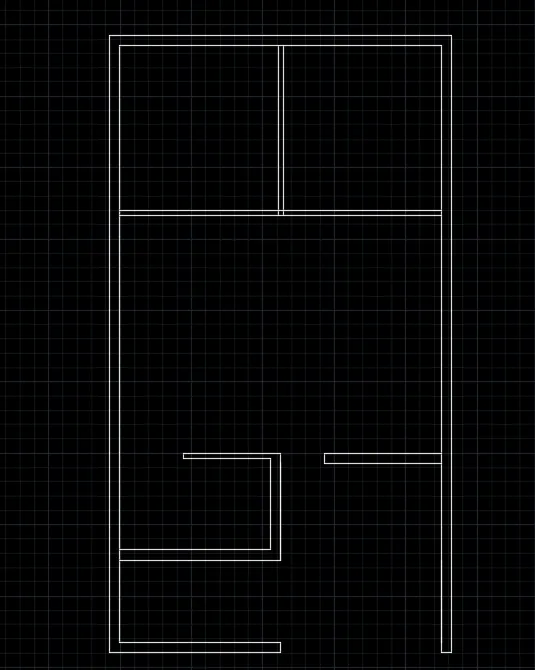
- Take an offset of 3' from the middle wal at both side for door width
- Again take an offset of 4'6.0" from the created wall and also an offset of 4.5" for thickness at both sides and use trim for clearing the unwanted lines
- Take Take an offset of 8'3" from left wall and 8'1.5" from rigth wall and offset it at a thickness of 4.5"
- Trim the remains
- Now take an offset of 2'6" for doors D2 and trim the width
Step 3: Staircase
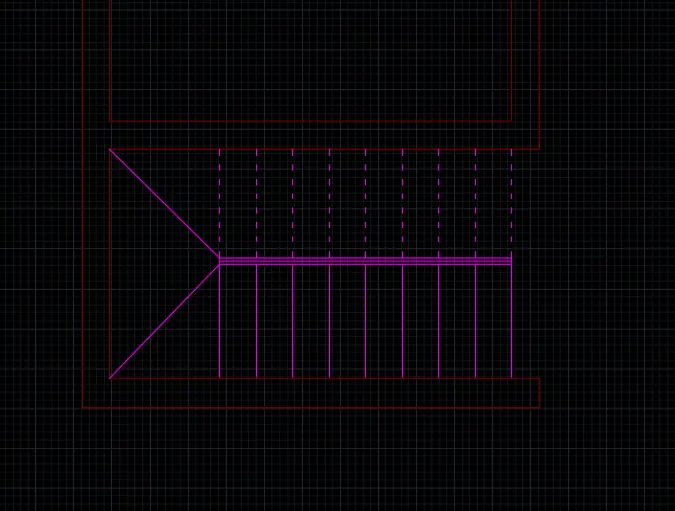
- Take an offset of 3' from exterior wall at both horizontal and vertical direction
- trim the Portion for landing slab
- Connect the wall using lline command
- Take an offset of 1' as tread and make multiple offset
- Trim the upper treads and use dashed line type to make the treads of offset 1'
Step 4: Creating Doors
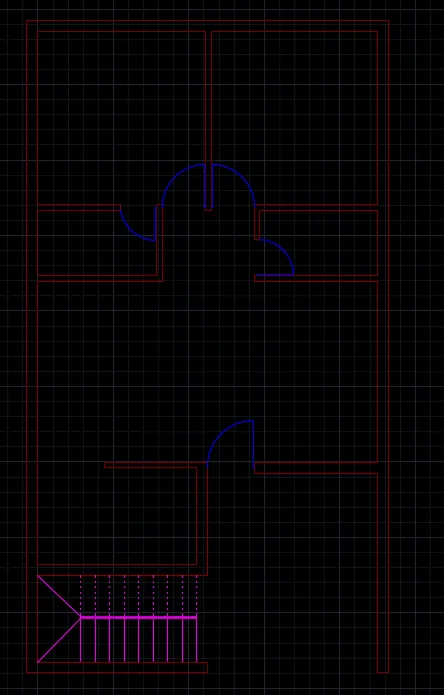
- Draw D1 doors of width 3' using line and arc tool
- D2 width 2'6"
- D3 width 3'3"
Step 5: Providing Windows
- Provide widows of width 6' at the living room
Step 6: Providing Dimensions
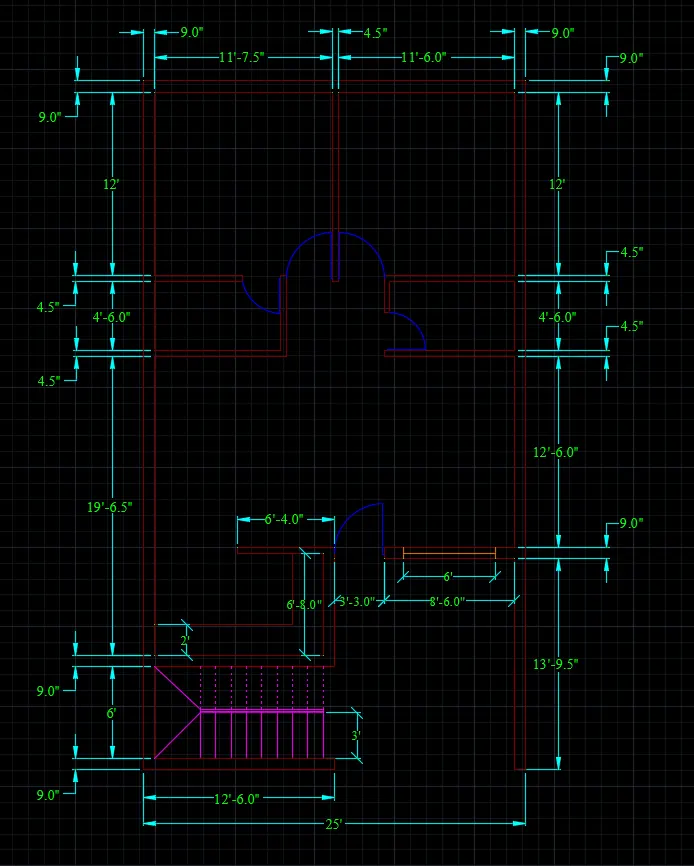
- Give dimensions as per drawing using dimension command from the command bar
Step 7: Providing Text
- Give the Text and Dimension of the room below it
Result:
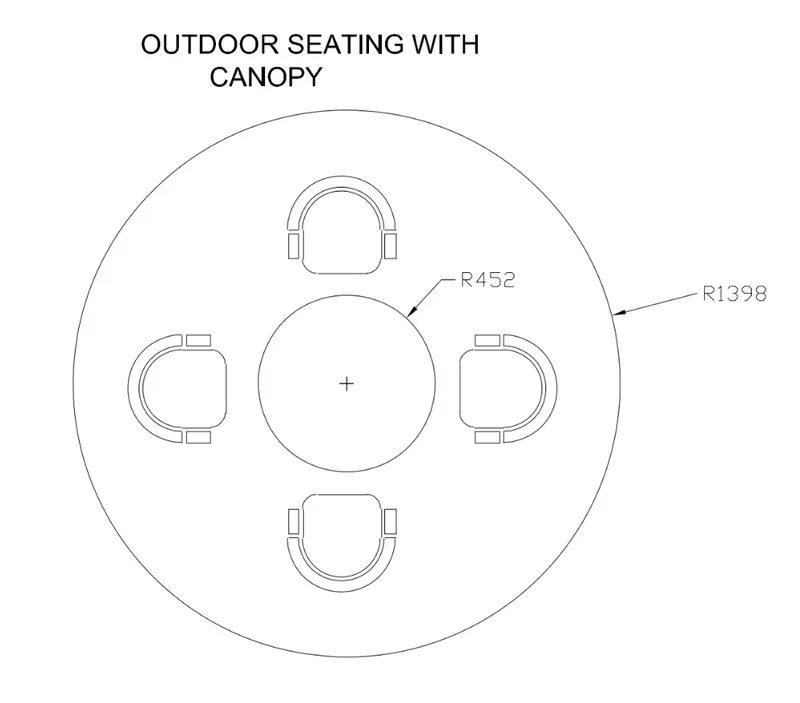
Sketch 2: Outdoor Seating with canopy
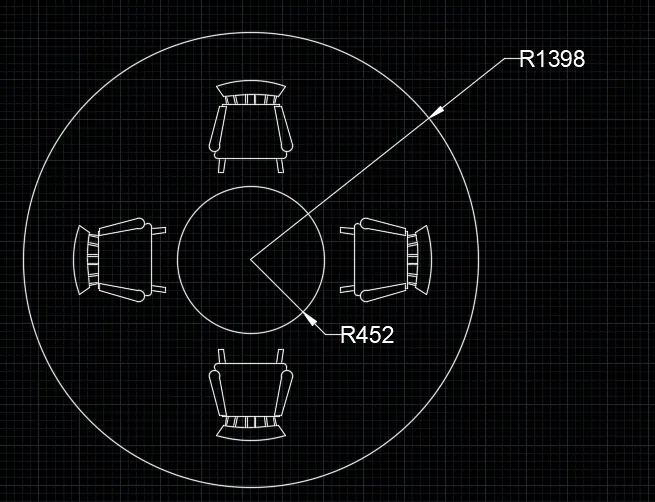
Procedure:
Steps:
- Use cirlcle command and make a cirlce of radius 1398mm
- Now using center in osnap on create one more circle with same center of radius 452mm
- Type dc and enter
- Click design center
- Double click home space planning and select blocks in it
- Now select the chair rocking option and double click
- press enter
- make copy of chairs and rotate it likewise
- place the chair at positions
- Give dimensions as per drawing using dimension command from the command bar
Result:
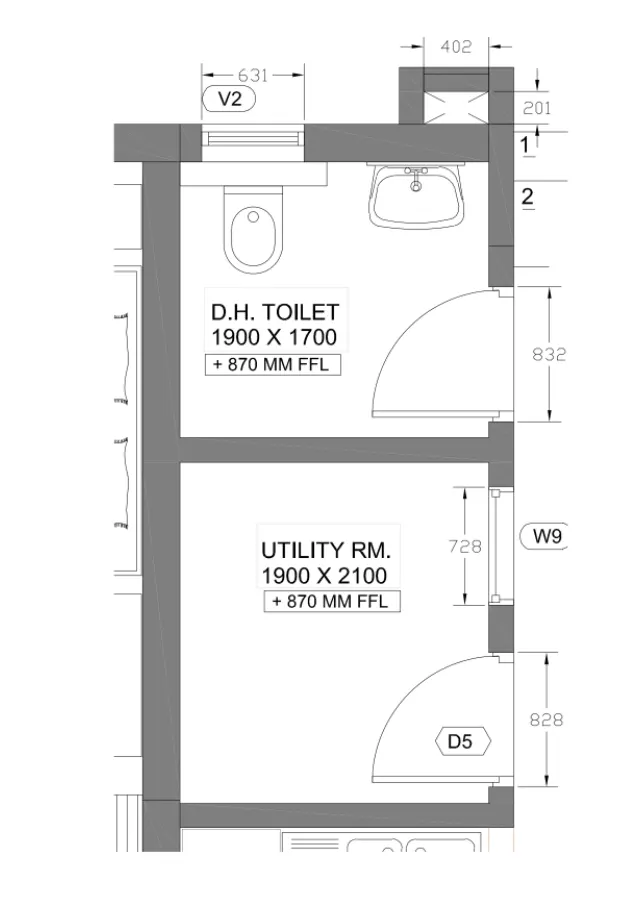
Sketch 3: Toilets and Utility room
Procedure:
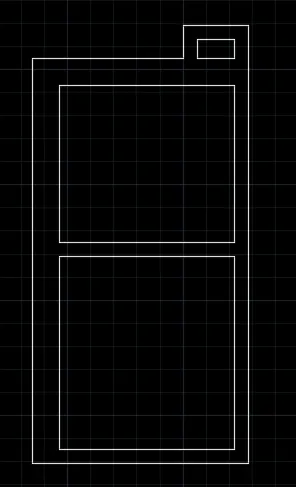
Steps 1: Creating walls
- Draw xline in vertical as well as in horizontal direction
- Now take an oofset of 300mm from vertical xline and 150 mm from horizontal xline
- Take an off set of 1900mm from the verical xline wall and again an offset of 150mm in same direction
- Take an offset of 2100mm from horizontal xline wall and again an offset of 150mm.
- Again in same direction take an offset of 1700mm and again 300m offset in the upper direction
- Take an offset of 201mm from the upper most line and again an offset of 150mm upwards
- Now take an offset of 150mm from right wall towards left and continue it with offsets 402mm and 150mm
- Now trim the unnecessary lines
Step 2: Creating Doors, Windows and Ventilater
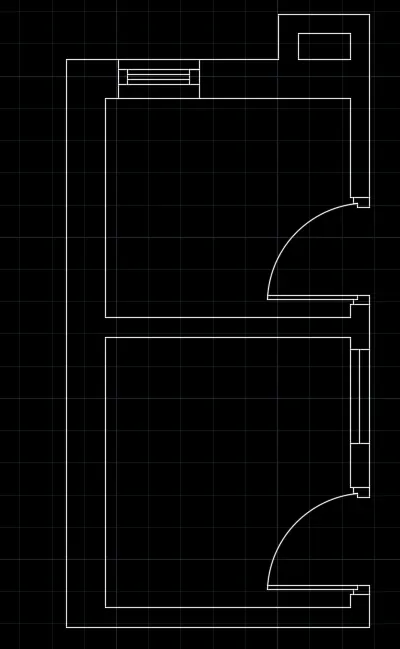
- Use extent for line in horizontal wall and extend it
- Taking an offset of m from the horizontal wall take another offset of 832mm for door and trim it
- Taking an hinge draw door and using arc option make an arc connecting door and wall
- Repeat the above step for another toilet
- Draw window of 728mm in the utility room and ventilator of 631mm in the toilet room
Step 3: Symbols, text and Dimensions
- Now provide Utility symbols from design center and text the details
- Give dimensions as per drawing using dimension command from the command bar
Result: