Creating a Residence Layout, Seating plan, Toilet and Utility room plan using AutoCad
CHALLENGE 4
AIM
Sketch the layout of a residence as shown in the Figure.
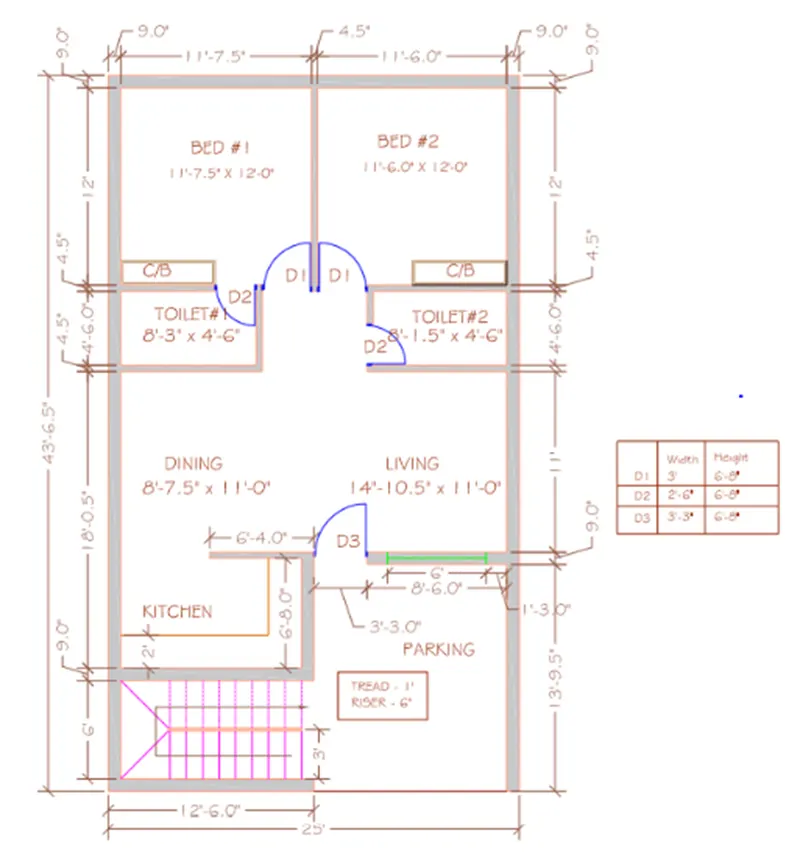
PROCEDURE:
Enter LINE command: L
LINE specify first point: click left mouse button, drag the mouse right and type 25’
Specify next point or [Undo]: drag the mouse UP and type 43’6.5
Specify next point or [Undo]: drag the mouse left and type 25’
Specify next point or [Close Undo]: C
Enter OFFSET command: O [enter]
OFFSET specify offset distance: 9”
Select object to offset or [Exit Undo]: select all 4 lines
Specify point on side to offset [Exit Multiple Undo]: click inside the rectangle
Enter FILLET command: F
FILLET select first object: select vertical side
Select second object: select horizontal side
Enter OFFSET command: O [enter]
OFFSET specify offset distance: 12’
Select object to offset or [Exit Undo]: select the line to create bedroom
Specify point on side to offset [Exit Multiple Undo]: click on the other side
Enter OFFSET command: O [enter]
OFFSET specify offset distance: 4.5”
Select object to offset or [Exit Undo]: select the line to create interior wall
Specify point on side to offset [Exit Multiple Undo]: click on the other side
Enter OFFSET command: O [enter]
OFFSET specify offset distance: 4’6
Select object to offset or [Exit Undo]: select the line to create toilet
Specify point on side to offset [Exit Multiple Undo]: click on the other side
Enter OFFSET command: O [enter]
OFFSET specify offset distance: 4.5”
Select object to offset or [Exit Undo]: select the line to create interior wall
Specify point on side to offset [Exit Multiple Undo]: click on the other side
Enter OFFSET command: O [enter]
OFFSET specify offset distance: 11’
Select object to offset or [Exit Undo]: select the line to create living dining
Specify point on side to offset [Exit Multiple Undo]: click on the other side
Enter OFFSET command: O [enter]
OFFSET specify offset distance: 4.5”
Select object to offset or [Exit Undo]: select the line to create interior wall
Specify point on side to offset [Exit Multiple Undo]: click on the other side
Enter OFFSET command: O [enter]
OFFSET specify offset distance: 6’8”
Select object to offset or [Exit Undo]: select the line to create kitchen
Specify point on side to offset [Exit Multiple Undo]: click on the other side
Enter OFFSET command: O [enter]
OFFSET specify offset distance: 4.5”
Select object to offset or [Exit Undo]: select the line to create interior wall
Specify point on side to offset [Exit Multiple Undo]: click on the other side
Enter FILLET command: F
FILLET select first object: select vertical side
Select second object: select horizontal side
Enter TRIM command: TR
TRIM select object to trim: enter
TRIM: select the lines to be trimmed and create doors
Enter OFFSET command: O [enter]
OFFSET specify offset distance: 1’
Select object to offset or [Exit Undo]: select the line to create steps of stairs
Specify point on side to offset [Exit Multiple Undo]: M
Specify point on side to offset [Exit Multiple Undo]: create steps
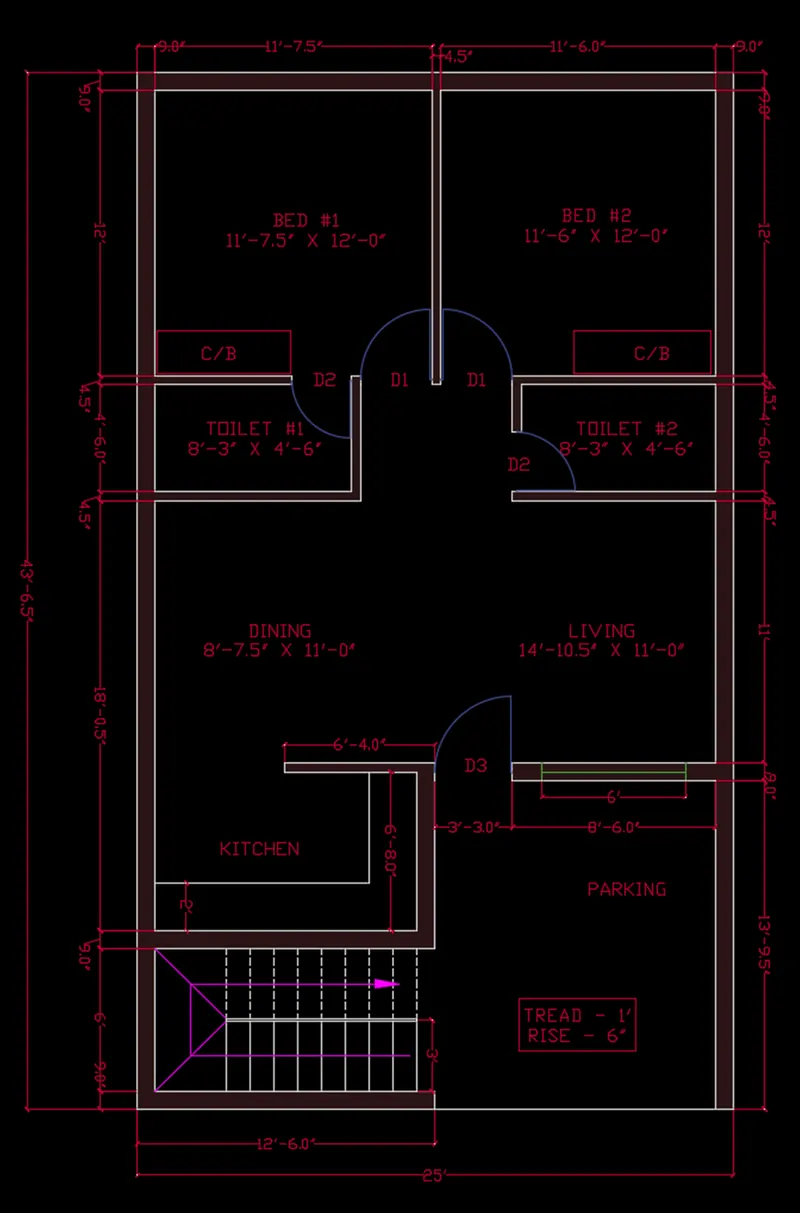
RESULT
AIM
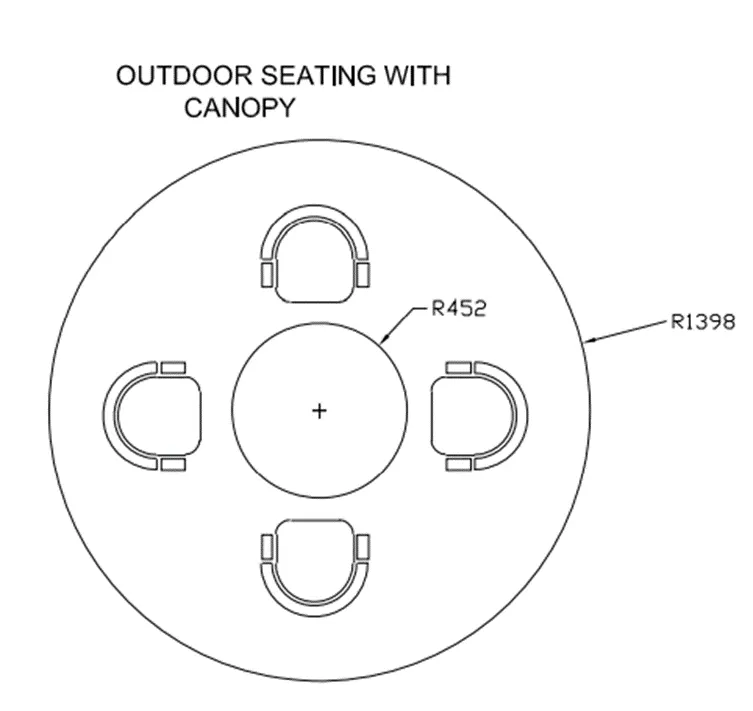
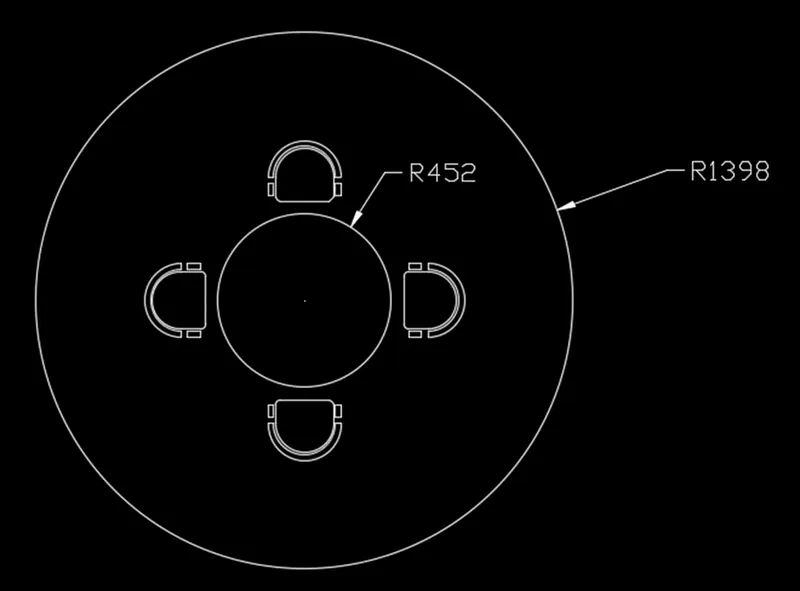
Sketch the seating plan for an outdoor canopy. Assume the dimensions for the seating. Also, consider the dimensions in mm.
PROCEDURE:
Enter CIRCLE command: C
CIRCLE Specify center point for circle: click on the points
Specify radius of circle or[Diameter]: 1398
Enter CIRCLE command: C
CIRCLE Specify center point for circle: click on the same point
Specify radius of circle or[Diameter]: 452
CREATING CHAIR
Enter LINE command: L
LINE specify first point: click left mouse button, drag the mouse right and type 200
Specify next point or [Undo]: drag the mouse up and type 100
Create the second vertical line
Enter FILLET command: F
FILLET select first object or [Undo Polyline Radius Trim Multiple]: R
Specify fillet radius: 150
Select first object: select vertical side
Select second object: select other vertical side
Enter ARRAY command: AR
ARRAY select objects: select the created chair
Enter array type [Rectangular Path Polar]: PO
Specify centre point of array: click the centre of the circle
Select grip to edit array [Associative Base point Items Angle]: I
Enter number of item in array: 4
Exit command
RESULT
AIM
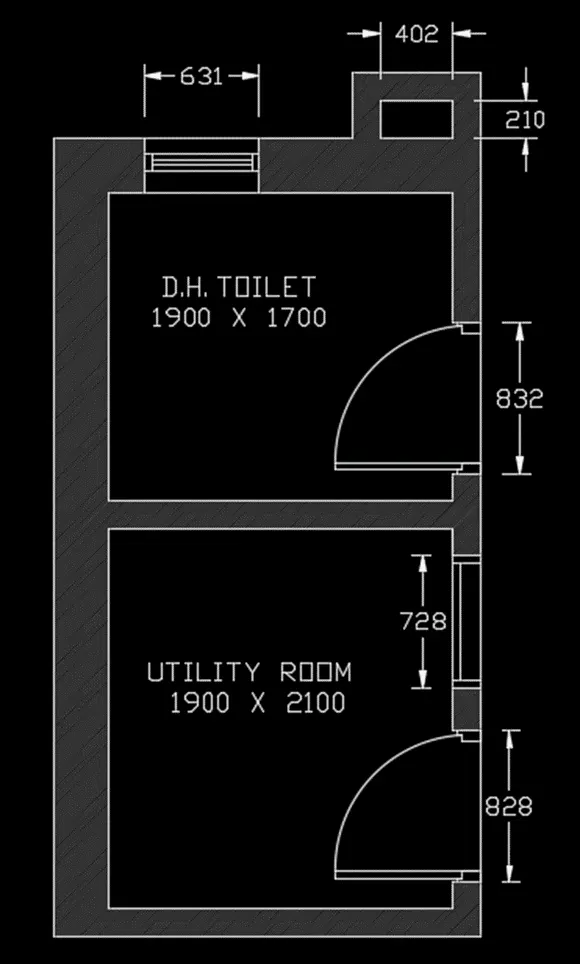
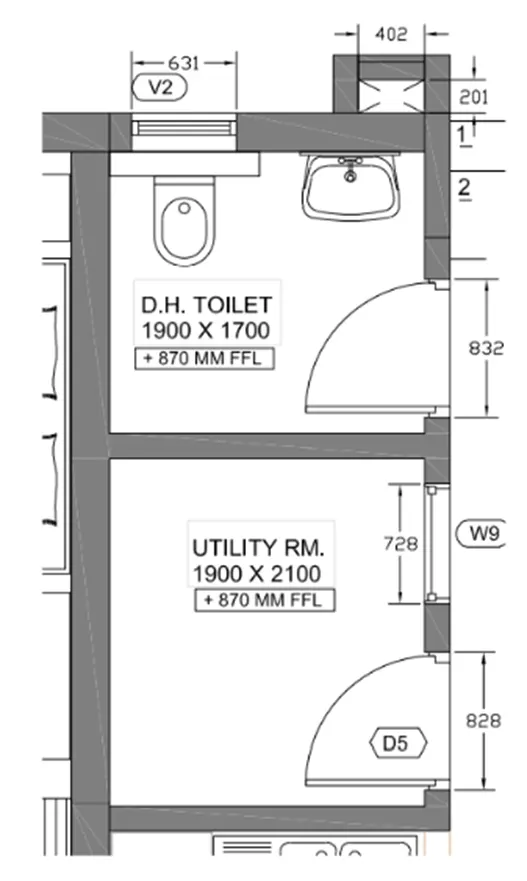
Sketch the part plan for the toilets and utility room. Consider the outer wall thickness as 300mm and inner wall thickness as 150mm.
PROCEDURE:
Enter LINE command: L
LINE specify first point: click left mouse button, drag the mouse right and type 1900
Specify next point or [Undo]: drag the mouse UP and type 1700
Specify next point or [Undo]: drag the mouse left and type 1900
Specify next point or [Undo]: C
Enter OFFSET command: O [enter]
OFFSET specify offset distance: 300
Select object to offset or [Exit Undo]: select for exterior wall
Specify point on side to offset [Exit Multiple Undo]: click outside the rectangle
Enter OFFSET command: O [enter]
OFFSET specify offset distance: 150
Select object to offset or [Exit Undo]: select for interior wall
Specify point on side to offset [Exit Multiple Undo]: click outside the rectangle
Enter OFFSET command: O [enter]
OFFSET specify offset distance: 2100
Select object to offset or [Exit Undo]: select for interior wall
Specify point on side to offset [Exit Multiple Undo]: click other side of the rectangle
Enter TRIM command: TR
TRIM select object to trim: enter
TRIM: select the lines to be trimmed and create doors
RESULT