Creating a Residence Layout, Seating plan, Toilet and Utility room plan using AutoCad
07/06/21
Answers
Challenge 1
STEP-1 opening to the AutoCAD software and entering the workspace.
STEP-2 Setting limits >specify lower-left corner:0,0
STEP-3 specify upper-left corner:100,100
STEP-4 Set>units>Architectural>intersectional scale>inches
STEP-5 Limmax>100,100
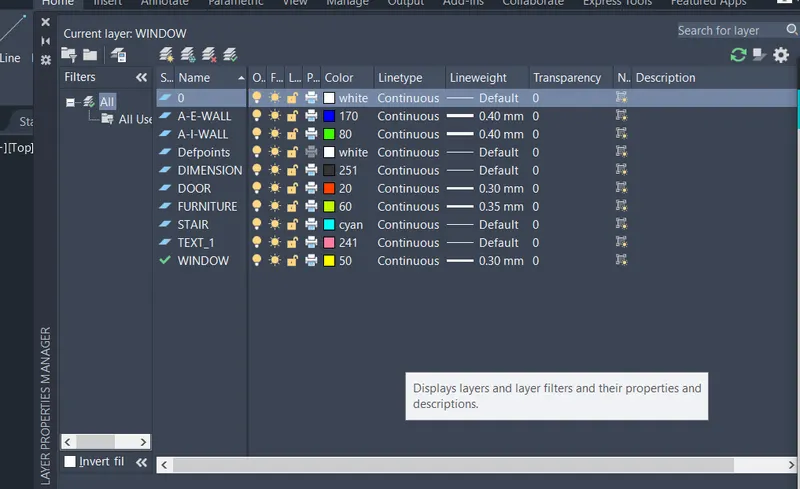
STEP-6 Layer Properties management>create 8 layers for all different functions.
STEP-7 Window,door,E-wall,I-wall,Dimension,Text-1,furniture,Stair these are the layer created.
STEP-8 all different layers line weight and color want to choose accordingly.
STEP-9 XL command> construction line use to draw the outer boundary of the plan.
STEP-10 vertical and horizontal lines help to perform the functions.
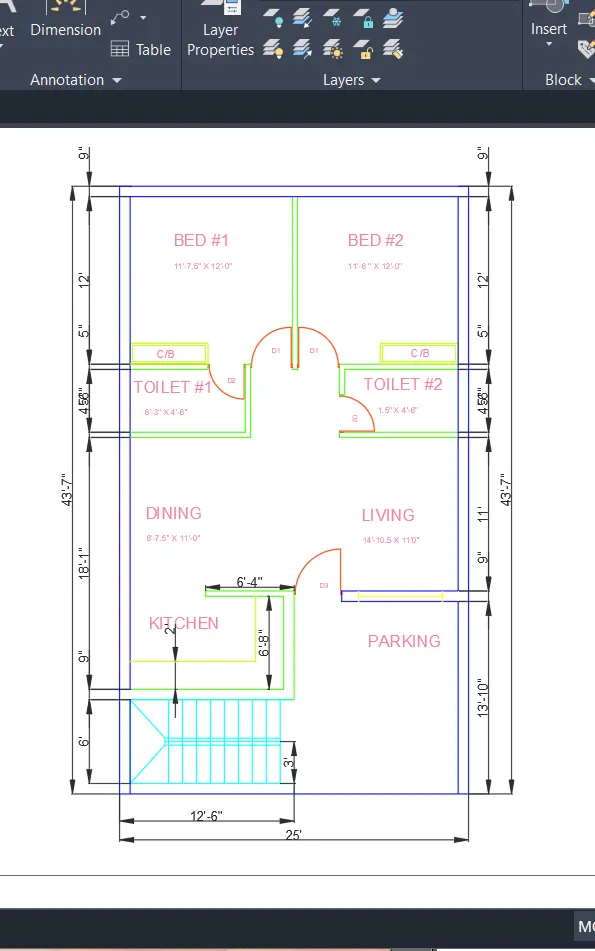
STEP-11 offset command> vertical of 43'6.5'' and 25' of horizontal to form a boundary.
STEP-12 offset command>set the external wall of 9''.
STEP-13 6' of the stairs
STEP-14 18'0.5'' of kitchen and dining room
STEP-15 4'6'' of toilet
STEP-16 12' of bed#1
STEP-17 internal wall of 4.5''
STEP-18 13-17 steps all done by the offset command
STEP-19 top horizontal 11'7.5'' bed#1 and 11'6'' for bed#2 offset command
STEP-20 create the door by the given dimensions
STEP-21 D1-3' by the line command and circle command
STEP-22 D2-2'6'' by the line command and circle command
STEP-23 D3-3.3'' by the line command and circle command
STEP-24 vertical direction measurements,
STEP-25 12' of Bed#2
STEP-26 4'6 of toilet#2
STEP-27 11' of living
STEP-28 13'9.5'' of parking
STEP-29 close the entire object
STEP-30 and save the file for feature use.
Challenge 2
STEP-1 opening to the AutoCAD software and entering the workspace.
STEP-2 Setting limits >specify lower-left corner:0,0
STEP-3 specify upper-left corner:100,100
STEP-4 Set>units>Architectural>intersectional scale>inches
STEP-5 Limmax>100,100
STEP-6 circle command>R452 make a circle
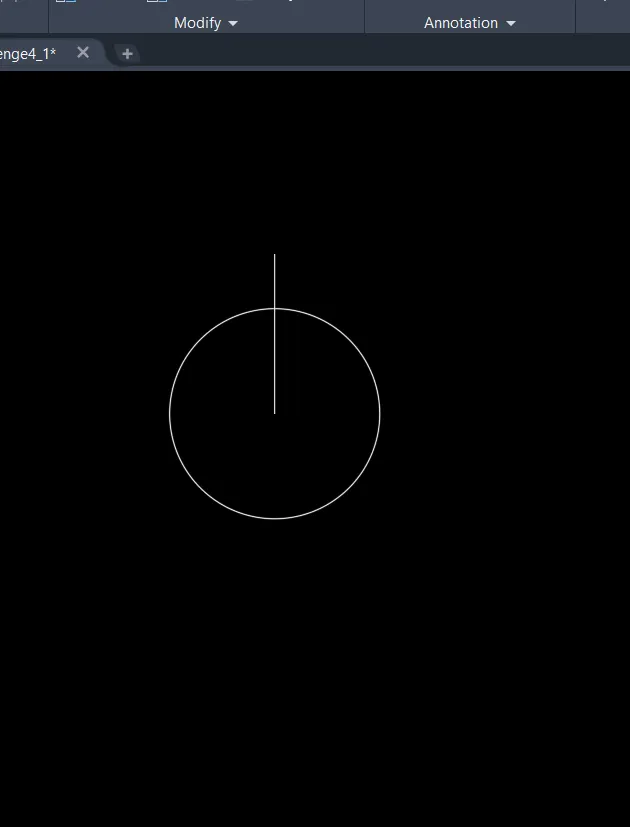
STEP-7 rectangle command> make a square
STEP-8 filet command> for the radius 10 make an arc shape.
STEP-9 offset command> for the 10 and make the two offset
STEP-10 trim command > to trim for the required shape
STEP-11 line command>take the circle center, make the line perpendicular
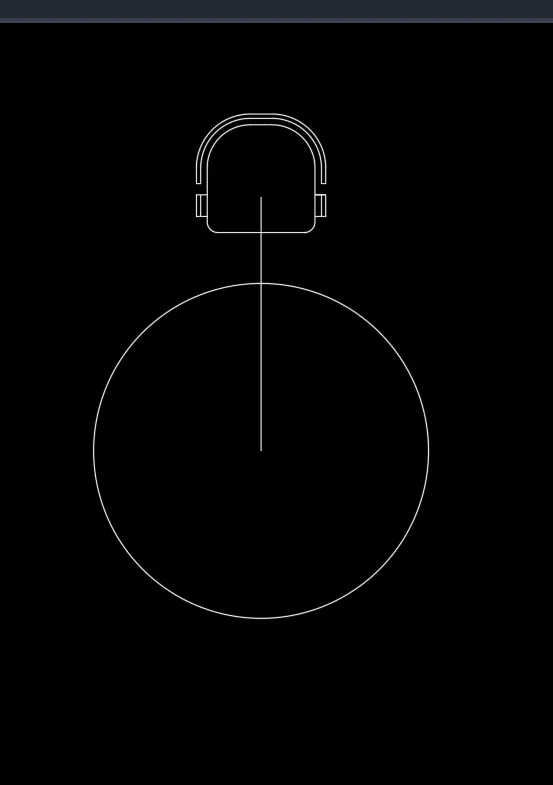
STEP-12 array command>polar form to duplicate 4 items
STEP-13 circle command>radius of 1398
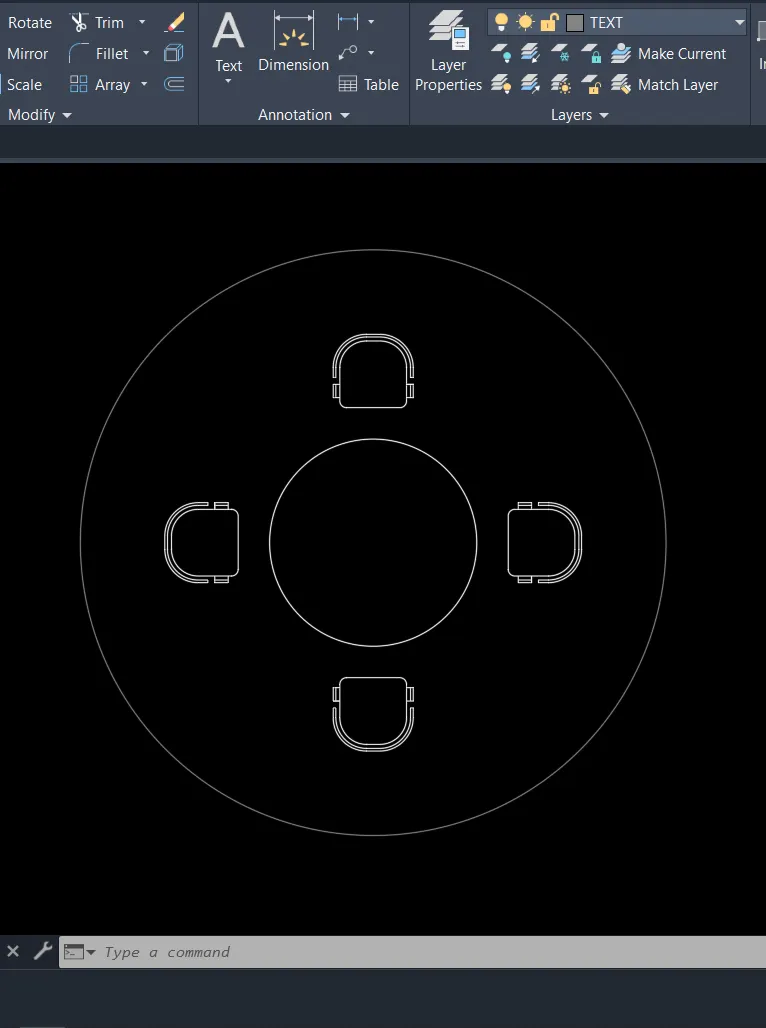
STEP-14 close the entire object
STEP-15 and save the file for feature use.
Challenge 3
STEP-1 opening to the AutoCAD software and entering the workspace.
STEP-2 Setting limits >specify lower-left corner:0,0
STEP-3 specify upper-left corner:100,100
STEP-4 Set>units>Architectural>intersectional scale>inches
STEP-5 Limmax>100,100
STEP-6 Layer Properties management>create 8 layers for all different functions.
STEP-7 Window, door, E-wall, I-wall, Text, Closet are the layer created.
STEP-8 all different layers line weight and color want to choose accordingly.
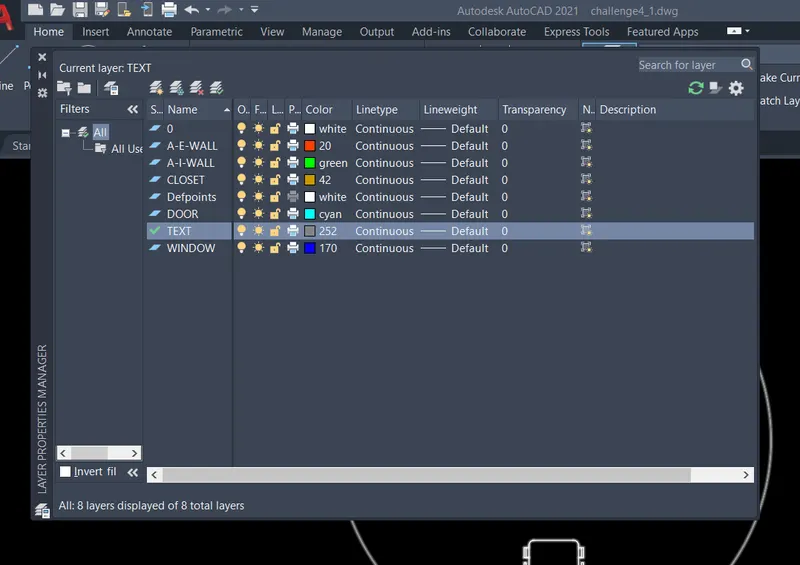
STEP-9 XL command> construction line use to draw the outer boundary of the plan.
STEP-10 vertical and horizontal lines help to perform the functions.
STEP-11 offset command> vertical of 2100 utility room
STEP-12 offset command>set 1700 and make d.h.toilet
STEP-13 line command >width 631 and height 300 and make a window
STEP-14 line command> width and height of 832mm and 828mm make a line in X and Y direction for the creation of the door.
STEP-15 circle command>join the line drawn through the circle.
STEP-16 trim command> to trim the unwanted line.
STEP-17 tool pallet command> to toilet set and handwash closet
STEP-18 all the required items are made and ready to place
STEP-19 place the window, door, and toilet closets
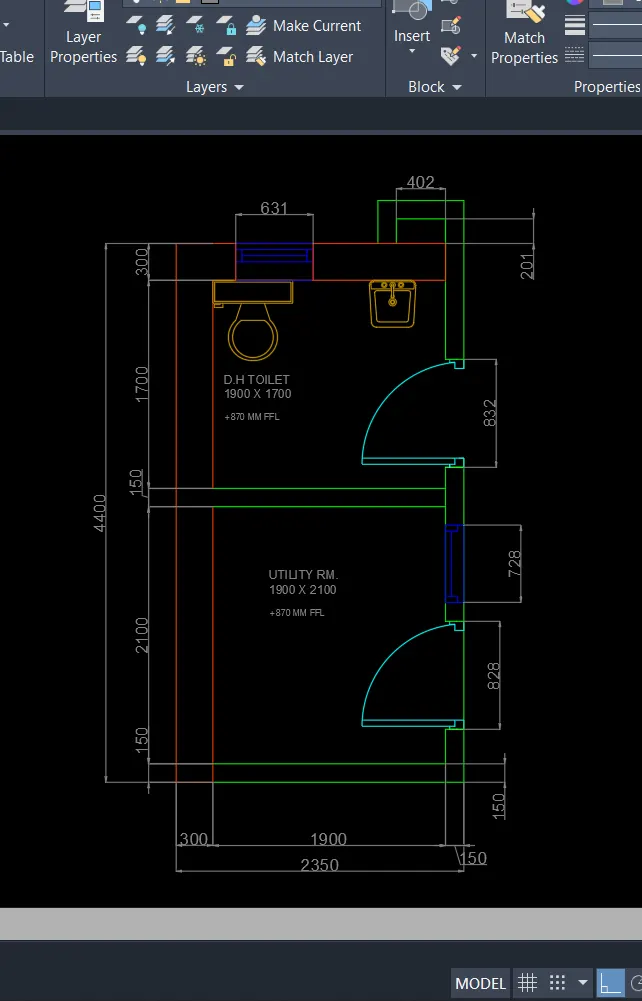
STEP-20 close the entire object
STEP-21 and save the file for feature use.