Creating a Residence Layout, Seating plan, Toilet and Utility room plan using AutoCad
Challenge - 4
Commands used in this challenge are
- Line 'L'
- Copy 'CO' or 'CP'
- PolyLine 'PL'
- Trim 'TR'
- Offset 'O'
- Isometric View
- Text
- Dimension 'DIM'
- Dimstyle 'D'
- MATCHPROP 'MA'
- Move 'M'
- Mirror 'MI'
- Fillet 'F'
- Erase 'E'
- Rotate
- PTYPE
- POINT
- CIRCLE
- RECTANGLE
- units
- Hatch
- Array
Q1) Residence Plan
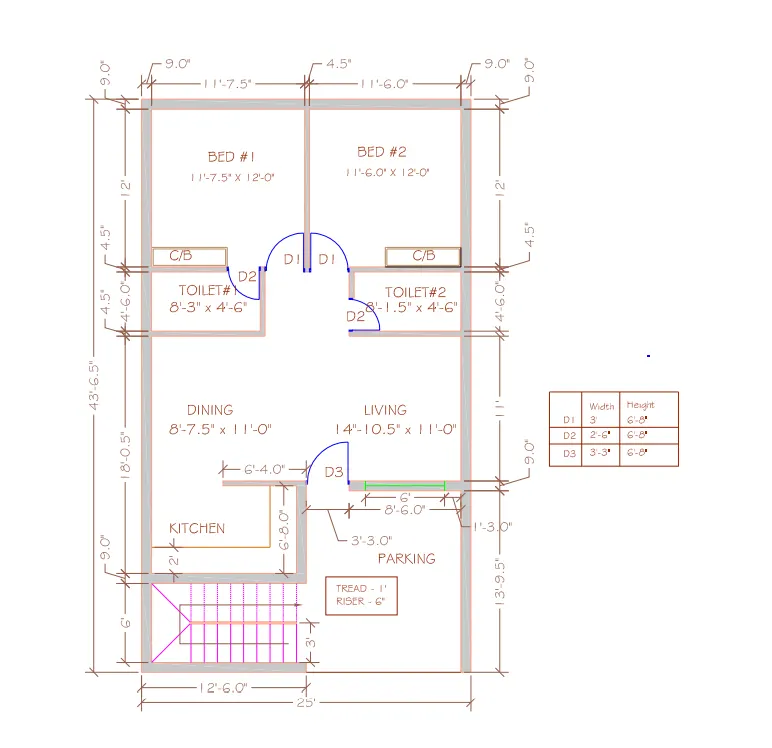
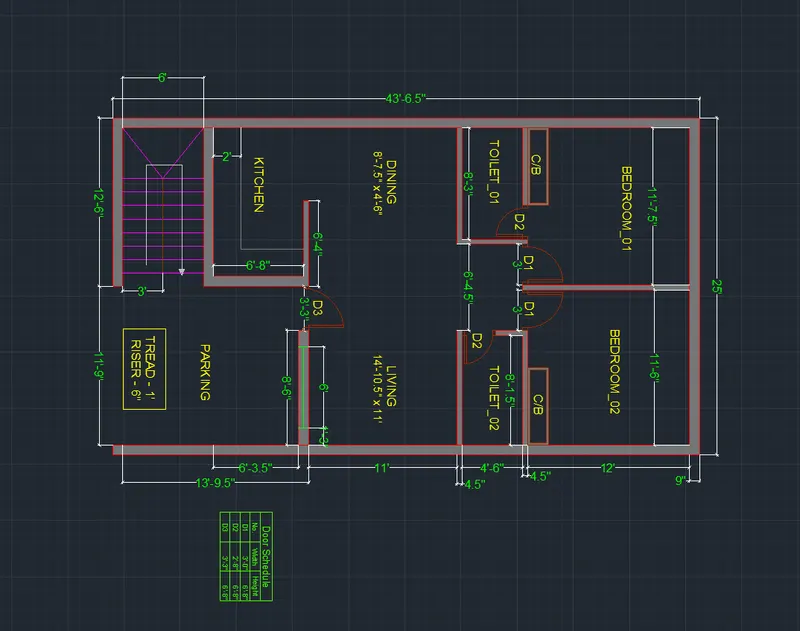
Aim:- Sketch the layout of a residence plan, seating plan for the toilet and utility room in AUTOCAD given in the question.
Procedure:-
1. open the new file and set the unit as 'Engineering'
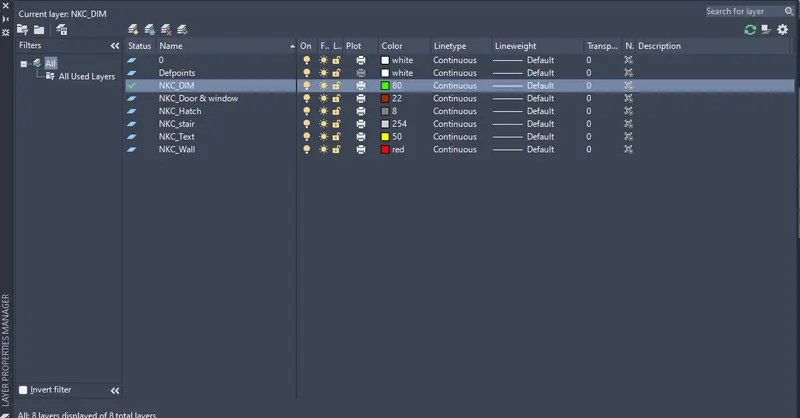
2. Now, create some new layer as per required with a different name, color & line weight, etc
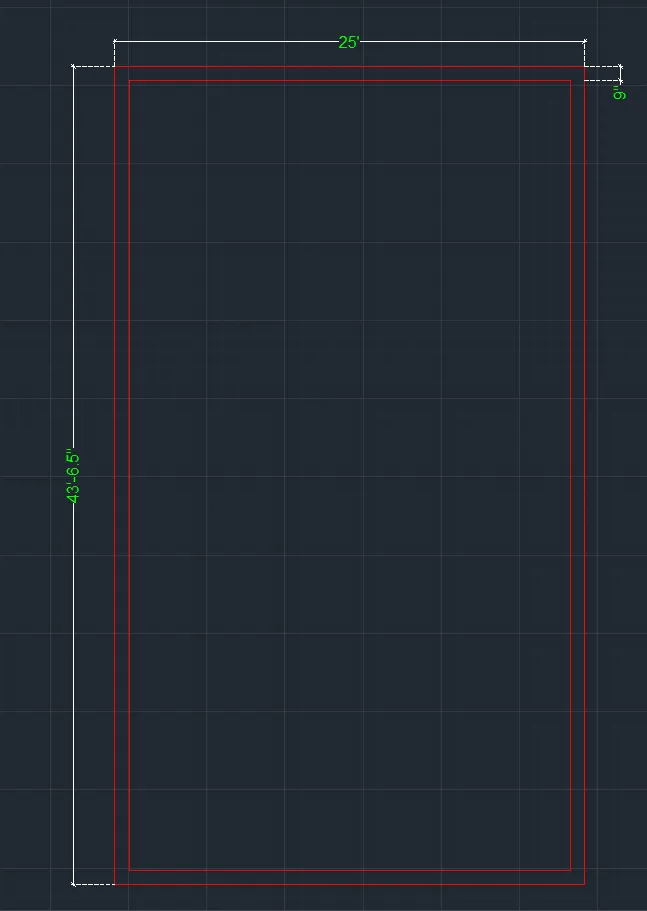
3. line command, draw a rectangle of size 25' x 43'-6.5"
4. using offset command, offset that rectangle in inwards by 9". ESC
. using the offset command, draw the horizontal line as per the given dimension.
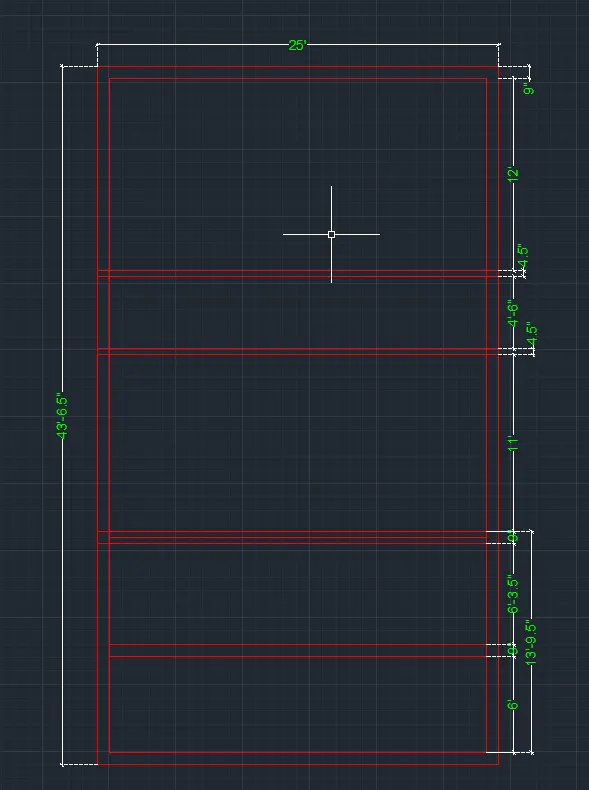
6. Again using the offset command, draw the vertical line as per the given dimension.
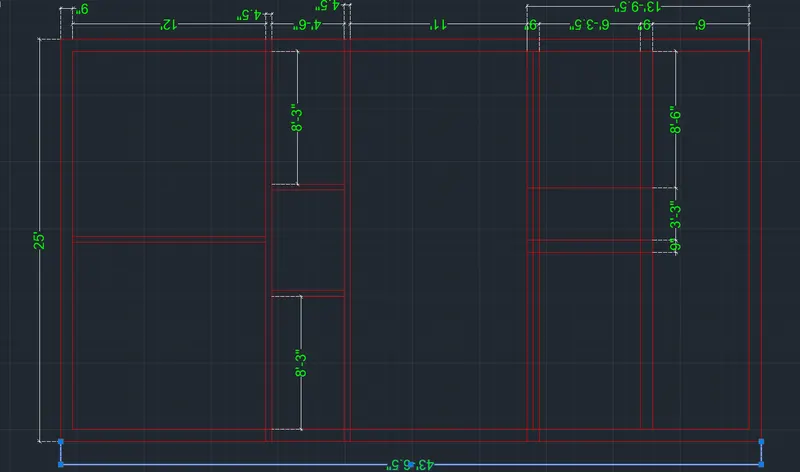
7. using the trim command remove an unwanted line or part. after that using the hatch command, hatch the walls.
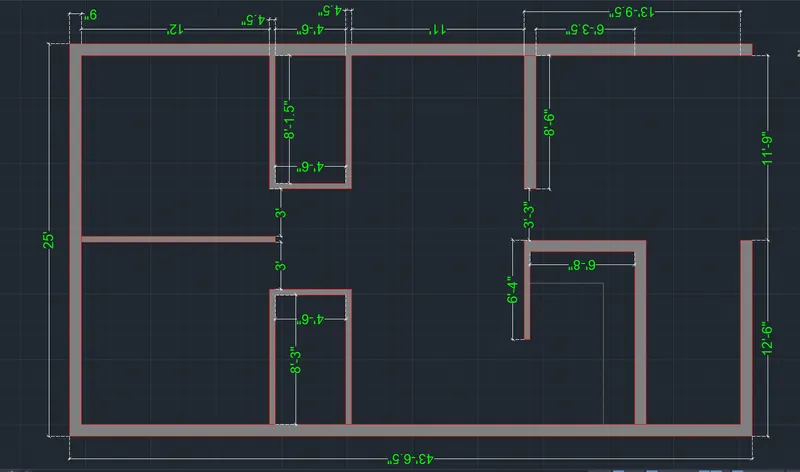
8. now select the door & window layer, and draw the door, window & cupboards. using the table tool I had to make a table for the door schedule.
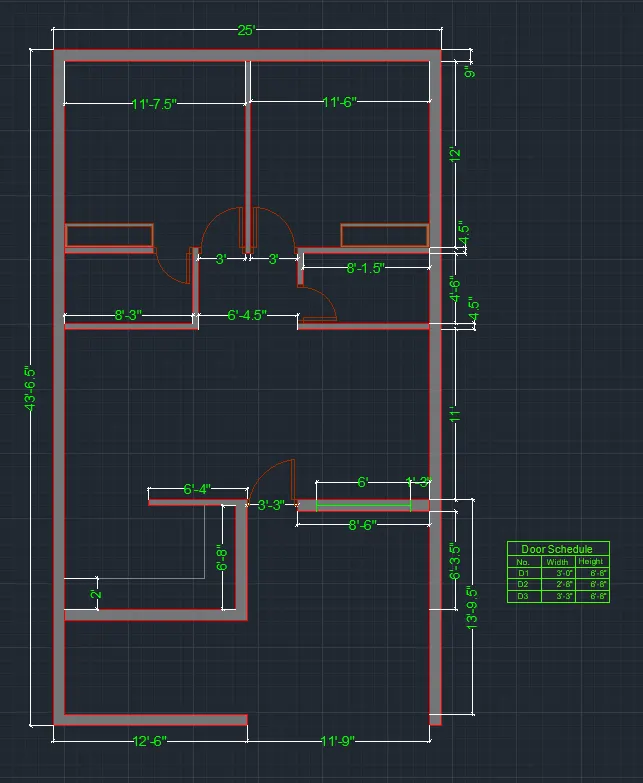
9. select stair layer and draw staircase by using line command & array in the copy command.
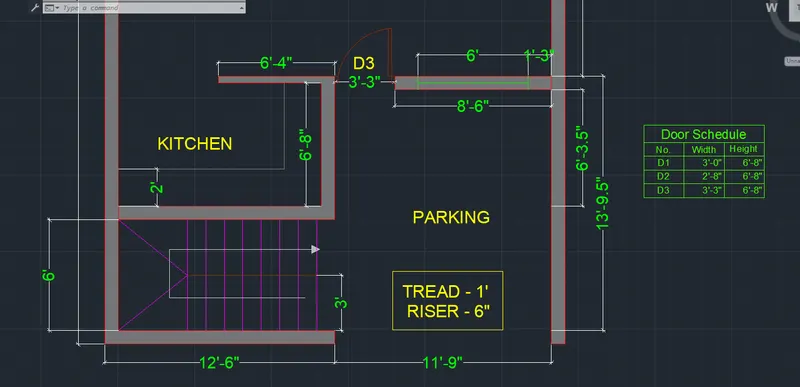
10. Now select the text layer and give individual text for all pard of the plan.
Result:-
Q.2) Sketch the seating plan for an outdoor canopy. Assume the dimensions for the seating. Also, consider the dimensions in mm.
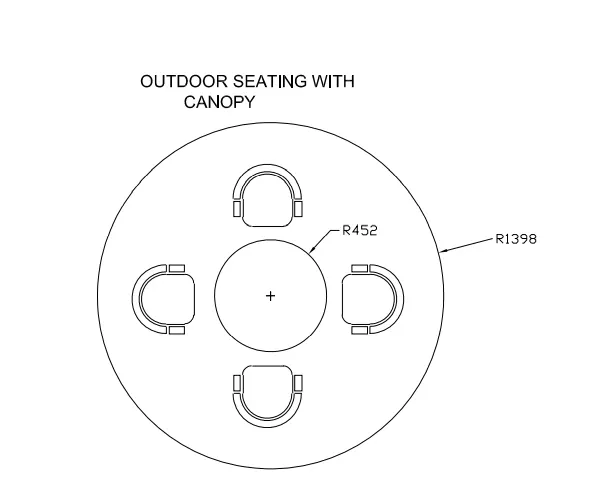
Aim:- Sketch the seating plan for an outdoor canopy, in AUTOCAD given in the question.
Procedure:-
1. open the new file and set the unit
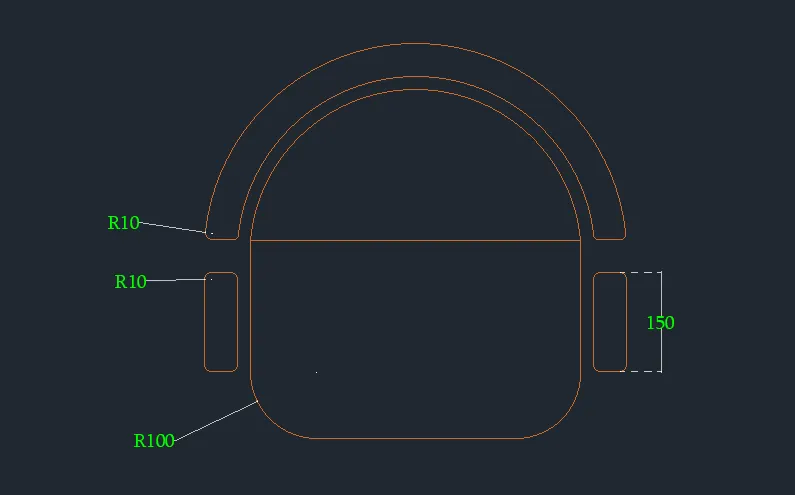
2. using the rectangular command, draw a rectangle of 500mm X 300mm
3. esc
4. Now draw a semicircle above the rectangle of dia 500mm
5. by using the offset command, offset the semicircle at a distance of 20mm & 70mm in the outside direction.
6. draw a rectangle of 150mm X 50mm as shown in the pic. & mirror it on another side.
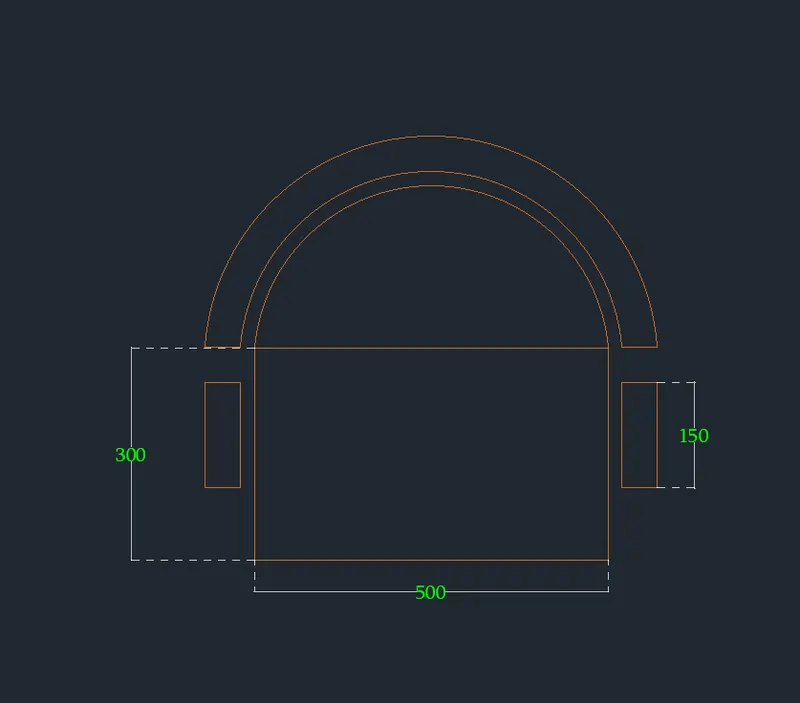
7. Now, using the fillet command, fillet the bottom of both corners of the first rectangle of 100mm. And fillet another corner of radius 10mm as shown in oic.
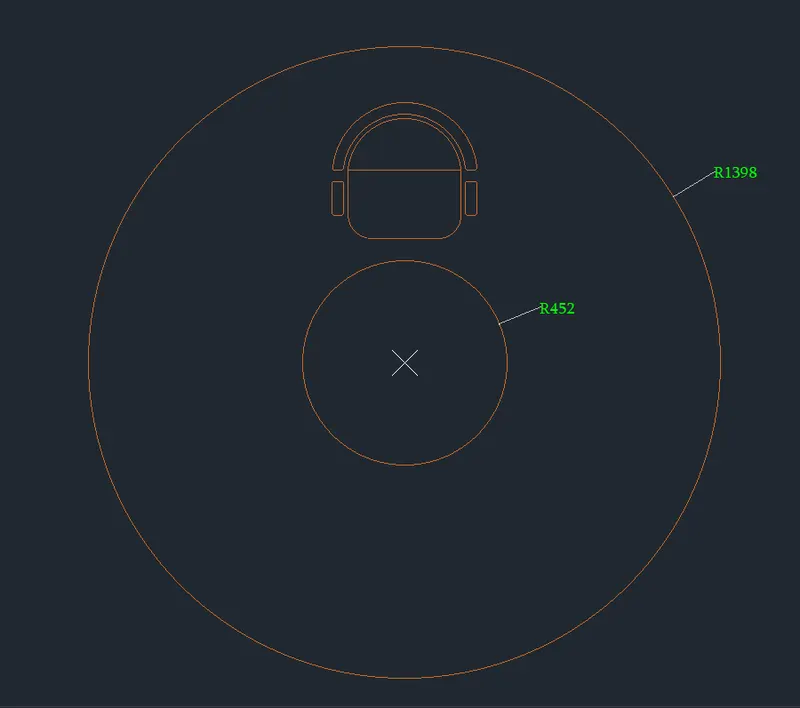
8. by using the circle command, draw two concentric circles of radii 452mm & 1398mm. move the chair as shown in the pic.
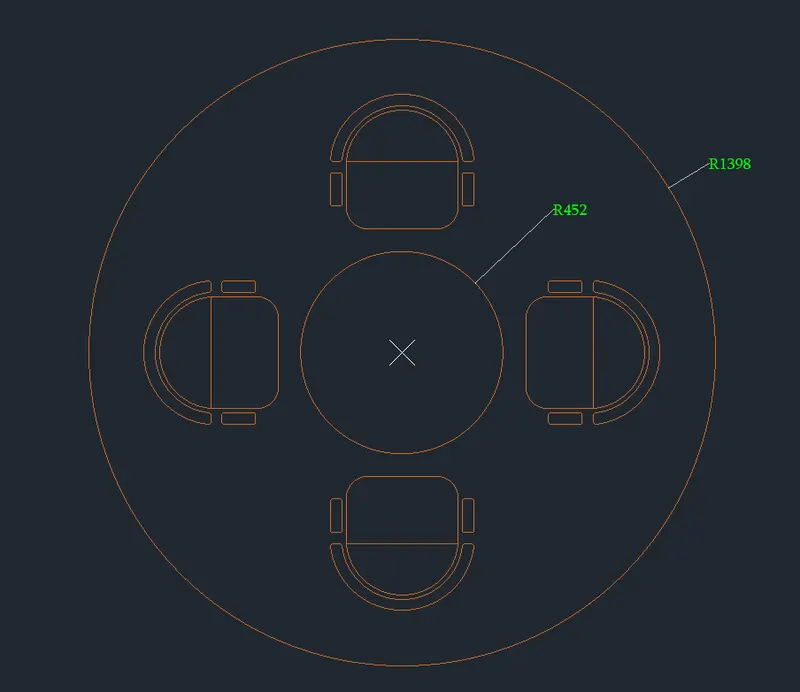
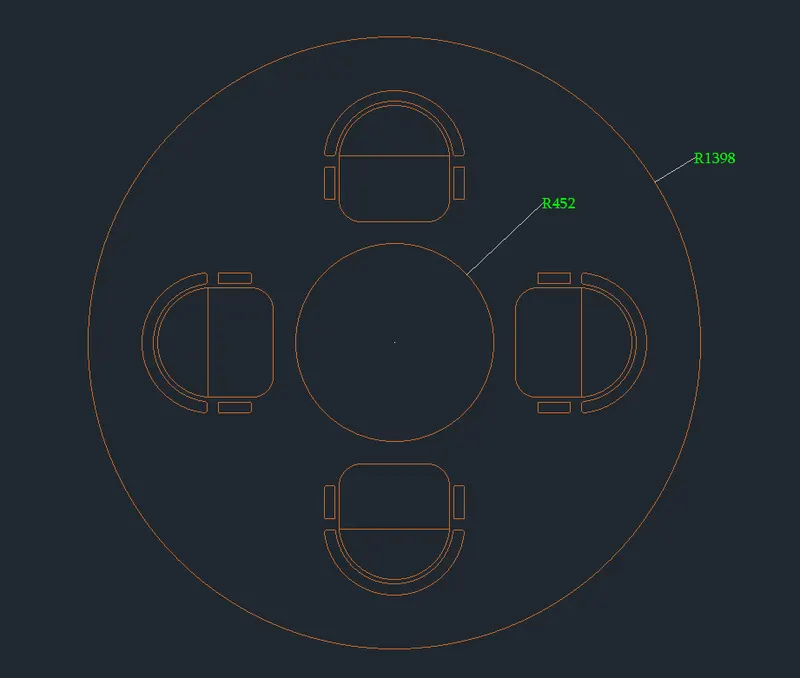
9. now by using the Polar Array command make 4 copies of chairs around the circle of radius 452mm.
Result:-
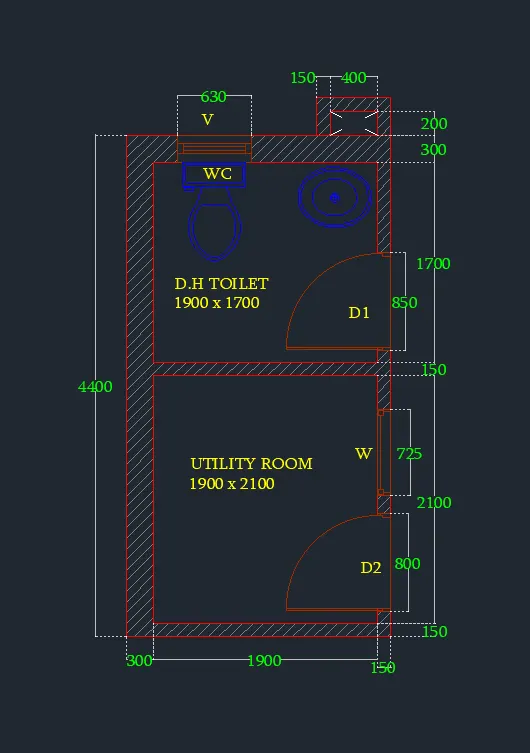
Q.3) Sketch the part plan for the toilers and utility room. Consider the outer wall thickness as 300mm and inner wall thickness as 150mm. Also, assume the missing dimension, Texts, dimensions, and hatches are only for references. Also, symbols for toilets and w/c are also for references.
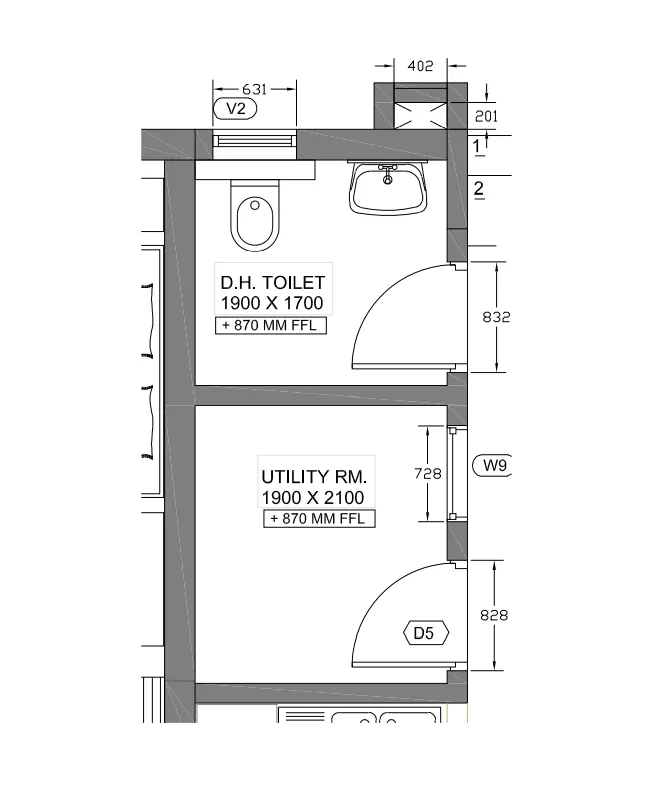
Aim:- Sketch the part plan for the toilers and utility room in AUTOCAD given in the question.
Procedure:-
1. open the new file and set the unit
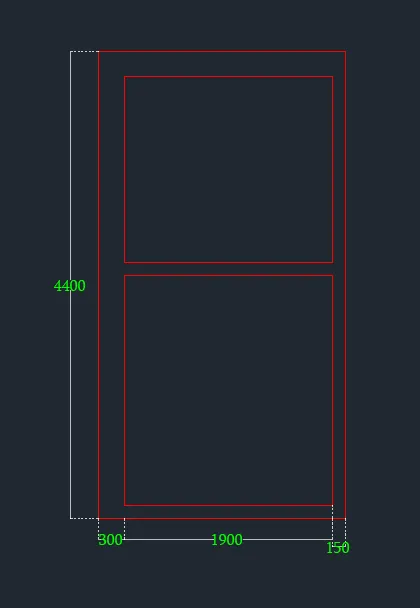
2. using the rectangular command, draw a rectangle of 4400mm X 2350mm and draw the smaller sections of 1900mm X 2100mm & 1900mm X 1700mm.
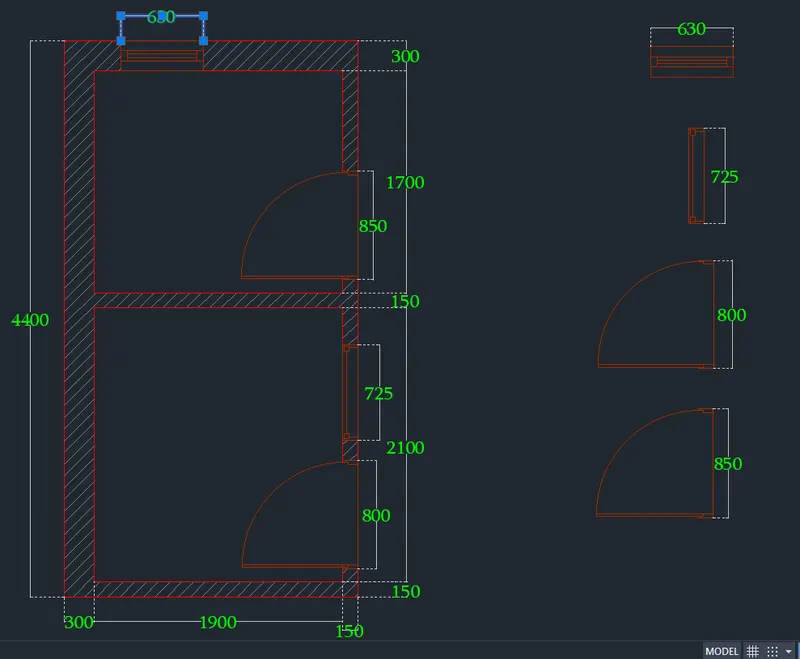
3. by using line, arc, and other commands draw the following doors, window, and ventilation of the following dimensions. And place those doors, window, and ventilation at their respective places.
4. Now, it's time to place WC & sink. for this press CTRL+2 or type 'dc' in command and go as per dc command > sample > en-us > design center > house designer.dwg > blocks, now drag & drop the toilet-top view and sink-top view into the drawing.
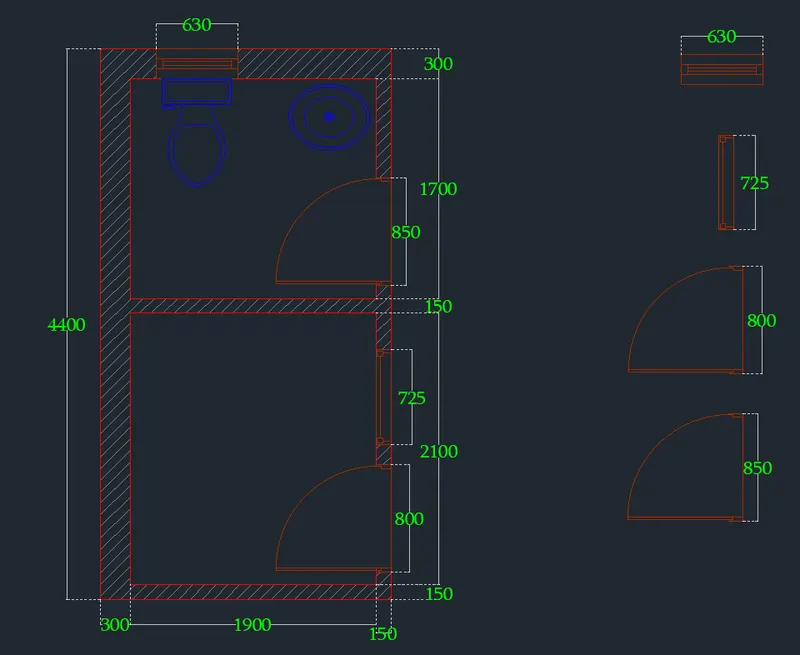
5. using line command draw the duct as per the dimension on the image.
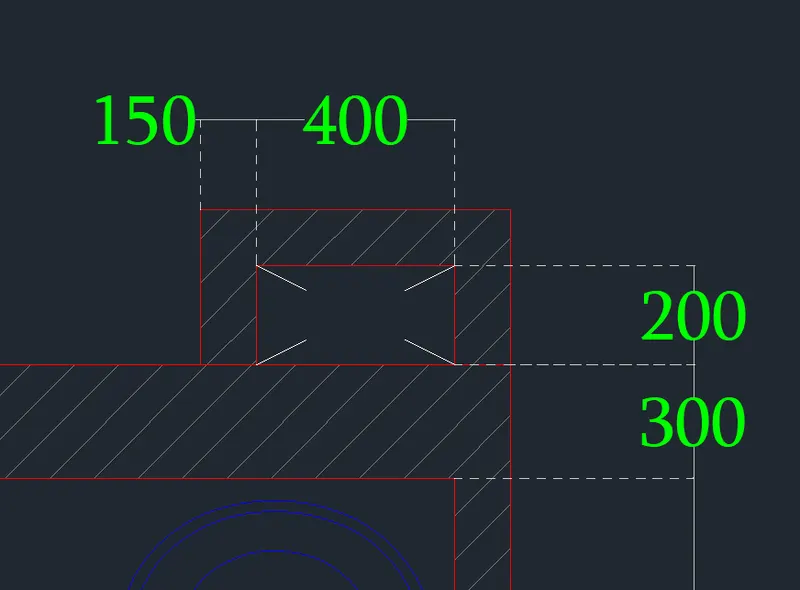
6. Now, using the hatch layer, Hatch the wall after that give all dimensions and text
Result:-