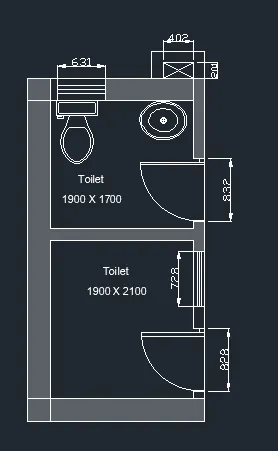
Creating a Residence Layout, Seating plan, Toilet and Utility room plan using AutoCad
Aim: Sketch the layout of a residence plan.
Introduction: Sketch the layout of a residence plan by using Auto Cad
Procedure:
- First read the plan carefully and start the work from left to right and bottom to top
- Take the construction line by typing “XL” in command for vertical “V” for horizontal “H”
- Next set the limits by using command limax 100’,100’
- Next set the unit command “un”<engineering<0’.0.0”<inches
Step1:
To create the external wall
- Take the command offset “O” take the offset of 6’ from the horizontal line
- Next take the offset of 18’0.5” from the horizontal line
- Next take the offset of 4’6.0” from the horizontal line
- Next take the offset of 12’ from the horizontal line
- Next take the offset of 11’7.5” from the vertical line
- Next take the offset of 11’6.0” from the vertical line
- Now take the command “TR” and trim all the extra lines
- Take the offset command give the 9” offset for all the external wall
- All the external walls are created with the offset of 9”
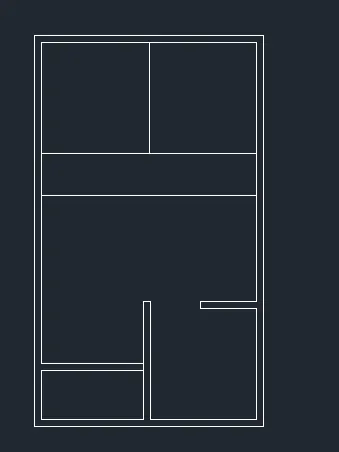
Step2:
To create the internal walls
- Take the offset command give the 4.5” offset for all the internal wall
- All the internal walls are created with the offset of 4.5”
- Now take the command “TR” and trim all the extra lines.
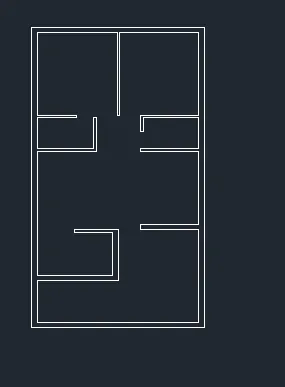
Step3:
To create staircase
- Take the offset of 3’ from the external line to inner side
- Mark a line between the two outer wall from one end to anther end ‘
- Take the offset of 1’ mark the multiple times
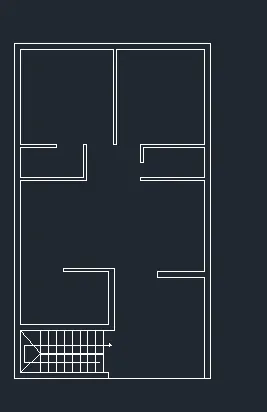
Step4:
To create doors
- Take the line by command “L” and mark a line of .5” next take the height of the door 2’6”
- Take the arc by command “A” mark the end point create an arc
- Take the trim by command “TR” and trim the extra lines
- Repeat the same process for all the doors
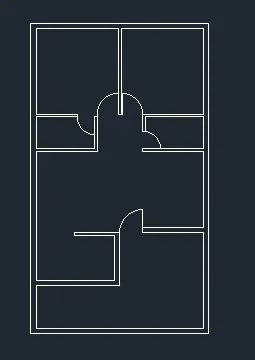
Step5:
To create dimensions
- Go to the command “DIM” for the dimension
- Next take the start point and end point to find to dimension
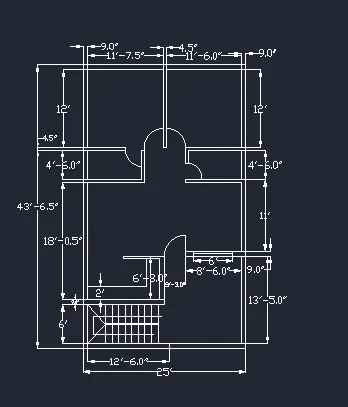
Step6:
To create the text
- Go to the command “TEXT” to create text
- Click the first point give the size of the text and write the text
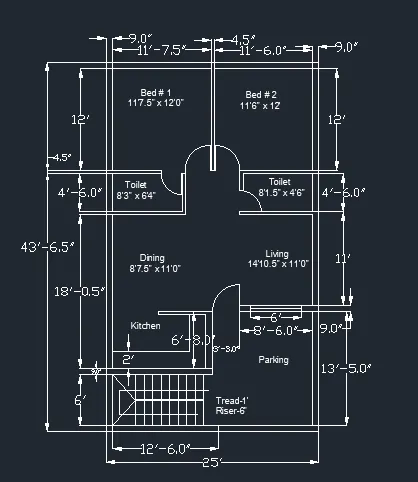
Step7:
To create hatch
- To create a hatch go to the command “HATCH”
- Select the point and click it.
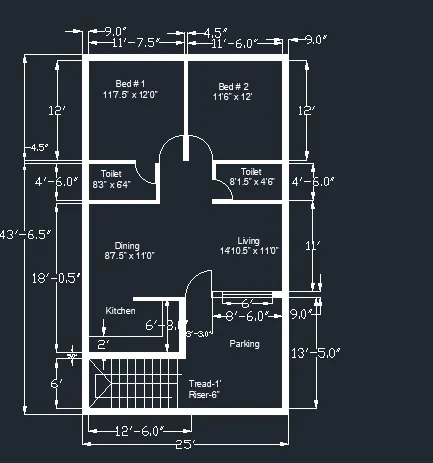
Step8:
To create the layers
- To create the layers go to the command “LAYER”
- Tap on new layer
- Create the no.of layers we need
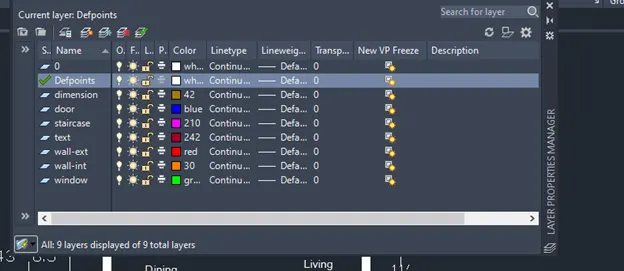
Assing the properties of layers:
- To apply the layer tap on the layer from the ribbon
- Select the object name
- Next tap on the object
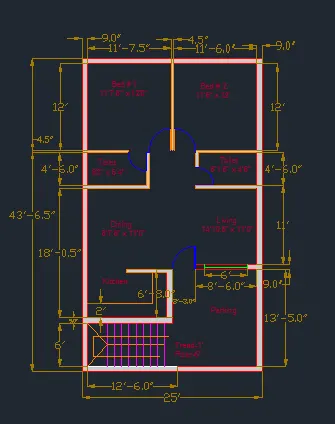
Result:
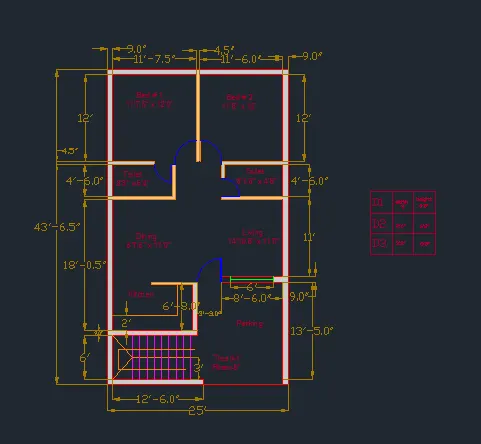
2):
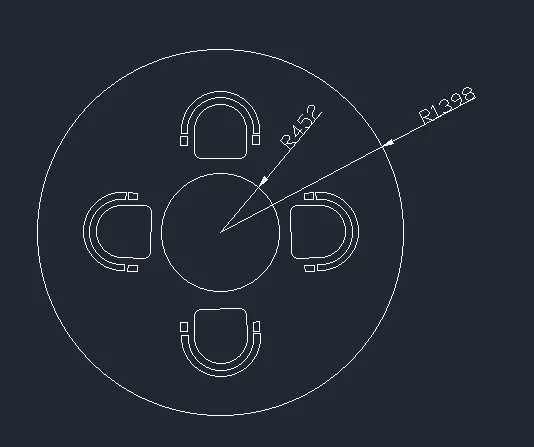
Aim: Sketch the seating plan for an outdoor canopy.
Introduction: Sketch the seating plan for an outdoor canopy by using AutoCad
Procedure:
Step1:
- Take the command circle
- Next take the circle with radius and center
- Draw the circle with the radius 1398
- Draw another circle with the same center with radius of 452

Step2:
- To create chair
- Draw a rectangle of 400x200
- Next take an arc with start, center, end point
- Draw an arc top of rectangle
- Take the offset command
- Make the offset of arc with 50 unit
- Draw another rectangle of 50x70
- Place at below of the arc at the both side
- Take the fillet command
- Make the fillet od 50 unit at bottom edge of the rectangle
- Next trim the extra lines

Step3:
- Placing of chair
- Take the command move
- Select the object with base point and move it to place
- Take the copy command and place it on other side
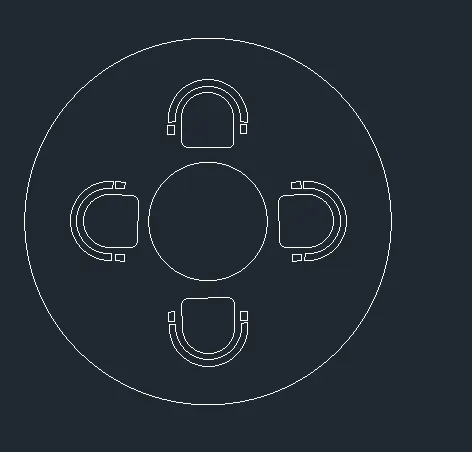
Result:
3):
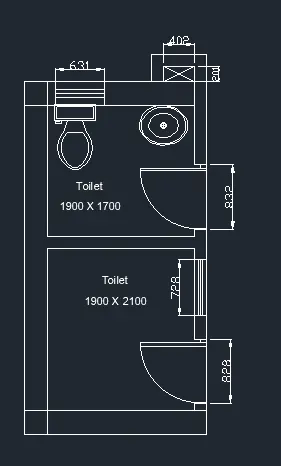
Aim: Sketch the part plan for the toilers and utilities room.
Introduction: Sketch the part plan for the toilers and utilities room.
Procedure:
Step1:
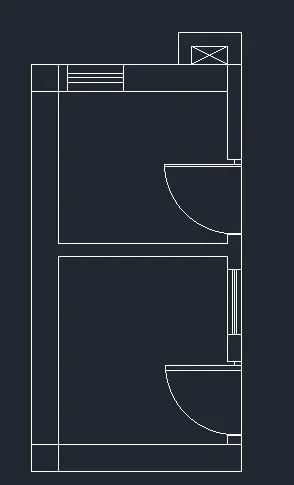
To create external walls and internal wall the toilers and utilities room.
- Take the command xl for the construction line next enter v for vertical line draw a vertical line
- Take the command xl for the construction line next enter h for horizontal line draw a horizontal line
- Take the command offset
- Take the offset of 150 to the horizontal line
- Next Take the offset of 300 to the vertical line
- Now from the horizontal line take the offset of 2100 to top
- next from the vertical line take the offset of 1900 to right
- from the horizontal line take the offset of 1700 to top
- now give the offset of 300 for external wall
Step2:
To create door
- Take the command L for the line
- Next mark the line with unit of 828 for the door
- Now trim for line for the opening
- Mark a 50mm line form the mid of wall
- Now take the circle command
- Make a circle tangent to opposite side pf wall
- Next trim the extra line
- Repeat the same process for the other door
To create windows
- Take the command L for the line
- Next mark the line with unit of 728 for the window
- From the mid of the wall mark a line
- Next take the offset of 25mm at both side of the line
- Repeat the same process for the other window
To draw a duck
- mark a vertical line with unit of 201 from the top external line
- next take the offset of 401 to left side
- now join the line with two end point then offset 150 and fillet it
Step3:
Adding text and dimension
- take the command text and enter the height of text
- next the text and place it
- for dimension type the command “DIM”
- next select the start point and end point to know the dimension
Result: