Creating a Residence Layout, Seating plan, Toilet and Utility room plan using AutoCad
AIM & INTRODUCTION :
i ) AIM :
To Sketch the layout of a residence , the seating plan for an outdoor canopy and the part plan for the toilers and utilities room by assuming or considering all dimensions as reference to sketch .
ii ) INTRODUCTION :
- The layout of a residence is a sketch which shows the house plan in 2d drawaing and it is sketched by using the reqired tools such as line, rectanglar, offset, dimlinear, arc, text etc.
- The seating plan for an outdoor canopy is a outdoor canopy and it is sketched by major tools such as line, circle, mirror, dimradius, arc etc.
- The part plan for the toilets and utilities room is also a 2d drawing of a toilets and utilities of a house which can be sketched by major tools such as line, offset, arc, dimlinear, rectangular etc.
PROCEDURE :
1. Residence Plan:
- The first step is to set a units of the layout as required such as " length type - precision - insertion scale". Ex: In this following residence plan sketch it is set as "Engineering - 0.0 - Inches".
- After the units set, we should type the command limits and needs to set required limits ( between which area we are going to sketch the total plan).
- Then Using the line tool or other tools, we should sketch the whole plan as considered or assumed dimensions.
- The walls of the plan such as interior/exterior should be sketched as required by using the tool called "offset".
- Like this, we should sketch all the required layout with its required tools.
- To give the layers the different colour to differentiate it from the other layers, we should open the layer property and create new layout for each individual layer which we want to colour separately.
- To check or to denote the dimesions of the layout, we should use the tool called " Dimlinear and also we can edit the dimension properties by using the tool " Dimstyle" .
- And also for the text, we should go to the annotation and select the text type and we can aslo edit it, by double clicking it and changing its text height.
- At last save the drawn sketch by the save option from the main menu bar, after saving the drawing we can edit and save the same sketch by using command "qsave" or the shortkey ctrl+s .
2. The seating plan for an outdoor canopy :
- The first step is to set a units of the layout as required such as " length type - precision - insertion scale". Ex: In this following residence plan sketch it is set as "Decimal - 0 - Mm".
- After the units set, we should type the command limits and needs to set required limits ( between which area we are going to sketch the total plan).
- Try sketching the outdoor canopy table by the "circle tool"with required radius.
- Then sketch the seats as a assumed dimention by using the line tool, arc tool, rectangular tool ect.Sketch one seat and use the " Mirror command " to mirror the sketched seat to reflect in direction where it requires.
- At last save the drawn sketch by the save option from the main menu bar, after saving the drawing we can edit and save the same sketch by using command "qsave" or the shortkey ctrl+s .
3. The part plan for the toilers and utilities room :
- The first step is to set a units of the layout as required such as " length type - precision - insertion scale". Ex: In this following residence plan sketch it is set as " Decimal - 0 - Mm ".
- After the units set, we should type the command limits and needs to set required limits ( between which area we are going to sketch the total plan).
- Then Using the line tool or other tools, we should sketch the whole plan as considered or assumed dimensions.
- The walls of the plan such as interior/exterior should be sketched as required by using the tool called "offset".
- Like this, we should sketch all the required layout with its required tools.
- To give the layers the different colour to differentiate it from the other layers, we should open the layer property and create new layout for each individual layer which we want to colour separately.
- To check or to denote the dimesions of the layout, we should use the tool called " Dimlinear and also we can edit the dimension properties by using the tool " Dimstyle" .
- And also for the text, we should go to the annotation and select the text type and we can aslo edit it, by double clicking it and changing its text height.
- At last save the drawn sketch by the save option from the main menu bar, after saving the drawing we can edit and save the same sketch by using command "qsave" or the shortkey ctrl+s .
RESULT :
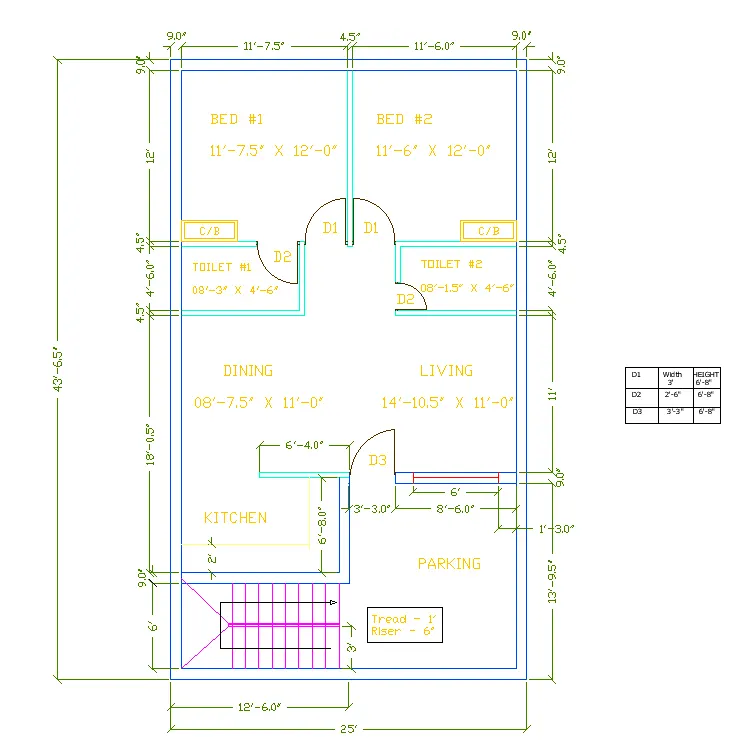
1. Residence Plan:
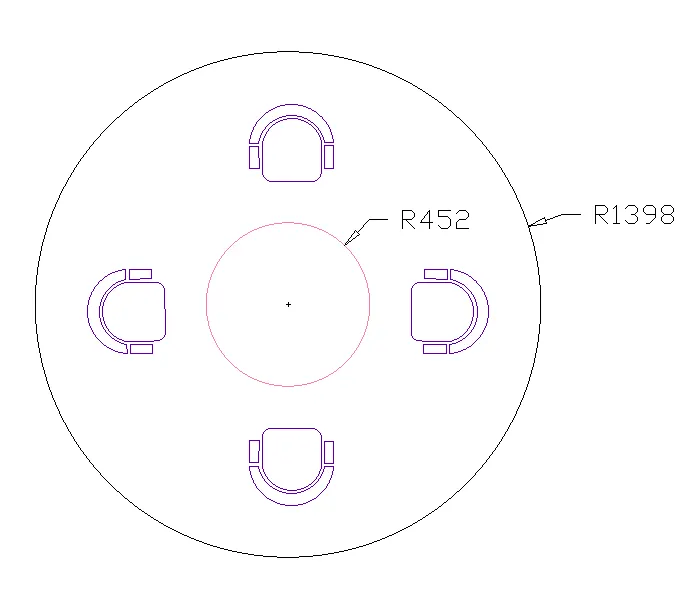
2. The seating plan for an outdoor canopy :
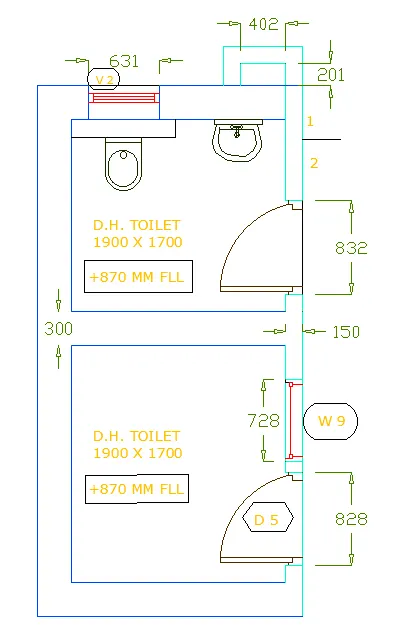
3. The part plan for the toilers and utilities room :