Creating a Residence Layout, Seating plan, Toilet and Utility room plan using AutoCad
C1:
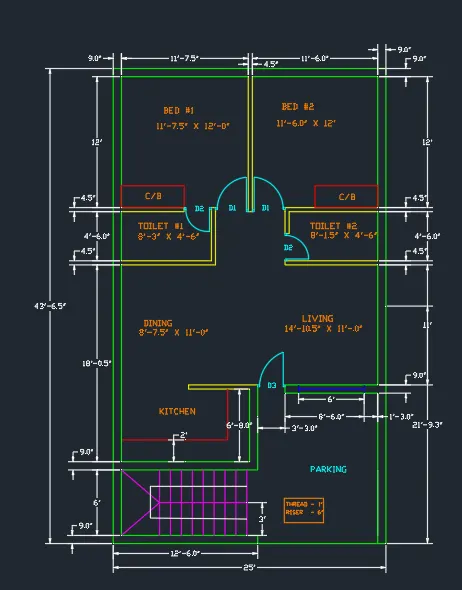
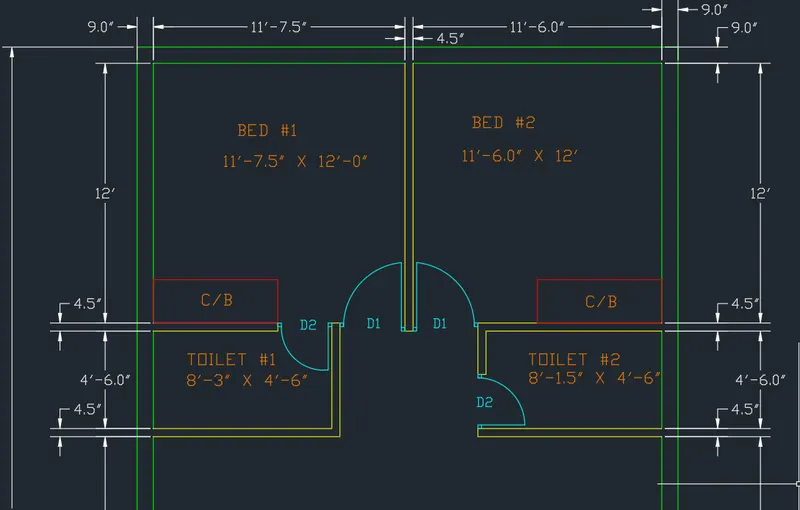
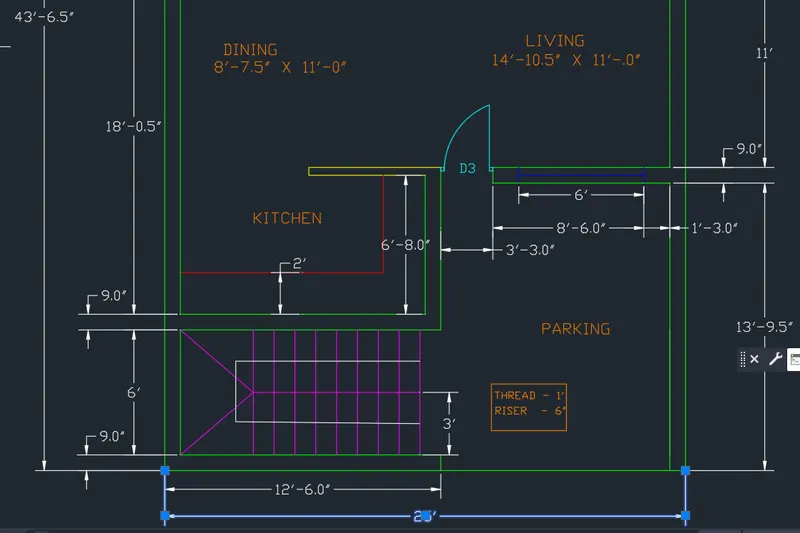
AIM: To sketch the layout of a residence as shown in the Figure 1
PROCEDURE:
STEP 1:
- Open AutoCAD software
- In command prompt type QNEW, set to Imperial,
- In command prompt type UNITS set to ENGINEERING, precision = 0'-0.0"
- In command prompt type LIMMAX to 50',50'
- In command prompt type LIMITS to 0',0' and upper right corner 50',50'
- In command prompt type ZOOM and select ALL and enter
STEP 2:
- In command prompt type XL and Horizontal line and assign anywhere
- In command prompt type OFFSET specify distance as 9" select previous line as to offset in upward
- In command prompt type OFFSET specify distance as 6' select previous line as to offset in upward
- In command prompt type OFFSET specify distance as 9'' select previous line as to offset in upward
- In command prompt type OFFSET specify distance as 18'-0.5" select previous line as to offset in upward
- In command prompt type OFFSET specify distance as 4.5" select previous line as to offset in upward
- In command prompt type OFFSET specify distance as 12'' select previous line as to offset in upward
- In command prompt type OFFSET specify distance as 9" select previous line as to offset in upward
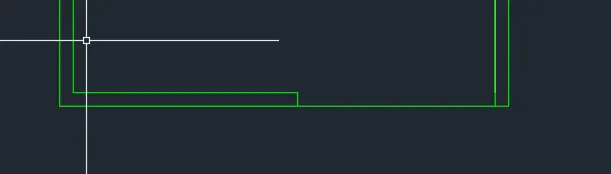
- In command prompt type TRIM and trim the extra XL line also unwanted lines and the diagram looks like this

- In command prompt type OFFSET specify distance as 9'' select vertical XL and offset in right side direction
- In command prompt type OFFSET specify distance as 25' select previous line and to right side
- In command prompt type OFFSET specify distance as 9'' select previous line as to offset in left side
- In command prompt type TRIM, trim the unwanted line the horizontal diagram looks like this
STEP 3: STAIR CASE AND KITCHEN
STAIRCASE
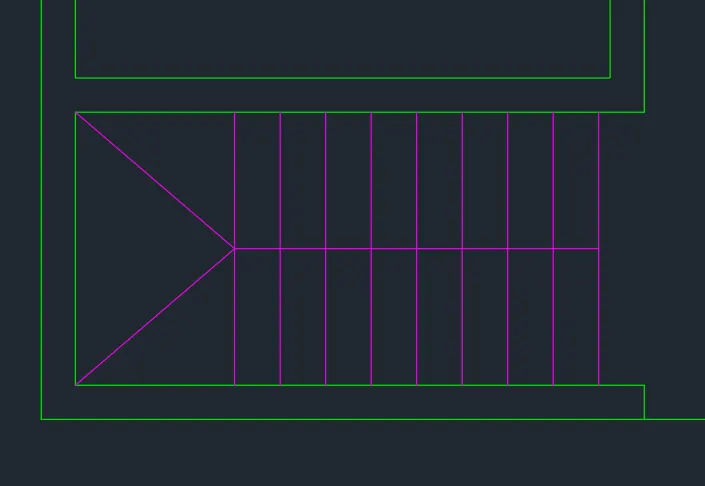
- In command prompt type OFFSET specify distance as 1' from 12'-6.0" to the left and select Multiple and offset 9 threads in right to left
- In command prompt type OBJECT SNAP and click on midpoint and endpoint
- In command prompt type LINE and specify the point at end point of the in to in of 9" wall of staircase at left edge to midpoint of last thread
- In command prompt type LINE specify point at last thread midpoint and extend the line from that point to first thread
KITCHEN
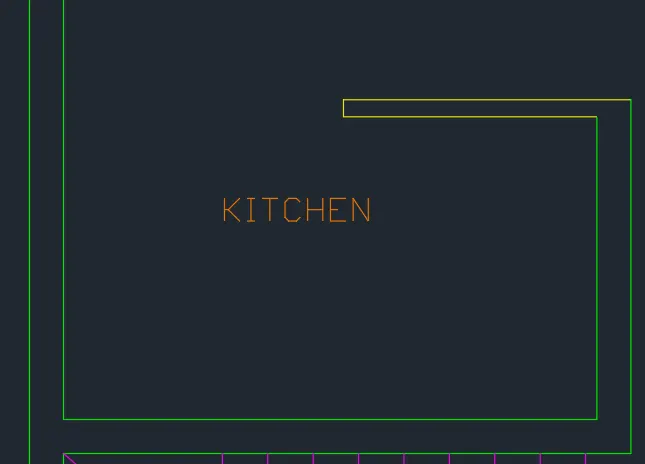
- In command prompt type OFFSET specify distance as 12'-6.0'' and offset from left side out to out wall
- In command prompt type OFFSET specify distance as 12'-6.0'' and offset from left side out to out wall for staircase
- In command prompt type OFFSET specify distance as 12'-6.0'' and offset from left side out to out wall for Kitchen
- In command prompt type OFFSET specify distance as 6'-8.0'' and offset from previous line in kitchen
- In command prompt type OFFSET specify distance as 4.5'' and offset from previous line in kitchen as interior wall
- In command prompt type OFFSET specify distance as 6'-4.0" and offset from out to out right side line of 9" wall in kitchen to the left side
- In command prompt type TRIM, trim after 6'-4.0" line, so we get void and also unwanted lines also
- In command prompt type OFFSET specify distance as 2' and offset from in to in 4.5" wall in bottom of the kitchen to upward
- In command prompt type OFFSET specify distance as 2' and offset from in to in 9" wall in right side of the kitchen to left side
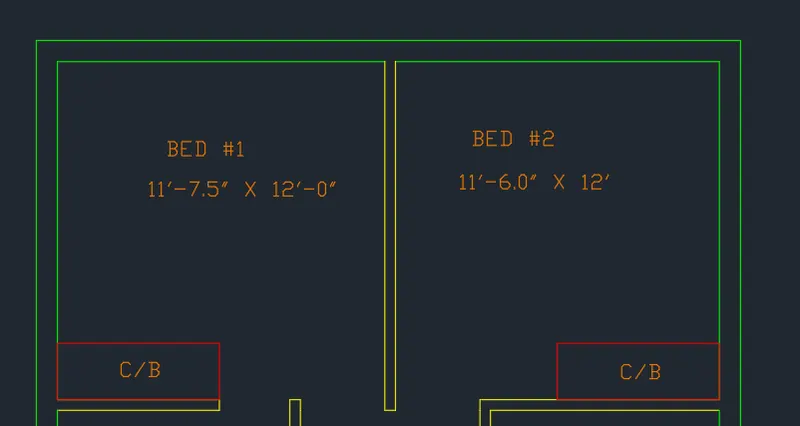
STEP 4: BED #1 and BED #2
- In command prompt type OFFSET specify distance as 11'-7.5'' and offset from left side in-to-in of 9" wall
- In command prompt type OFFSET specify distance as 4.5'' and offset from previous line to get interior wall
- In command prompt type EXTEND, extend the 4.5" line to the nearest line
- In command prompt type OFFSET specify distance as 3' and offset from 4.5" wall of bed 1 & 2
- In command prompt type TRIM, trim the 3" offset for the door and also unwanted lines
- In command prompt type REC, specify point for C/B in bed #1 and dimension as length as 5'-9.0" and width as 2'
- In command prompt type COPY, copy the previous C/B object and paste in bed #2
STEP 5: TOILET #1 AND TOILET #2
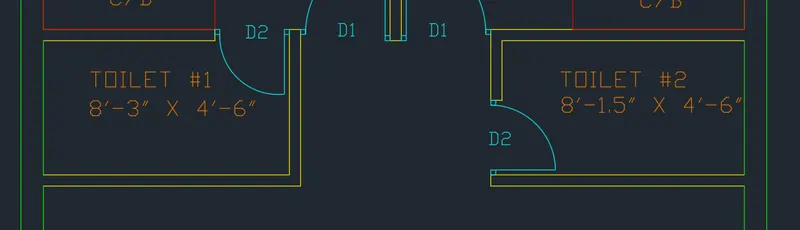
Toilet #1
- In command prompt type OFFSET specify distance as 8'-3'' and offset from left side in-to-in of 9" wall to right side
- In command prompt type OFFSET specify distance as 4.5'' and offset to right side from previous line
- In command prompt type OFFSET specify distance as 4'-6.0'' and offset from left side in-to-in of 9" wall
- In command prompt type EXTEND, extend previous line to wall
- In command prompt type TRIM, trim for the door D2 and unwanted lines
TOILET #2
- In command prompt type OFFSET specify distance as 8'-1.5'' and offset from 9" wall IN-TO-IN
- In command prompt type OFFSET specify distance as 11'-7.5'' and offset from left side in-to-in of 9" wall
- In command prompt type OFFSET specify distance as 4.5'' and offset from previous line
- In command prompt type OFFSET specify distance as 11'-7.5'' and offset from left side in-to-in of 9" wall
- In command prompt type OFFSET specify distance as 2'-6.0" and offset from bottom line
- In command prompt type TRIM, trim for the door D2 and unwanted lines
STEP 6: PARKING
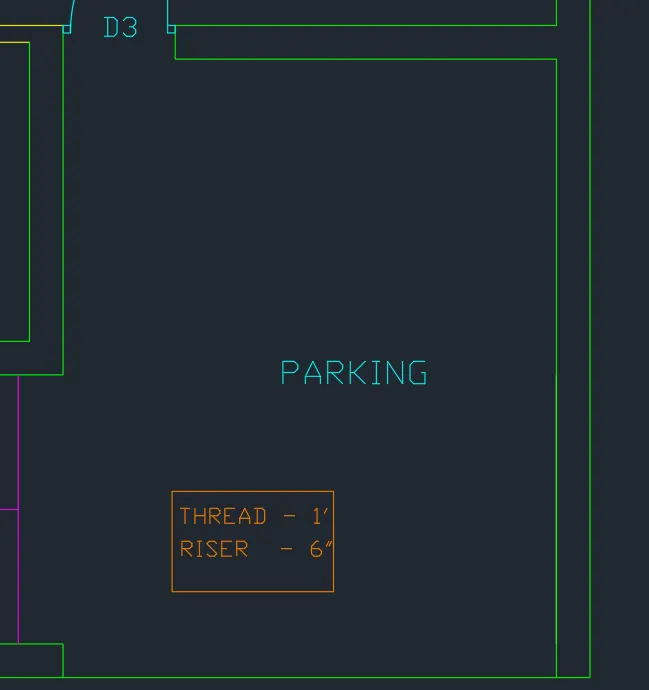
- In command prompt type OFFSET specify distance as 13'-9.5'' and offset from bottom line
- In command prompt type OFFSET specify distance as 9'' and offset from previous line in upward from out to out
- In command prompt type OFFSET specify distance as 8'-6.0'' and offset from right wall of parking area
- In command prompt type TRIM, tirm the area for door D3 and unwanted lines
- In command prompt type OFFSET, specify distance as 1'-3" and offset from in to in of 9" wall from right to left
- In command prompt type OFFSET specify distance as 6" from the previous offset line
- In command prompt type LINE join the midpoint of 6" line to the 1'-3" line midpoint
STEP 7: DIMENSION AND TEXT
- In command prompt type DIMLINE and assign dimension where ever required
- In command prompt type TEXT, to do text where required
RESULT:








C2 :
AIM:
PROCEDURE:
STEP 1:
- Open AutoCAD software
- In command prompt type QNEW, set to METRIC,
- In command prompt type UNITS set to DECIMAL, precision = 0.0, Insertion scale = mm
- In command prompt type LIMMAX to 50',50'
- In command prompt type LIMITS to 0',0' and upper right corner 50',50'
- In command prompt type ZOOM and select ALL and enter
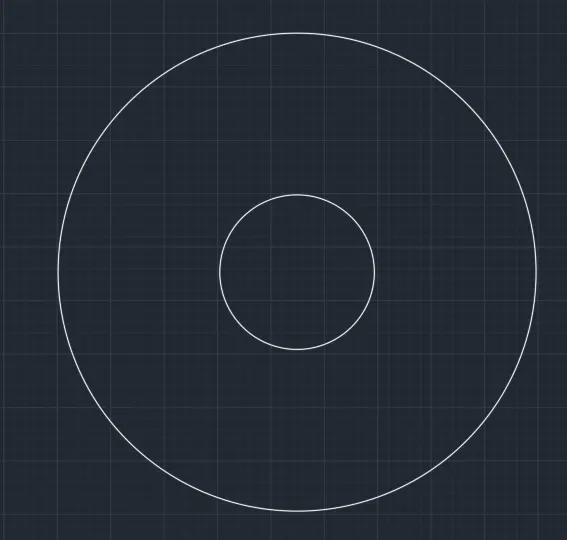
STEP 2: Circles
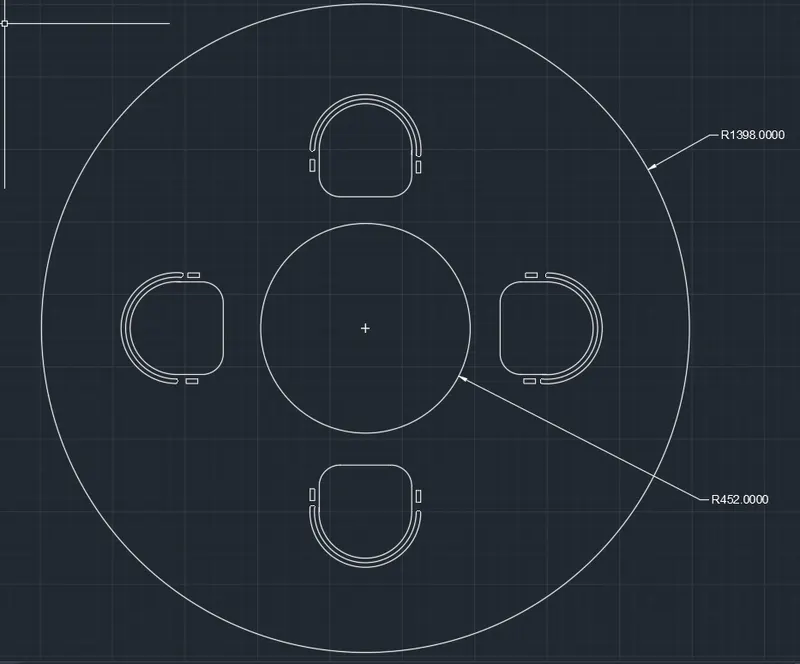
- In command prompt type CIRCLE, specify centre anywhere and assign radius as 452
- In command prompt type CIRCLE, specify centre from previous circle centre and assign radius as 1398
STEP 3: CHAIRS
- In command prompt type CIRCLE, specify centre anywhere and assign radius as requried
- In command prompt type REC, specify point with reference to the centre imaginary line of circle and assign from middle chord of circle to bottom of circle like as shown below
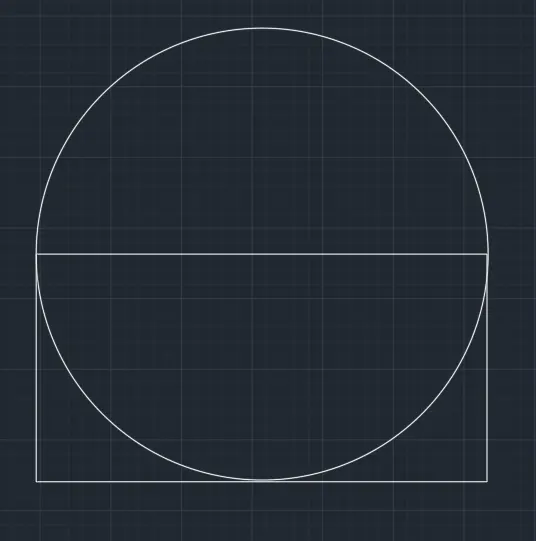
- In command prompt type TRIM, trim the middle chord of circle and bottom semicircle after trimming unwanted lines the object looks like below
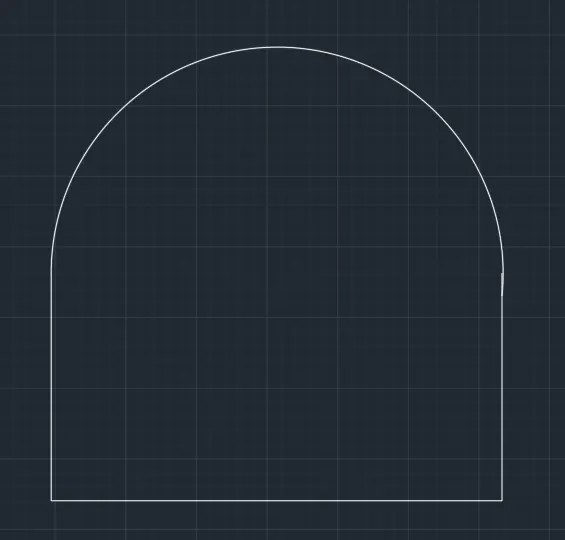
- In command prompt type OFFSET, specify the offset distance as per required and done twice as appeared in below diagram
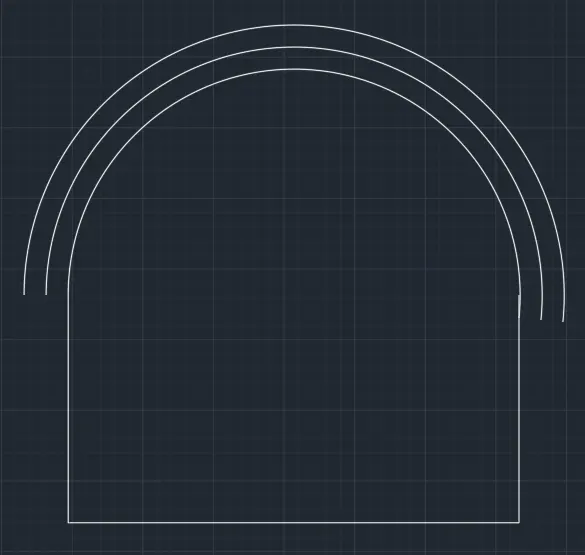
- In command prompt type Fillet, specify the lines and radius as 90
- From the modify ribbon under fillet, blend curve option is selected and blend of offset curves done and final output is below
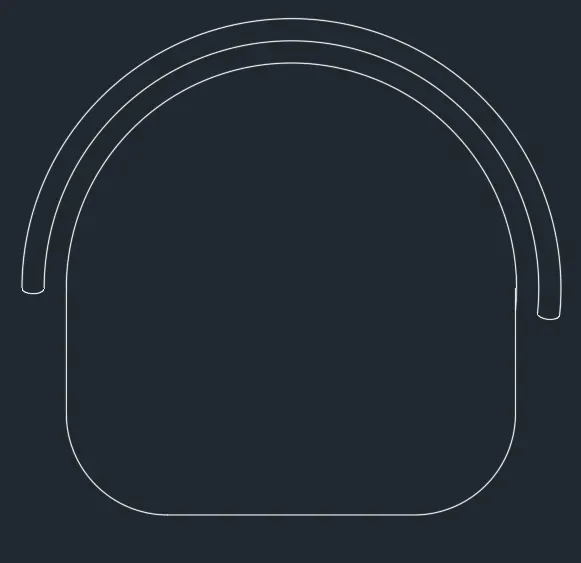
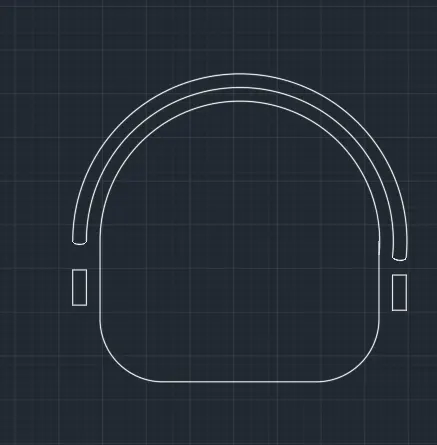
- In command prompt type REC, specify point below the blend curve and make rectangle that looks like handles as shown below on both side
- Desired chair is drawn clearly below
STEP 4: SEATING ARRANGEMENT
- The chair is copied into required numbers and placed with the help of commands move, copy and rotate.
RESULT:
C3:
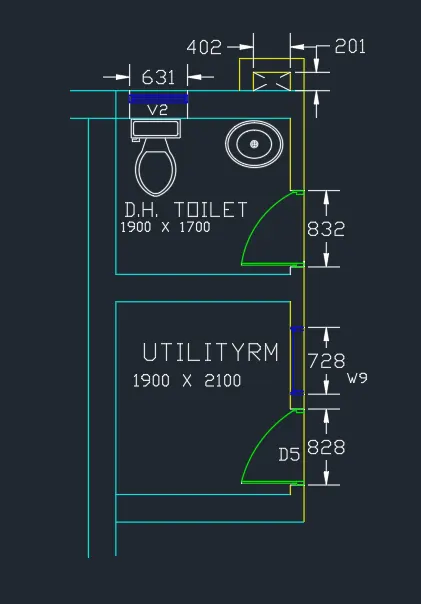
AIM: To sketch the part plan for the toilers and utilities room
PROCEDURE:
STEP 1:
- Open AutoCAD software
- In command prompt type QNEW, set to METRIC,
- In command prompt type UNITS set to DECIMAL, precision = 0.0, Insertion scale = mm
- In command prompt type LIMMAX to 50',50'
- In command prompt type LIMITS to 0',0' and upper right corner 50',50'
- In command prompt type ZOOM and select ALL and enter
STEP 2: EXTERIOR AND INTERIOR WALLS
HORIZONTAL LINES
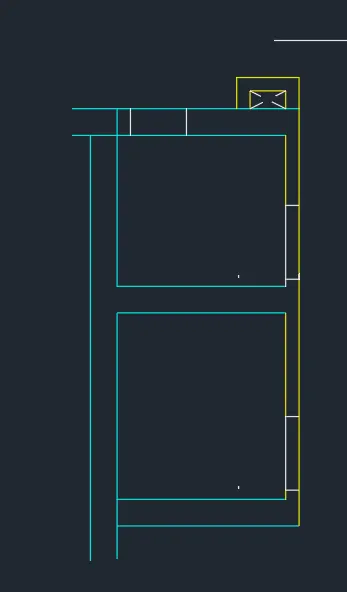
- In command prompt type XL, specify the horizontal line
- In command prompt type OFFSET, specify the offset distance 300 of previous line in upward direction
- In command prompt type OFFSET, specify the offset distance 2100 of previous line in upward direction
- In command prompt type OFFSET, specify the offset distance 300 of previous line in upward direction
- In command prompt type OFFSET, specify the offset distance 1700 of previous line in upward direction
- In command prompt type OFFSET, specify the offset distance 300 of previous line in upward direction
VERTICAL LINES
- In command prompt type XL, specify the vertical line from left corner passing horizontal lines
- In command prompt type OFFSET, specify the offset distance 300 of previous line in right side direction
- In command prompt type OFFSET, specify the offset distance 1900 of previous line in right side direction
- In command prompt type OFFSET, specify the offset distance 300 of previous line in right side direction
- In command prompt type TRIM, trim the unwanted lines
- In command prompt type LINE, specify the point at the left last top corner point and assign value @351<90, @702<180, @351<270 and close
- In command prompt type LINE, specify the point at the left last top corner point and assign value @201<90, @402<180, @201<270 and close
STEP 3: DOORS, WINDOWS and VENTILATION
DOORS
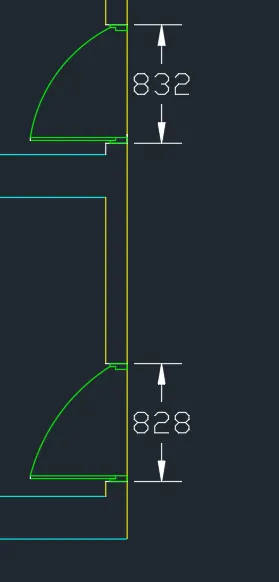
- In command prompt type TRIM, trim the space required for the door as for Utility room 828 and for D H toilet is 832
- In command prompt type ARC, select the first and last point of the door and assign radius we get the door image as per desired
WINDOWS
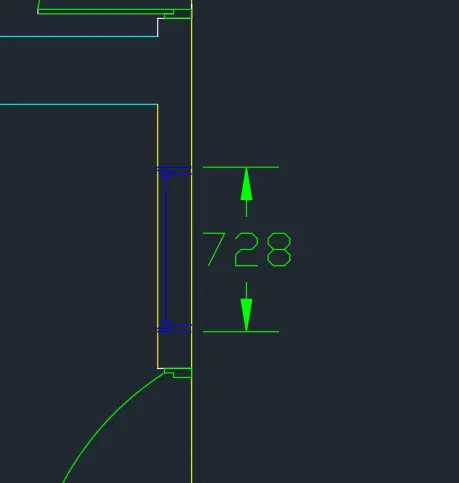
- In command prompt type LINE, specify point in interior wall of the utility room above door area and make a perpendicular line
- In command prompt type OFFSET, specify the offset distance as 728 of previous line in same direction
- In command prompt type LINE, select the midpoint of the above two lines and join the points as shown in figure below
VENTILATION
- In command prompt type LINE, select the point in 300 mm wall in dh toilet top side left corner at a desired distance and made perpendicular line
- In command prompt type OFFSET, specify the distabce as 631 and offset the previous line
- In command prompt type LINE, join the mid points of the above two lines
- In command prompt type OFFSET, specify desired distance and offset the previous line multiple times as desired
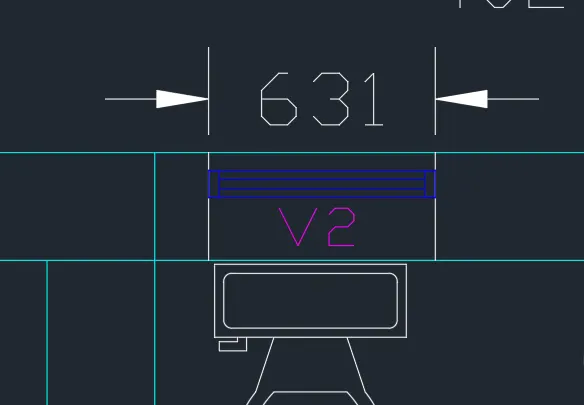
STEP 4: Toilet essentials
From view ribbon, select tool palettes and assign toilet and sink as requried
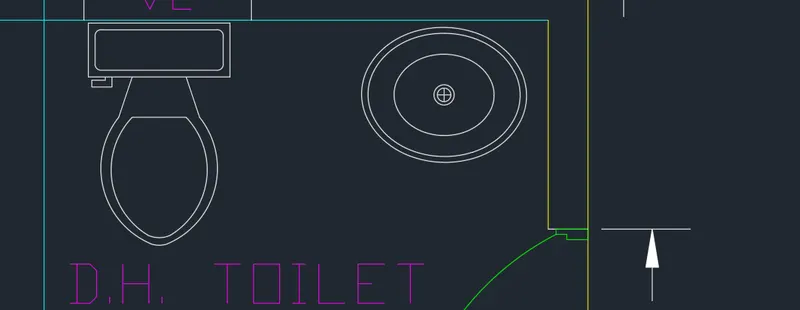
STEP 5: Dimensions and Text
- In command prompt type DIMLINE, assign dimension to the diagrams as requried
- In command prompt type TEXT, assign names to the rooms plotted
RESULT: