Creating a Layout, Section and Elevation with dimensions using AutoCad
Drawing of Plan
Aim:
Drawing the floor plan of 1st, 2nd and 3rd levels at the scale of 1:100 using various commands of AutoCAD
Procedure:
- Open AutoCAD and open a workspace using metric input system
- Use input as millimeter under the metric system
- Use the LAYER command to create appropriate layers
- Assuming all the columns of 250x400 mm
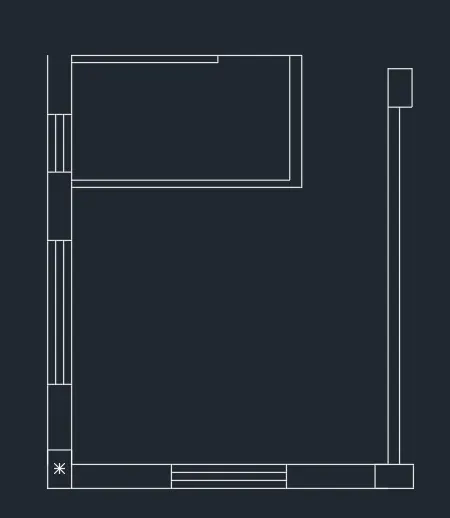
Drawing of Bedroom of size 3300x2888 mm with W2, W3, D1 and D2
- Use RECTANG to draw a column of 250x400 mm size
- Draw a LINE of 3300 mm and OFFSET it by 250 mm for wall thickness
- Drawing right side wall of the room for the length of 2888 mm and OFFSET it by 120 mm for wall thickness
- Draw an OFFSET of 3300 for the left side wall with a thickness of 250 mm
- For the toilet, Draw a RECTANG of 2275x1225 mm with OFFSET outside for wall thickness
- Use FILLET command for cutting corners of the walls and TRIM to mark 750 mm opening for door D1
- For W2, Draw an OFFSET of 1045 mm from the left column and another OFFSET of 1200 mm for W1 length
- Use LINE command to draw window penal in drawing
- For W3, OFFSET 685 mm for 1500 mm window thickness, further use LINE command for penal
- For W4, OFFSET 2897 mm for 601 mm window thickness, further use LINE command for penal
- Place a column at the right of W2 using COPY and ROTATE command
- For D2, EXTEND right sidewall to the column at D2
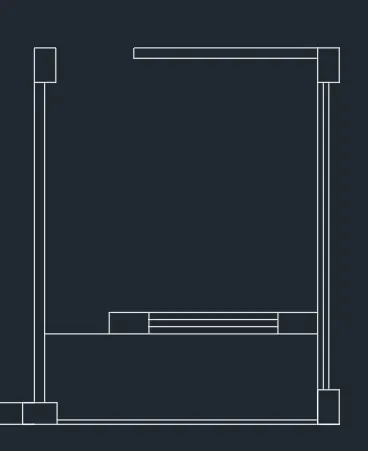
Drawing of the bedroom of size 3175x3000 mm and Ver of 1000 mm space
- Take an OFFSET of 3175 from the right wall and make a wall thickness of 130 mm with LINE in between
- Place a column using the COPY command on top and bottom of the wall with the correct orientation
- Using EXTEND and TRIM command bottom 50 mm thickness line is drawn
- For Ver, OFFSET by 1000 mm and mark D1 opening of 750 mm thickness
- For W3, mark 463 mm distance from D1 for the length of 1500 mm with LINE in between for penal
- For the top wall of the room, draw a wall (LINE) of 2138 mm with the thickness of 120 mm thickness
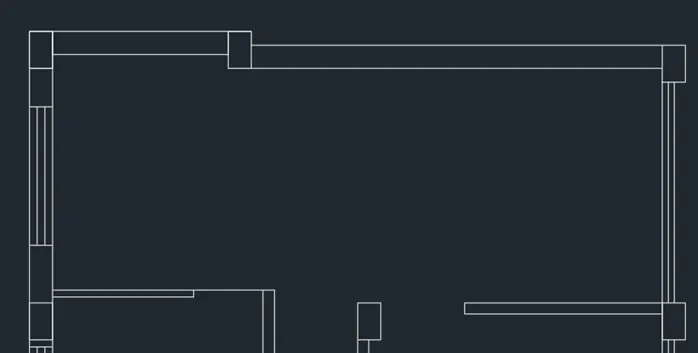
Drawing of Kitchen/Dining room
- Draw an OFFSET of 2550 mm from toilet top wall with further OFFSET of 250 mm for wall thickness
- COPY the column near the toilet and top left of the kitchen
- Make an OFFSET of 2815 mm for the top wall adjacent to the stairs
- COPY the column and place at 1900 mm from the top left column, similarly also place the column at the door of the kitchen near stairs
- For W3, place an OFFSET of 1500mm for the window at a 416 mm distance from the top column. Use LINE to mark penal
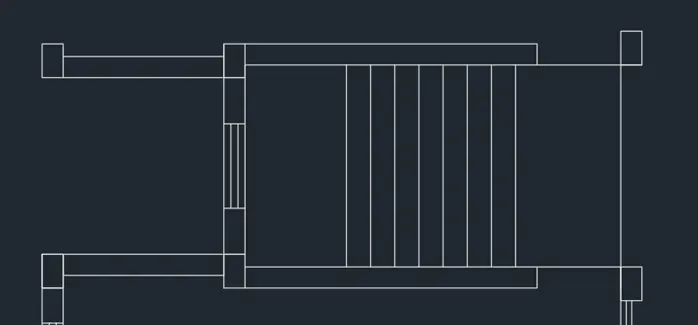
Drawing of stairs
- Use OFFSET and TRIM to mark 990 mm door of kitchen and stairs
- Use COPY command and place 2 upper column
- Use LINE and OFFSET to draw the upper 250 mm wall of stairs
- EXTEND the right-side wall up to the top wall and COPY the column appropriately
- The door between the upper kitchen and stairs can be made similarly as done for the bottom
- For W, mark an OFFSET of 1000 mm at 546 mm from the top column. Use LINE to draw for penal
- For the first 1200mm from left, use OFFSET
- For 2nd 2000 mm, use ARRAY function under COPY command to place stairs at 250 mm
Drawing of the bedroom of 3225x3200 mm, D2, and W3
- Make an OFFSET of 3225 mm to the right side for the wall of 120 mm thickness
- Make an OFFSET of 3200 mm for the top wall of 130 mm thickness
- EXTEND and TRIM diff and extra parts of the wall
- COPY the column at the place at the right top part of the room near door D2 and top left is shown rotation
- For D2, Make an opening of 900 using TRIM and OFFSET command
Drawing of the bedroom of 3100x3100 mm, D2, W2, and W3
- OFFSET bottom room line by 3100 mm and further by 250 mm for wall thickness, Similarly do for left wall by extending it by distance for 3100 room internal dimension using OFFSET and EXTEND
- COPY the column and place it at the top left corner
- For W2, OFFSET by 950 mm for 1200 mm length window
- COPY the column and place it on the top right side of the room
- For W3, OFFSET a distance of 700 mm from the bottom column and mark window of 1500 with panels in between
- For D2, Mark a OFFSET of 900 mm and TRIM it
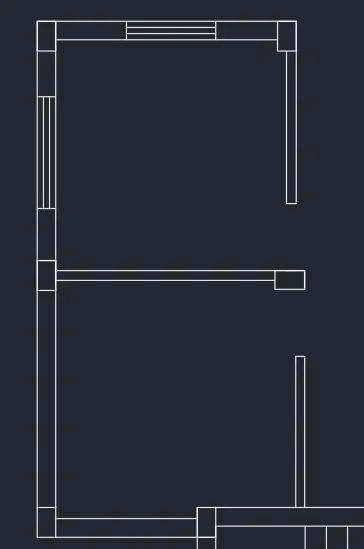
Drawing of Kitchen/Drawing along with 2 toilets
- OFFSET right wall of the top room (3100x3100 mm) by 2550 mm and mark wall thickness of 85 mm
- EXTEND the top wall and draw the top right wall of the kitchen up to the length of 2525 mm from the top wall as shown
- For left W1, Mark an OFFSET of 45 mm and further OFFSET by 900 mm for window length with panels
- For toilets, OFFSET by 1250 mm for 2 times and EXTEND top line
- Mark the 130 mm as wall thickness between the toilet and 120 mm as wall thickness to the right of the toilet
- For the bottom side of the kitchen, mark an OFFSET of 3250 for room width with a wall of 130 mm thickness
- Use EXTEND, OFFSET and TRIM command for joining kitchen and mid-wall of toilets
- EXTEND the rightmost wall of the toilet to 825 mm as shown
- COPY the column and place it at a distance of 2800 mm on a 3775 mm wall
- For the first W4, Mark the window of 600 mm at a 10 mm distance from the wall of the toilet
- COPY the first W4 and place at 2nd toilet wall
- COPY the column and place it adjacent to W4 of the first toilet
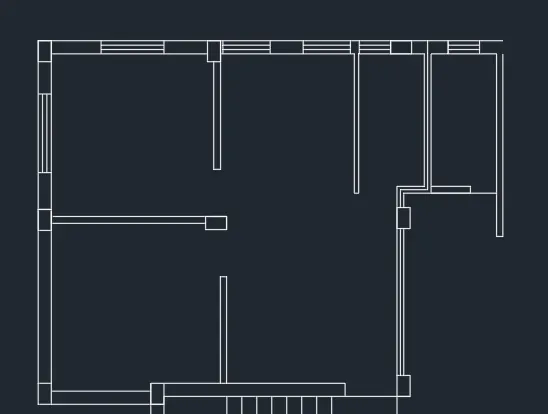
Drawing of Bedroom 3000x3225 mm, W2, W3 and D2
- OFFSET left and top wall by 3000 and 3225 mm respectively with the thickness of wall 250 mm and 120 mm
- For W2, mark an OFFSET of 900 mm and place 1200 mm length window with panels
- COPY the column and place it 150 mm short of the rightmost wall towards the top side
- For W3, COPY the W3 from the previous room and place it
- For D2, mark the opening of 900 mm
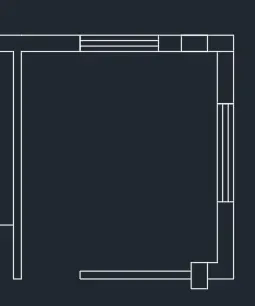
Drawing of the living room of 4475x2950 mm
- Draw a wall of 250 mm thickness from the top right column of the living room towards the downside for any length
- Draw an OFFSET of 2950 mm and draw the bottom wall of 130 mm thickness
- COPY the column and place it at the right end of the bottom line
- Mark the opening of 1000 using OFFSET, LINE, and TRIM command
- To mark the opening wall on the bottom side, use OFFSET, FILLET, and LINE command as shown in the drawing
Drawing of Bedroom of size 3225x3050 mm
- OFFSET the top wall by 3050 mm for the bottom wall of 120 mm thickness
- For D2, mark the opening of 900 mm at 120 mm distance from the left wall
- COPY the column and place in the horizontal line of the left side wall
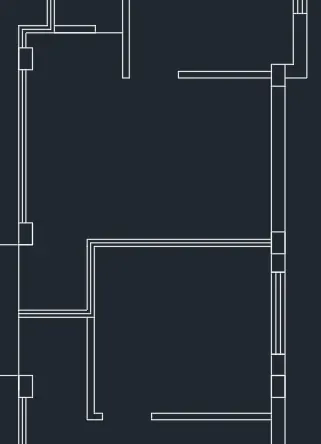
Drawing of drawing/kitchen of size 4475x2863 mm
- OFFSET top line by 2863 mm with 120 mm thickness in downside
- Take an OFFSET of 900 mm for door D2 and TRIM excess length
- COPY and place the W3 at 600 mm from top
- Also, COPY the column and place it lower side of the W3
Drawing of toilet 1250x2150 mm, Bedroom 3100x3300 mm and BAL 1375x1150 mm
- For Toilet, Draw OFFSETS of 1250 mm and 2150 mm horizontally and vertically with a wall thickness of 120 mm as shown
- For W4 in the toilet, place 600 mm length window at 870 mm distance
- For W2, COPY the W2 of 1200 mm length place it at 825 mm from the left column
- Use TRIM, EXTEND and OFFSET to create bal and room walls
- COPY the column and place it at the bottom right corner
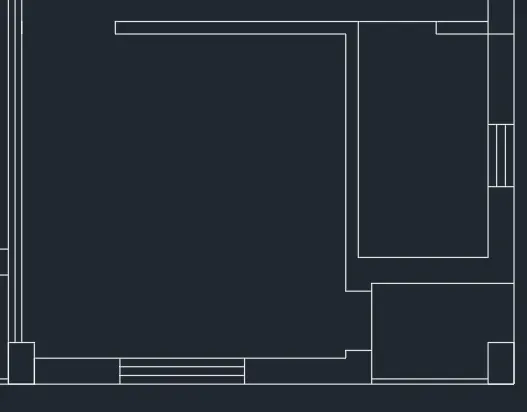
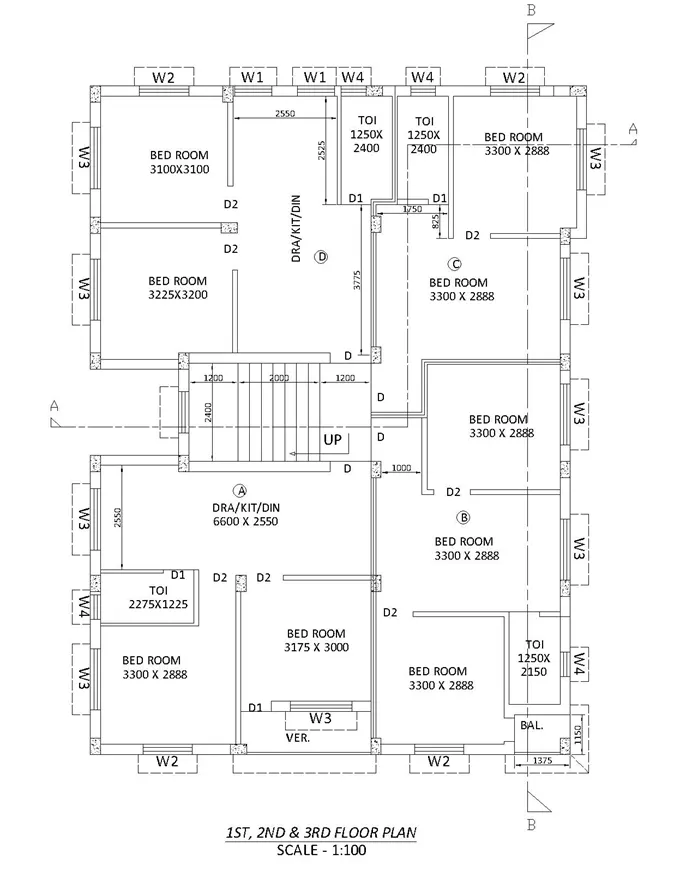
Drawing of all dash type lines and various sections
- Open LINETYPE and load the dashed line format
- Draw all the dashed lines around windows using LINE and OFFSET command
- Marking using MTEXT command and Calibri font type as shown in the drawing
- Marking all the windows and doors are also done using MTEXT and CIRCLE
- HATCH all the columns
- Use DIMLIN to show all the dimensions
Results:
The shown result is on the scale of 1:100
Drawing of Section AA
Aim:
Drawing of the Section AA of the plan drawn above using various commands of AutoCAD
Procedure:
- Open AutoCAD and open a workspace using the metric input system
- Use input as millimeter under the metric system
- Use the LAYER command to create appropriate layers
- Assuming all the columns of 250x400 mm
Marking of GL and ground floor hall elevation
- Use XLINE as GL and draw the horizontal line for the floor
- OFFSET it by 2450 mm for roof upper wall with a thickness of 95 mm as in drawing
- Make the Rightmost wall of 400 mm thick and left most wall of 250 mm thick
- Use TRIM, OFFSET, EXTEND and FILLET to complete room
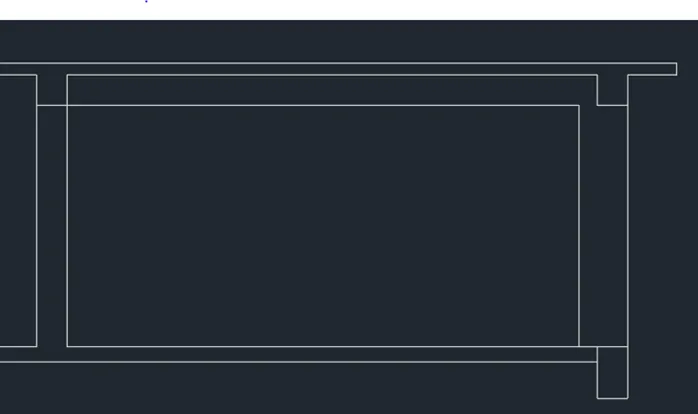
Drawing of elevation of 2 rooms of 1st, 2nd and 3rd floor
- OFFSET the floor by 2850 mm for the roof
- COPY the bottom of the slab along with beam projections and place at the 2nd-floor bottom
- Make the rightmost wall of 250 mm thickness
- Make 2 walls above the beam of the first floor with a thickness of 120 mm using LINE and OFFSET command
- For Windows of 1200 mm and 600 mm use OFFSET and TRIM command in both rooms
- Above the window of the rightmost wall, use LINE, OFFSET, and TRIM command to draw the projection
- Drawing of the box of 1000x2100 mm dimension between stairs and rooms using LINE, OFFSET, and TRIM command
- As the elevation of 2nd and 3rd floor is similar for rooms, so COPY the elevation of 1st floor and place as shown in the drawing
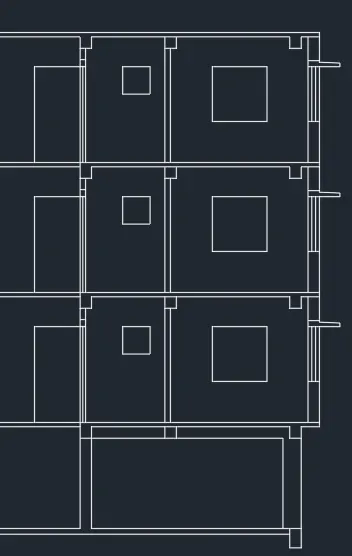
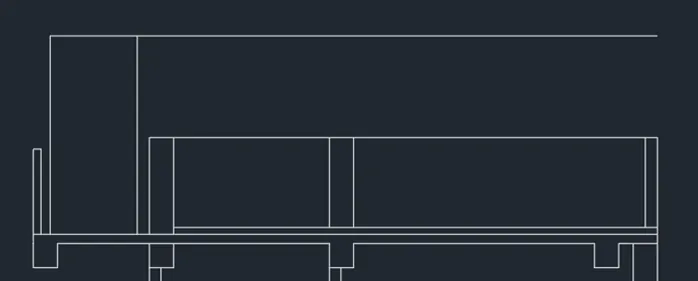
Drawing of top boundary on 3rd-floor roof
- OFFSET top line by 1000 mm
- OFFSET the same line by 70 mm for slab on 3rd floor
- Use EXTEND to extend the line in the line of beam projections upward as shown in figure
- OFFSET the line by 1200 mm for the landing slab of stairs
- Mark the 885 mm high and 80 mm thick handrail at the start of landing using LINE and OFFSET
- Making the RECTANG box of 2050x900 mm at the landing of stairs
- Use TRIM to remove extra lines in the drawing
Drawing of stairs from bottom to top
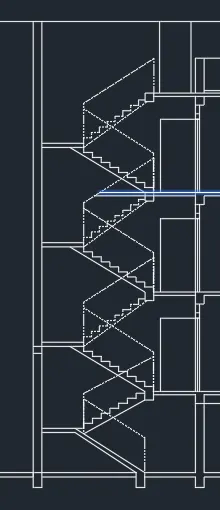
- OFFSET by 1200 for stairs at the bottom level as shown
- Make the 250mm size column of stairs below GL
- OFFSET by 1750 mm for the total horizontal length of rising
- Further OFFSET by 250 mm for the trend of stairs
- Draw a LINE and draw the inclined slab of stairs with 120 mm thickness
- For the Handrail of stairs, Draw the 1000 mm height handrail along the stairs using dashed LINE and COPY command
- For 1st Floor stairs, make the mid lending at 1290 mm from the slab using OFFSET with a thickness of 120 mm slab
- Draw the trend and risers of 250 mm and 143.75 mm using LINE and OFFSET command
- Use LINE to draw the inclined slab line of stairs
- As stairs are the same on each floor up to the 3rd floor, COPY the whole stairs with handrails and place it as in drawing
Drawing of windows of 1500 mm in the left column
- OFFSET by 200 mm from top slab and OFFSET by 1500 mm for window with 2 panels
- Draw the projection using LINE and TRIM command
- As the window is same on each floor
- COPY the window and place it on each floor
Drawing of O.H.T. and other top arrangements of buildings
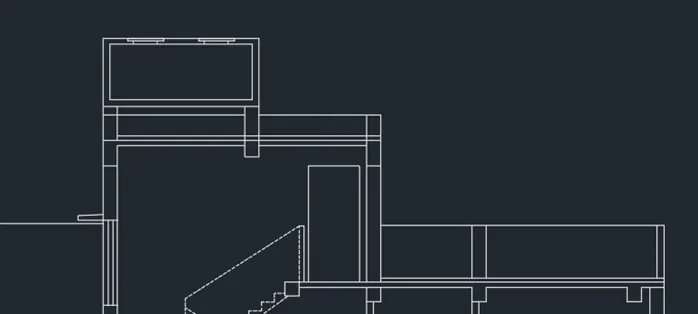
- OFFSET top roof by 2500 mm for the upper boundary
- EXTEND the columns to this height
- Use the combination of LINE, RECTANG, OFFSET, EXTEND and TRIM to draw the all upper arrangements as shown in drawing
Drawing of dimensions, texts
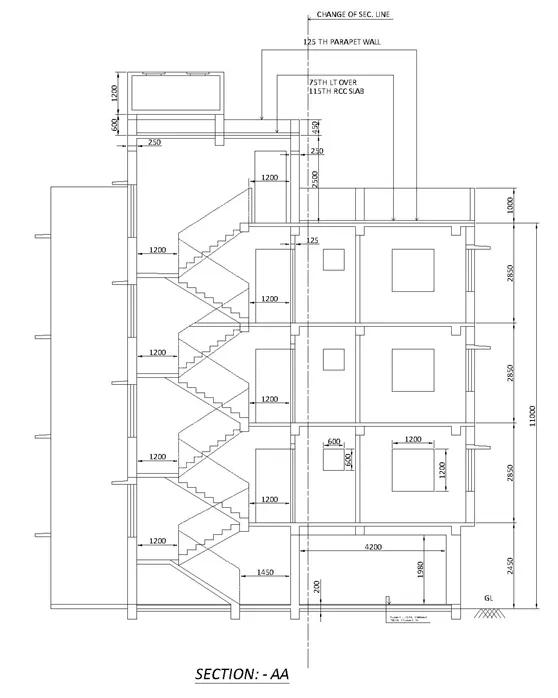
- Use DIMLIN to draw all the dimensions shown in the drawing
- Use MTEXT to type all the texts in the combination of LINE tool to show the location
- Use Calibri type of text for all text heights
Results:
Drawing of Section BB
Aim:
Drawing of the Section BB of the plan drawn above using various commands of AutoCAD
Procedure:
- Open AutoCAD and open a workspace using the metric input system
- Use input as millimeter under the metric system
- Use the LAYER command to create appropriate layers
- Assuming all the columns of 250x400 mm
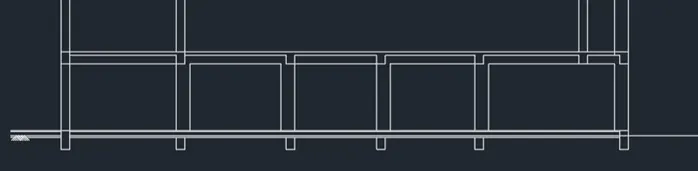
Drawing of the Ground floor with GL
- Use XLINE to draw the GL of the building
- OFFSET appropriately for P.C.C and I.P.S thickness as shown in the drawing
- Draw the left-most column using LINE and OFFSET command
- OFFSET by 2190 mm and further by 100 for the slab thickness
- OFFSET the roof slab by 250 mm for beams projections
- Mark the intermediate column as 400 mm thick
- Make the 2640x1940 mm size, 2nd room from the left side
- Similarly, make all the ground floor rooms as per dimensions given in the drawing using LINE, OFFSET, TRIM, and EXTEND
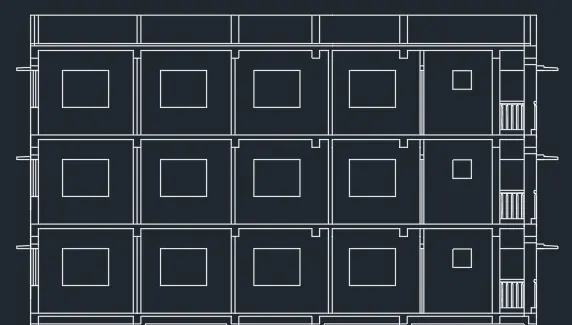
Drawing of 1st, 2nd, and 3rd floor
- For the Window of the leftmost wall, OFFSET lower line by 900 mm and mark the window length of 1500 mm with the outside projection of 450 mm
- Mark the roof slab at 2750 mm from the base and mark all the column projection below the roof slab using OFFSET and LINE
- Draw the RECTANG of 1500x1200 mm in the middle of the room as the window
- As all rooms on the 1st floor are having the same pattern except the width of the room, so using the COPY command place the right column in accordingly column line of the ground floor
- For the 2nd last room on the 1st floor, beam projection and vertical wall are separated by 285 mm
- For the last room of 1st floor, beam projection as a vertical wall are separated by 410 mm
- In the rightmost small room, draw the vertical panels
- Make the window projection on the right side using OFFSET and LINE commands
- As the 2nd and 3rd floors are similar to the 1st floor in every aspect, use the COPY command to draw it and add the levels to the buildings
- For the top roof, make 75 mm OFFSET
- For Parapet, make an OFFSET of 1000 from the roof slab
- Make the projection of beams up to parapet wall top using EXTEND and TRIM command
Marking dimensions and texts
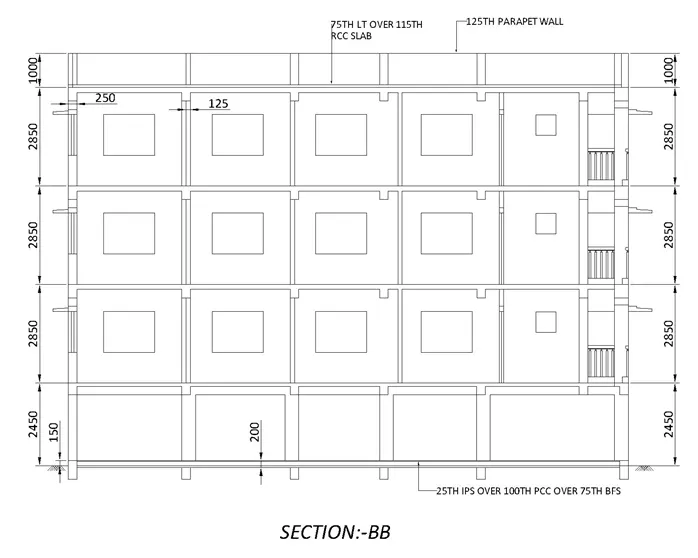
- Use DIMLIN and DIMCONT to show all the required dimensions in the drawing
- Use MTEXT and MLEADER command to type texts with leaders as shown in the drawing
Results:
Conclusion:
As the above exercise, contain multiple uses of some of the commands like – LINE, OFFSET, and TRIM, etc. but efficiently use of these commands within a limited period saves a lot of time for the designer and project. Other commands like FILLET, TRIM, MTEXT, MLEADER, and COPY are also used in this exercise. This exercise gives good practice for the modeling of the building plan, elevation, and details.