Creating a Layout, Section and Elevation with dimensions using AutoCad
1. Create the Plan and Sections as shown in the Figures. Use proper dimension techniques and dimension styles to document the project. Assume the sizes of the doors and windows as per construction standards. Refer to sections for stair details if required.
A):
1.Open the new drawing file in autocad.
2.Set the units to decimal units.
3.First we are drawing floor plan drawing.
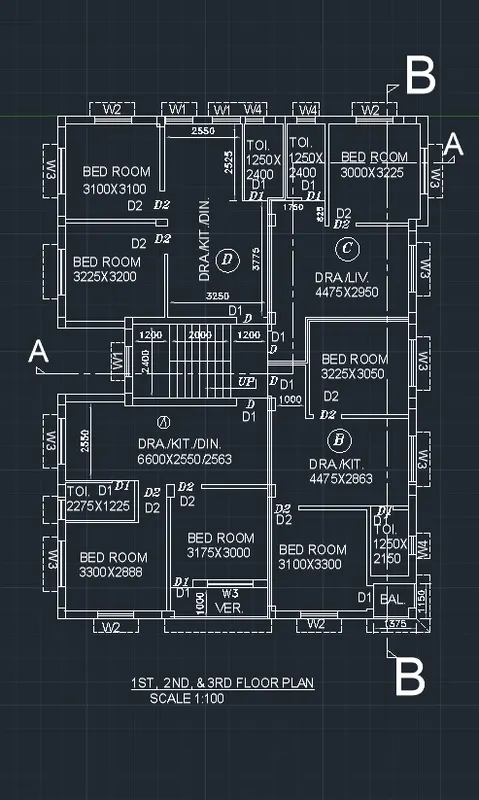
ABOVE PLAN ALL DIMENSIONS ARE IN MM
4.The floor plan is same for 1,2&3 floors.
5.Using line command first we have to draw the walls of the plan.
6.First we have to draw the outer walls of 230mm and stair case.
5.Then we have to divide the inner walls of 150mm thickness.
6.Then we have to draw the doors and windows of the floor plan.
7.Then after using dotted lines specify the lintel above the windows.
8.Then specify the names of the rooms and its dimensions.
9.Then draw the lines of section a and section b lines.
10.Then after we have to draw the secion AA plan.
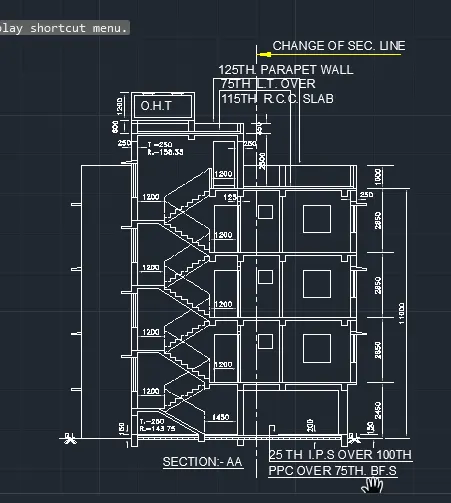
ABOVE PLAN ALL DIMENSIONS ARE IN MM
11.In that we have to draw the elevation section plan of the given plan.
12.Then divide the lines of the floor with given lengths.
13.Then draw the staircase of the sectional plan.
14.Then specify the dimensions of the section AA plan.
15.Then we have to draw the over head tank.
16.Then we have to draw the section BB plan.
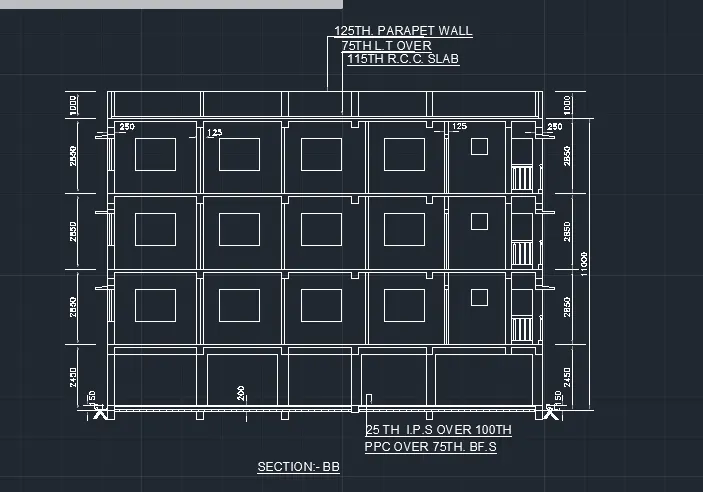
ABOVE PLAN ALL DIMENSIONS ARE IN MM
17.In this section we have to draw the section BB plan..
18.The section plan we have to draw the windows and lintels .
19.At the last floor we have to draw the parapet wall.
20.Then specify the thickness and lengths of the section BB plan.
21.Then we have to specify the dimensions of the plan.