Creating a Layout, Section and Elevation with dimensions using AutoCad
AIM: To create plan and section drawing as given in figure by using AutoCAD.
INTRODUCTION:
XLine: It means construction line. It has infinty edges we used for making wall. By typing "XL" on command line we envoke this tool.
Line: It connects one point to another points. Used to draft various elements.
Trim: This modification tool helps to cut extended edges on the drawing. And to trim inbetween two line or elements. "TR" command to envoke this tool.
Extend: It is also a modification tool, if we have some broken edges or need to extend some portion towards anonther element. "EX" command to envoke the tool.
Offset: Offset the existing element with certain distance. this tool avoid to create new parallel elements.
Layer: Each and every elements has unique property and unique style. This layer tool helps to organize those. Line weight, line style, colour gradient, freeze, lock. it has numerous benefits in Auto CAD drafting.
Hatch: Hatching helps to fill the voids with certain texture on it. If we draft wall means, we mention the brickwork details with the help of hatching.
Circle: Used to make circle elements in the sheet. Type "C" to envoke this tool. Here it is used to draft door.
Polygon: Used to make rectangle or polygons with number of sides.
PROCEDURE:
step-1: Type "UN" to select the units we required "DECIMAL" with precision of 0 and Millimeter.
step-2: Type "LIMITS" to set the limit of the sheet.
step-3: Type "XL" constrcution line to plot and select "H" and "V" angle.
step-4: Type "O" to envoke offset tool to offset specify distance of 250mm as wall thickness.
step-5: Type "TR" to trim extended edges from construction line.
step-6: Type "F" to envoke fillet tool to fillet the edges with zero radius.
step-7: Type "O" to envoke offset tool to offset specify distance of 3300 mm in the direction of +ve X-direction.
step-8: Type "O" to envoke offset tool to offset specify distance of 2888 mm in the direction of +ve Y-direction to make first bedroom.
step-9: Type "O" to envoke offset tool to offset specify distance of 125 mm as wall thickness.
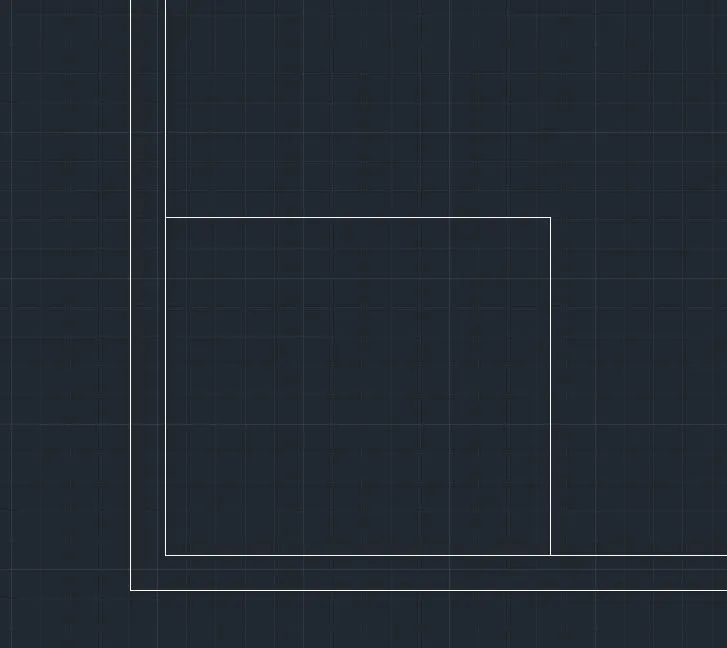
step-10: Type "O" to envoke offset tool to offset specify distance of 2275 mm in the direction of +ve X-direction
step-11: Type "O" to envoke offset tool to offset specify distance of 1225 mm in the direction of +ve Y-direction to make second bed room.
step-12: Type "O" to envoke offset tool to offset specify distance of 125 mm as wall thickness.
step-13: Type "O" to envoke offset tool to offset specify distance of 3175 mm in the direction of +ve X-direction.
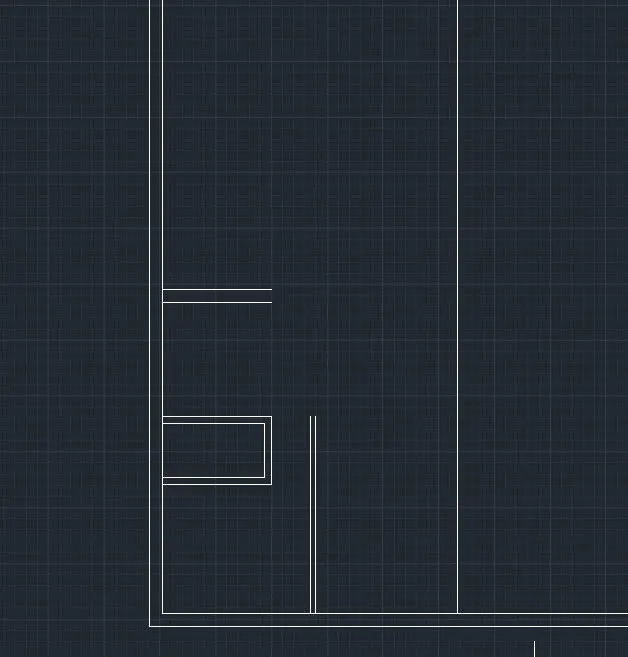
step-14: Type "O" to envoke offset tool to offset specify distance of 3000 mm in the direction of +ve Y-direction to create third bed room.
step-15: Type "O" to envoke offset tool to offset specify distance of 125 mm as wall thickness.
step-16: Type "O" to envoke offset tool to offset specify distance of 1000 mm in the direction of +ve Y-direction to create vertical places.
step-17: Type "O" to envoke offset tool to offset specify distance of 250 mm as wall thickness.
step-18: Type "O" to envoke offset tool to offset specify distance of 3100 mm in the direction of +ve X-direction.
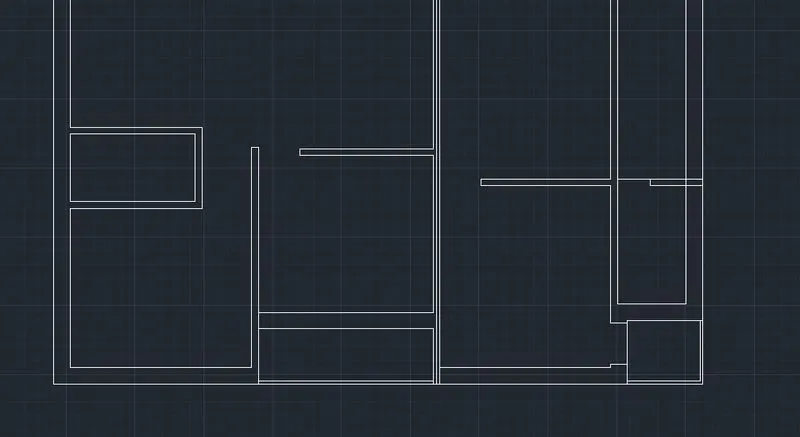
step-19: Type "O" to envoke offset tool to offset specify distance of 3300 mm in the direction of +ve Y-direction to make another bedroom.
step-20: Type "O" to envoke offset tool to offset specify distance of 125 mm as wall thickness.
step-21: Type "O" to envoke offset tool to offset specify distance of 1250 mm in the direction of +ve X-direction.
step-22: Type "O" to envoke offset tool to offset specify distance of 2150 mm in the direction of +ve Y-direction to draft toilet room.
step-23: Type "O" to envoke offset tool to offset specify distance of 250 mm as wall thickness.
step-24: Type "O" to envoke offset tool to offset specify distance of 1150 mm in the direction of +ve Y-direction
step-25: Type "O" to envoke offset tool to offset specify distance of 1375 mm in the direction of +ve X-direction.
step-26: Type "O" to envoke offset tool to offset specify distance of 2550 mm in the direction of +ve Y-direction
step-27: Type "O" to envoke offset tool to offset specify distance of 6600 mm in the direction of +ve X-direction to draft dinning room.
step-28: Type "O" to envoke offset tool to offset specify distance of 125 mm as wall thickness.
step-29: Type "O" to envoke offset tool to offset specify distance of 4475 mm in the direction of +ve Y-direction.
step-30: Type "O" to envoke offset tool to offset specify distance of 2863 mm in the direction of +ve Y-direction
step-31: Type "O" to envoke offset tool to offset specify distance of 125 mm as wall thickness.
step-32: Type "O" to envoke offset tool to offset specify distance of 3225 mm in the direction of +ve X-direction.
step-33: Type "O" to envoke offset tool to offset specify distance of 3050 mm in the direction of +ve Y-direction.
step-34: Type "O" to envoke offset tool to offset specify distance of 125 mm as wall thickness.
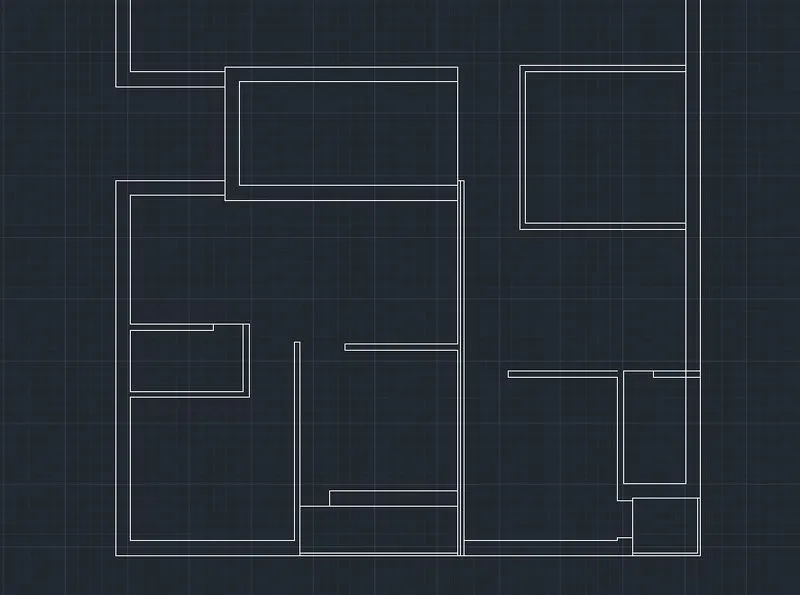
step-35: Type "O" to envoke offset tool to offset specify distance of 2400 mm in the direction of +ve Y-direction
step-36: Type "O" to envoke offset tool to offset specify distance of 4400 mm in the direction of +ve X-direction to draft stair case area.
step-37: Type "O" to envoke offset tool to offset specify distance of 250mm as wall thickness.
step-38: Type "L" to envoke line tool to plot staircase tread with thickness of 250 mm.
step-39: Type "AR" to envoke ARRAY dialogue box and enter number of rows of 9 with 180 degree.
step-40: Type "F" to envoke Fillet tool with zero radius.
step-41: Type "TR" to envoke Trim tool to trim extended edges from offsetting.
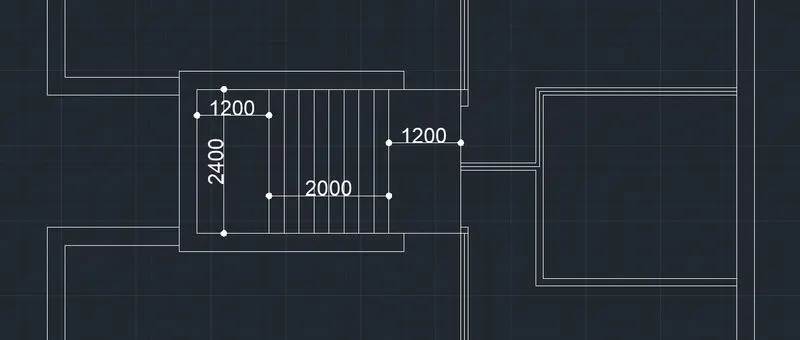
step-42: Select "Layer properties tab" to create new layers and assign the properties.
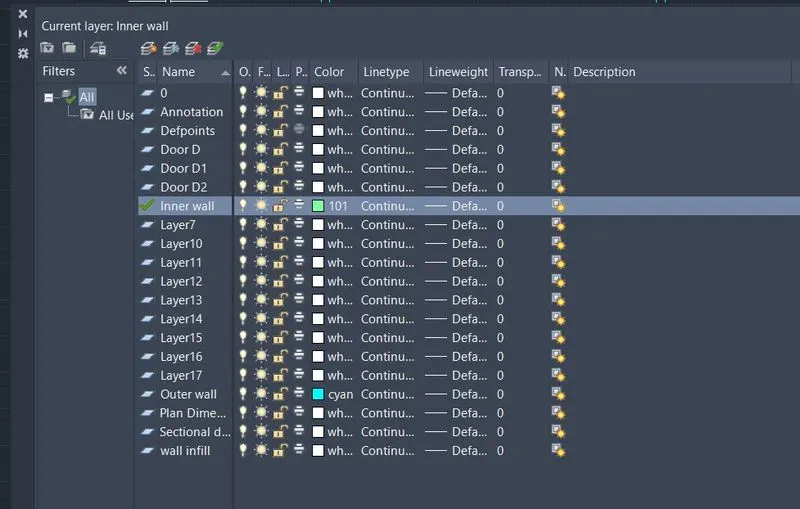
step-43: Assign all propertiies to the drawings.
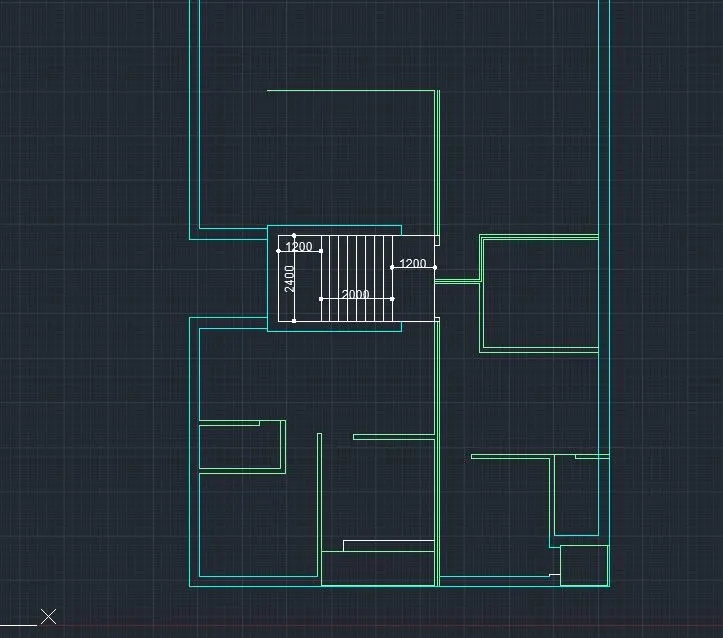
step-44: Type "O" to envoke offset tool to offset specify distance of 3775 mm in the direction of +ve X-direction.
step-45: Type "O" to envoke offset tool to offset specify distance of 3250 mm in the direction of -ve X-direction.
step-46: Type "O" to envoke offset tool to offset specify distance of 125 mm as wall thickness.
step-47: Type "O" to envoke offset tool to offset specify distance of 3225 mm in the direction of +ve X-direction.
step-48: Type "O" to envoke offset tool to offset specify distance of 3200 mm in the direction of +ve Y-direction.
step-49: Type "O" to envoke offset tool to offset specify distance of 250mm as wall thickness.
step-50: Type "O" to envoke offset tool to offset specify distance of 3100 mm in the direction of +ve X-direction.
step-51: Type "O" to envoke offset tool to offset specify distance of 3100 mm in the direction of +ve Y-direction.
step-52: Type "O" to envoke offset tool to offset specify distance of 250mm as wall thickness.
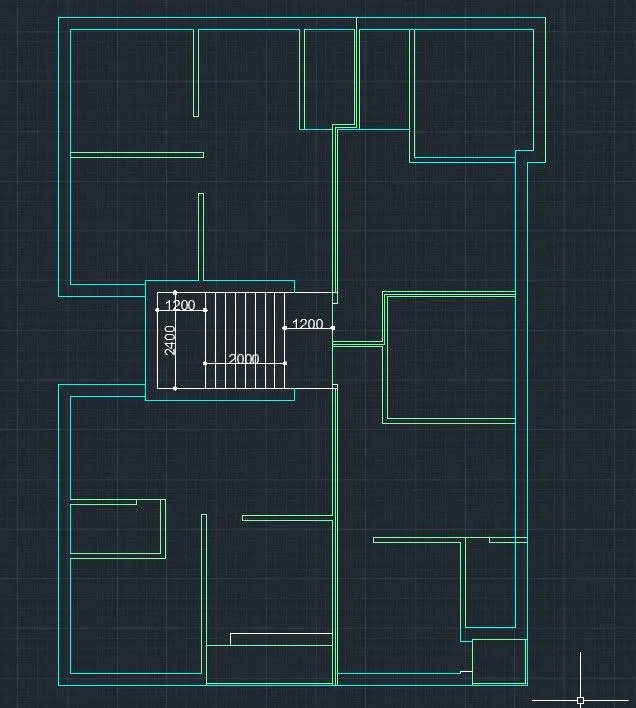
step-53: Type "O" to envoke offset tool to offset specify distance of 2550 mm in the direction of +ve X-direction.
step-54: Type "O" to envoke offset tool to offset specify distance of 2525 mm in the direction of +ve Y-direction.
step-55: Type "O" to envoke offset tool to offset specify distance of 125 mm as wall thickness.
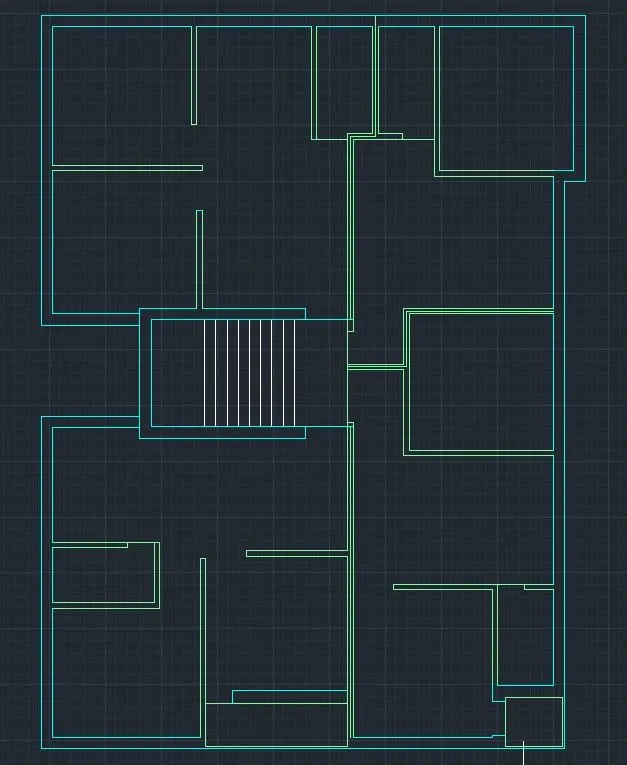
step-56: Type "O" to envoke offset tool to offset specify distance of 1250 mm in the direction of +ve X-direction.
step-57: Type "O" to envoke offset tool to offset specify distance of 2400 mm in the direction of +ve Y-direction.
step-58: Type "O" to envoke offset tool to offset specify distance of 125 mm as wall thickness.
step-59: Type "O" to envoke offset tool to offset specify distance of 1250 mm in the direction of +ve X-direction.
step-60: Type "O" to envoke offset tool to offset specify distance of 2400 mm in the direction of +ve Y-direction.
step-61: Type "O" to envoke offset tool to offset specify distance of 125 mm as wall thickness.
step-62: Type "O" to envoke offset tool to offset specify distance of 3000 mm in the direction of +ve X-direction.
step-63: Type "O" to envoke offset tool to offset specify distance of 3225 mm in the direction of +ve Y-direction.
step-64: Type "O" to envoke offset tool to offset specify distance of 125 mm as wall thickness.
step-65: Type "O" to envoke offset tool to offset specify distance of 4475 mm in the direction of +ve X-direction.
step-66: Type "O" to envoke offset tool to offset specify distance of 2863 mm in the direction of +ve Y-direction.
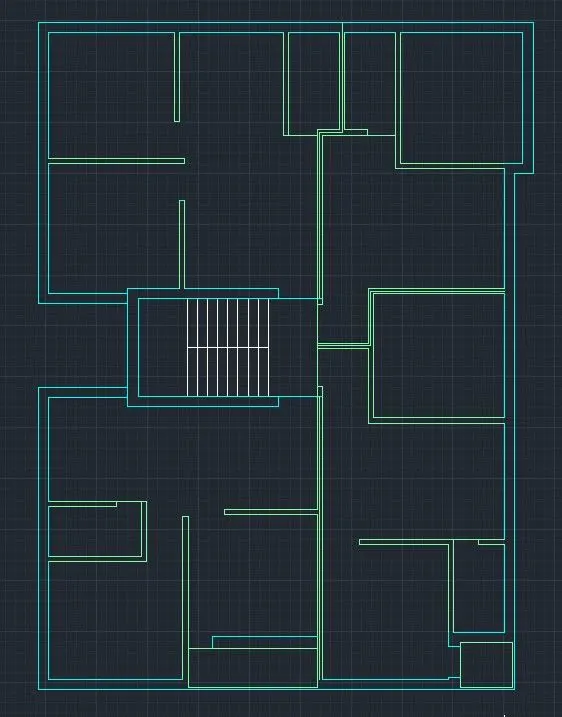
step-67: Type "R" to envoke rectangle tool and plot column dimensions.
step-68: Type "H" to envoke Hatch tool to select concrete hatching tool.
step-69: Type "B" to block column with hatching.
step-70: Type "CO" copy the column block and paste it wherever it is required in the floor plan.
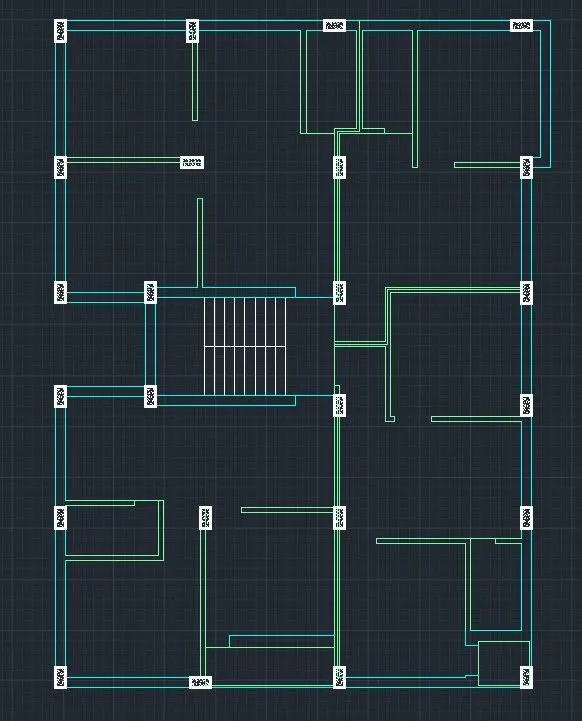
step-71: Type "DT" to select left justify with text height of 300 mm and text angle of zero degree and now enter the text.
step-72: Type "CO" copy the text and paste it wherever it is required in the floor plan.
step-73: Type "ED" to edit the text and mention the name of all rooms.
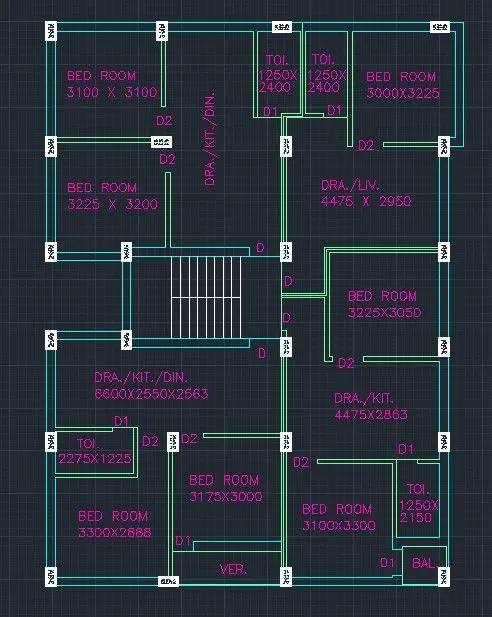
step-74: Type "DIML" dimlinear to mark the dimensions of floor plan.
step-75: Type "DIMC" dimcontinue tool to mark all dimensions of a room.
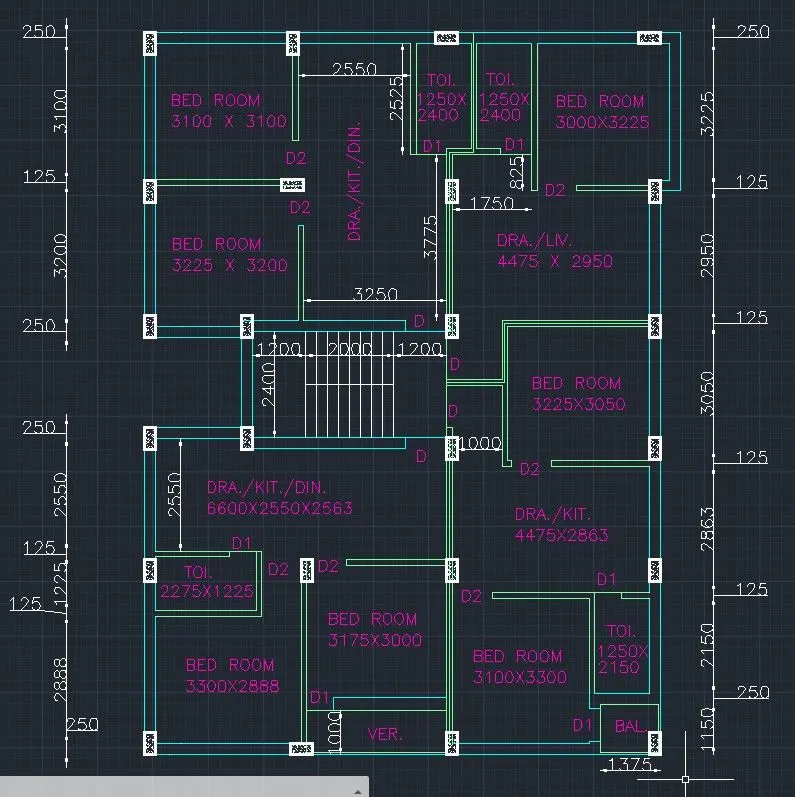
step-76: Type "DT" to select left justify with text height of 300 mm and text angle of zero degree and now enter the text.
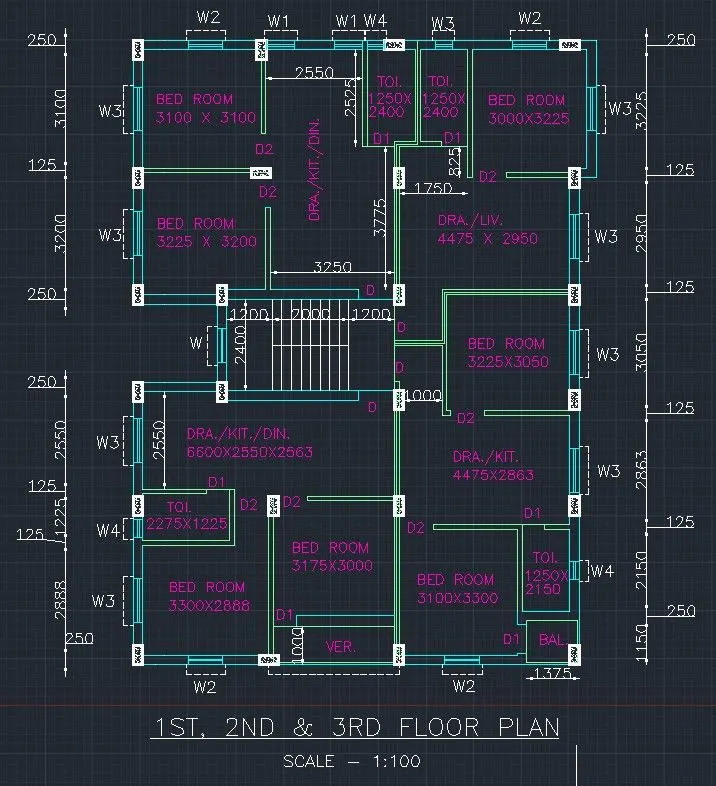
step-77: Type "LT" to open Line style dialogue box and load center line tool to draw section view of the floor plan.
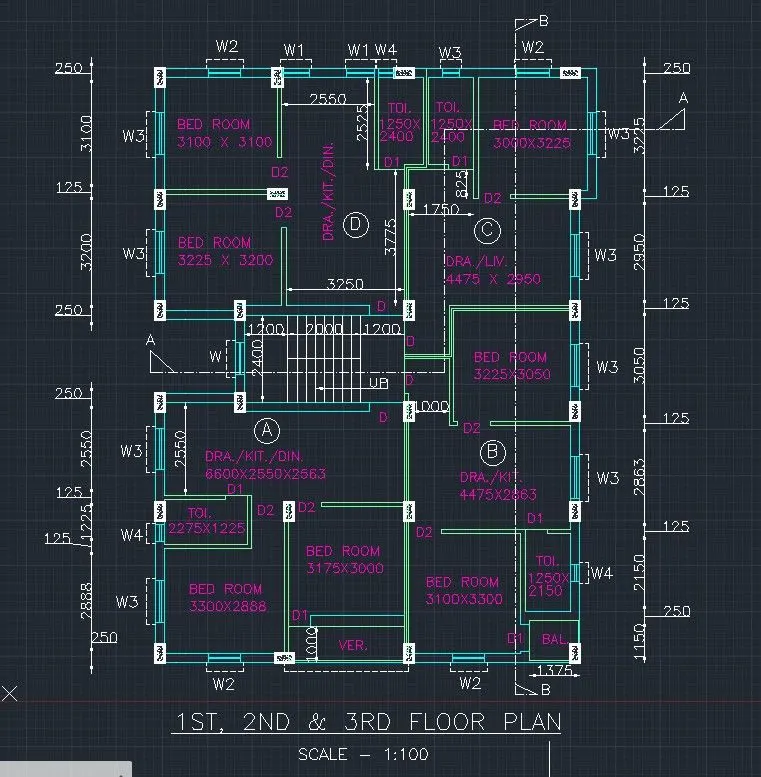
step-78: Type "XL" constrcution line to plot and select V to plot vertical lines with the reference from floor plan.
step-79: Type "O" to 2450 from bottom of the ground level.
step-80: Type "O" to 115 from the slab thickness.
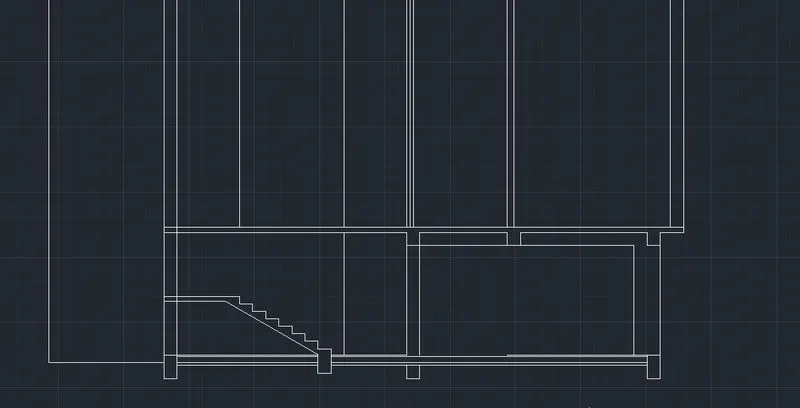
step-81: Type "PL" to plot staircase tread and rise with the distance of 250 and 143.75 mm respectively up to the mid level of floot.
step-82: Type "PL" to plot staircase tread and rise with the distance of 250 and 143.75 mm respectively up to the bottom of the slab.
step-83: Type "LT" to open Line style dialogue box and load dashed line tool to draw hand rail for the staircase.
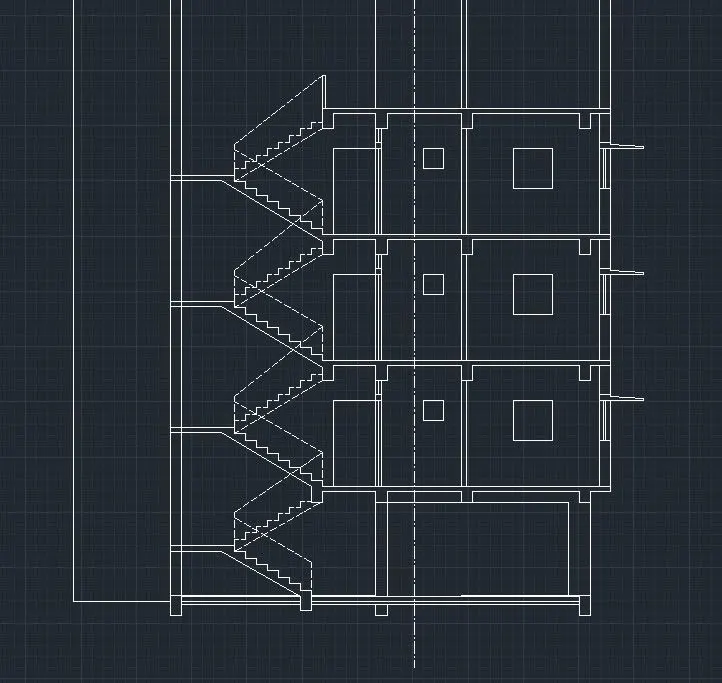
step-84: Type "O" to 2850 from the slab level.
step-85: Type "O" to 115 from the slab thickness.
step-86: Type "PL" to plot staircase tread and rise with the distance of 250 and 158.33 mm respectively up to the mid level of floot.
step-87: Type "PL" to plot staircase tread and rise with the distance of 250 and 158.33 mm respectively up to the bottom of the slab.
step-88: Type "LT" to open Line style dialogue box and load dashed line tool to draw hand rail for the staircase.
step-87: Type "XL" and select Vertical to project window from the plan.
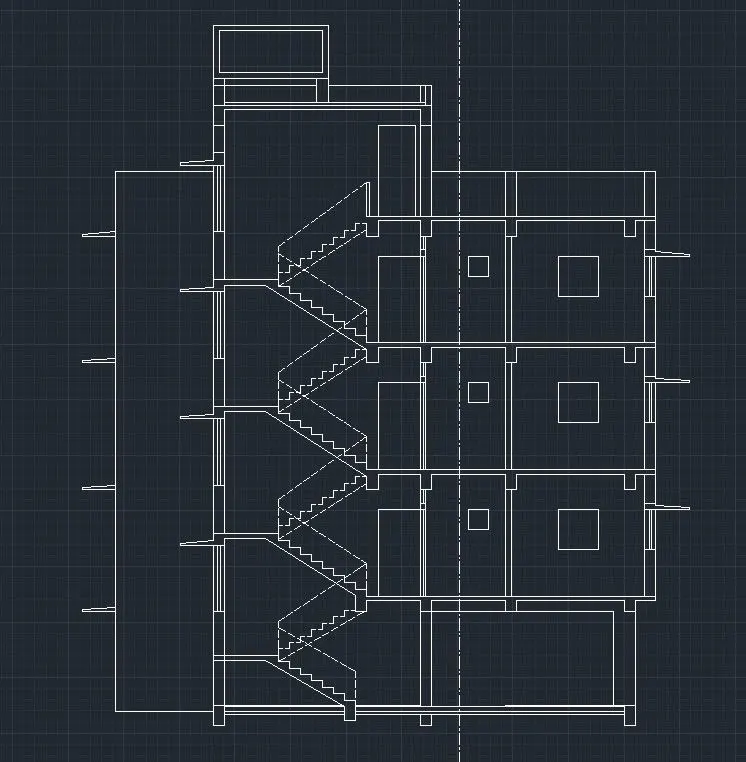
step-88: Type "L" to draft windows and sunshade slab.
step-89: Type "CO" to copy the first floor section view to paste it in another two floors.
step-90: Type "L" to draft Over head water tank view.
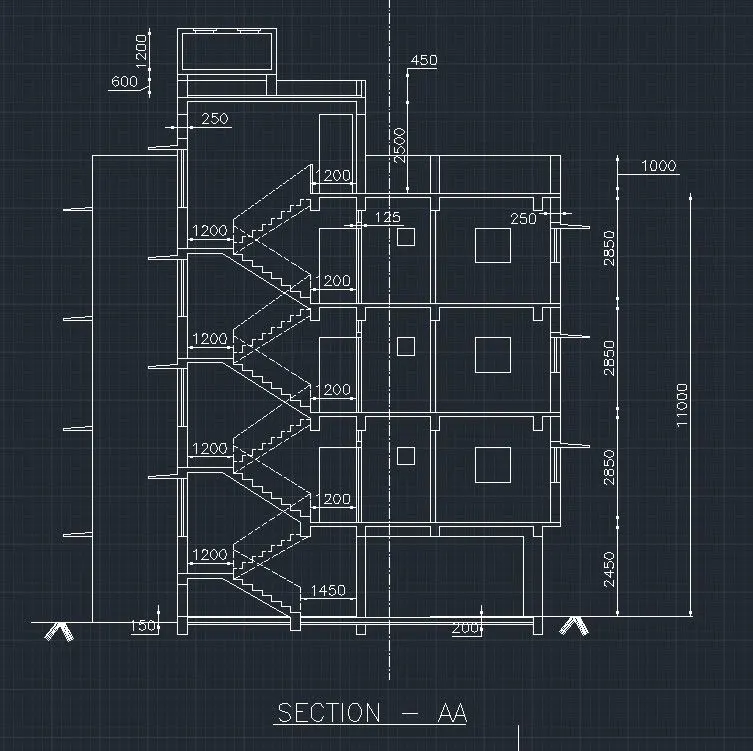
step-91: Type "DIML" to mark linear dimensions of sectional view.
step-92: Type "DIMC" to mark all dimensions in the sectional view.
step-93: Type "DT" to envoke text tool to mention the notes in the drawing.
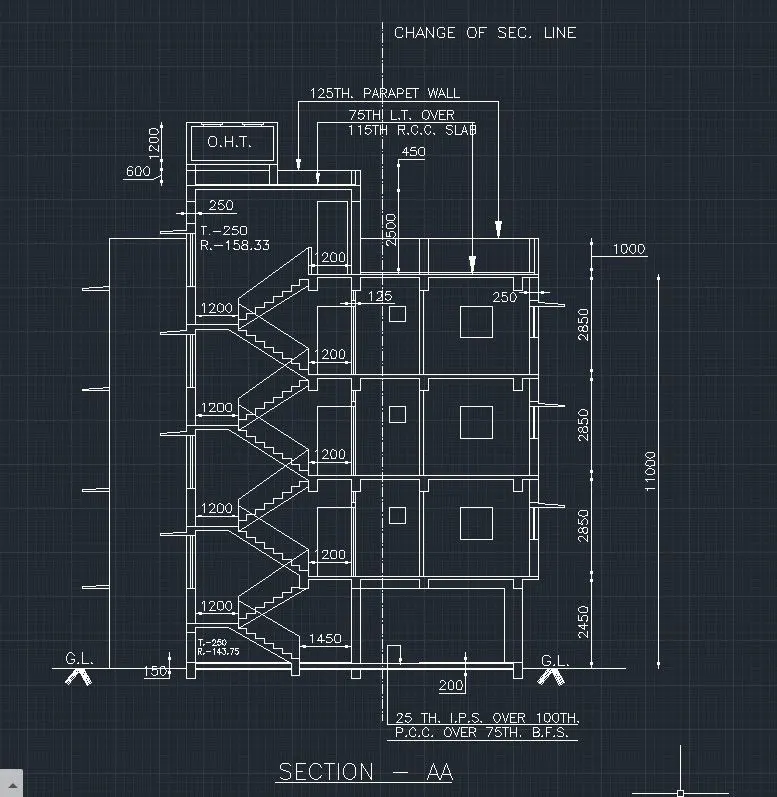
step-94: Type "XL" constrcution line to plot and select H to plot Horizontal lines with the reference from floor plan.
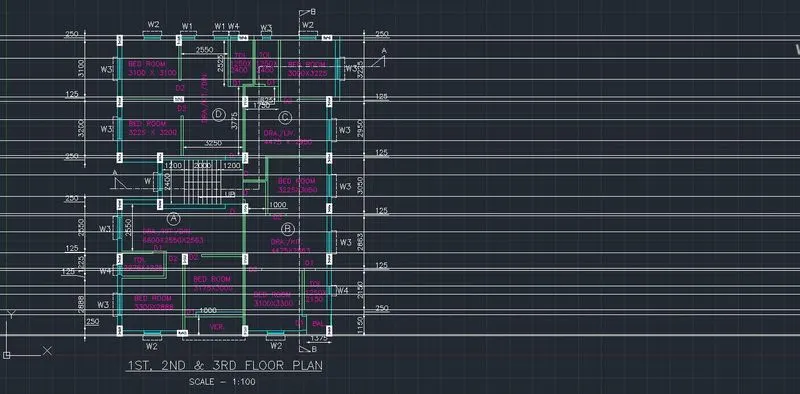
step-95: Type "TR" trim the extended lines from the drawing.
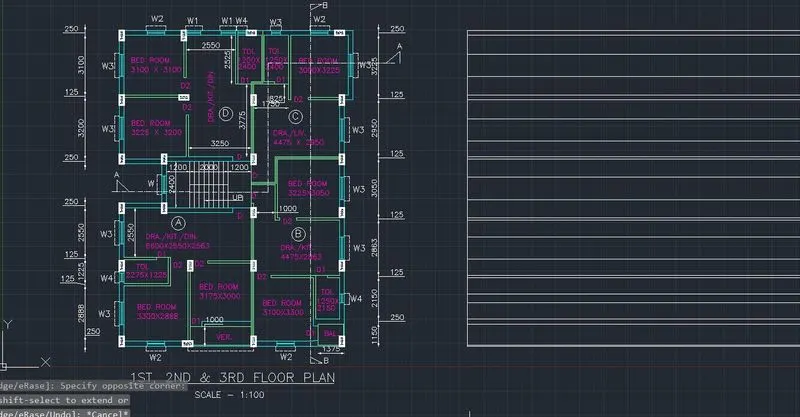
step-96: Type "O" to 150 to create P.C.C slab.
step-97: Type "O" to 2450 from bottom of the ground level.
step-98: Type "O" to 115 from the slab thickness.
step-99: Type "O" to 2850 from the slab level.
step-100: Type "O" to 115 from the slab thickness.
step-101: Type "XL" horizontal lines to project column width.
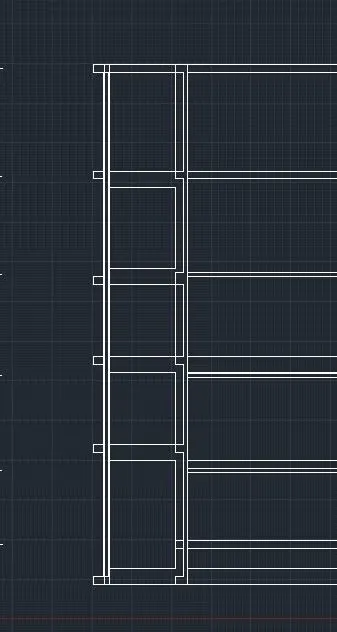
step-102: Type "O" to 2850 from the slab level.
step-103: Type "O" to 115 from the slab thickness.
step-104: Type "XL" and select Vertical to project window from the plan.
step-105: Type "Tr" trim extra lines to make window area.
step-106: Type "L" to draft windows and sunshade slab.
step-107: Type "CO" to copy the first floor section view to paste it in another two floors.
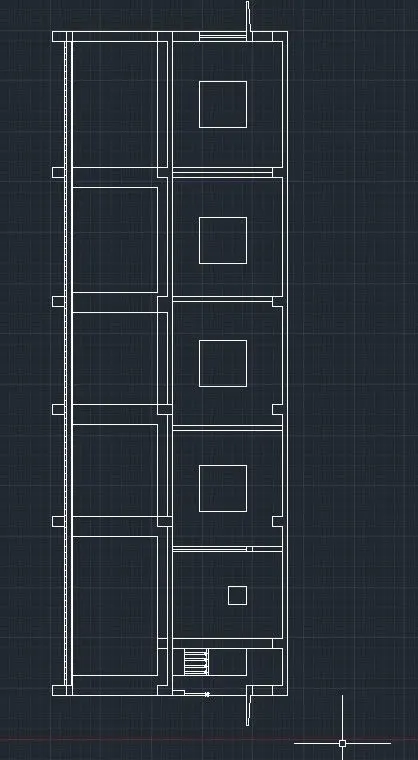
step-108: Type "O" to 1000 to create parapet wall area.
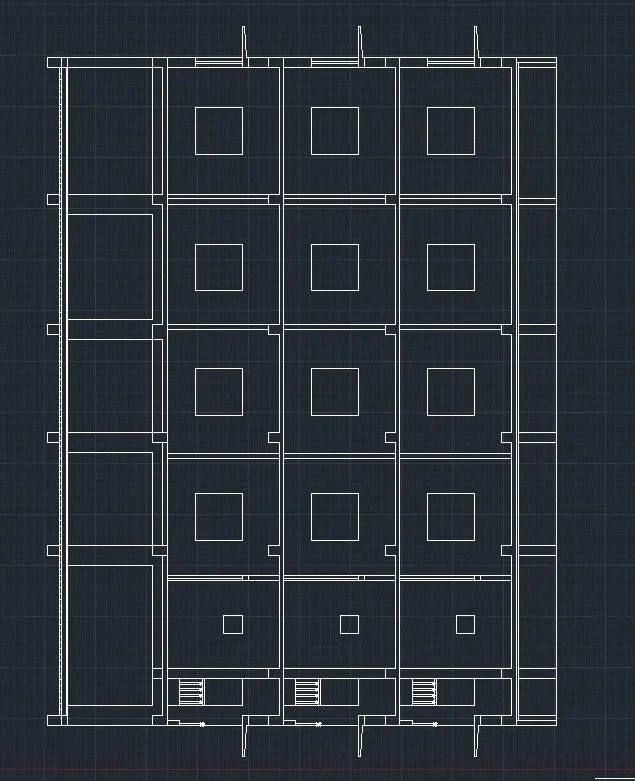
step-109: Type "DIML" to mark linear dimensions of sectional view.
step-110: Type "DIMC" to mark all dimensions in the sectional view.
step-111: Type "DT" to envoke text tool to mention the notes in the drawing.
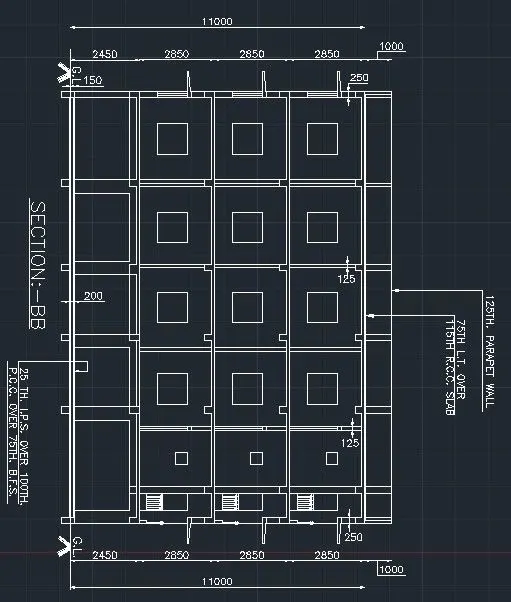
step-112: Type "Z" extent command to display all the drawing in the sheet.
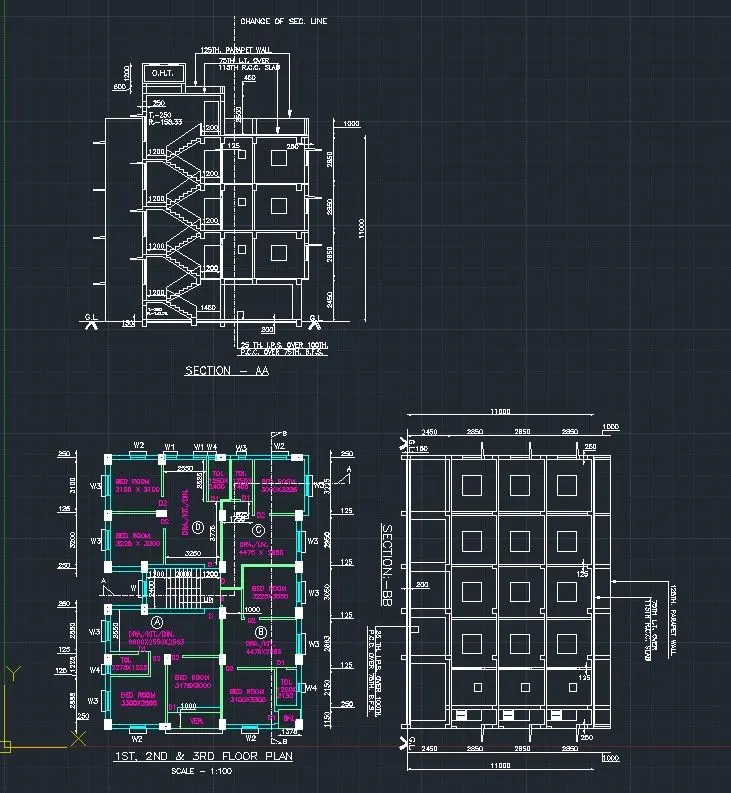
RESULT:
Created the Plan and section drawing as given in figure. Assumed the doors and window dimensions to draft the plan. And also I attached PDF file of drawing. Please find an attachment below in this document.