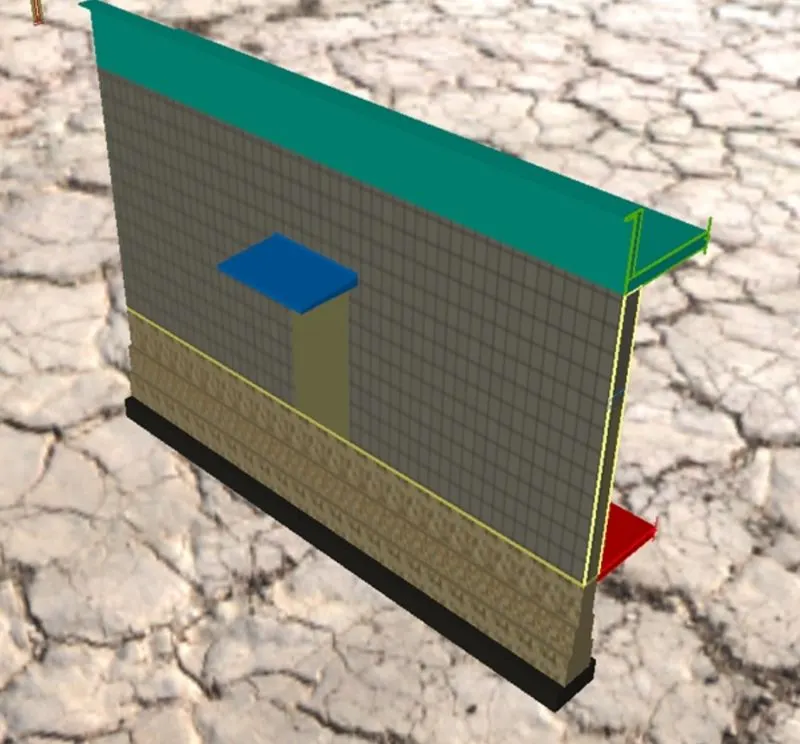
Creating 3D Isometric view of various structural elements in AutoCAD
1) AIM:
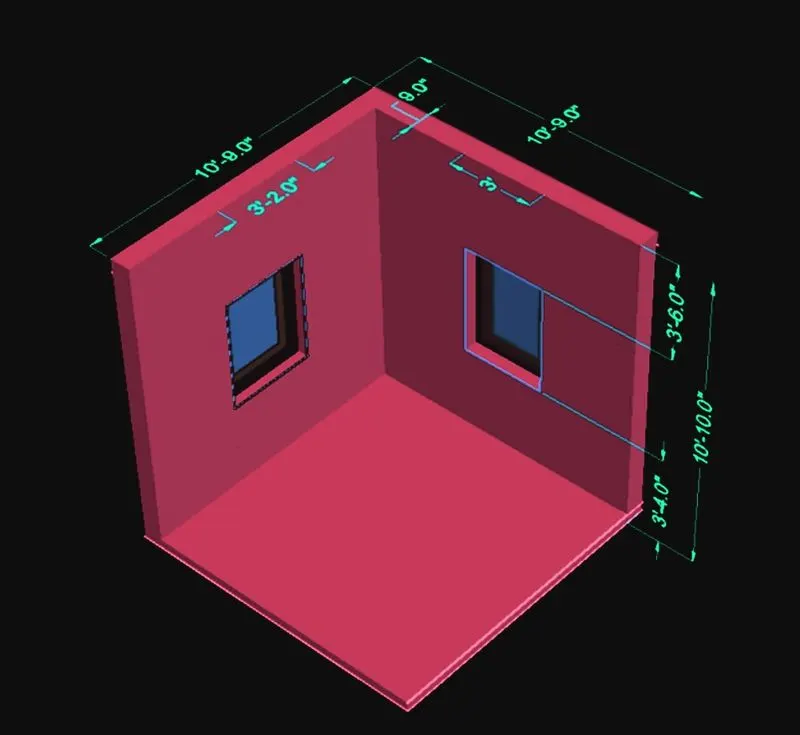
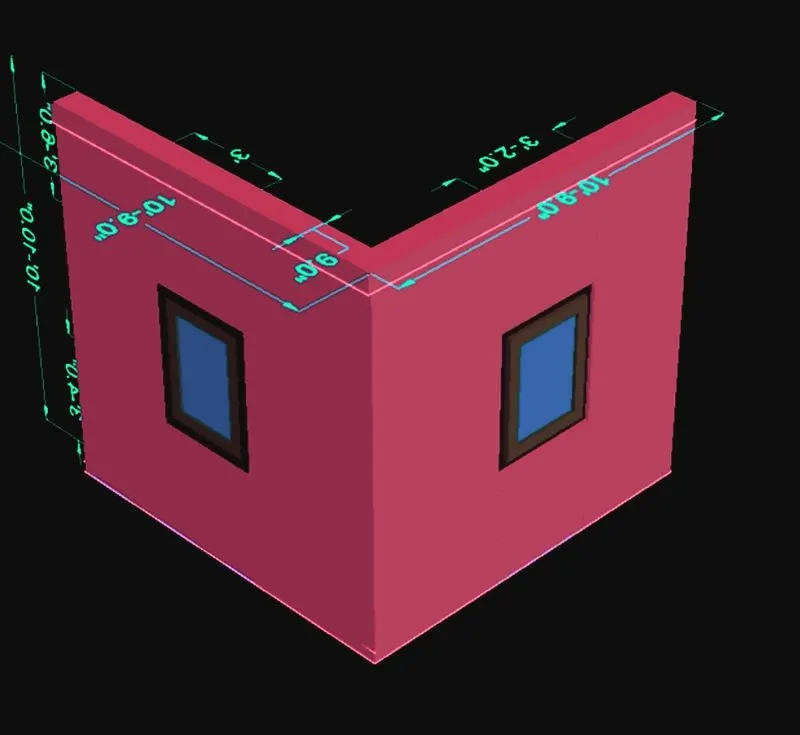
TO DRAW THE 3D ISOMETRIC VIEW OF THE BUILDING AS SHOWN IN THE FIGURE
INTRODUCTION:
A plan perspective is a drawing of a plan but shown in perspective. This is more of a design drawing meant to show what the space is going to look like and less how the space will be built.An Elevation is drawn from a vertical plane looking straight on to a building facade or interior surface. This is as if you directly in front of a building and looked straight at it. Elevations are a common design drawing and technical architectural or engineering convention for graphic representation of architecture. Elevation drawings are orthographic projections.
PROCEDURE:
Open AutoCAD
In the startup setting click on new and then select imperial
Select the units as Engineering and then in insertion scale Inches and precision 0'-0"
Open grid and snap settings
Change the workspace settings of AutoCAD from drafting and annotation to 3D modelling
STEP 1:
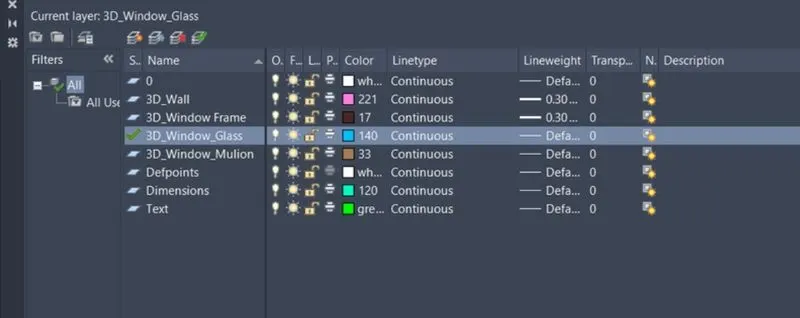
CREATING LAYERS
Open layer properties and create new layers by clicking on new layer or right click on layer and select new layer to create new layer
Layers are created as follows
STEP 2:
CREATING 2D PLAN VIEW
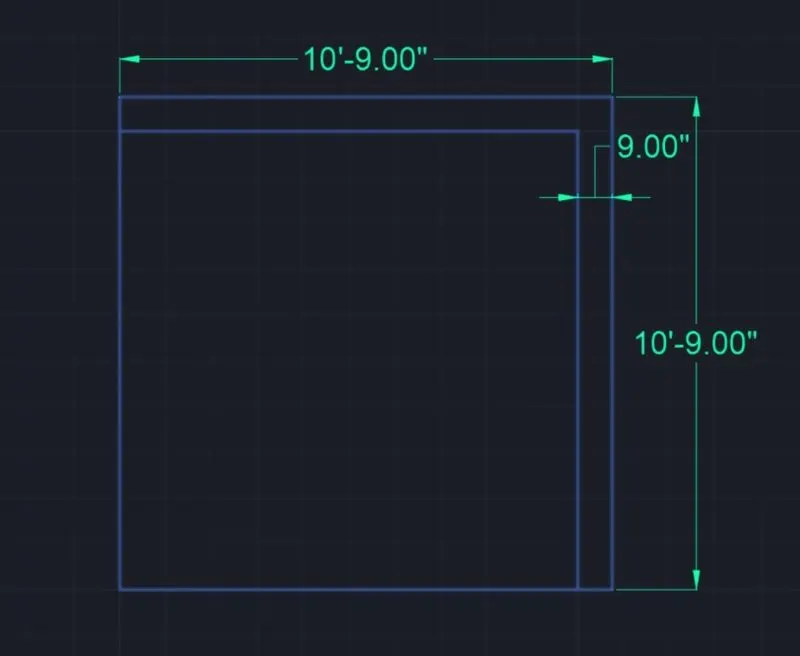
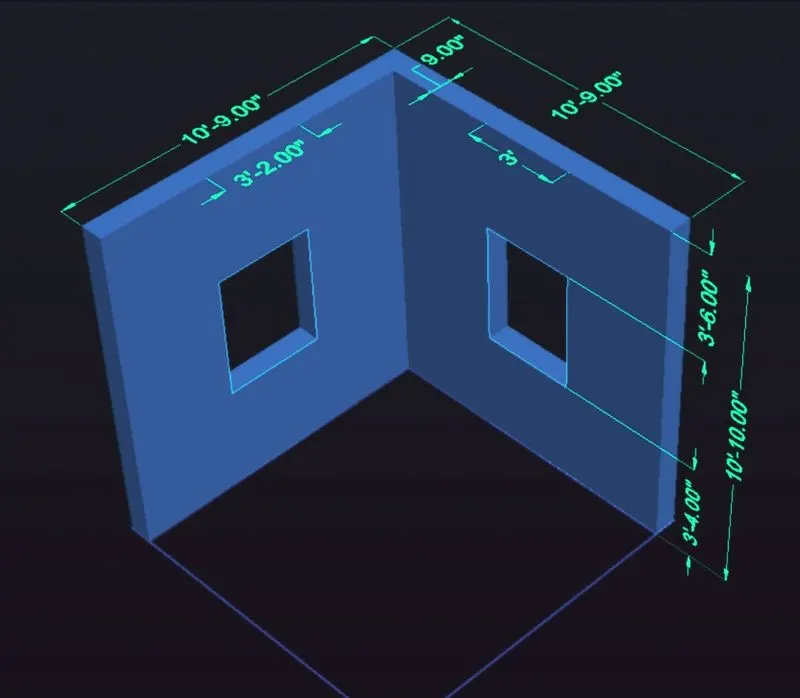
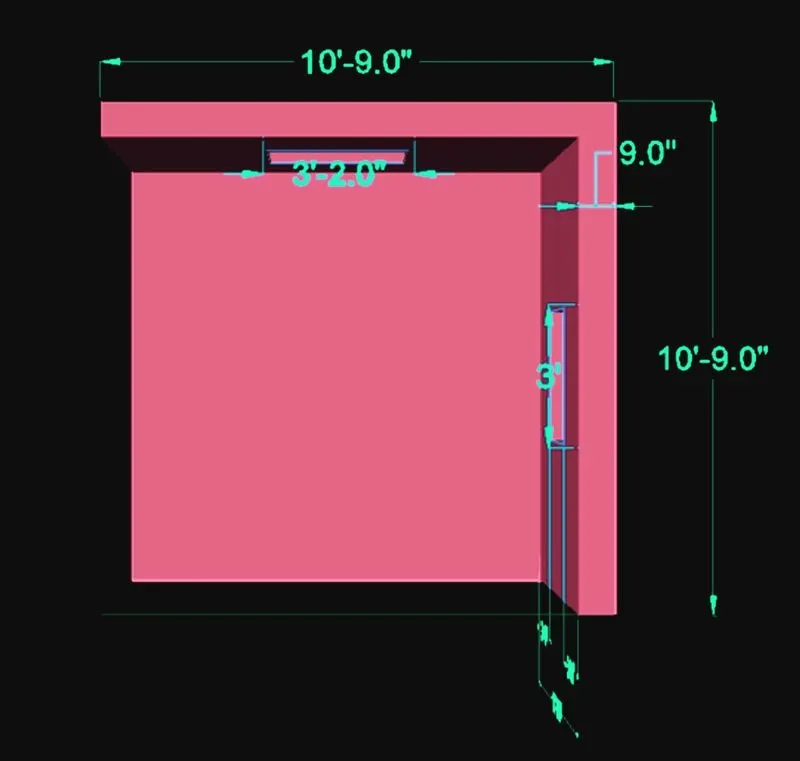
Create a rectangle of dimensions 10'-9" x 10'-9" at any point on the screen
Offset the rectangle to inside to distance of 9" as wall thickness
Type TRIM and delete the extra lines
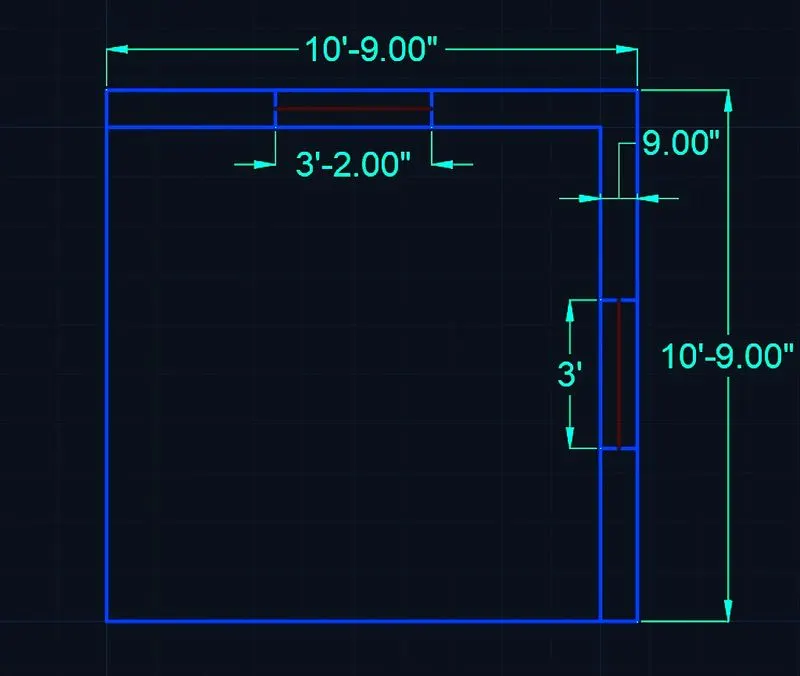
Change the current layer 3D WINDOW FRAME
Create the window opening of dimensions 3' wide in the top and 3'-2" on the right as in the drawing
Type DIMSTY and change the settings to Engineering and precision 0'-0.0"
Type DIMLIN and add dimensions using the dimension layer
STEP 3
CREATING A 3D VIEW
Change the view to 3D by clicking on home button of view cube
Set UCS as world
Set the view style control as REALISTIC
Create the boundries for the walls using BO command
Extrude the boundaries created to total height of 10'-10"
Select all the wall and use group command to group them together
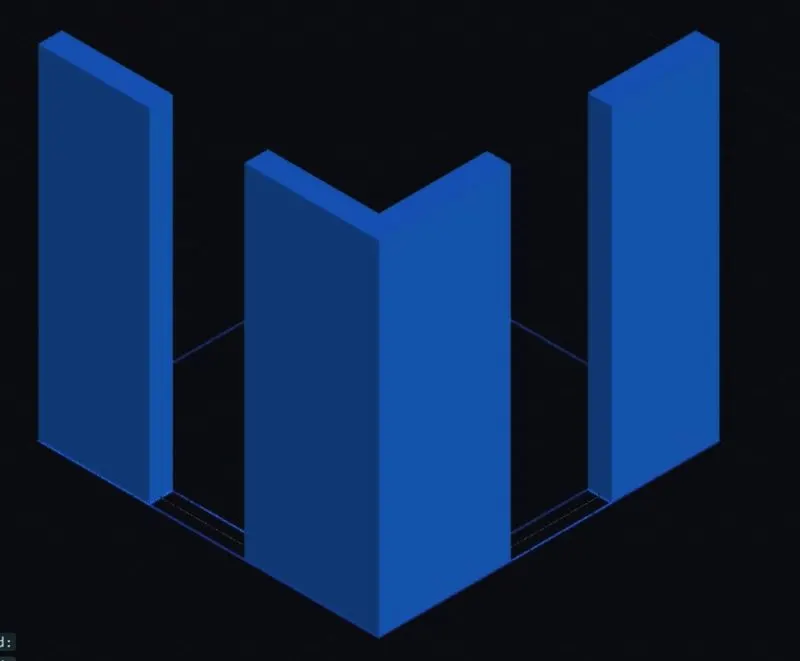
Draw rectangles at both windows and change them to boundaries using boundaries using boundary command
Extrude both rectangles drawn to height 3'-4" as shown in the drawing
Draw rectangles at top of both window openings and change them to boundary using boundary command
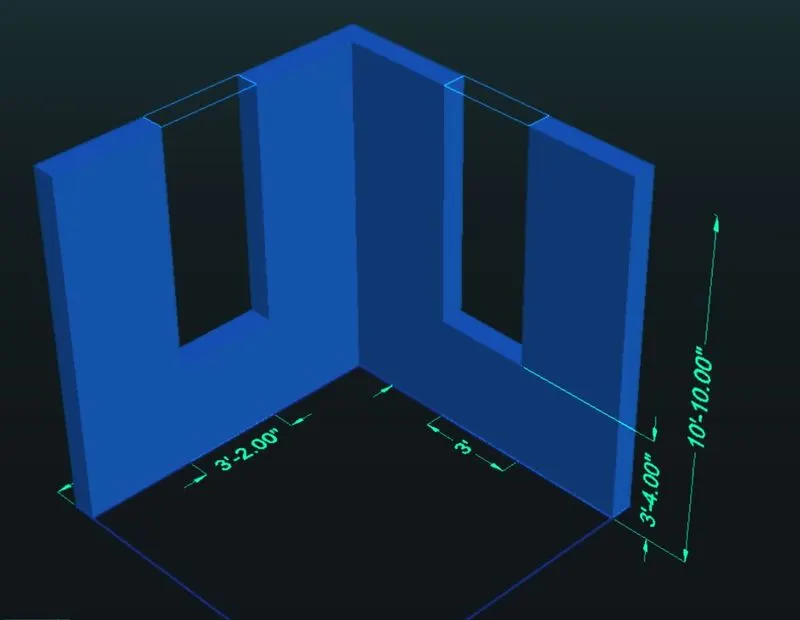
Type UCS and click on face and select the face having 3' wide window
Draw a rectangle from bottom part of window part of window with dimensions @3',4'
Type UCS and click on face and select the face having 3' wide window
Draw a rectangle from bottom part of window part of window with dimensions @3'-2",4'
STEP 4:
CREATING ELEVATION A
Change the current layer to 3D WINDOW FRAME
Type UCS and click on face and select the face having 3' wide window
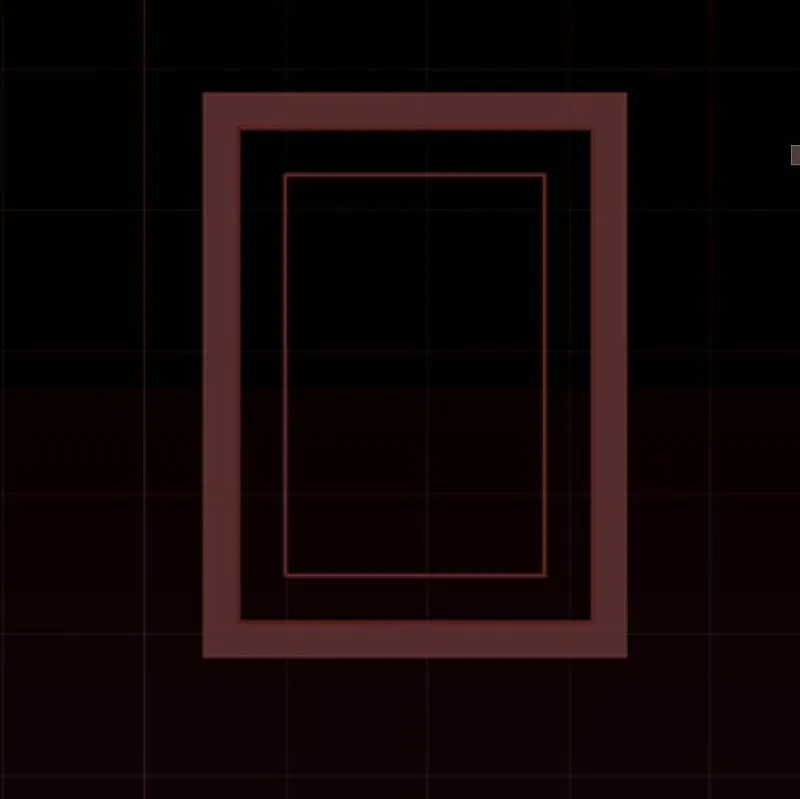
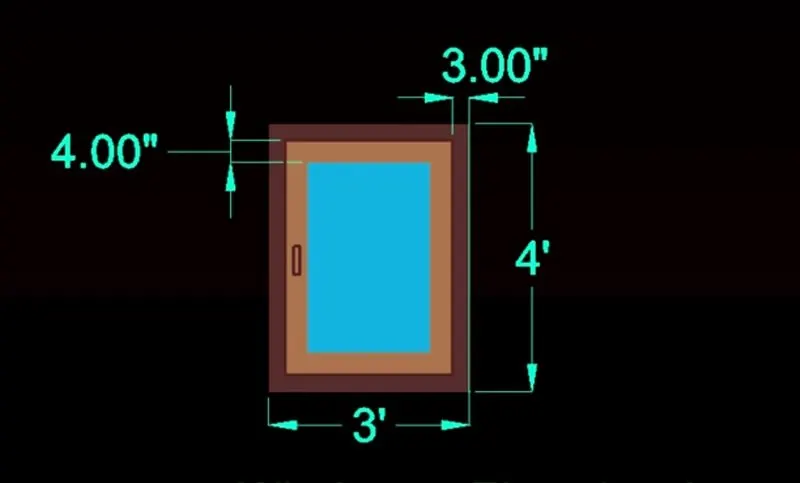
Draw a rectangle of dimension @3',4'
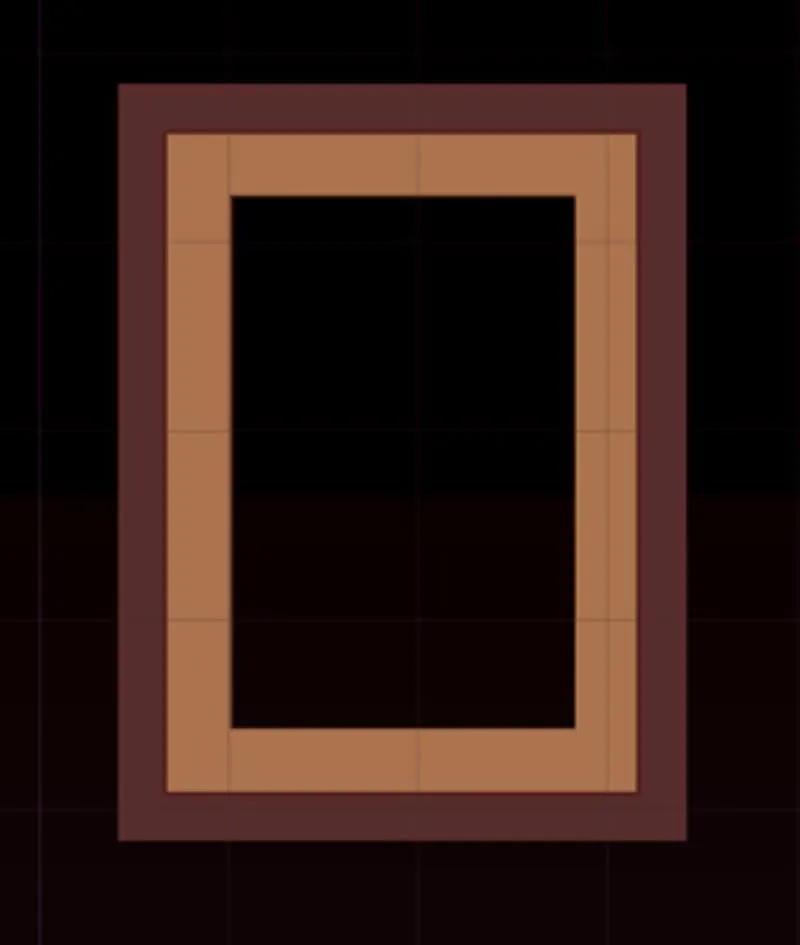
Offset the rectangle to inside to distance of 3"
Offset the offset rectangle to inside to distance 4"
Start the boundary command and click on pick points
Click inside the window frame area and press enter
Start SUBTRACT command
Select the bigger region and then the smaller region to subtract
Follow the same for all three boxes
Change the current layer to 3D WINDOW MULION
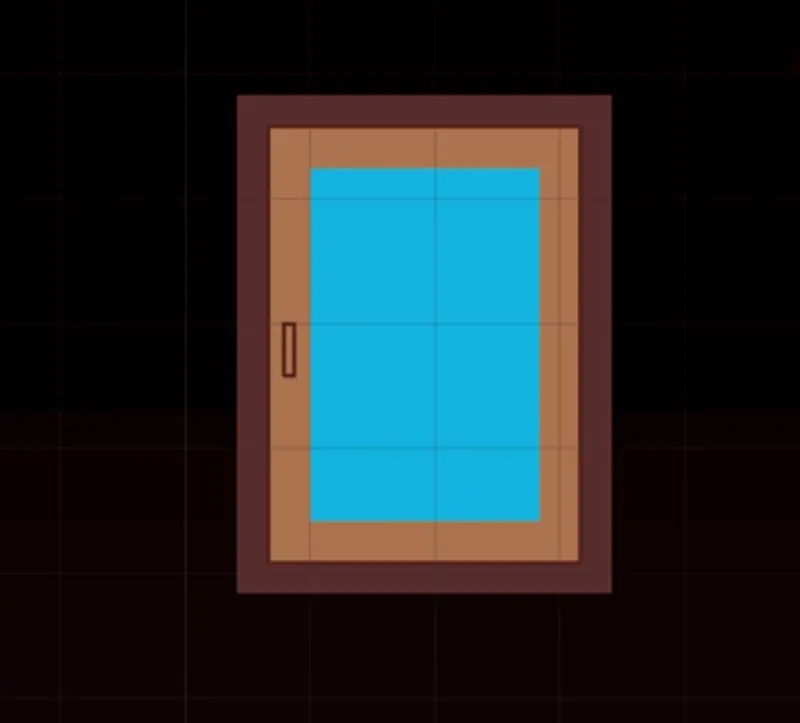
Start the boundary command and click on pickup points
Click inside the window mulion area and press enter
Start SUBTRACT command
Select the bigger region and then the smaller region to subtract
Change the current layer to 3D WINDOW MULION
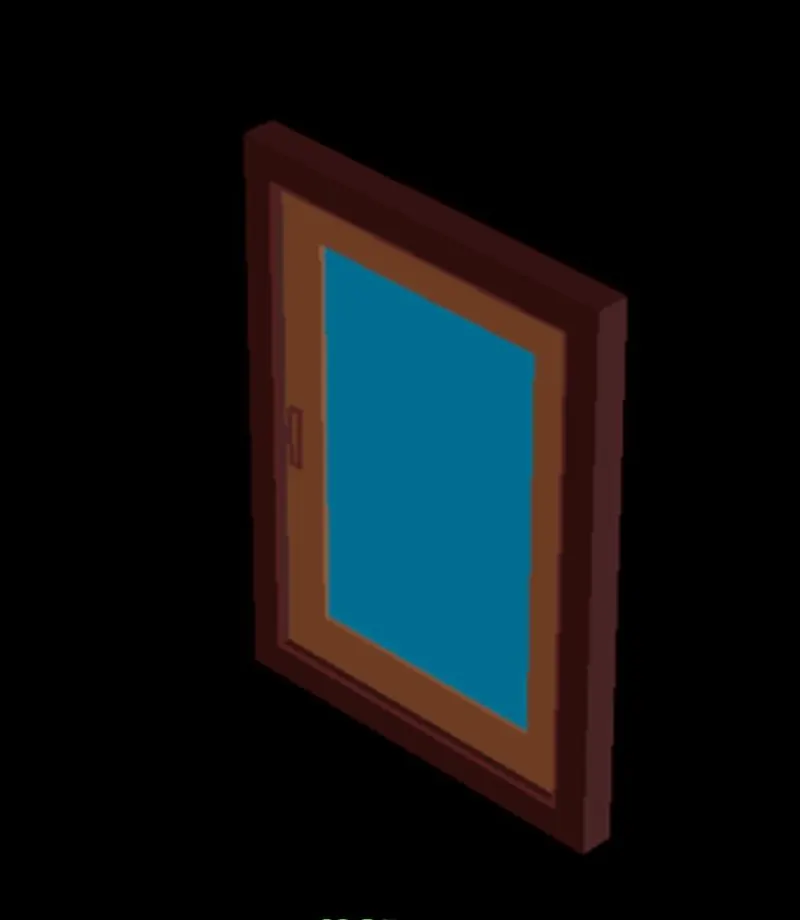
Start the boundary command and click on pickup points
Click inside the window glass area and press enter
All the layers are extruded to give window projection look as in the drawing
CREATING ELEVATION B
Change the current layer to 3D WINDOW FRAME
Type UCS and click on face and select the face having 3'-2" wide window
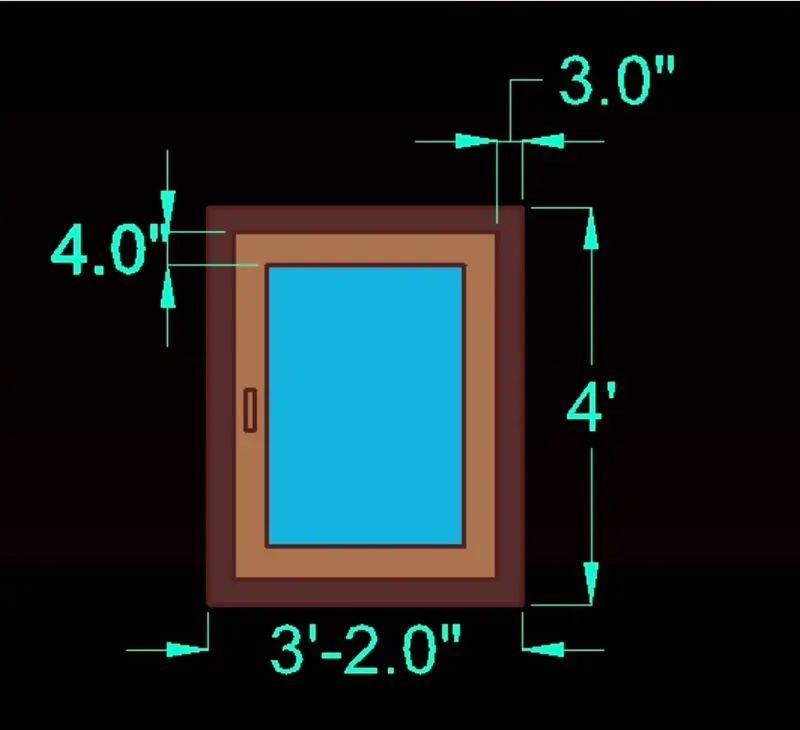
Draw a rectangle of dimension @3',4'
Offset the rectangle to inside to distance of 3"
Offset the offset rectangle to inside to distance 4"
Start the boundary command and click on pick points
Click inside the window frame area and press enter
Start SUBTRACT command
Select the bigger region and then the smaller region to subtract
Follow the same for all three boxes
Change the current layer to 3D WINDOW MULION
Start the boundary command and click on pickup points
Click inside the window mulion area and press enter
Start SUBTRACT command
Select the bigger region and then the smaller region to subtract
Change the current layer to 3D WINDOW MULION
Start the boundary command and click on pickup points
Click inside the window glass area and press enter
All the layers are extruded to give window projection look as in the drawing
RESULT:
TOP VIEW
SW ISOMETRIC
NE ISOMETRIC
WINDOWS
2) AIM:
To draw the 3D building facade as given in the plan and elevation
INTRODUCTION:
Plan view mostly referred to Civil Engineering Drawing and it is Top view and if its external appearance.Some drawings mention the sectional detail viewing from top at different levels such as Ground plan, First floor plan, Second floor plan and so on. A plan drawing is a drawing on a horizontal plane showing a view from above. An Elevation drawing is drawn on a vertical plane showing a vertical depiction.
PROCEDURE:
Open AutoCAD
In the startup setting click on new and then select imperial
Select the units as Engineering and then in insertion scale Inches and precision 0'-0"
Open grid and snap settings
Change the workspace settings of AutoCAD from drafting and annotation to 3D modelling
STEP 1:
CREATING LAYERS
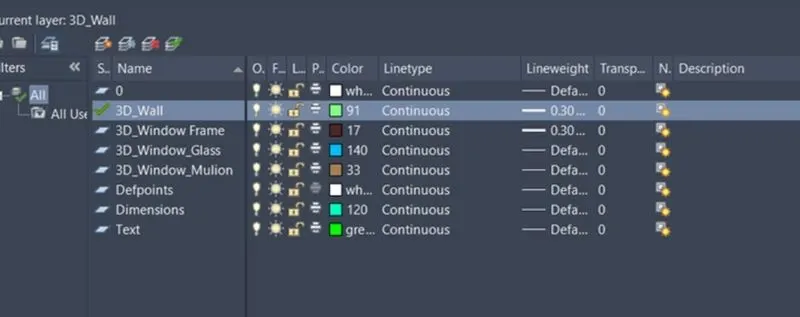
Open layer properties and create new layers by clicking on new layer or right click on layer and select new layer to create new layer
Layers are created as follows
STEP 2:
CREATING 2D PLAN VIEW
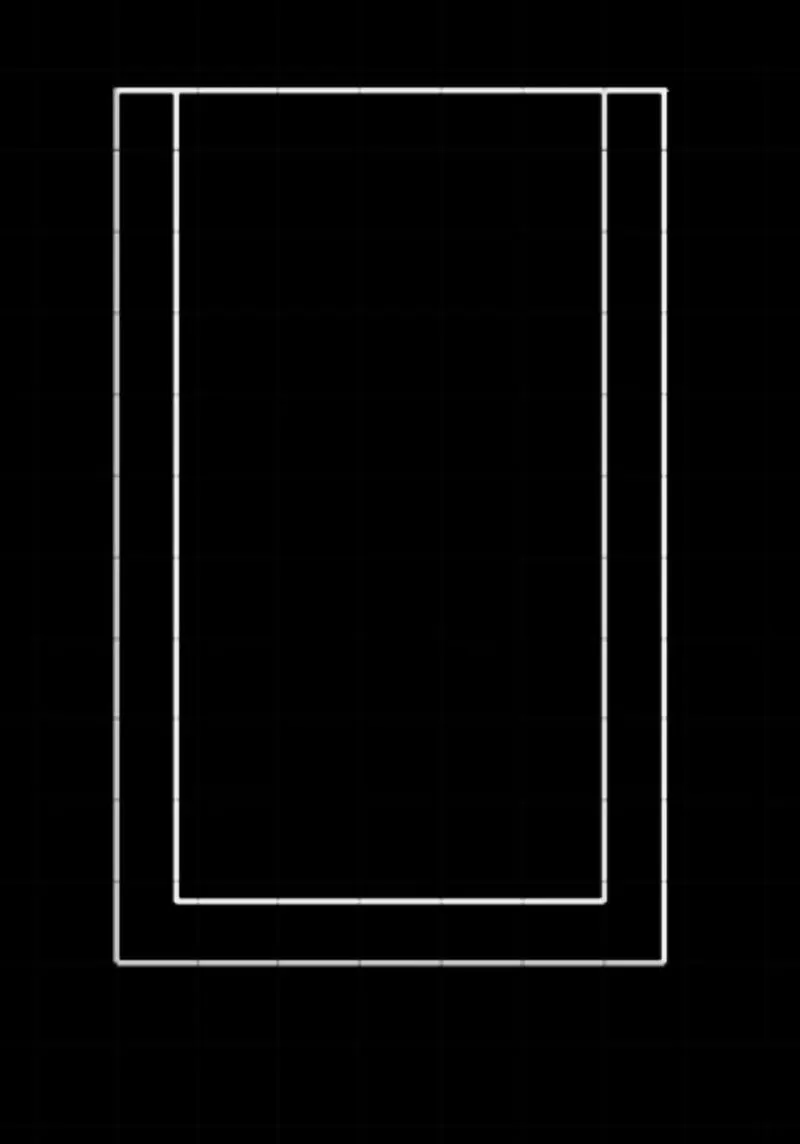
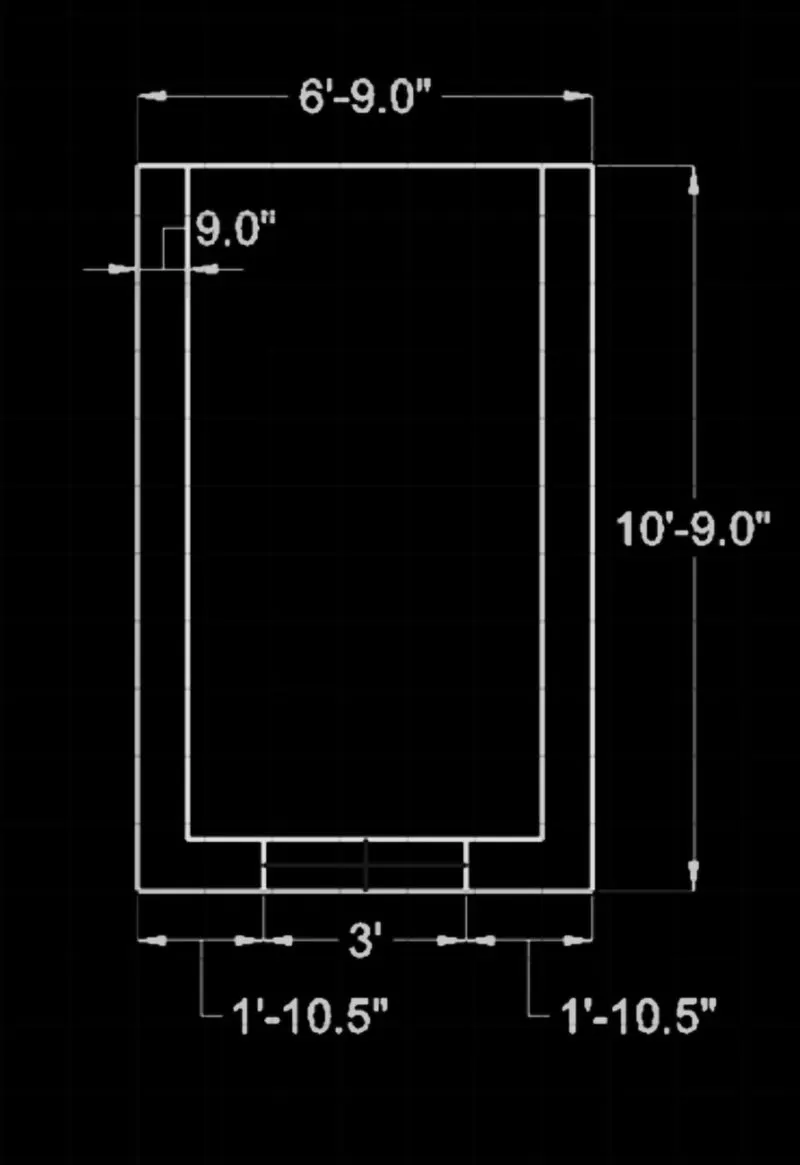
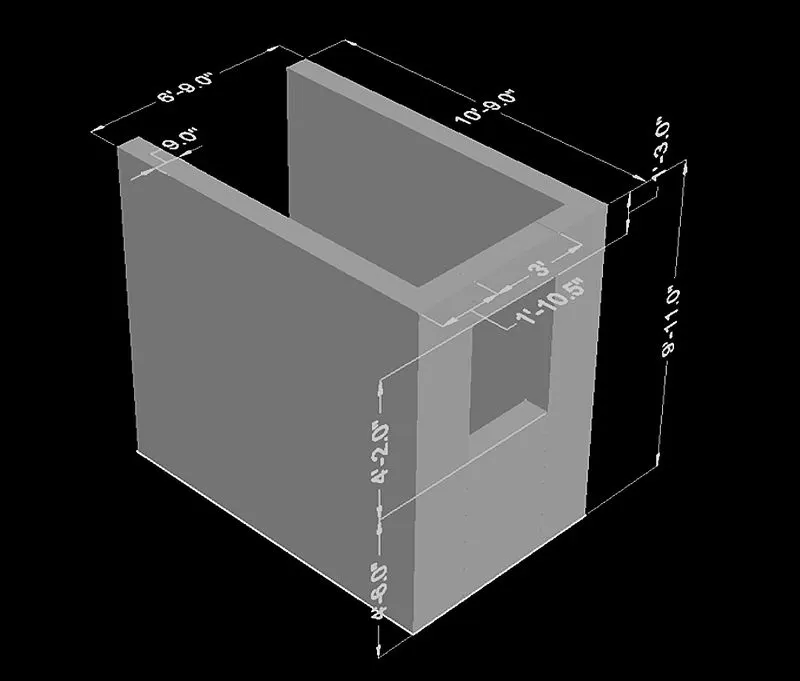
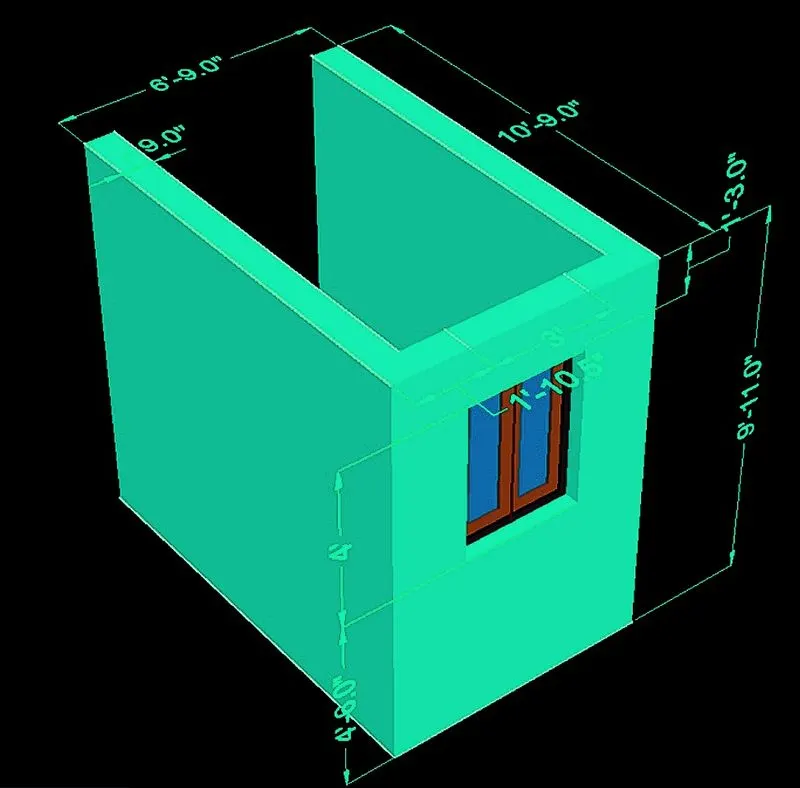
Create a rectangle of dimensions 6'-9" x 10'-9" at any point on the screen
Offset the rectangle to inside to distance of 9" as wall thickness
Type TRIM and delete the extra lines
Change the current layer 3D WINDOW FRAME
Create the window opening of dimensions 3' wide as in the drawing
Type DIMSTY and change the settings to Engineering and precision 0'-0.0"
Type DIMLIN and add dimensions using the dimension layer
STEP 3
CREATING A 3D VIEW
Change the view to 3D by clicking on home button of view cube
Set UCS as world
Set the view style control as REALISTIC
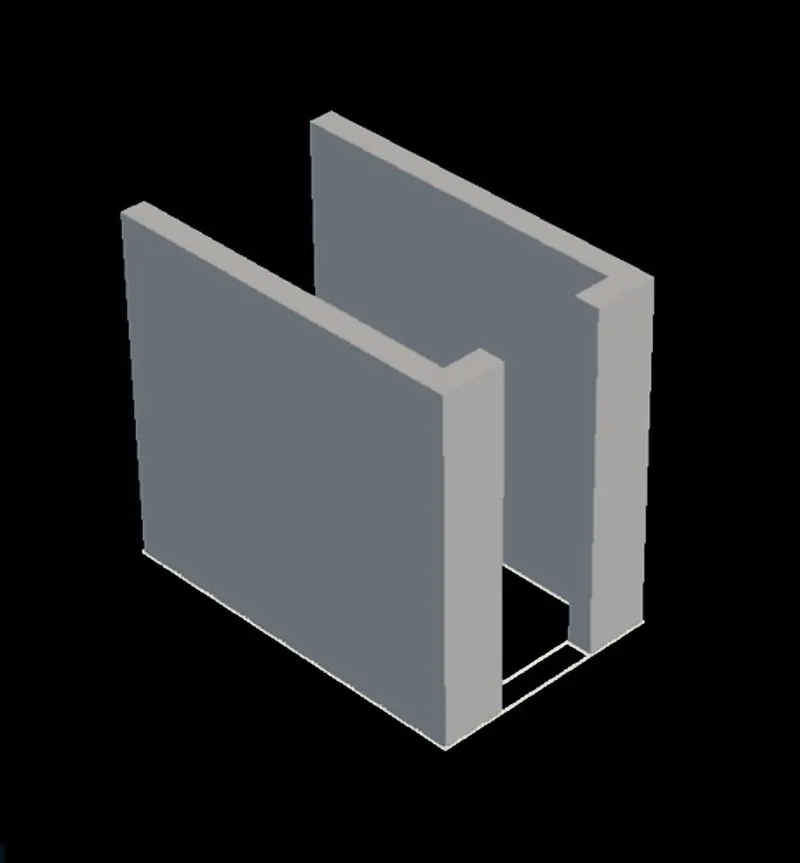
Create the boundries for the walls using BO command
Extrude the boundaries created to total height of 10'-10"
Select all the wall and use group command to group them together
Delete the window lines
Create a boundary region over the window lines
Extrude the boundary to a height of 4'-6"
Draw a rectangle on top of te window opening using rectangle command
Change the recatngle into a region
Extrude the region to distance of 1'-3" to below and then window opening is created referring the drawing
STEP 4:
CREATING ELEVATION WINDOWS 4' WIDE WINDOW
Change the current layer to 3D WINDOW FRAME
Type UCS and click on face and select the face having 3' wide window
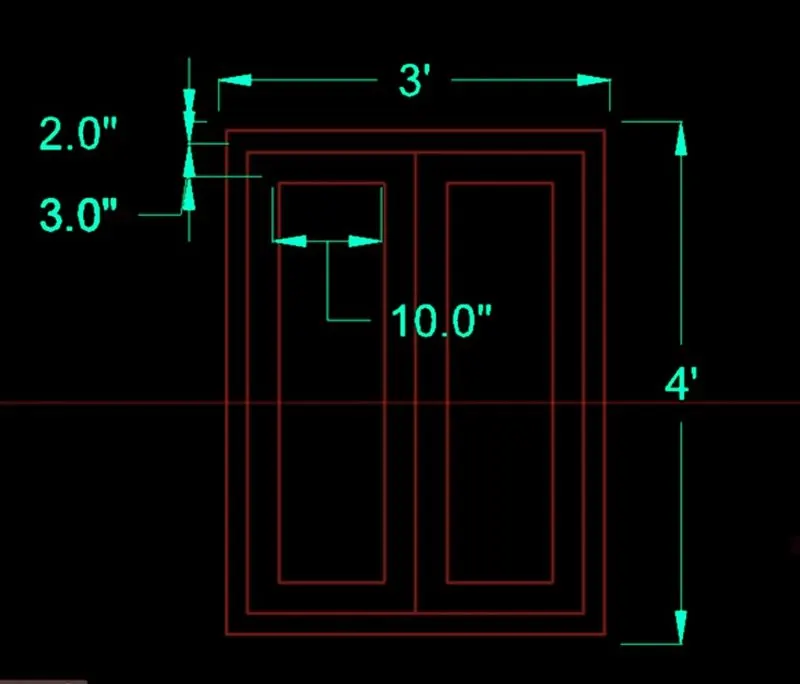
Draw a rectangle of dimension @3',4'
Offset the rectangle to inside to distance of 2"
Offset the offset rectangle to inside to distance 3"
Draw center line connecting midpoints
Offset the lines to both sides to a distance of 3"
Type TRIM and remove the extra lines
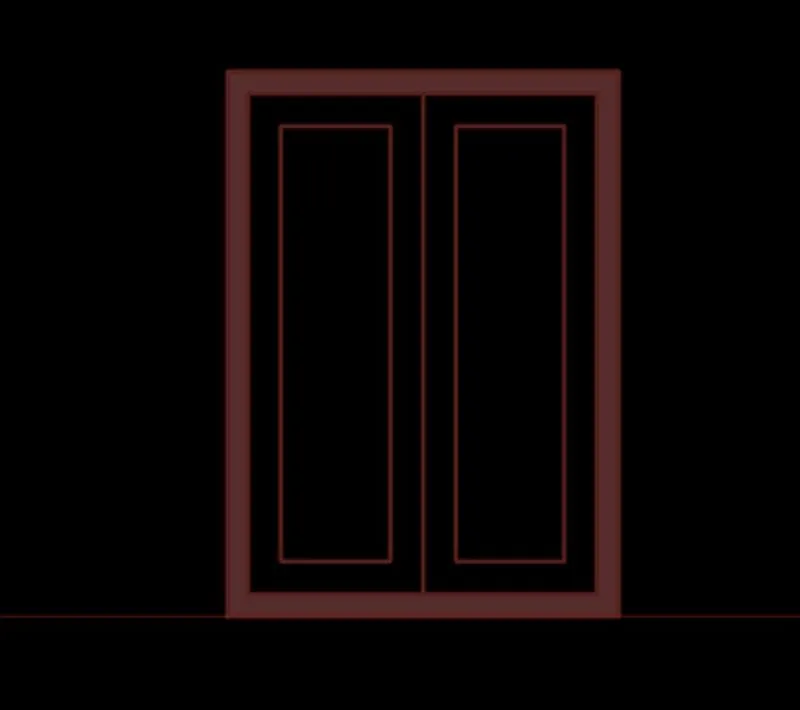
Start the boundary command and click on pick points
Click inside the window frame area and press enter
Start SUBTRACT command
Select the bigger region and then the smaller region to subtract
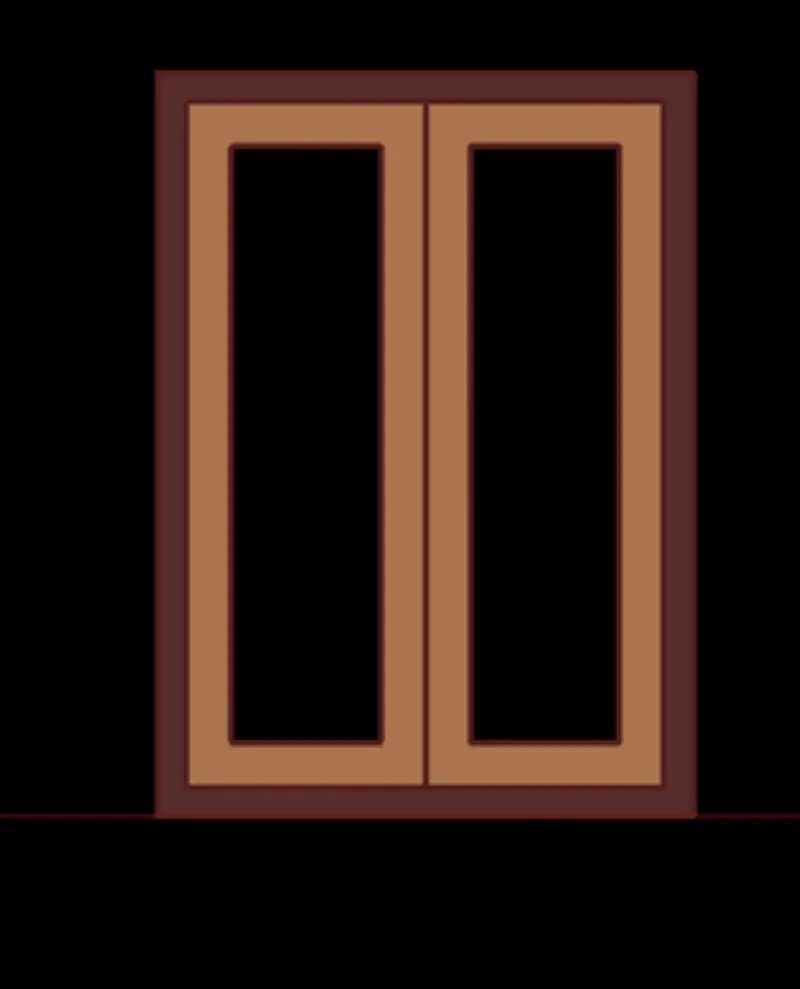
Change the current layer to 3D WINDOW MULION
Start the boundary command and click on pickup points
Click inside the window mulion area and press enter
Start SUBTRACT command
Select the bigger region and then the smaller region to subtract
Change the current layer to 3D WINDOW MULION
Start the boundary command and click on pickup points
Click inside the window glass area and press enter
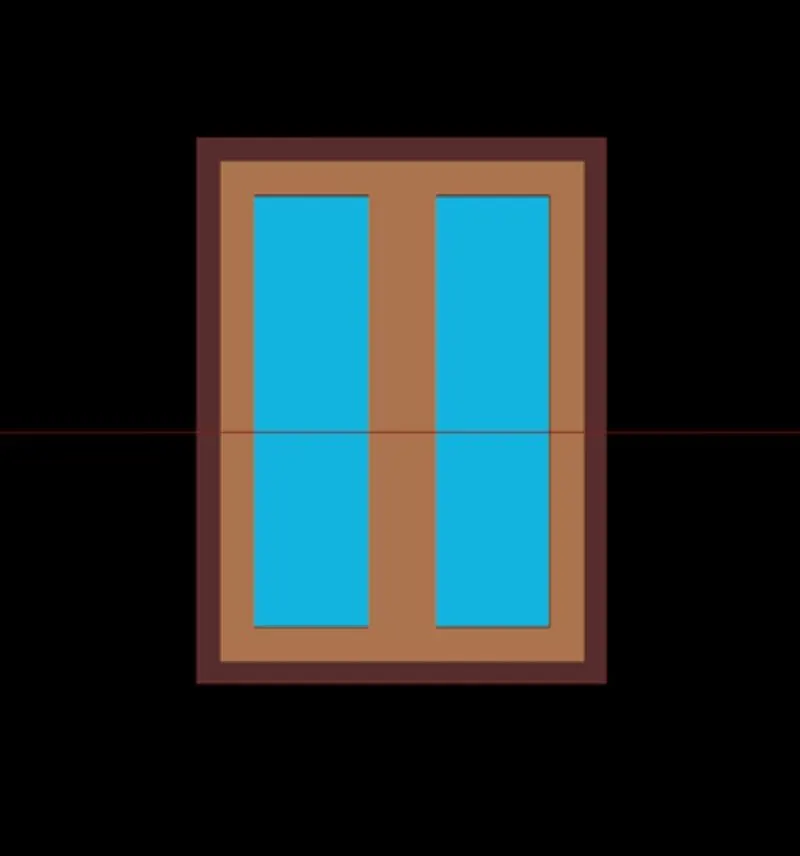
All the layers are extruded to give window projection look as in the drawing
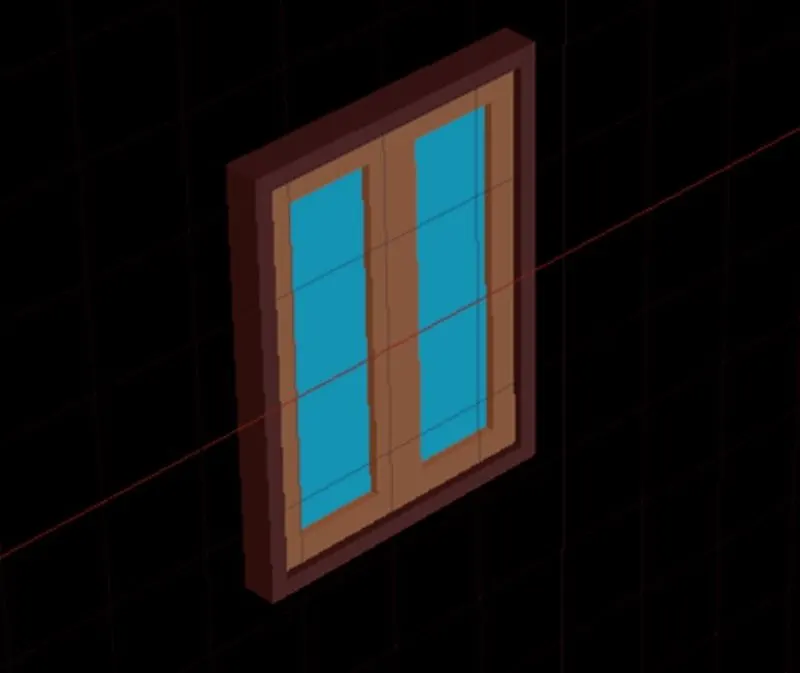
STEP 5:
CREATING ELEVATION VIEW
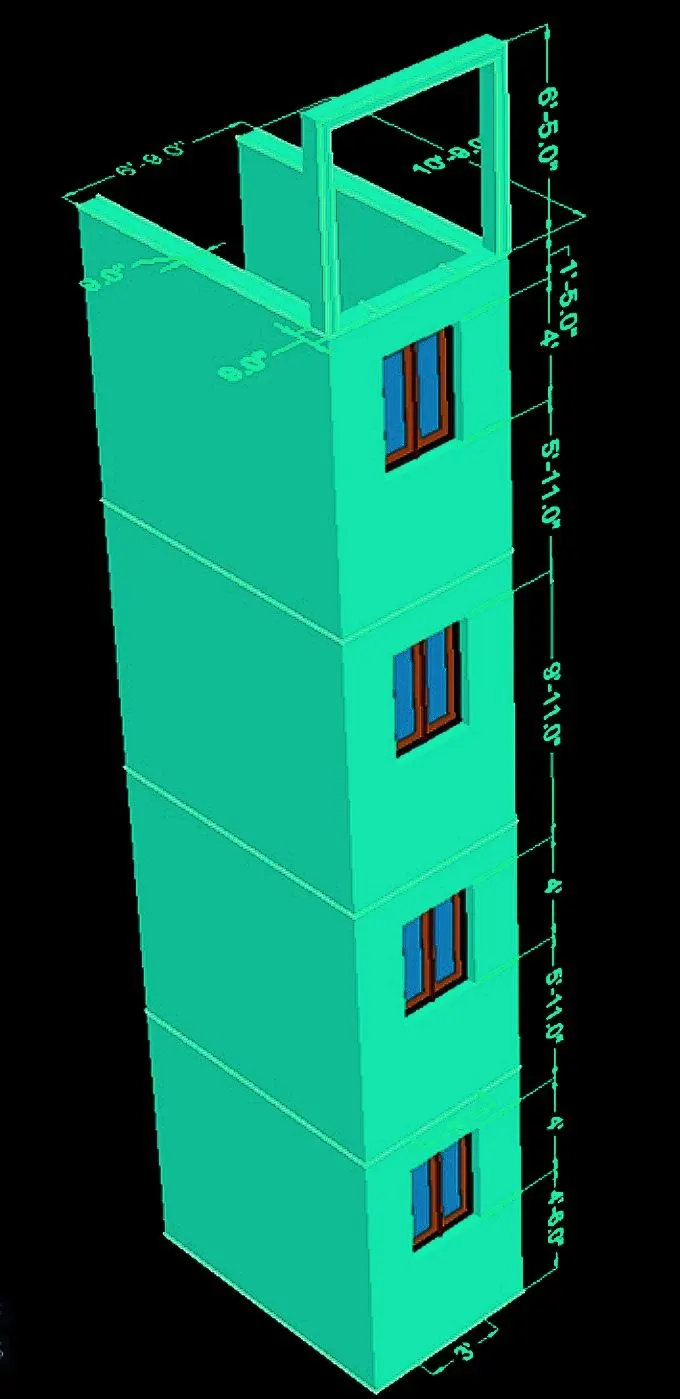
The windows created in step 4 are placed at its positions as in the darwing
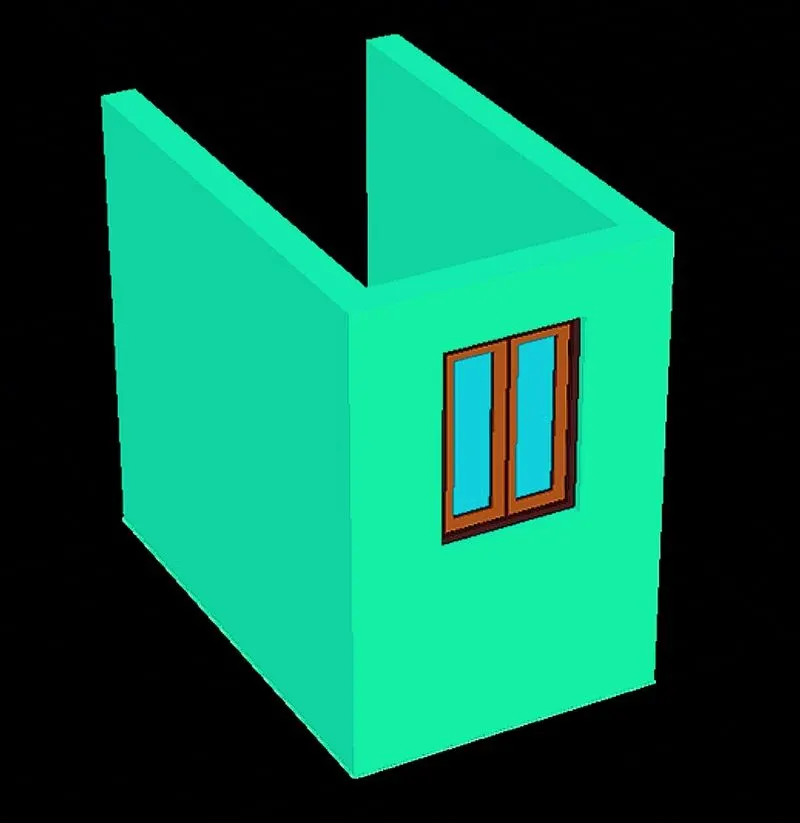
Group all the items to create the elevation view
Copy the block having height 4' window and place it 3 times as shown in the drawing
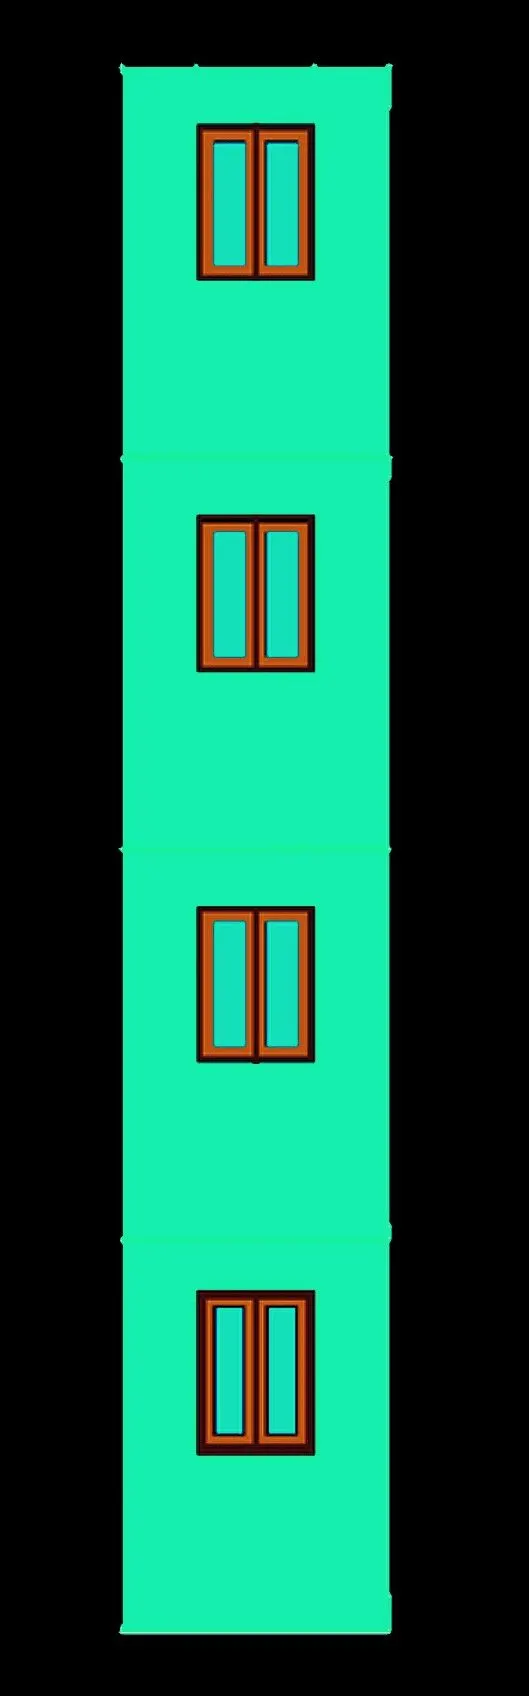
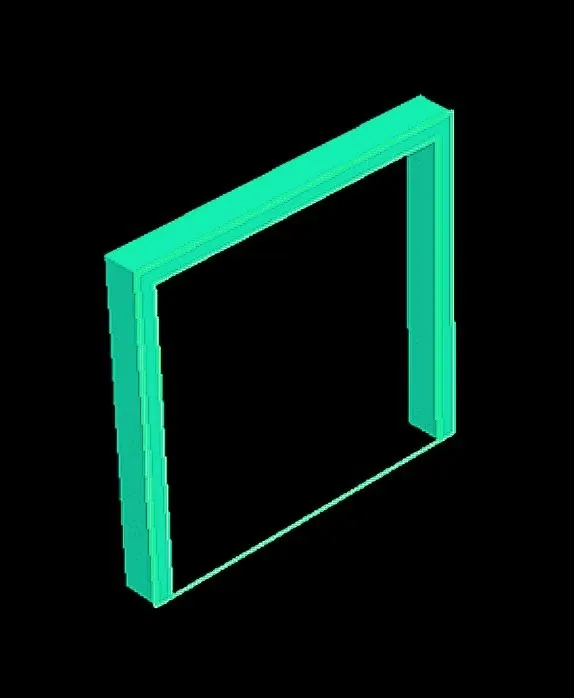
Create the top part of the drawing using 4" wall with height 6'-5" from top
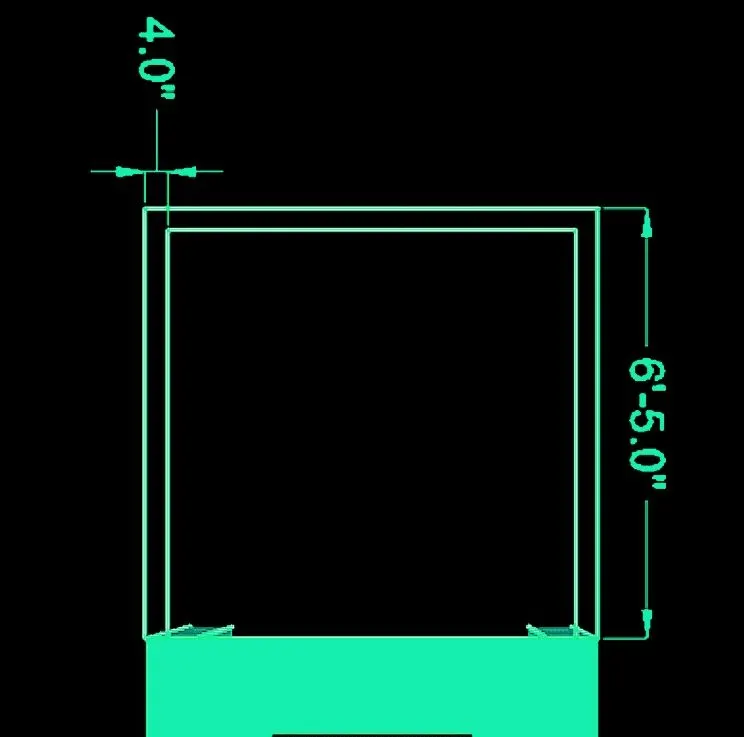
Create a boundary for the wall
Extrude the boundary to 9" referring the drawing
RESULT:
SW ISOMETRIC
TOP VIEW
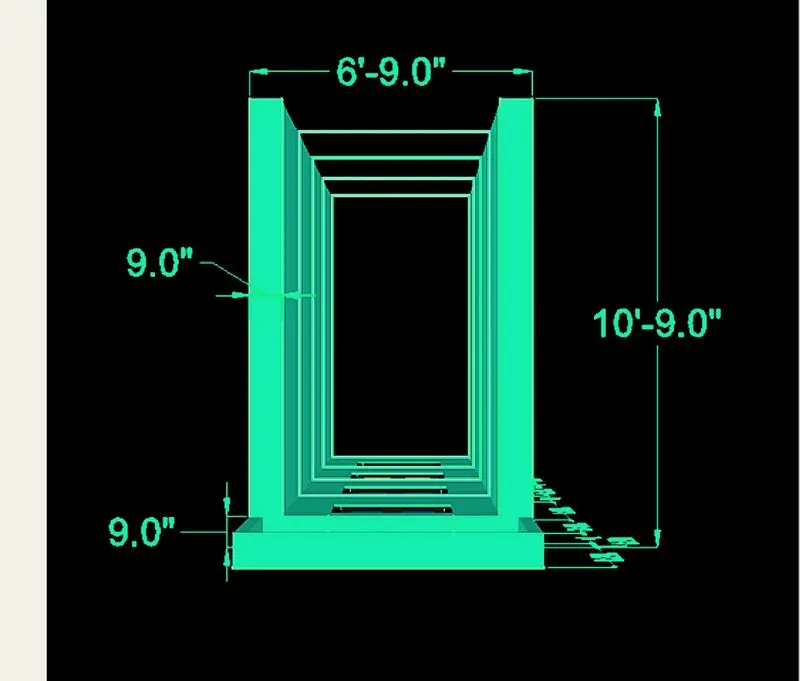
FRONT VIEW
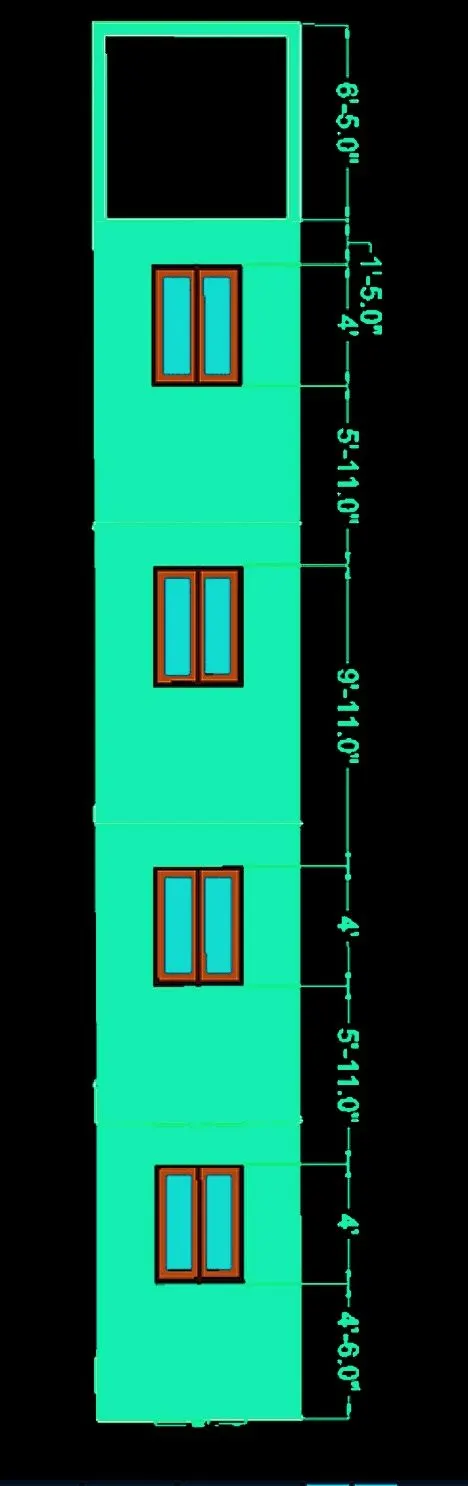
WINDOWS
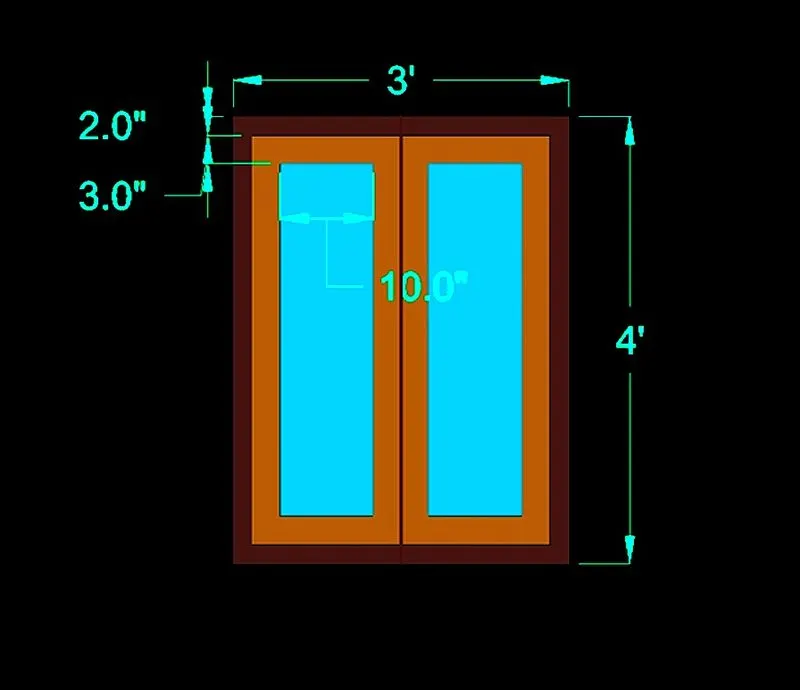
3.AIM:
TO DRAW A 3D VIEW OF A STAIR WITH RAILING AS IN THE DRAWING IN PLAN AND ELEVATION:
INTRODUCTION:
A plan perspective is a drawing of a plan but shown in perspective. This is more of a design drawing meant to show what the space is going to look like and less how the space will be built.An Elevation is drawn from a vertical plane looking straight on to a building facade or interior surface. This is as if you directly in front of a building and looked straight at it. Elevations are a common design drawing and technical architectural or engineering convention for graphic representation of architecture. Elevation drawings are orthographic projections.
PROCEDURE:
Open AutoCAD
In the startup setting click on new and then select imperial
Select the units as Engineering and then in insertion scale Inches and precision 0'-0"
Open grid and snap settings
Change the workspace settings of AutoCAD from drafting and annotation to 3D modelling
STEP 1:
CREATING LAYERS
Open layer properties and create new layers by clicking on new layer or right click on layer and select new layer to create new layer
Layers are created as follows
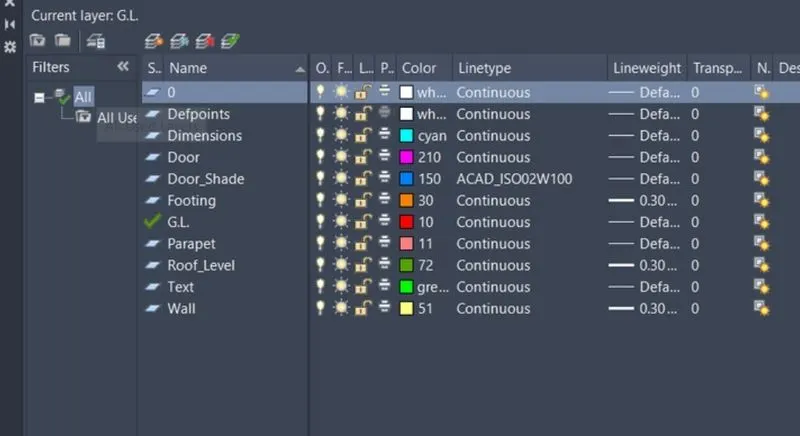
STEP 2:
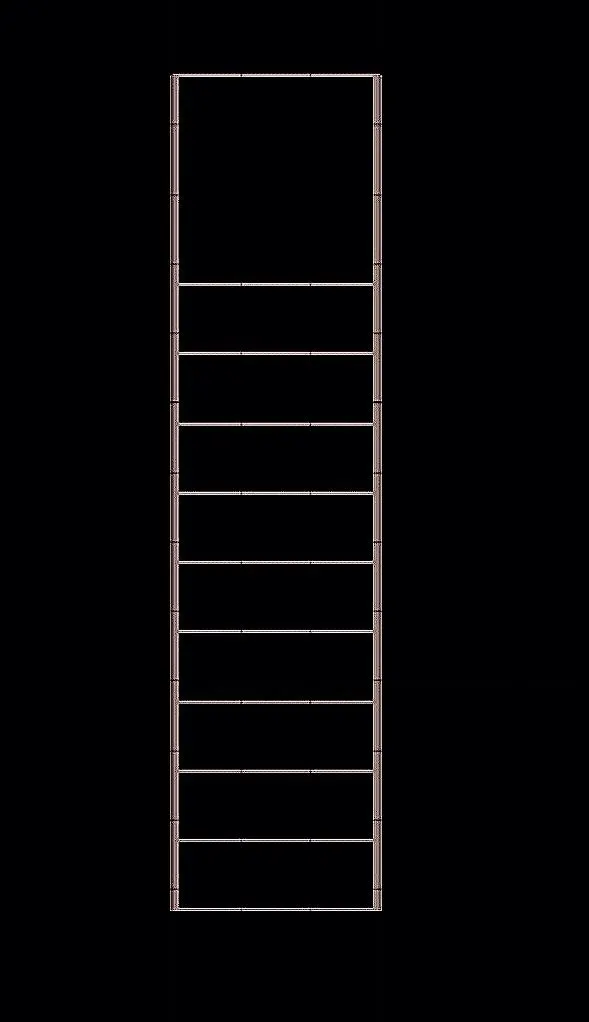
CREATING 2D PLAN VIEW OF STAIRCASE:
Change the current layer
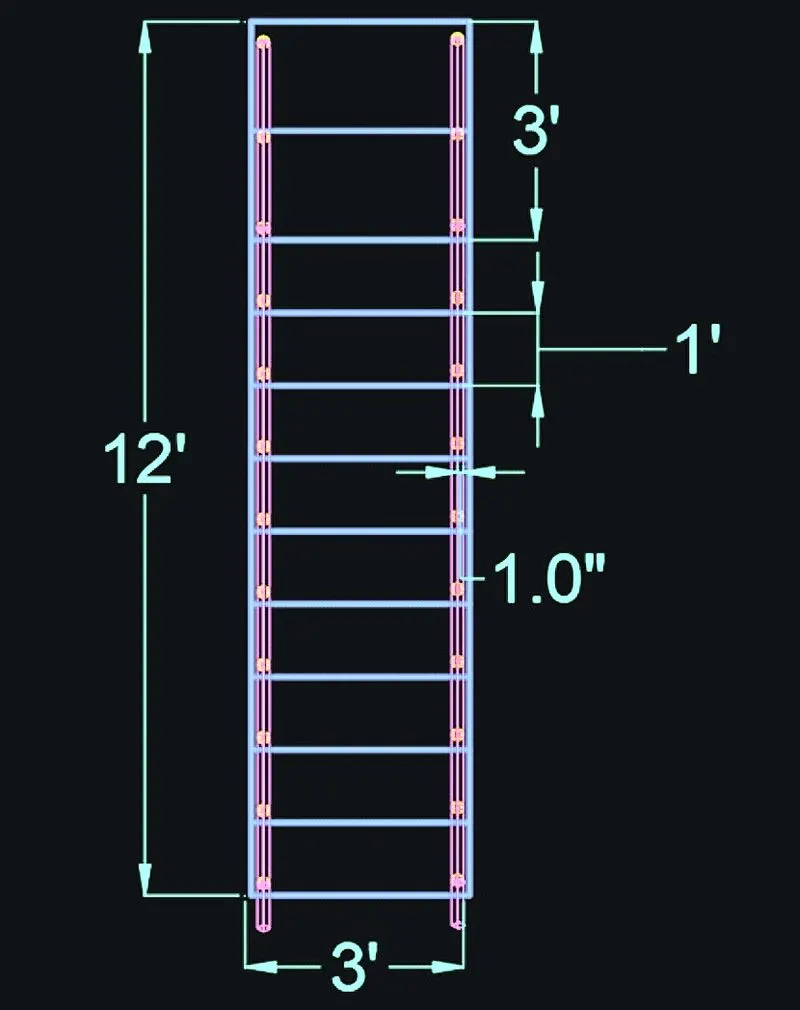
Create a rectangle of dimensions 3' x 12' at any point on the screen
Offset the side edge of rectangle to inside to distance of 1"
Offset the bottom edge to upside 12 times to a adistance of 1'
STEP 3:
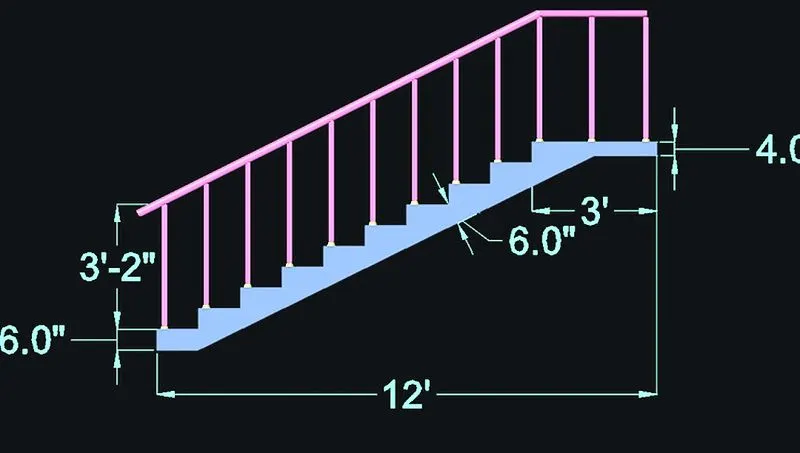
CREATING SIDE VIEW
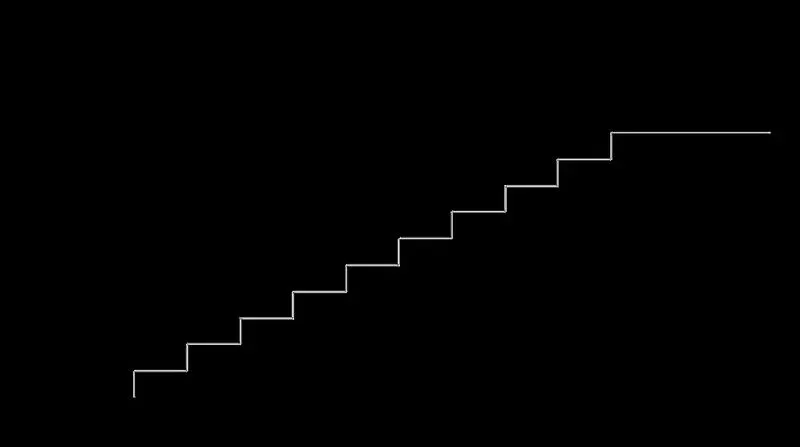
Change the view to 3d by clicking on home buttom of view cube and change the view to the right view
Set UCS as right
Star line command and draw a verticle line of length 6"
Draw a horizontal line of length 1'
Repeat the same process for 12 times to draw 12 steps
After reacghing 12 steps draw a landing of length of 3'
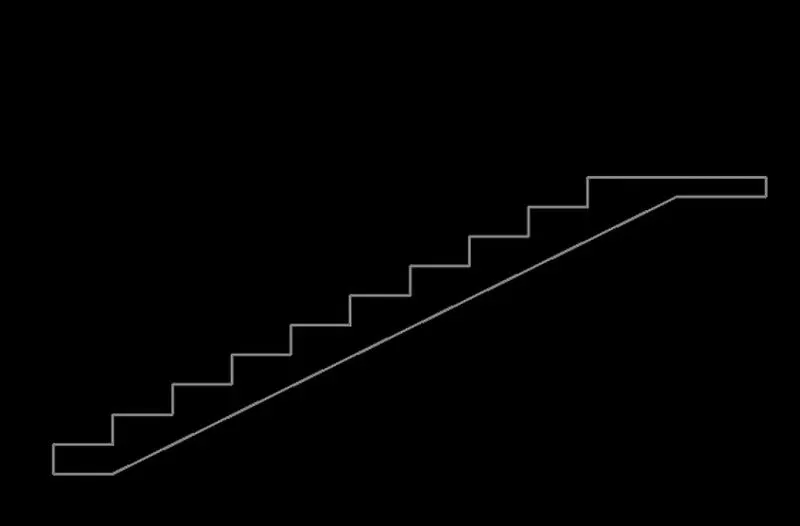
Draw a line of 1' at the bottom step
Draw a line of 6" at top right edge of landing
Draw a line 1'-6" backwards
Draw a slab joining the lines
STEP 4:
CREATING A 3D VIEW
Change the view to 3D by clicking on home button of view cube
Set UCS as world
Set the view style control as REALISTIC
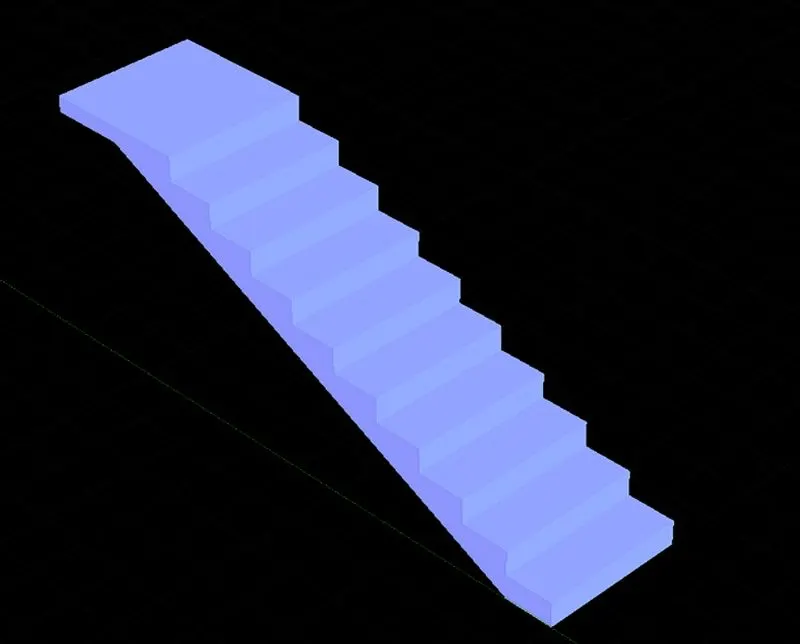
Create the region from the side view of the stairs
Extrude the side view to a distance of 3' as refering to the drawing
Change the current layer to Stair handrails stand
Draw a handrail stand at the bottom with dimension 2" and extrude as shown
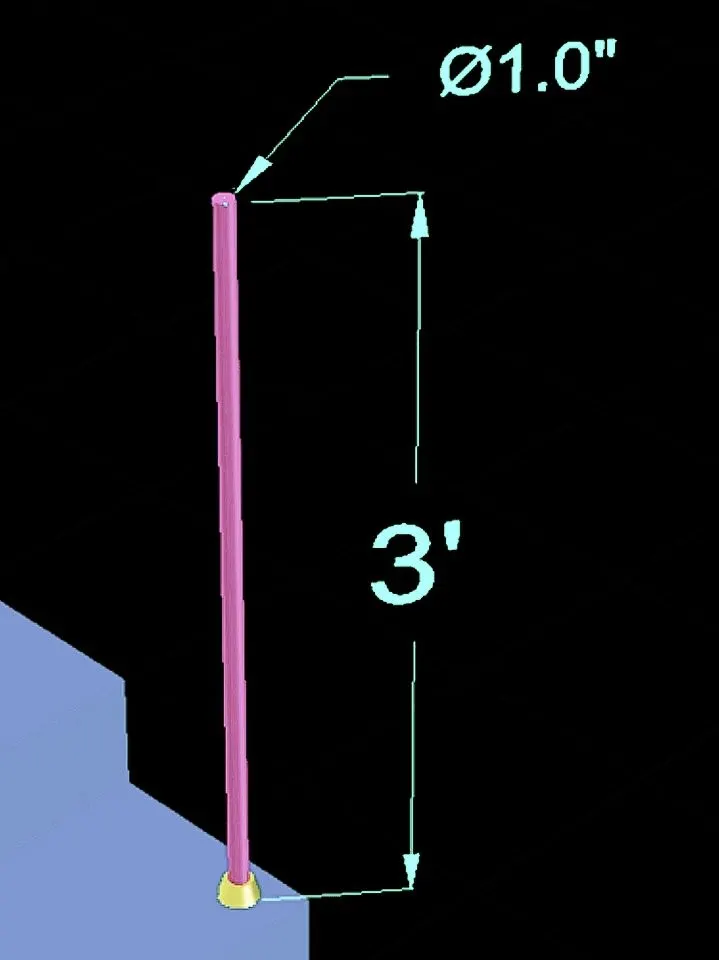
Using copy command copy all the hand rail compartments on stairs
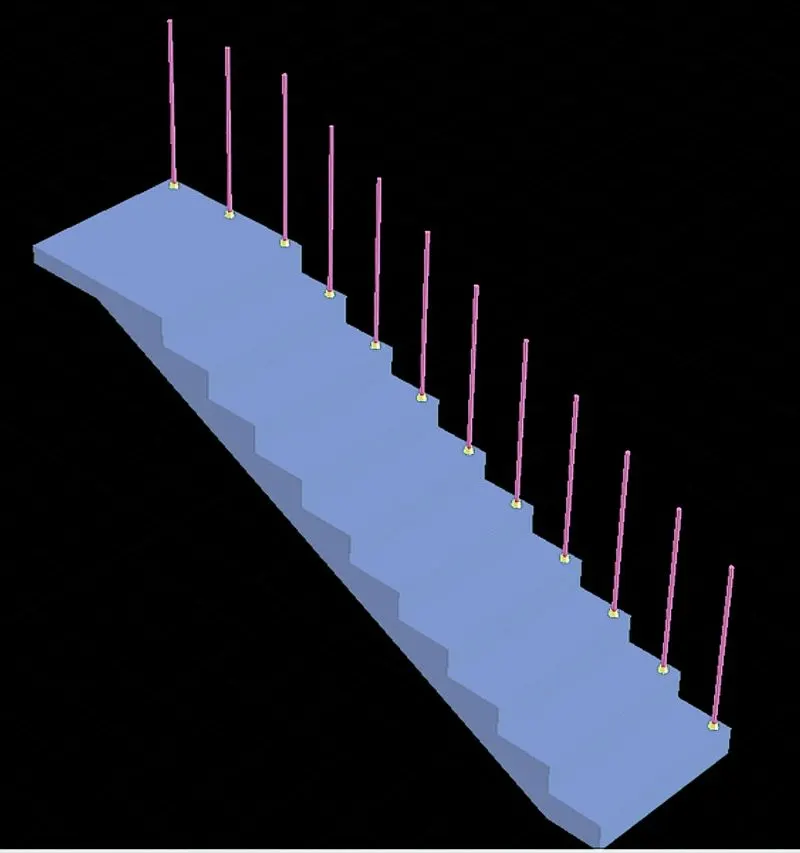
Copy on the other side
Join the railing and pull up to 1"
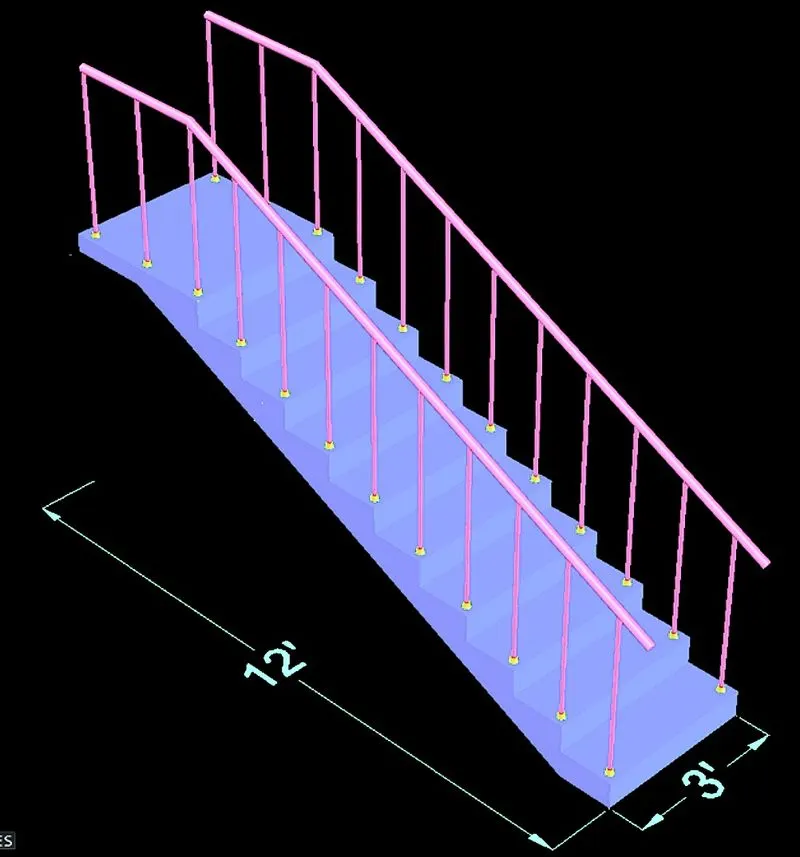
RESULT:
TOP VIEW
FRONT VIEW
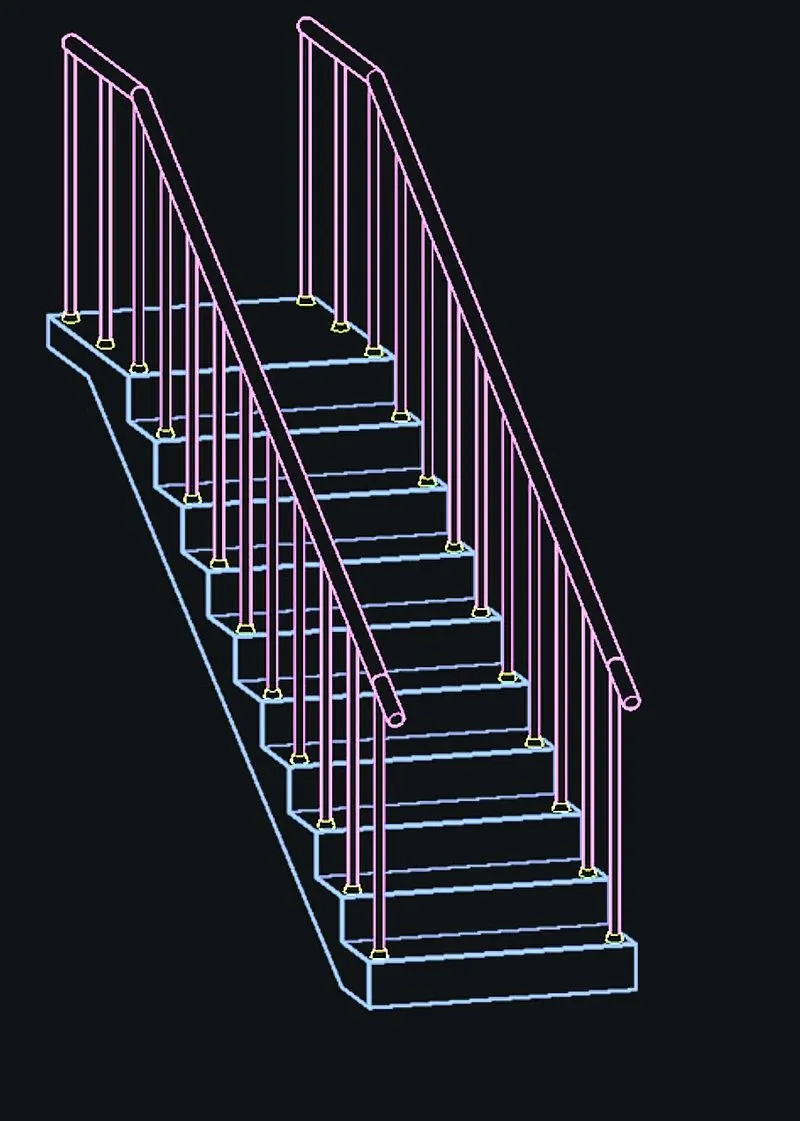
SW ISOMETRIC
RIGHT SIDE VIEW
4. AIM:
Create the 3D view of a Wall with spread footing . Create the Door opening only. Assume the size of the parpaet and the coping.
PROCEDURE:
Open AutoCAD
In the startup setting click on new and then select imperial
Select the units as Decimal and then in insertion scale millimeter and precision 0
Open grid and snap settings
Change the workspace settings of AutoCAD from drafting and annotation to 3D modelling
STEP 1:
CREATING LAYERS
Open layer properties and create new layers by clicking on new layer or right click on layer and select new layer to create new layer
Layers are created as follows
STEP 2:
CREATING 2D PLAN VIEW
Create a rectangle of dimensions 670 x 7500 at any point on the screen
Offset the rectangle to inside to distance of 120 mm
Offset the rectangle to inside to distance of 50 mm twice
Explode all the offset rectangle
Type TRIM and delete the extra lines
At the end select the individual lines and change their respective layers
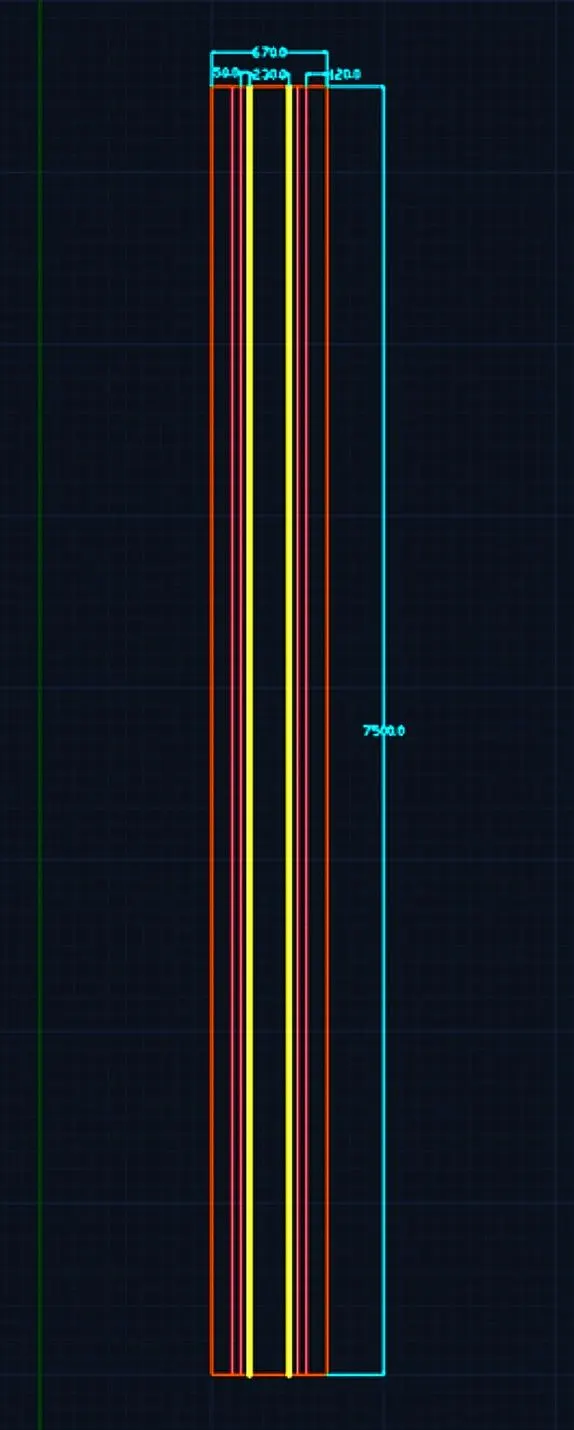
Type DIMSTY and change the settings
Type DIMLIN and add dimensions using the dimension layer
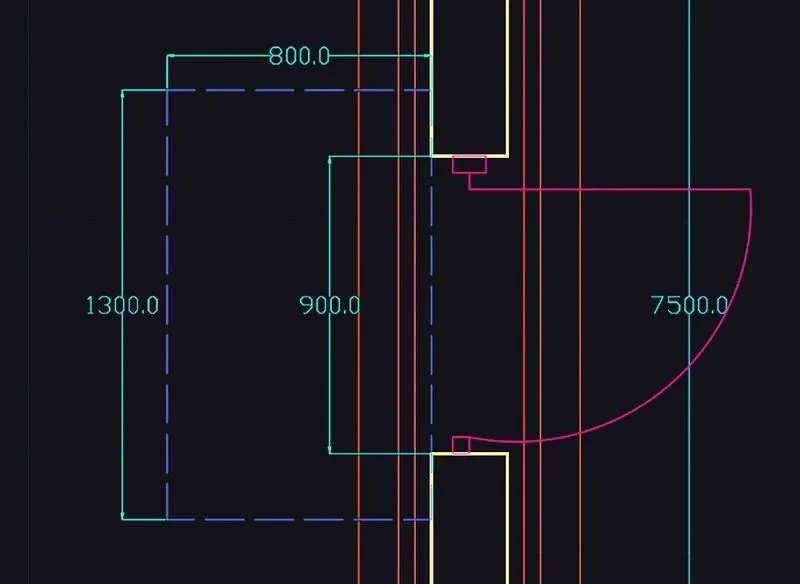
Creating door block
Draw a rectangle of dimension 50 x 100 mm
Draw another rectangle with dimensions of 50 x 50 mm
Draw a line of length 850 mm from the edge
Draw an arc line of the door swing
Convert the door into block
Edit the block and add flip parameters
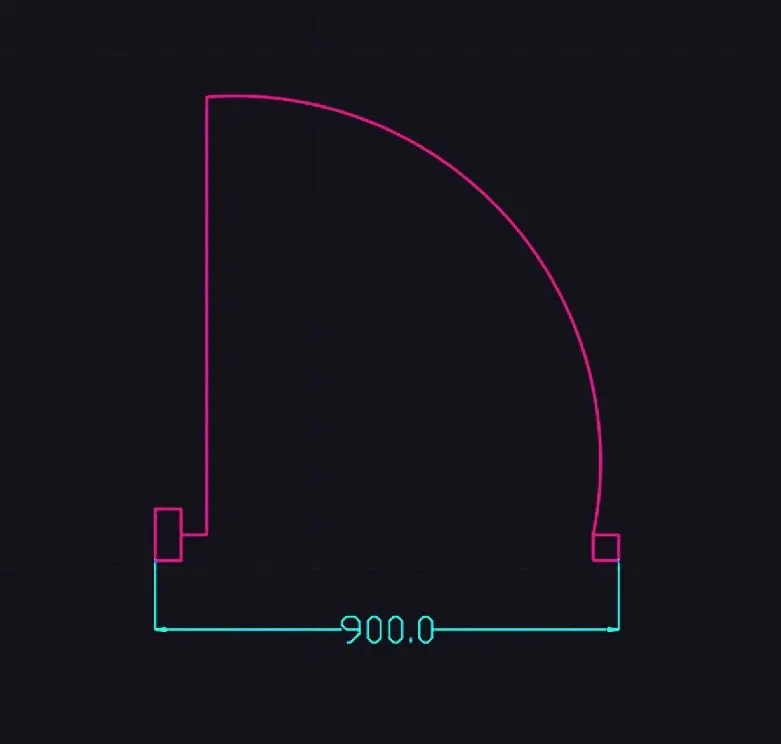
Add the door to the respective layer
STEP 3
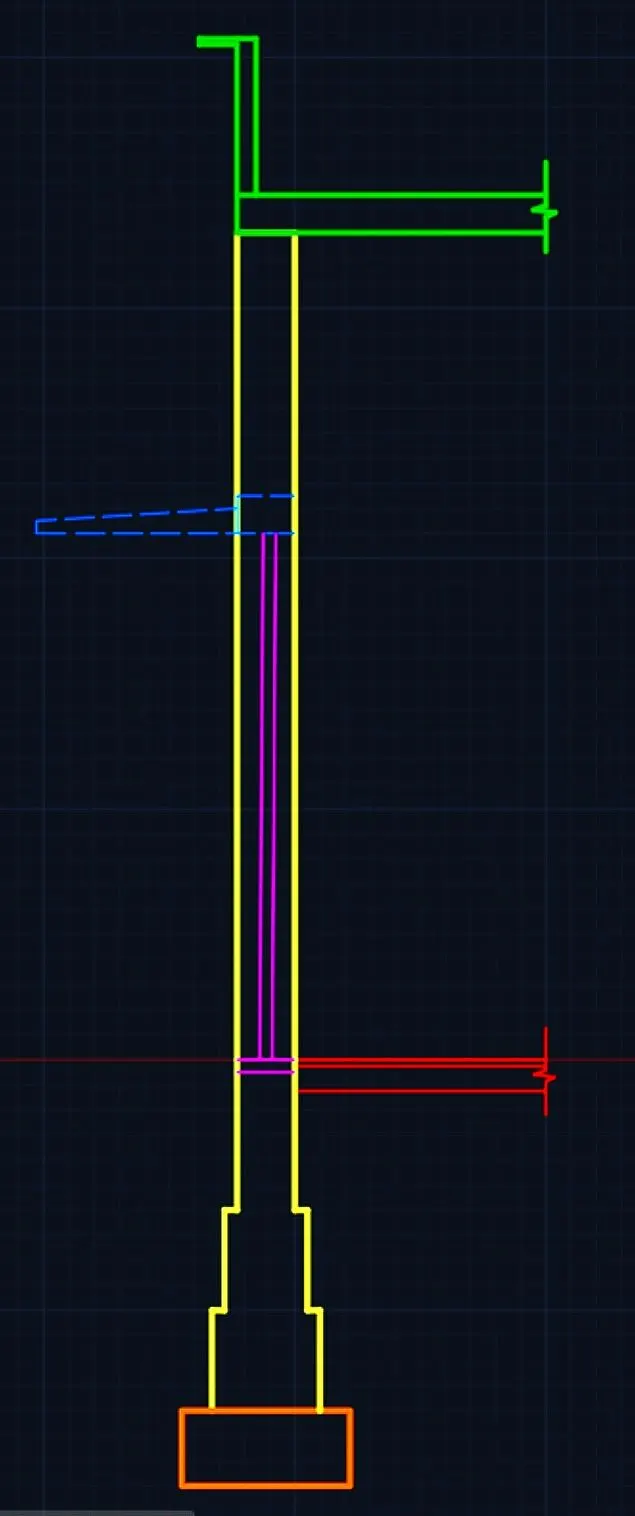
CREATING ELEVATION VIEW
Click on the front view of the view cube and zoom for better view
Change the UCS to front
Change the current layer to GL
Draw a line of certal length
Offset the line to bottom 25 mm
Offset the last offset line bottom to distance of 100 mm
Change the current layer to wall
Draw a recatngle of dimension 230 x 3300 from the top left edge of GL
Change the current layer to roof level
Draw roof of thickness 150 mm
Draw a parapet wall of height 600 mm as shown in the drawing
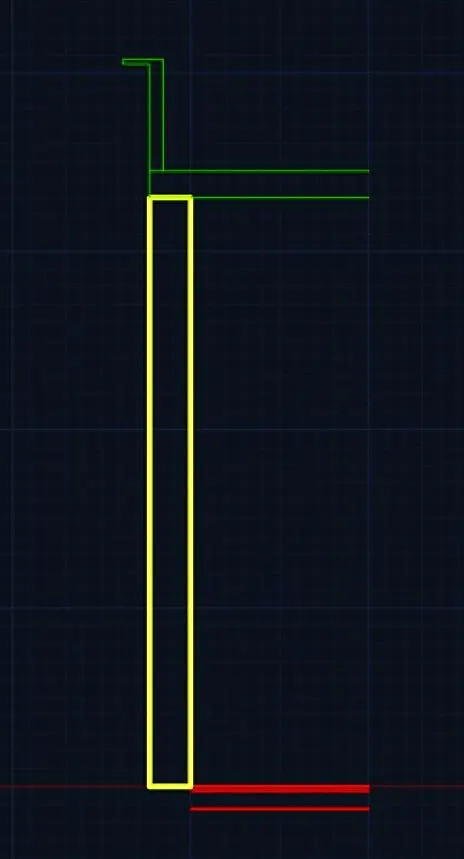
Footing layers
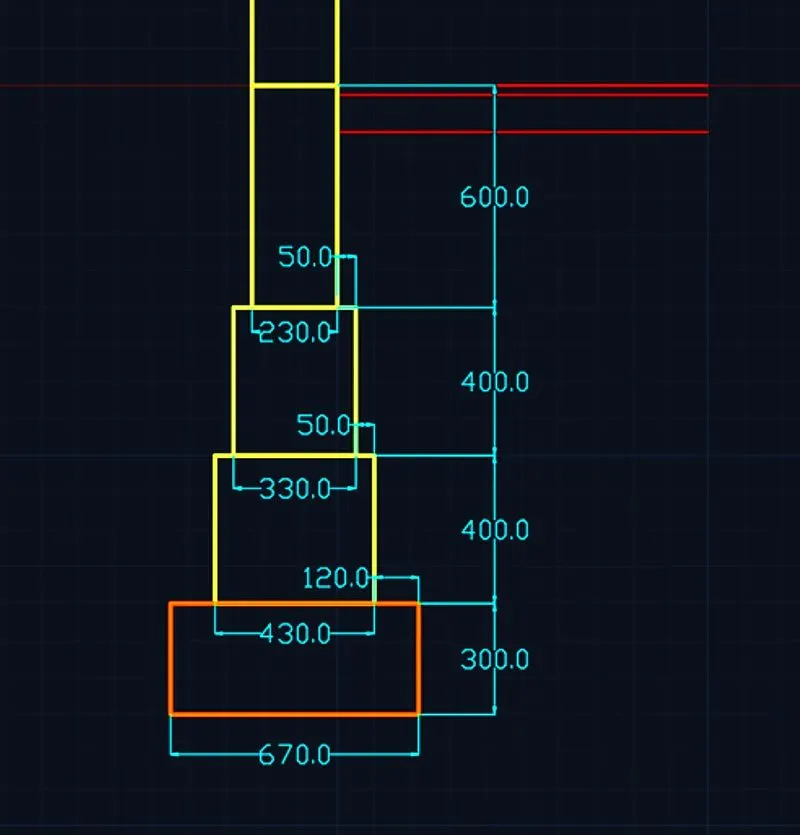
Draw a rectangle of dimension 230 x 600 below the floor level as shown in the drawing
Draw a rectangle of dimension 330 x 400 below the first floor level as shown in the drawing
Draw a rectangle of dimension 430 x 400 below the second floor level as shown in the drawing
Change the current layer to footing
Draw a rectangle of dimension 670 x 300 below the second floor level as shown in the drawing
Trim the extra lines
Door
Change the current layer to the door
Draw a line along the length of door 230 mm at ground level
Offset distance 50mm below the ground
Offset the line to distance of 2100 to above
Change the current layer to door shade
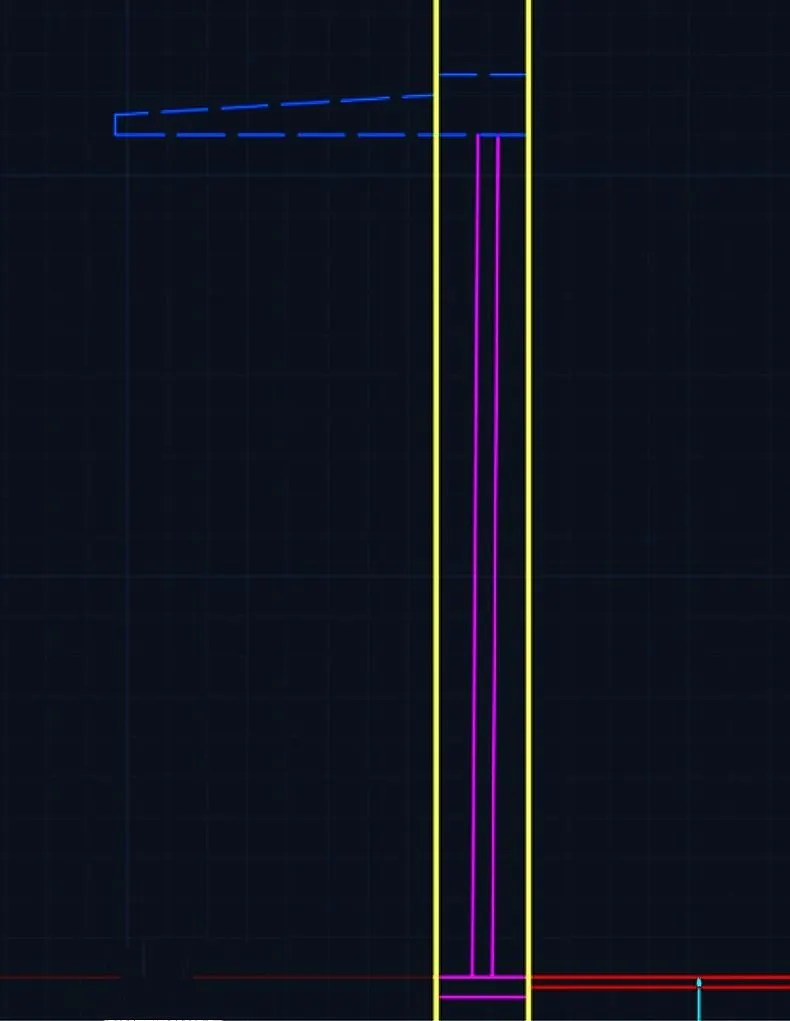
End result is
STEP 4
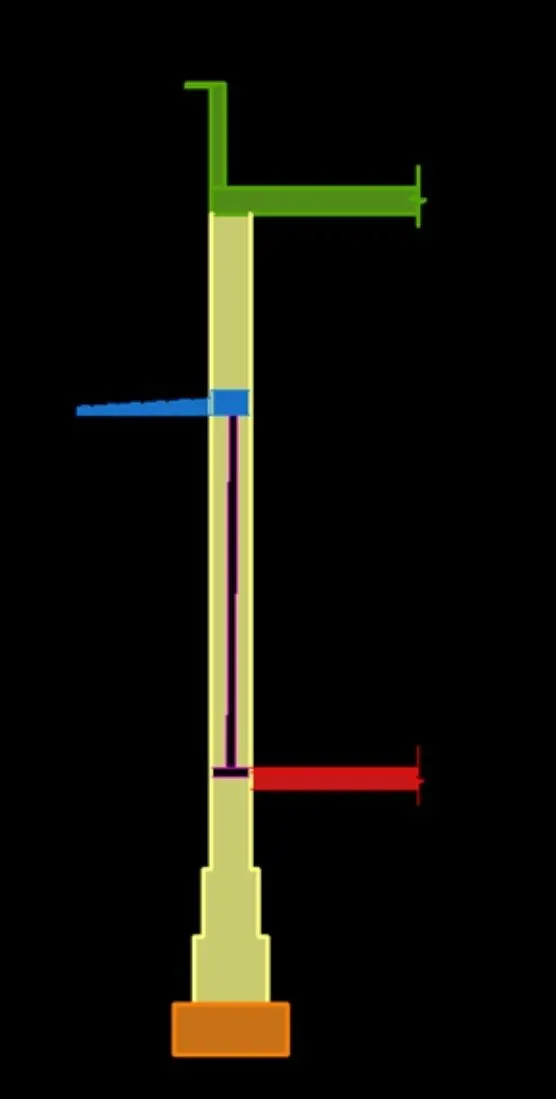
DRAWING 3D VIEW OF THE SECTION
For creating the 3D viw intially boundaries are created
Each boundary is created with its respective layer as current layer
STEP 5
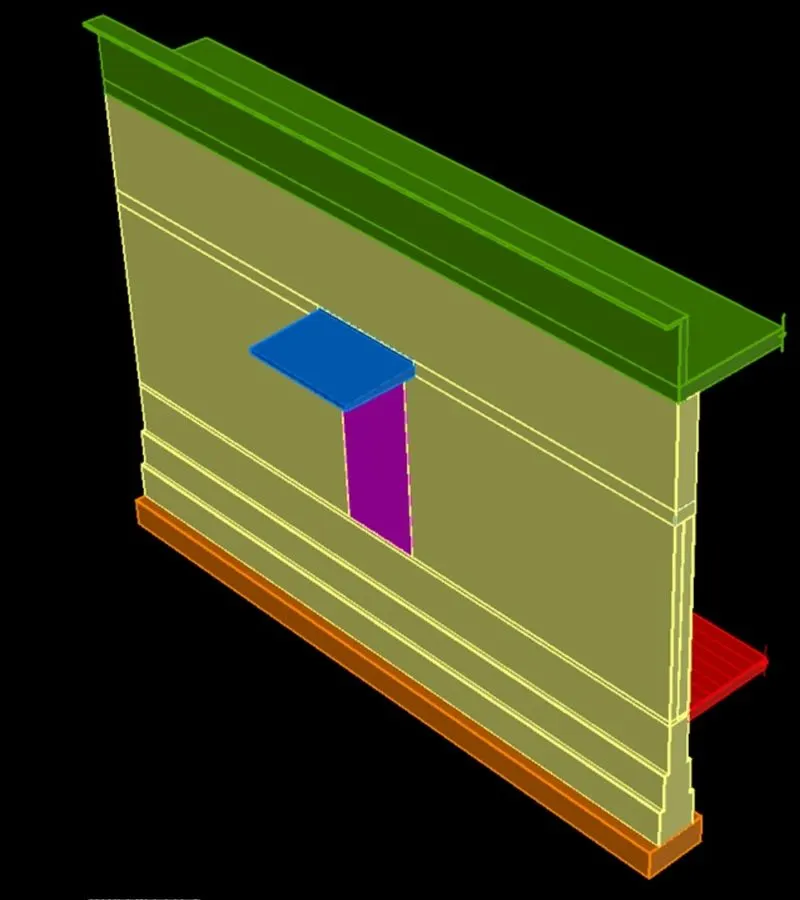
Extrude the section at the distance 7500mm
STEP 6
RENDERING
Rendering is done by adding materials in the 3D view
Material browser is used for adding materials to object
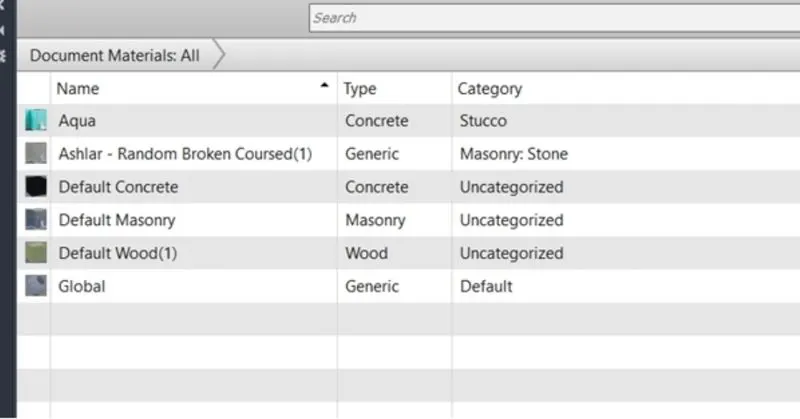
Box mapping is done to adjust the texture of the wall