Assignment 5-RADIOSS Interfaces & Study of Effect of Notches Challenge
OBJECTIVE: The main objective of this week is to study the various contact and boundary condition.Tabulate the difference in each case along with the explanation.
To create the mesh on the bumper assembly with the required element size.
PROCEDURE:
STEP I: Import the geomentry into the hypermesh workspace.
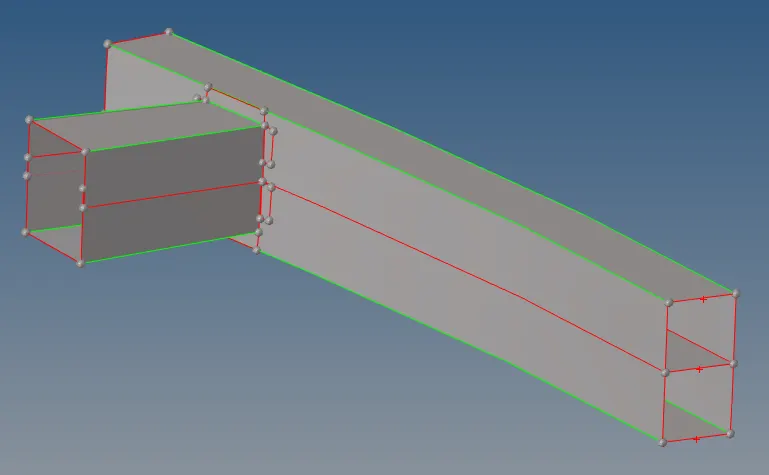
STEP II: Delete the solid in the model.Press F2 and select solids and click delete.
STEP III: Now go to auto cleanup and select the surface and click auto cleanup button.
STEP IV: Now to mesh the surface go to 2d tab and click automesh button.
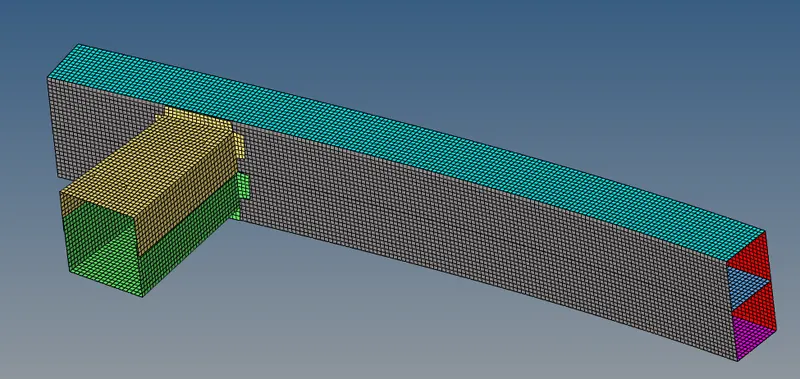
STEP V: Now check for free edges within the elements.Go to tools tab and click edges button.Select all the elements and click on find edge.
TASK 2
Import the given rad file into the radioss solver deck.
Go to file --> import --> solver deck. Select the RAD file and click import.
CASE 1:
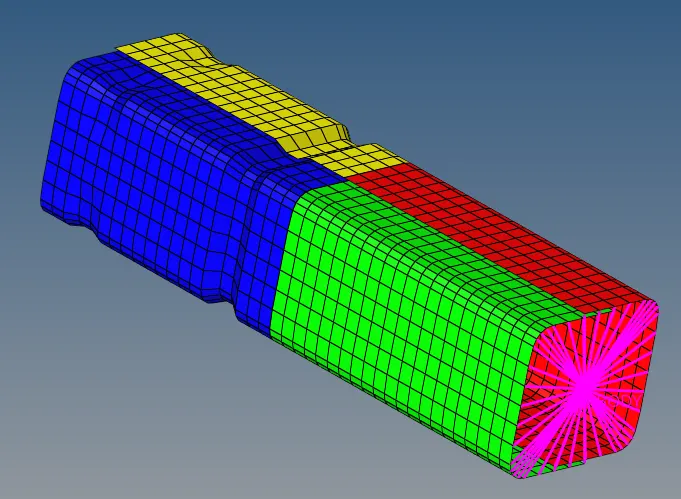
STEP I. In Radioss, Import Crush_tube_0000.rad starter file using Import Solver Deck menu.
STEP II. In the solver menu, create TH/PATH for all the four component
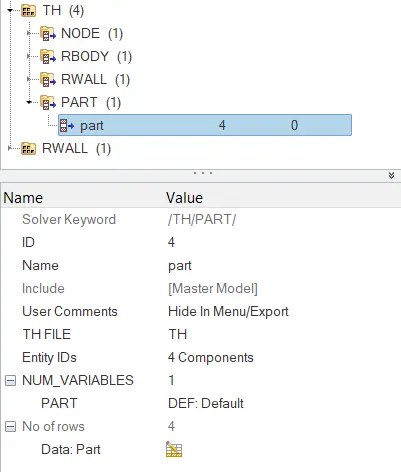
STEP III: Now export the solver and save it.
STEP III: Then go to analysis tab and click radioss.
STEP IV: Now select the RAD file and run the simulation.
STEP V: Now open the output file and see the energy and mass error.
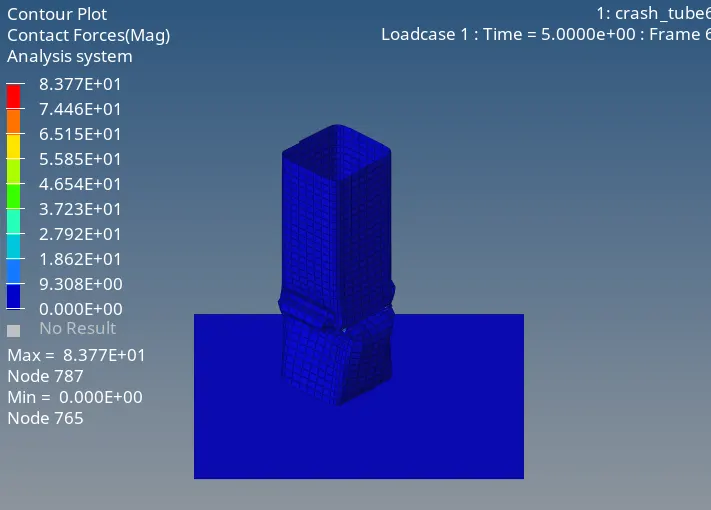
STEP VI. Then view the result in hyperview window for visualization.
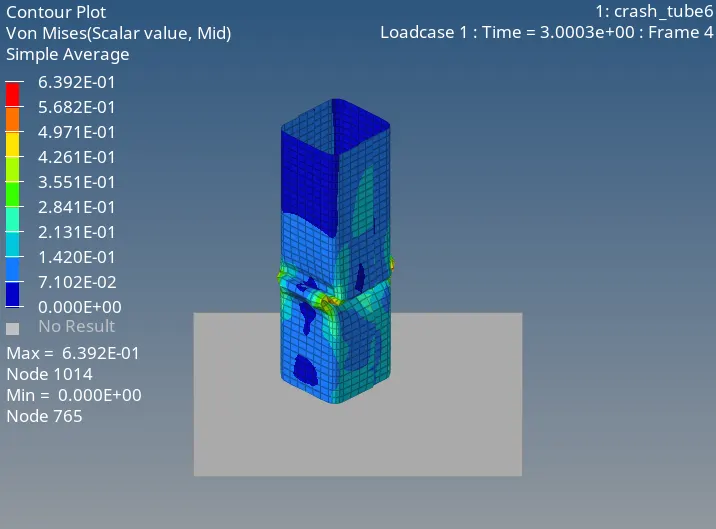
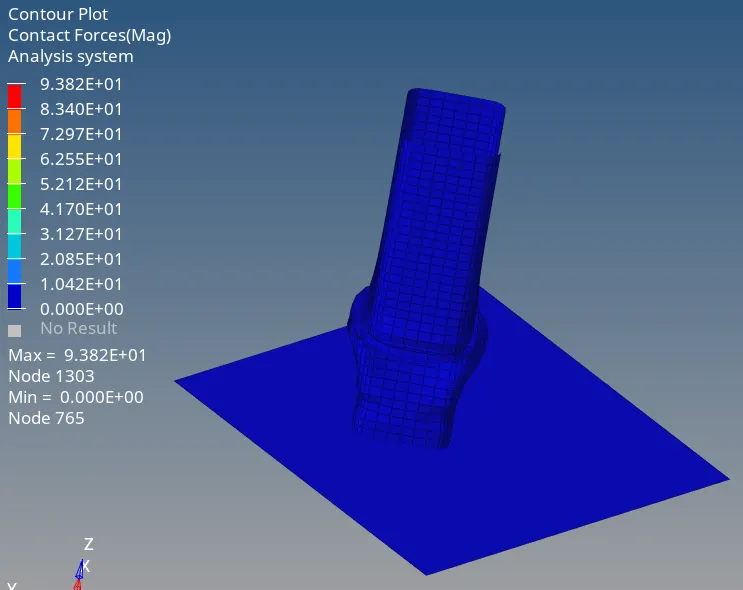
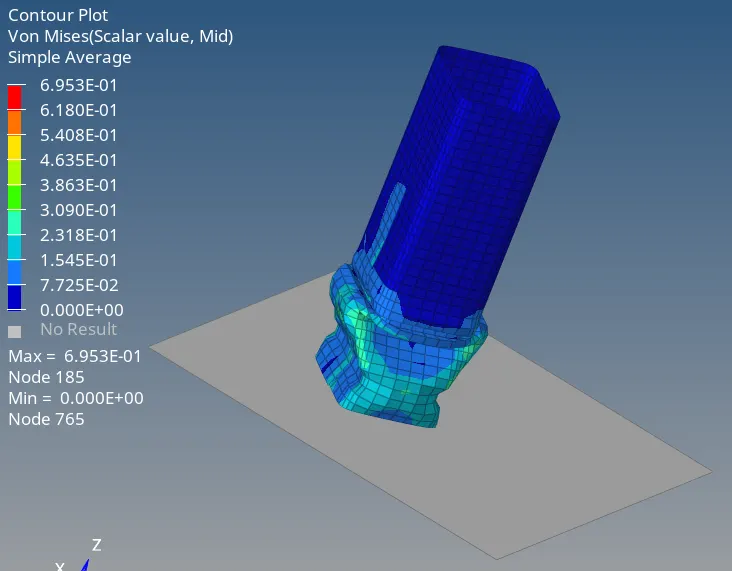
STEP VII. Load .h3d file from specified path, play the animation and plot contour of Von Mises stress using Simple averaging method.
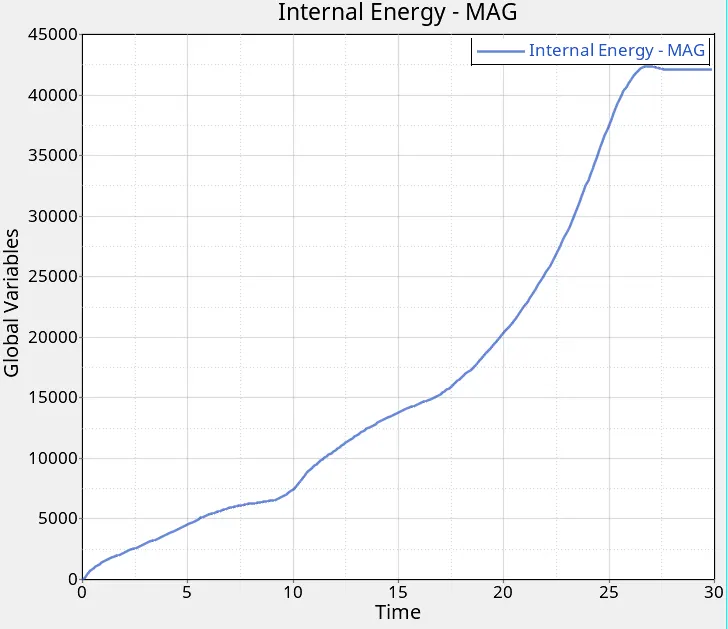
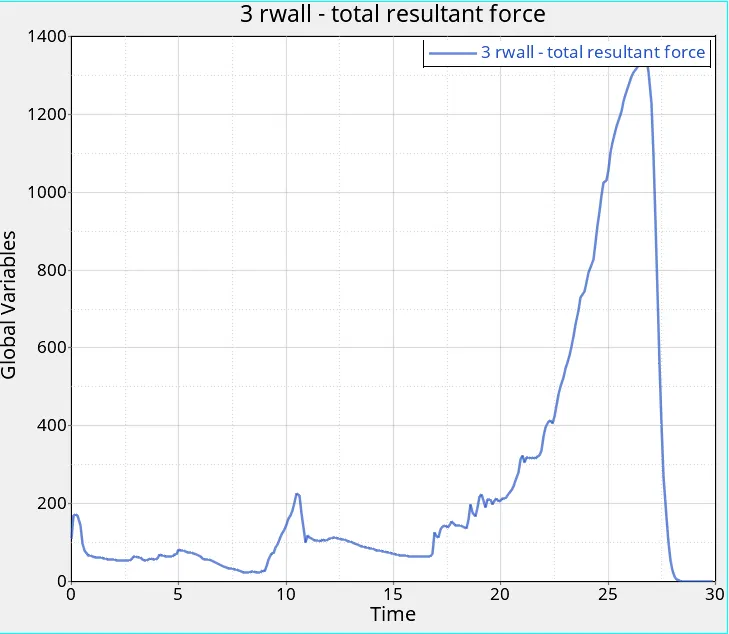
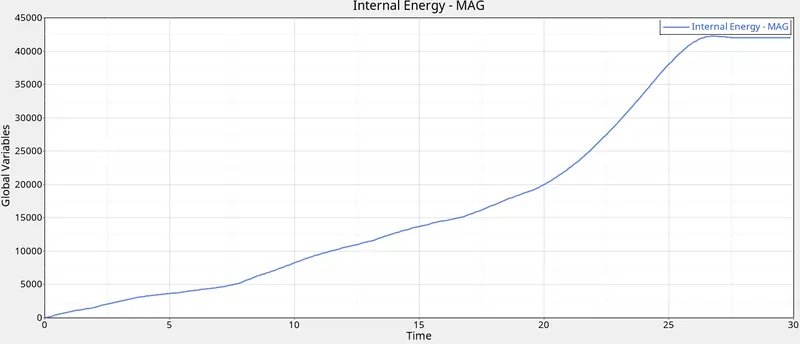
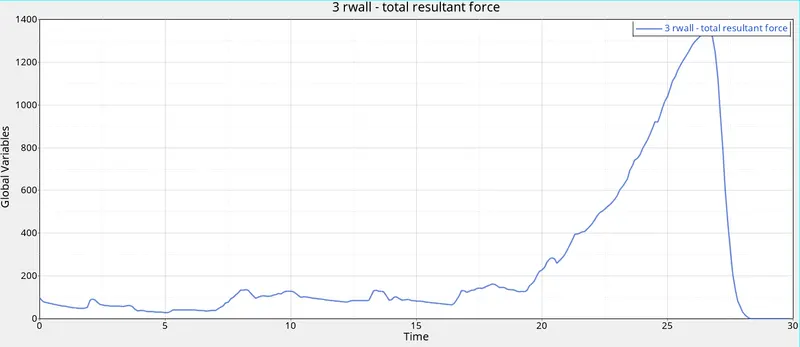
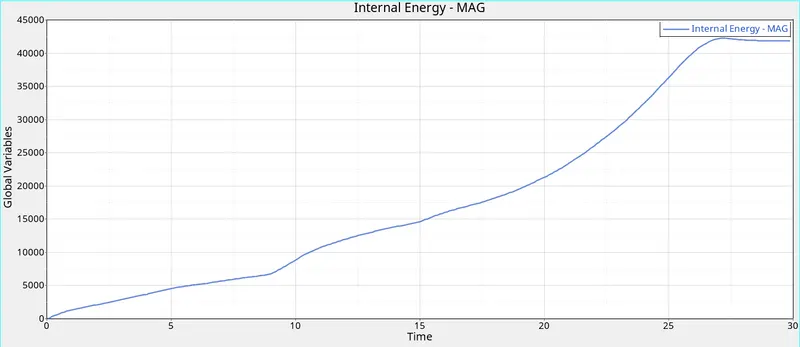
STEP VIII. Open HyperGraph 2D in a new window, load TO1 file and plot the energies required.
CASE 2:
STEP I. In Radioss, Import Crush_tube_0000.rad starter file using Import Solver Deck menu.
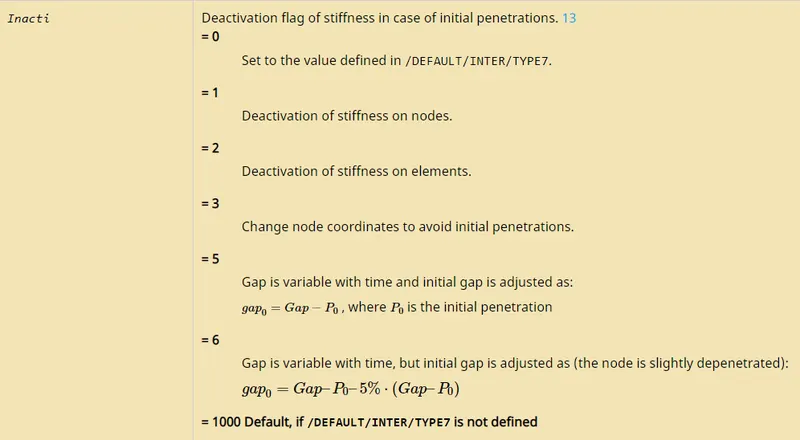
STEP II. In the model menu, under groups card go to self contact and change the Inacti property from 0 to 6.
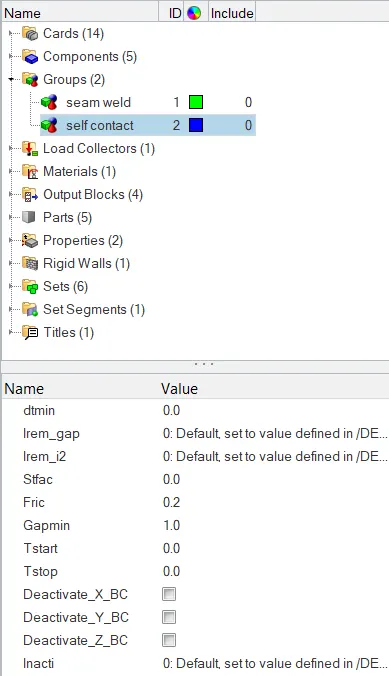
STEP III: Now export the solver and save it.
STEP III: Then go to analysis tab and click radioss.
STEP IV: Now select the RAD file and run the simulation.
STEP V: Now open the output file and see the energy and mass error.
STEP VI. Then view the result in hyperview window for visualization.
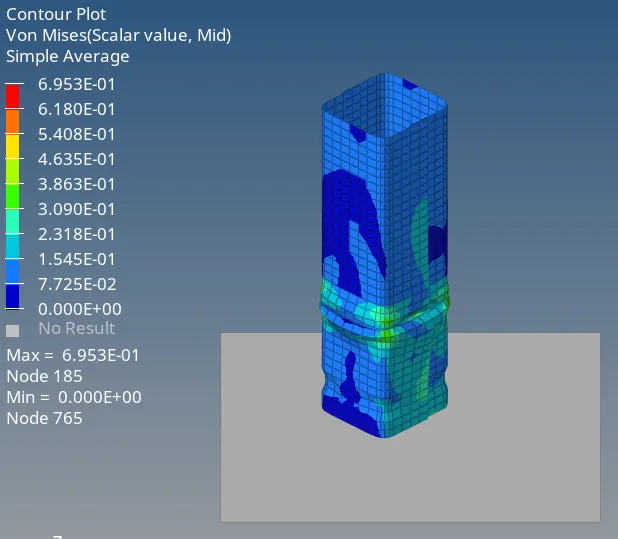
STEP VII. Load .h3d file from specified path, play the animation and plot contour of Von Mises stress using Simple averaging method.
STEP VIII. Open HyperGraph 2D in a new window, load TO1 file and plot the energies required.
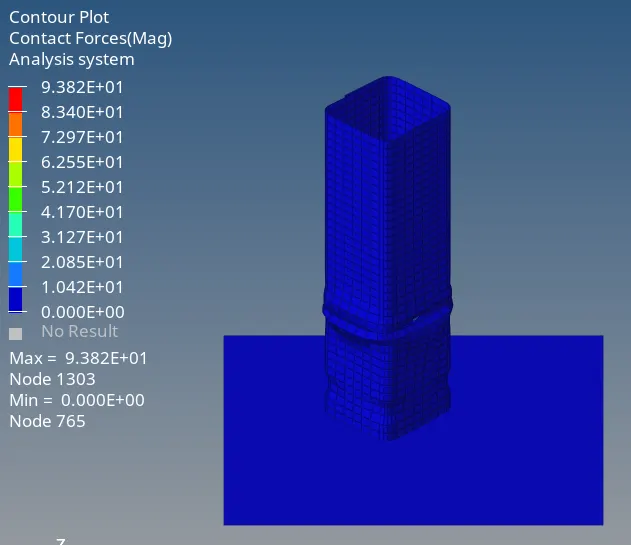
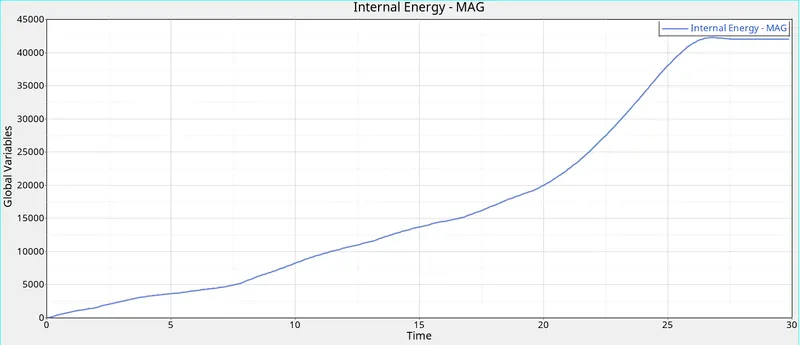
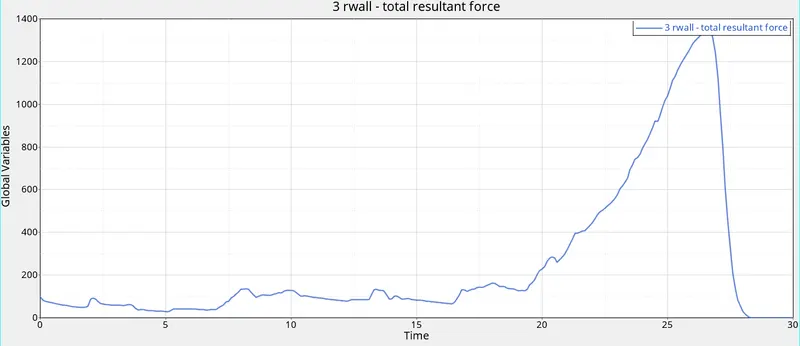
The difference between this case and the previous is that the Inacti property was set to default whereas in this case it is changed to 6. The main difference is that if there is any initial penetration within the component then in the previous case there will be no effect for that penetration but in this case the penetration will be adjusted to a particular scale factor as the gap changes with time.Since there is no initial penetration there will be no change in internal energy.
CASE 3:
STEP I. In Radioss, Import Crush_tube_0000.rad starter file using Import Solver Deck menu.
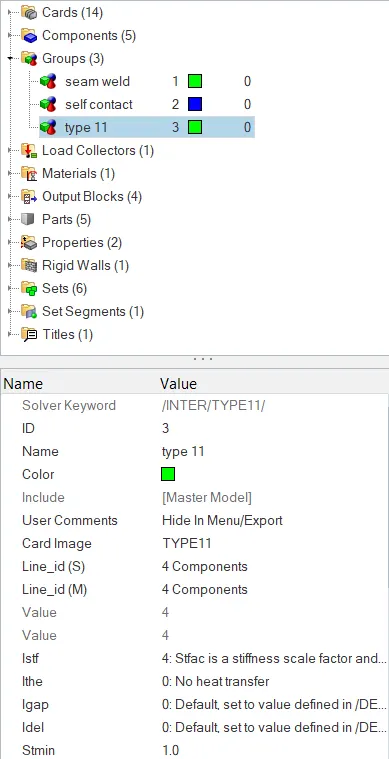
STEP II. In the model menu, under groups card create a type 11 contact.
STEP III: Then go to analysis tab and click radioss.
STEP IV: Now select the RAD file and run the simulation.
STEP V: Now open the output file and see the energy and mass error.
STEP VI. Then view the result in hyperview window for visualization.
STEP VII. Load .h3d file from specified path, play the animation and plot contour of Von Mises stress using Simple averaging method.
STEP VIII. Open HyperGraph 2D in a new window, load TO1 file and plot the energies required.
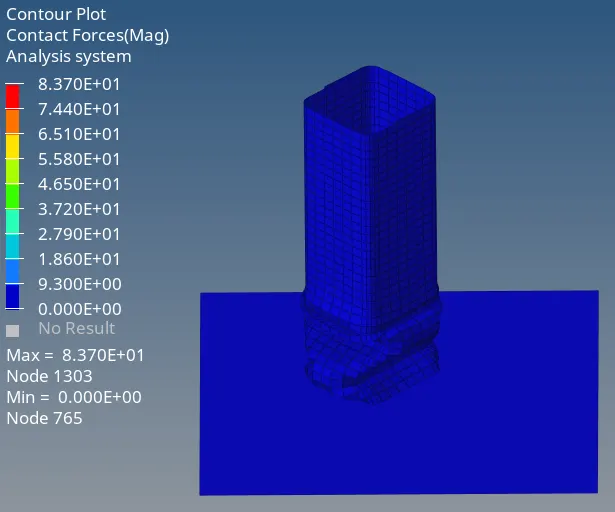
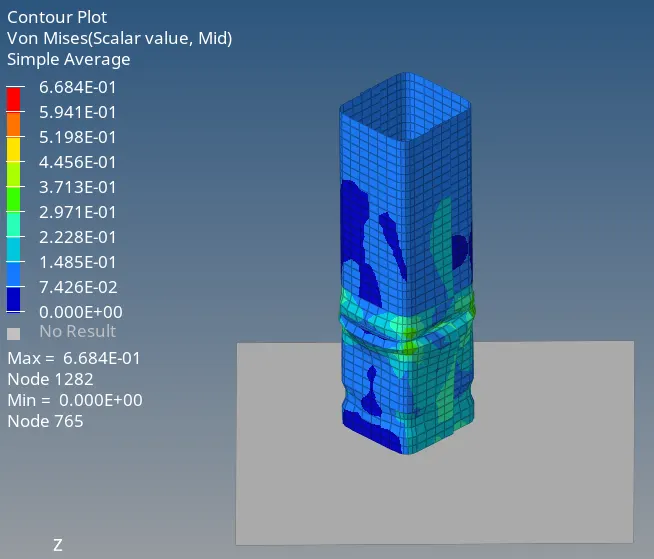
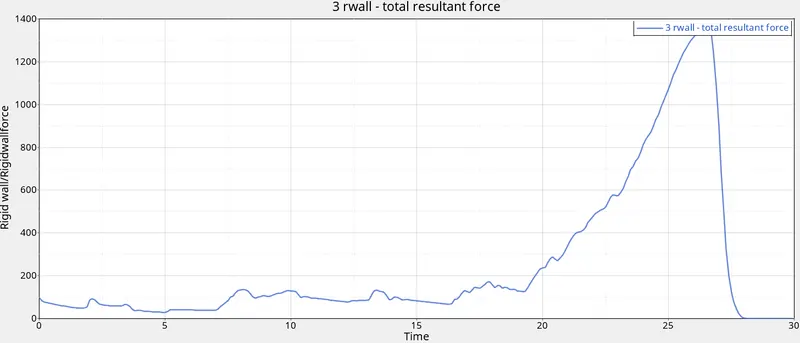
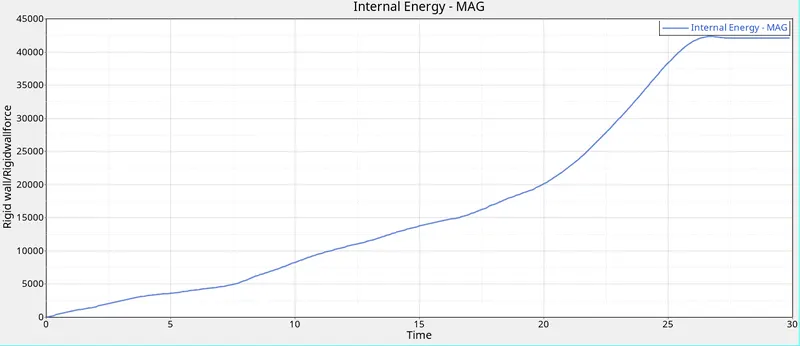
In this case a type 11 contact is created in addition to the type 7 contact in order to consider the edge and edge contact also.Here type 11 uses stronger mathematical algorithms hence the computation time will be more.
CASE 4:
STEP I. In Radioss, Import Crush_tube_0000.rad starter file using Import Solver Deck menu.
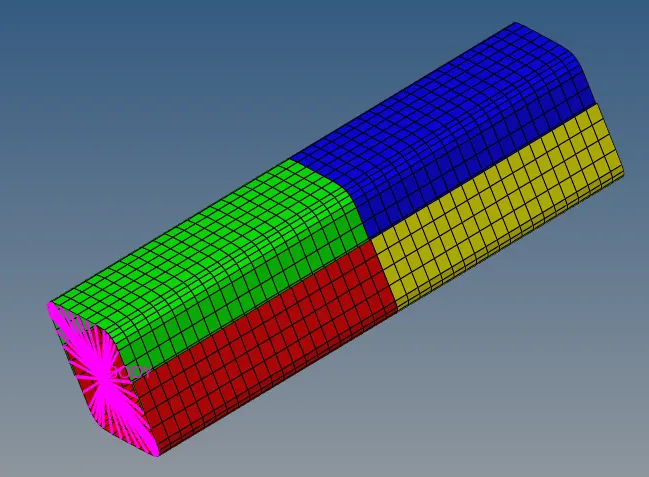
STEP II. Using align node option in geomentry tab remove both the notches
STEP III: Go to solver tab and select the boundary condition card and remove the conditions.
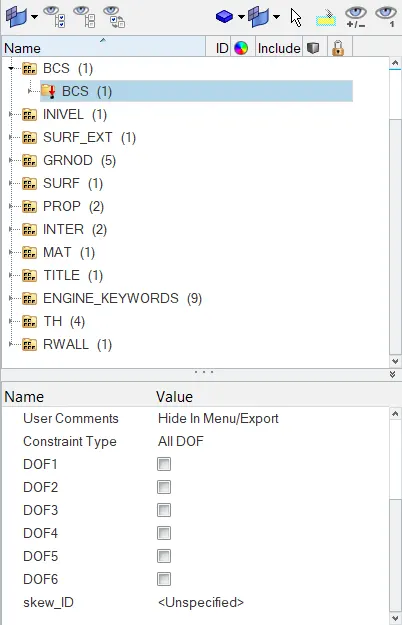
STEP IV: Then go to analysis tab and click radioss.
STEP V: Now select the RAD file and run the simulation.
STEP VI: Now open the output file and see the energy and mass error.
STEP VII. Then view the result in hyperview window for visualization.
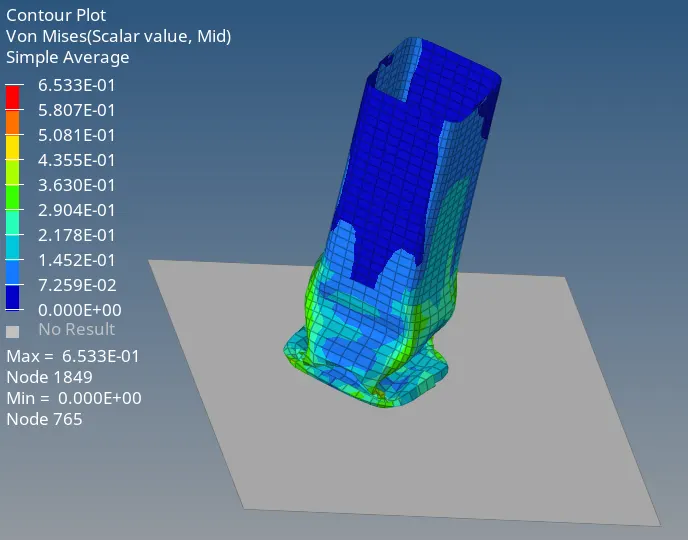
STEP VIII. Load .h3d file from specified path, play the animation and plot contour of Von Mises stress using Simple averaging method.
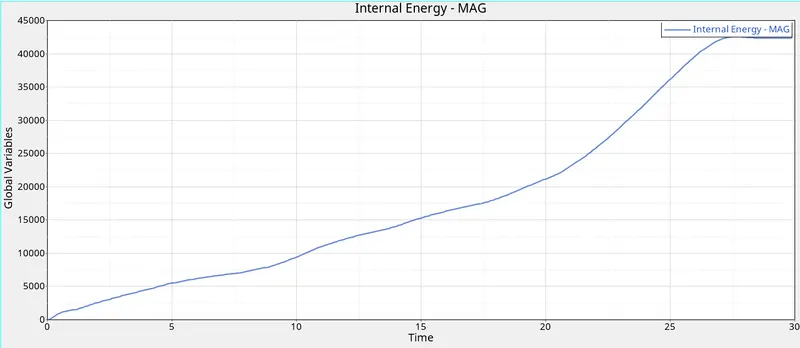
STEP IX. Open HyperGraph 2D in a new window, load TO1 file and plot the energies required.
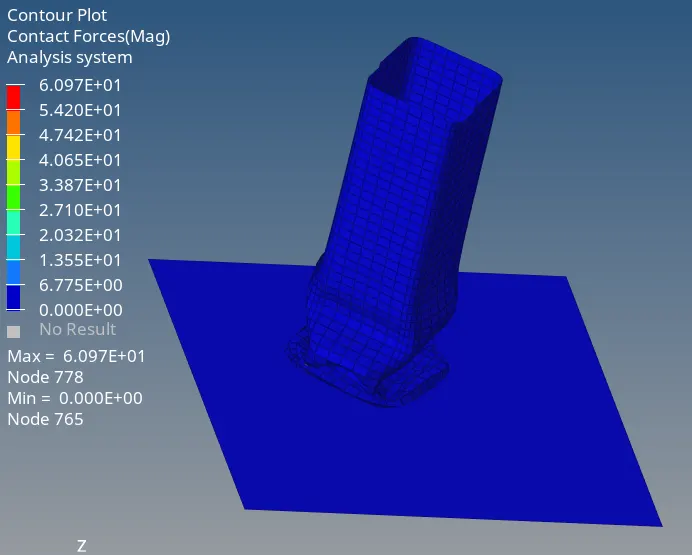
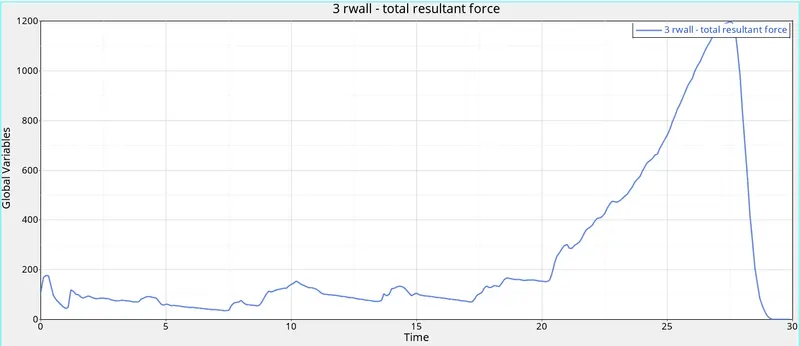
In this case the notches are removed which will lower the stress concentration in that particukar area and the boundary condition of the rigid body is removed and hence it can move in all the 6 degree of freedom.Due to this the maximum stress is reduced.
CASE 5:
STEP I. In Radioss, Import Crush_tube_0000.rad starter file using Import Solver Deck menu.
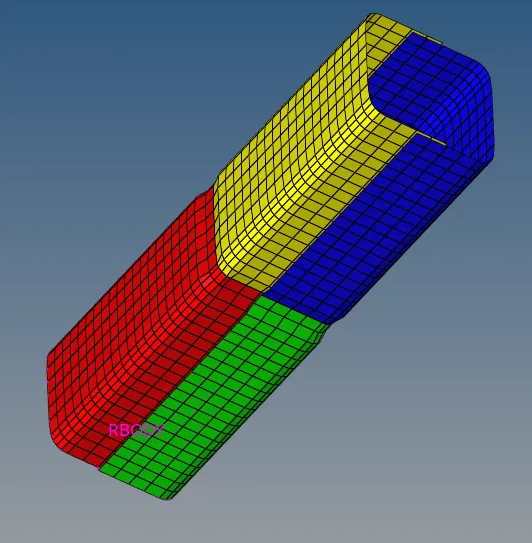
STEP II. Using translate node option in geomentry tab create a notch at the middle of the component.
STEP III: Then go to analysis tab and click radioss.
STEP IV: Now select the RAD file and run the simulation.
STEP V: Now open the output file and see the energy and mass error.
STEP VI. Then view the result in hyperview window for visualization.
STEP VII. Load .h3d file from specified path, play the animation and plot contour of Von Mises stress using Simple averaging method.
STEP VIII. Open HyperGraph 2D in a new window, load TO1 file and plot the energies required.
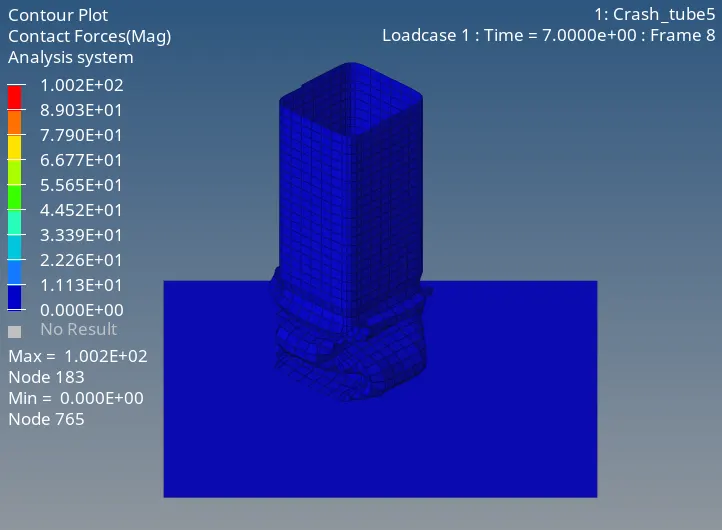
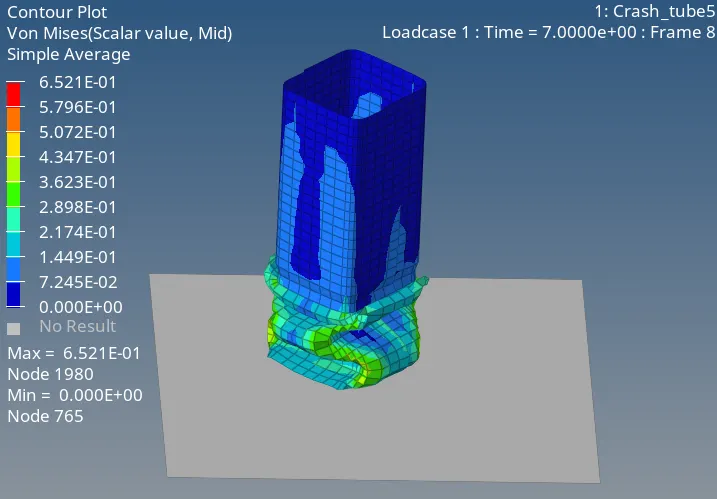
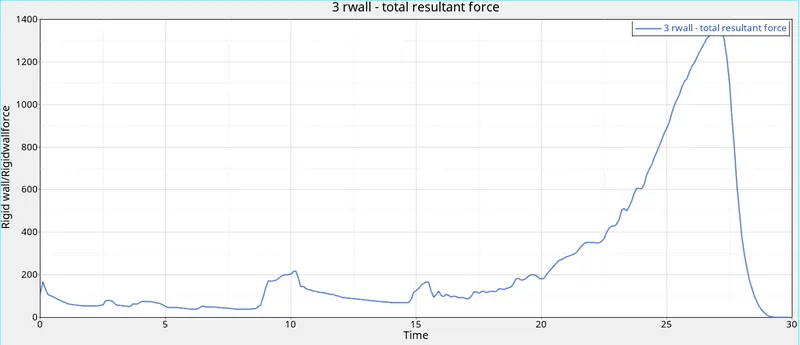
In this case a notch is created at the center and due to this stress may be a little more concentrated in that area and the rigid wall forces are increased due to the effect of notch.
CASE 6:
STEP I. In Radioss, Import Crush_tube_0000.rad starter file using Import Solver Deck menu.
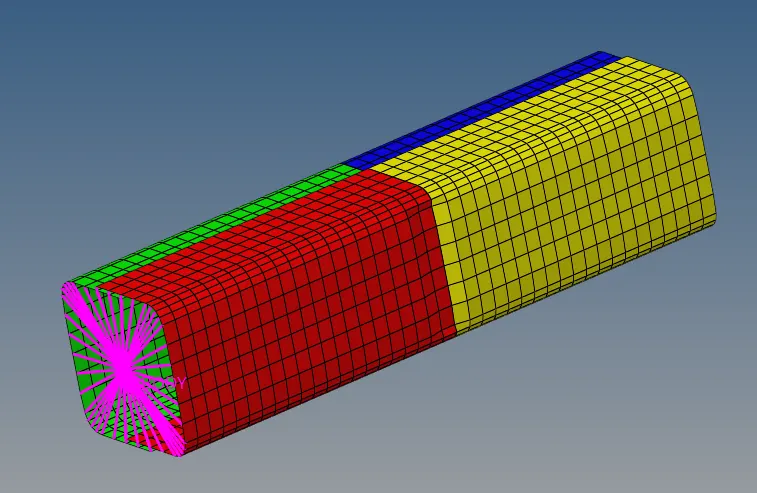
STEP II. Using translate node option in geomentry tab create a notch at the either side of the component.
STEP III: Then go to analysis tab and click radioss.
STEP IV: Now select the RAD file and run the simulation.
STEP V: Now open the output file and see the energy and mass error.
STEP VI. Then view the result in hyperview window for visualization.
STEP VII. Load .h3d file from specified path, play the animation and plot contour of Von Mises stress using Simple averaging method.
STEP VIII. Open HyperGraph 2D in a new window, load TO1 file and plot the energies required.