Assignment 2-RADIOSS Engine File Editing & 3D Meshing Challenge
Report on Assignment 2-RADIOSS Engine File Editing & 3D Meshing Challenge
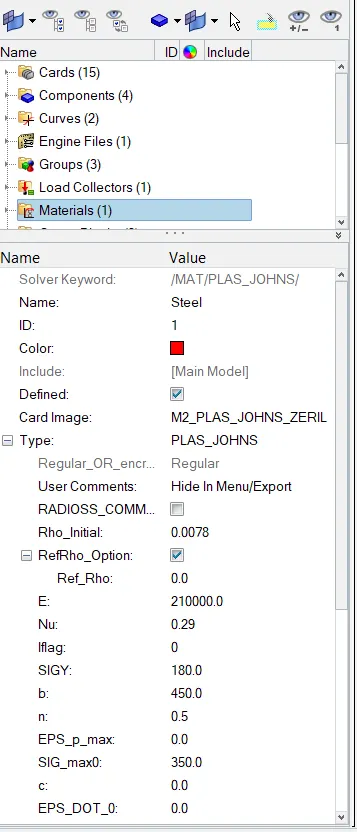
1. Check the material properties of the rail component and calculate the speed of sound in steel rail ?
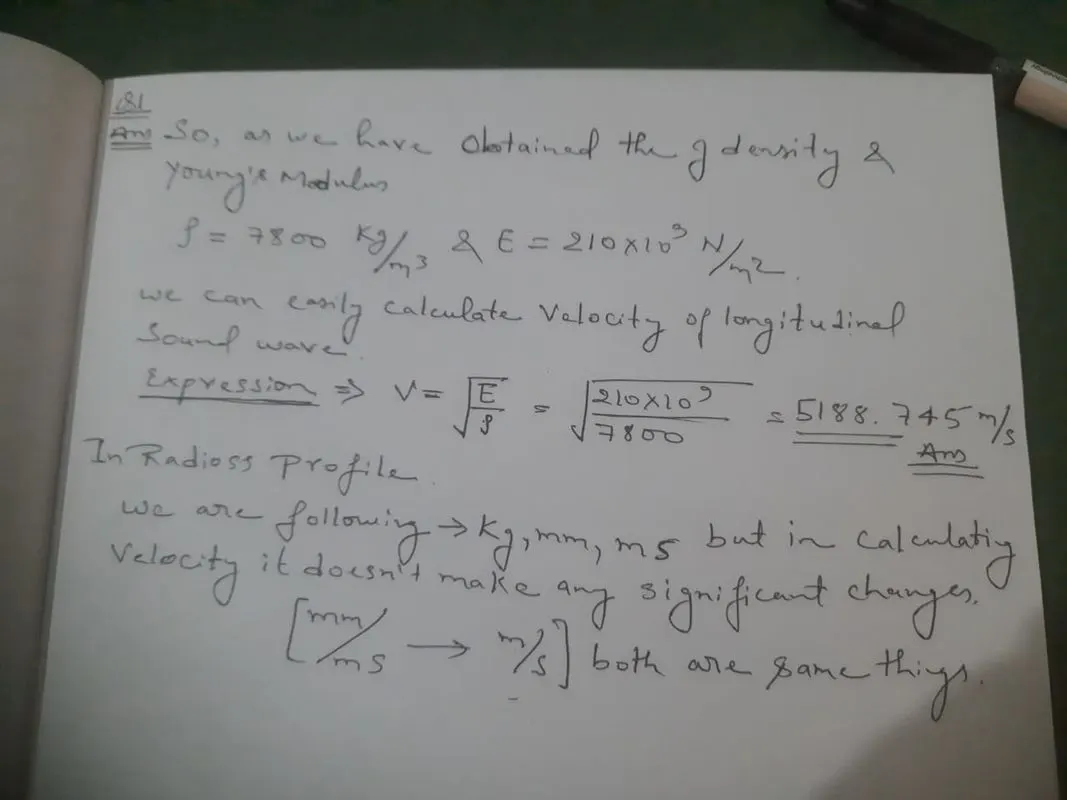
so here we can obtain density = 0.0078 g/mm^3, so we can convert it into SI unit, which is equal to 7800kg/m^3
and here modulus of elasticity is given as 210000 MPa, we can convert it into SI unit, which is equal to 210*10^9 N/m^2
by doing this we can calculate velocity of longitudinal sound wave , Now from here i will sove it in paper upload the image because it difficult to put symbols , so that there will be less confusion
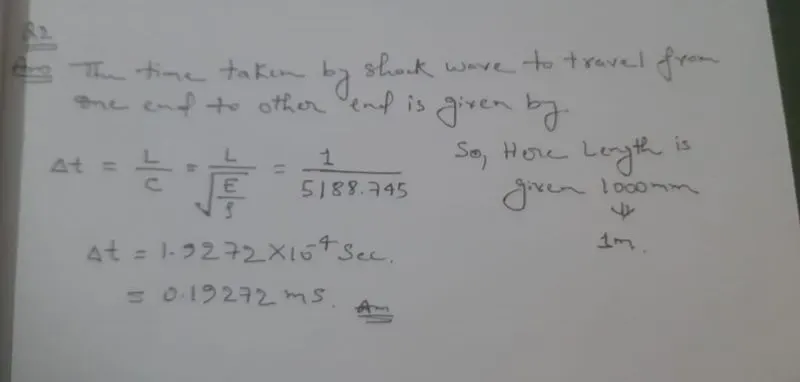
2. The length of the rail is about 1000 mm.calculate the time takes for a shock wave to travel from one end of the rail to the other?
3.Set the frequency of animation output to a time that will give 20 animation steps(/ANIM/DT)
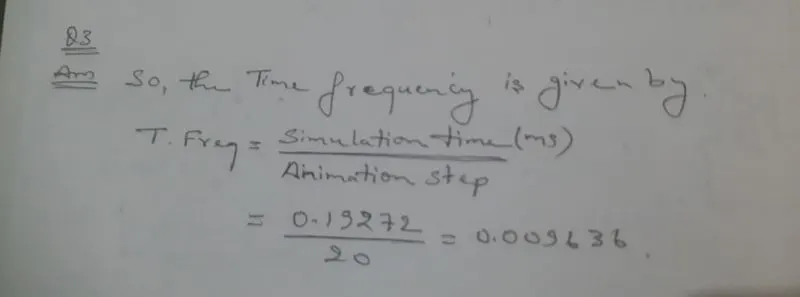
and the rest of the things are set in RUN_0000.rad file
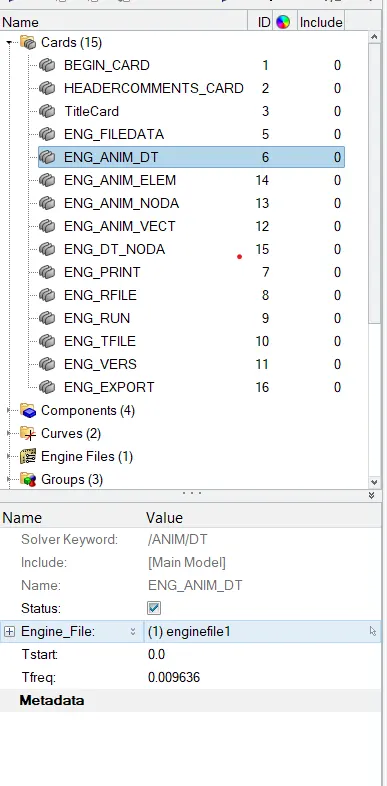
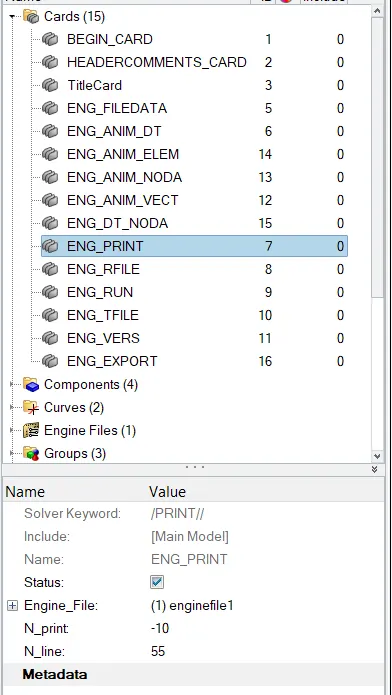
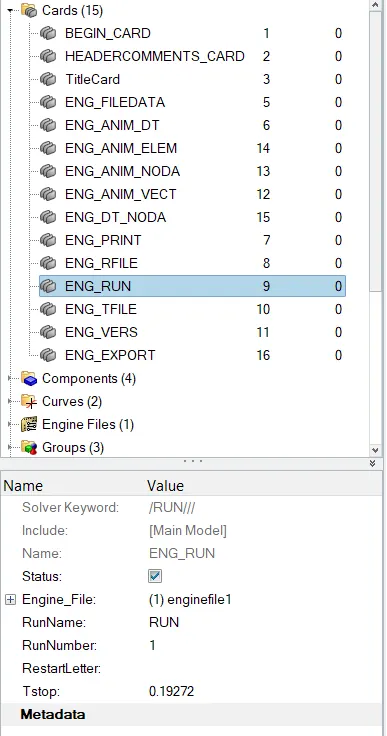
3d meshing tetra mesh and hex mesh
So here we need to do 3D meshing on the given component
1) 1D element :- In this model we have a 1D element length of 10mm , then goto 2d>automesh>select the surface > give target element size=10>click on mesh
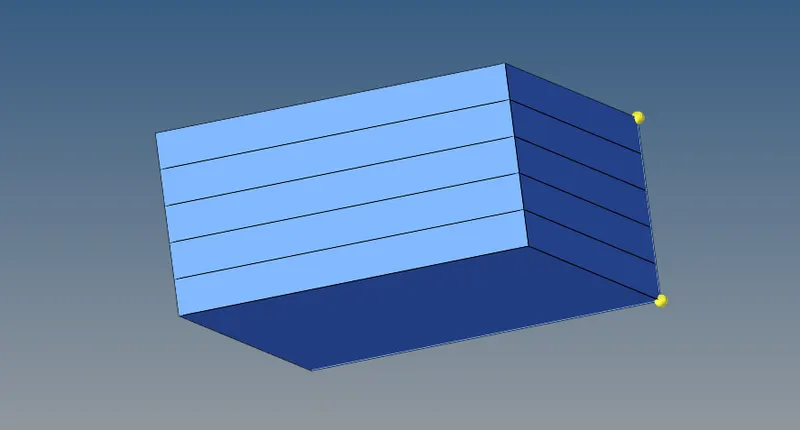

2) Arm Bracket
For 3D mesh we have to follow the following steps
I) First we have to Rectify the Geometrical Errors for that we have to do manual geometry cleanup specially in this model, check the connectivity and suppress the unnecessary lines and the models should have closed geometry,correct the undeformed surface.
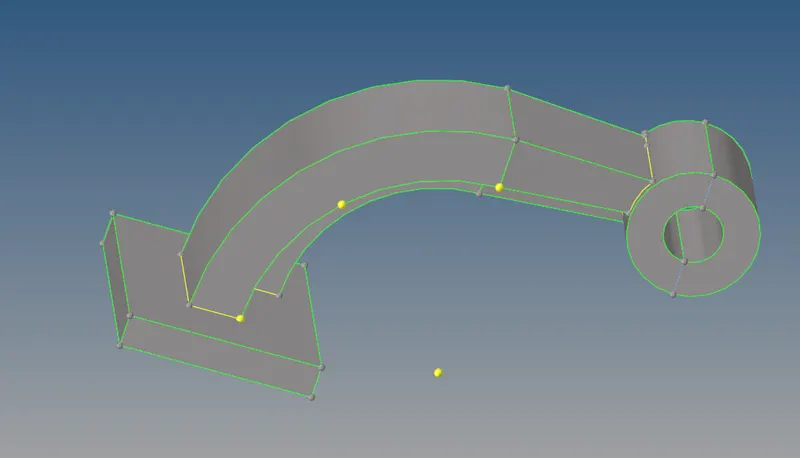
II) First we mesh on the base surface bounded by L-shape make sure there shouldn'tbe any trias because it will form penta element, now create node on the arm curve and create a centre node for that goto nodes>select arc centre > select nodes on the arc>click on create , hence centre node is created then goto 3D>spin>spin elenent>select element to be spin (all the elem in L-shape)>select centre node>provide appropriate direction>provide angle=90>give no of spin to create layers of 3d elements>then click on spin now arm curved part is completely meshed with hexas elements
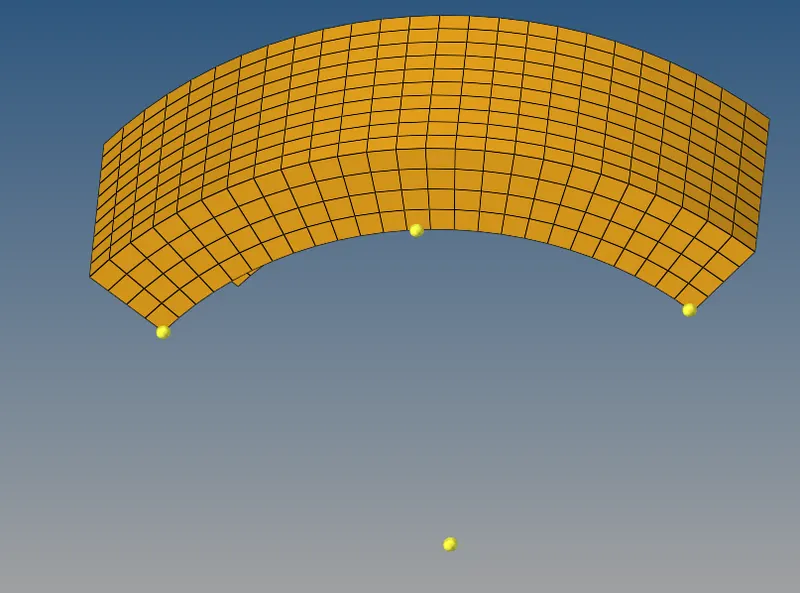

III)we have to create mesh on the base surface then goto 3D>Line drag>elem drag>select element>select line list >give no of drag to create solid layer by layer>click on drag 3D hexa element will created
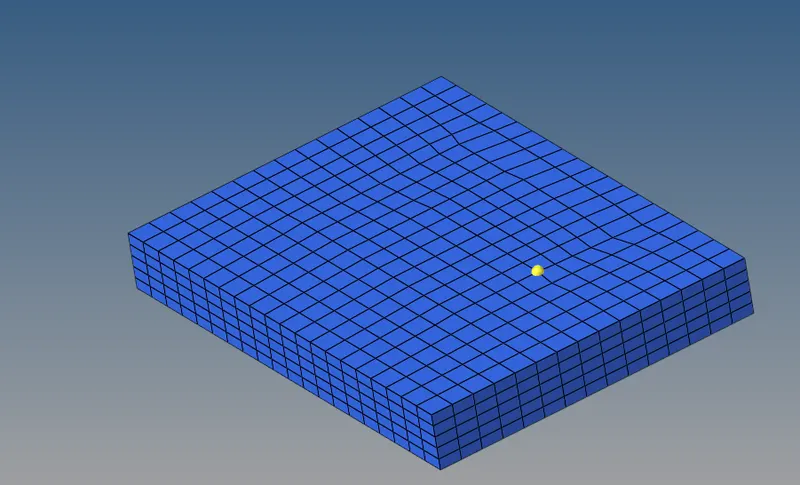
IV) Now we create 3D element on Arm straight part for that first we need to create mesh on the frontal part and use the option Linear solid to make proper solid aligned with curved 3d element for that after creating mesh goto 3D>linear solid>select the element from>select element to >alignment of nodes should be selected respectively>provide density as no of layer>click on solids
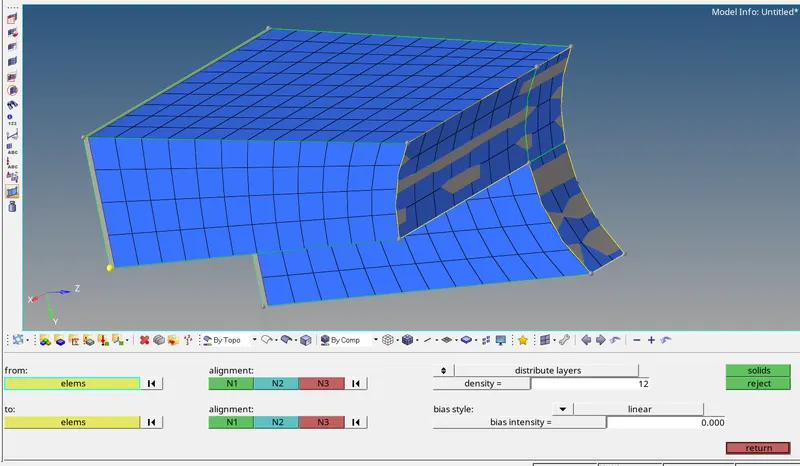
V) Now for meshing Boss with 3D element , for that no of nodes should be match and align with straight arm for that we create mesh on the hollow circular face and project the nodes to surface of hollow circular face then goto 3D>solid map>general>source geom set none>select destination surface>select element to drag> click along geom to mixed now select select the node path and line along which 3D element to be created>click on mesh now 3D element are created
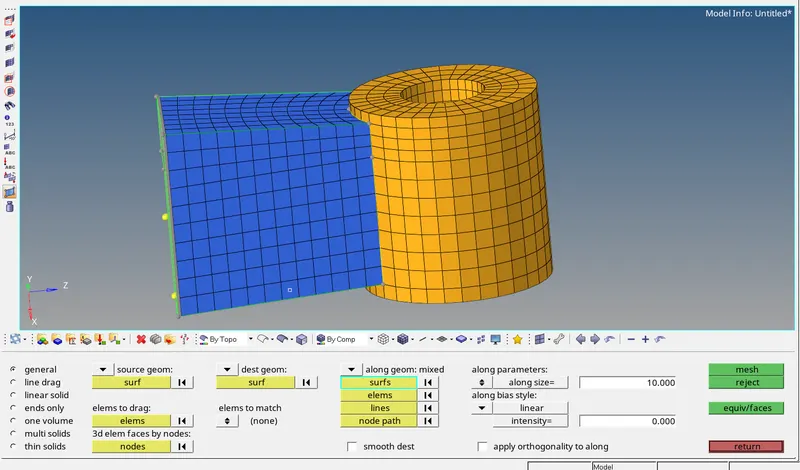
now all the 3D meshing for arm bracket is done
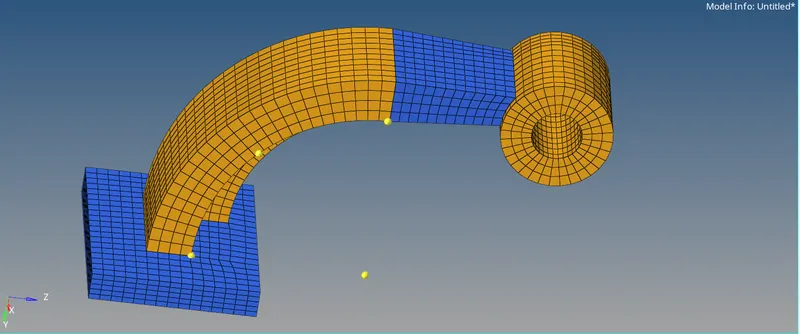
3) mesh housing with 3D element
I) First we have to Rectify the Geometrical Errors for that we have to do manual geometry cleanup specially in this model, check the connectivity and suppress the unnecessary lines and the models should have closed geometry,correct the undeformed surface. provide target element size=5mm, tet collapse=0.15
II) Since there are more feature areas so we proceed with tetra meshing for that first we mesh the element with trias and then proceed for tetra meshing for that we need to mesh the component with tria element then goto 3D>tetra mesh>select the component>click on mesh now tetra element is created
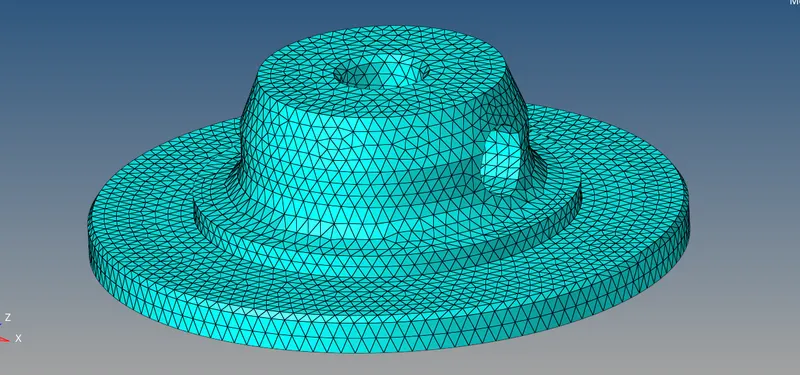
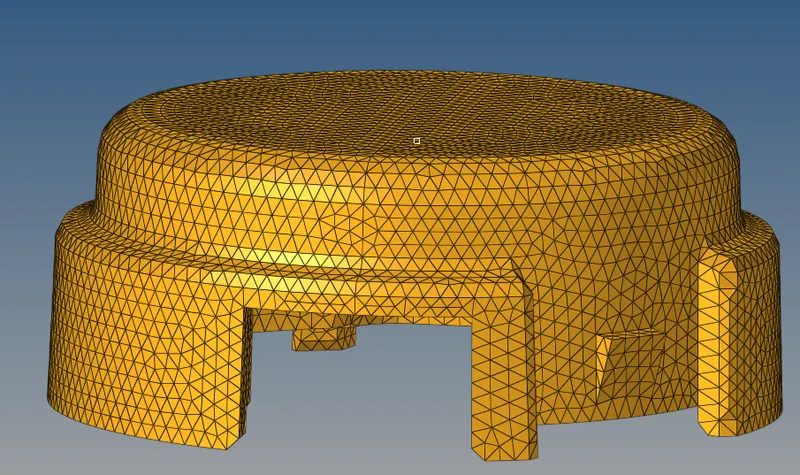
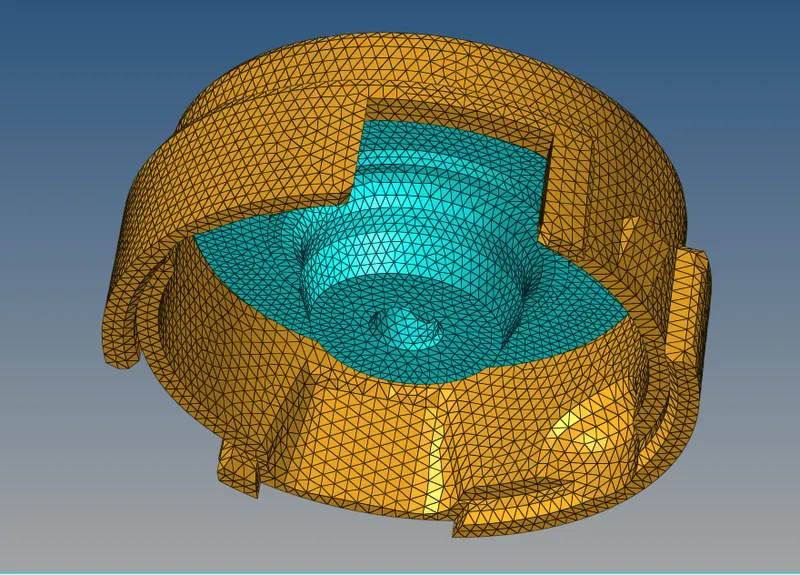
Conclusion :- We learn 3D meshing for tetra and hexa element