Editing Engine File, Performing Tetramesh and Hexamesh
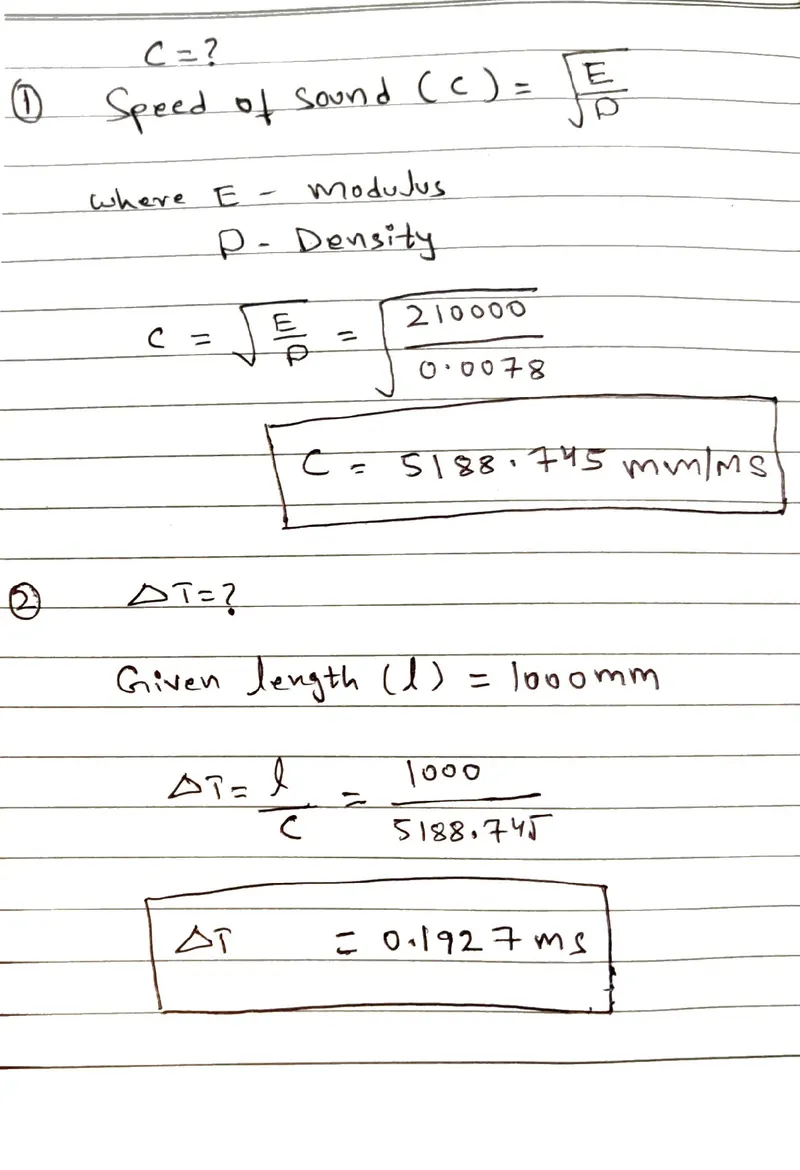
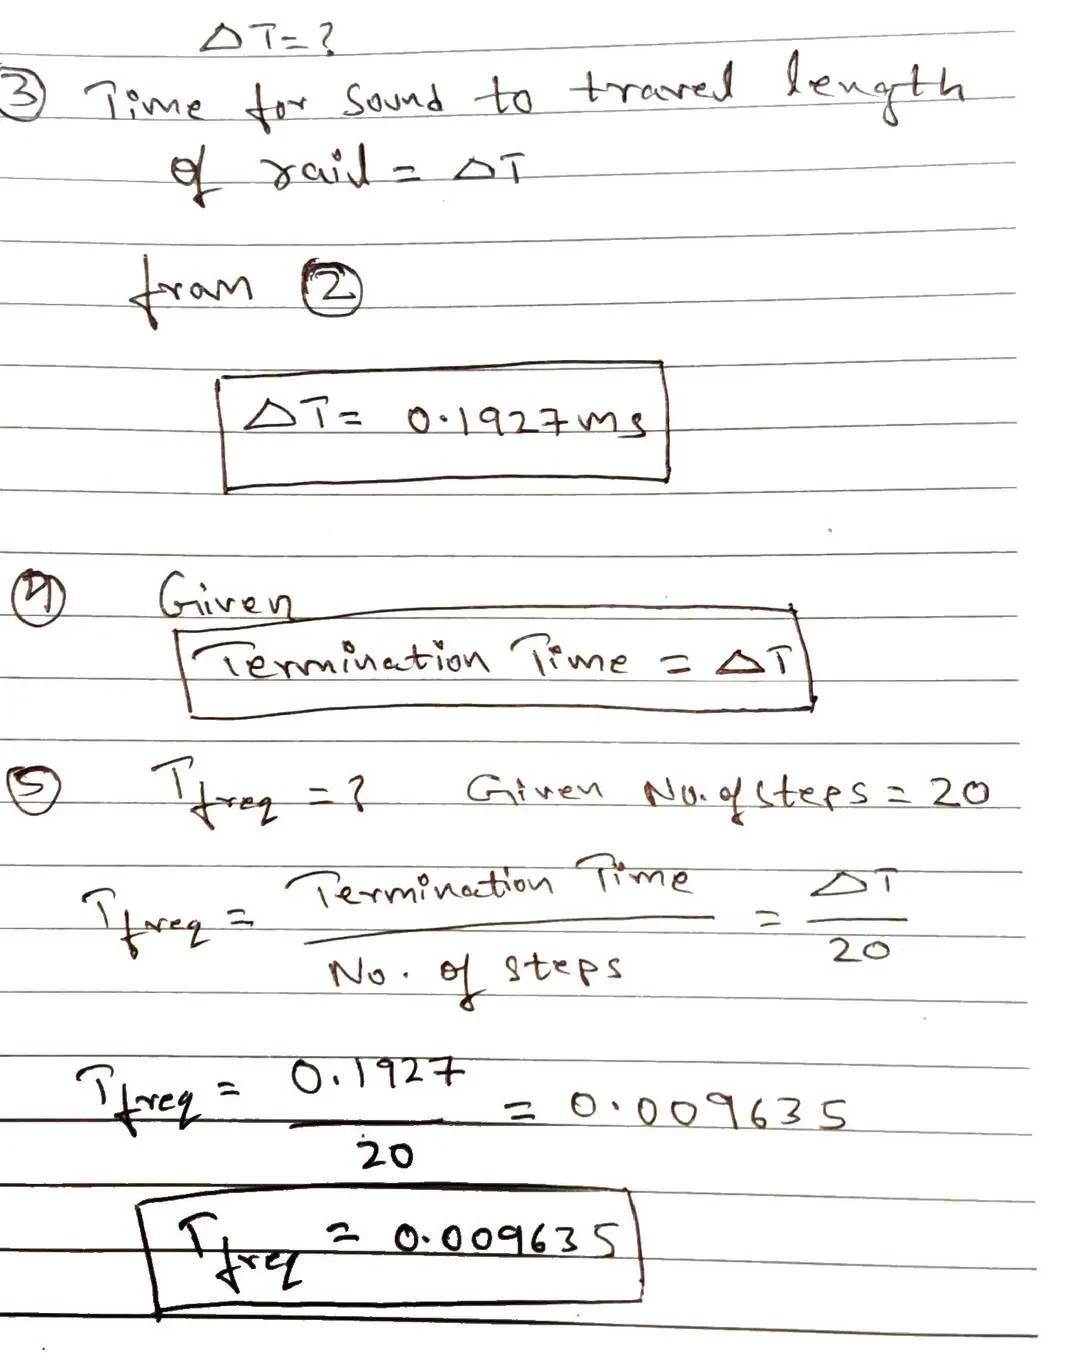
Answers for the Questions 1-6 can be found in the below image.
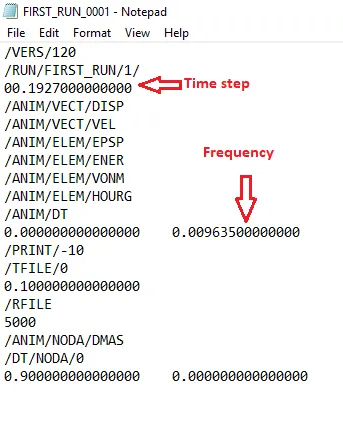
Edited engine file can be found below:
7. 3d meshing tetra mesh and hex mesh
MODEL 1:
Aim:
To create 1D elements and assign properties to them.
SOFTWARE:
HyperWorks 2020
PROFILE:
RADIOSS
PROCEDURE:
First import the model in HyperWorks.
After importing the model, mesh the surface.
Now create 1D elements between the 2 meshed surfaces. To perform this operation go to the main menu page and select 1D.

In 1D first select rods and element type as TRUSS2N. Select 2 opposite nodes anywhere on the shell elements and this will create a 1D TRUSS2N element between them.
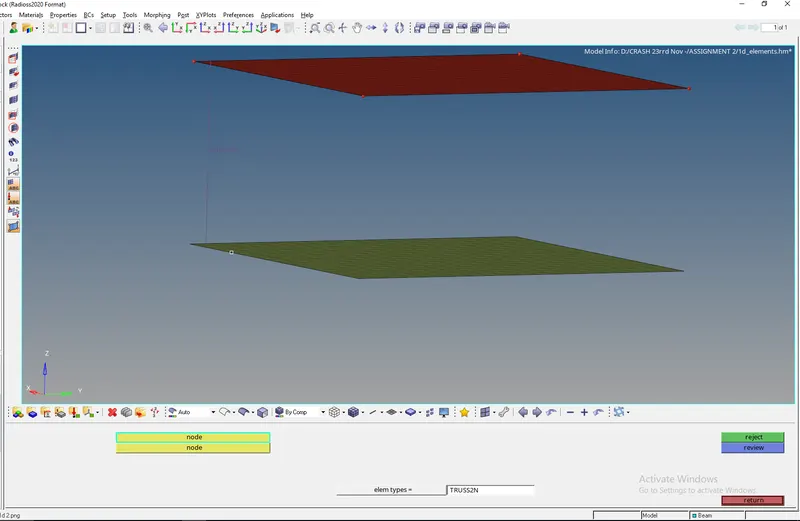
Similarly create one more element i.e, a bar/beam element. This time in 1D, select bars and element type as BEAM3N.
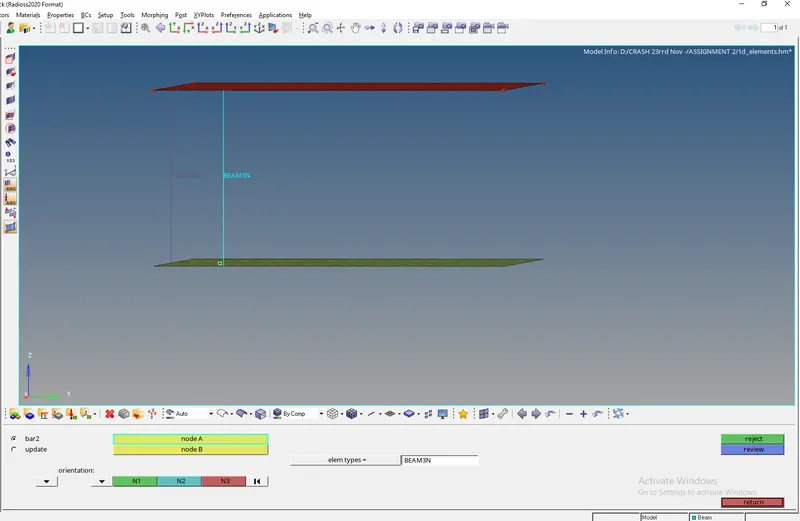
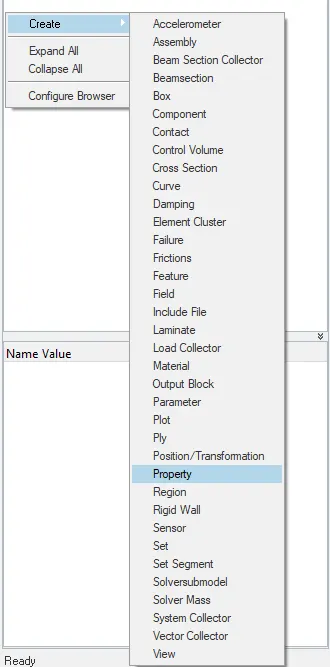
Now create properties for these elements by going to the "Tab bar".
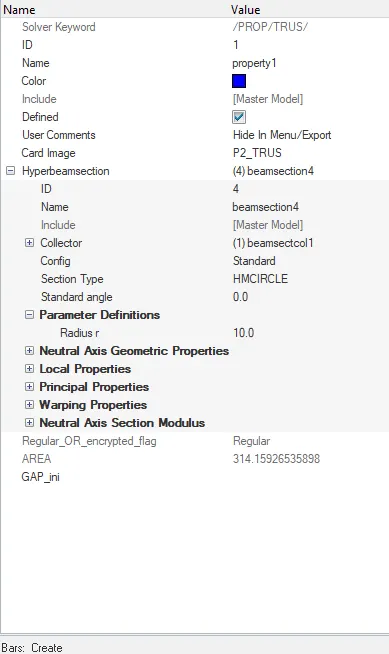
For TRUSS2N element select card image as P2_TRUSS and in HYPERBEAM SECTION select section type as HMCIRCLE and give any suitable thickness to it.
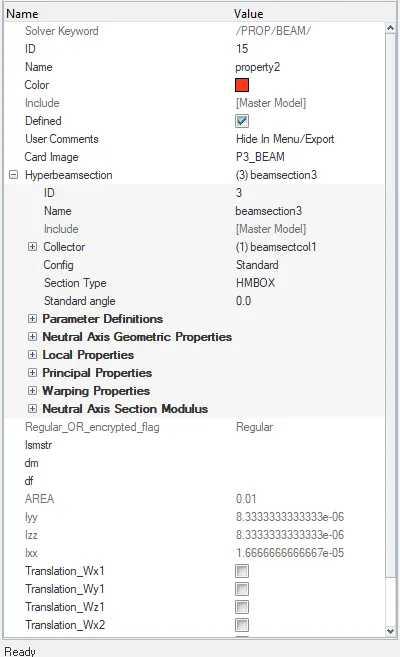
Similarly for BEAM3N element select card image as P3_BEAM and in HYPERBEAM SECTION select section type as HMBOX and give any suitable thickness to it.
Once all the properties are created assign them to their respective components.
After all the components are assigned with their respective properties, Go to Toolbar > select from list > 1D Detailed Element Representation.

Save the model in HM format.
FINAL OUTPUT:
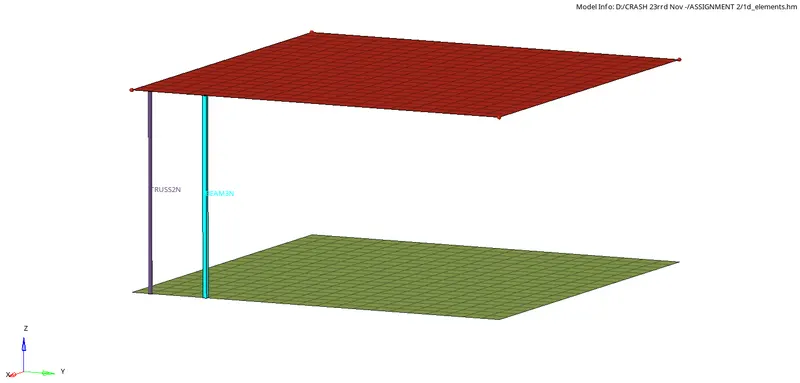
RESULT:
1D elements were successfully created and the properties have also been assigned to the respective components.
MODEL 2:
AIM:
To create 3D Tetra mesh on the given component with a target element size of 5mm.
SOFTWARE:
HyperWorks 2020
PROFILE:
RADIOSS
PROCEDURE:
First import the model in HyperWorks.
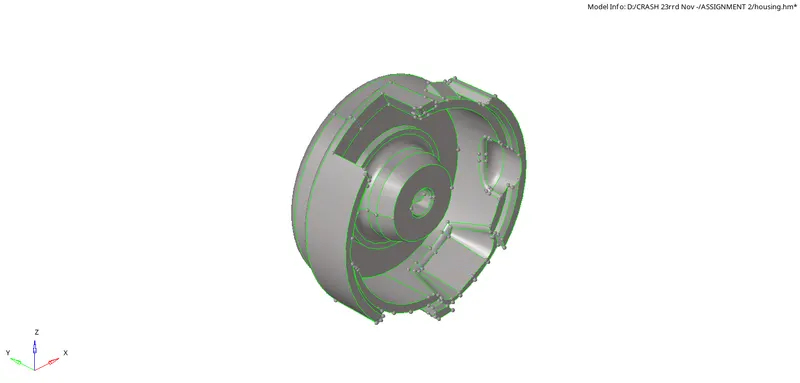
once the model is imported, hide the cover and set hub as the current component.
First, perform 2D meshing on the hub with trias only. To perform meshing Go to "2D > automesh > size and bias > surfaces and select mesh type as trias, element size as 5mm and click on the mesh.
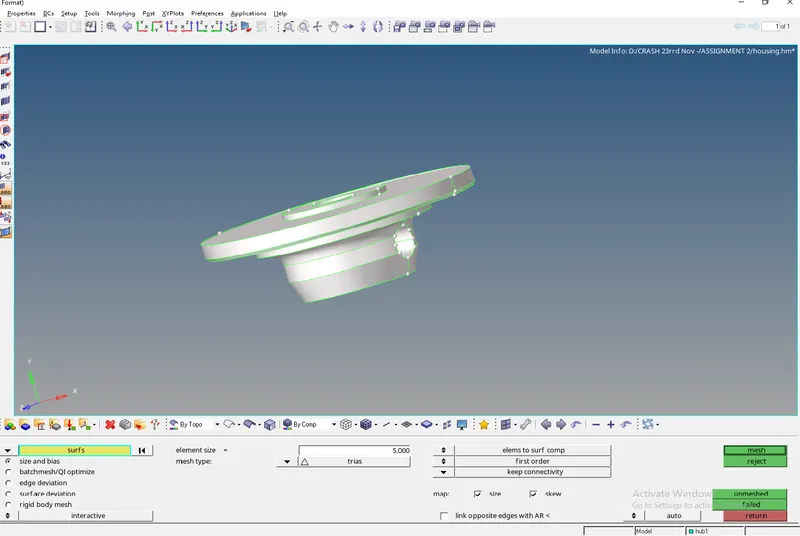
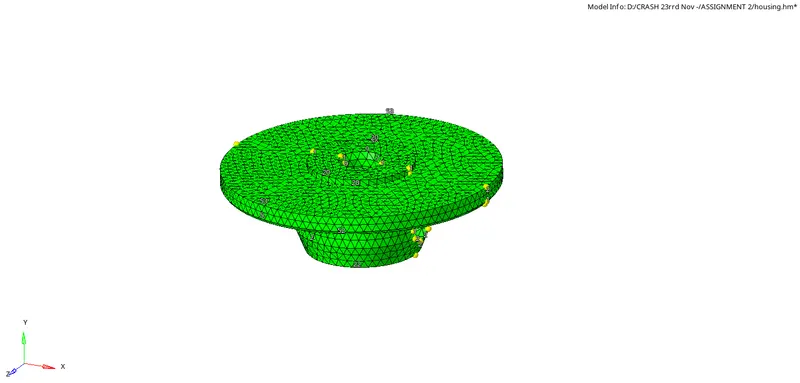
Now create tetra mesh on the hub with the help of 2D shell elements. To perform this operation Go to the main menu page > 3D > tetramesh, select the displayed elements and click on the mesh. This will create a 3D tetramesh by the hep of 2D shell elements.

Before performing tetramesh, set the tet collapse element quality target to 0.150 under tetramesh parameters.

Press F5 and mask few elements to confirm the 3D tetramesh.
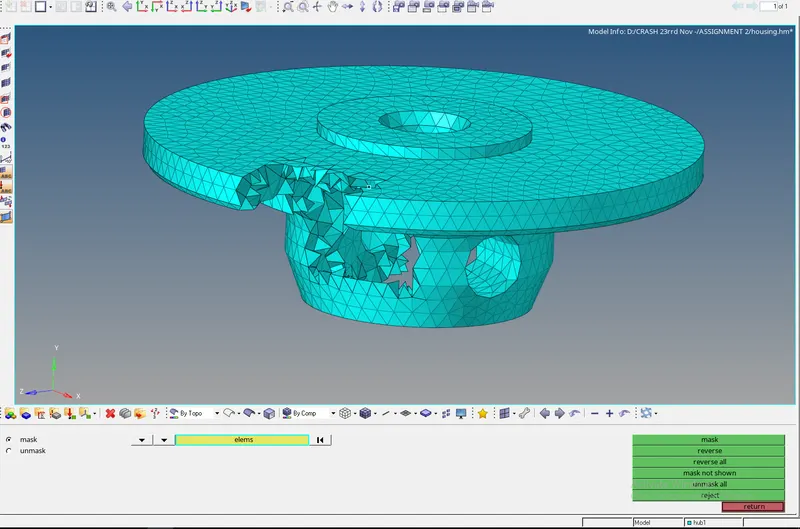
Delete the 2D shell elements. To do this press F2, select elems > by config > tria 3 > select entities and delete. This will delete all the 2D shell elements.


Now hide the hub and set cover as the current component.
On this component instead of performing 2D mesh, we will be directly meshing the component with 3D tetramesh. To perform this operation Go to the main menu page > 3D > volume tetra. Select the surfaces, set the element size as 5mm, 2D mesh type as trias, and 3D mesh type as tetras and mesh. This operation will directly create a 3D tetra mesh.

Check for the tet collapse. To check this Go to main menu page > Tool > Check elems > 3D > tet collapse. set the value as 0.150 and check.

Press F5 and mask few elements to confirm the 3D tetramesh.
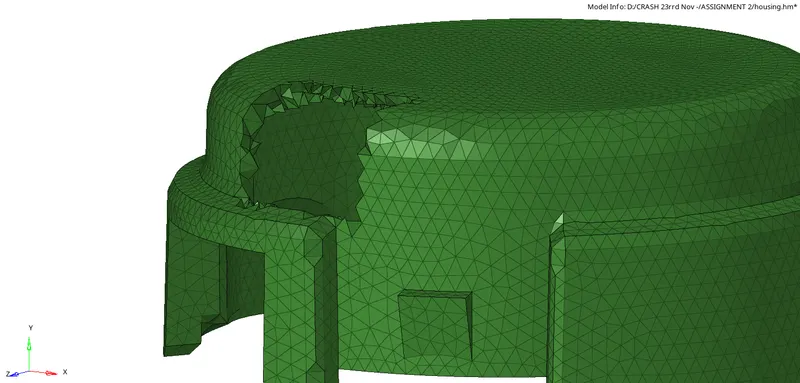
save the model in HM format.
FINAL OUTPUT:
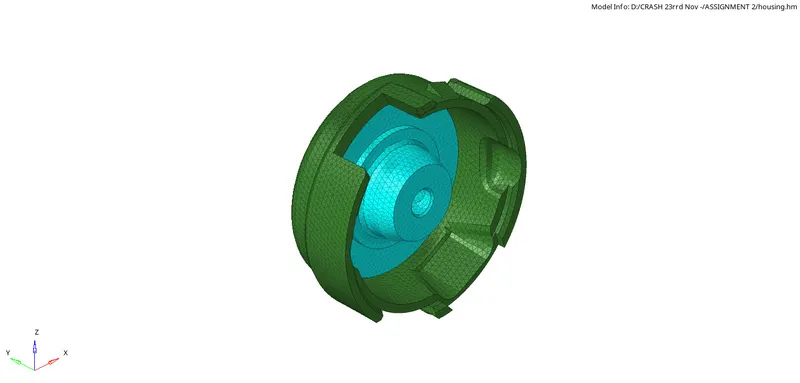
RESULT:
3D Tertamesh has been successfully created on the given component with a target element size of 5mm and zero tet collapse.
MODEL 3:
AIM:
To create 3D HEXA mesh on the given component with a target element size of 10mm.
SOFTWARE:
HyperWorks 2020
PROFILE:
RADIOSS
PROCEDURE:
First import the model in HyperWorks.
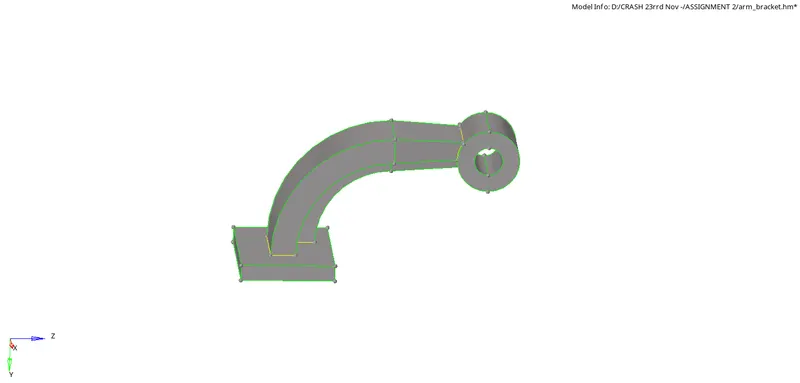
After importing the model, hide all the components except 'Base' and make it as a current component.
Mesh one side of the base with 2D quads element and using "elems offset" create 3D HEXA elems on all the surfaces. To perform this operation Go to the main menu page > 3D > elems offset. select the 2D elems then select the surfaces under "along Geom to follow", set the number of layers as 5 and thickness as 25, and click on offset.
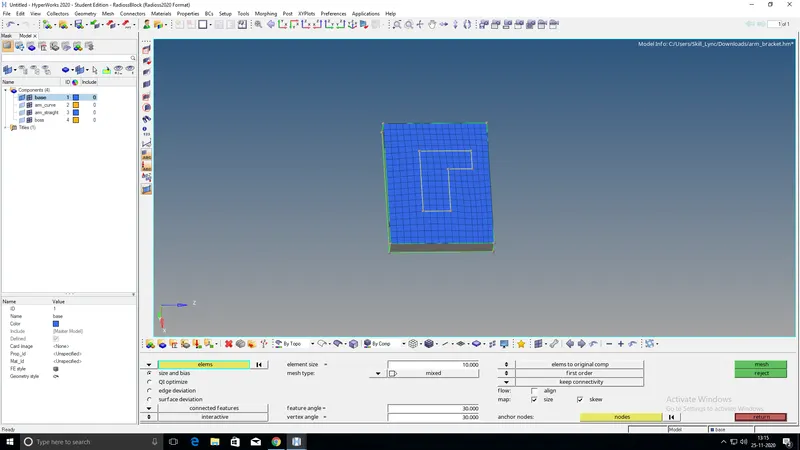
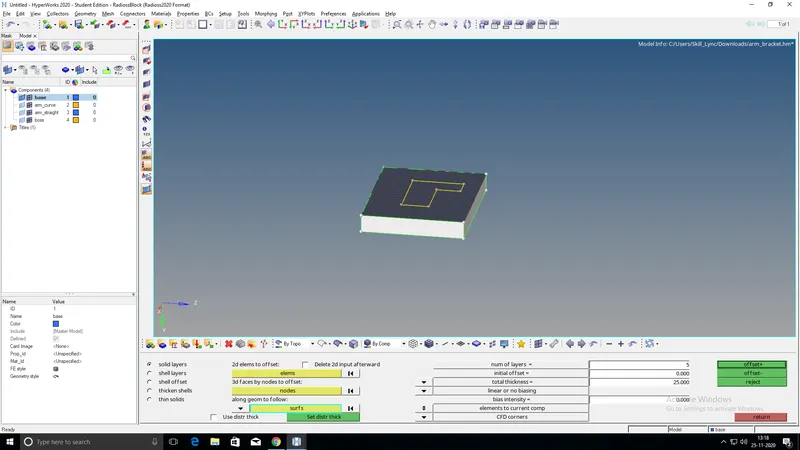
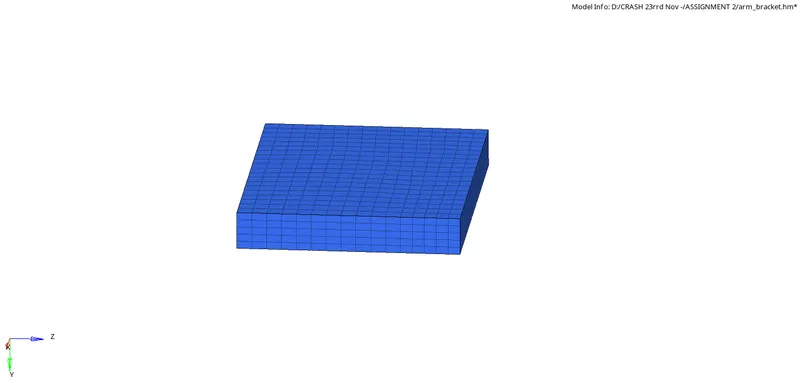
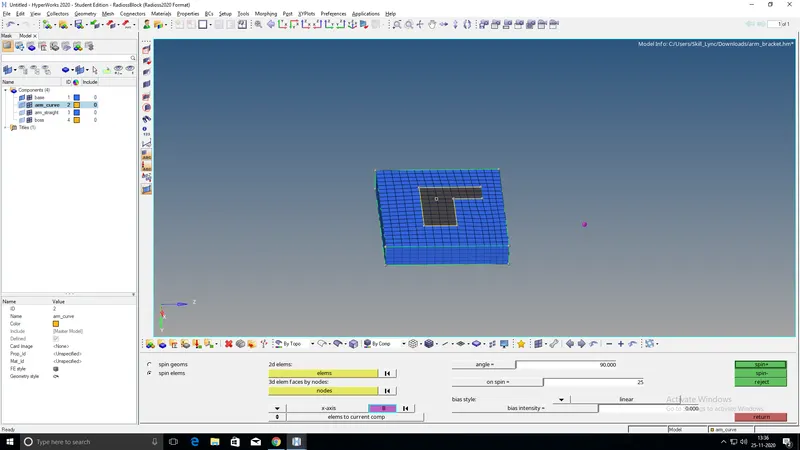
Now using the spin option, create 3D HEXA elements on the arm curve with the help of 2D shell elements which was created on 'Base'. To perform this operation Go to main menu page > 3D > spin > SPIN elems. Select the 2D elements, set angle as 90, on the spin as 25, axis as X, and base point as the center of the circle, and click on spin.
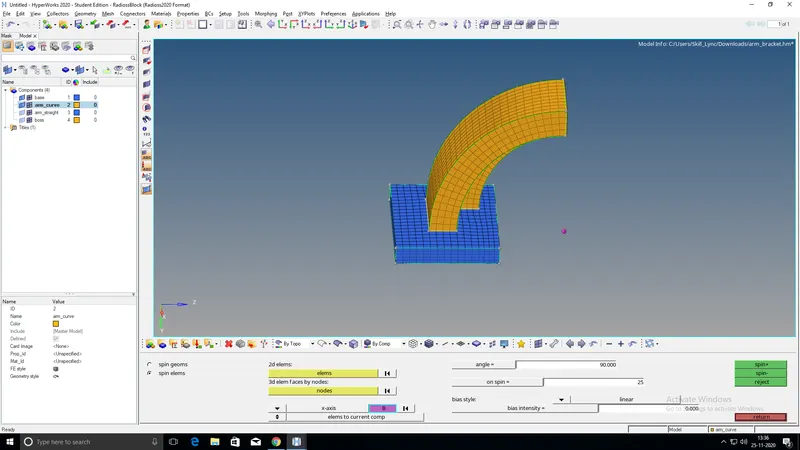
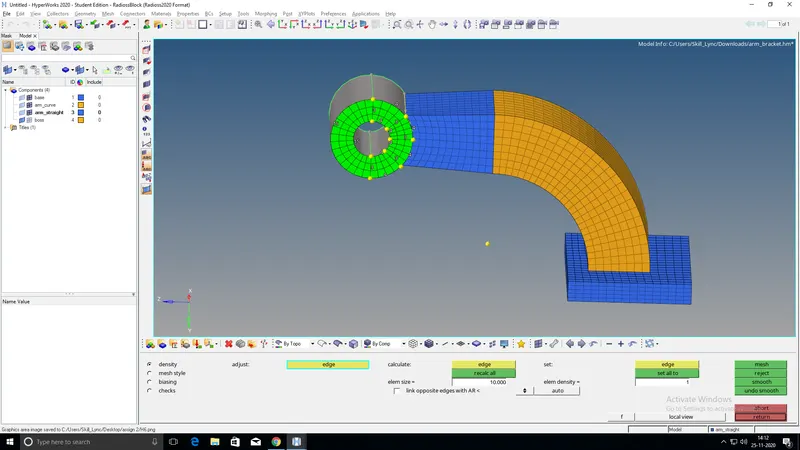
Now using the linear solid option, create HEXA elements on arm straight. As shown in the below figure select the source elements and the destination elements, set the density as 12, and click on solids.
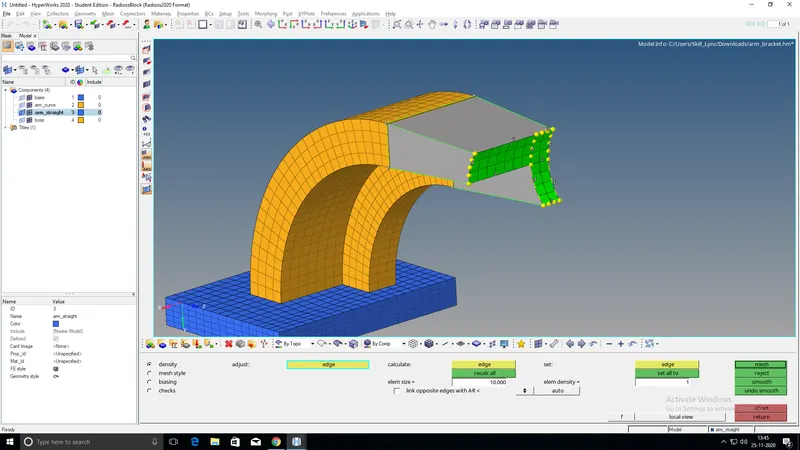
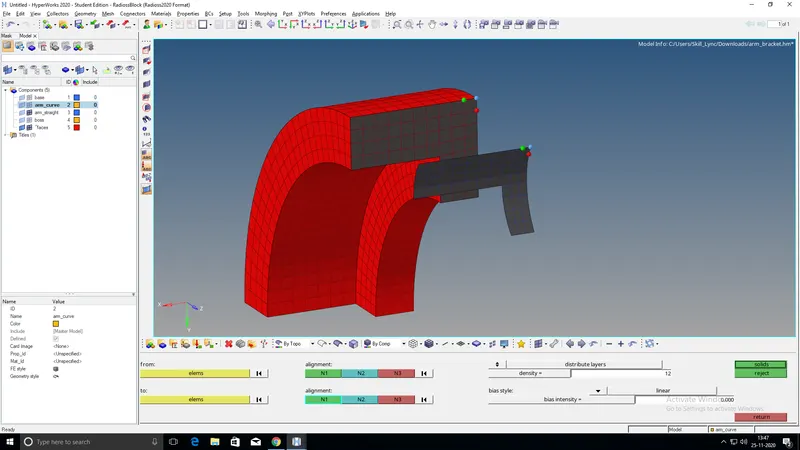
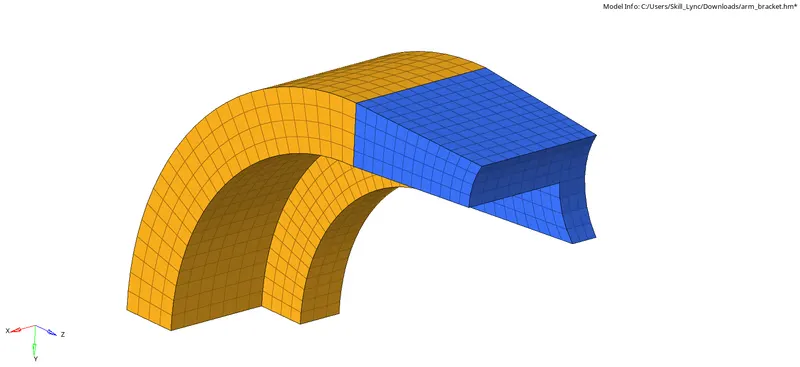
Note: Create faces for the arm curve in order to select the source elements and 2D mesh the destination surface with a same number of elements present on the source elements.
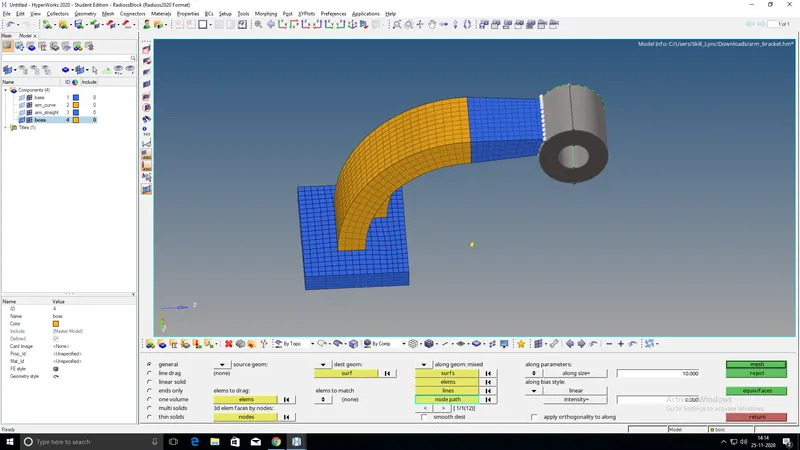
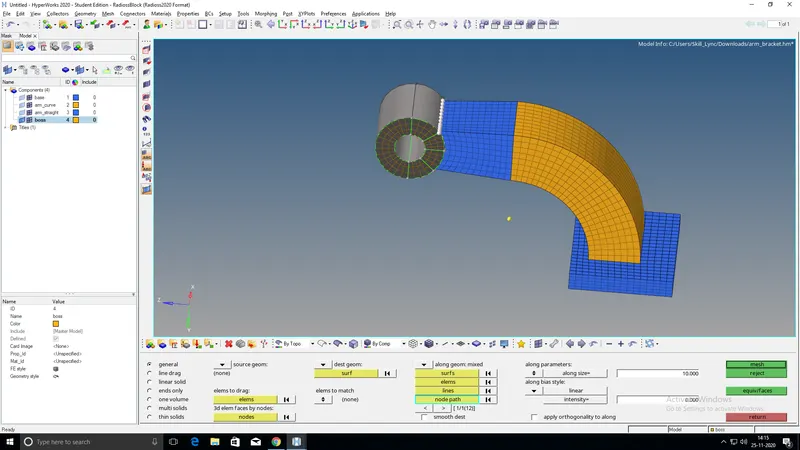
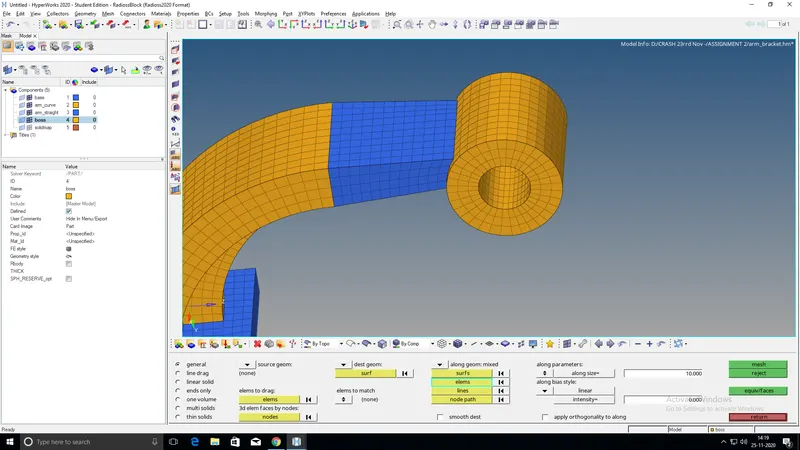
Now using a solid map, create 3D HEXA elements on the boss. Refer to the below figure for performing this operation.

Save the model in HM format.
FINAL OUTPUT:
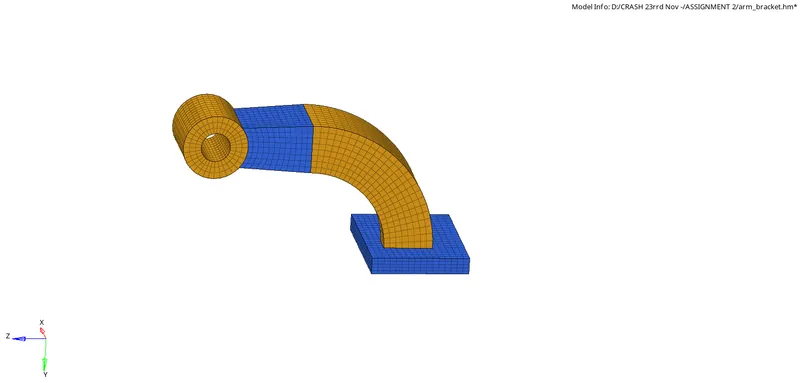
RESULT:
3D HEXA mesh has been successfully generated on the given component with a target element size of 10mm.