Advanced Sheet Metal Design Using NX Cad Challenge_7_ Metal bracket-II
Advanced Sheet Metal Design using NX CAD- Metal Bracket 2
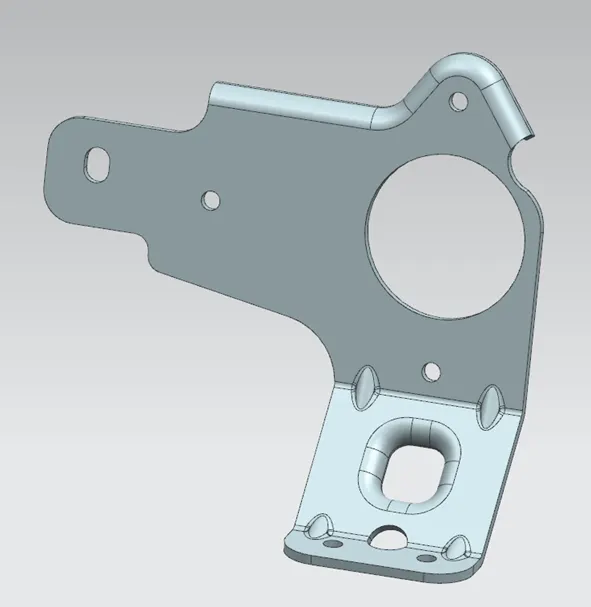
Objective-
To Design Sheet Metal Bracket using NX CAD and create flat Pattern (Drafting)
Introduction-
Sheet Metal is a Comprehensive cold working process for metal sheet (usually below 6mm), including Shearing, punching/ cutting, Folding, riveting, splicing, forming (such as car body).
Types of sheet metal
- Galvanized steel
- Stainless steel
Application Sheet Metal
- Aircraft bodies
- Automobile bodies
- Utensils used for domestic purpose
- Beverage cans
Design Methodology (Flow Chart)-
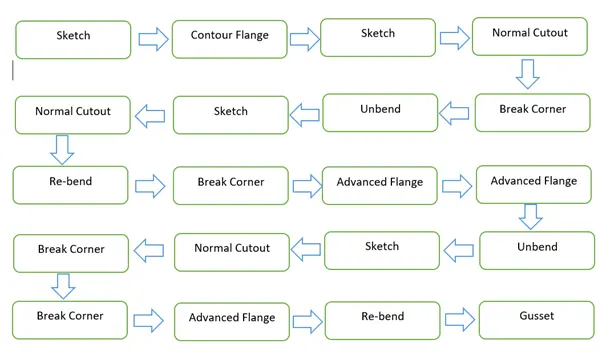
Description-
Tools
- Sketch- by selecting the required plane sketch is drawn by using geometrical constrains and giving desired dimensions
- TAB- this command is used to extrude a sketch along a specific direction or axis by a giving required thickness (converting 2D sketch to 3D)
- Normal cut-out- this command is used to remove material from the object by using desired sketch profile or curve.
- Bending- as the name suggest this command is used to bend the tab along required line.
- Flange- this command is used to create flange by using edge of TAB or BEND at an angle and length.
- Break corners- this command is used to round the sharp edges.
- Unbend- this command is used to unbend all the adjacent bend sides and other operations.
- Hole- command is used to remove material from the base or required side.
- Dimple- this command is used to create a raised surface on a flat surface in a required shape by creating sketch.
- Bead- this command is used to give additional strength to part.
- Re bend- after doing required operation which is not possible to do in bend state, un bend command is used to bring the initial state which is required.
- Flat Pattern- after Re bending and finishing all the operation flat pattern command is used to flat the sheet metal component which is then used for drafting purpose.
- Mirror- this command is used to mirror a feature or body about a plane.
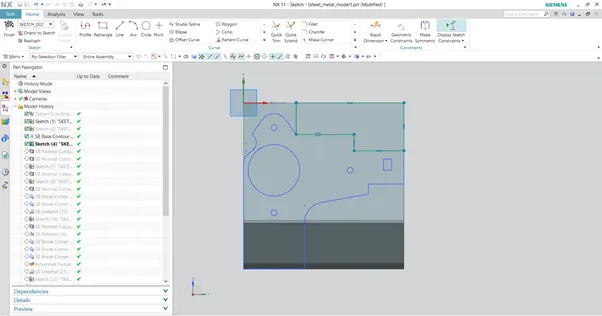
Draw the sketch on the XZ plane as shown in the image with the given Dimensions.
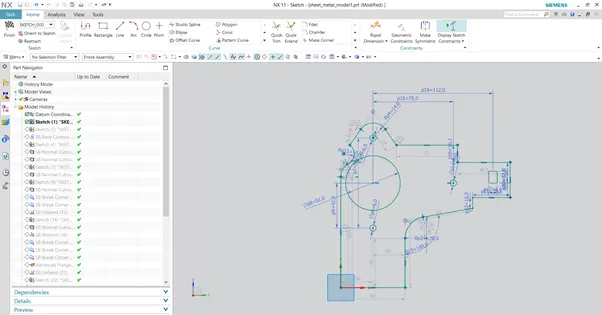
Select the sketch command and the draw the sketch on side plane with the given dimensions.
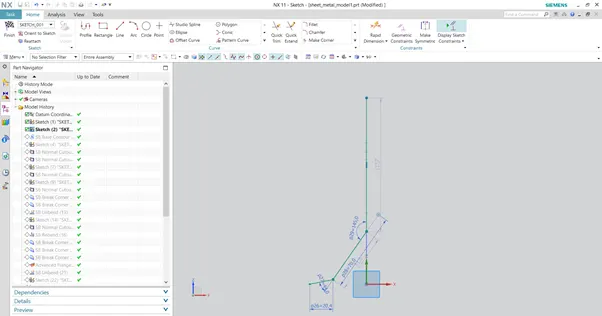
Select the Contour Flange option and click on the sketch which was created on the side plane enter required parameters and create the flange as shown in the image.
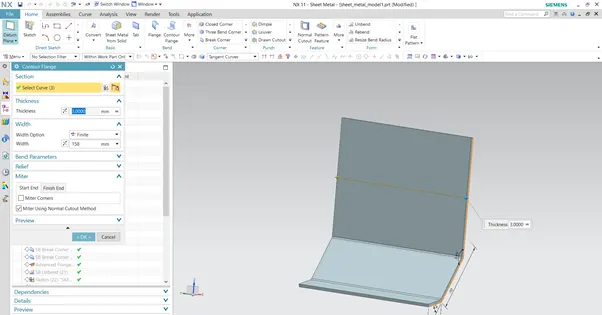
Select the surface of the flange and draw the sketch with reference to the sketch drawn on the XZ plane.
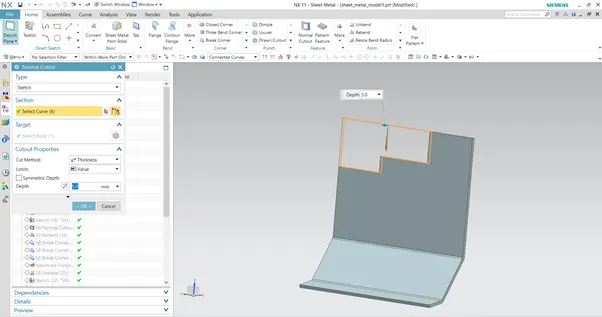
Select the Normal cut-out option and remove the excess material as shown in the image.
Repeat the above two steps till you get the intended shape as per the sketch one which was drawn on the XZ plane, which is shown in the image.
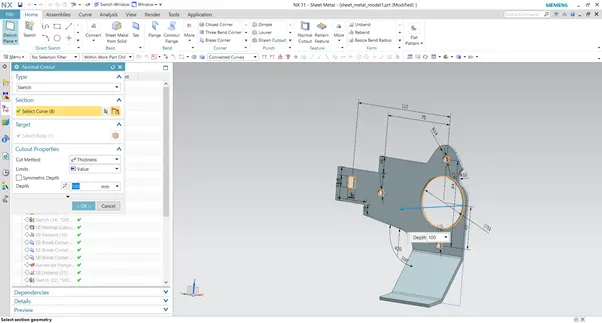
Select the Break corner option and round the edges as shown in the image.
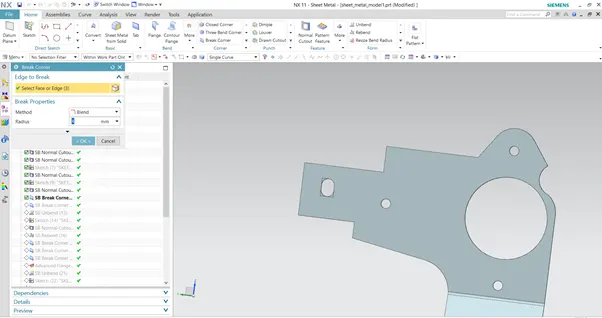
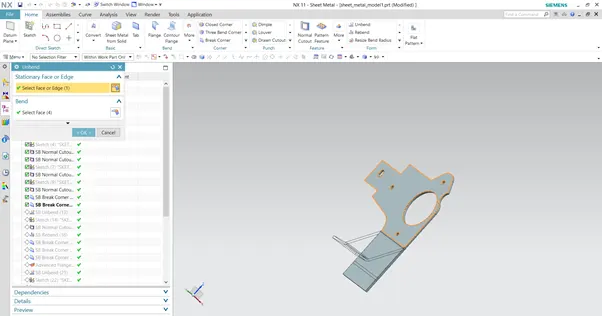
Select the unbend option, select the stationary face, with respect to that face unbend the entire component.
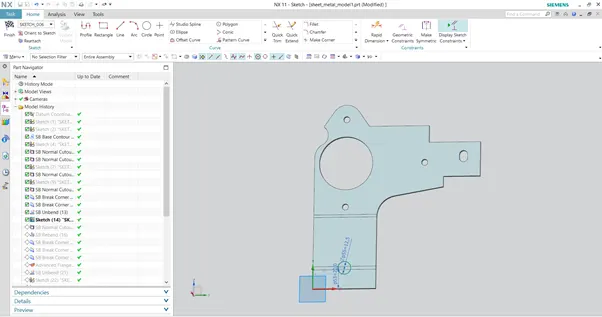
Select the sketch option and draw the circle with the required dimensions and finish the sketch.
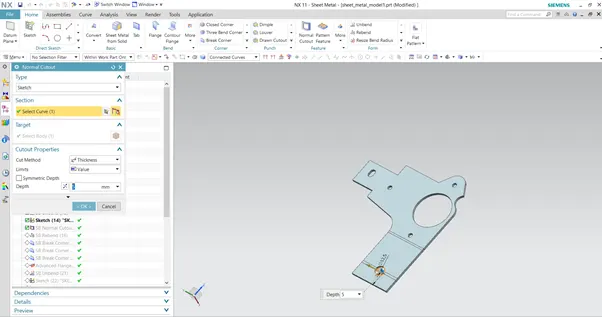
Select the Normal cut-out option and select the previously drawn circle and remove the material as shown in the image.
Select the Re-bend option and select the entire component to get back to its original shape.
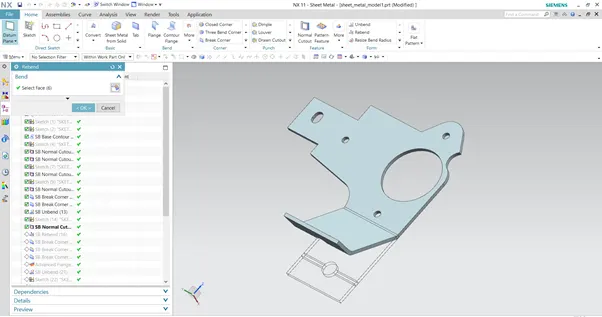
Select the Break corner option and round the sharp edges as shown in the image.
Repeat same step to round the other sharp edges as shown in the image.
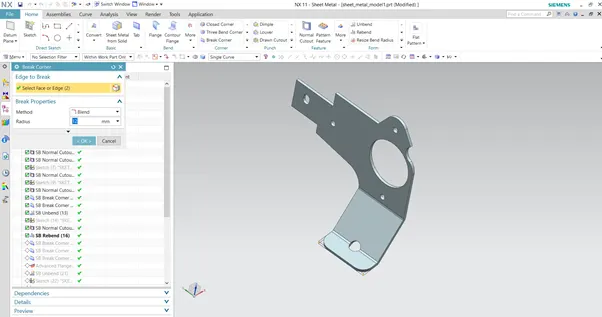
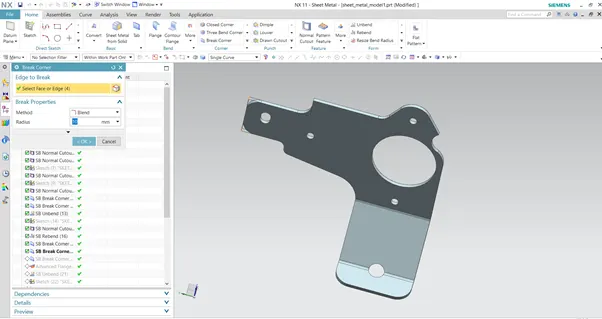
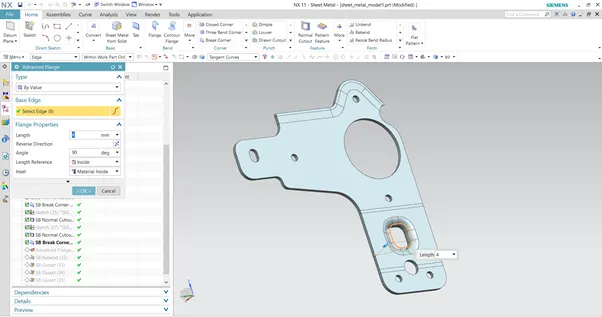
Select the Advanced flange option, select the edges as shown in the image fill the required parameters in the dialogue box click on ok.
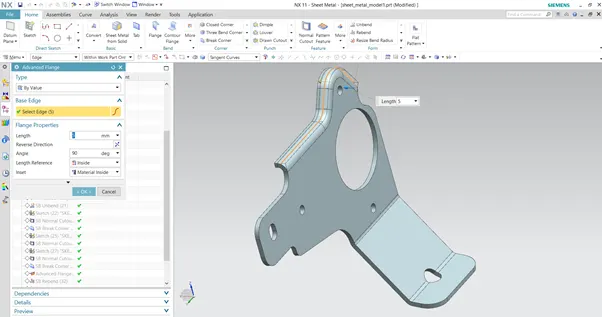
Select the Unbend option, select the one stationary face with respect to stationary face unbend the entire component.
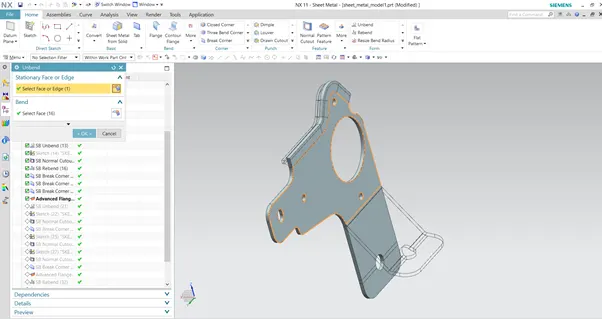
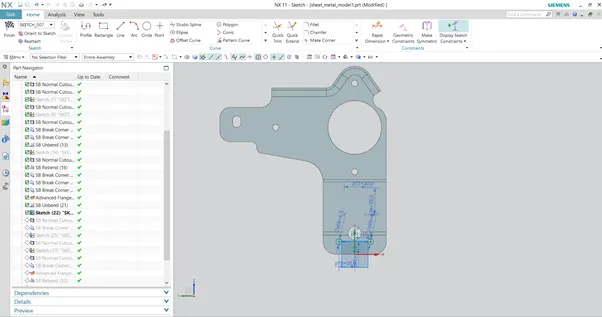
Select the sketch option, select the face as shown in the image ad draw the two circles with given dimensions as shown in the image.
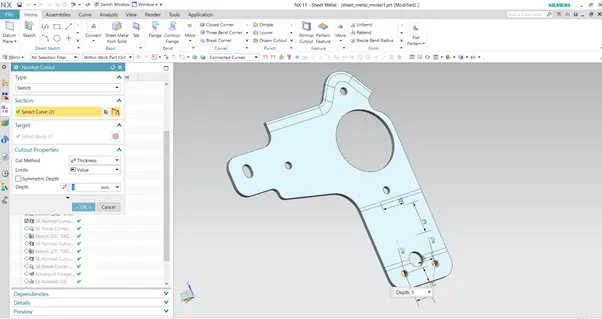
Select the normal cut-out option, select the previously drawn sketch and remove the material.
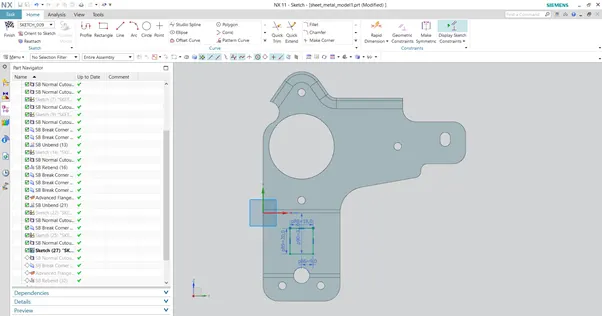
Select the sketch option and draw the rectangle with given dimension and finish the sketch as shown in the image.
Select the normal cut-out, select the previously drawn sketch and remove the material as shown in the image.
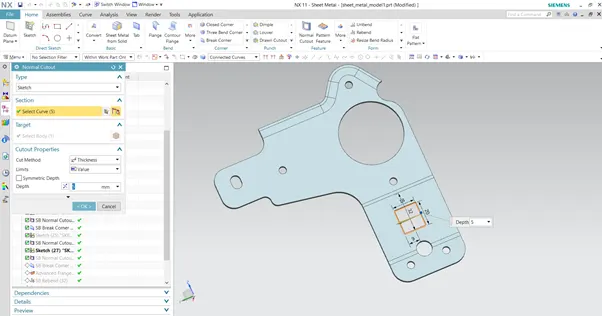
Select the Advanced flange option, select the edge and create the flange by filling the required parameters in the dialogue box.
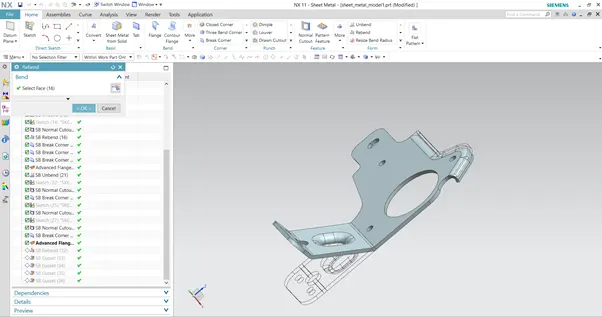
Select the Re-bend option, select stationary face with respect to that stationary face entire part is brought back to its intended shape.
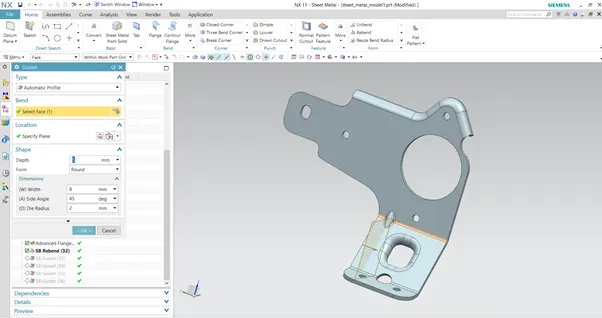
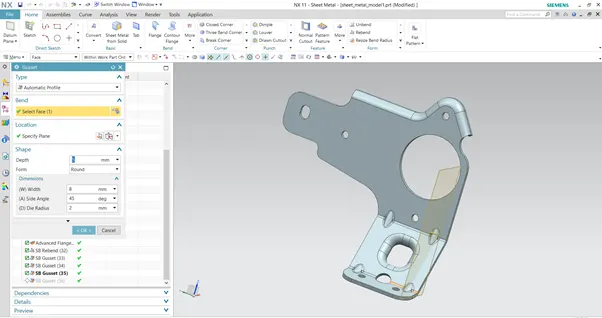
Select the Gusset option, select the surface on which Gusset is to be created, create plane by giving distance, fill the details in the dialogue box i.e. depth, width, form, die radius and create the Gusset as shown in the image, repeat the above step to create all four Gussets.
Model Views-
Front view
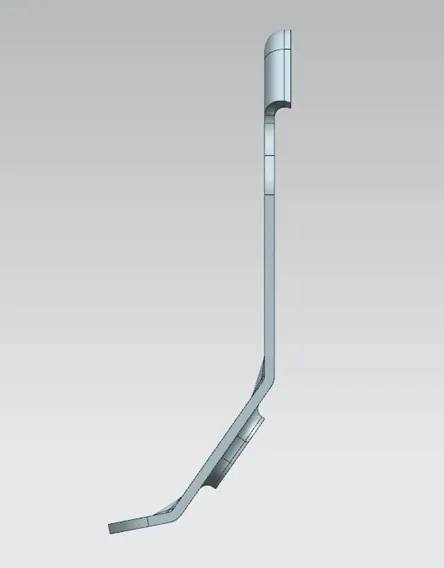
Side view
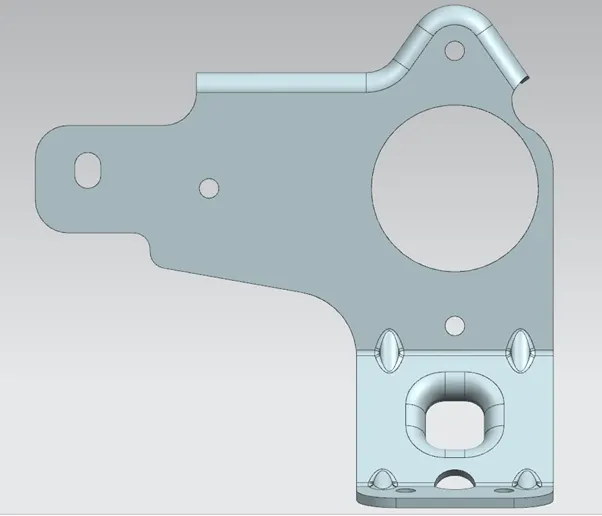
Top view
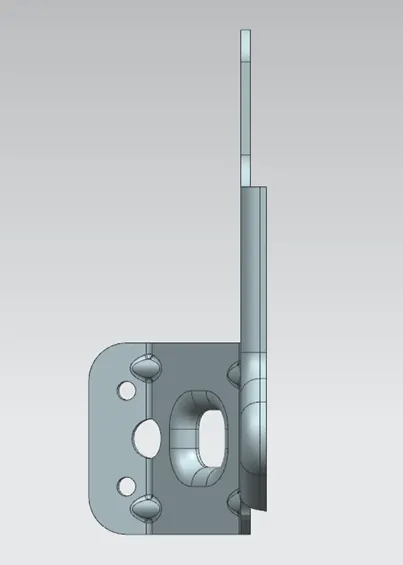
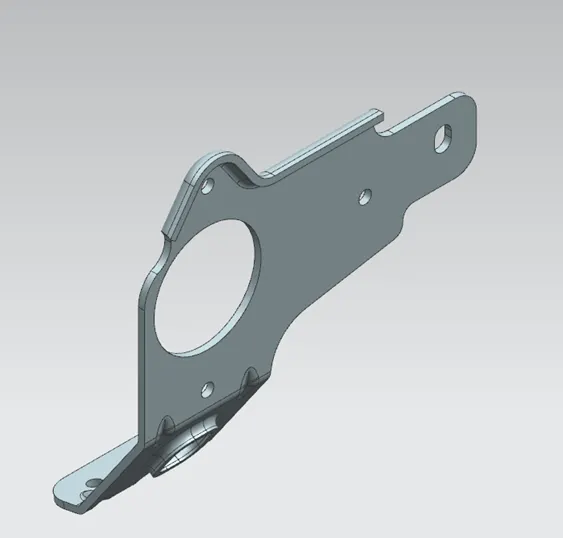
Isomteric view
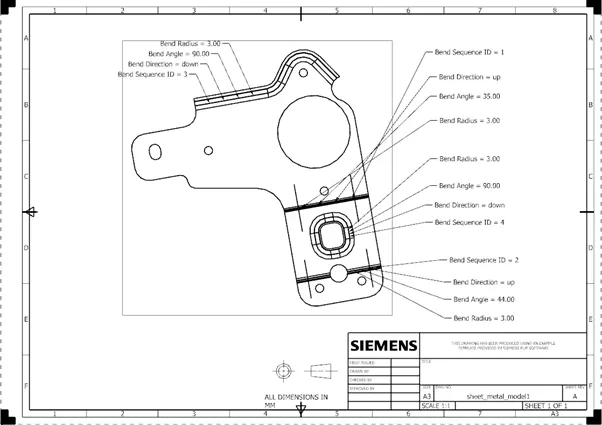
Drawing Sheet-
Conclusion-
Thus by using NX CAD tool and folllowing proper methodology Bracket-2 is modelled.