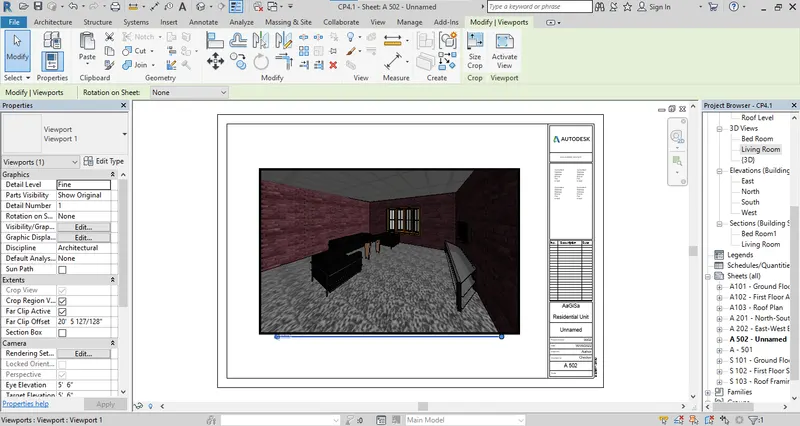
3D Creation of Celing, Roof, Architectural plan, Structural plan, Sectional view, Elevation view and Camera specific view for a house plan using REVIT
Q.1 Ans
AIM : Ceiling To layout.
Procedure:
Step 1: Open the layout plan created in week 3. Go to ceiling plan from project browser window. Select the plan where the ceiling is required.
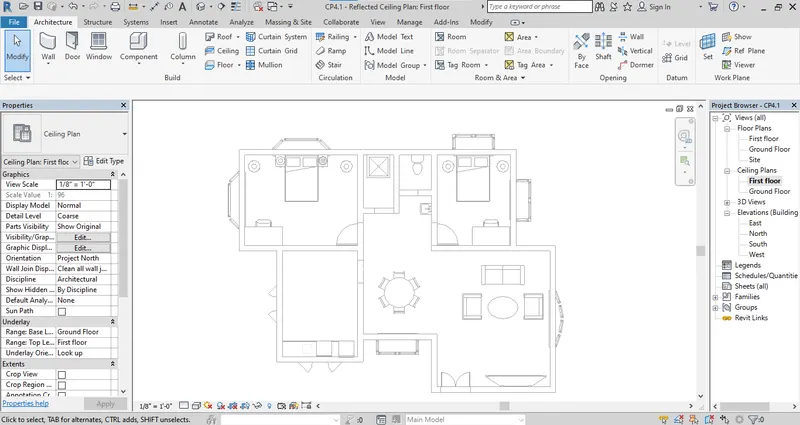
Step 2: Go to architectural tab from that build panel and select the ceiling command.
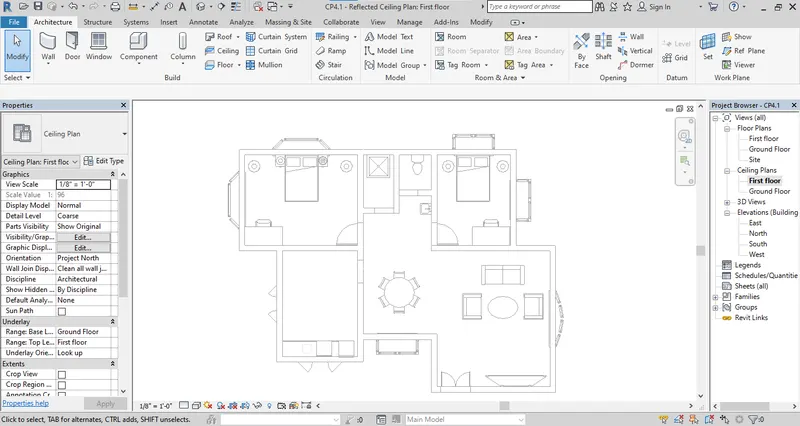
Step 3: As you entered in the ceiling command there are two options to provide ceiling.
a. Automatic ceriling
b. sketch ceiling
Select any one of the above method to draw the ceiling.
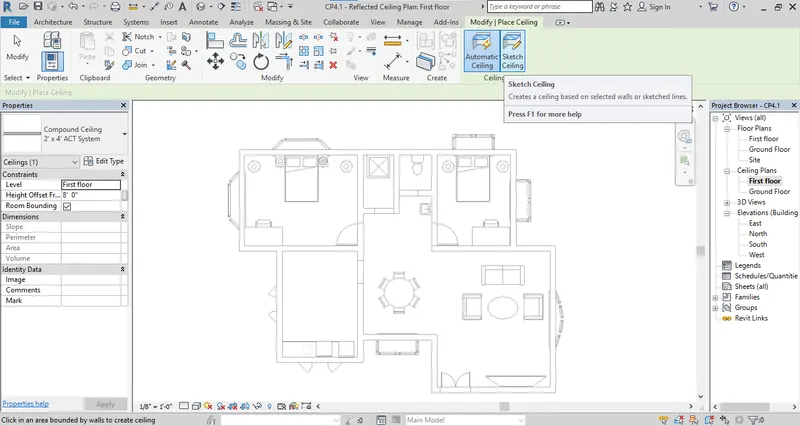
Step 4: I am selecting the sketch ceiling method selecting the outer boundaries of the layout.
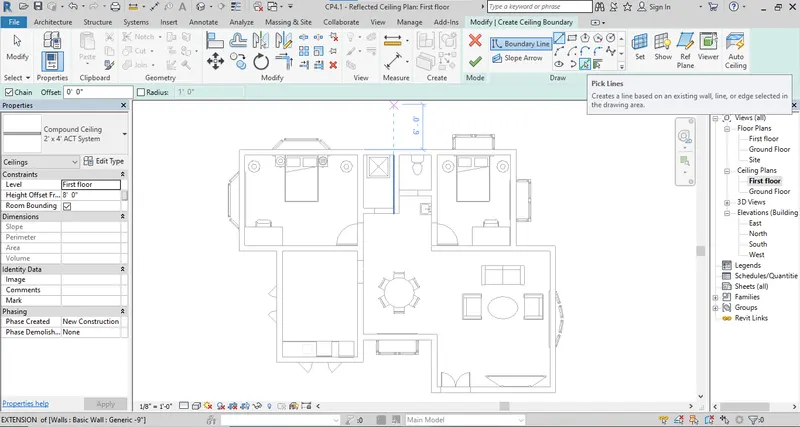
Step 5: Select all the boundary and click on finish.
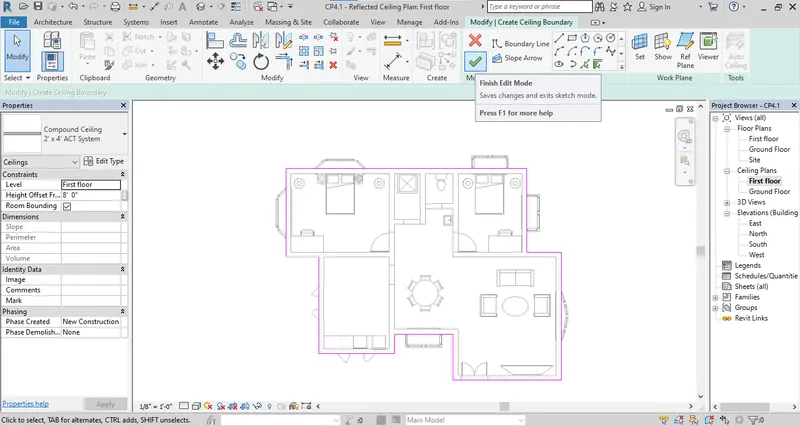
Step 6: The ceiling will be provided.
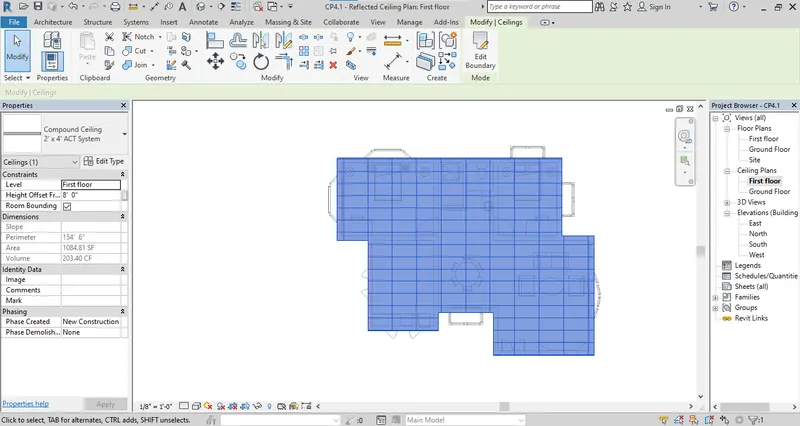
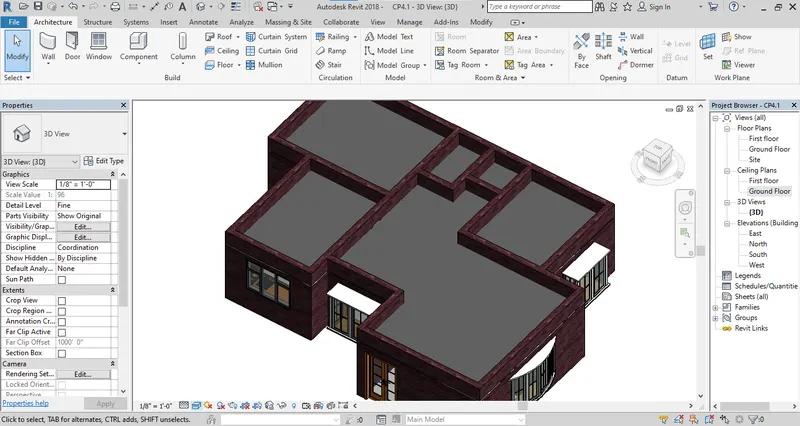
Result : Go to 3D view and realistic mode. The ceiling will be shown in the layout.
Q.2 Ans
AIM : Provide roof to Layout By footprint and Slope 10 degree.
Procedure:
Step 1: Open the layout and go to floor plan. Select the architectural tab and from build panel use the roof command.
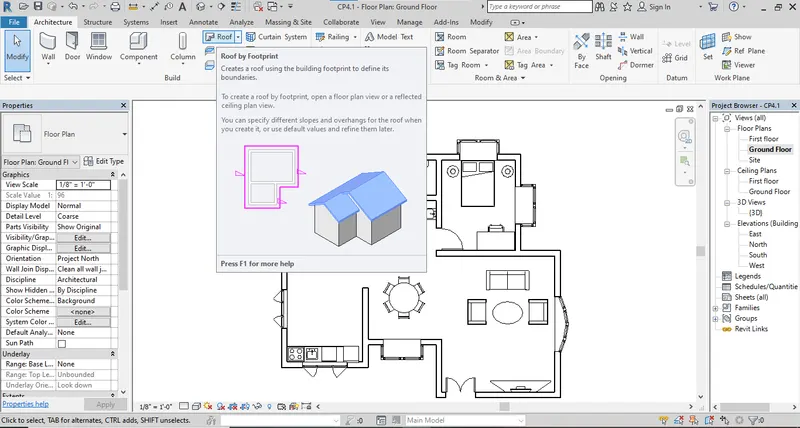
Step 2: From drop down menu there will some options for providing a roof. Use the "Roof by Footprint" option.
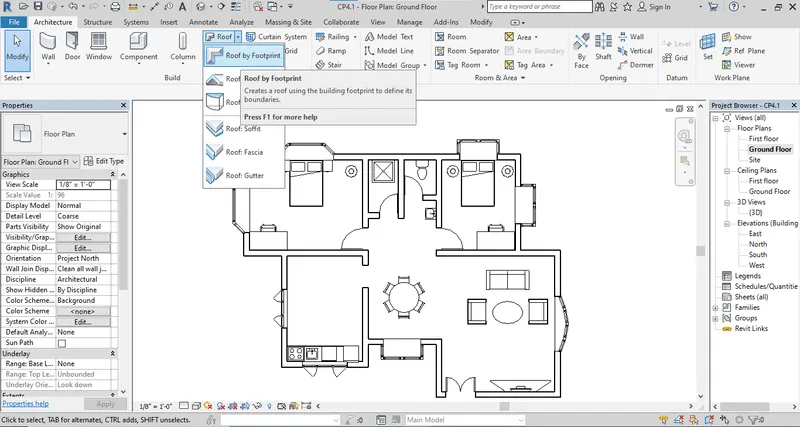
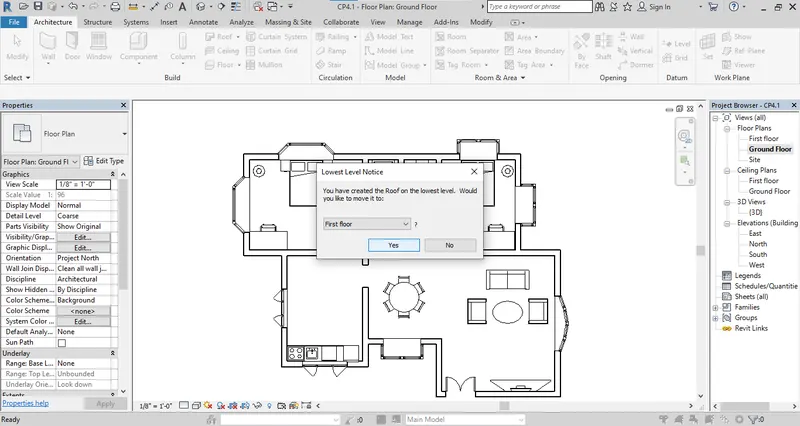
Step 3: Select the level to draw the roof.
Step 4: As you selected the level draw tools will be open. Use a "Pick a line" option and Select the boundary of layout to draw a roof.
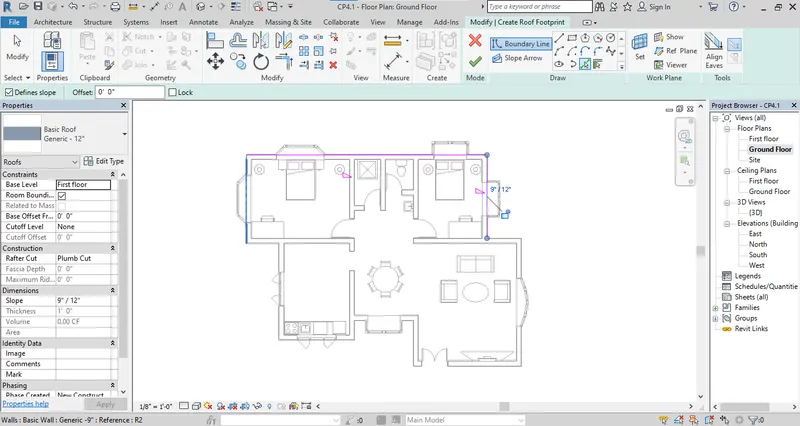
Step 5: Select all the boundries and go to finish.
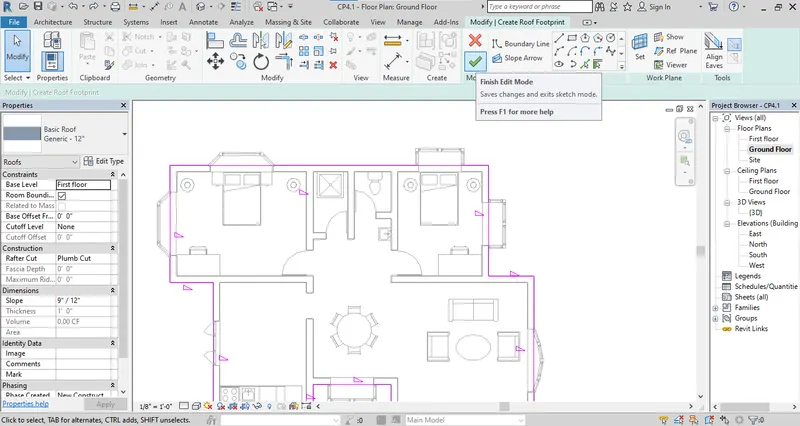
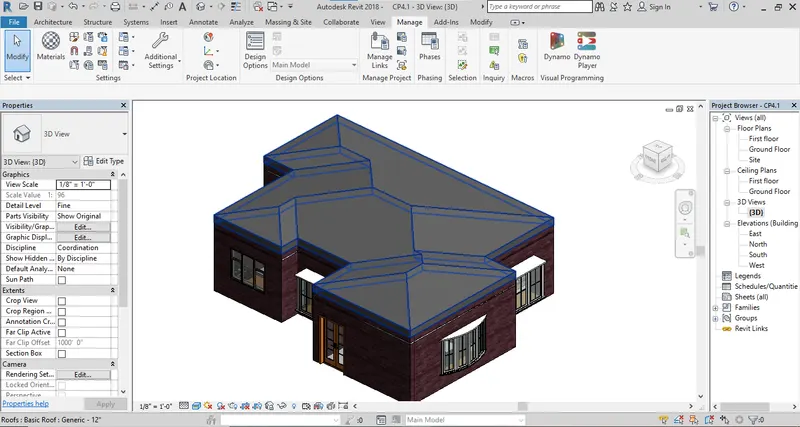
Step 6: The roof will be drawn at selected level.
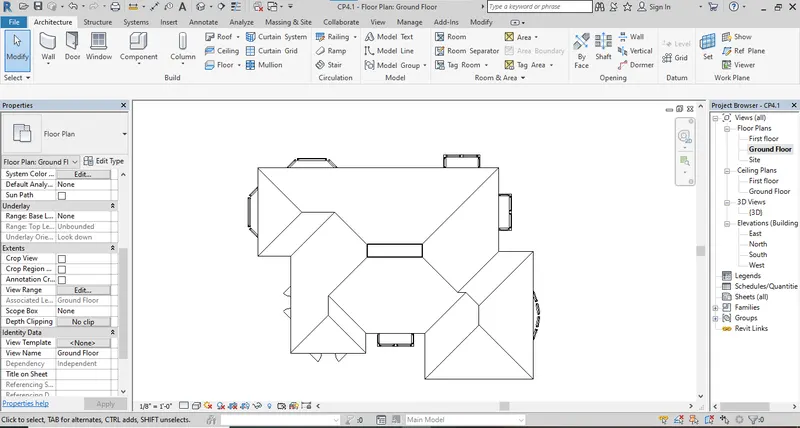
Step 7: Now go to 3D view and check the roof.
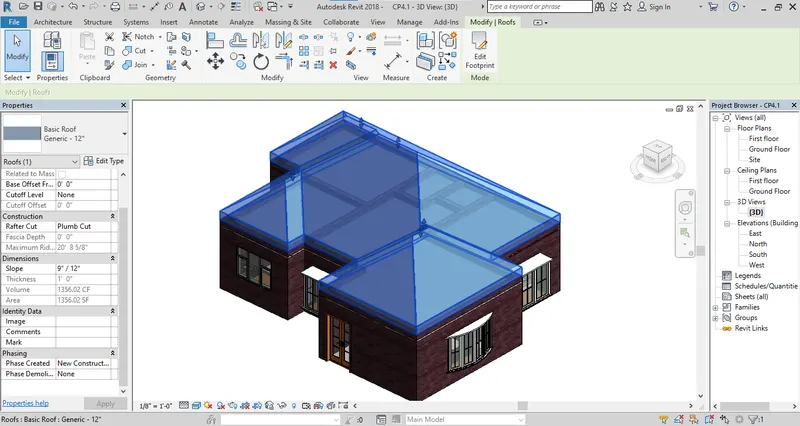
Step 8: To change the slope of roof select the roof and go to properties browser.
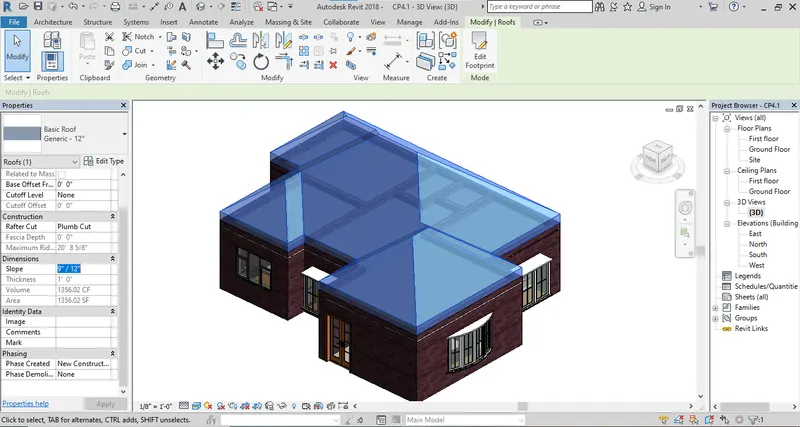
Step 9: The slope of roof is in inches. To change the unit go to manage tab and select the project units.
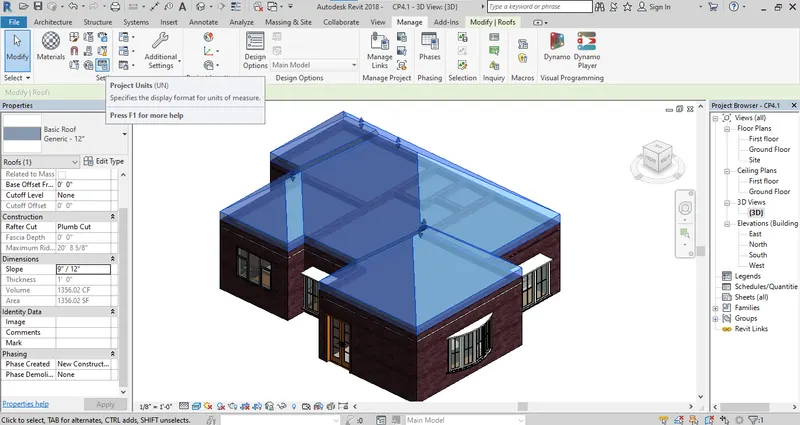
Step 10: As you selected the project units. The formats of unit will be open.
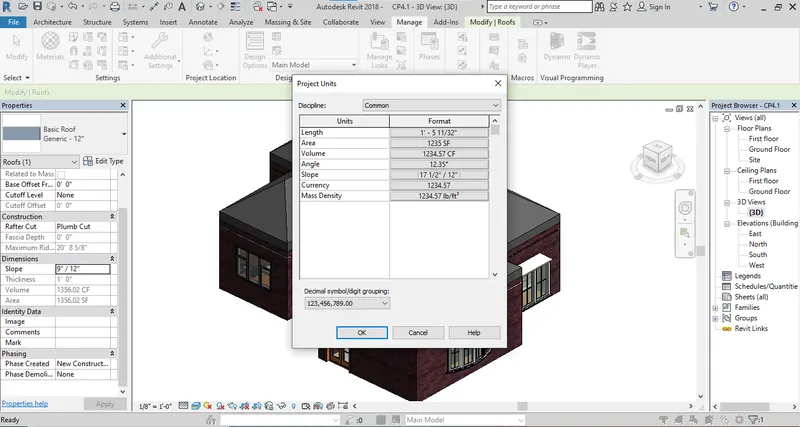
Step 11: Select slope option and change from inches to degree.
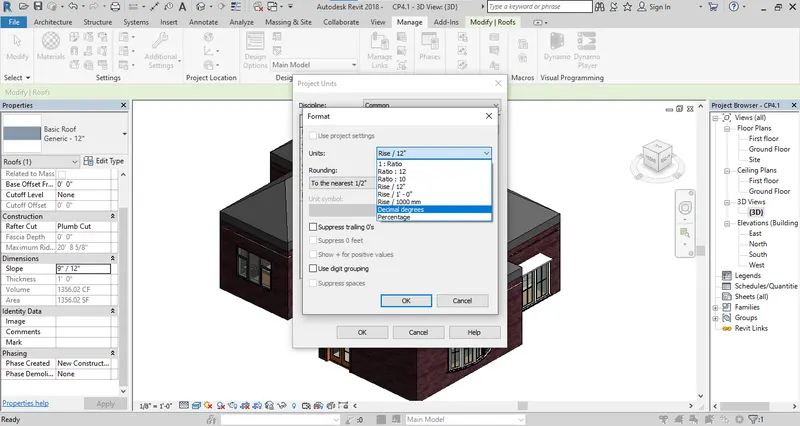
Step 12: As you changed the unit change the value of slope as 10 degree.
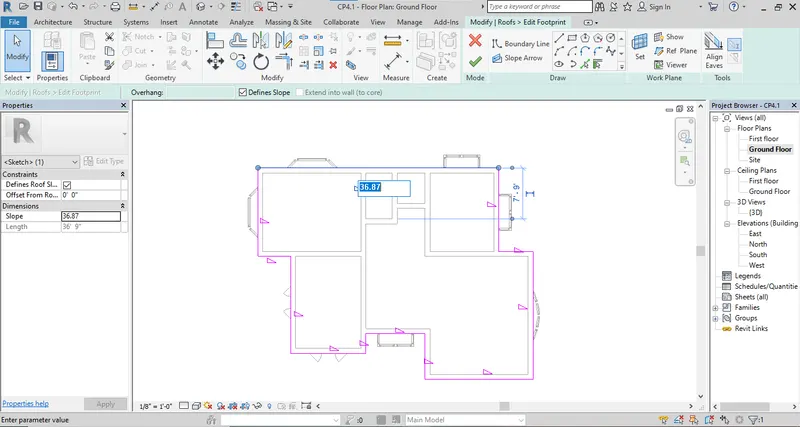
Result: The Roof is provided to the layout and the angle of roof will be changed as 10 degree.
Q.3 Ans
AIM : Creating the architectural layout & Structural layout.
Procedure:
Step 1: Reffere a plan created in week 2 or week 3. I am reffered a plan from week 3.
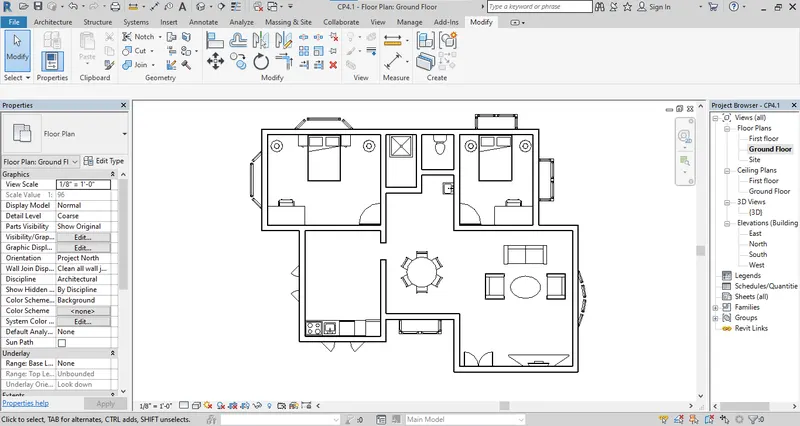
Step 2: Go to View tab and select the plan view from create panel.
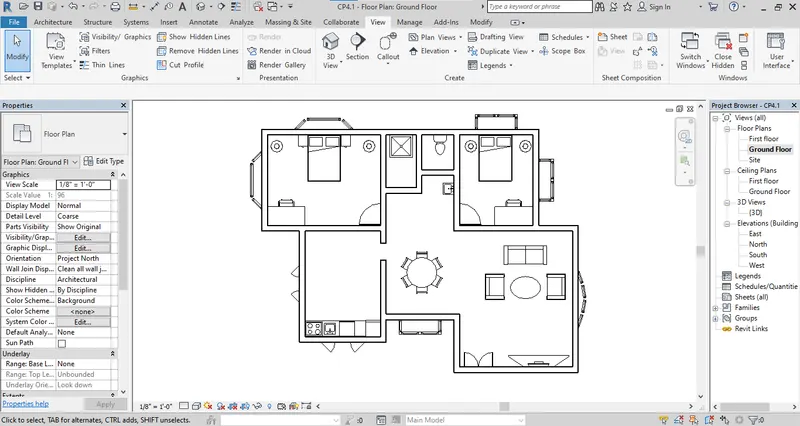
Step 3: Use the plan view dropdown menu and select the floor plan to create a architectural plan.
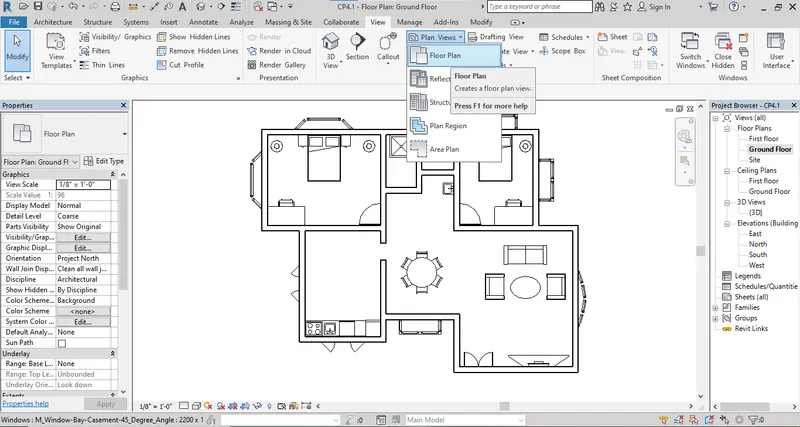
Step 4: The floor plan window will be open go to edit type and check the plan settings.
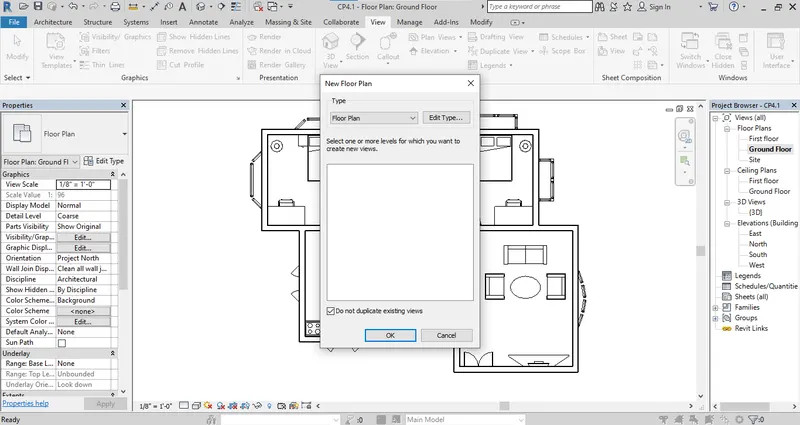
Step 5: Identify the data in view template applied new view.
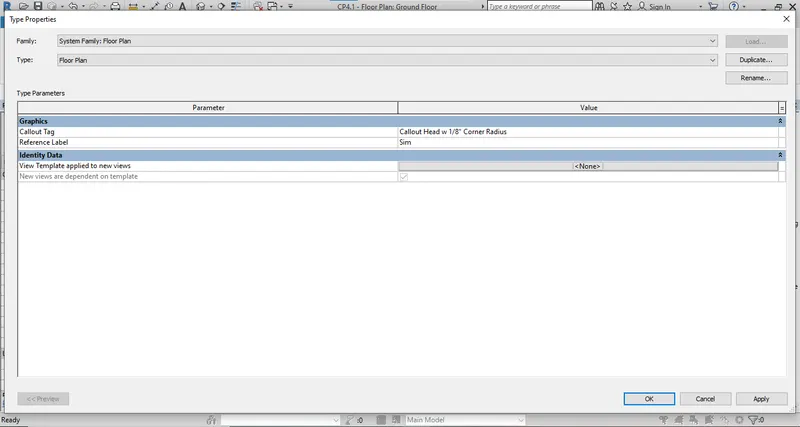
Step 6: Change the assign view to architectural view.
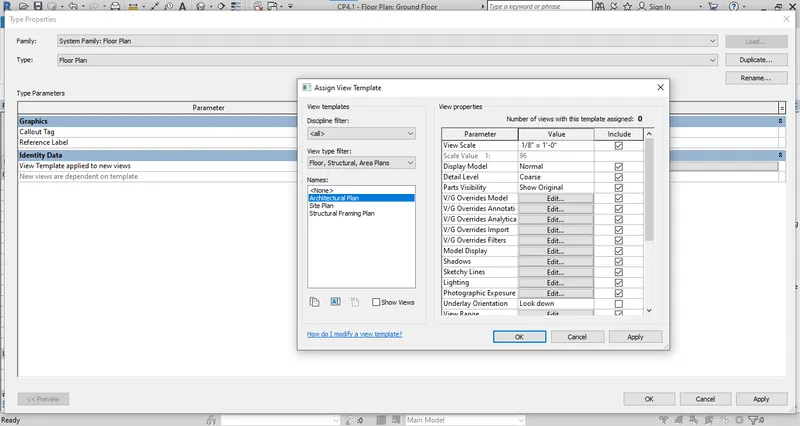
Step 7: As change the architectural plan select apply and ok.
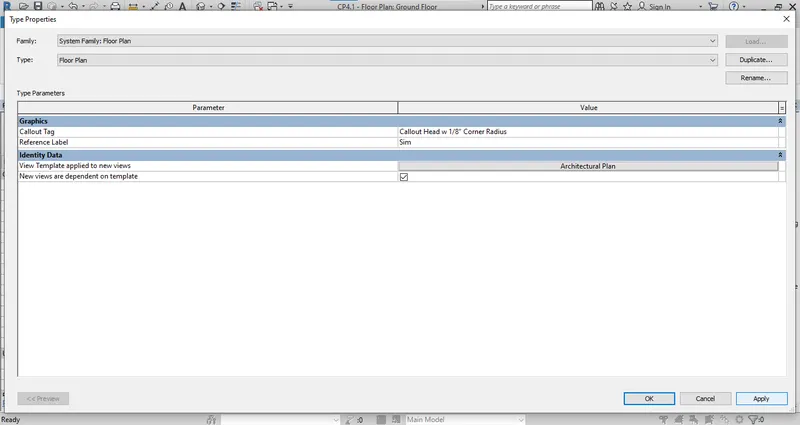
Step 8: The architectural plan will be created.
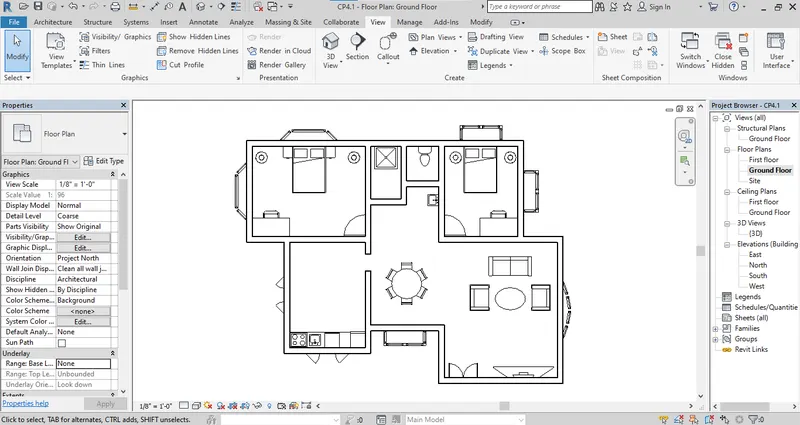
Step 9: The again go to plan view use the dropdown menu and select the
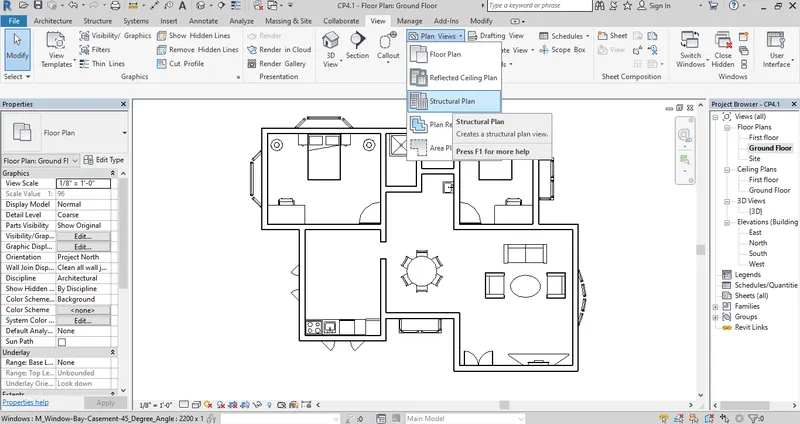
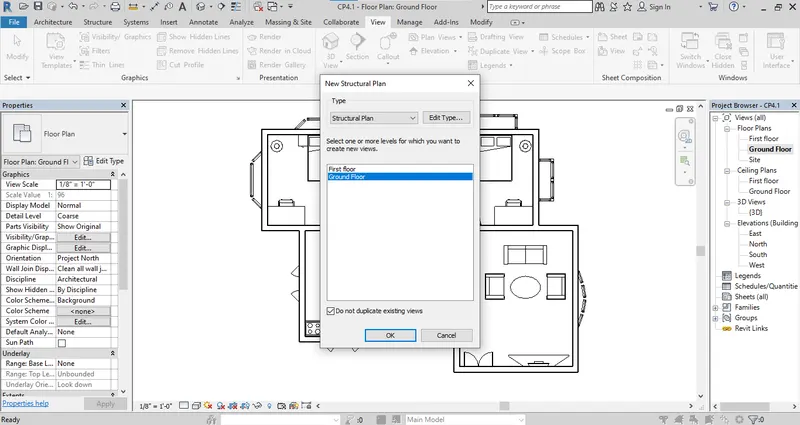
Step 10: Select the level or structural plan. I am selecting Ground floor level.
Step 11: The structural plan will be created in new.
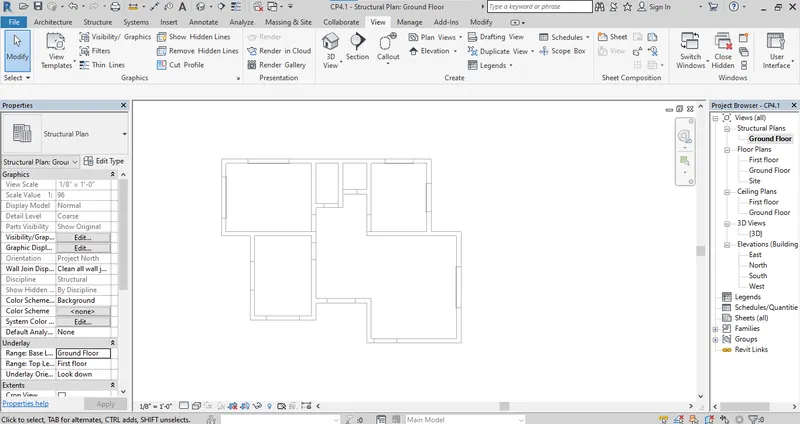
Result:
a. Architectural plan will be created.
b. Structural plan will be created.
Q.4 Ans
AIM : Add dimensions for Architectural and Structural plan.
Procedure:
Step 1: Open the architectural plan created. Go to annotate tab.
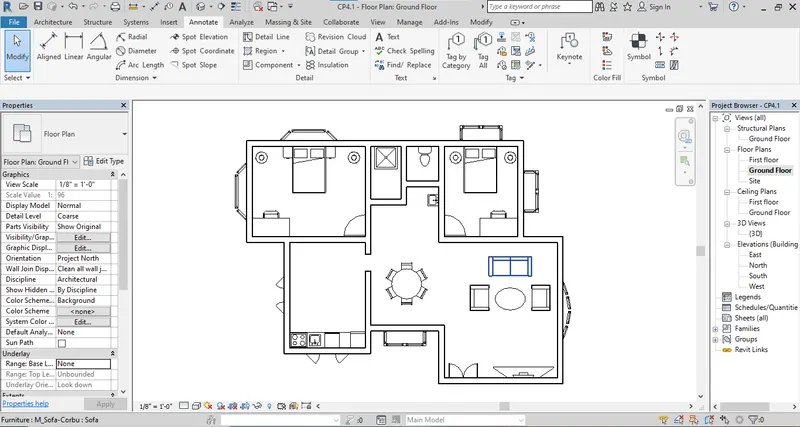
Step 2: Go to dimension panel and select the linear or aligned. Provide the dimension.
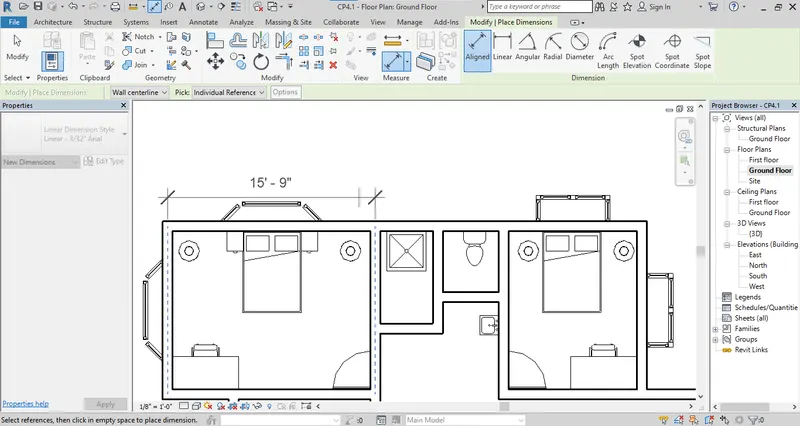
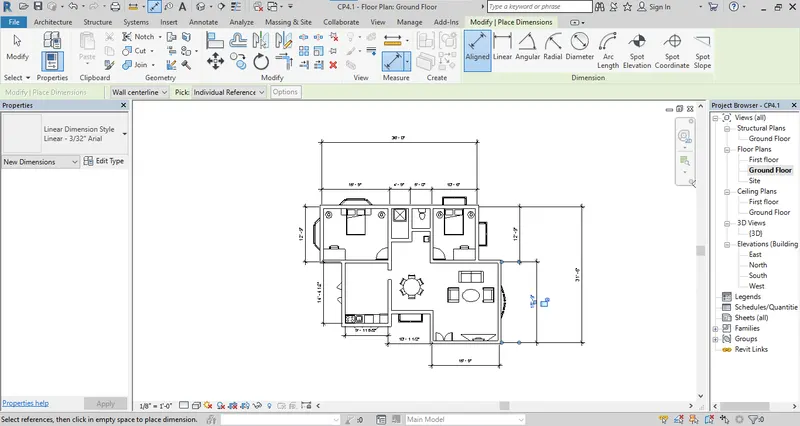
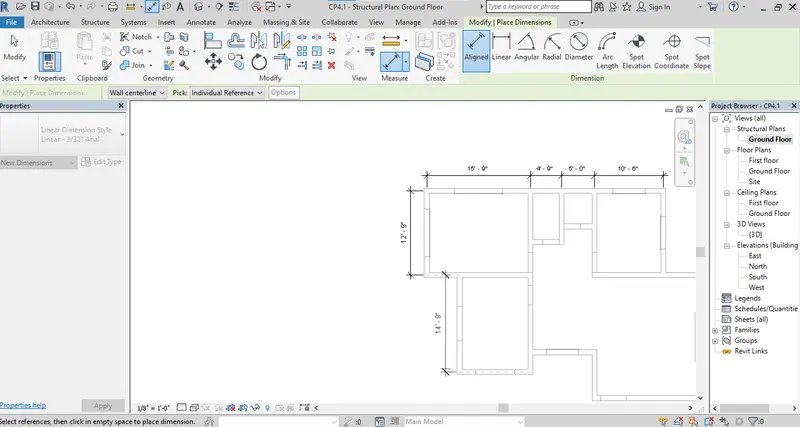
Step 3: I am selecting the wall at centre to centre. Provide the Centre to centre dimensions.
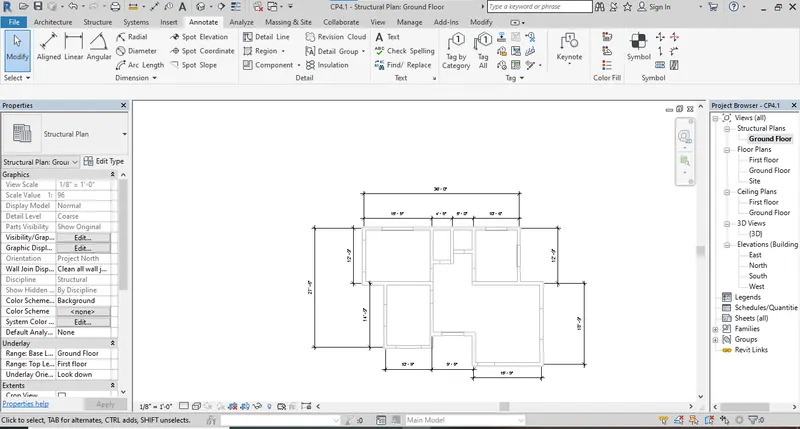
Step 4: Select the structural plan open it and again go to annotate.
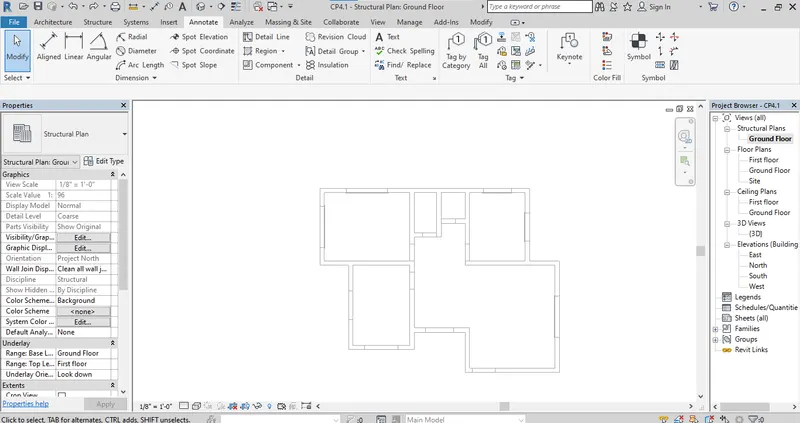
Step 5: Same select the linear or aligned to provide the dimesion and add the dimension.
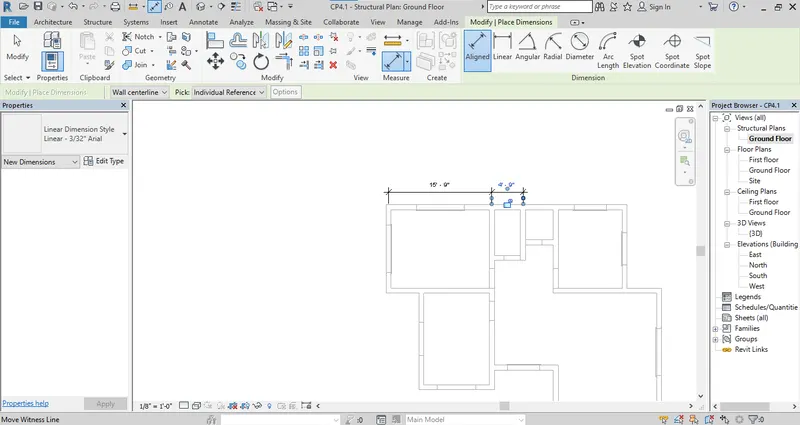
Step 6: Provide all the dimensions one by one.
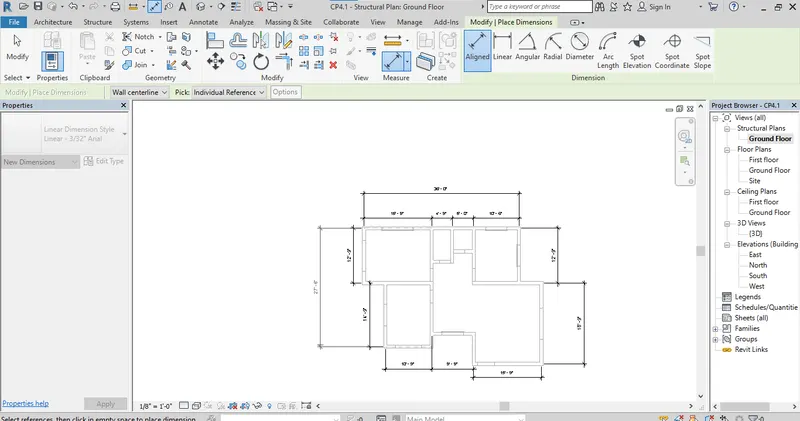
Result:
a. Architectural layout plan with dimension.
b. Structural layout plan with dimension.
Q.5 Ans
AIM : Create a Sheet template.
Procedure :
Step 1: Open the recent layout and go to view tab.
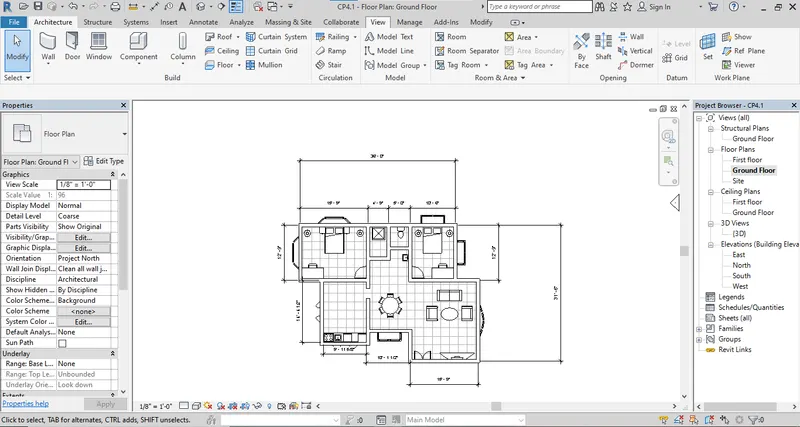
Step 2: From view tab select a sheet command.
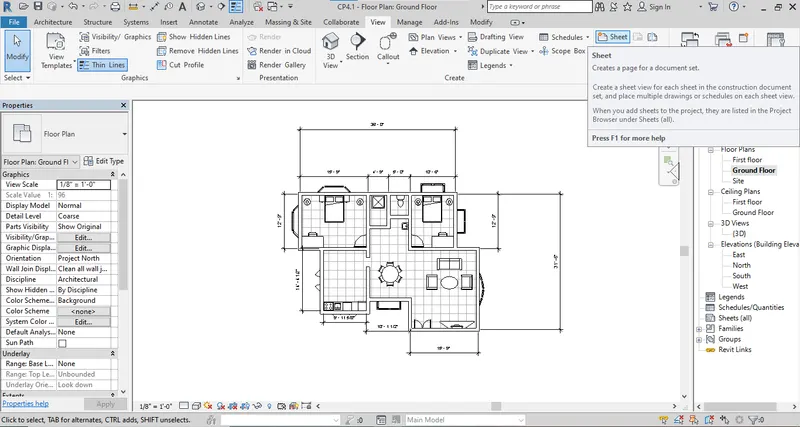
Step 3: As you seslected the create a new sheet new window will be open for the selection of size of page.
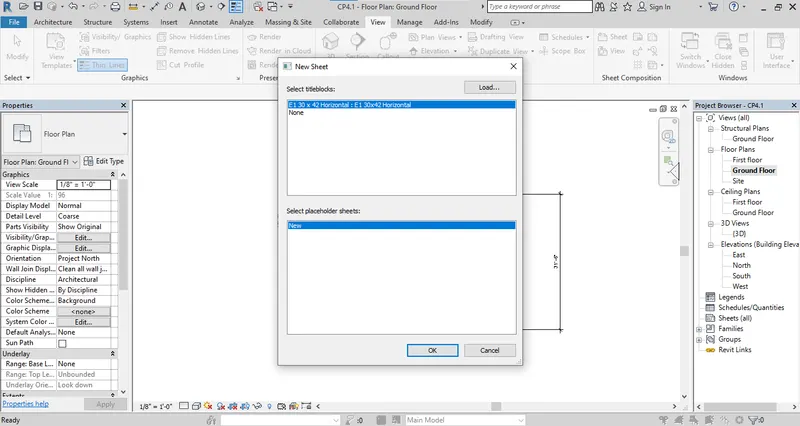
Step 4: I want A1 Size of sheet. Go to Library and go to titleblock to select the size of sheet.
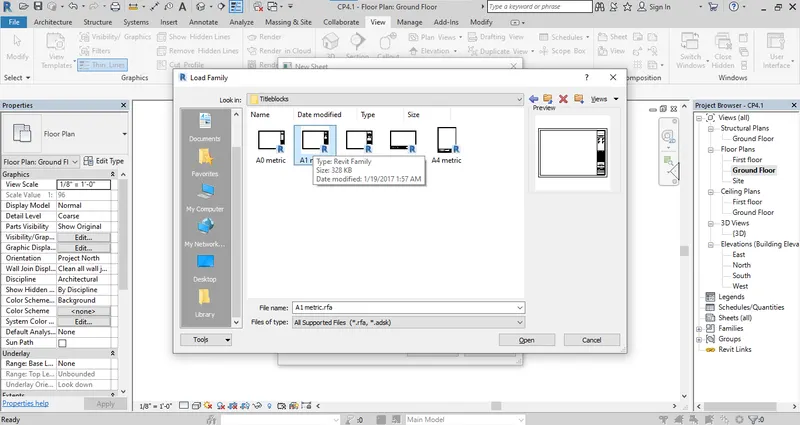
Step 5: Fill the details for the sheet. Like Name of project, Project no , date of submission etc.
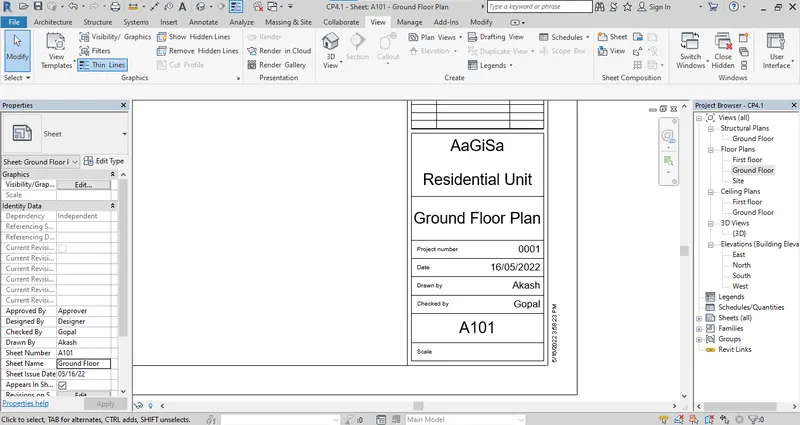
Step 6: Fill the data as required as you have.
Step 7: The sheet details will be filled now. Go to Floor plan and drag the ground floor plan to create a sheet.
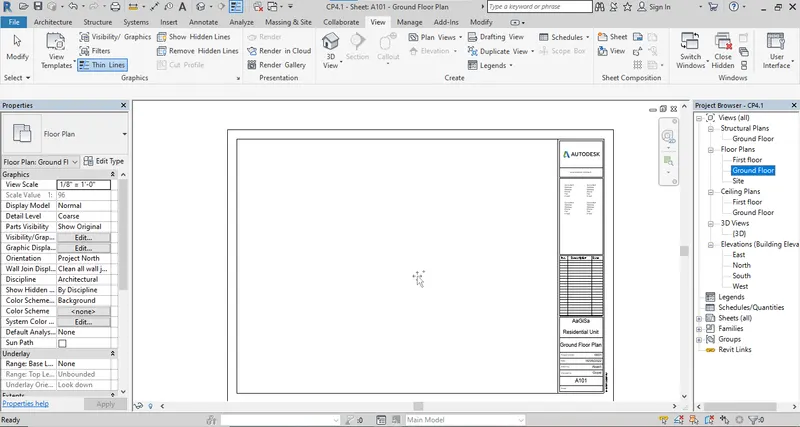
Step 8: As you drag the plan click on the Sheet.
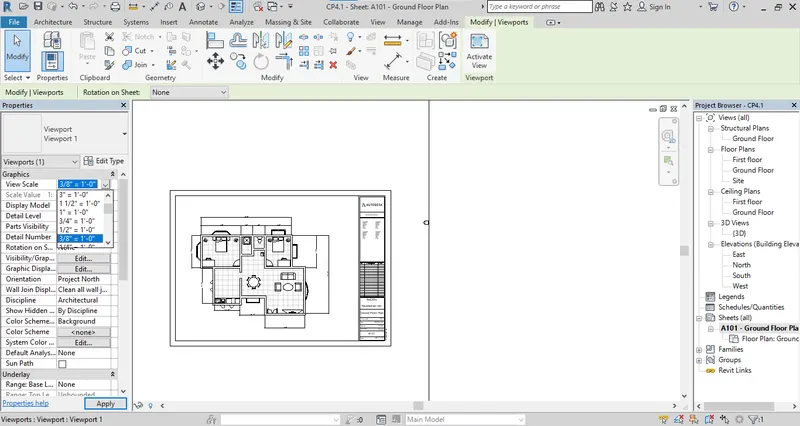
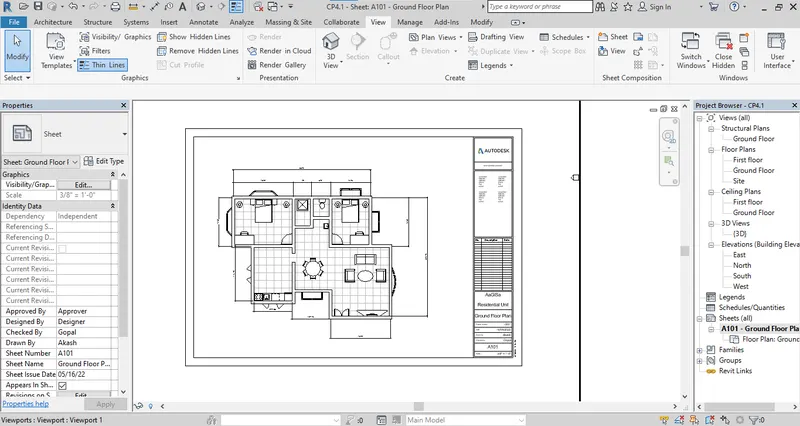
Result:
As you drag the plan and click on the sheet. The sheet for the selected plan will be created.
Q.6 Ans
AIM : Create elevation From view tab.
Procedure :
Step 1: Go to View tab ans select elevation again.
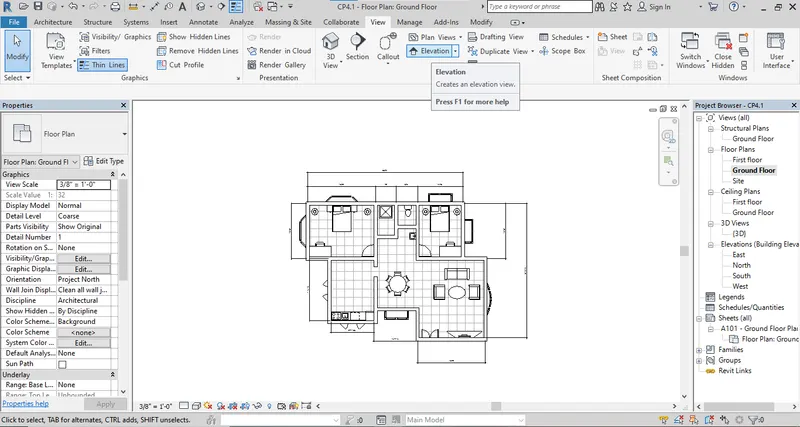
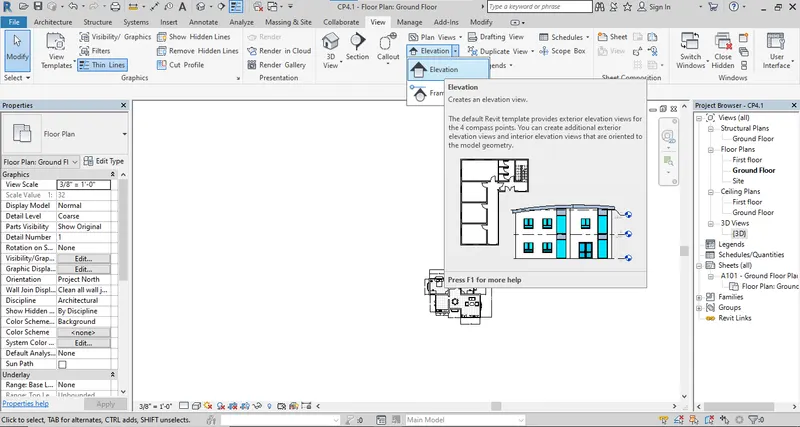
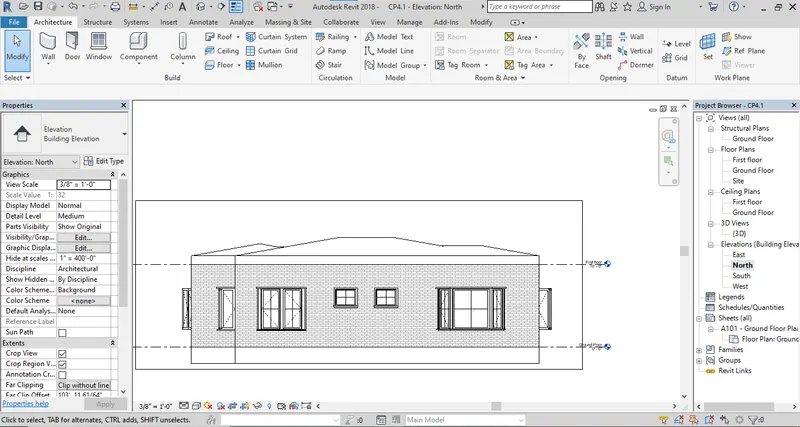
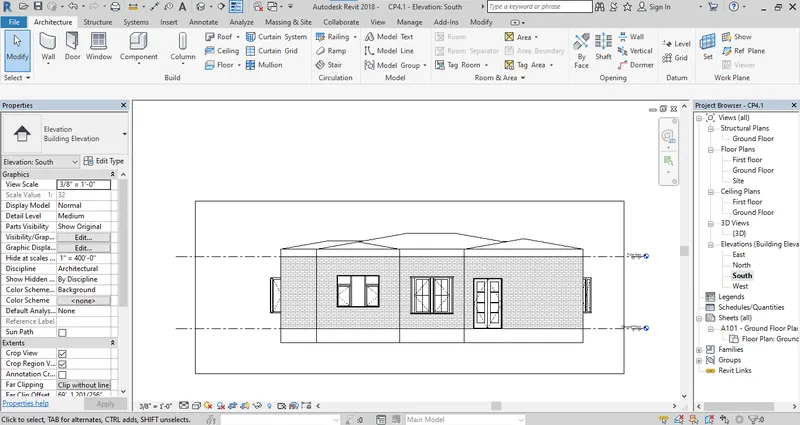
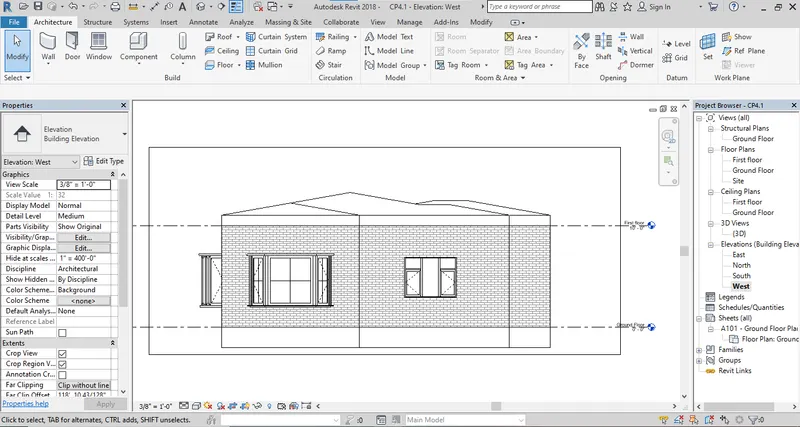
Step 2: We considered that we have to create a new elevation from every direction. As we selected the elevation one view port will be shown. Use this to add the elevation.
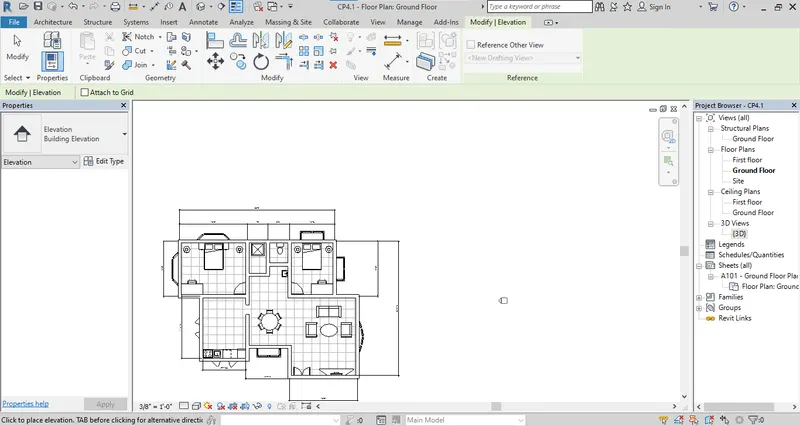
Step 3: As we added the view elevation will be created in project browser.
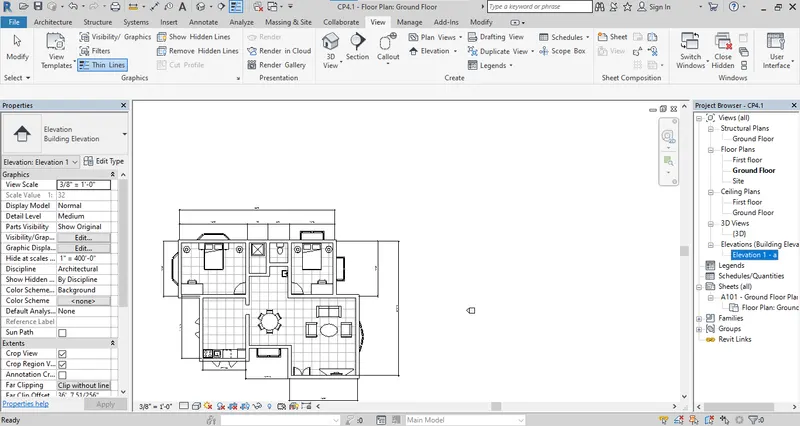
Step 4: Rename this added view to the East.
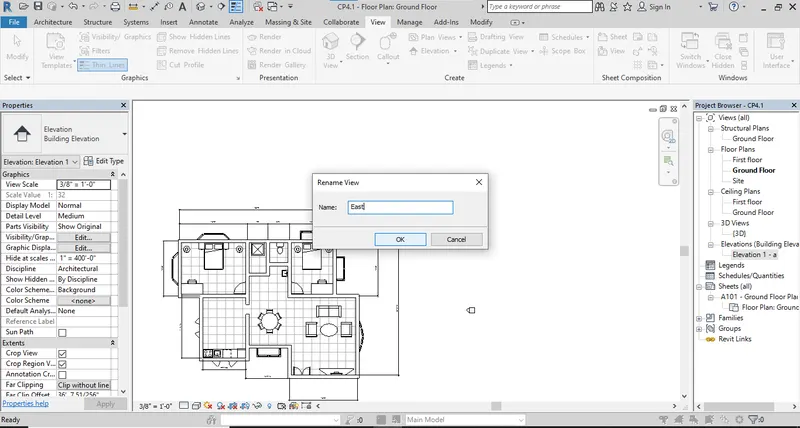
Step 5: Repeat the procedure and add for remaining direction.
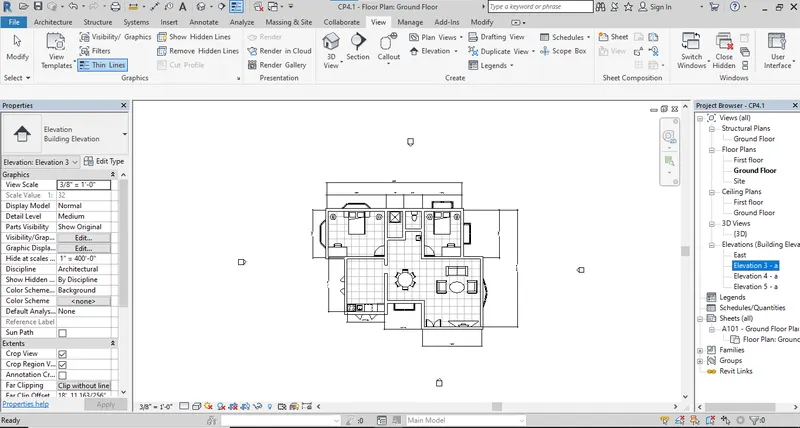
Step 6: Rename the created view as Remaining North, West And South.
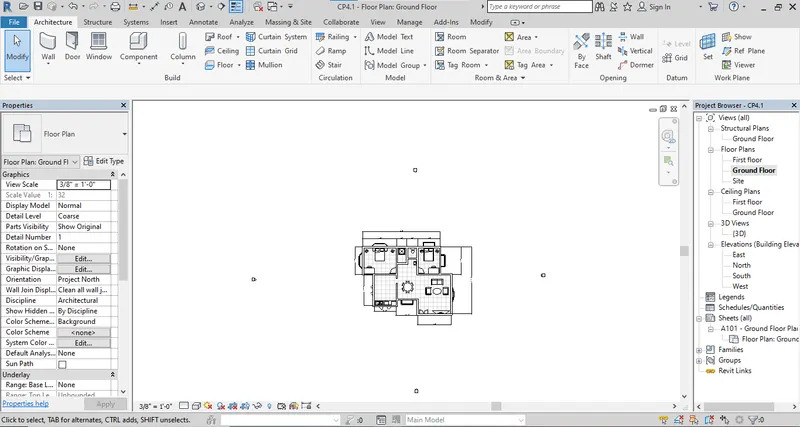
Result:
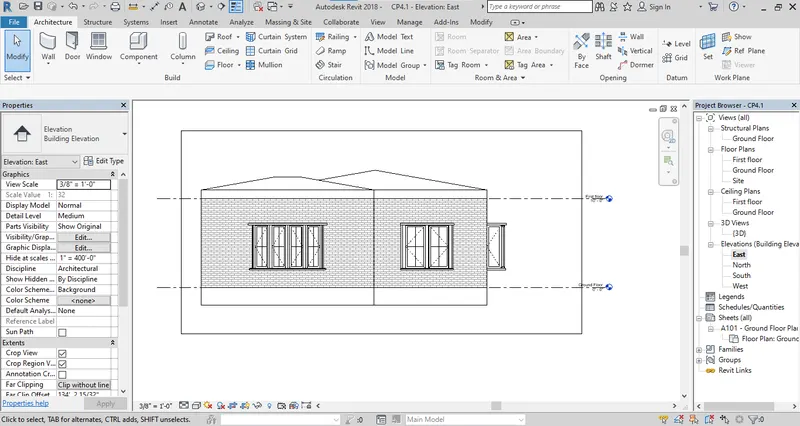
A. As we selected the Direction from Elevation tab. The elevation for respected direction will be created.
a. East Elevation.
b. North Elevation.
c. South Elevation
d. West Elevation.
Q.7 Ans
AIM : Provide a Section Cut.
Procedure :
Step 1: To create a section again go to view tab. Select the section tab.
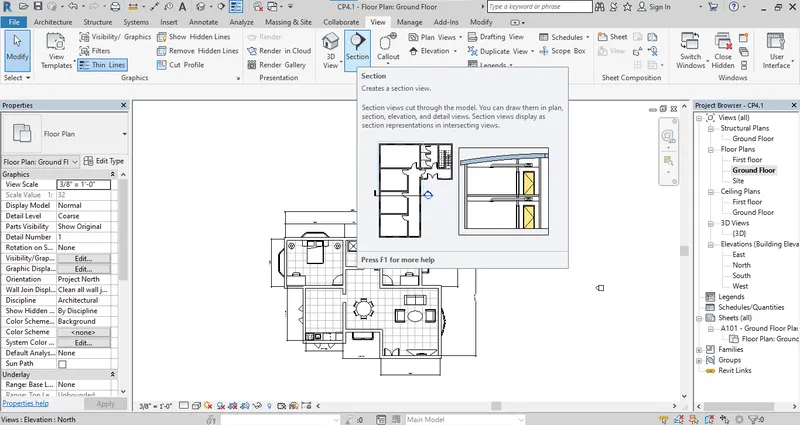
Step 2: Select the ground floor. Add the line of section view.
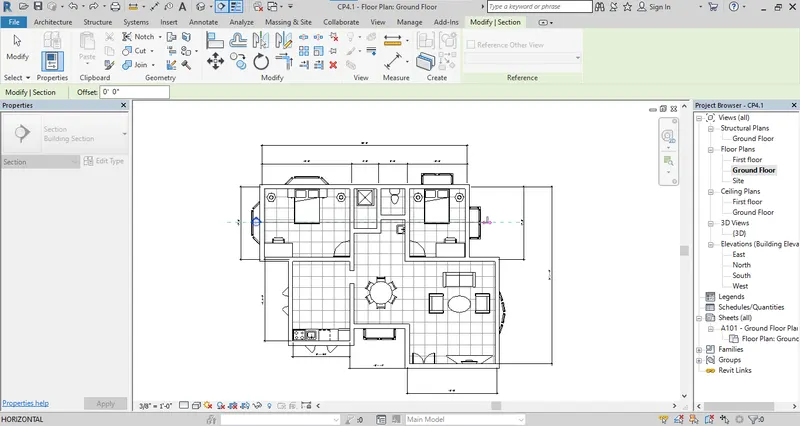
Step 2: Create both longitudinal and transverse direction.
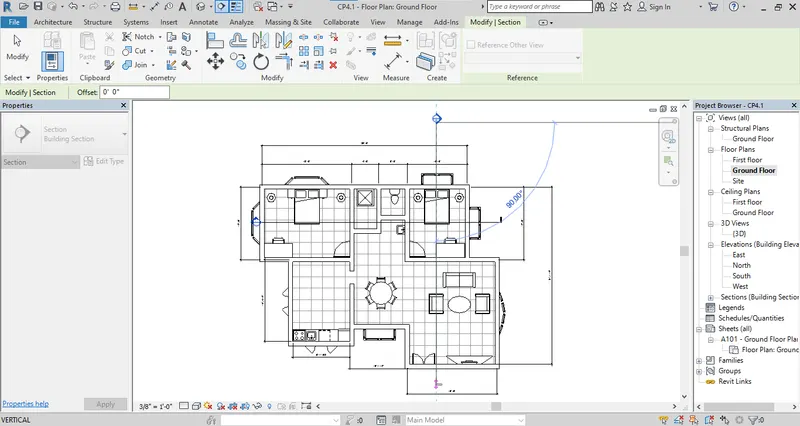
Step 3: In project browser section view will be created in section tab.
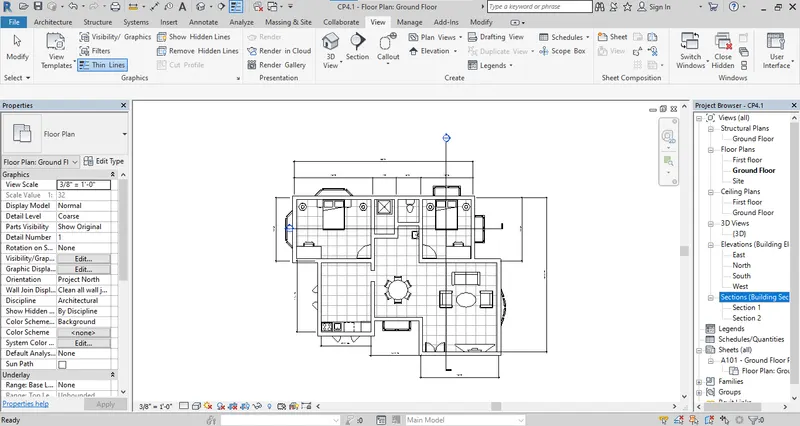
Step 4: Rename the created section view.
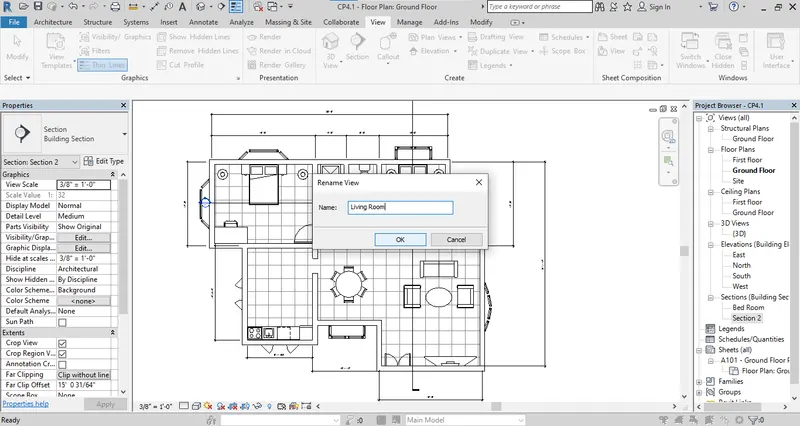
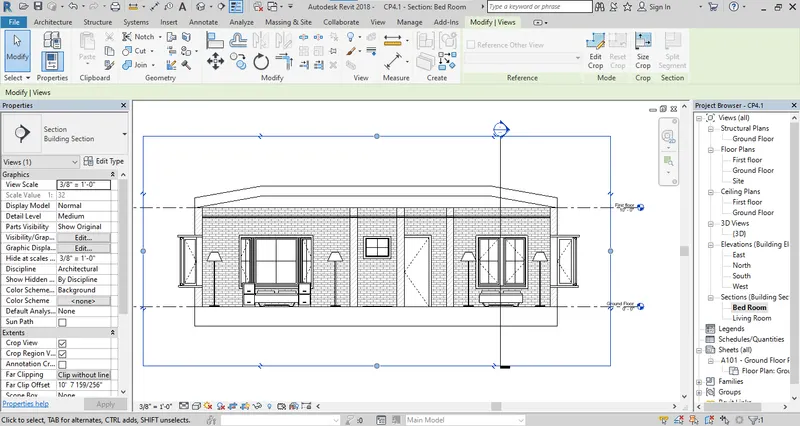
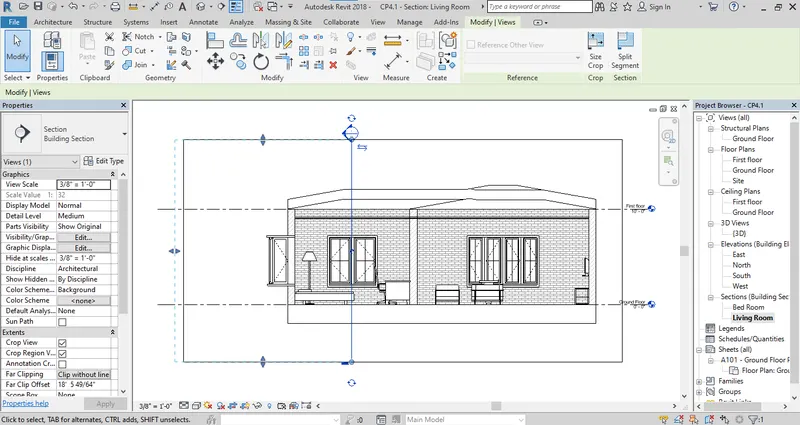
Result : Select the section view the cut section will be shown.
a. Section view of Bed Room.
b. Living Room section view.
Q.8 Ans
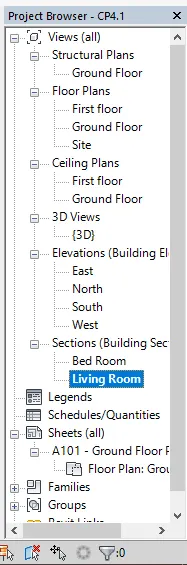
AIM : Classify the Views.
Procedure :
Step 1: Use the Screenshot command and create a screen shot for classify the views.
Result:
Q.9 Ans
AIM : Create multiple sheets.
Procedure :
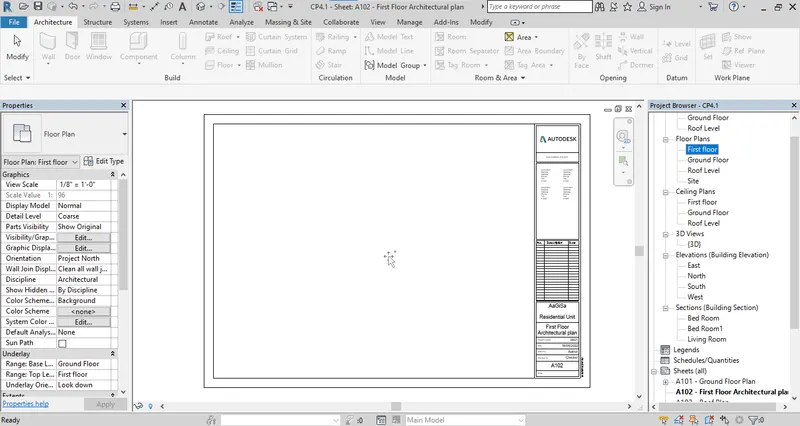
Step 1: Go to view tab and add the sheets fot create a sheet. Select the sheet tab and select the size of paper.
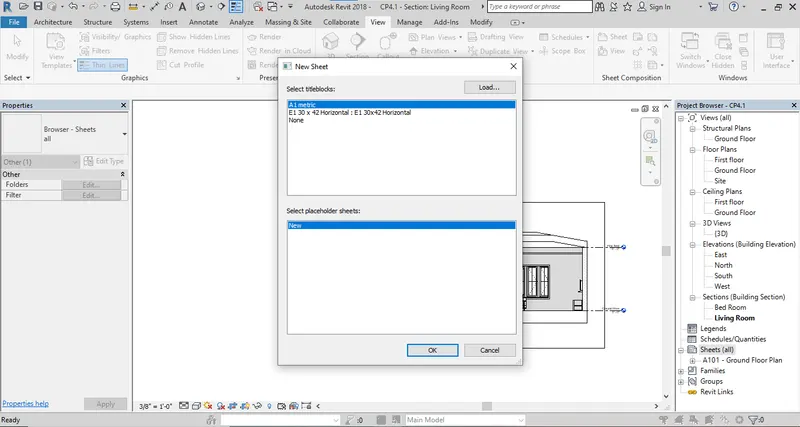
Step 2: Add the sheets for all the respected views and rename all the sheets as per given above.
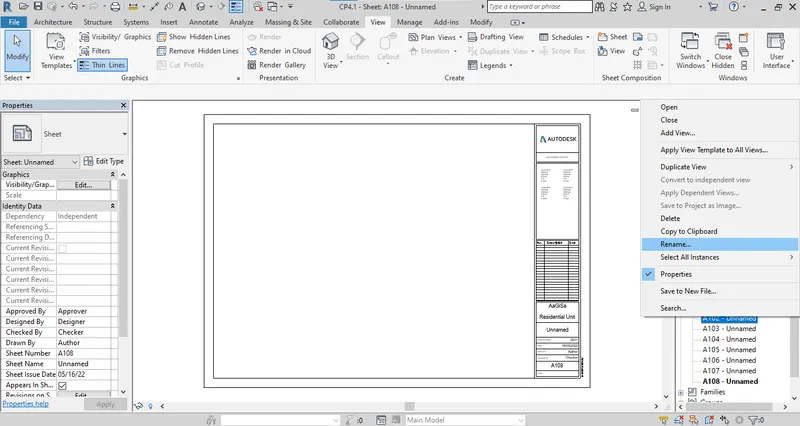
Step 3: Rename every sheet for the respected floor and view.
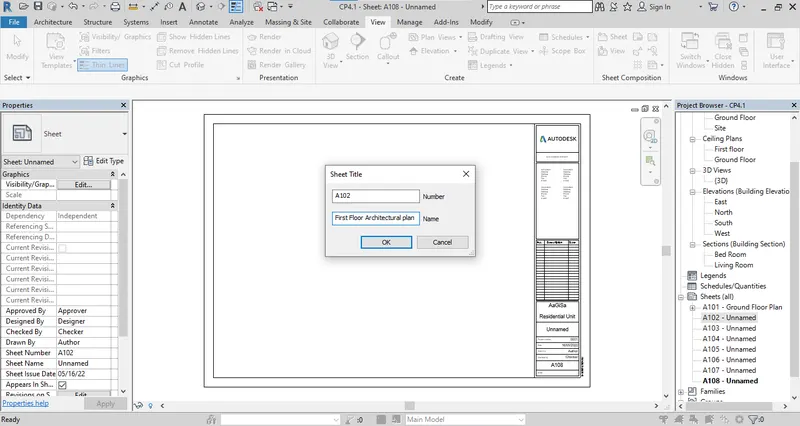
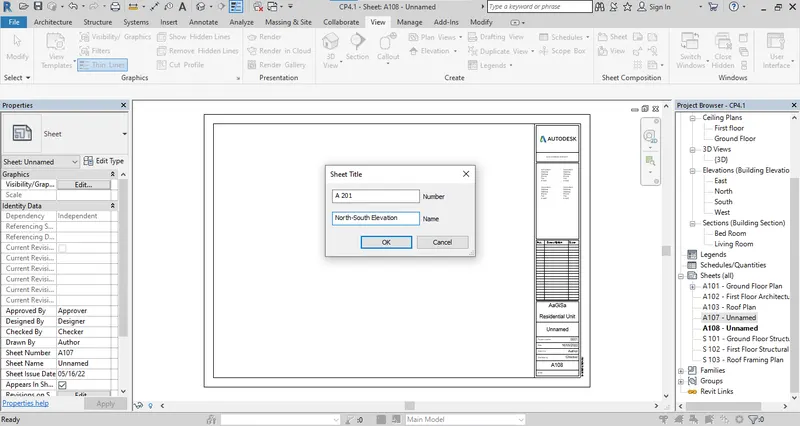
Step 4: All the sheets are created and renamed.
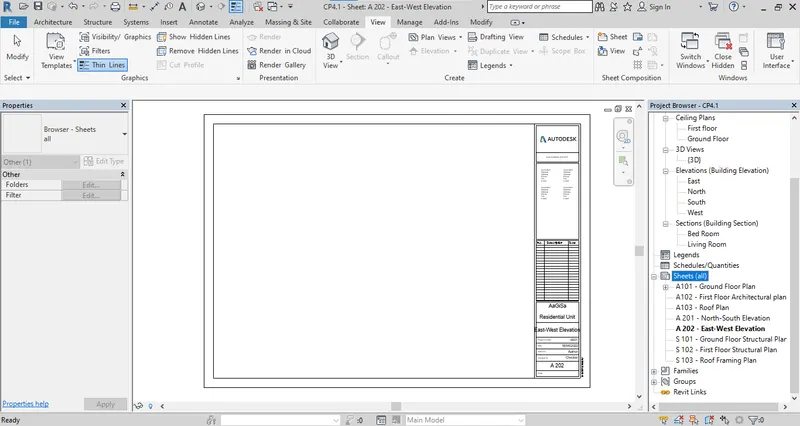
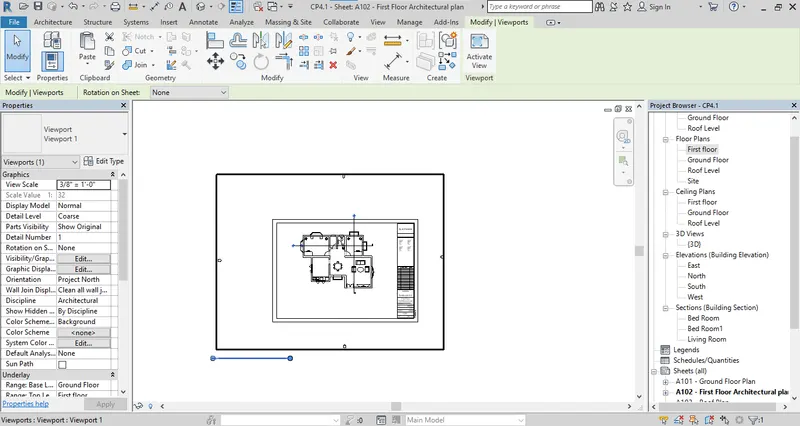
Step 5: Create a view for the sheet. Drag the respected view on respected sheet.
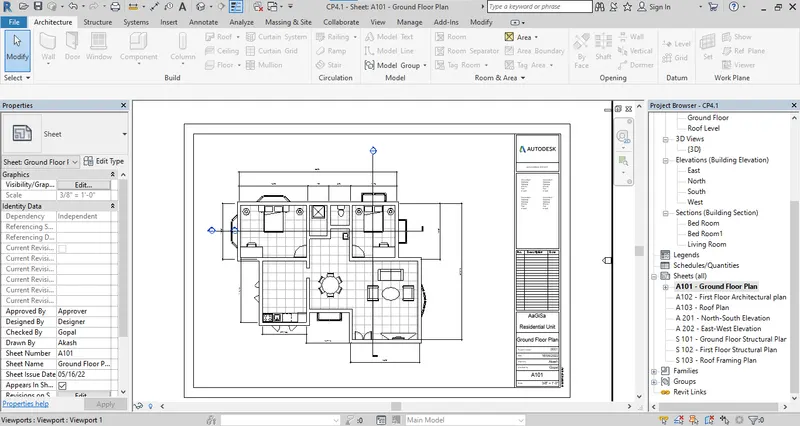
Step 5: Drag each view one by one.
Step 6: Move and adjust the view as you required.
Result : Repeat the procedure and create all the sheets.
a. Sheet of East west elevation.
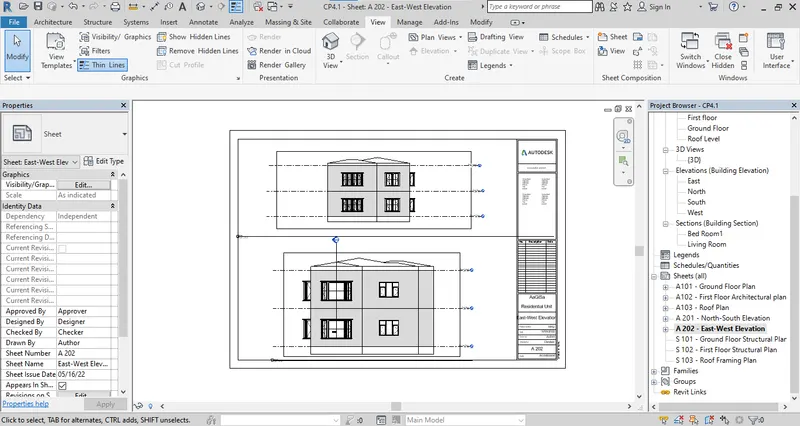
b. Sheet for North and south Elevation.
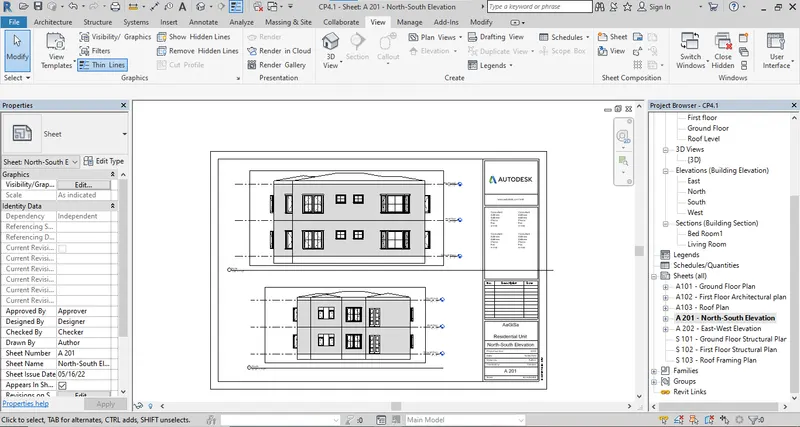
c. Elevation for ground floor structural plan.
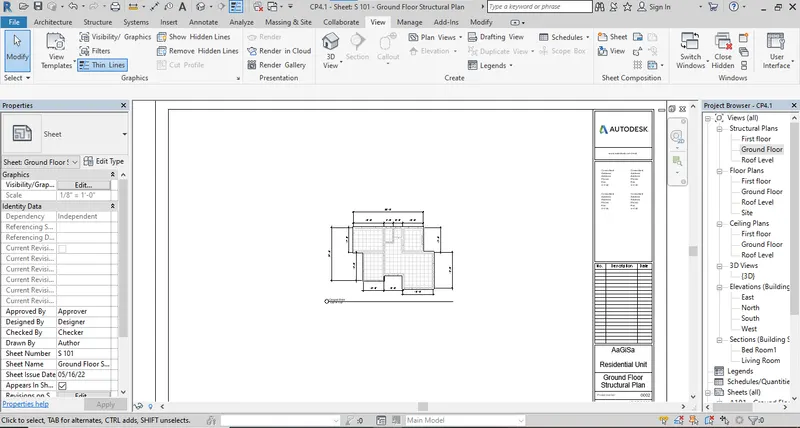
d. Elevation for first floor structural plan.
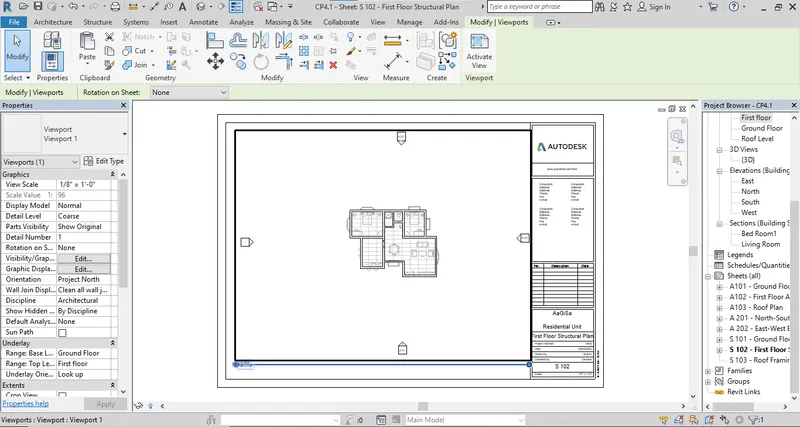
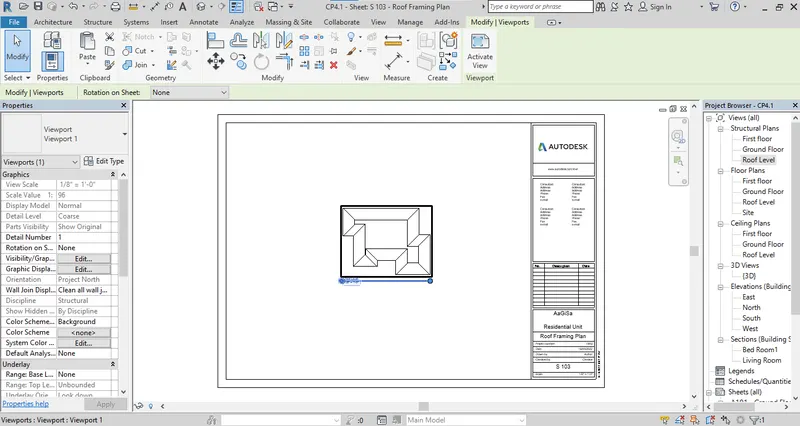
e. Structural plan for Roof framing view.
Q.10 Ans
AIM : Create 3D views.
Procedure :
Step 1: To create a camera view go to view. Use the 3D view drop down menu and select the camera.
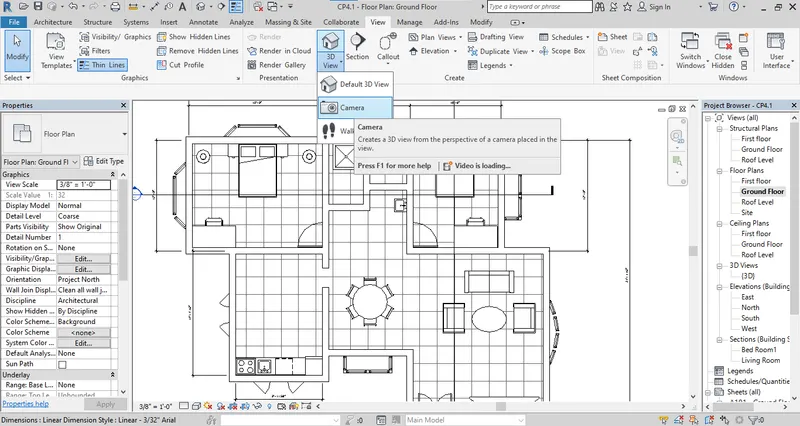
Step 2: Place the camera in any of the bed room and drag for the capture the view by camera.
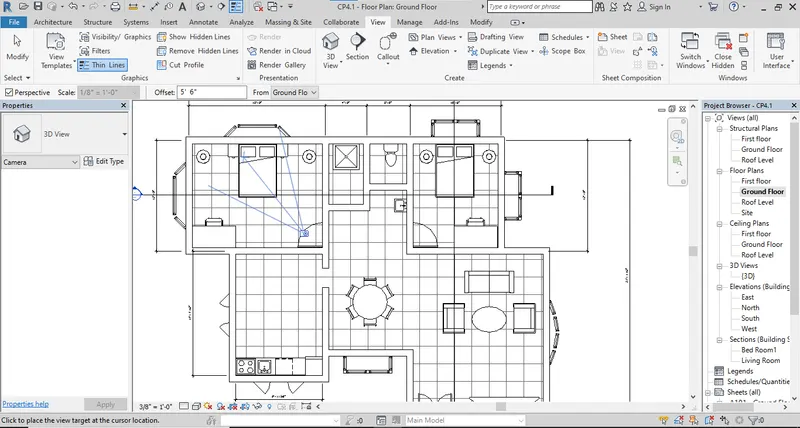
Step 3: The camera view will be created. select the Realistic view.
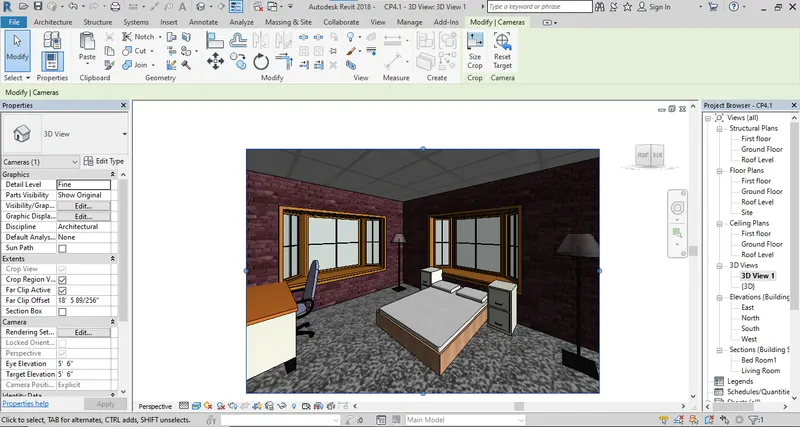
Step 4: The 3D view from camera will be created in 3D views tab. Rename the view with Bed room.
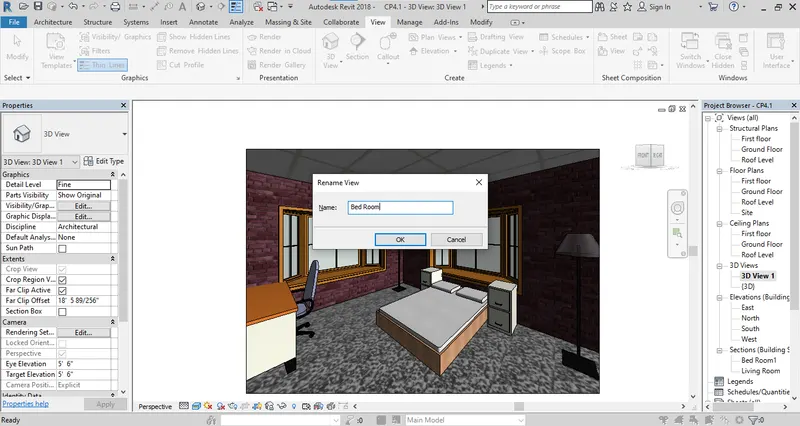
Step 5: Repeat the process for Living room and rename it as Living room.
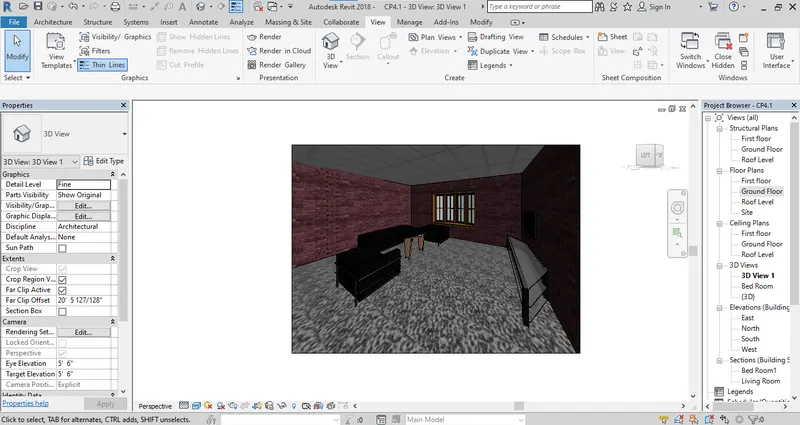
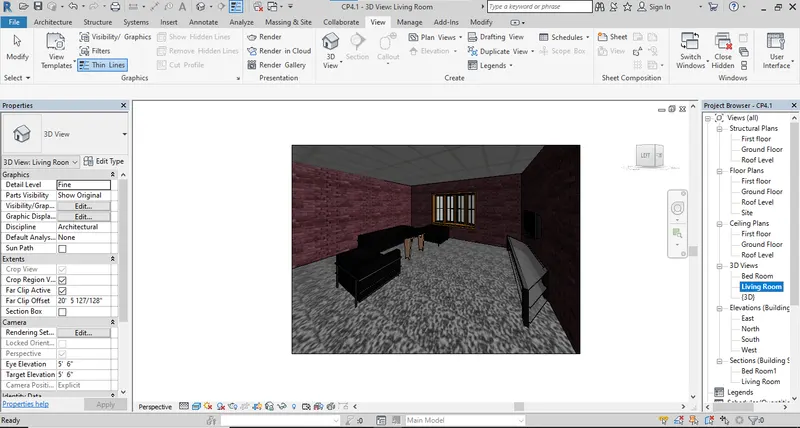
Step 6: Create a sheet and add the camera views in sheets.
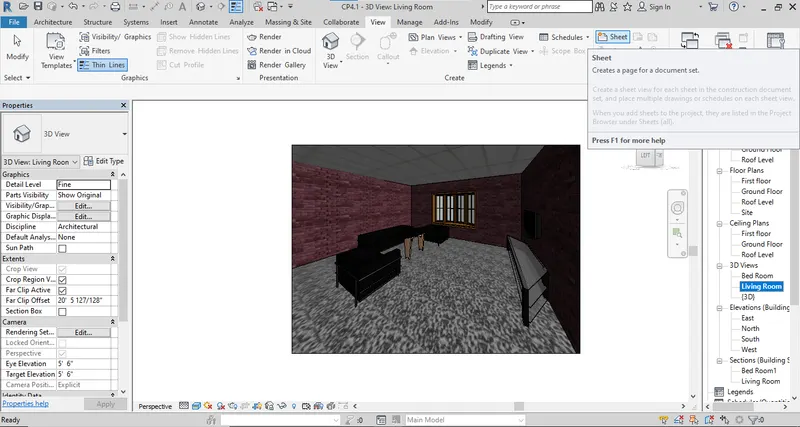
Step 7: Create a new sheet for the camera views. Drag the views.
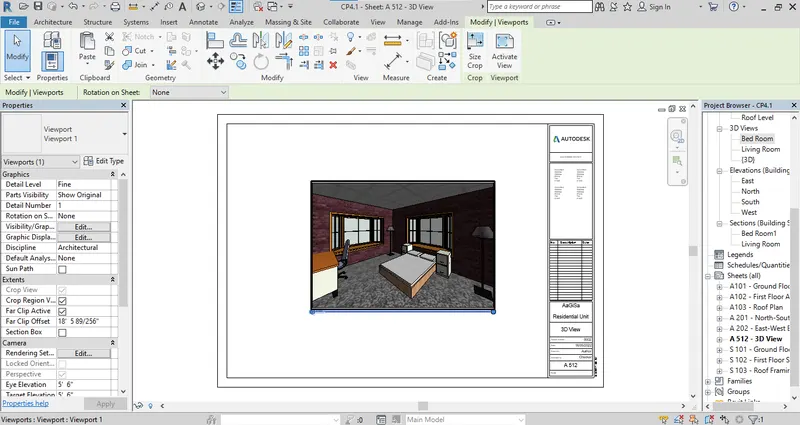
Step 8: Use the size crop tab for resize the view on sheet.
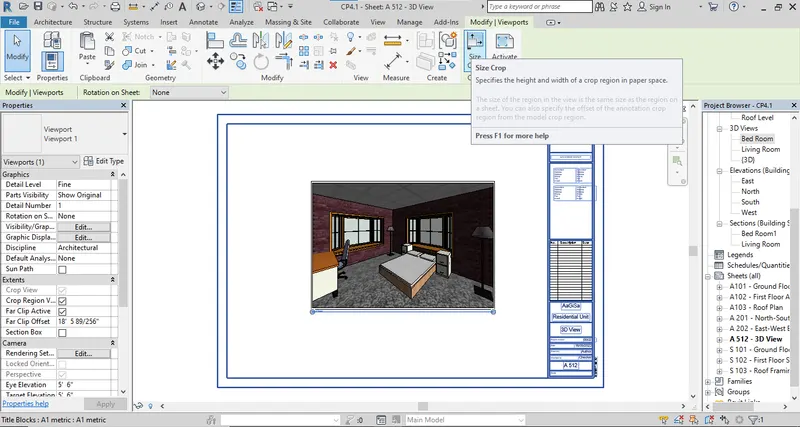
Step 9: Crop region size has two method use any one of the method and adjust.
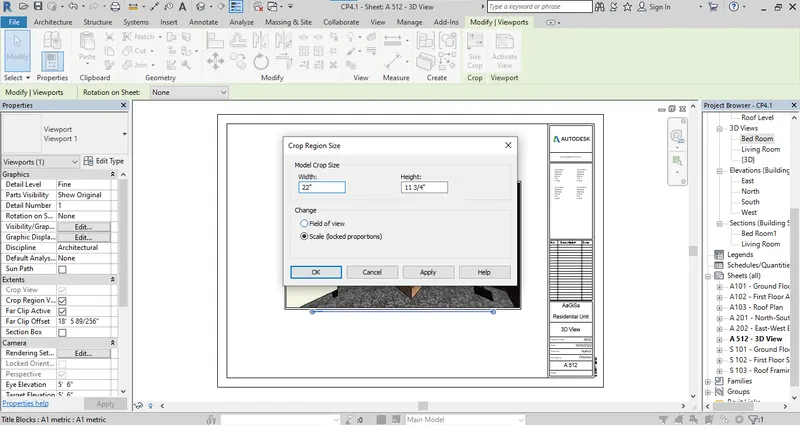
Result:
a. Sheet for Bed Room.
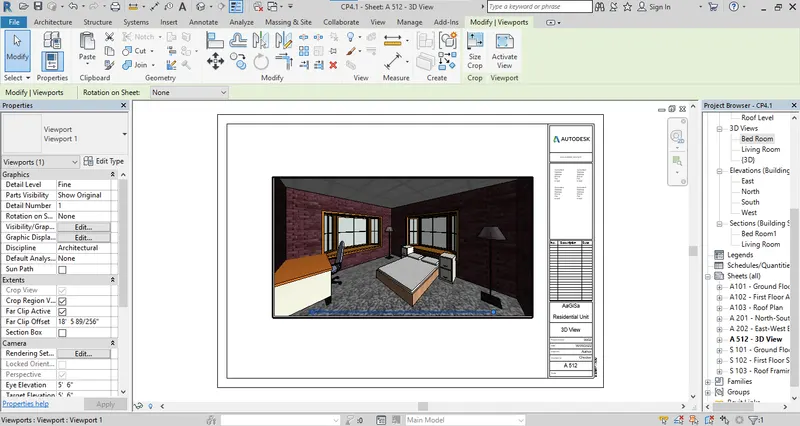
b. Sheet for Living room.