3D Creation of Celing, Roof, Architectural plan, Structural plan, Sectional view, Elevation view and Camera specific view for a house plan using REVIT
CHALLENGE 4
Q1. Based on the project saved from Week 3, proceed from the First Floor Level. Model a Ceiling from the architecture tab above the walls at the first-floor level.
Answer:
Aim: To create the first floor of the project from the week 3 file and model a ceiling above the walls at the first-floor level.
Procedure:
- Open the week 3 Revit project file
- Select the South elevation view
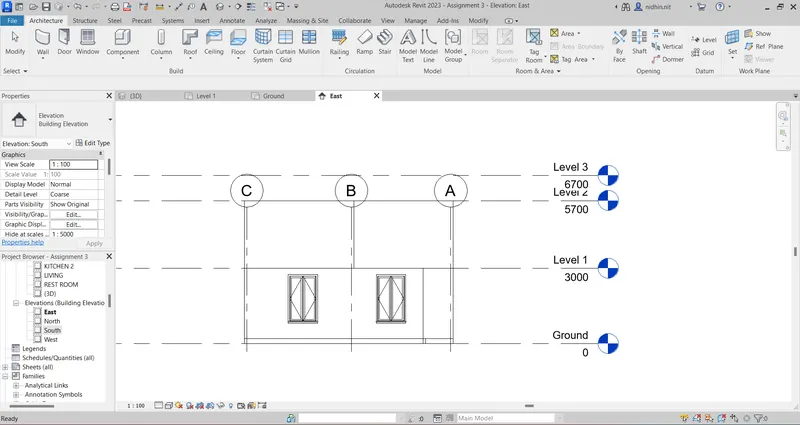
- From the Architecture tab, select the Level option
- Create level 2 and level 3 at levels 5700 and 6700 respectively.
- Select the first floor from the project browser
- Select the wall option from the Architecture tab and Select Basic wooden wall 200mm
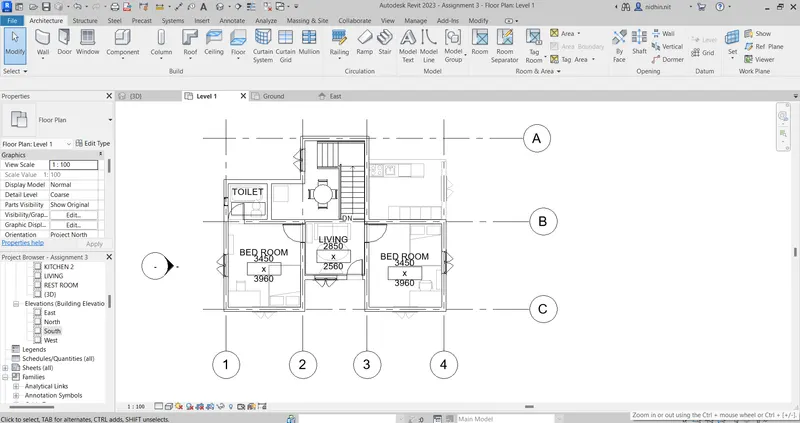
- Create the walls for the first floor rooms
- Select the Door option from the Architecture tab and assign doors to the bedrooms, living room and toilet.
- Select the Window option from the Architecture tab and assign Windows to the bedrooms, living room and toilet.
- Select the Room separator option from the Architecture tab and adjust the room separation lines on the first floor.
- Select the tag room option from the Architecture tab and tag bed the bedrooms, living room and toilet.
- Select the Ground level from the project browser.
- Select the ceiling option from the architecture tab.
- Select edit type
- Select the duplicate option and create a new ceiling and give the name Ceiling 1.
- Select the edit option in the structure and assign the material as Oak flooring and give the thickness 150mm.
- Select the sketch ceiling option.
- Select the pick line option.
- Select all the outer lines of the layout.
- Click the tick mark
- Check the 3D view and save the file.
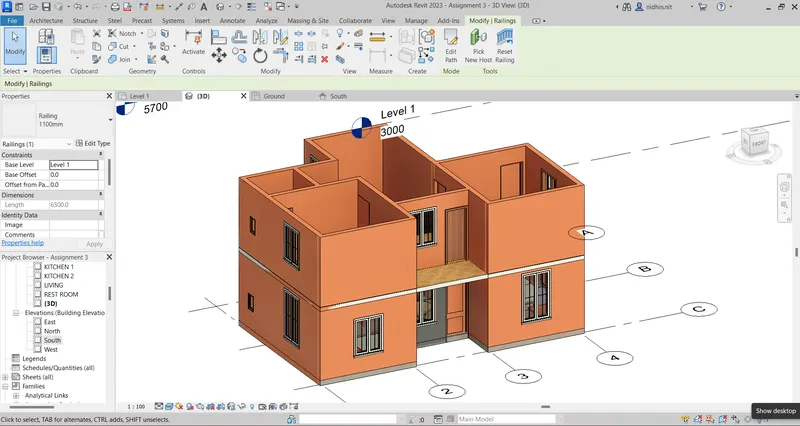
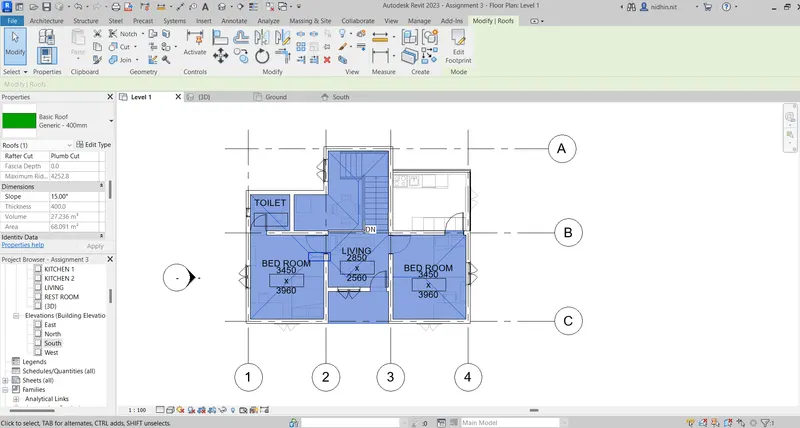
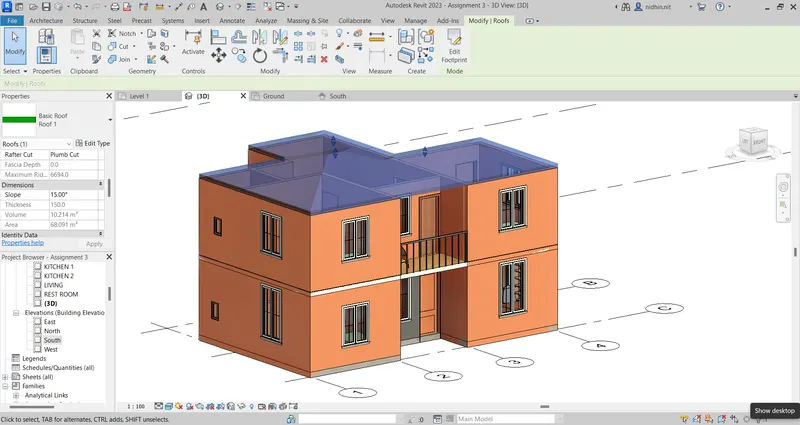
Q2: Model a roof above the ceiling by selecting the footprints of the ceiling. Using the adjustment toolbars appearing on-screen adjust the roof slope to 10 degrees
Answer:
Aim:
To model a roof for the week 3 project model and adjust the roof slope to 100degrees.
Procedure:
- Open the week 3 Revit project file
- Select level 1 from the project browser
- Select the roof option from the Architecture tab
- Select the roof by footprint option.
- Select the pick line option
- Select all the outer lines of the layout.
- Select the tick option
- Check the 3D view to make sure roof is modelled properly
- From the properties browser set the slope to 15 degrees
- Save the file
Q3: Using the file saved from weeks 2 to 4, create plan views for ground floor level and first-floor level including all the walls, floors, and components. Separate them to
architecture and structural plans
Answer:
Aim:
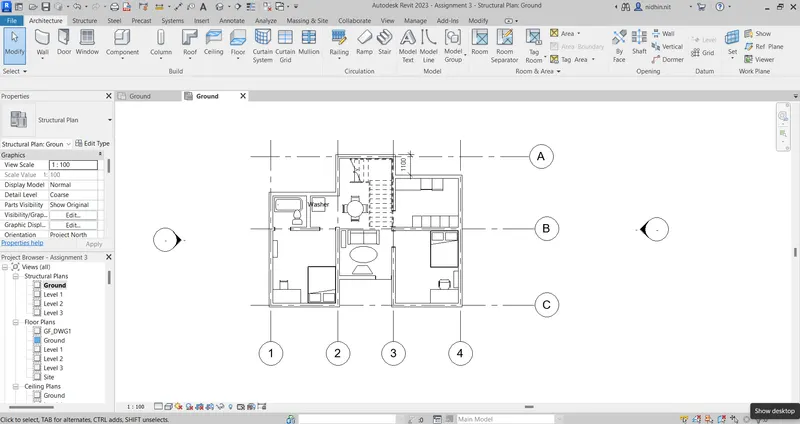
To create plan views for ground floor level and first-floor level and separate them to
architecture and structural plans
Procedure:
- Open the week 3 Revit project file
- Go to the View tab and from the plan view drop-down select floor plan
- Select the ground floor and Click ok
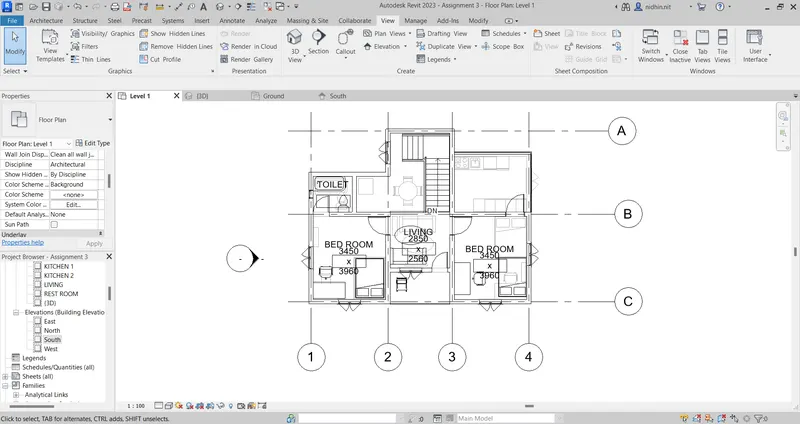
- Go to the View tab and from the plan view drop-down select the structural plan
- Select the ground floor and click ok
- Save the file
Q4:Using annotate toolbar add dimensions to all the walls and floors with reference to the longitudinal and transverse grids created in the project file
Answer:
Aim:
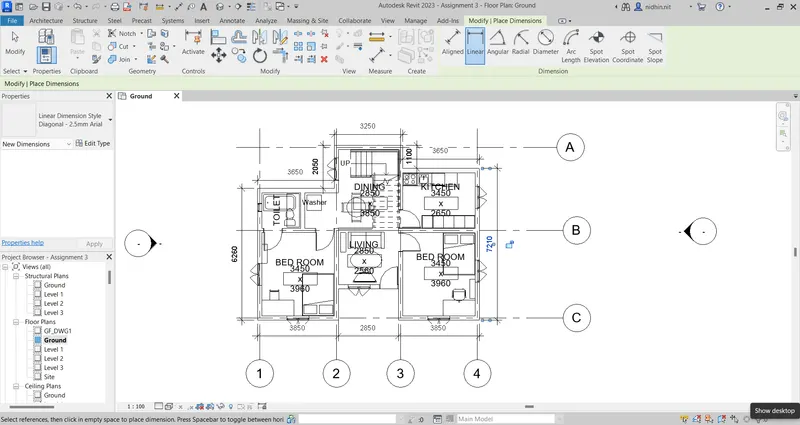
To add dimensions to all the walls and floors with reference to the longitudinal and transverse grids created in the project file using annotate toolbar.
Procedure:
- Open the week 3 Revit project file
- From the Project browser open the architectural floor plan for the ground floor
- From the annotate tab choose the linear dimension.
- By clicking the edges of the wall provide the dimensions.
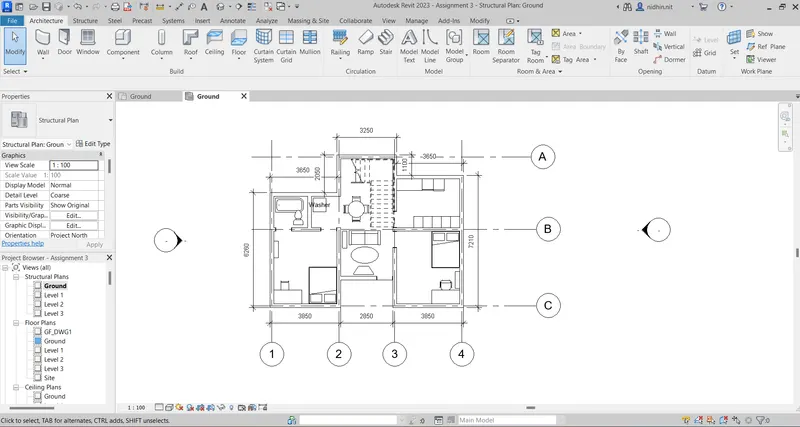
- From the Project browser open the structural floor plan for the ground floor
- From the annotate tab choose the linear dimension.
- By clicking the edges of the wall provide the dimensions.
- Save the file
Q5: Create a sheet template from the view tab and adjust the parameters on the sheet to add appropriate views
Answer:
Aim:
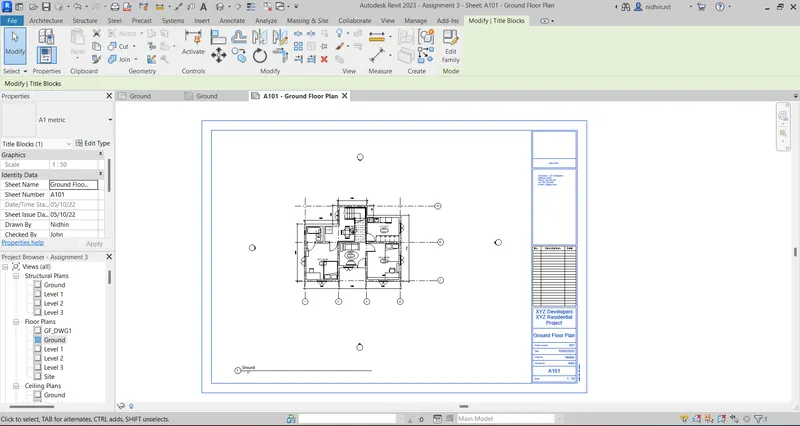
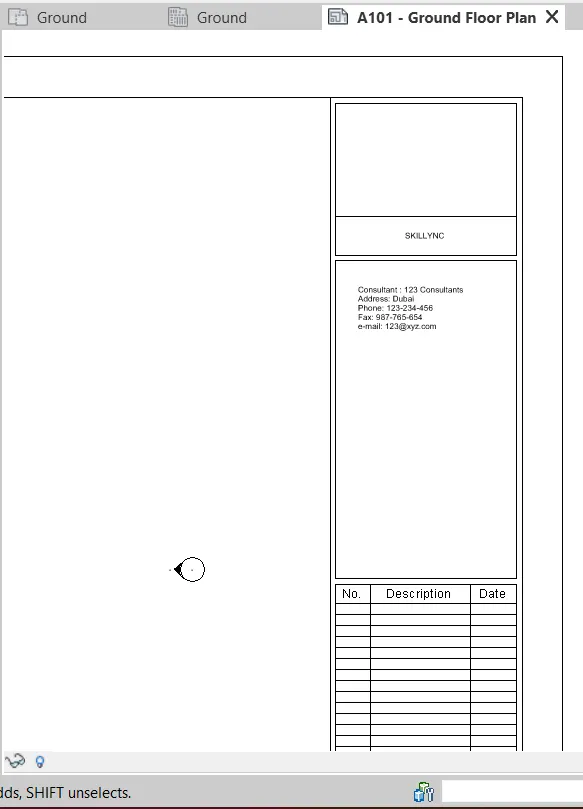
To create a sheet template from the view tab and adjust the parameters on the sheet to add appropriate views
Procedure:
- Open the week 3 Revit project file
- Click on the sheet option from the view tab
- Select A 1 metric and click ok
- Click on edit family
- Make the changes required and click load to the project.
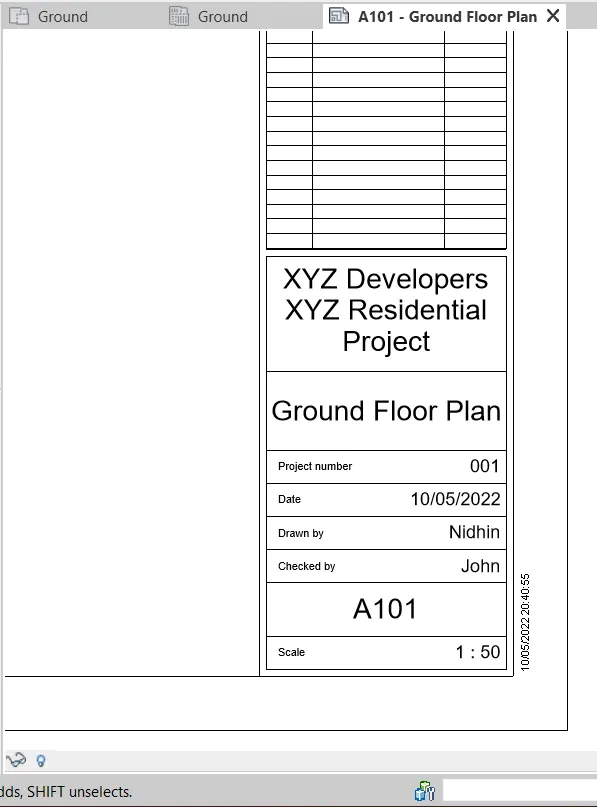
- Add identity data by double-clicking on the entries on the sheet
- Drag the ground floor architectural plan from the project browser to the sheet
- From the property browser change the scale to 1:50
- Save the file
Q6:Using the elevation tab create the elevation views, looking at your building from East, North, South, and West
Answer:
Aim:
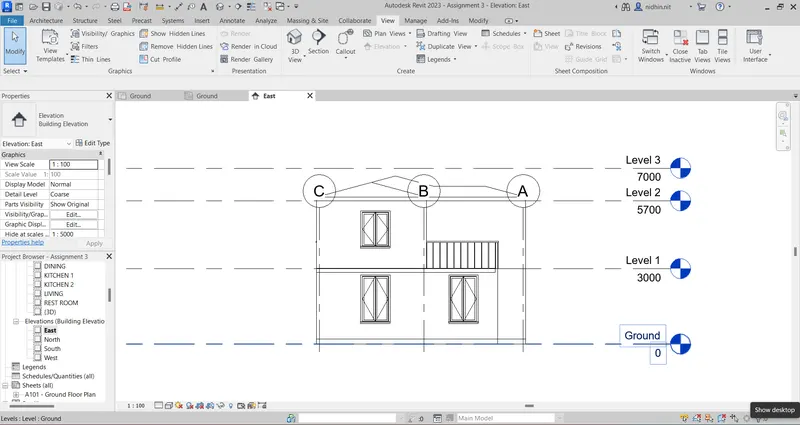
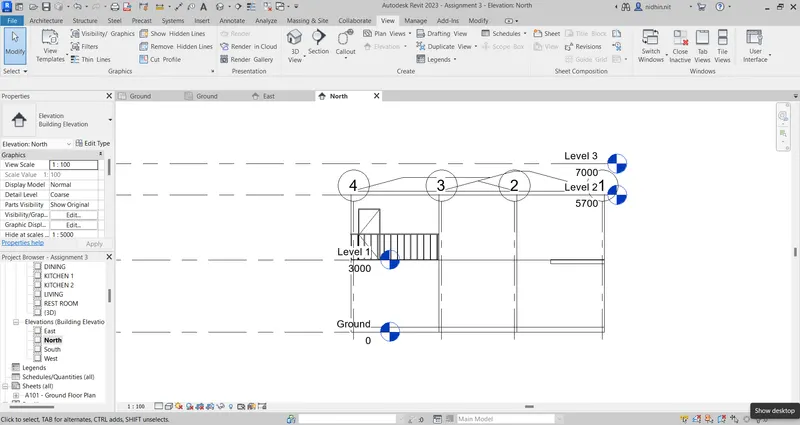
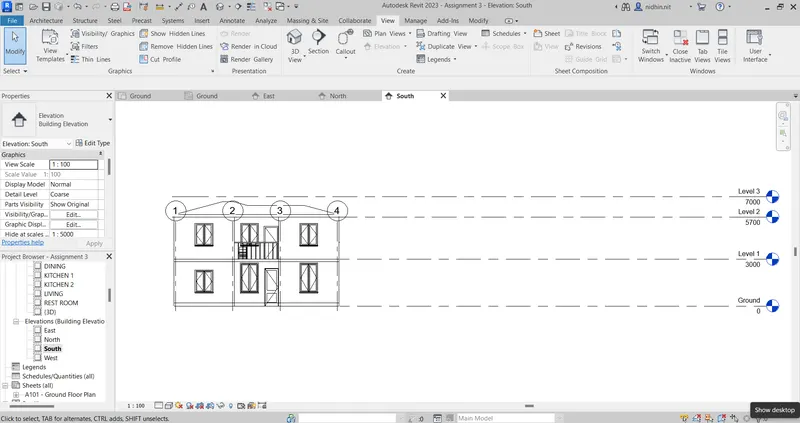
To create the elevation views from East, North, South, and West using the elevation tab.
Procedure:
- Open the week 3 Revit project file
- Select the elevation option from the elevation dropdown in the view tab
- Place the elevation symbol on the east side
- Rename the elevation name to East
- Again click the elevation option
- Place the elevation symbol on the Westside
- Rename the elevation name to West
- Again click the elevation option
- Place the elevation symbol on the Northside
- Rename the elevation name to North
- Again click the elevation option
- Place the elevation symbol on the Southside
- Rename the elevation name to South
- Go to each view from the project browser and check the views
- Save the file
EAST ELEVATION VIEW
NORTH ELEVATION VIEW
SOUTH ELEVATION VIEW
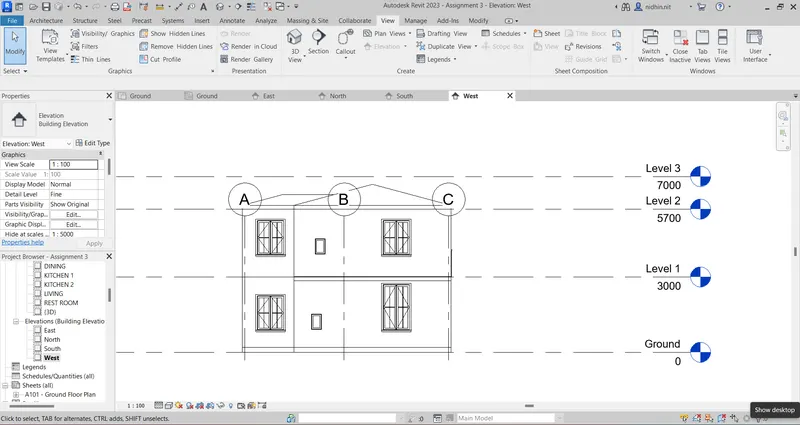
WEST ELEVATION VIEW
Q7: Produce section cut through each room either cutting across longitudinally or in a transverse direction.
Answer:
Aim:
To produce section cut through each room of the project model
Procedure:
- Open the week 3 Revit project file
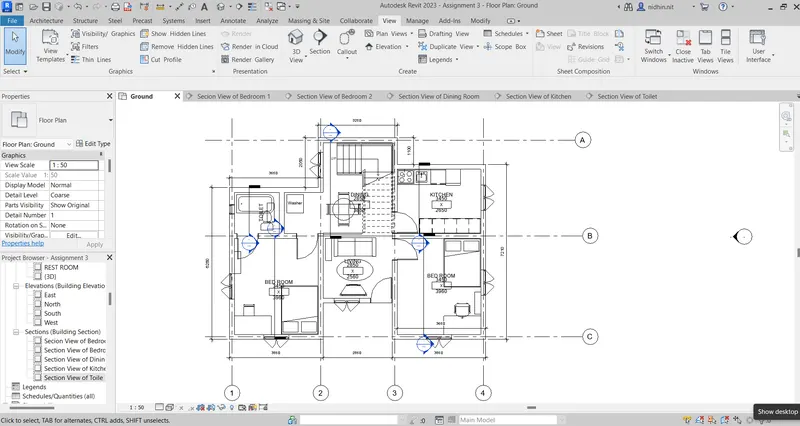
- Go to the ground floor plan view from the project browser
- Select the section option from the view tab
- Create a section of the first bedroom
- Right click on the section created in the project browser and rename it as Section view of bedroom 1
- Create a section of the second bedroom
- Right click on the section created in the project browser and rename it as Section view of bedroom 2
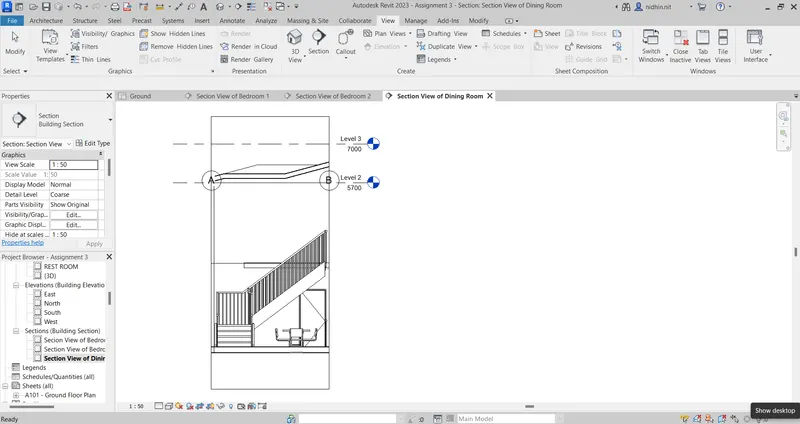
- Create a section of the second Dining room
- Right click on the section created in the project browser and rename it as Section view of Dining room
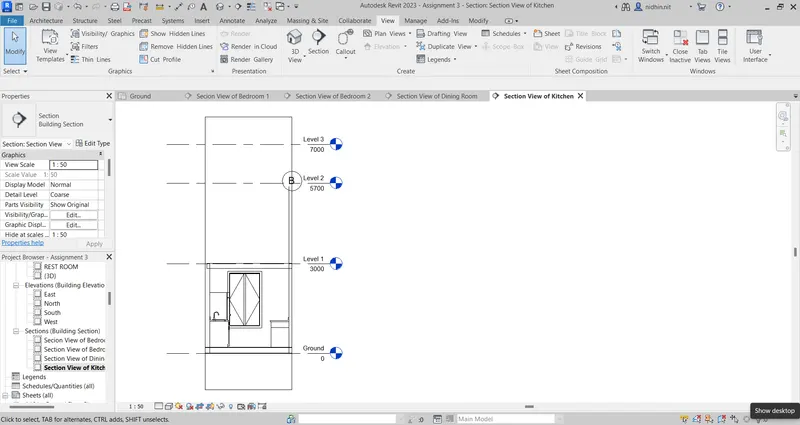
- Create a section of the second Kitchen
- Right click on the section created in the project browser and rename it as Section view of Kitchen
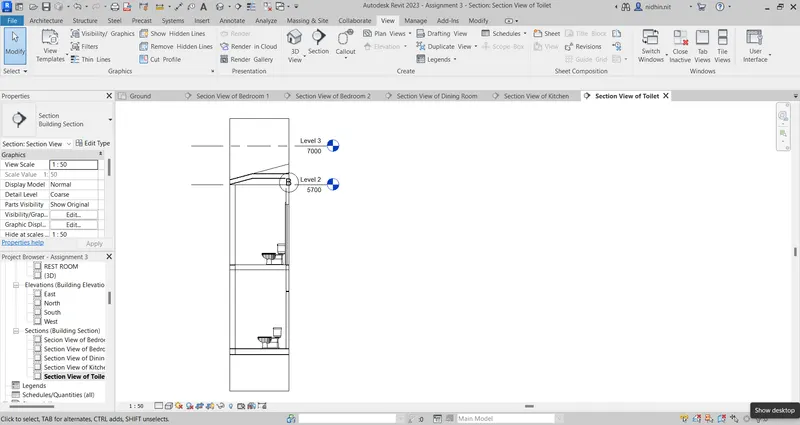
- Create a section of the second Toilet
- Right click on the section created in the project browser and rename it as Section view of Toilet
- Save the project.
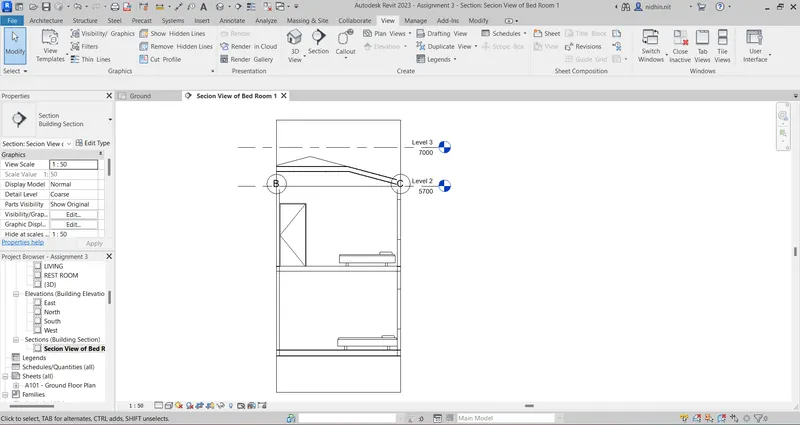
BEDROOM SECTION VIEW 1
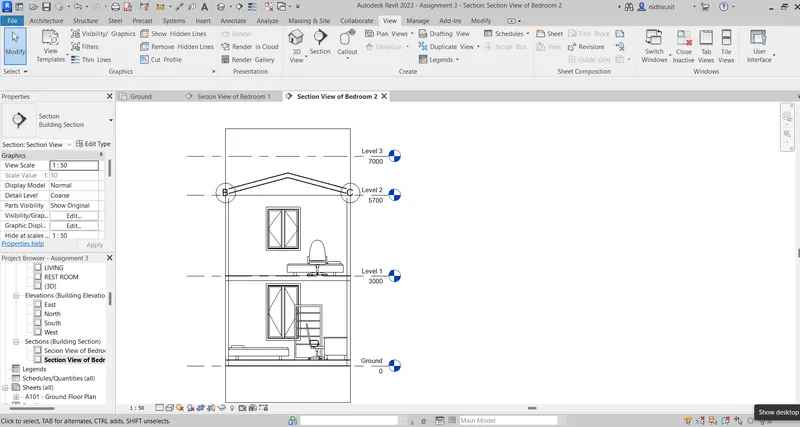
BEDROOM SECTION VIEW 2
DINING ROOM SECTION VIEW
KITCHEN SECTION VIEW
TOILET SECTION VIEW
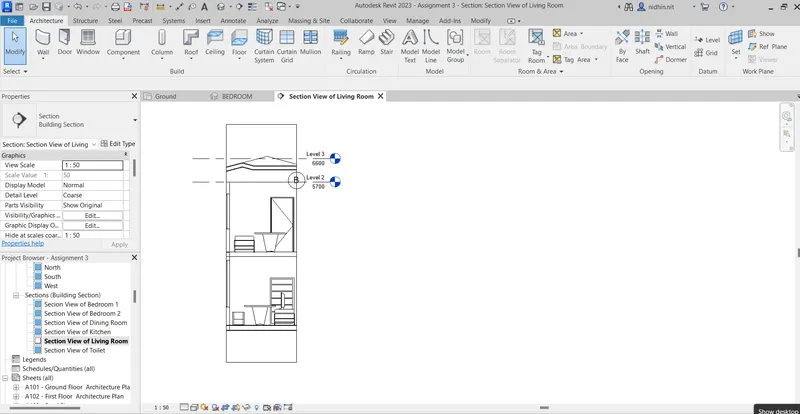
LIVING ROOM SECTION VIEW
Q8:Classify the views, Plan Views, Section Views, and Elevation views to either Design or Documentation category using Properties browser
Answer:
Aim:
To classify the views, Plan Views, Section Views, and Elevation views to either Design or Documentation category using Properties browser.
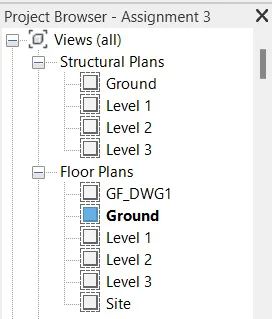
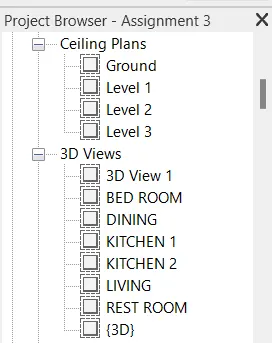
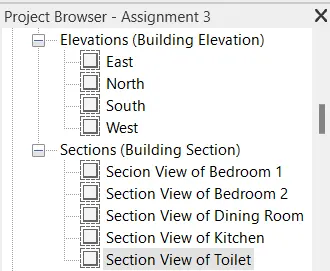
Q9: Using the sheet template produced create multiple sheets as follows
a. A 101- Ground Floor Architecture Plan
b. A 102- First Floor Architecture Plan
c. A 103- Roof Plan
d. S 101- Ground Floor Structural Plan
e. S 102- First Floor Structural Plan
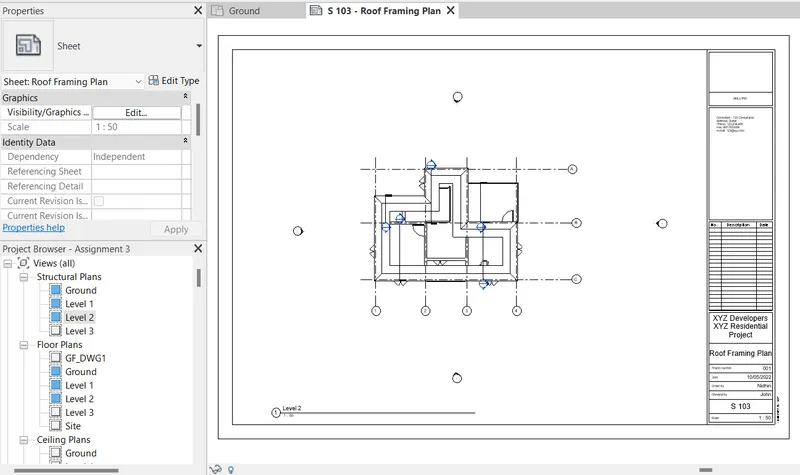
f. S 103- Roof Framing Plan
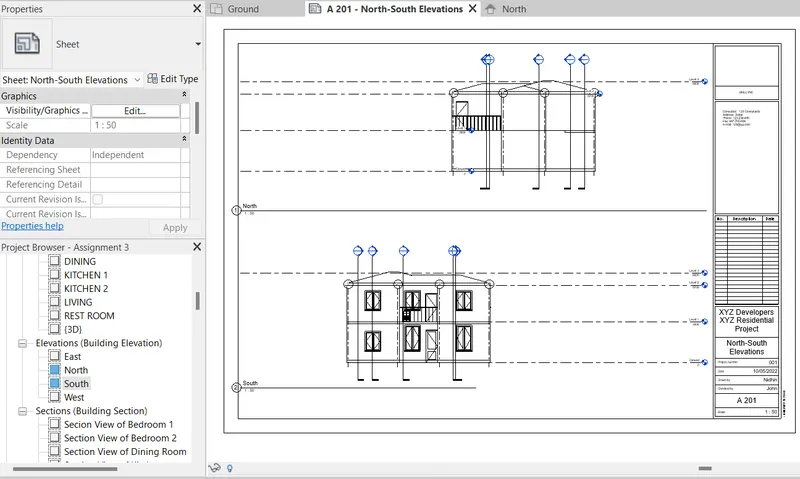
g. A-201- North-South Elevations
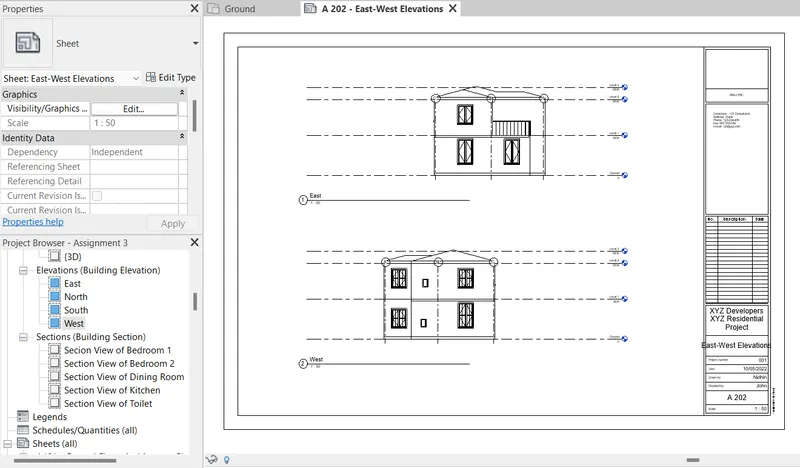
h. A-202- East-West Elevations
Add additional sheets based on the sections created in your Revit file
Answer:
Aim:
To create multiple sheets using the sheet template produced in Q5.
Procedure:
- Open the week 3 Revit project file
- FDrom the project browser seclrt the template already created which is Ground floor architectural plan.
- Right click on the ground floor architectural plan and click duplicate empty files to crate multiple sheets
- Right click the duplicate sheets created from the project browser and rename them to First Floor Architecture Plan, Roof Plan, Ground Floor Structural Plan, First Floor Structural Plan, Roof Framing Plan, East-West Elevations, North South Eleveations and give the drawing numbers accordingly in the sheet.
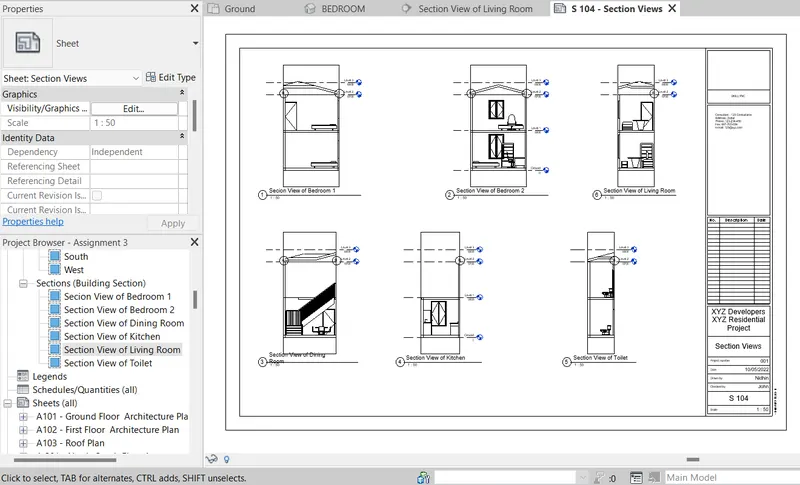
- Create one more duplicate sheet and rename it as Section Views.
- Drag each view from project browser to the respective sheets and give proper scale using property browser.
- Save the file
Ground Floor Architecture Plan
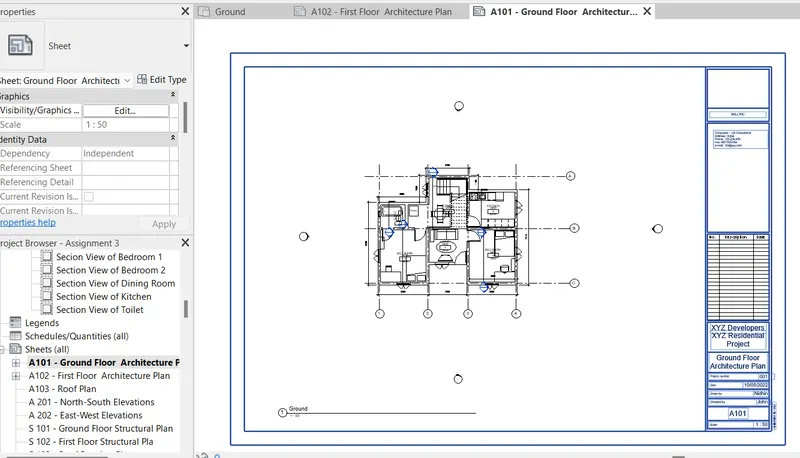
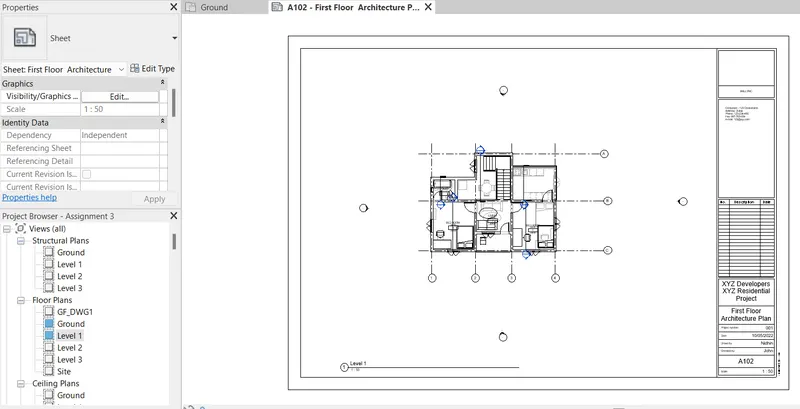
First Floor Architecture Plan
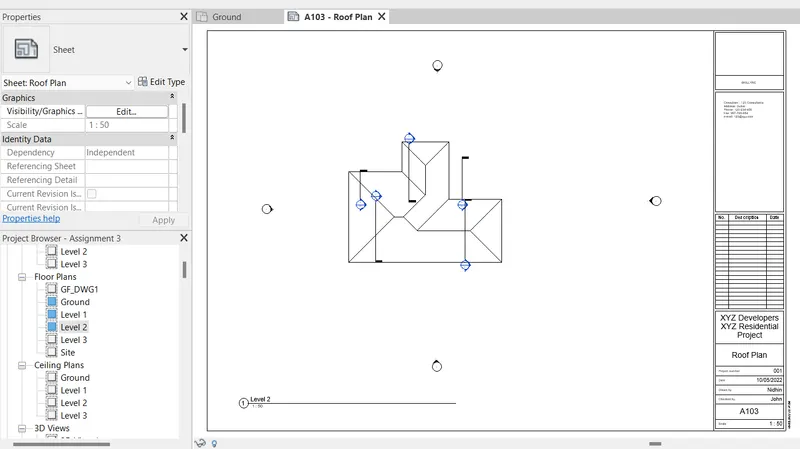
Roof Plan
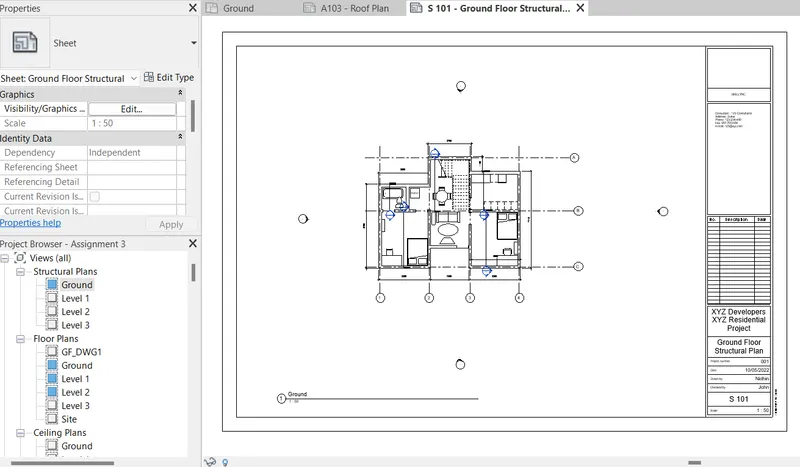
Ground Floor Structural Plan
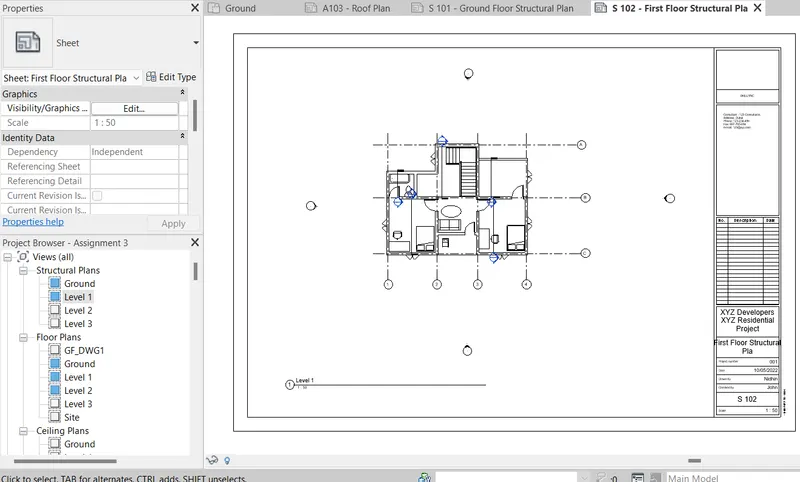
First Floor Structural Plan
Roof Framing Plan
North-South Elevation
East-West Elevations
Section Views
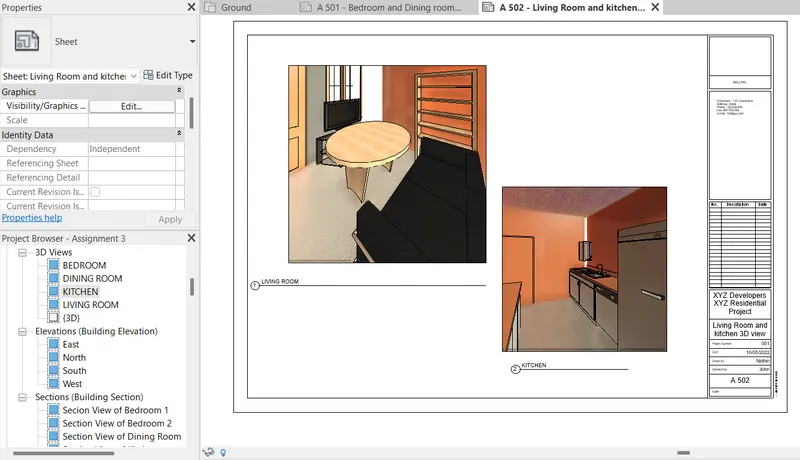
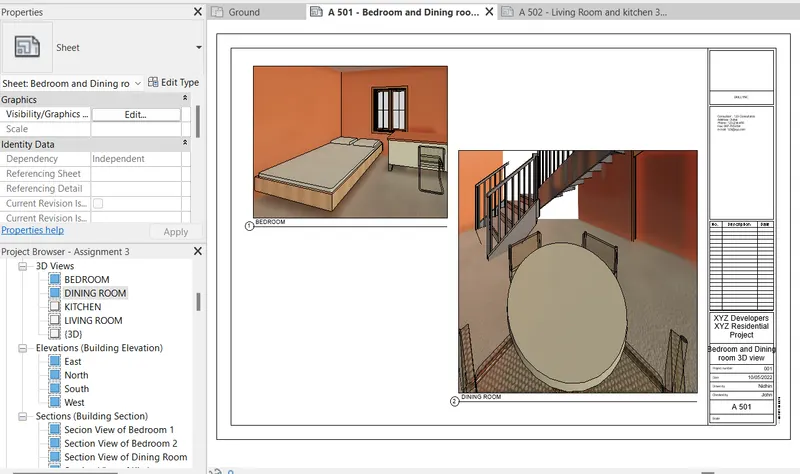
Q10: Create a camera-specific view or a 3D view in each room ( living, dining, bedroom). Based on the views create a new set of sheets starting A-501 (you can add as many sheets after, 502, 503.. n)to place the 3D view images. Produce the sheets as a part of project drafting.
Answer:
Aim:
To create a camera-specific view or a 3D view in each room and based on the views create a new set of sheets
Procedure:
- Open the week 3 Revit project file
- Go to the Ground floor plan view form the project browser
- Go to View tab and select camera from the 3D view drop down
- Place the camera in bedroom and create a camera view.
- In the project browser rename this view as Bedroom
- Similarly create the camera views for dining room, living room and kitchen and rename it in the project broewser
- Right click on any sheet in the project browser and create 2 empty duplicate sheets.
- Rename these sheets to Bedroom and Dining room 3D view and Living Room and kitchen 3D view
- Drag the respective views in these sheets and adjust the scale by using size crop option.
- Save the file
Bedroom and Dining room 3D view
Living Room and kitchen 3D view