3D Creation of Ceiling, Roof, Architectural plan, Structural plan, Sectional view, Elevation view and Camera specific view for a house plan using REVIT
1. AIM :
To model a ceiling from the architectural tab above the walls at the first floor level
Creation of ceilings in revit is similar process to that of floors and roofs
Ceilings are level based elements
You can create ceiling defined by walls,or sketch its boundary
PROCEDURE :
Go to architecture toolbar, select ceiling option
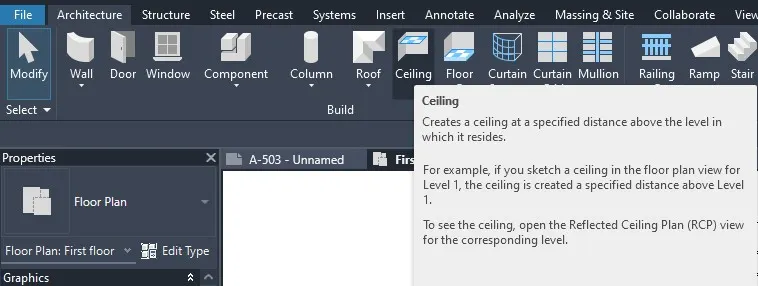
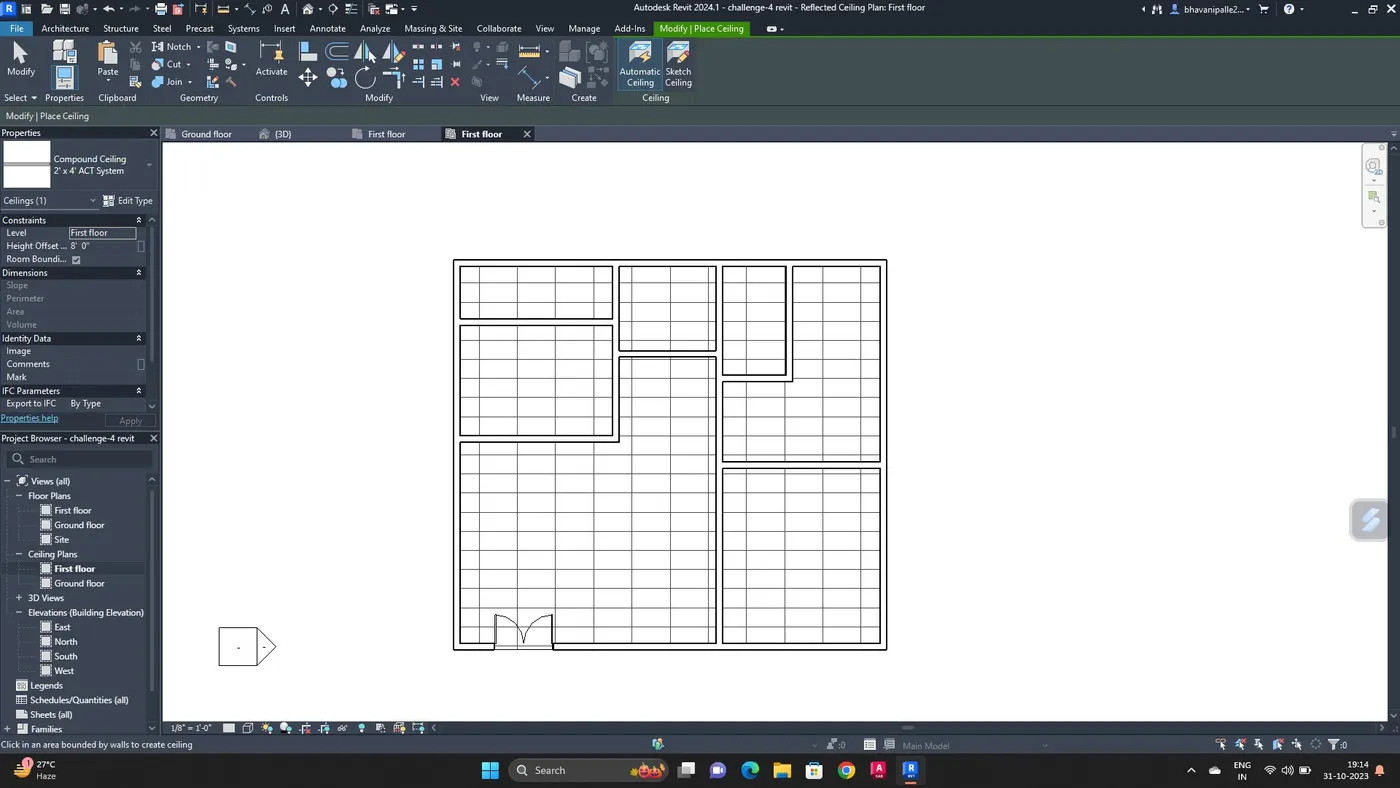
After selecting the ceiling option, then select rectangle or pick line option, select the boundary
Then the ceiling will be created, as shown in fig.
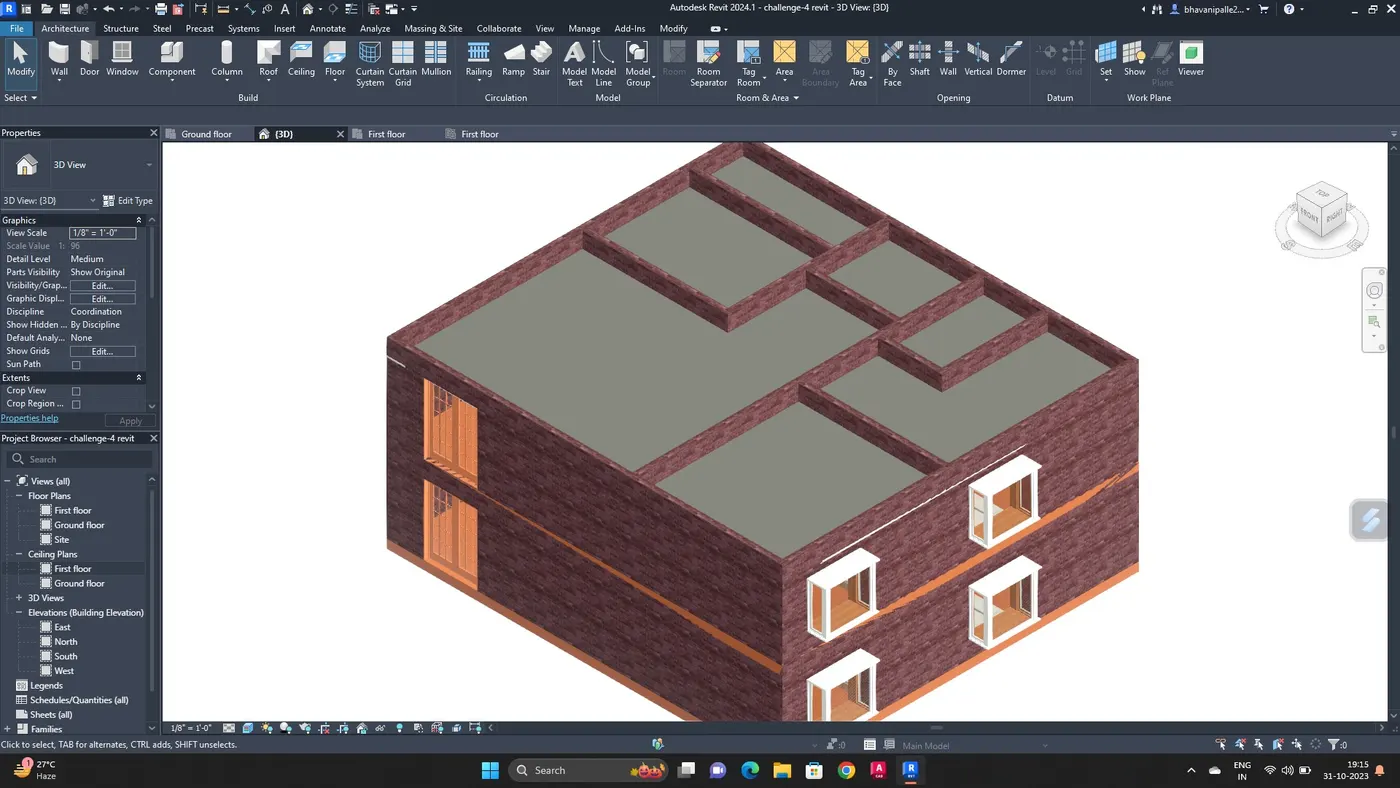
We can see the ceiling in the 3D view
RESULT :
Ceiling has been modelled from architecture tab above the walls
2. AIM :
To model a roof above the ceiling by selecting the footprints of ceiling
INTRODUCTION :
Roof covering of the top of a building protect against weather conditions like rain,sunlight,wind
Roofs havebeen constructed in a wide variety of forms flat,pitched,or in combinations as aesthetic considerations.
PROCEDURE :
Go to architecture toolbar,select the Roof by footprint option
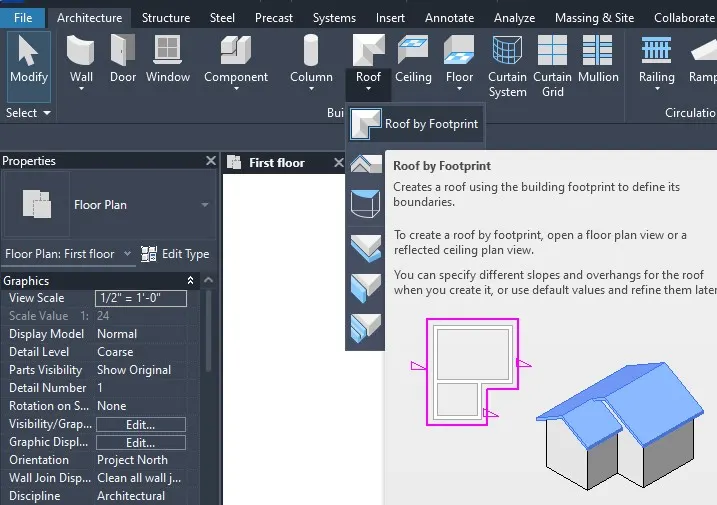
Select the roof and adjust the roof to 10 degrees by selecting it
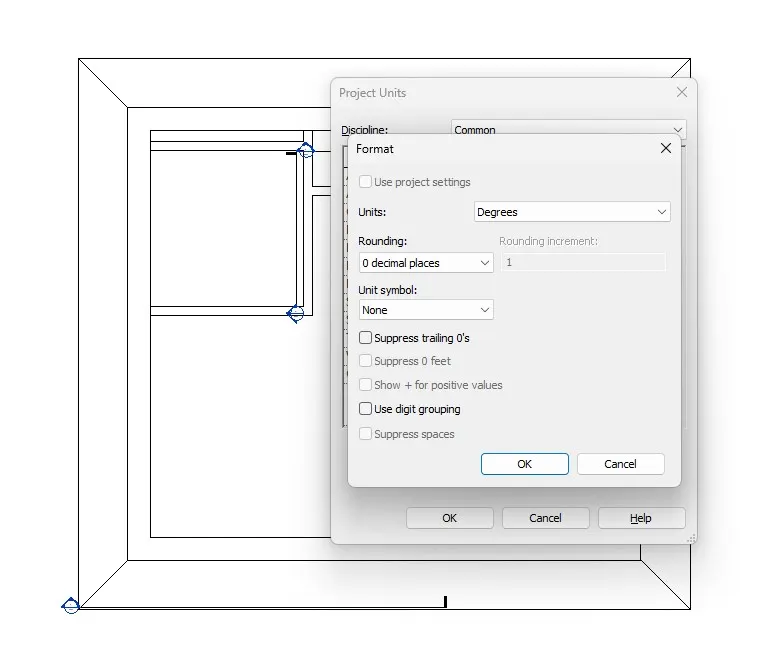
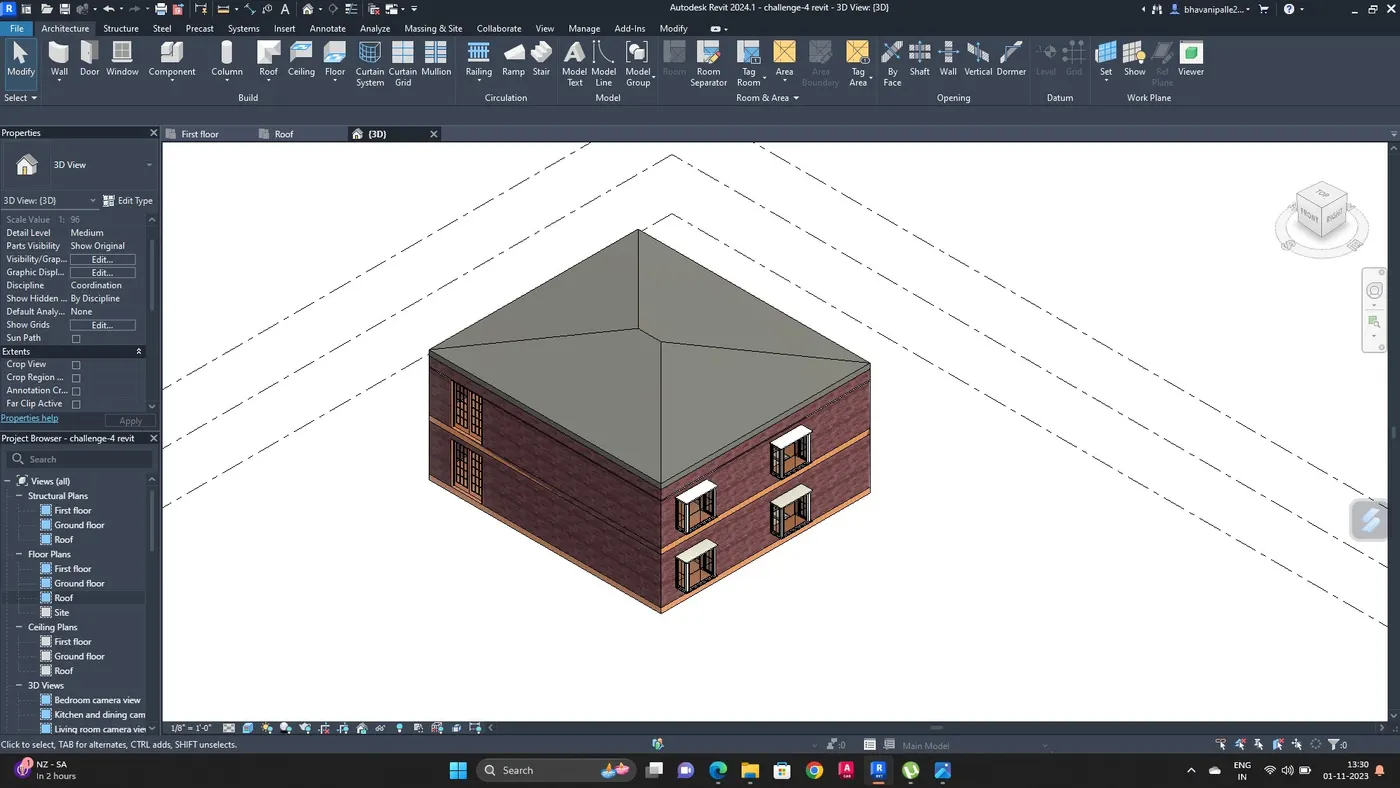
RESULT :
The roof has been created to the model in the revit
3. AIM :
To create plan views for ground floor level and first floor level inculding all the walls,floors,and components
And to separate them to architecture and structural plans.
INTRODUCTION :
Floor plan view is a default view in a new architectural project
Most projects inculde atleast one floor plan
Structural plan view is the default view when you start a new project using structural template
Structural plan doesnot contain any components
PROCEDURE :
First draw the architectural plans of first floor and second floor
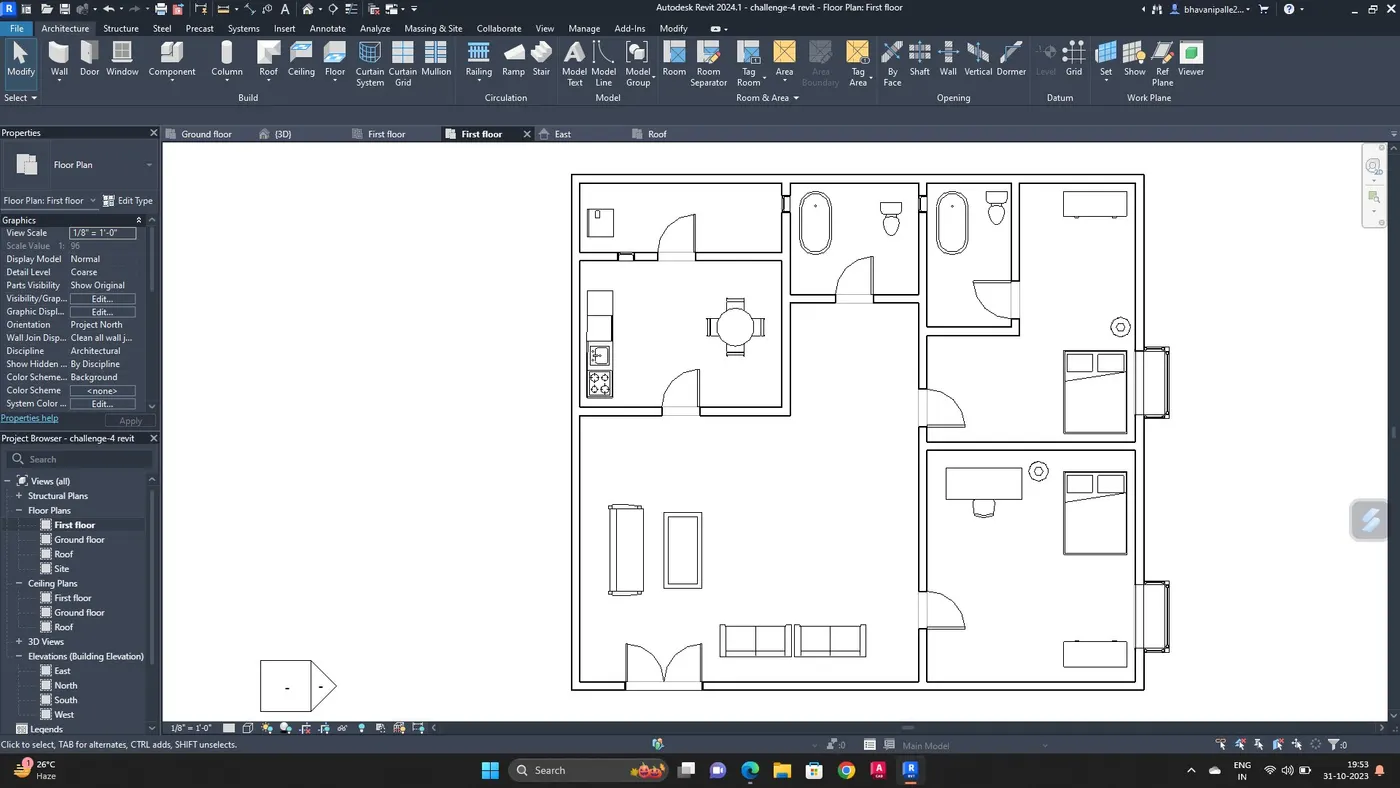
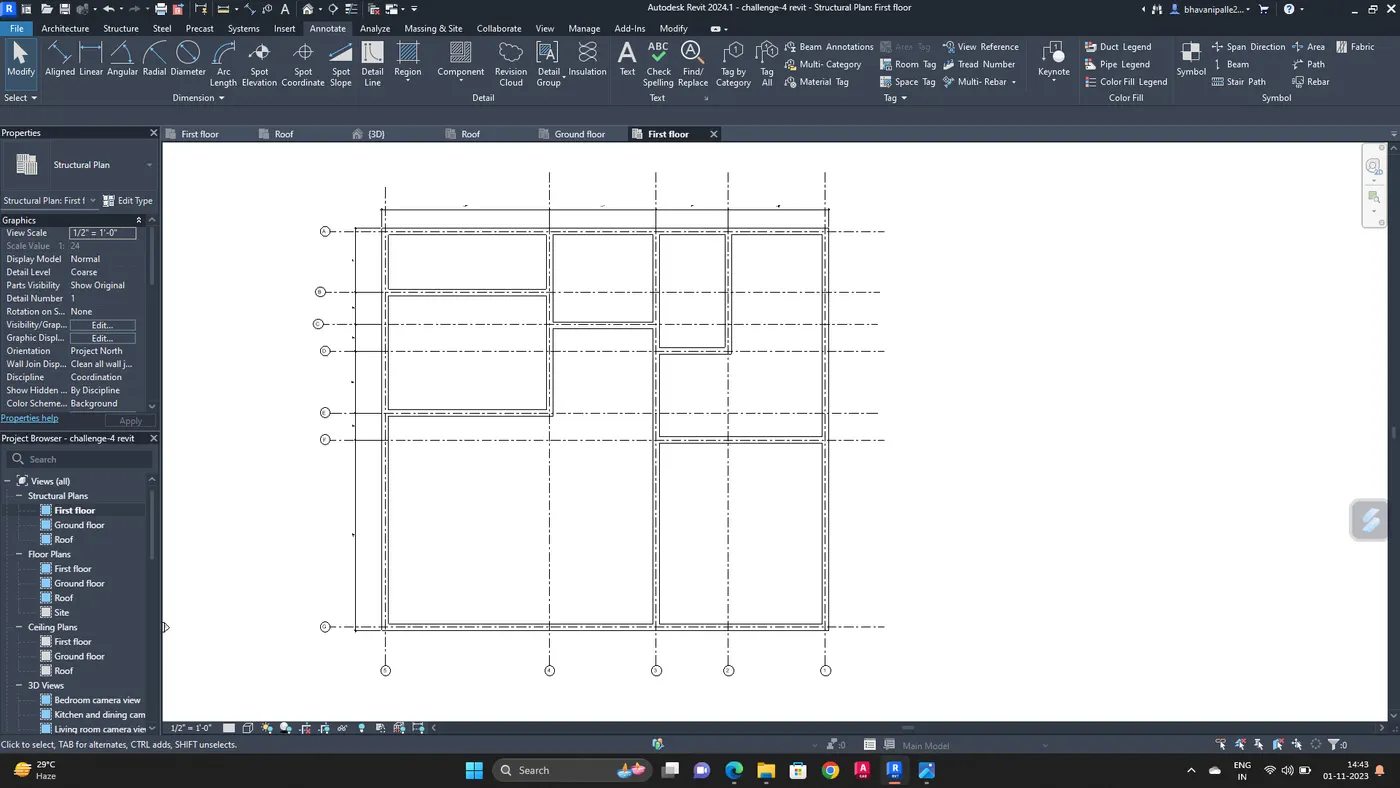
Draw the structural plans of first floor and second floor
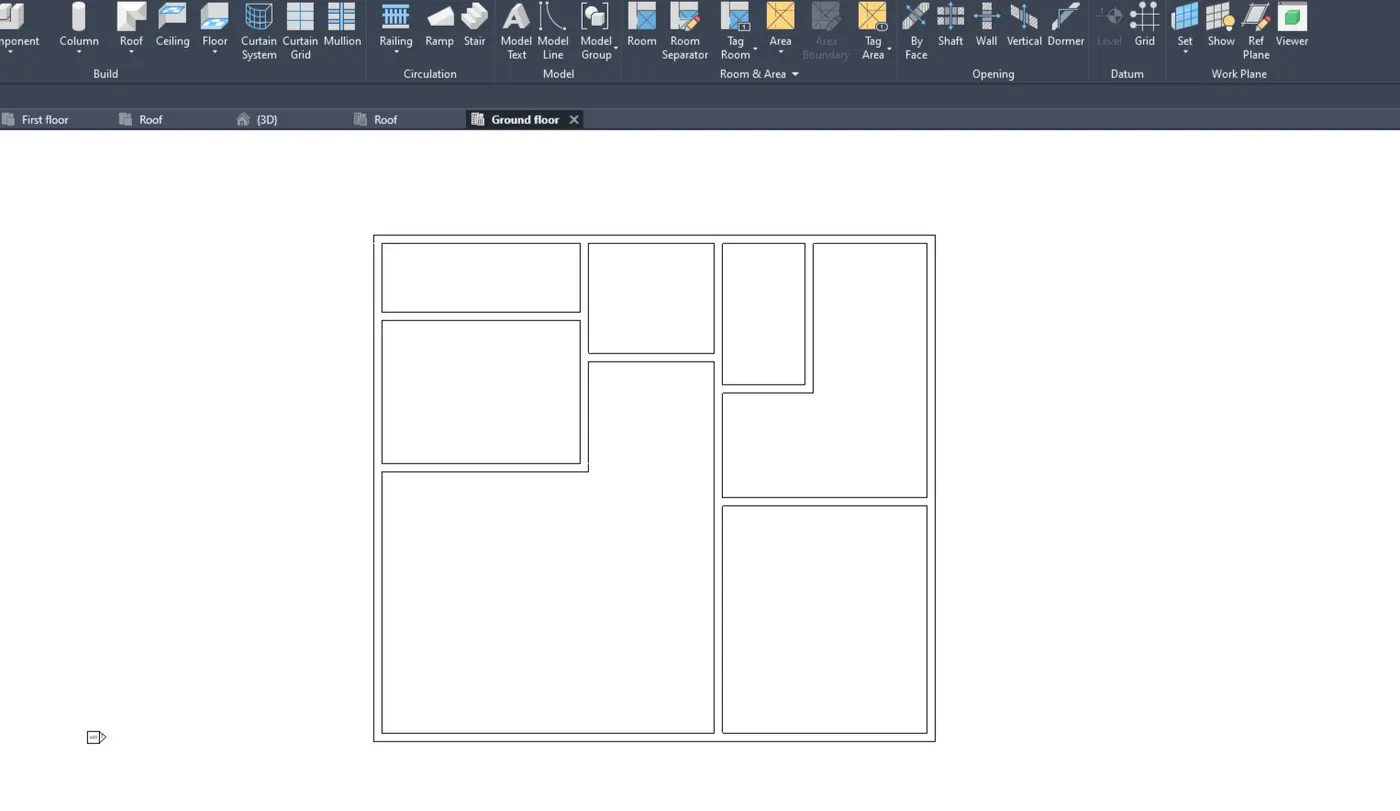
RESULT :
Created plan views for ground floor level and first floor level including all the walls,floors and components, and to separated them to architecture and structural plans
4. AIM :
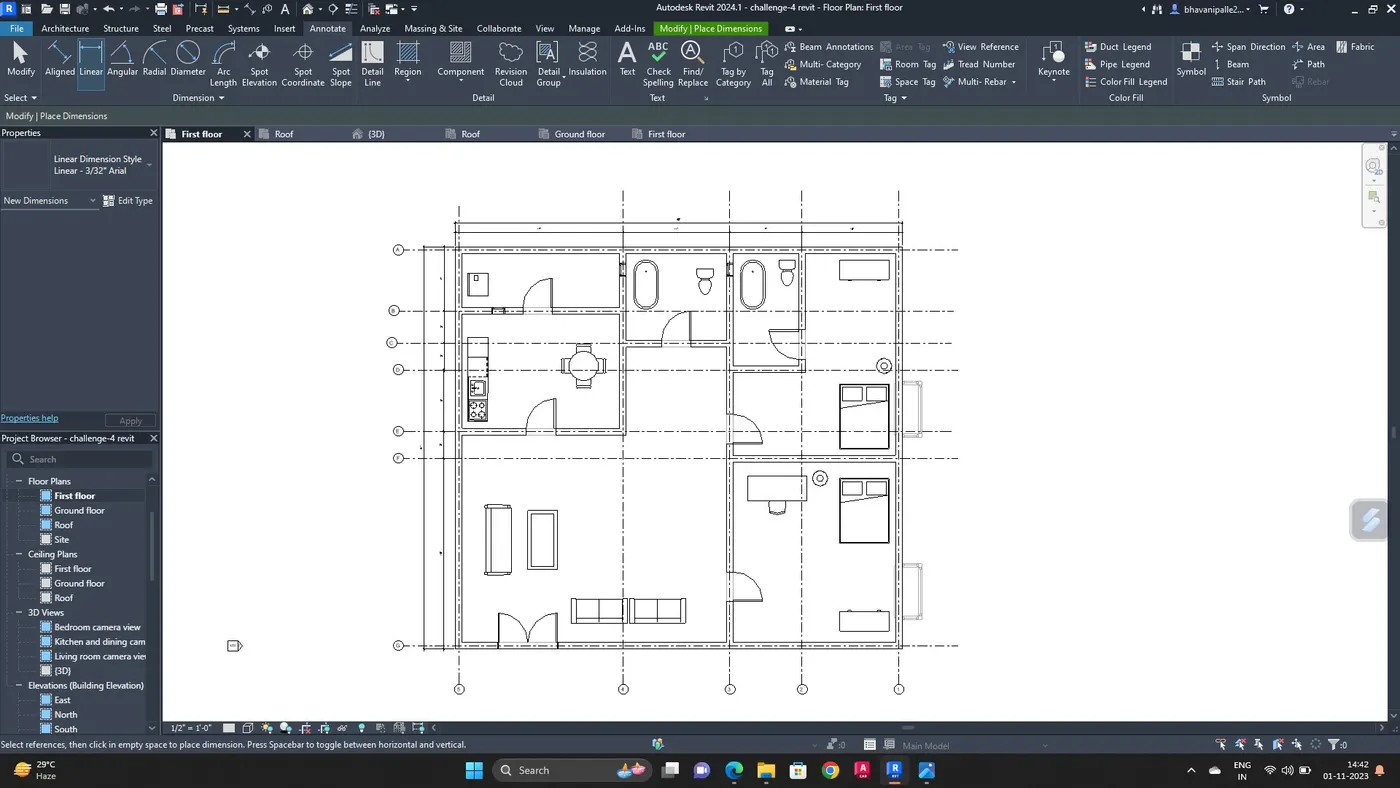
To add dimensions to all the walls and floors with reference to the longitudinal and transverse grids created in the project file
INTRODUCTION :
Using revit to produce construction drawings is ,you will need to dimension a number of your views
Dimensions convey the length,height and angle of elements.
Grids are datum elements used for making the alignment for the structural elements in a building design.
PROCEDURE :
Draw the longitudinal and transverse grids architectural floor plans
Add dimensions to the architectural plan as shown in fig
Draw the longitudinal and transverse grids to structural floor plan
Add the dimension
RESULT :
The dimensions are added to the structural floor plans and the architectural plan
Longitudinal and transverse grids are created
6. AIM :
To create a sheet template from view tab and adjust the parameters on the sheet to add appropriate views
INTRODUCTION :
When creating a project template, you can include sheets in the template
Views can be added to sheets, using desired viewports templates
We can edit a sheet ,like renaming the sheet name, sheet number, and can fill the owner detailes
PROCEDURE :
Go to view toolbar, select the sheet option
After selecting the sheet, new tab will be visible on the screen
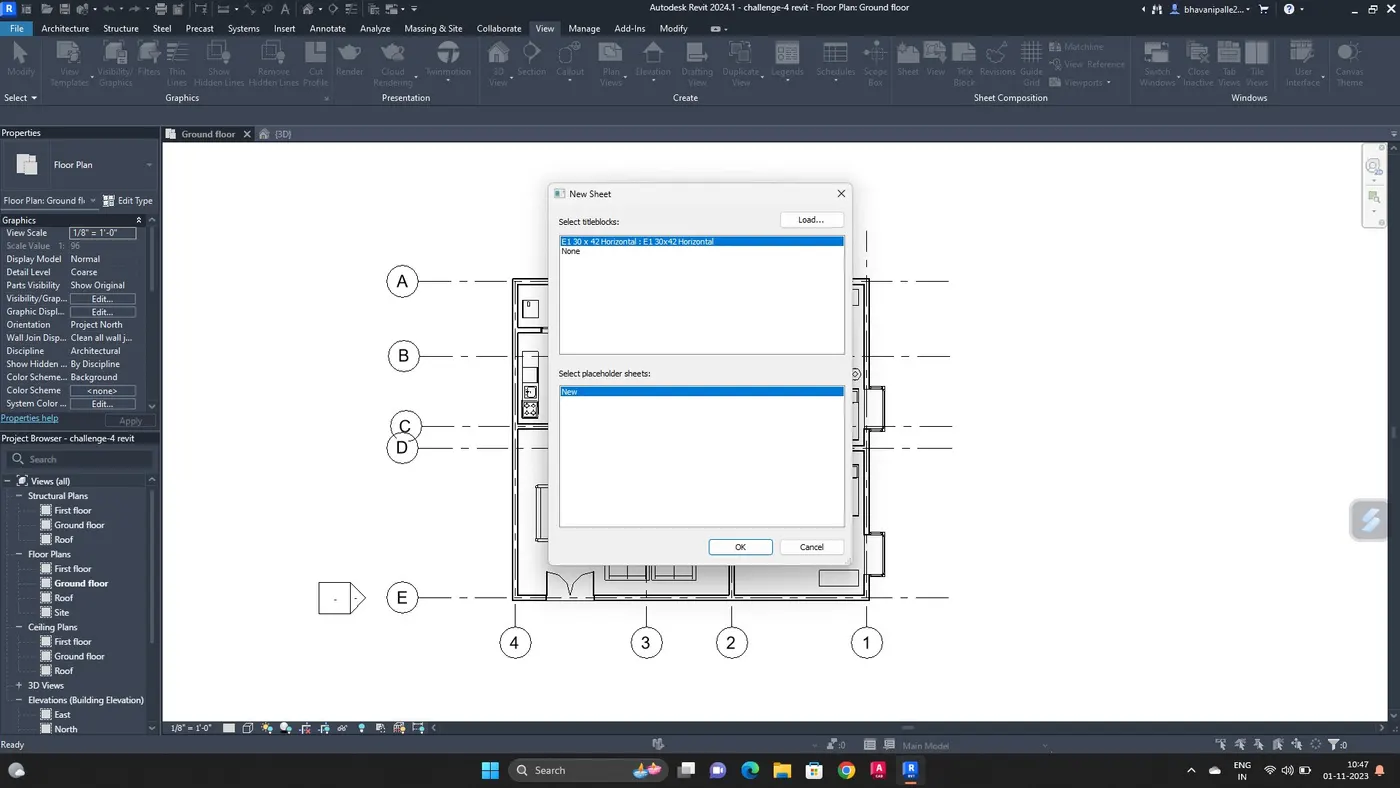
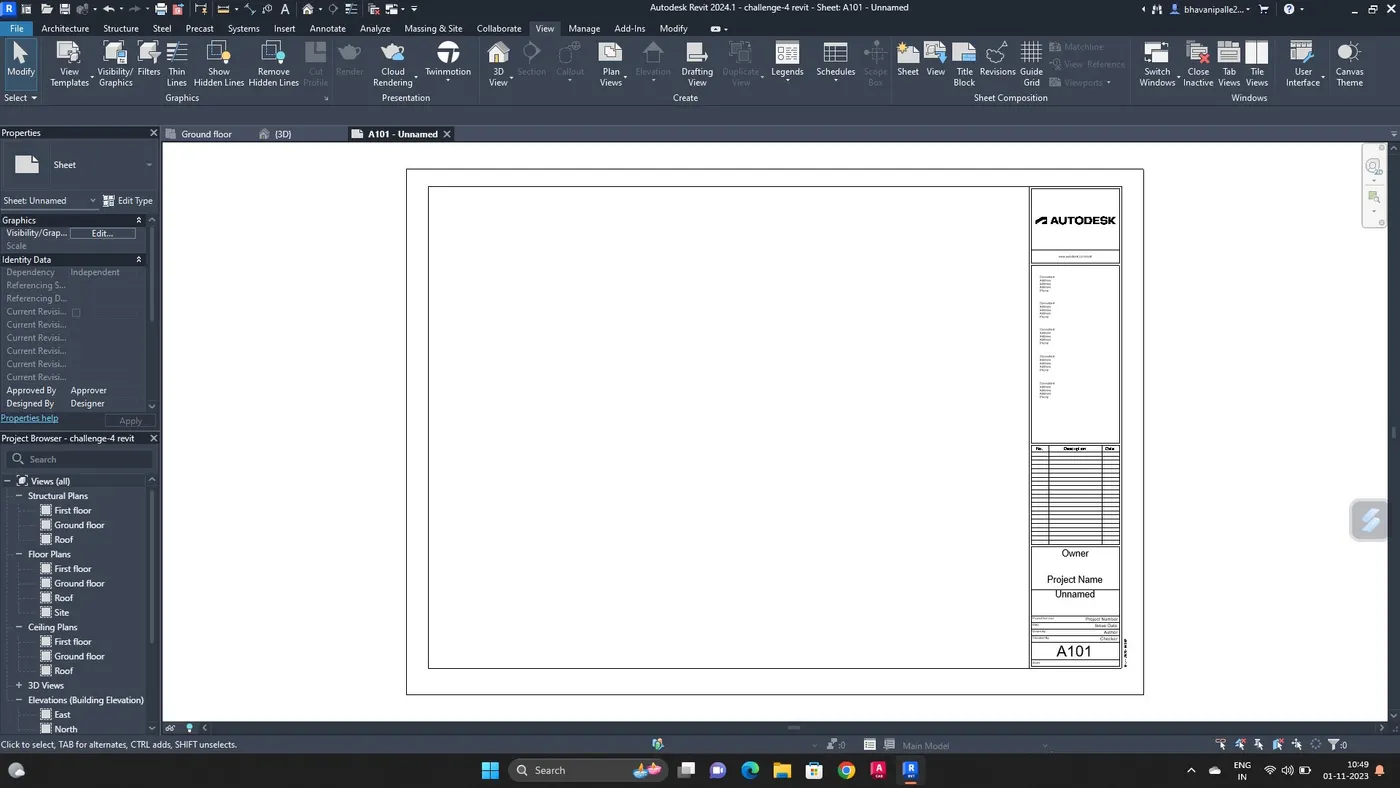
Edit the sheet number and name by double clicking it
Insert the first floor and second floor plan separately.
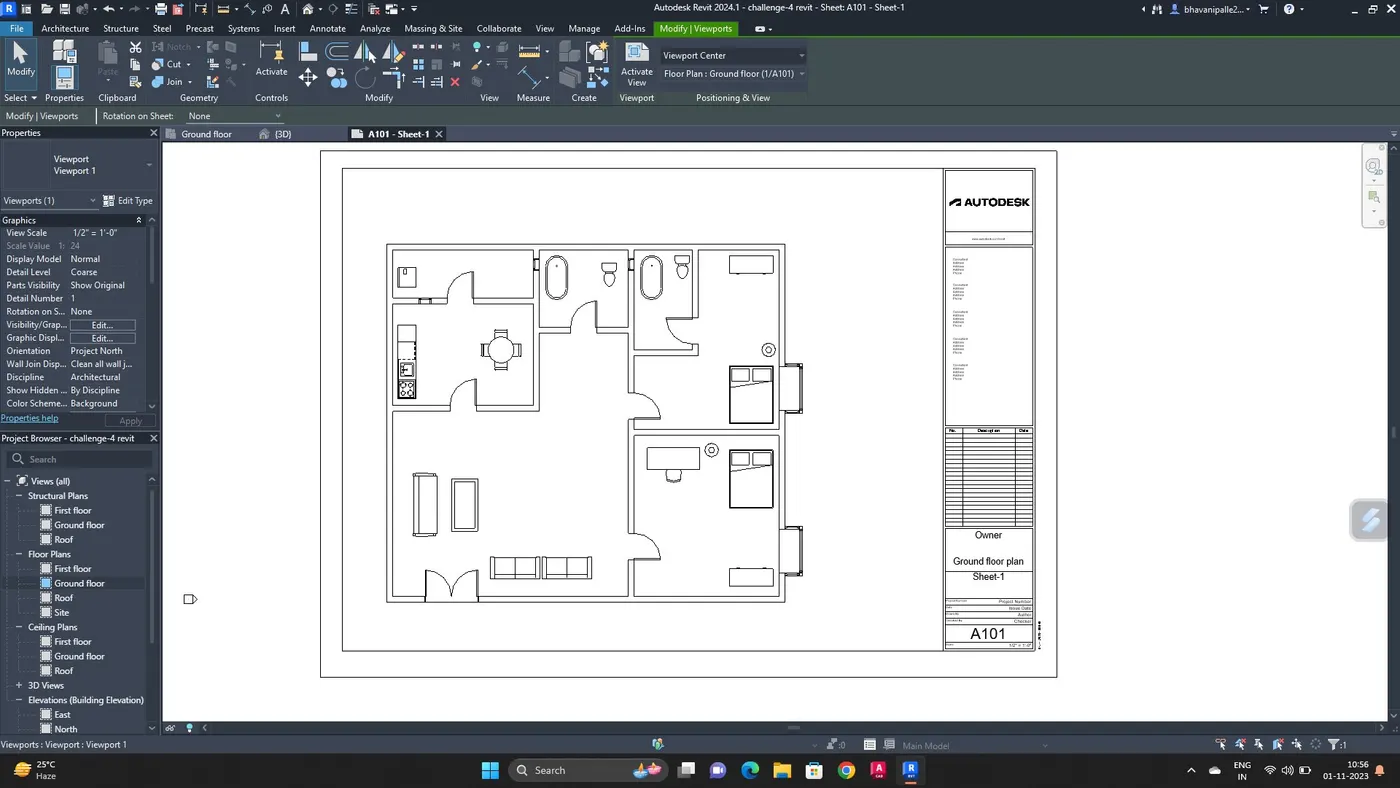
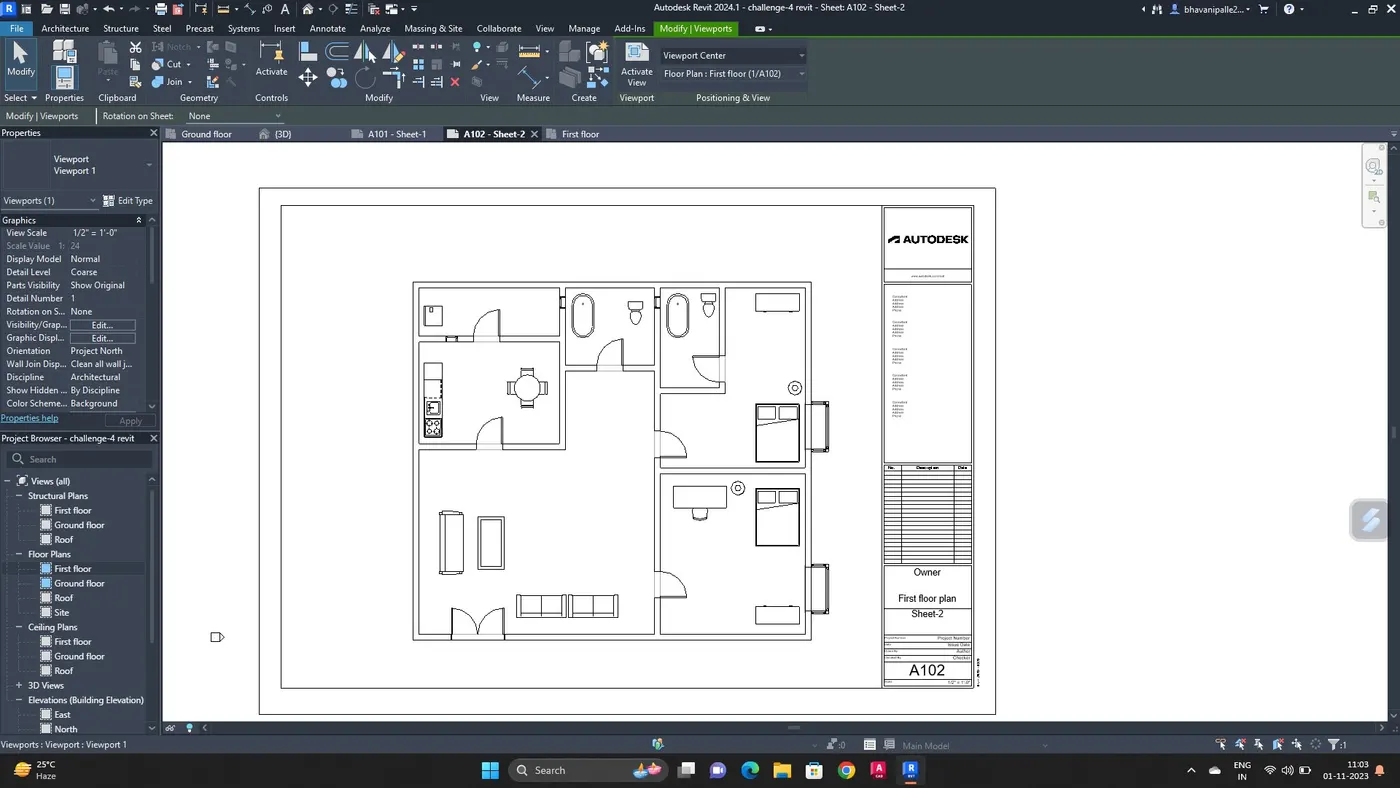
RESULT :
Created a sheet template from the view tab and adjusted the parameters on the sheet for adding appropriate views
6. AIM :
To create the elevation views looking at your building from East, North, South, West using the elevation tab
INTRODUCTION :
An elevation is a view of buildingseen from one side
It is a most common view used to see external appearance of a building
PROCEDURE :
Go to view, click on elevation option
Elevation views are visible in project browser
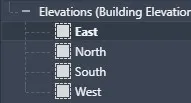
Select east to see the elevation view from the East direction
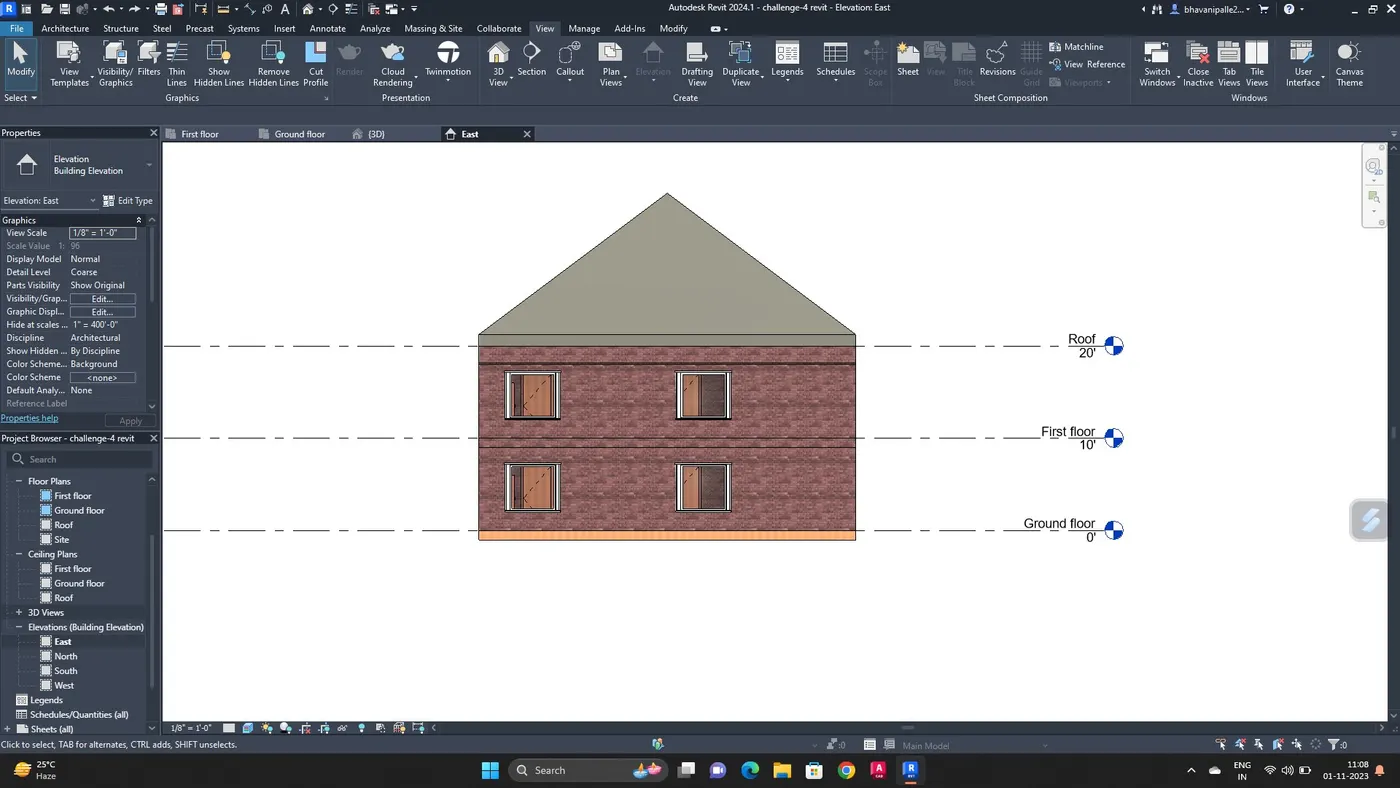
Select the north to see elevation view from the North direction
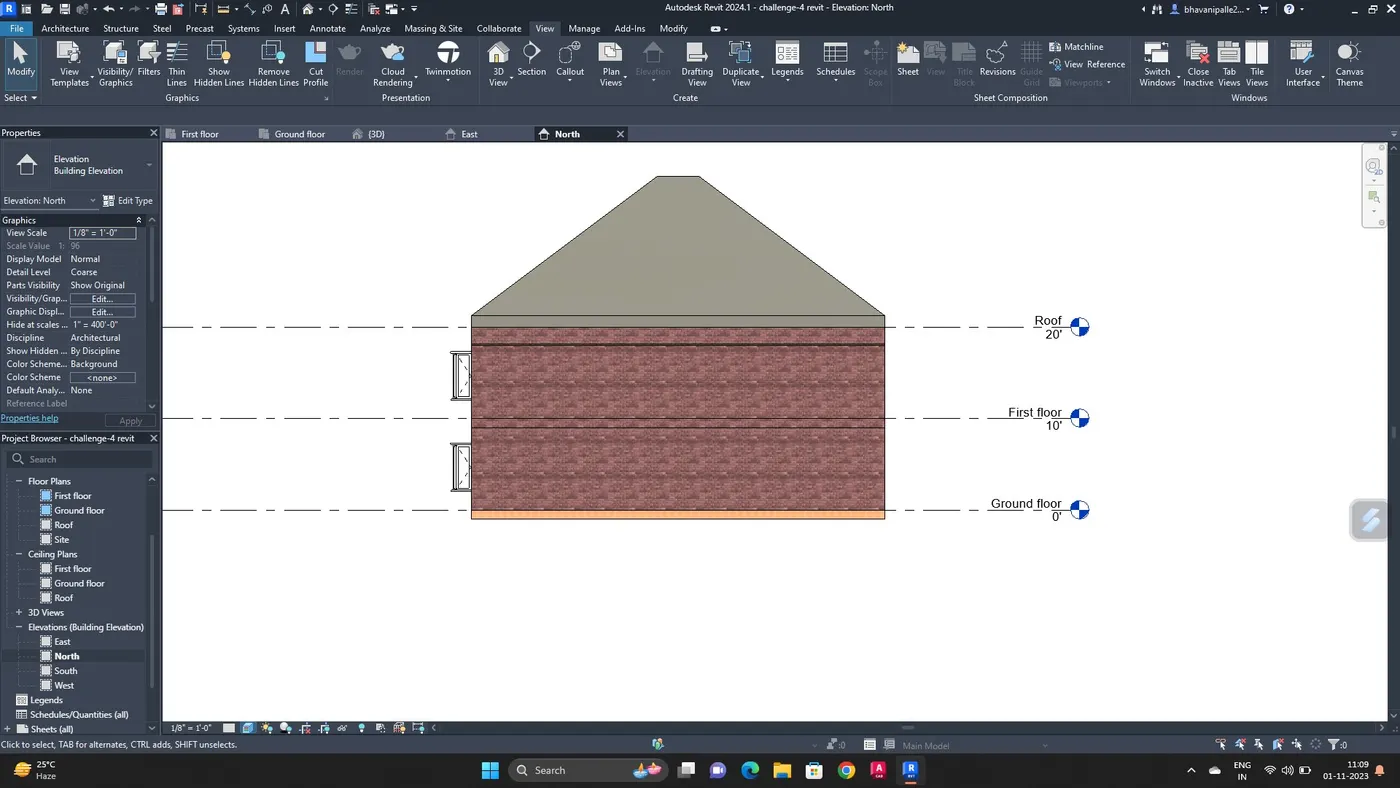
Select south to see the elevation view from south
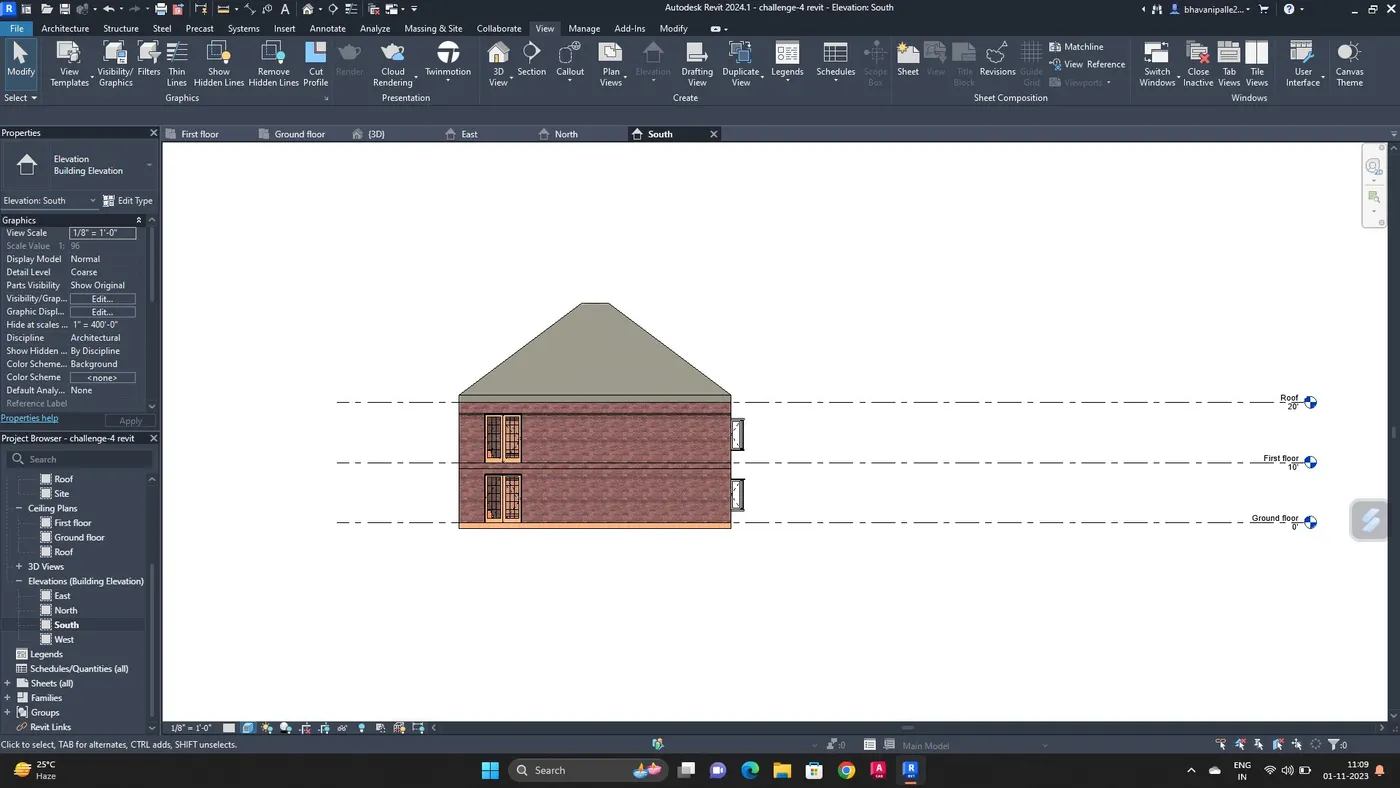
Select west to see elevation view from West direction
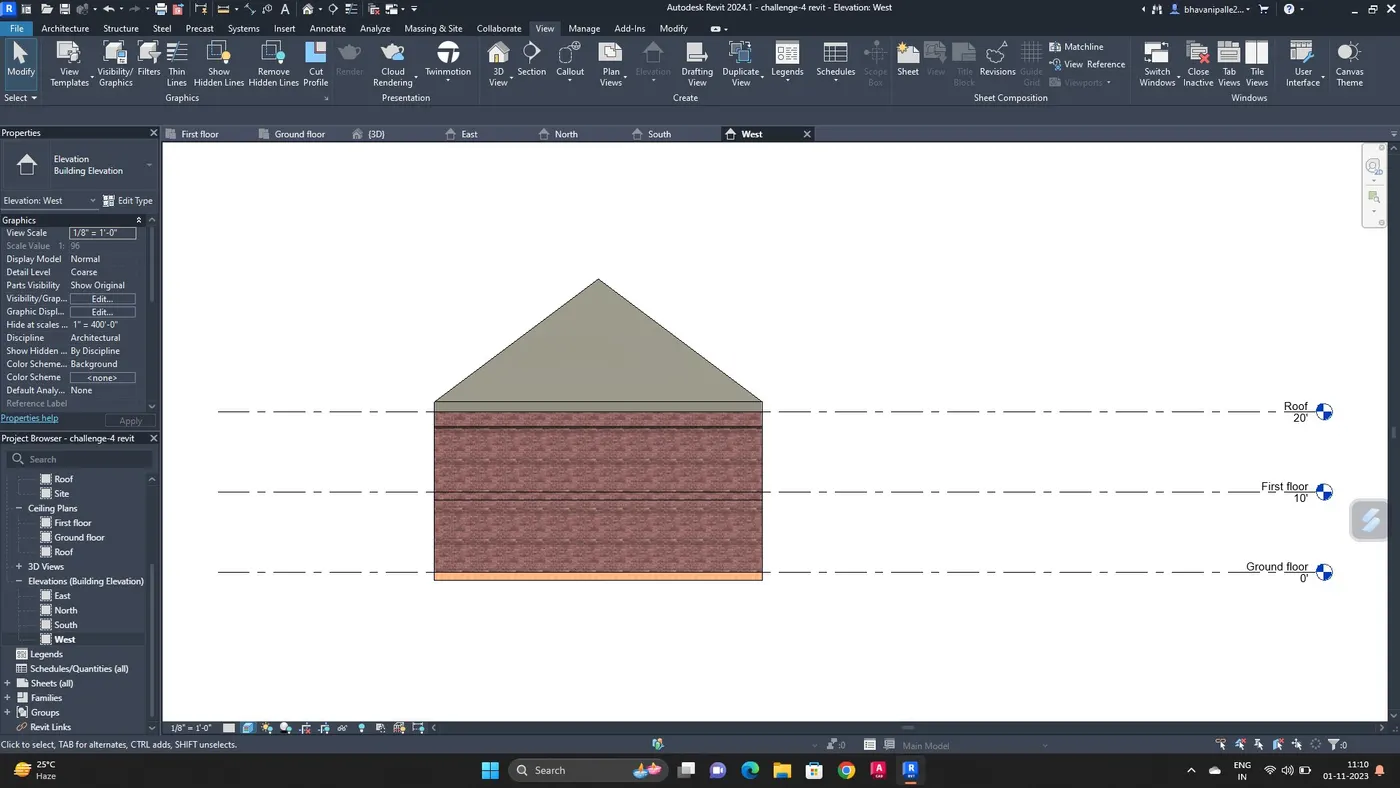
RESULT :
Created elevation views from East,North,South,West using elevation tab
7. AIM :
To produce section cut through each room either cutting across longitudinally or in a transverse direction
INTRODUCTION :
Sectional view represents the part of a building or a individual rooms remaining after a portion is assumed to have been cut
These views assumed that a cutting plane has been removed portions of the object represented by the displaying the appropriate section of the interior
Sectional views are used in engineering and architectural drawings
PROCEDURE :
Click on section option from view toolbar
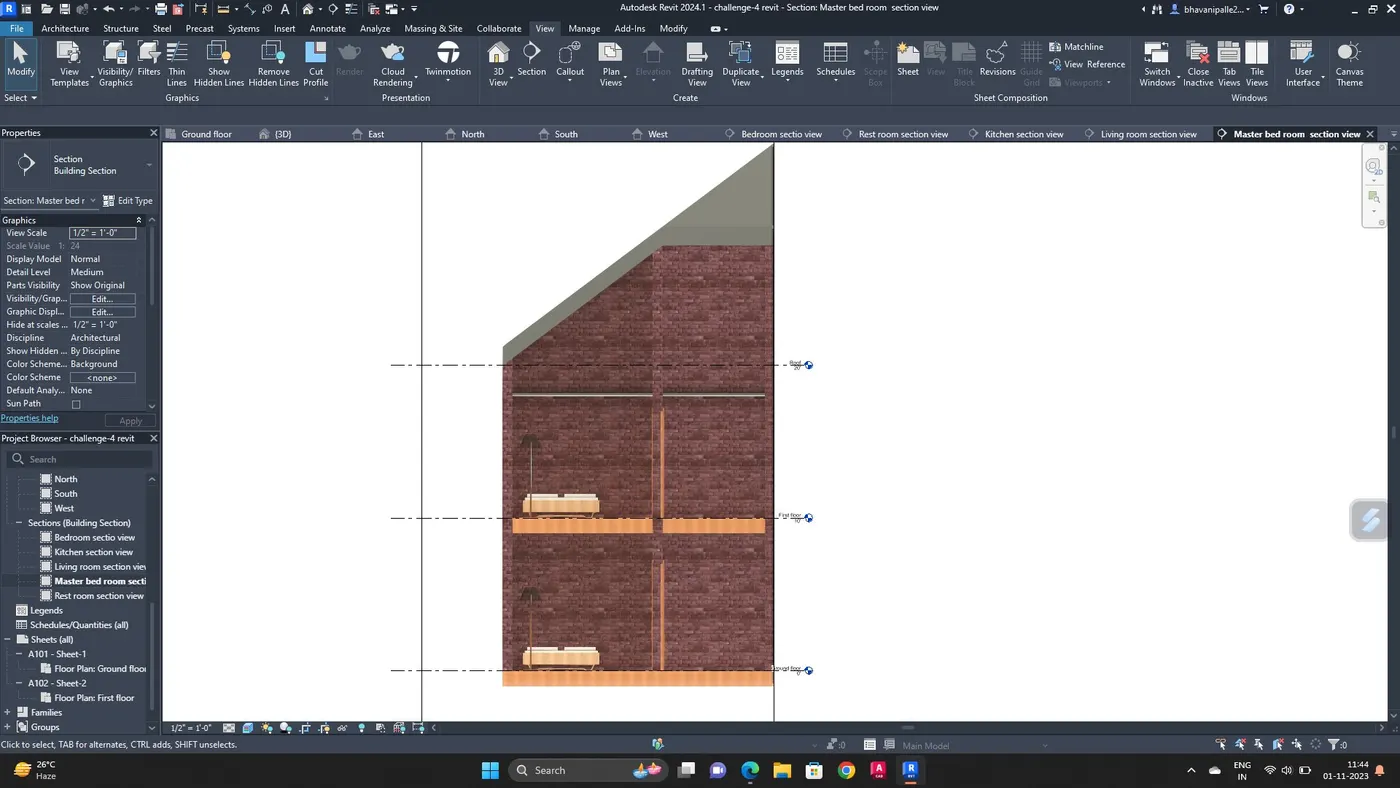
Draw sectional line in the bedroom to see the section view of bedroom
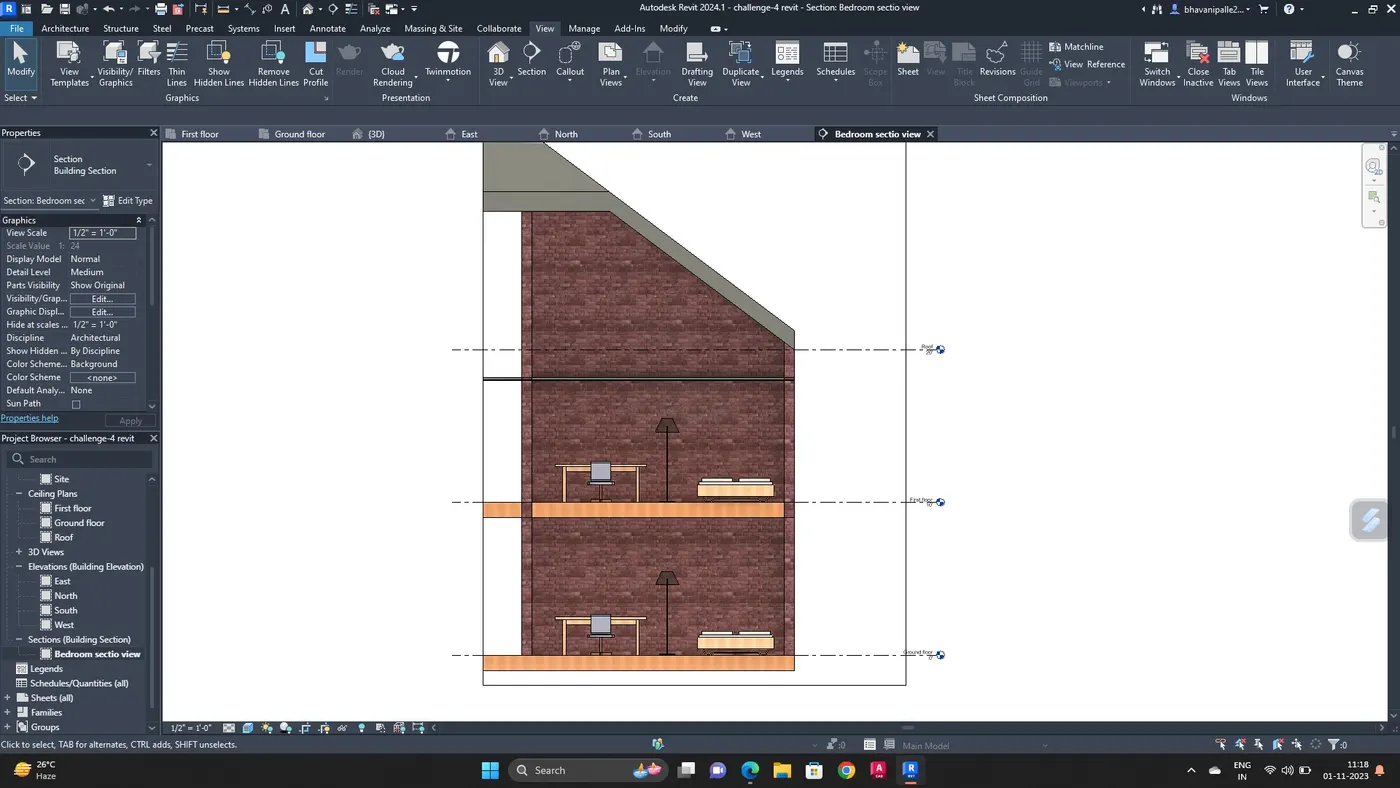
Section view of master bed room
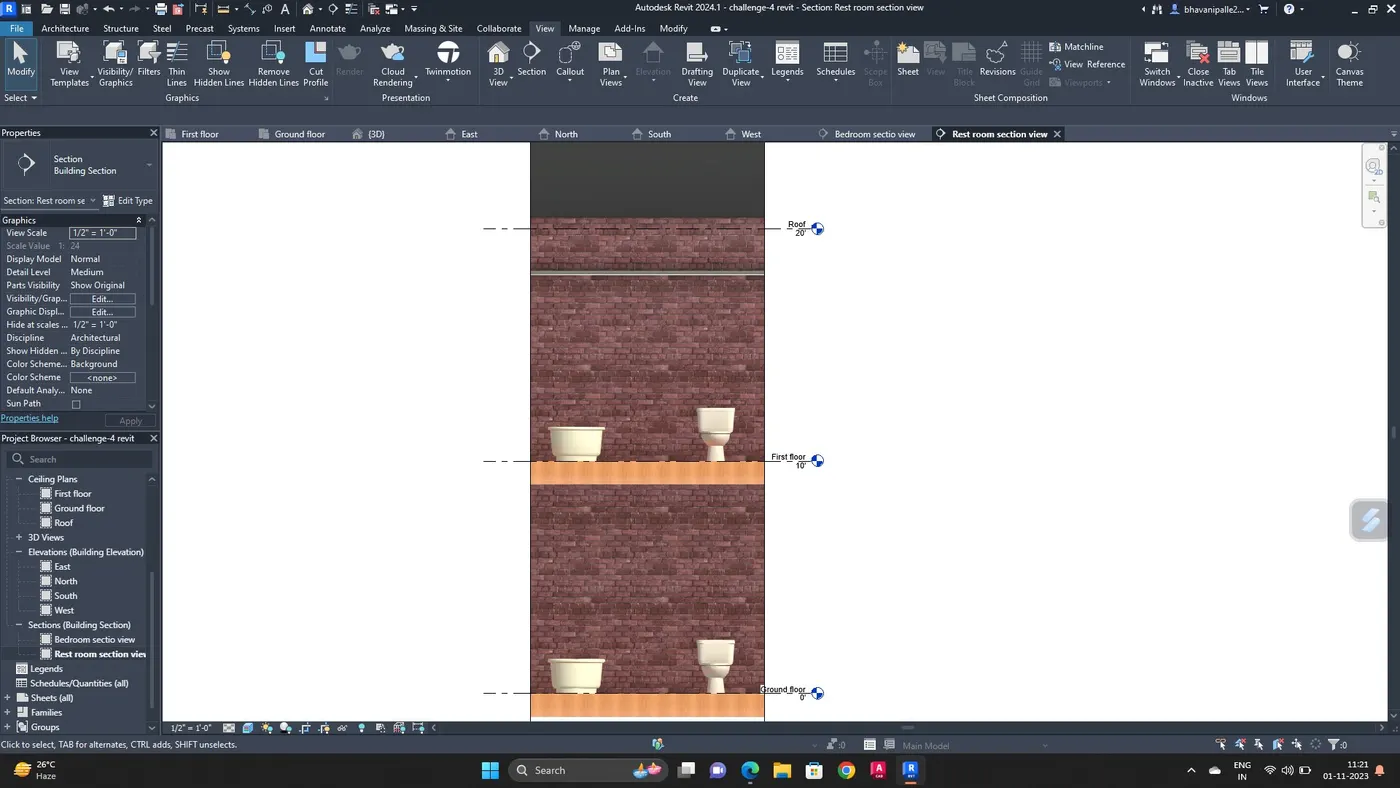
Draw the sectional view of the toilet room
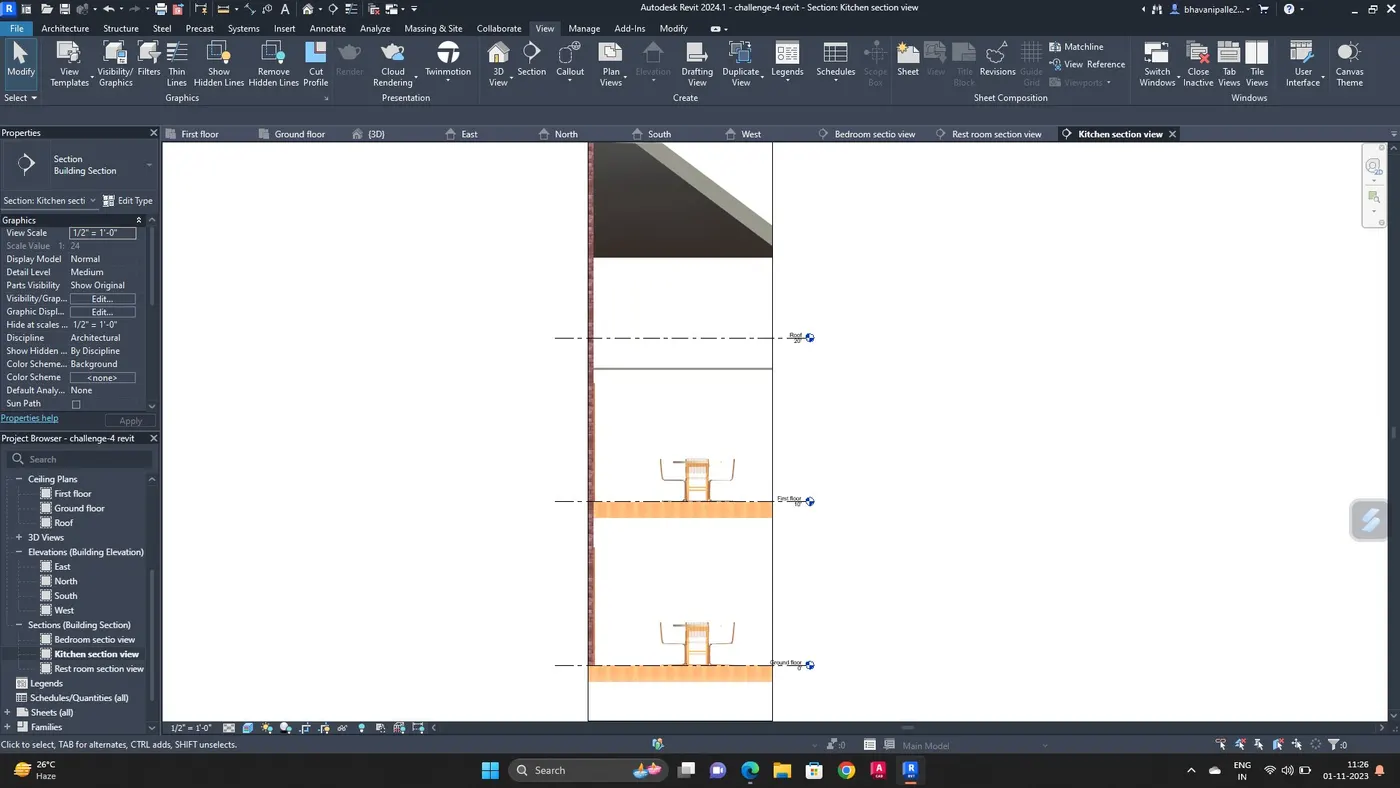
Draw the sectional view of kitchen room as shown in fig
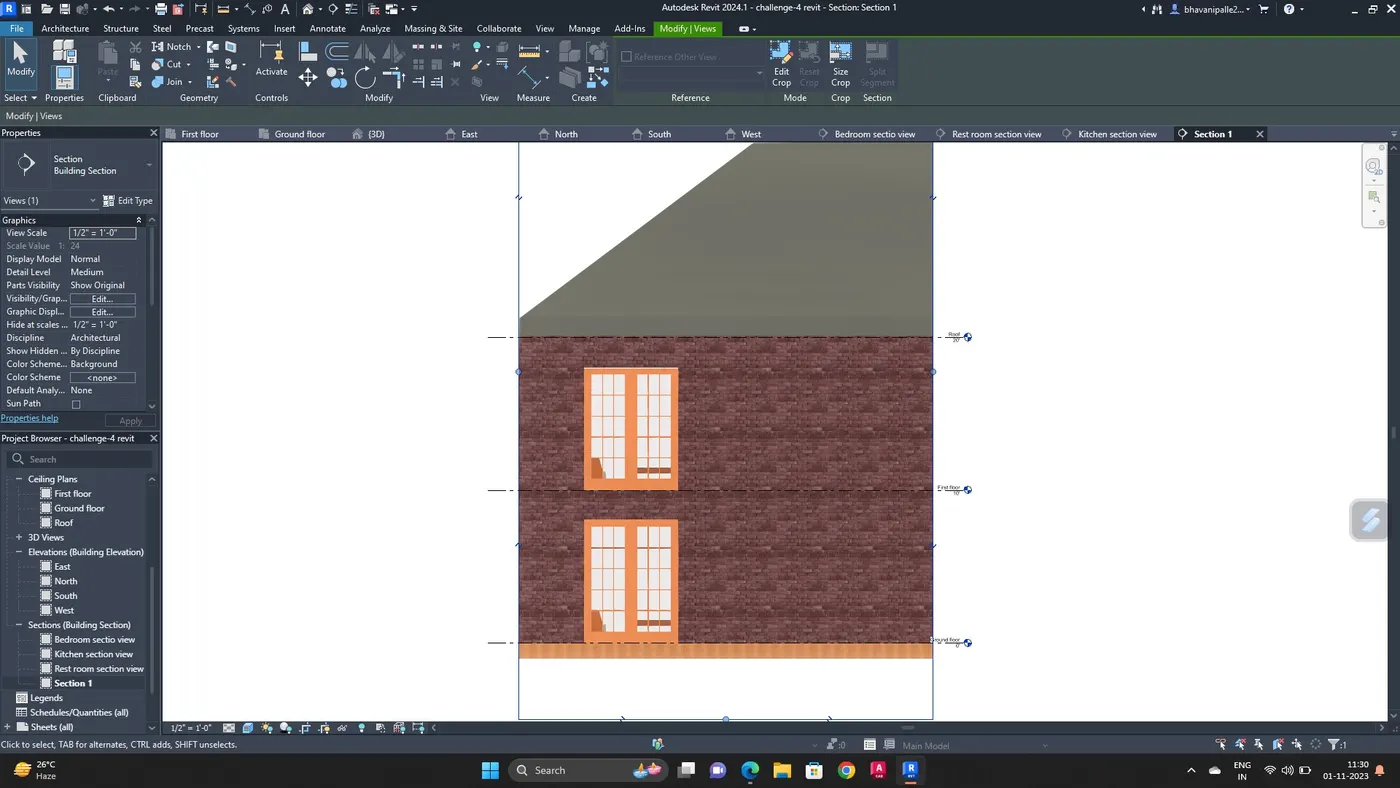
Draw the sectional view of living room as shown in fig
RESULT :
Created sectional views of each room of a building in the revit
8. AIM :
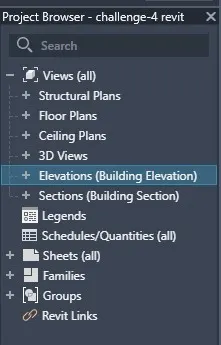
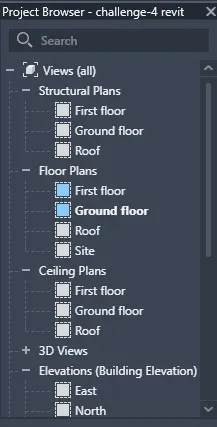
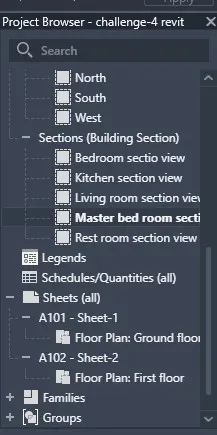
To classify the views,plan views, sectiona views and elevation views to either design or documentation category using properties browser
INTRODUCTION :
Project Browser shows all the views, schedules, sheets, groups, and other parts of the current project
As you expand and collapse each branch,lower level items display
9. AIM :
To create the multiple sheets and produce the drawings in the sheets from given drawing list
INTRODUCTION :
Creating a project template, you can include sheets in the template
Create views on a project template before you start building the model to streamline the project documentation process
You can place multiple drawings in each sheet view
PROCEDURE :
Go to view select sheet option
Rename the sheet number as A-101, and sheet name as Ground floor
Place the ground floor architectural plan the sheet template
Take another sheet, rename it as First floor plan, and sheet number as A-102
Place the first floor architectural plan in that sheet by dragging it from project browser
Go to view select sheet option
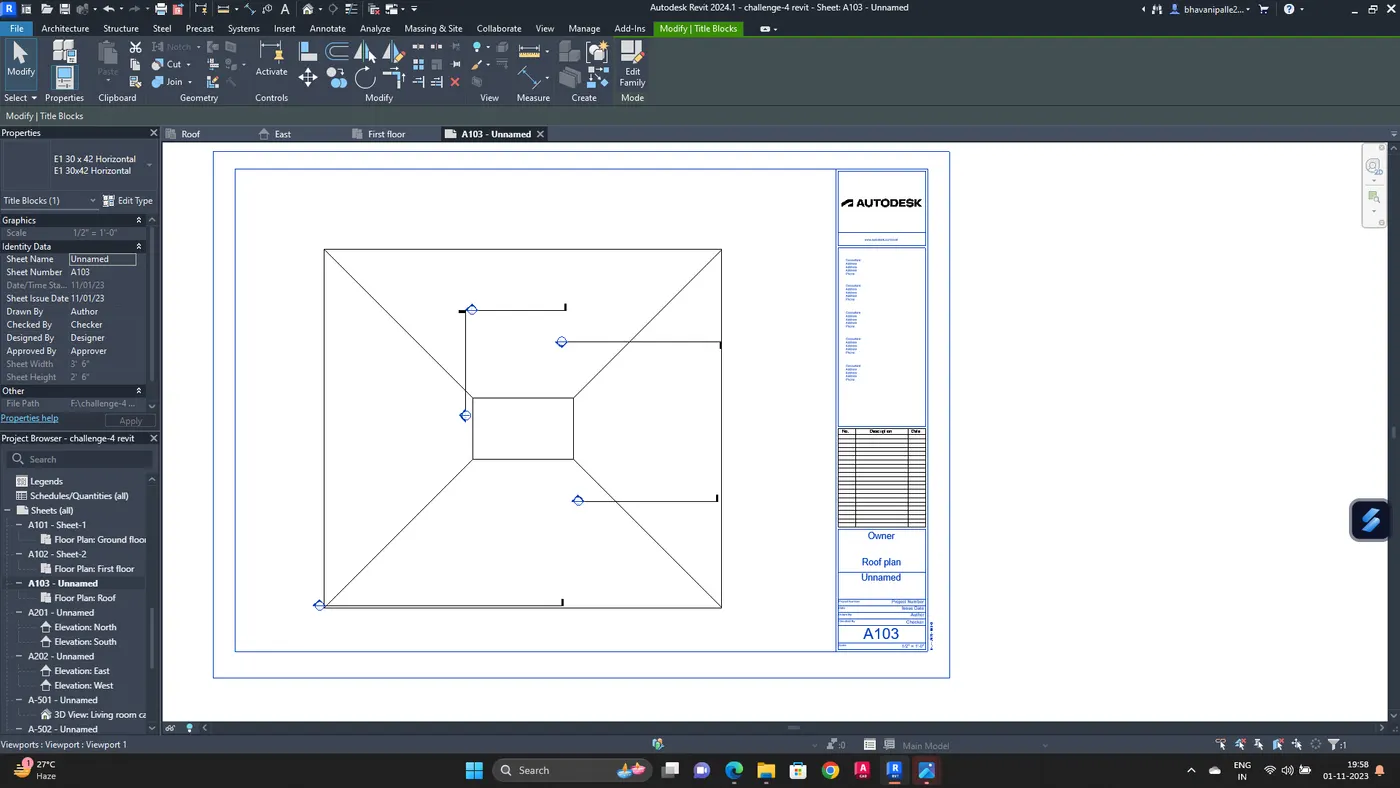
Rename the sheet number as A-103, and sheet name as Roof plan
Place the Roof architectural plan the sheet template
Go to view select sheet option
Rename the sheet number as S-101, and sheet name as Ground floor structural plan
Place the Ground floor structural plan in the sheet template
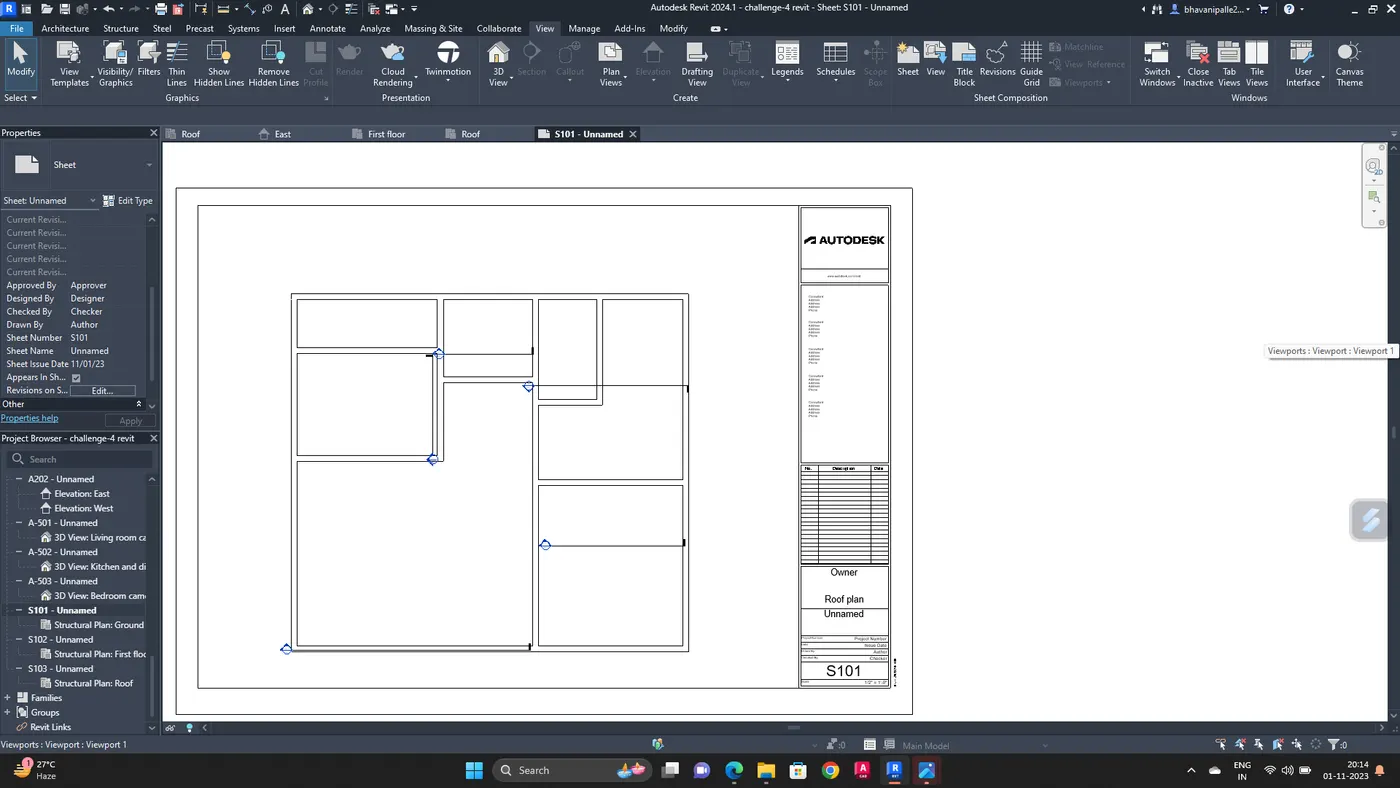
Take another sheet, rename it as First floor structural plan, and sheet number as S-102
Place the first floor structural plan in that sheet by dragging it from project browser
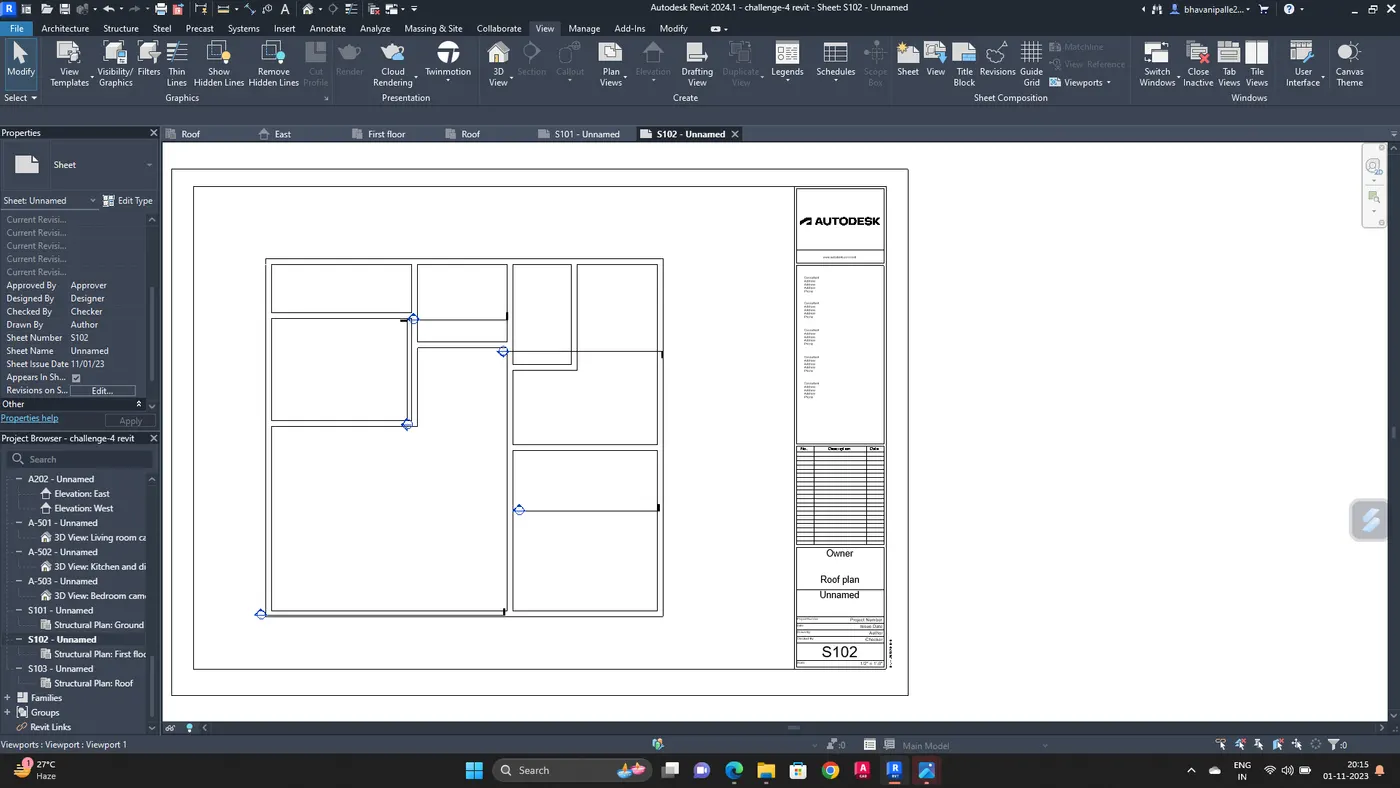
Take another sheet, rename it as framing plan, and sheet number as S-103
Place the roof framing plan in that sheet
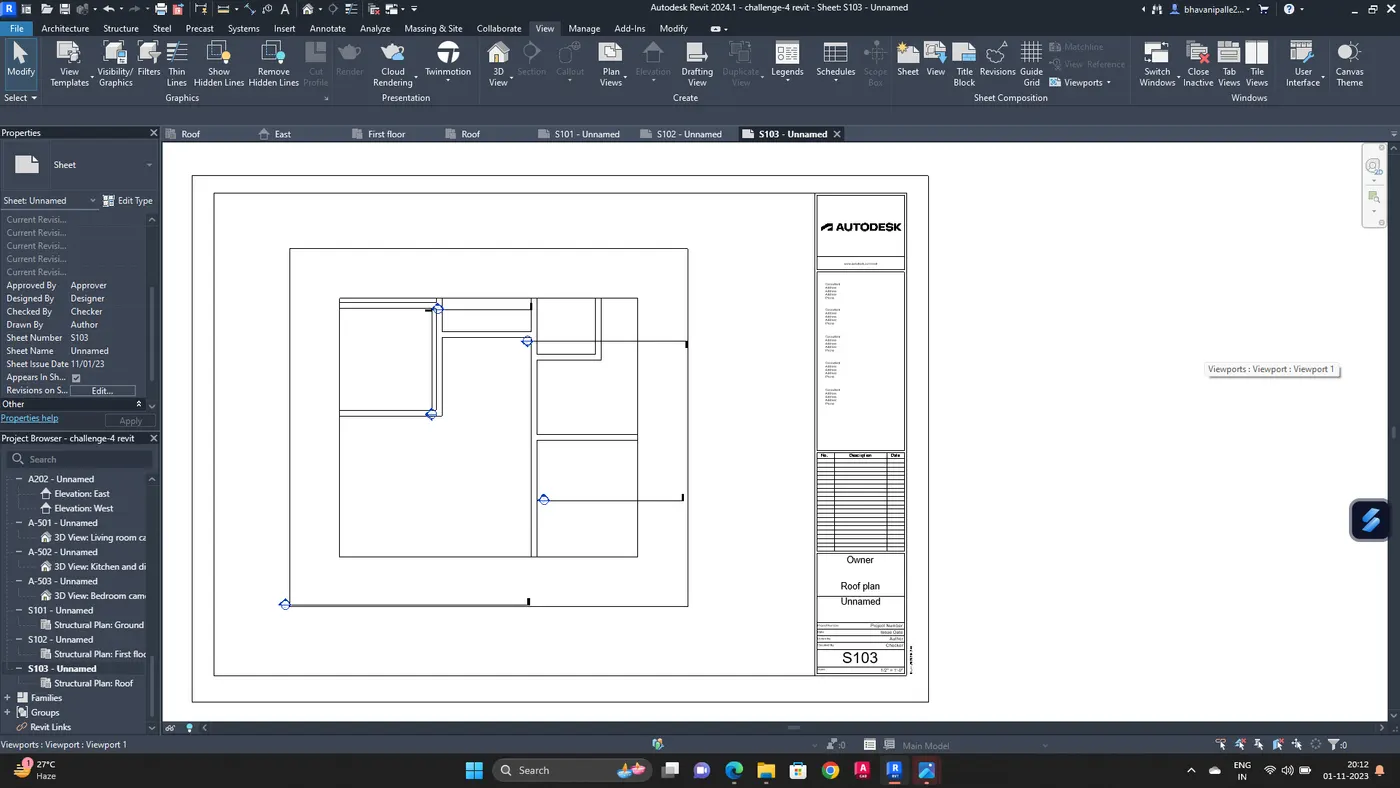
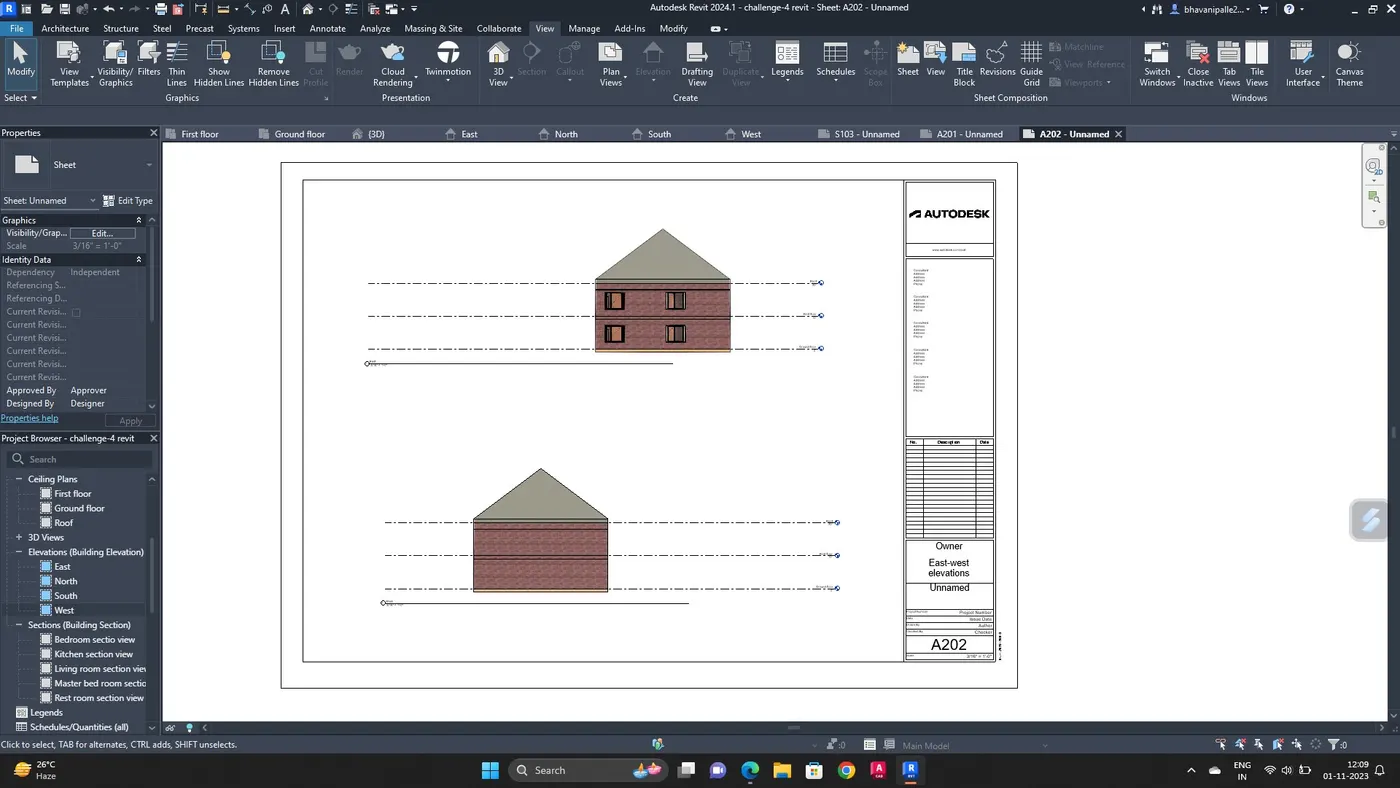
Place North and South elevation views in the template
Rename the sheet as North and South elevations, and sheet number as A-201
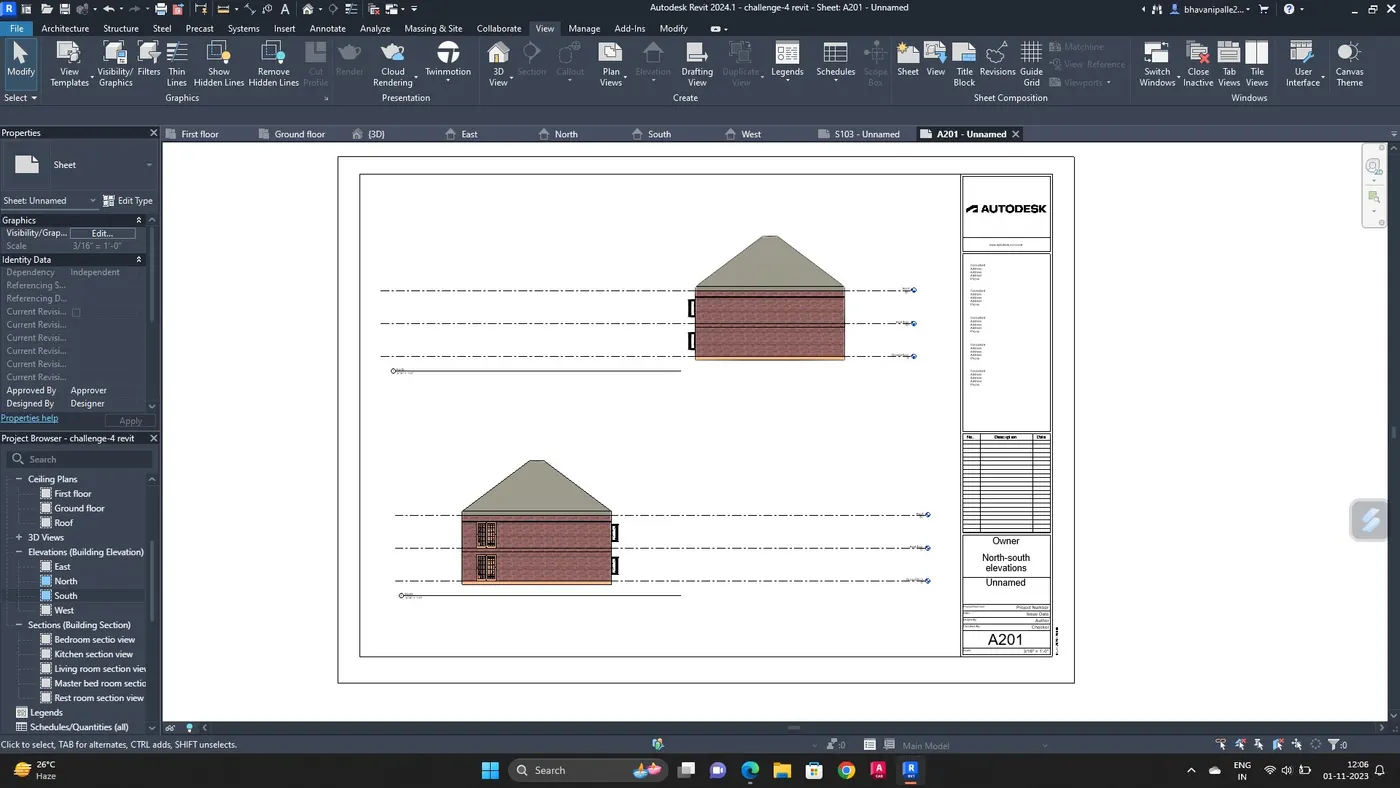
Place East and West elevation views in the template
Rename the sheet as East and West elevations, and sheet number as A-202
RESULT :
Created the multiple sheets and produced the drawings in the sheets
10. AIM :
To create a camera-specific view or a 3D view in living room,dining room and bedroom in the sheets separately
INTRODUCTION :
Camera views are really useful in revit
Camera allow us to view what we would actually see if we are standing at any given location
PROCEDURE :
Go to view
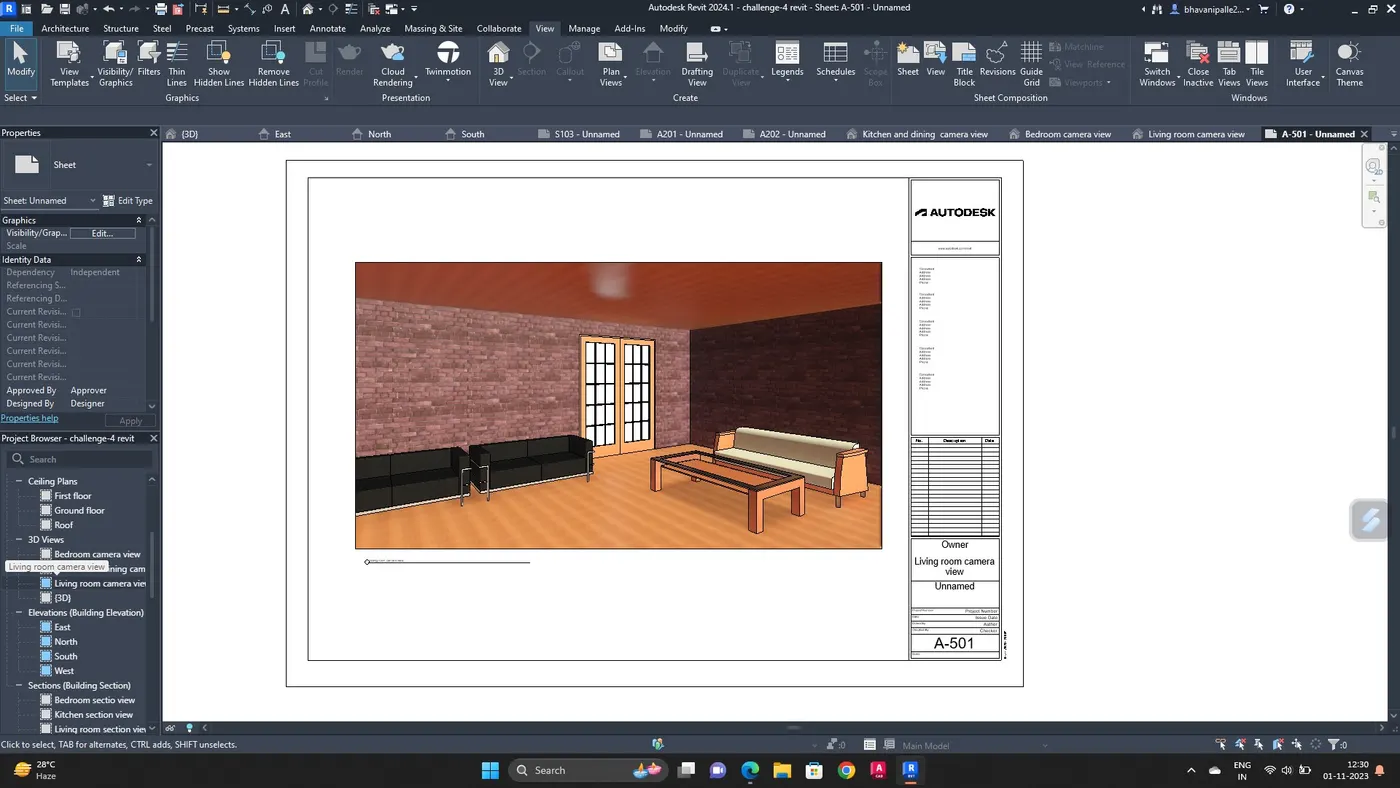
Select camera, place the camera in living room
In properties browser the camera view visible,rename it as living room camera view, and open it to see the camera view
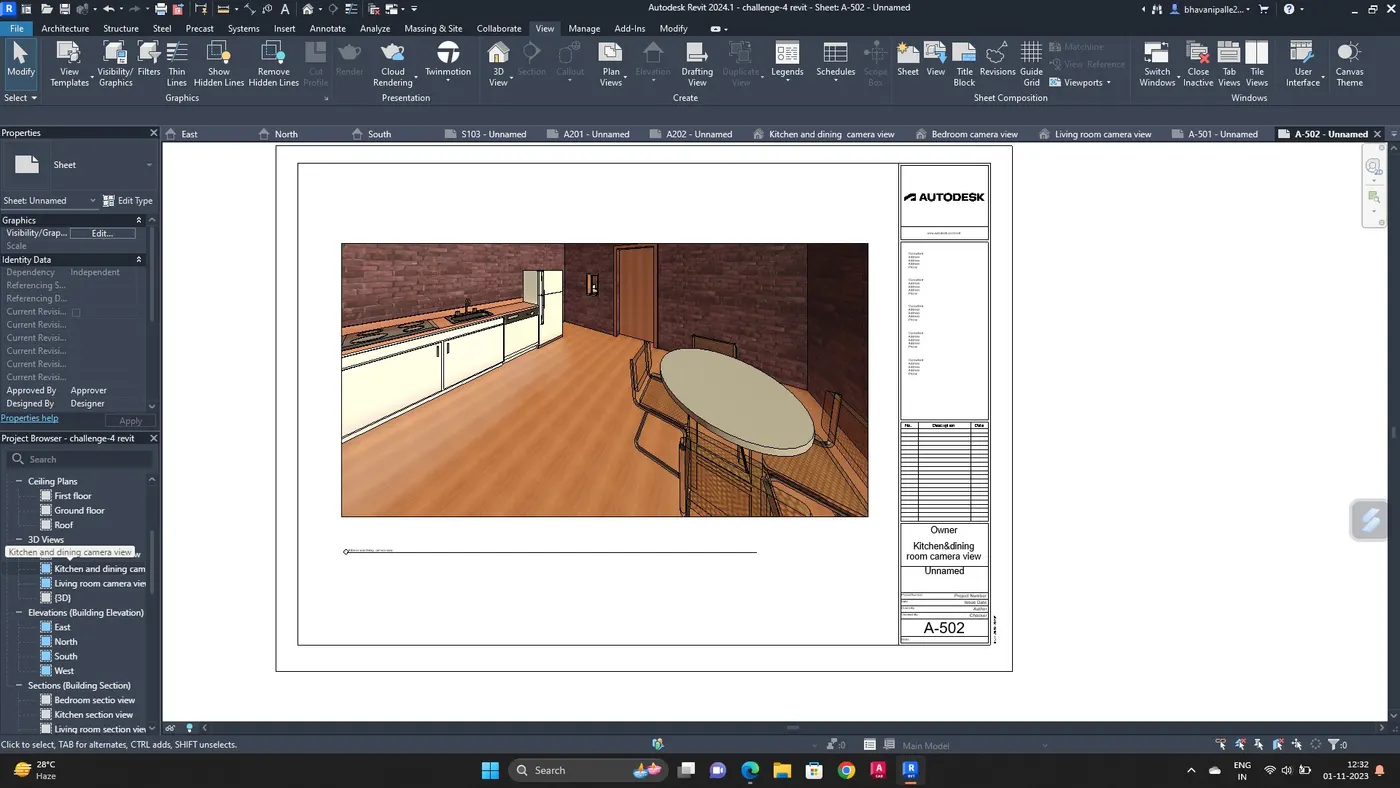
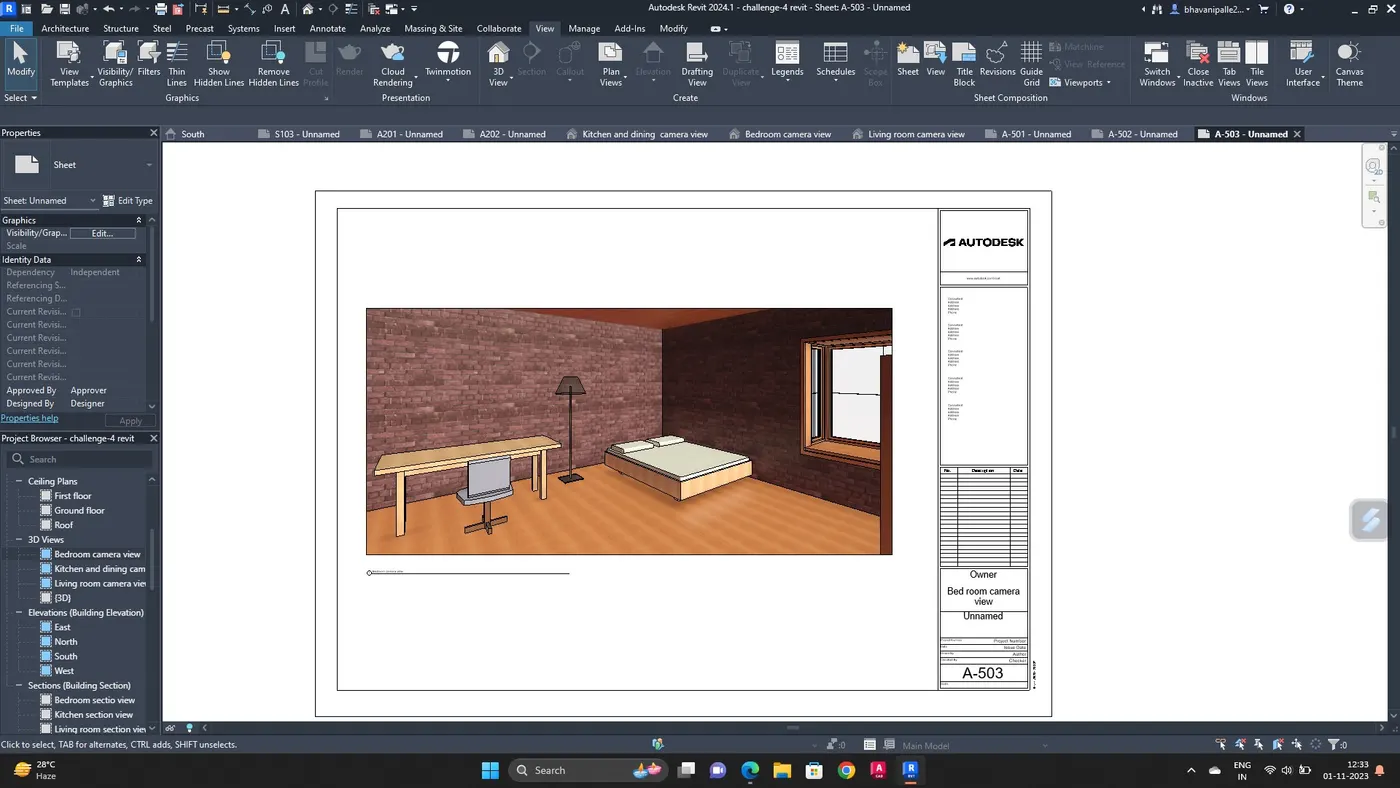
Create camera view of dining and bedroom
Go to view, select the sheet
Rename it as Living room camera view, and sheet number as A-501
Place the bedroom camera view into the sheets
Take the sheet, rename it as Kitchen and dining camera view and sheet number as A-502
Place the camera view in the sheet
Take the sheet, rename it as bedroom camera view, and sheet number as A-503
Place the camera view in sheet
RESULT :
Created a camera specific view or a 3D view in livingroom, dining room, and bed room in the sheets separately.