2D Meshing on automobile Hood
Q. For The Given Component, Check The Geometrical Error Meshing With The Give Element Quality Criteria. After Meshing the Component the Thickness Has to Be Assigned .Write A Detailed Report on Your Process and Also Mention Which Method You Used to Extract the Mid-Surface Along With the Reason.
|
SR.NO. |
QUALITY CRITERIA |
VALUE |
|
1. |
TARGET/AVERAGE LENGTH |
5 |
|
2. |
MINIMUM LENGTH |
2 |
|
3. |
MAXIMUM LENGTH |
7 |
|
4. |
ASPECT RATIO |
3 |
|
5. |
WARPING |
15 |
|
6. |
SKEWNESS |
45 |
|
7. |
JACOBIAN |
0.7 |
|
8. |
MINIMUM QUARD ANGLE |
45 |
|
9. |
MAXIMUM QUARD ANGLE |
135 |
|
10. |
MINIMUM TARGET ANGLE |
30 |
|
11. |
MAXIMUM TARGET ANGLE |
120 |
|
12. |
TRIA PERCENTAGE |
15 |
Solution:
Aim:
To Check The Geometrical Error Meshing With The Give Element Quality Criteria. After Meshing The Component The Thickness Has To Be Assigned.
Theory:
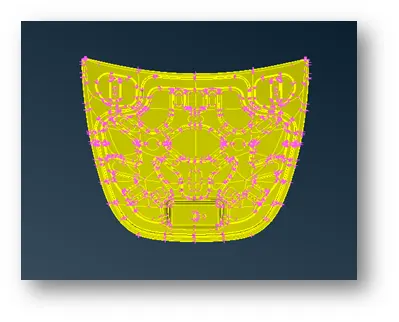
Hood:
- It Main Function Is To Direct Access To The Engine, Battery And Other Crucial Parts Of The Cars For Repair And Maintenance And To Protect These Parts From Dust And Sunlight.
- It Is Hinged Thin Sheet Which Covers And Protects The Main Parts Of Car i.e., Engine Or Electric Machine In Case Of HEV/EV.
- When The Car Comes Across Any Accident From The Front Portion Most Of The Time The Hood Part Gets Damaged And Absorbs Some Parts Of The Impact Energy Resulting From The Crash.
- It Also Gives Good Looks, Helps To Design Car Aerodynamically Stable, And Is Also Provided With Vents For Supply Inlet Air To Cool The Engine.
Fig 1 ;Hood
Procedure:
Hare The Components Has Four Separate Parts Namely Outer Hood Panel, And In Between We Have A Latch Reinforcement In Which The Striker Will Be Placed For Locking And Hinge Reinforcement Is For Opening And Closing Of Hood.
Fig 2; Outer Hood 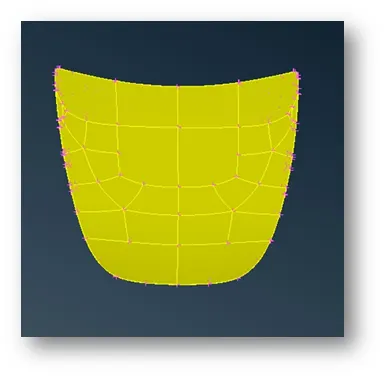
Fig 3; Inner Hood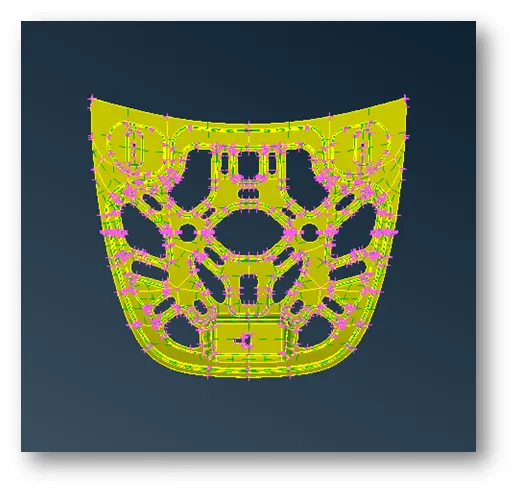
Fig 4; Latch Reinforcement 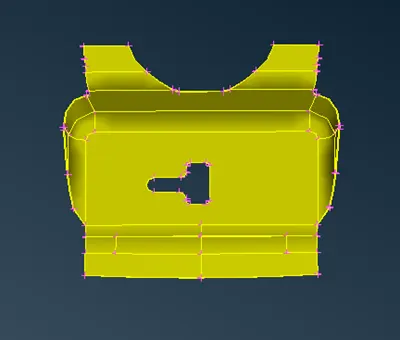
Fig 5; Hinge Reinforcement 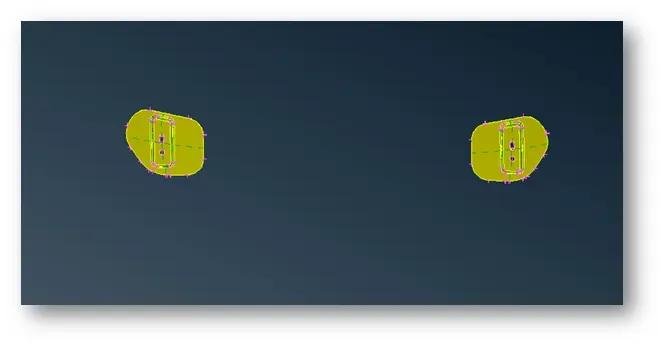
Since the provided component is a sheet metal and has the thickness below 6mm range so we are going for 2D meshing.
Outer & inner panel thickness =0.75mm
Reinforcement thickness =1.2mm
Steps involves in this challenge
- Geometry clean-up.
- Mid surface extraction, shell property and quality assigning.
- Meshing and assigning thickness to it.
- Geometry clean up;
Before Opening The File We Have To Set The Tolerances And Resolution From The Settings Options, These Options Ensure That The Topology Is Performance For The Specified Range During File Opening.
The File is of .STP Format and Now the Component Is Ready for Geometry Clean up and for That, We Have to Check the Geometry Errors Found out Is Shown
Fig 6; Geometry Check 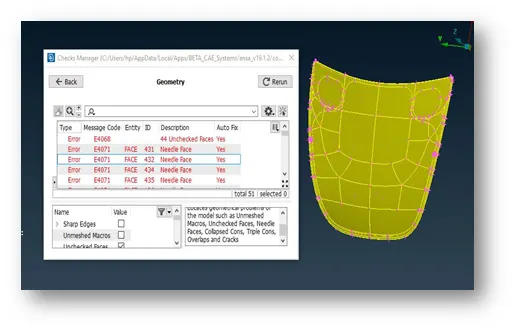
There Are Gaps Present Between The Two Cons And Unwanted Needle Faces Are Present In Between Two Faces. By Using Topo Module Button The Actions Are Performed To Fix The Errors In The Geometry.
From Face Module Used –Delete, New, Topo
From Cons Module Used –Release, Paste
More Options Supported To Clean Up Geometry Error Are Focus, Drawing Styles, And Face Draw.
So With the Above Tool, We Have Done the Geometry Clean Up
Fig 7; Geometry Clean Up Has Done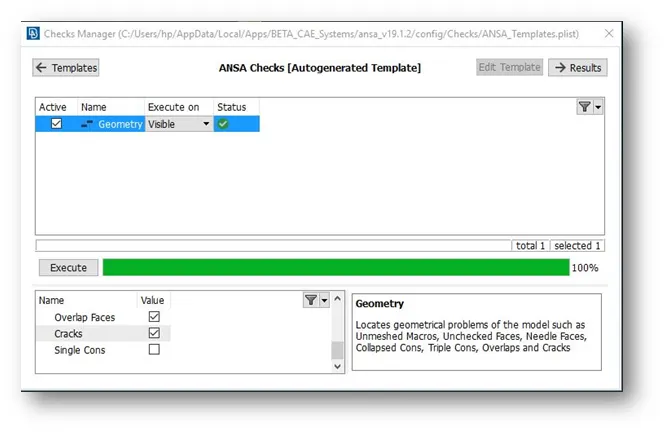
2.Mid surface extraction :
The mid surface of the inner hood is taken by a manual method using the offset from the face module. For the mid surface extraction, we selected one side of the geometry and given an offset value is of half the thickness value of half the thickness value of the inner hood which is 0.375.
Fig 8; mid surface extraction from the inner hood 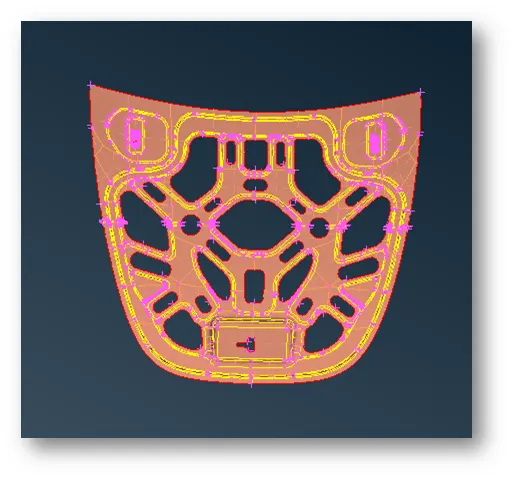
Property Id Assigning;
Here we having a separate property id for all parts of hood and similarly we should create a new property id for the end of the mid surface and details like thickness and other material properties to be mentioned.
Fig 9; Property Id Assigning for the Inner Hood 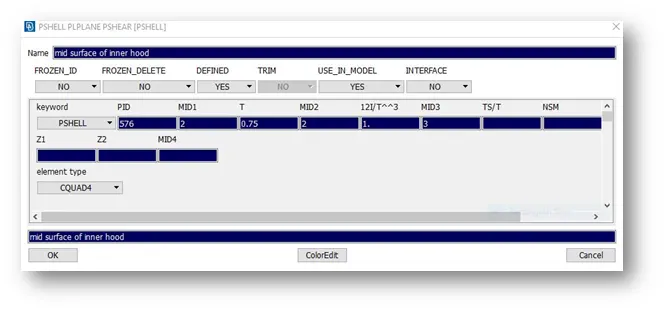
similarly, we can be able to extract the mid surface of the other parts of the hood and with proper thickness to get the mid surface.
Skin mid Surface Option:
Here we are having more option for the mid surface extraction that is skin mid surface option from the face module. here all the face are selected in one shot and ANSA will automatically give you the thickness and ask for the offset and we can able to extract the mid surface faster .the skin mid surface option will show a green and red colour for the opposite face and dark blue colour for the thickness part.
Quality Criteria:
Before starting with meshing the model, the mesh parameters have to set.
Fig 10; Quality Criteria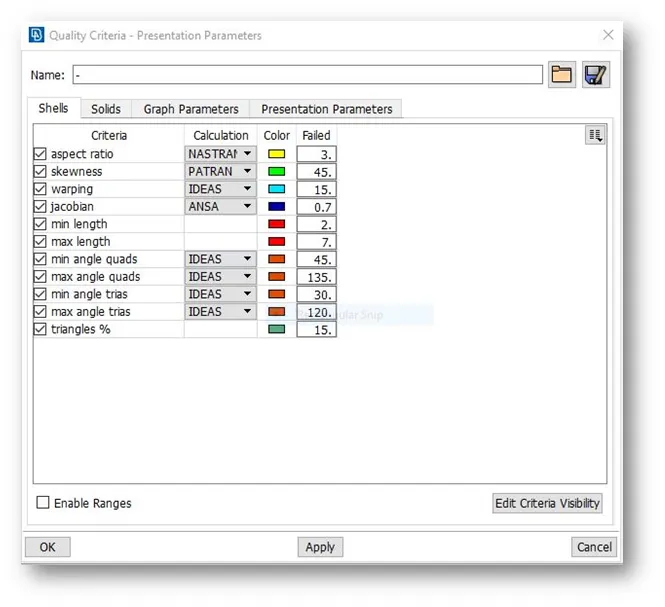
There are two types of two-dimensional cell shapes that are commonly used. These are triangle ( trias ) and quadrilateral (quad )
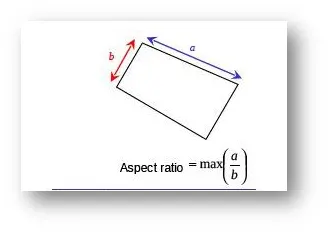
Aspect Ratio:
The aspect ratio is the ratio of maximum edge length to the minimum edge length of element .the ideal value of the aspect ratio is 1.that means all sides of an element are of equal length. If the aspect ratio is greater than 5, its means that the max length is 5 times greater than min. length of the element is said to be failed in aspect ratio criteria. However an aspect ratio of less than 5 is generally accepted.
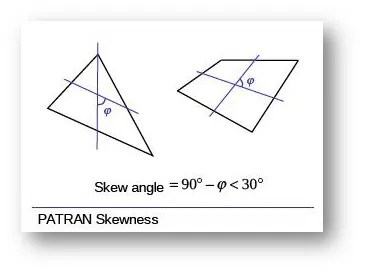
Skewness:
- Skew in Trias is calculated by finding the minimum angle between the vector from each node to the opposing mid-side and the vector between two adjacent mid sides of each node of the element. Ninety degree minus the minimum angle found is reported.
- Skew in quad is calculated by finding the minimum angle between two lines joining opposite mid-surface of the element. Ninety degree mines the minimum angle found is reported.
Warping
It is defined as the angle between the normal two planes formed by splitting the quad elements along the diagonals. The maximum angle of the two possible angle is reported as the warp angle.
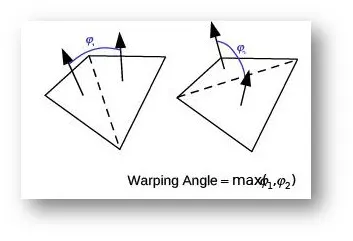
Jacobian:
The Jacobian is a scale factor arising because of transformation of coordinates system. Elements are transformed from the global coordinates to local coordinates (defined at the centroid of every element)
Minimum and Maximum Length:
Here the average element length is taken as 5mm and min length has 2mm and maximum length as 7mm.
Minimum and maximum angle of quad and Trias:
Similarly to length of element angle between the edge of the quad and trias is also taken under the quality criteria.
Triangle %:
Since it is mixed elements considered for the meshing so we taking a percentage of trias to be present in the meshing.
3.Meshing and assigning thickness to it:
Here the quality condition provided in challenge is entered into the quality criteria and it is saved for the checking while meshing. Here the best meshing algorithm is used and the element type is taken as a mixed type and used the 1st order equation for solving.
Best mesh generation is well-organised algorithm if the macro area is properly defined say in the rectangular shape, it also reduces the human efforts, and features are also most perfectly captured.
Fig 11: Meshing Is Done In Inner Hood 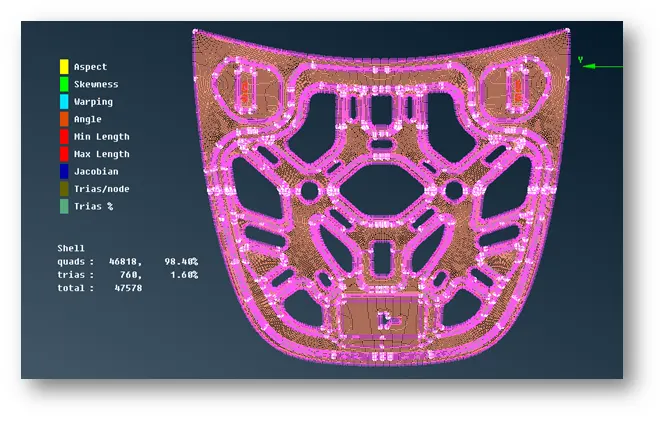
Fig 12; Meshing Is Done In Outer Hood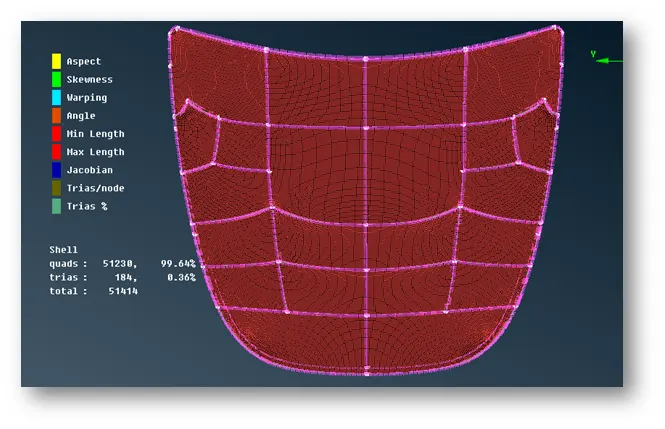
Fig 13; Meshing Is Done In Latch Reinforcement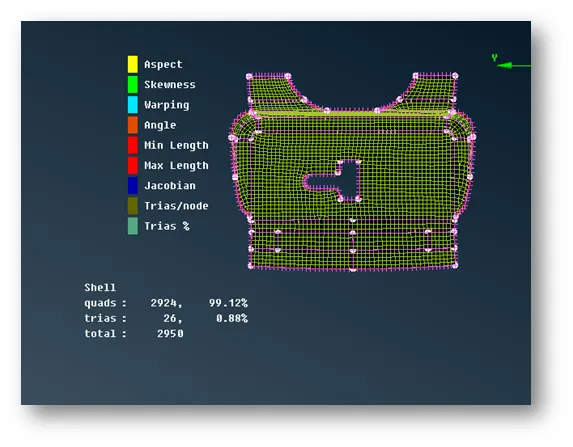
Fig 14; Meshing Is Done In Hinge Reinforcement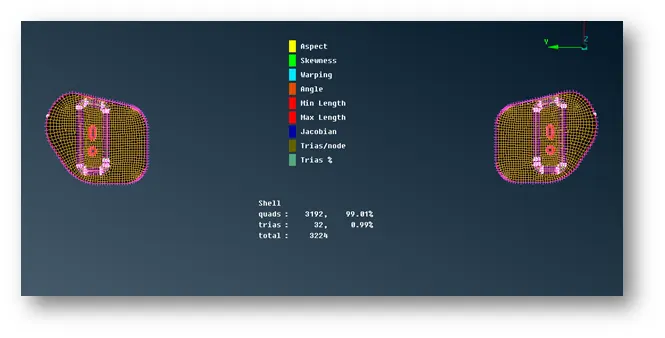
To eliminate the quality criteria errors:
- When the meshing us don on complex area like feature, we need to do some reconstruction and smooth function is properly align the element and to best quality meshing which should be remove the quality issues
- If the area is too big we can be able to divide it into small areas lets, say the macro area and can be able to do the best meshing out of it.
- Moreover, the options from the module like past, split swap, cut join are used in order to do meshing properly.
Now we need to check whether we defined the thickness properly into the property so the quality criteria when The Shell to Solid to Select and We Can See the Thickness Got for the Mid Surface
Problem faced: While doing the transform option at the time of meshing since we are doing it for the symmetrical components so we can be able to do for the one part and can be copied to the other symmetrical part.
Fig 15; here when we did the copy option with the default symmetrical plan by ANSA (inner hood)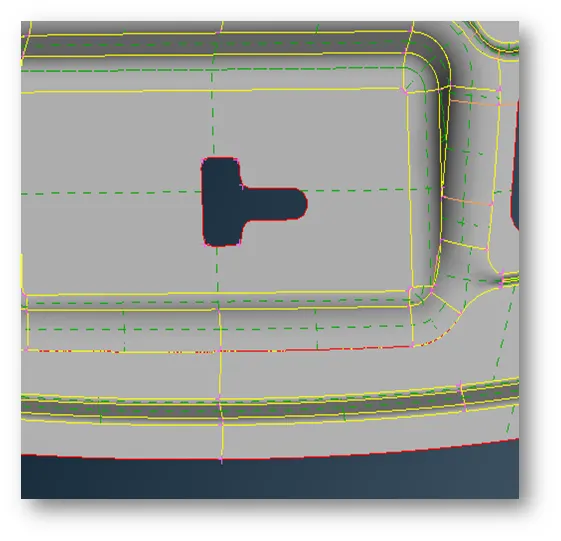
So, this problem was overcome with the paste of cons since the cons have deviated more than the tolerance value so we did manually to paste the cons and corrected.
Fig 16; the problem solved successfully (inner hood)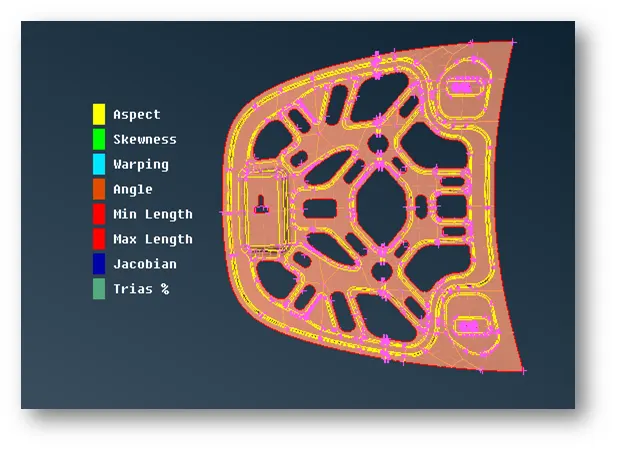
Learning outcomes:
- Fixed the geometrical errors in ANSA by manually.
- Learn to extract the mid surface for the component.
- To assigning the property and material specification to the component.
- Studied to do meshing according to quality criteria.
- Used the transformation option to do meshing effectively and saved much time.
Conclusion:
The hood components has meshed successfully.
Meshed hood model link provided below:
https://drive.google.com/file/d/1dMQjnXr9n7RnD-gl41g8rCDXS2HQNx1g/view?usp=drivesdk