Wiring harness routing & packaging Rules Week 3 Challenge
Q1. Download following cad data & define it as Electrical support using Electrical Part design Workbench. Define all the necessary properties.
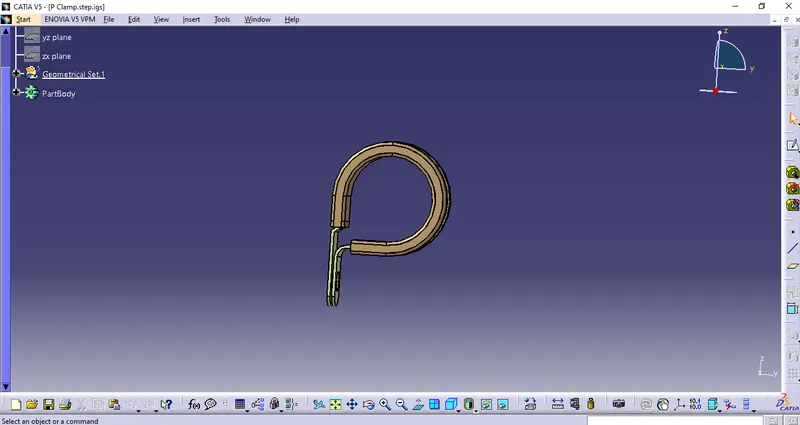
Step :1 Defining the geometrical parameter
Fisrt creation of entry point and plane
Create a point for exit & base also
as well as create a plane for entry point , exit & base point
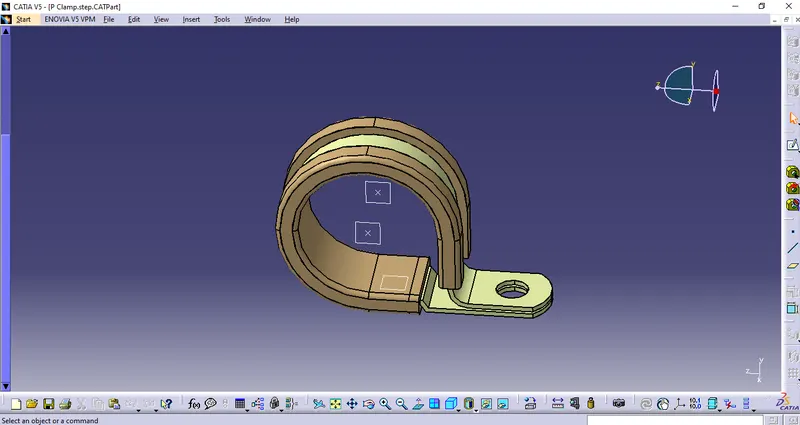
Step :2 Defining part as support
for this we need to move towards "Electrical Part Design " Workbench
Defining part as Support (For Entry Point)
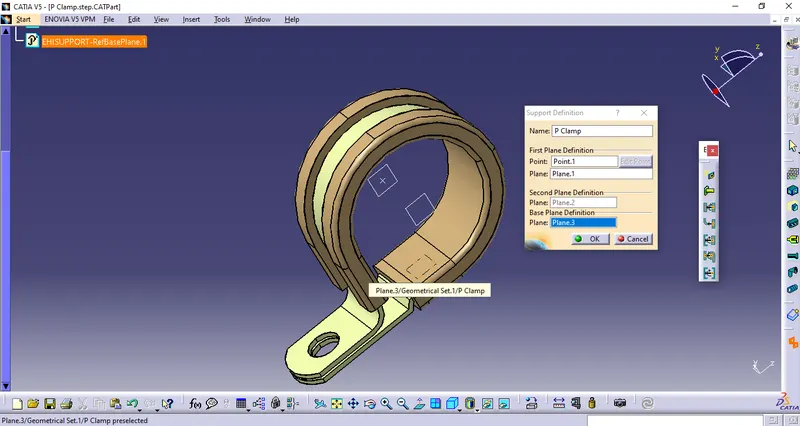
Defining part as Support (For Exit Point)
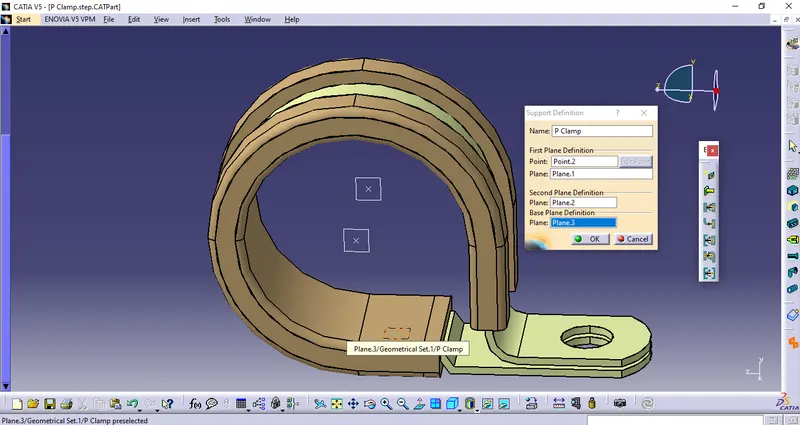
Now our clpi is ready to give a support to bundle
2. Download following Back shell cad data & define it as Electrical back shell using Electrical Part design Workbench. Define all the necessary properties.
Tyco 1738312-1
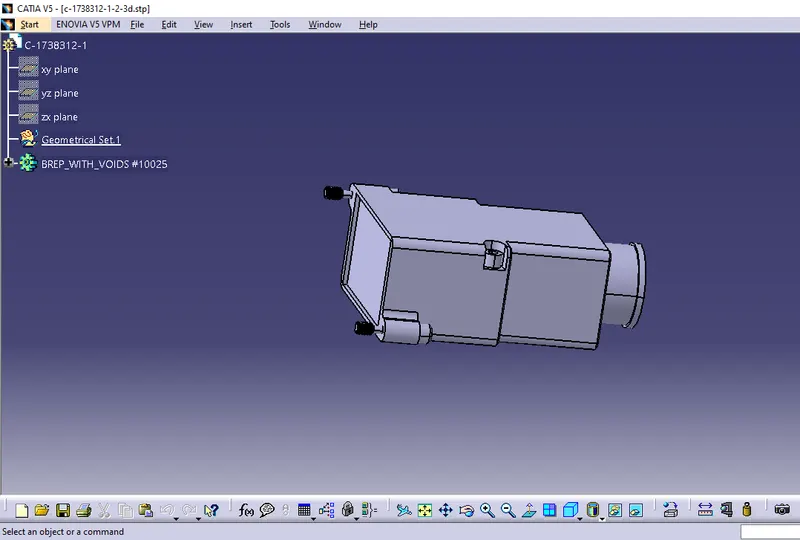
Step :1 Defining the geometrical properties
First define the bundle entry point
The shell fixing point also add the axis system to the fixing point
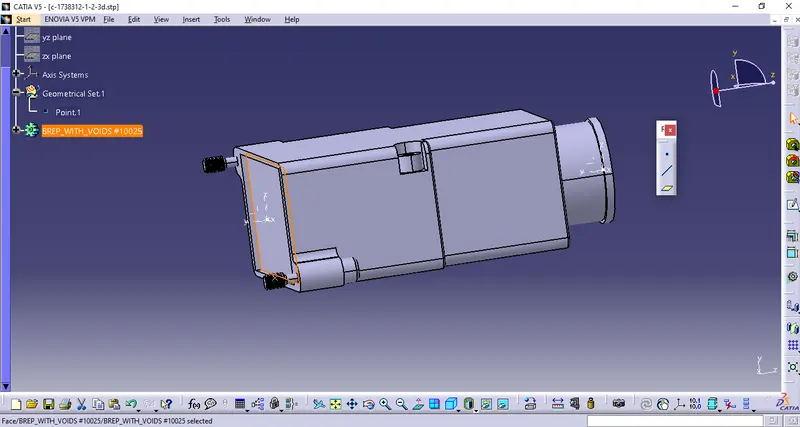
Step :2 Definig part as backshell
For this purpose we need to move towards "Electrical Part Design "
Defining as backshell
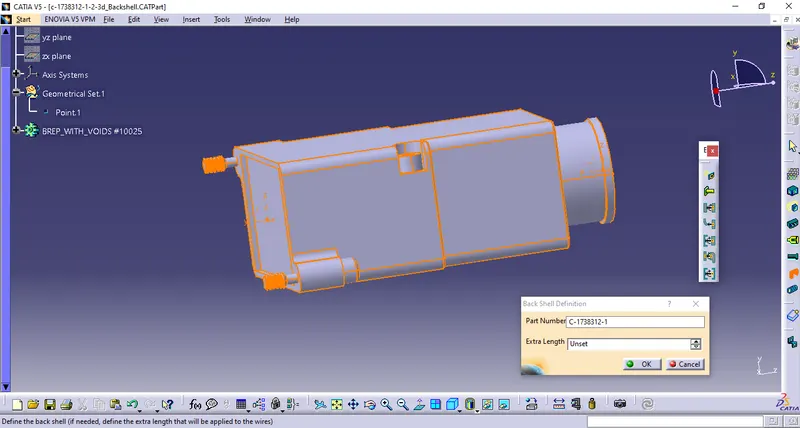
Defining bundle entry parameters
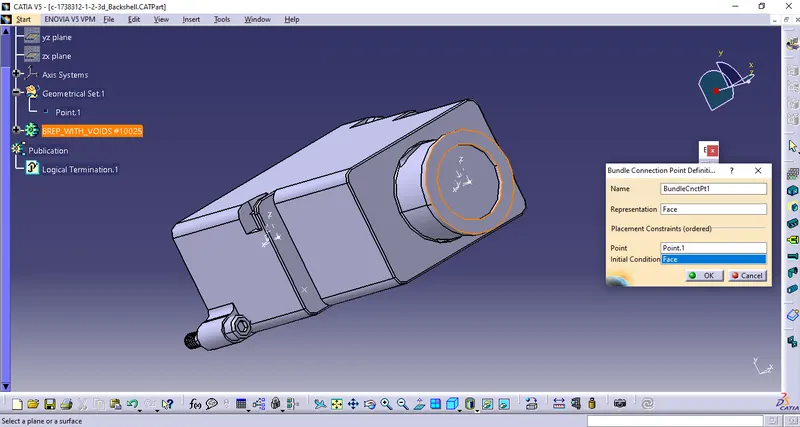
Defining the backshell connection points
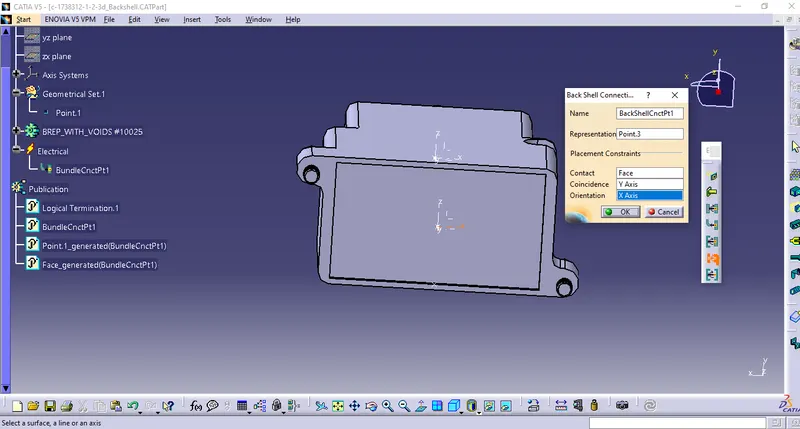
Now our backshell is ready to carry bundle
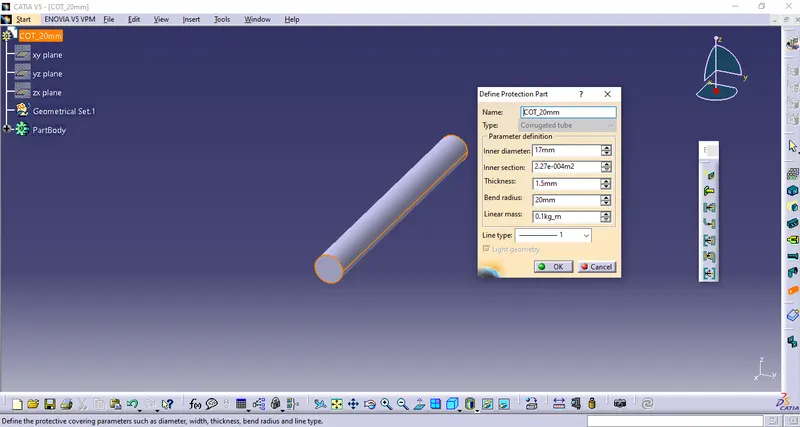
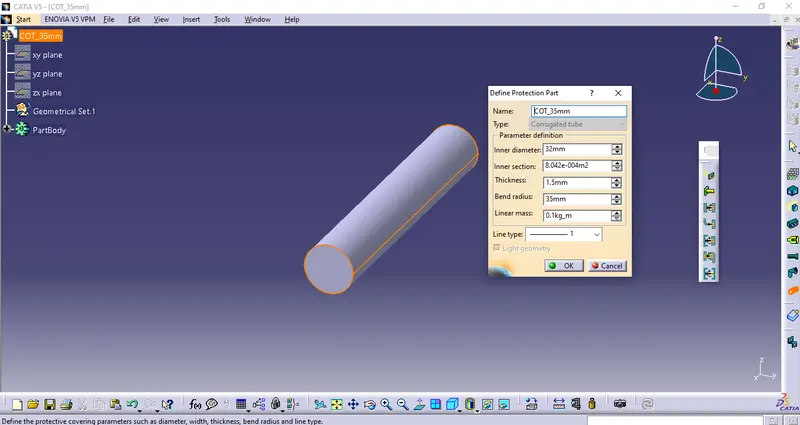
Q3. Create Following Corrugated tubes & Add them in Catalogue under “Slit COT” family.
|
Name |
ID (mm) |
OD (mm) |
Thickness (mm) |
|
15mm COT |
12 |
15 |
1.5 |
|
20mm COT |
17 |
20 |
1.5 |
|
35mm COT |
32 |
35 |
1.5 |
|
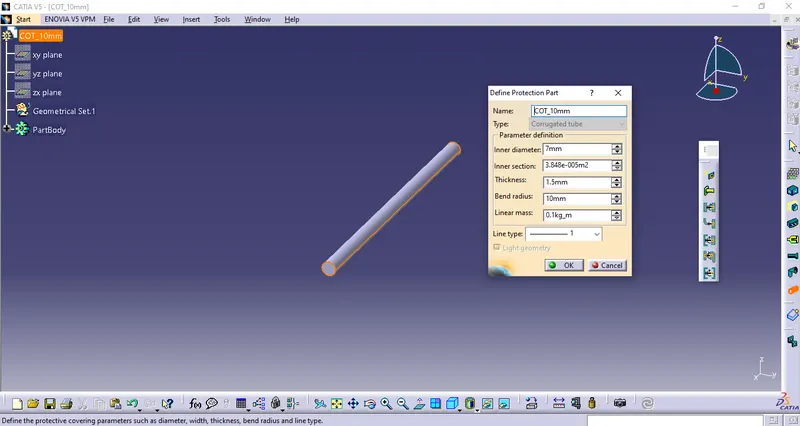
10mm COT |
7 |
10 |
1.5 |
|
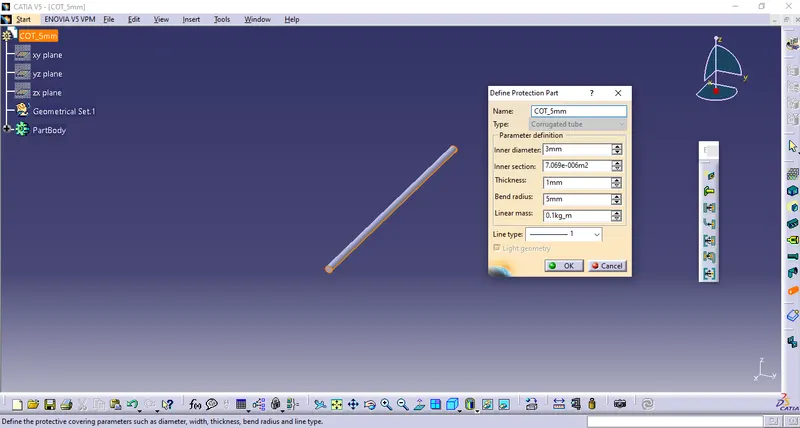
5mm COT |
3 |
5 |
1 |
1. COT_15mm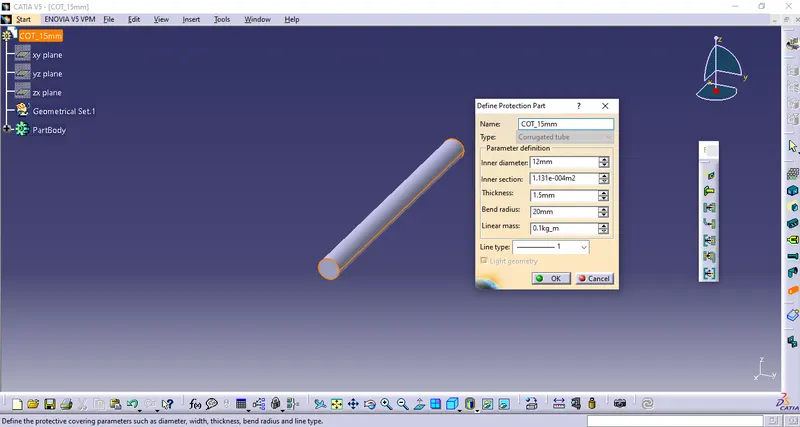
2. COT_20mm
3.COT_35mm
4.COT_10mm
5.COT_5mm
Conclusion :-
- In this week-2 i had undersatnd that the how to make a part as use for elctrical support & backshell.
- Also understand that the how to make a protection part as cotton tube with different sizes & also add them to a new catlogue for easy handling.