Wiring harness design in CATIA V5 - 3D modeling Week 7 Challenge
AIM
To Flatten the harness assembly completed in “ week 4 challenge”. Place the flattened view on drawing sheet. Ensure bundles with protective coverings has different visuals on drawing view.
WORKING PROCEDURE
- Create Product name it as Wiring harness assembly
- Create new product name it as geometrical bundle
- Open Mechanical Assembly design workbench
- Download connectors
- Create Electrical design with Bundle connection point and connectoe connection point
- Copy And Paste the respective connectors in Geometrical bundle product
- Use Manipulation command and move to respective place
- After that click Geometrical bundle workbench .it changes electrical part
- Open Wiring harness assembly
- click multiple branch document
- create routing diameter 10mm from connector DT06-08SA TO DT06-06SA
- After that ADD BRANCH Point in required area for branches
- Again click Multible branch document
- create a sub branches in DT06-4SA AND DT06-2SA Connectors
- Click Protective covering and select the catalogue for cot tubes 15mm
- Start extrimity point and end extrimity point 30mm CDT06-08SA and DT06-06SA connectors
- Click Protective covering and select the catalogue for cot tubes 10mm
- Start extrimity point and end extrimity point 30mm for DT06-2SA and DT06-4SA connectors
- Click Harness Flattening workbench and Click the Flattening command
- Select the bundle and click all
- Next click the scale option and give the respective dimensions
- Finally Creating a Drawing
BUNDLE CONNECTIVITY STATUS
- Open the Mechanical Assembly workbench
- Go to Edit option click Search
- Click Advanced and select the Electrical and Bundle segment
- Click fully connected
SAVE AS CAT.PART
- Open the Mechanical Assembly workbench
- Open Tool option and Click the Generate CAT PART From product
- Select the Assembly click ok
- Save as IGS file.
HARNESS FLATTENING
- Click flattening parameters
- go to general settings
- pick the algorithm mode coarse and angle mode regular and angle 20 degree
- Tich the exact ,keep exist and radius of bundle
- Next go to drawing option
- click bundle segment single line and protective covering double line
PROCEDURE
- Open the Harness Assembly Flattening workbench
- click the Extract option and Go to the assembly and click the product
- Click the Flatten option and select all branches
- Rotate the respective place
- Click scale option and Dimension to be taken as per drawing
DRAWING CREATION
- Click the File and create new Drawing file
- Click front view and click the datum or face
- Go to properties click view
- tick thre fillets,boundaries,display view frame and 3d spec
- Tick the 3d wire frame and always visible and click ok
- Select the Ballon options and click the connectors
- Open the Edit option Select Background sheet
- Click the title box
- Click the Bill Of Material option
- Save the Drawing
DTO6-08SA CONNECTOR
DTO6-06SA CONNECTOR
DTO6-2SA CONNECTOR
DTO6-4SA CONNECTOR
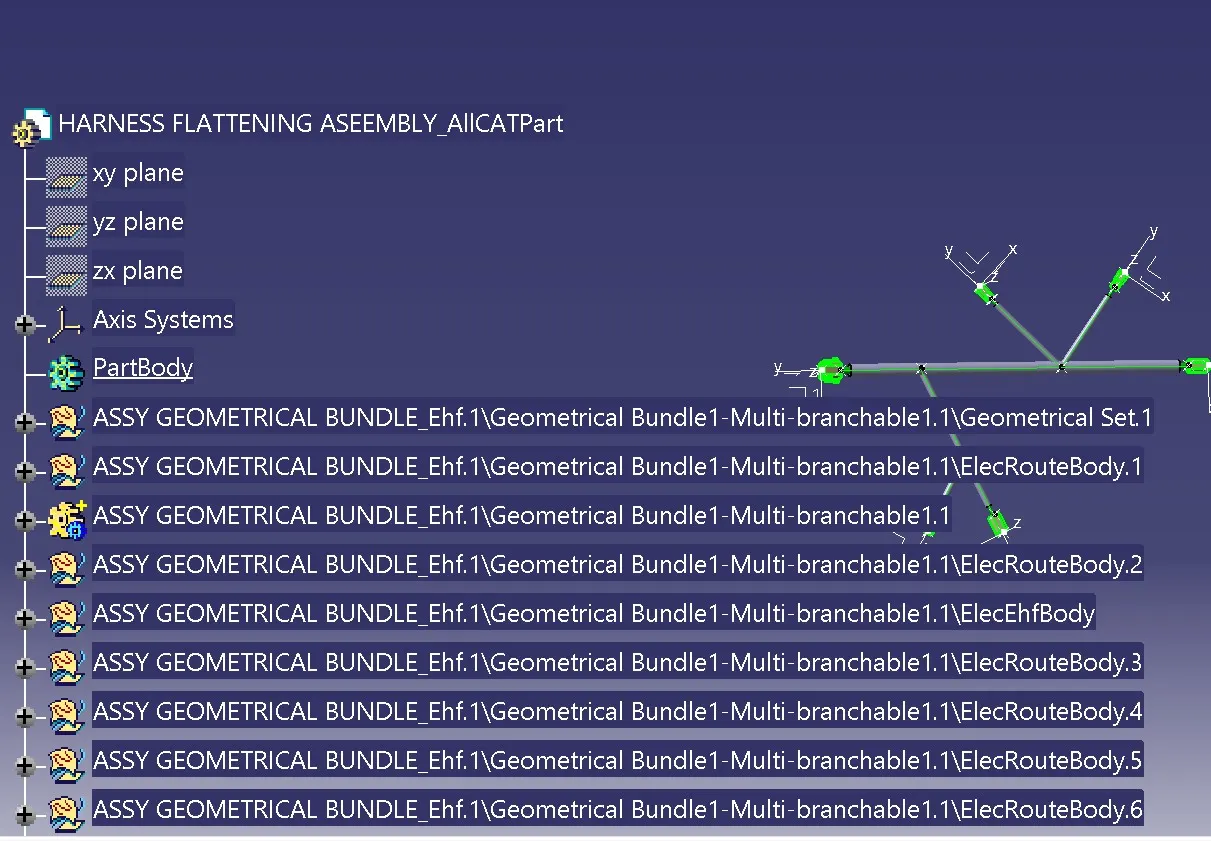
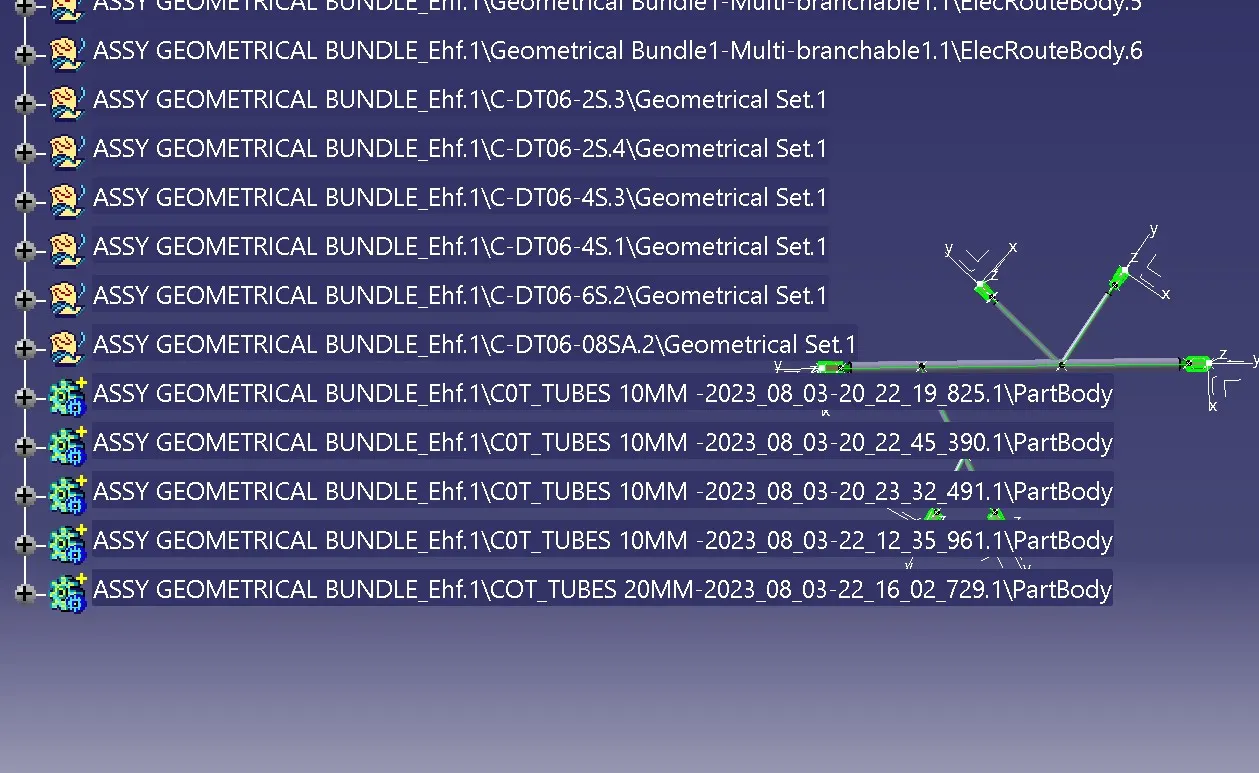
TREE STRUCTURE
DRAWING
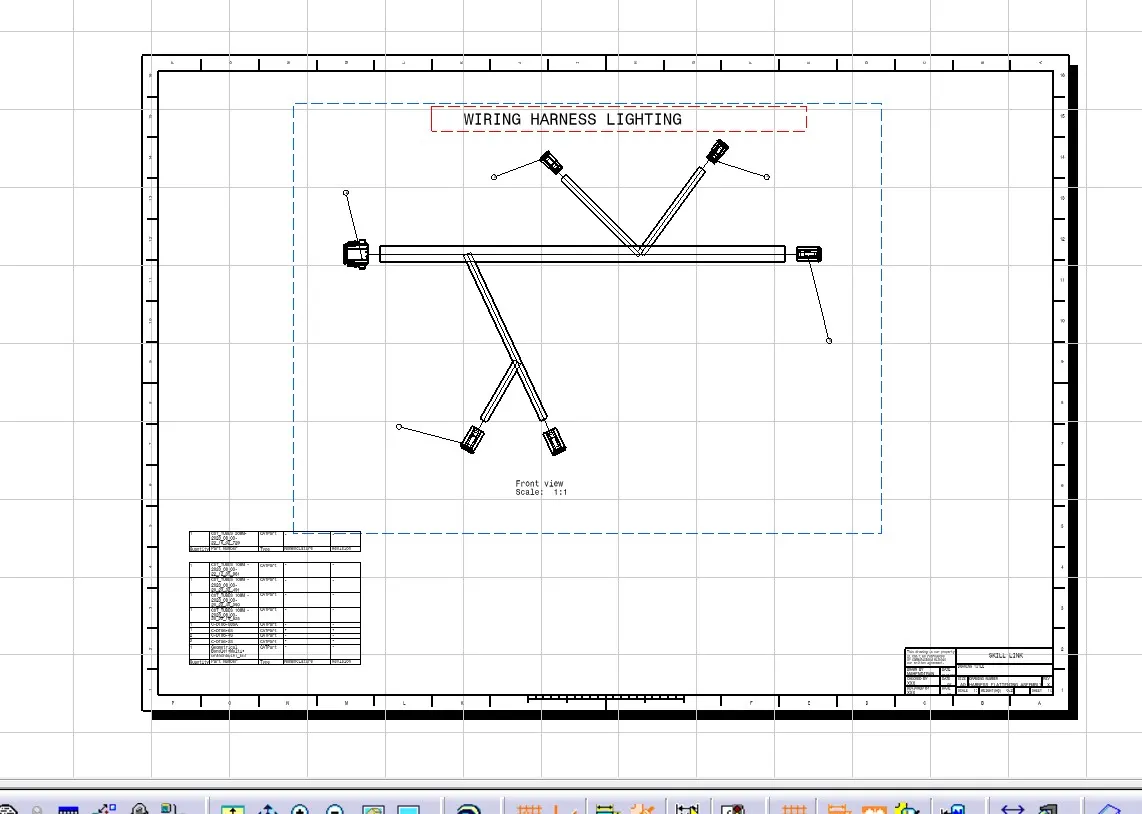
RESULT
Thus, the Flatten the harness assembly completed.Place the flattened view on drawing sheet. Ensure bundles with protective coverings has different visuals on drawing view to be created.