Wiring harness design in CATIA V5 - 3D modeling Week 4 Challenge
Week 4 project
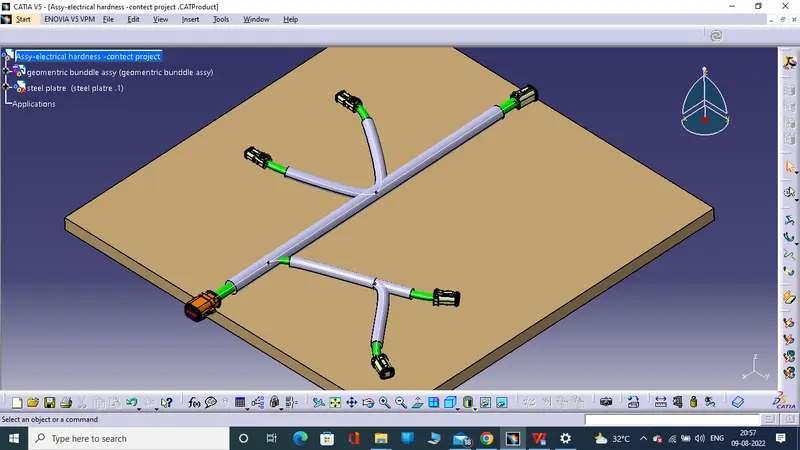
Q1. Route the following harness layout in Electrical workbench. Make assumption for harness bundle diameters. Use Following connectors as shown in layout diagram.
Add protective covering on all branches connected to DT06-2S & DT06-4S connectors. Keep end extremity at 30mm (from connectors end)
Download connector 3D data from www.te.com
- DT06-4S
- DT06-6S
- DT06-2S
- DT06-08SA
In this project following step to create the multi- branch-able to interlink the following connector in this project
Procedure
First all the required connector download from TE.com as a form of 3D igs & stp file and then open all igs file .
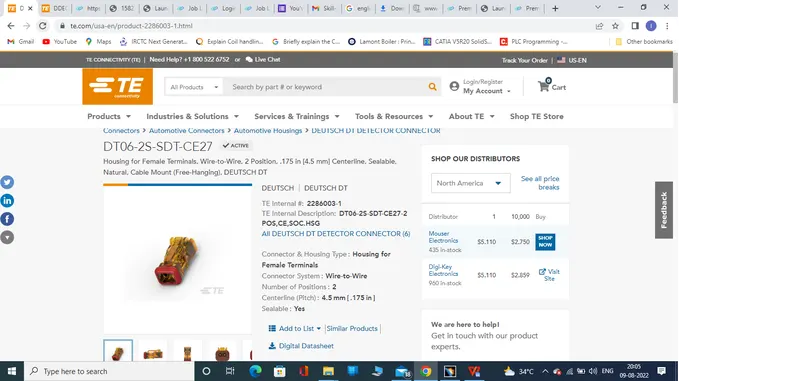
And all the connector to define as a electrical parts using catia V5 R20 .
Open all connector to define the connection Ctrl point & bundle connection point , if all the connector to determine the CCP & BCP .
Then open new product name as Ass-electrical hardness context and next to create the new product and then named as geometrical-bundle assembly .
The geometrical bundle to open in new window and the and all required component to copy and paste in it .
And all the required component are in required position to using mechanical assembly work bench tool as sanp, smart move, manipulation, compass move and compass properties

And then to move on the work bench as electrical hardness assembly to click the geometry option on geometrical-bundle assembly and to see the change the icon on branch.
And the click the multi branch document and move to select the main connector and the put value of the branch dia , bend radius & slack . and move to click on route definition and select the connector.
If they reverse tangent and to select to select the direction to the connector and click OK and see the main branch of the bundle .
And then to split the main branch ti two different length interval using add branch point & if they add branch point to click the bundle to determine the branch definition and the add in the connector.
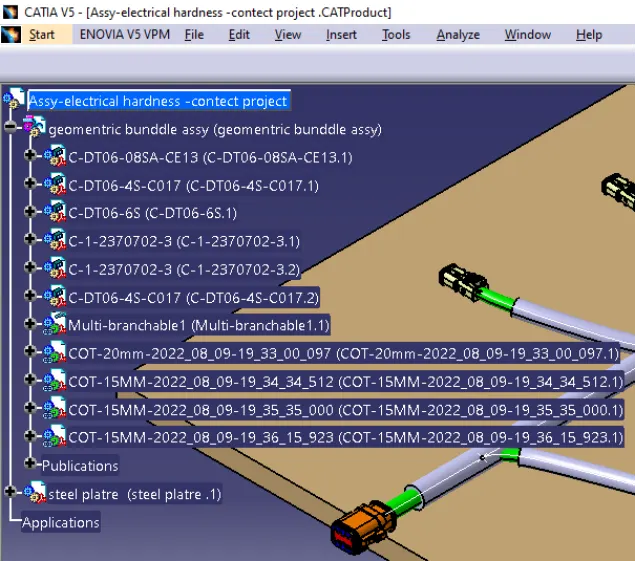
The all the multi branch and sub branch are completed then to protective the bundle and using the COT tube using 20mm , 15mm to productive and finial view Of the project view in given below